In Windows 10, you can add tags to your photos (and other files for that matter) to make them easier to find.
Sifting through hundreds or maybe thousands of pictures trying to find the exact one that you need is a thankless task. But if you’ve got your pictures tagged, then you can get Windows to search for them.
For example, if you tag all the pictures that have Dave in them, then regardless of which folders those pictures are in, simply searching for the tag: Dave will find them all.
In this guide, we’ll look at how to tag photos and how to search for those tags.

What Is A Tag?
Tags are additional information that you can add to a file. In the case of your photos, you could add information such as who is in the photo and where the photo was taken. And you can add multiple tags to a photo, so if a picture has got several people in it, you could add all their names as tags.
Tags work like keywords, special words that are attached to the photo, which you can then search for.
As an example, have a look at this picture.
On my computer, this photo has got the file name img 00256. Which tells us nothing.
And most of you will have your photos named similarly because that’s how digital cameras and smartphones name their pictures.

But if you add tags to the picture, you can say who exactly is in the picture, what they’re doing, where it was taken etc. So your tags might be something like
grandpa, bob g, wally, alfred, pete, street cafe.
Now if you need to find that photo again, you can have Windows search through your pictures for any one of those tags. Any one of those keywords.
How To Tag Photos In Windows 10.
Tagging your pictures (or any other file for that matter) has to be done manually. Windows can’t do it for you because it can’t “see” what’s in the picture.
So you have to tag your photos yourself, but it’s really easy to do.
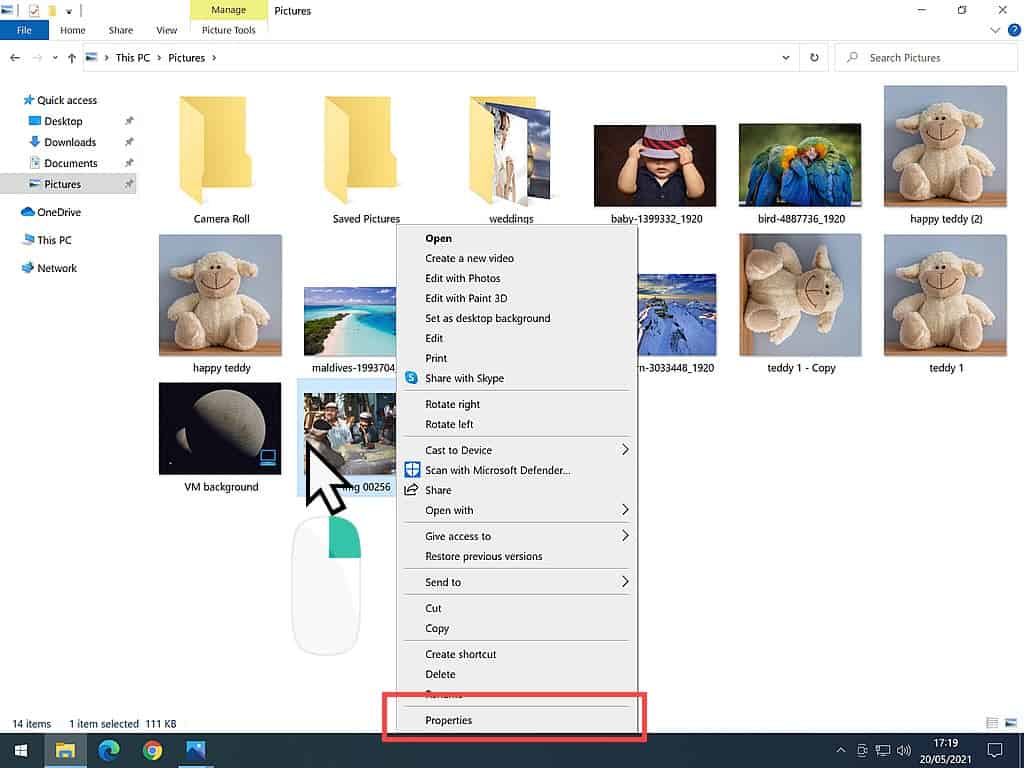
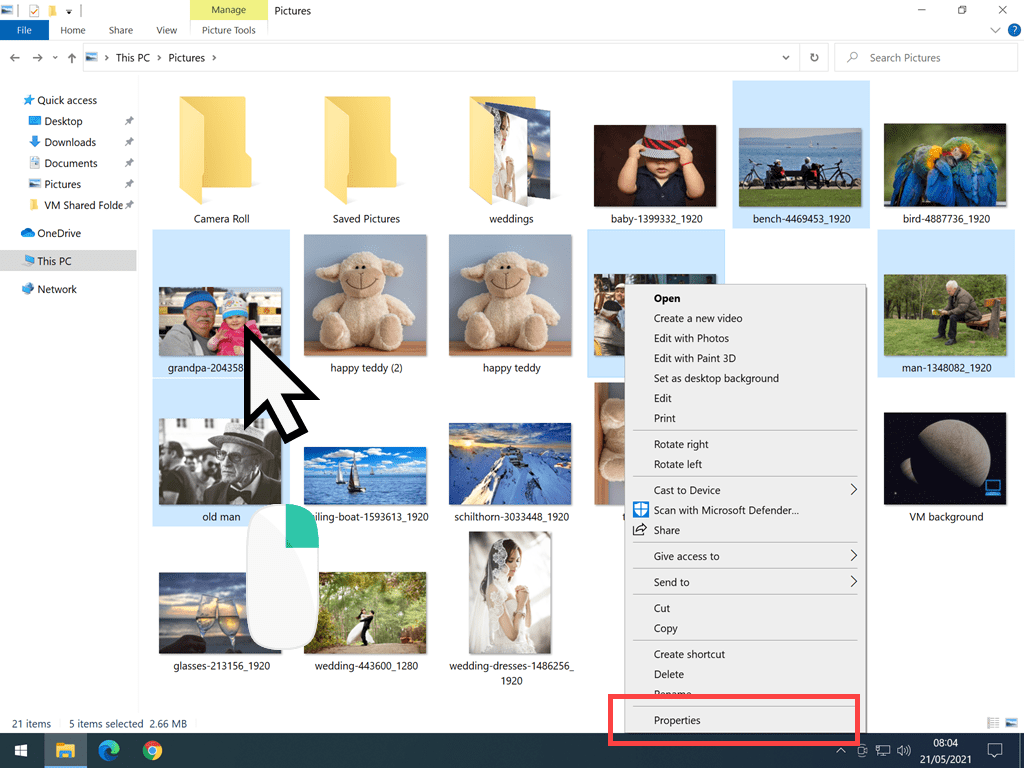
To tag a photo, right click on it.
The options menu opens, left click on PROPERTIES, which is usually at the bottom of the menu.
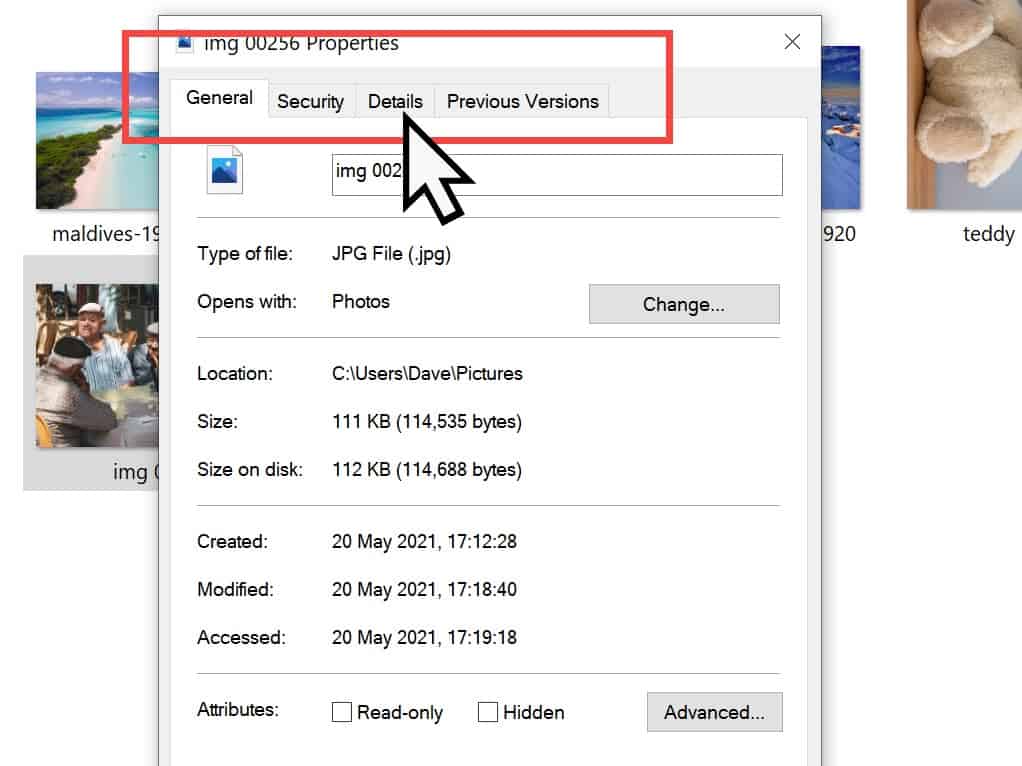
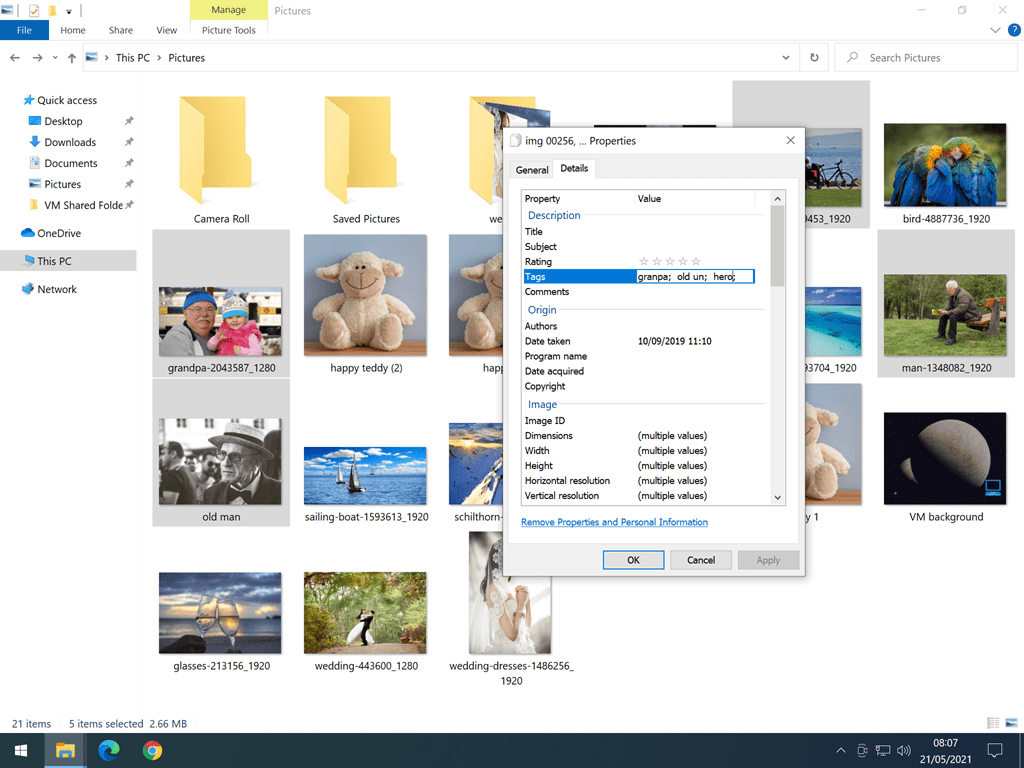
The Properties dialogue window will open. Left-click on the DETAILS tab.
At the top of the Details tab, in the Description section, you’ll see the Tags category.
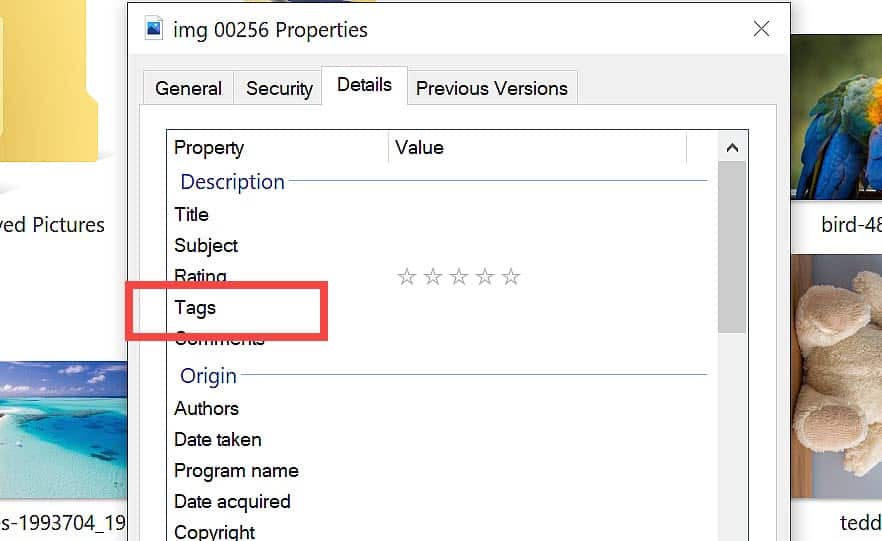
To the right of the “Tags” category, left-click the empty space in the “Value” column and a text box appears.
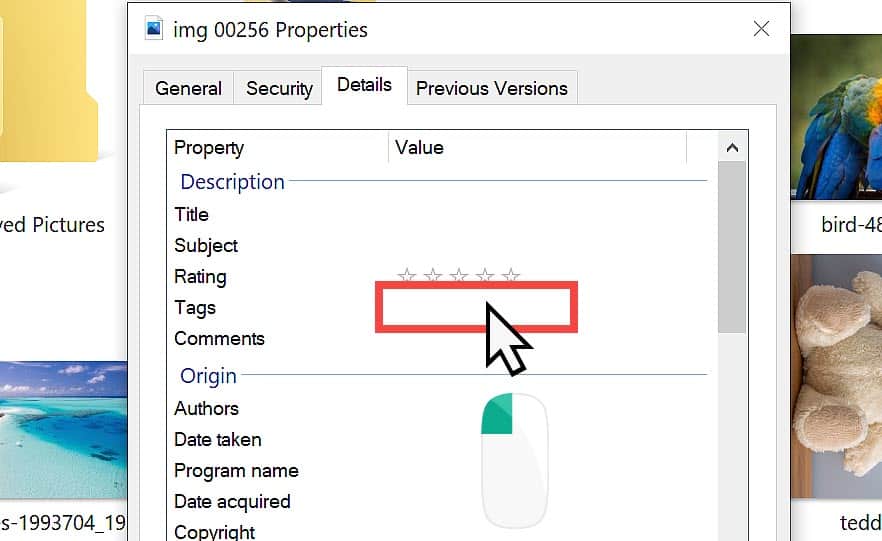
Now you can type in whatever tag (or keyword) you’d like the picture to have.
If you’re only adding a single tag, click the OK button when you’re done.
But if you want to add multiple tags, they have to be separated with a semicolon.
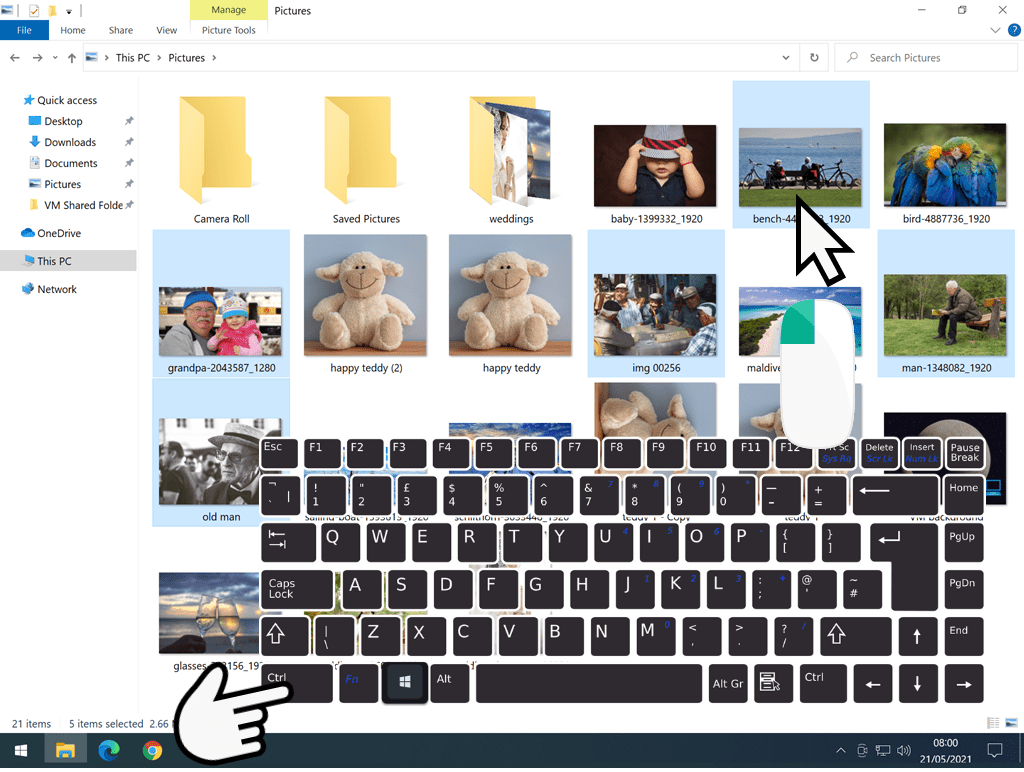
Colons & Semicolons When Tagging Pictures.
If you’re not sure what a colon or semicolon is, or where on the keyboard they are, then you’re not alone.
Unfortunately for us, colons and semicolons are very important when it comes to tagging pictures and then searching your computer for those tags. So listen up.
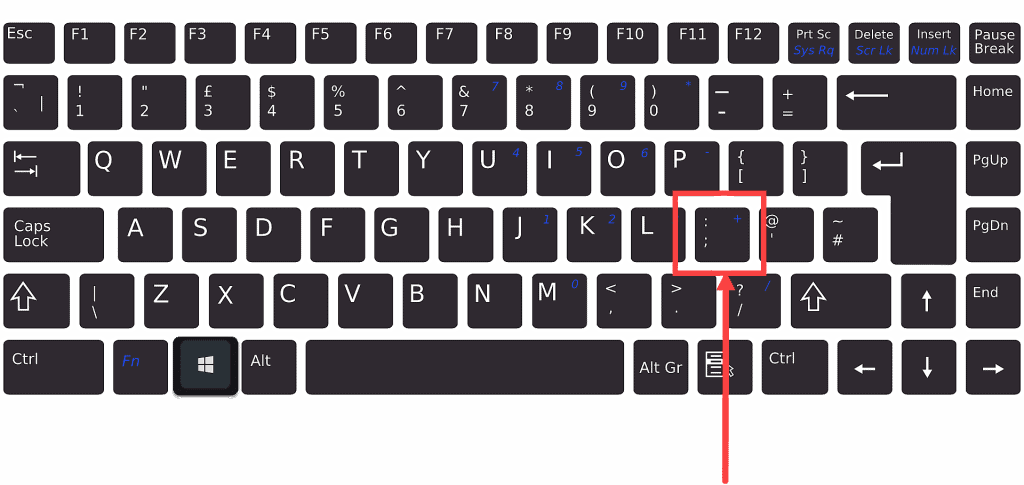
The colon and the semicolon keys are actually one and the same key on your keyboard. I’ve marked the key in the picture, on a UK layout keyboard, it’s usually next to the letter L.
To type a semicolon, you just hit the key.
To type a colon, you have to hold down the SHIFT key first and then hit the key.
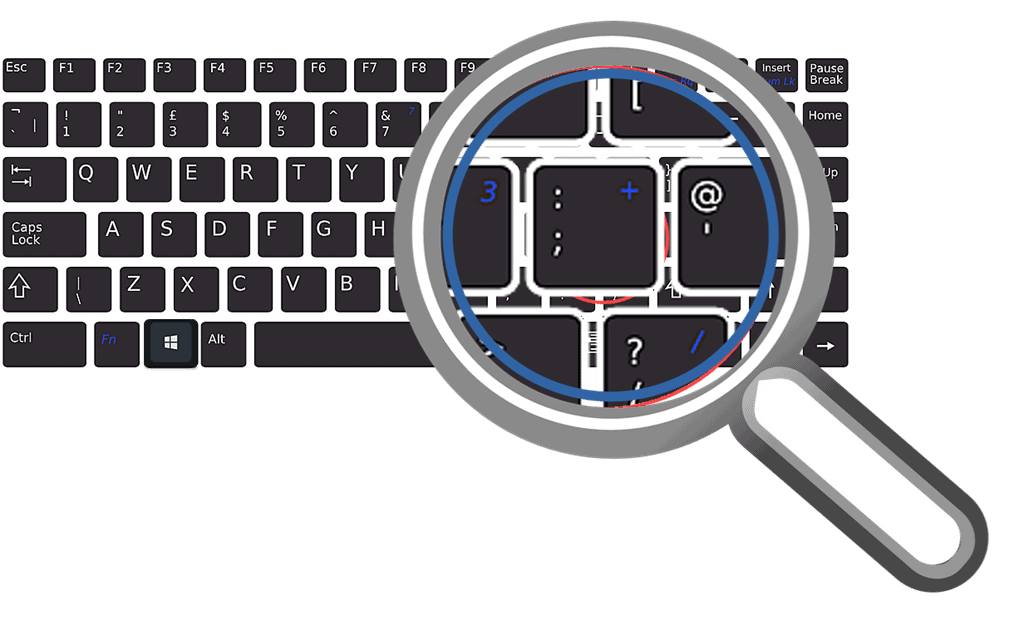
It can be difficult to see the difference. This is a semicolon ; and this is a colon :
On my keyboard, I can just see the difference using a magnifying glass.
But remember that a semicolon is just a press of the key, and a colon is Shift and then the key.
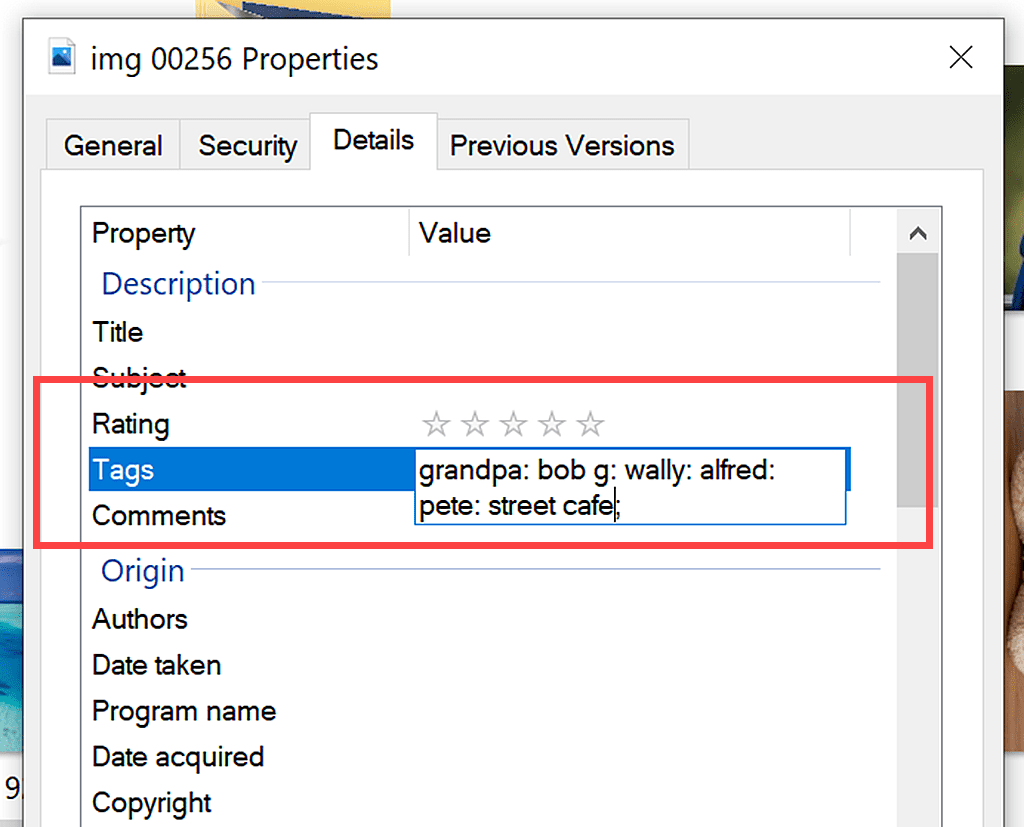
So going back to our example, I’d add the tags
grandpa; bob g; wally; alfred; pete; street cafe
Note that each tag is separated with a semicolon. That’s important.
Click the OK button when you’re done adding tags.
Sorting your colons from your semicolons is the hardest part of tagging your photos.
For you guys that are good on a keyboard, I’d expect you to have no trouble with this, but for us one finger plodders, well let’s just say we’ll get there eventually.
If You Can’t See The Tags Category On Your Photo.
If you can’t see a Tags category for the file you’re trying to add a tag to, then it can’t be tagged. Not all files can be tagged. If you don’t see an entry for tags, then that particular file can’t accept tags.
Dealing specifically with your pictures, most likely the ones that don’t have the tagging category will be in a format other than JPEG. Something like PNG for instance.
You can get around that by opening the file in an image editor and then re-saving it as a JPEG. Not a perfect solution but better than nothing.
How To Tag Multiple Photos At Once.
If you’ve got hundreds of photos that all need to be tagged, you’re in for a long weekend. But a lot of those photos will actually need to have the same tags because the same people will appear in them or they’ll be pictures of the same place etc.
You can speed things up a little by applying tags to multiple pictures at the same time.
To add the same tags to multiple pictures, select all the pictures to be tagged.
To do that, hold down the CTRL key (Control Key) and left-click once on each picture.
You’ll see that each one you click on becomes selected.
For more about selecting multiple files click How To Select Multiple Files In Windows
When all the files you want to tag are selected, right-click on one of them. It doesn’t matter which one, just right-click on one of the selected photos.
The options menu opens. Left-click PROPERTIES.
Now it’s just the same as tagging a single file.
Left-click the DETAILS tab, then click in the VALUE area of the TAGS row.
And type in the tags your want to add to ALL the pictures.
Don’t forget to separate your tags with a semicolon.
Click the OK button when ready.
Every tag that you add will be applied to every picture that you’ve selected. Saves a lot of time when you’re adding the same tags to more than one photo.
How To Search For Tagged Photos.
The only reason for going to all the trouble of tagging your photos is to speed up searching for them. To make it easier and quicker to find the picture you want.
You can search for your tagged photos from either File Explorer or from within the folder where your photos are stored (saved). It works just the same whichever you choose.
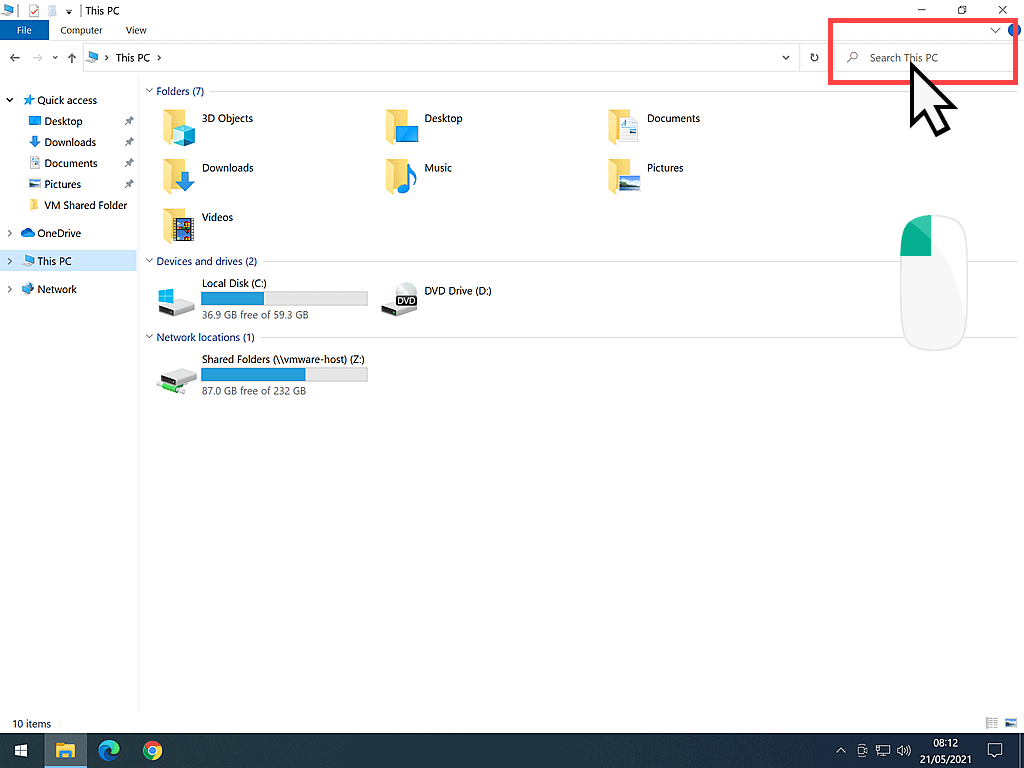
To search for your tagged photos, open File Explorer by clicking the File Explorer icon on your Taskbar or pressing the Windows key and the letter E on your keyboard.
If you have a good idea where the pictures are going to be, such as in your pictures folder, left-click Pictures in the navigation pane over on the left.
If you’re really not sure, and they could be just anywhere on your computer, click This PC in the navigation pane.
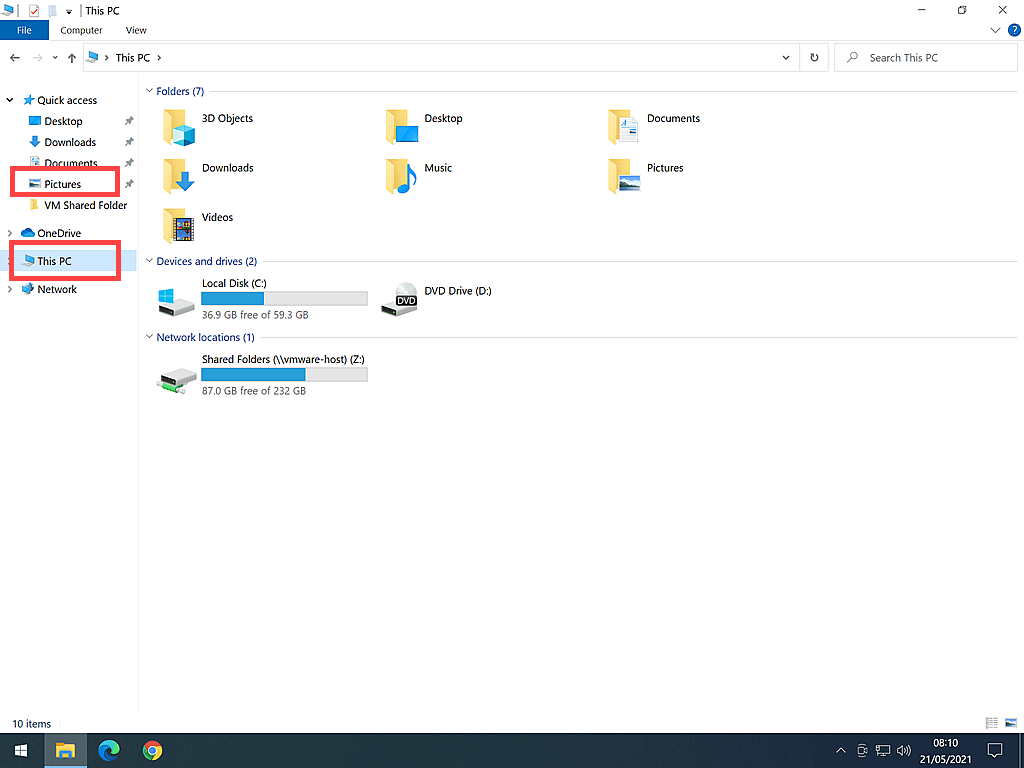
If you can narrow the search down to particular folders, such as the Pictures folder, you’ll find the search results come in much quicker than searching the whole computer.
Searching For Tags.
Windows normally searches for file names, but in this instance, you’ll want it to look for the tags (the keywords) you’ve added to the files. So you have to tell Windows to search for tags instead of file names.
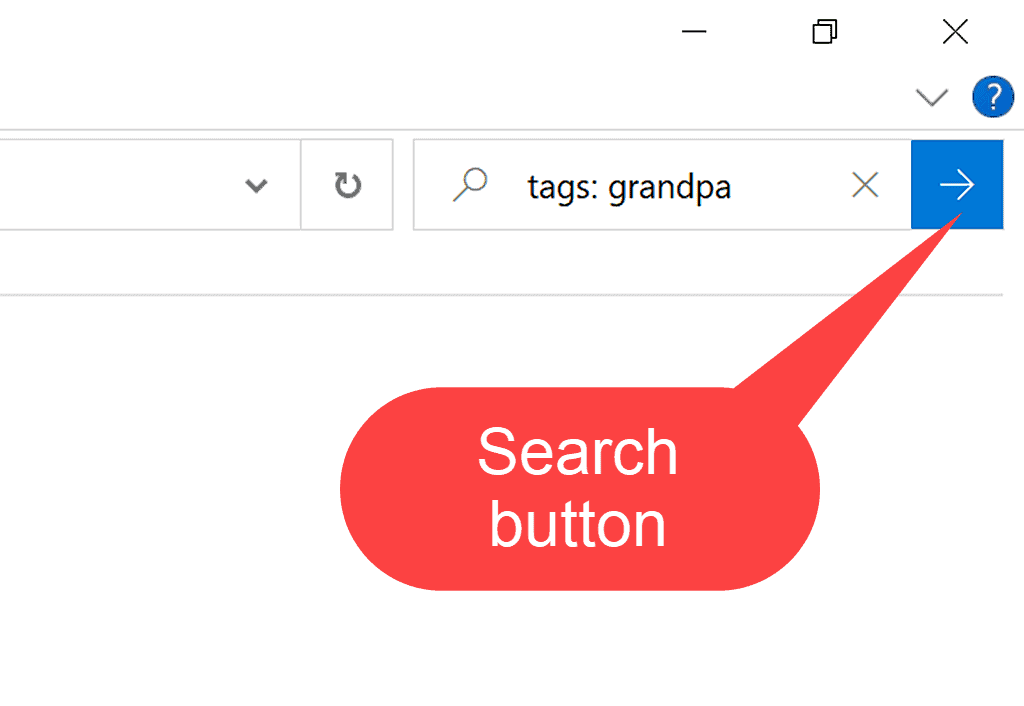
You do that by starting the search with the word tags followed by a colon (not a semicolon), followed by the name of the tag you’re looking for.
To search for a tag, left-click once into the search box (which you’ll see in the top right-hand corner of the window) and then type tags and a colon and then the tag you’re searching for.
So in the example we’ve been using, if I wanted to find pictures of Grandpa I’d type
tags: grandpa
Just to emphasise this, when you’re searching for a tag, you use the colon.
So on your keyboard, hold down SHIFT and then press the colon/semicolon key.
To start the search, click the search button (the arrow pointing right) or press the Enter key on your keyboard.
Windows will search your computer for any files with the tag you’ve just typed in. In our example, it’ll be searching for files with the tag grandpa.
It might take a while. It all depends on the speed of your computer and how many files you’ve got on there. But at least the computer is doing all the work and not you, so that’s a bonus.
When the search is finished, Windows will display the results.
All the files tagged with the tag you’re searching for will be displayed and the tag searched for will be highlighted beneath the file.
Brilliant, when tagging works like this, it really is a great time saver.
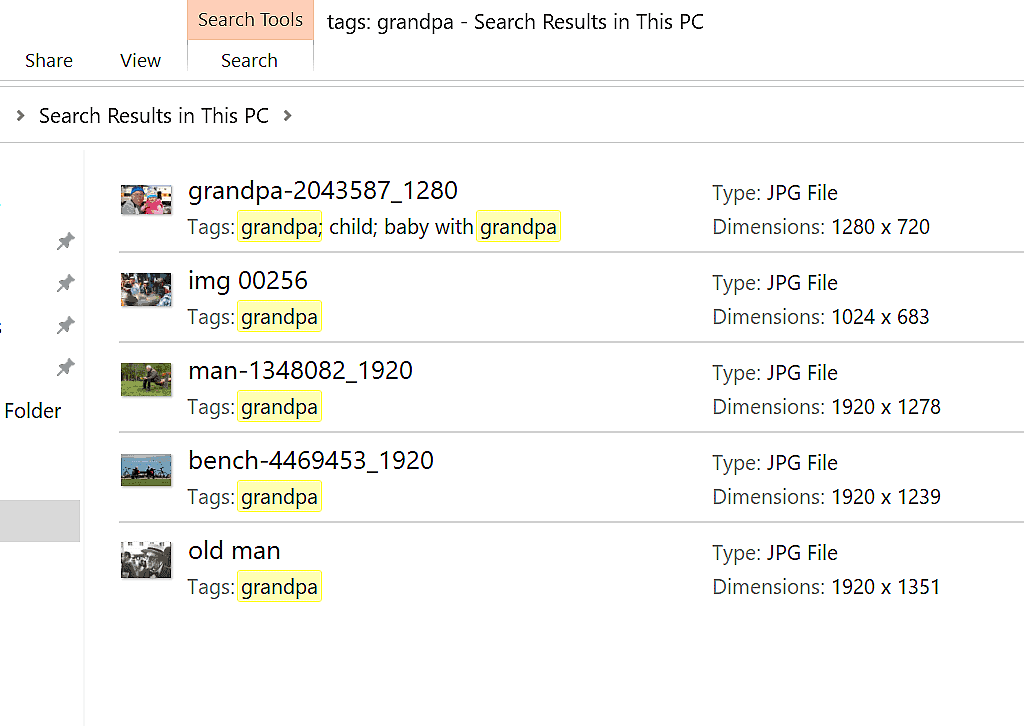
The search results are often displayed in “content” view. Which isn’t always that helpful, especially when searching for pictures.
You can quickly change the view by clicking on the VIEW button at the top of the screen.
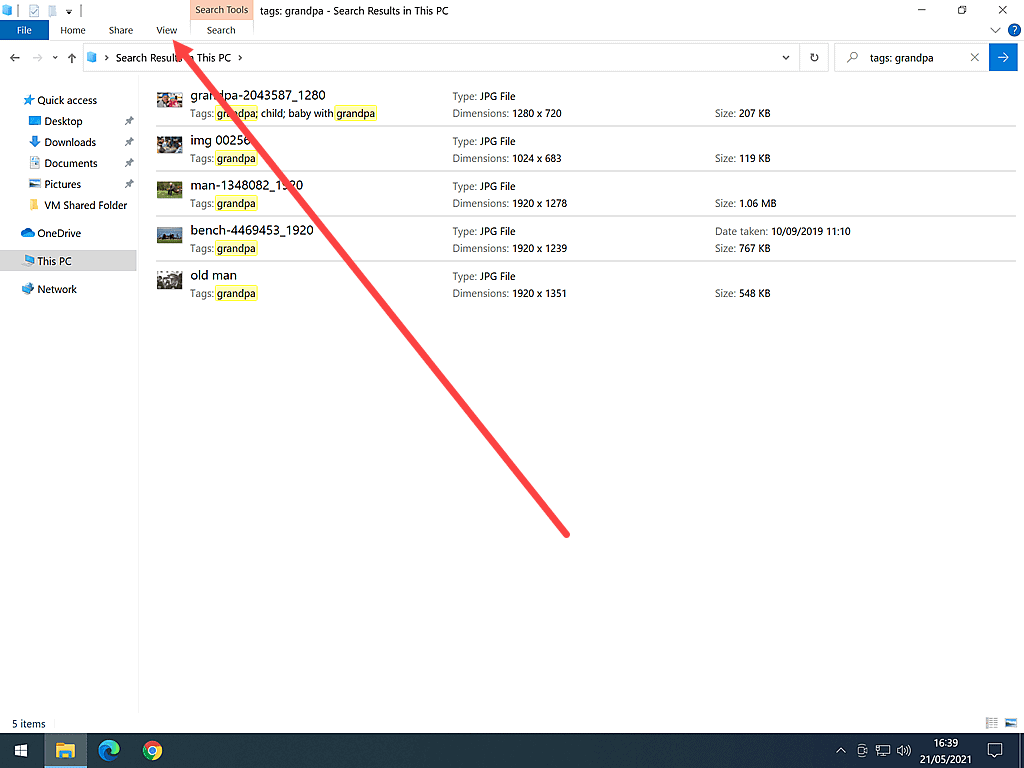
And then clicking EXTRA LARGE ICONS.
That’s better, we can see the pictures now.
Tagging Photos – Conclusion.
When you’ve got hundreds of photos it makes sense to add tags to them. Tagging just makes finding those pictures so much easier and quicker.
It’s a lot of work, yes it is, but what you do now will pay dividends in the future.
Pay attention to spellings, for instance we all know that grandpa, granpa, gramps and granddad are all the same guy, but your computer doesn’t. And also be careful with those colons & semicolons.
If you’re tagging photos for the first time, then tag a few and then try searching for them. If they appear in your search results, you’re doing it right. If they don’t, then you haven’t wasted too much time. You can go back and double check your tags.