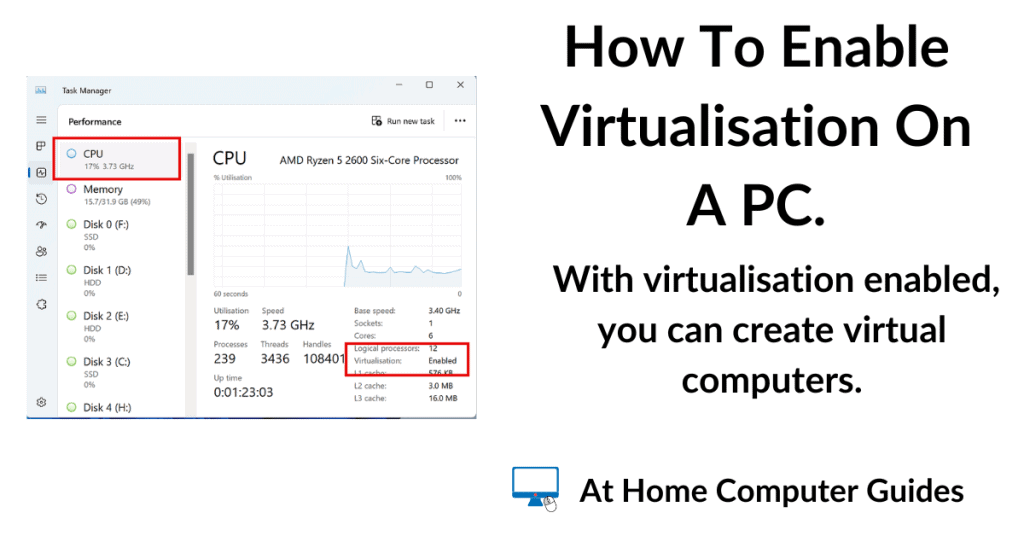
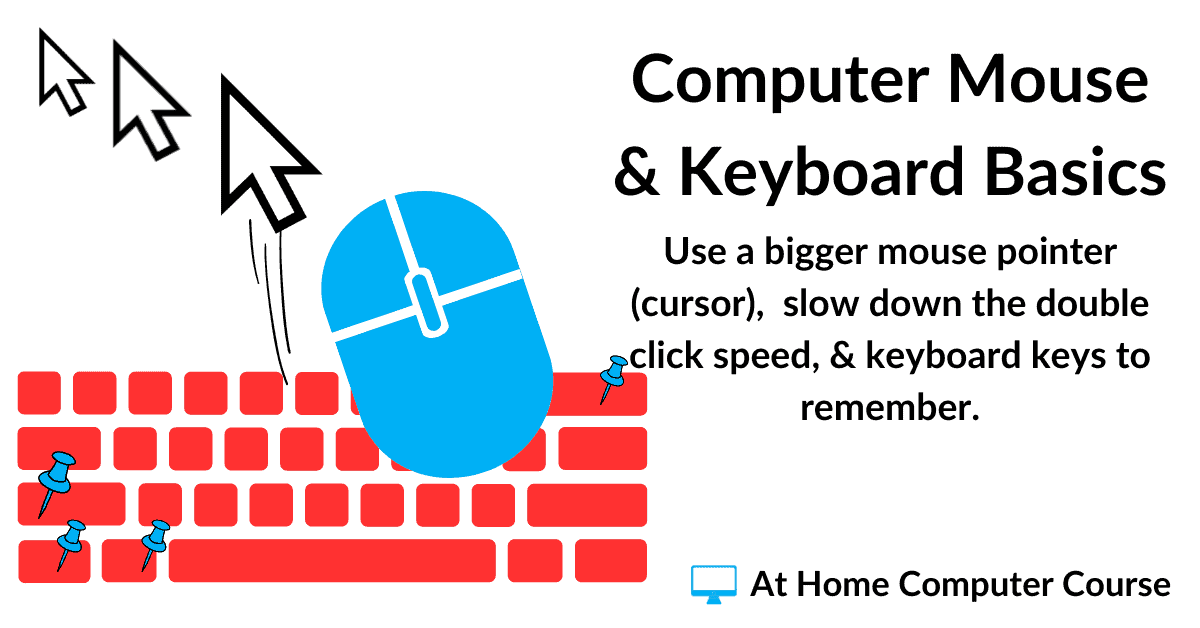
Computer Mouse Basics – There are 2 main issues that affect the use of the mouse, the first is the size (and perhaps the colour) of the pointer and the second is the double click speed. The double click speed affects how quickly you have to make two left clicks.
To make the mouse easier to use and more effective to use, we’re going to change the size of the pointer and slow down the double click speed.
Computer Keyboard Basics – Generally speaking the keyboard will just work, there’s not usually anything that you’ll need to do as regards its settings. However there are a few keys that you should find (apart from the usual alphanumeric keys).
How To Change The Double Click Speed Of A Computer Mouse.
To slow down the double click speed of your mouse, you’ll need to open the Mouse Settings on your computer.
Left click once on the Start button and then type “mouse settings“.
As you type, Windows will try to guess what you’re looking for. You’ll see the suggestions appearing and disappearing as you add more letters.
Left-click once on MOUSE SETTINGS (System Settings), which will eventually appear at the top of the list.
1

2

3

4

The Mouse Settings Page.
On the MOUSE SETTINGS page, look for the Related Settings section. You might need to scroll down a little, or if you’ve got a wide screen monitor, it might be over on the right-hand side of the screen.
When you find the Related Settings, in Windows 10 left-click ADDITIONAL MOUSE OPTIONS.
And in Windows 11, left-click ADDITIONAL MOUSE SETTINGS Pointer icons & visibility).


Adjust The Double Click Speed.
The Mouse Properties window will open. Click on the Buttons tab. already).
In the middle of the Buttons tab window, you’ll see the Double-Click Speed section.
To slow down the double click speed, put your pointer onto the slider, hold down the left mouse button and move your mouse to the left.
Personally, I’d go all the way to the left, as far as it can go. It’ll give you more time and make the mouse easier to use.

When you’re done, click the OK button and close all the open windows and try double clicking on a few items. You’ll find that they will open first time every time.
Mouse Properties On A Laptop.
If you’re using a laptop, then the Mouse Properties box will look a little different.
However, it’s the same window but with additional settings for your touchpad.
Across the top of the window, you’ll see some tabs.
To change the double left click speed, just click on the Buttons tab and then use the double-click slider to slow it down.


How To Change The Double Click Speed Of Your Mouse.
- Click Start – Type “mouse settings” – Click Mouse Settings (system settings).
- Windows 10 – click Additional Mouse options
- Windows 11 – click Additional Mouse Settings (pointer icons & visibility)
- Make sure you’re on the Buttons Tab – use the Double Click Speed slider to speed up or slow down.
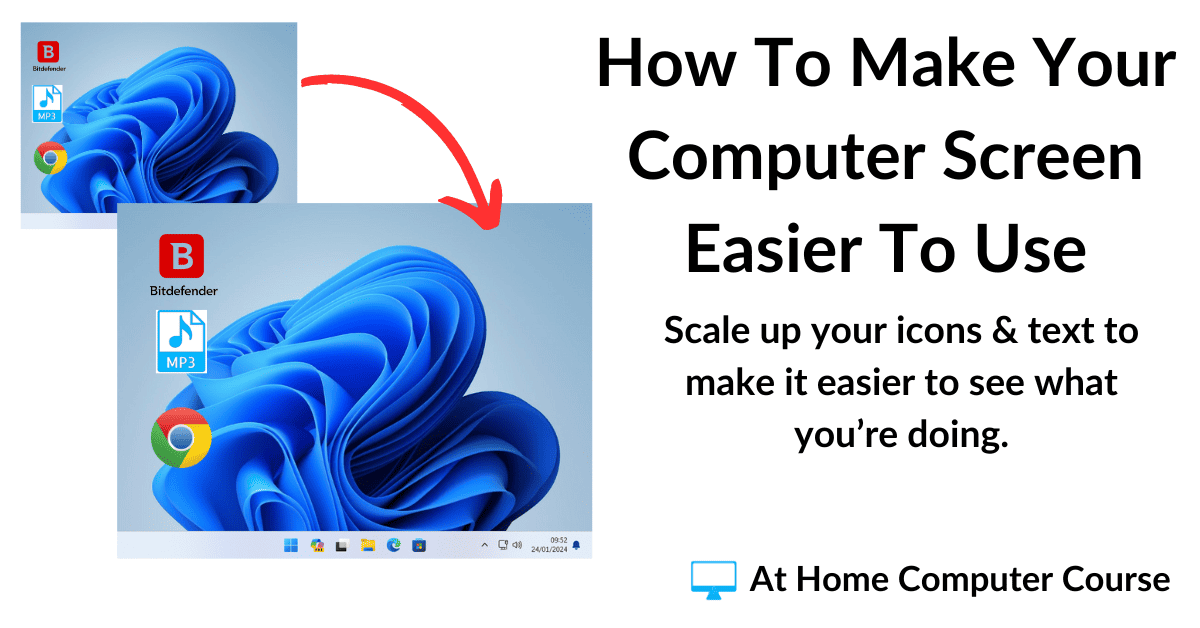
How To Adjust Your Mouse Pointer Size.
To make the mouse pointer easier to find on your screen, you can change its size (make it larger).
Open the Mouse Settings page just as you did above, click the Start button, type “mouse settings”, click Mouse Settings (system settings).
When the Mouse Settings page opens, go to the Related Settings section again.
In Windows 10, click ADJUST MOUSE & CURSOR SIZE.
And in Windows 11, click MOUSE POINTER (Pointer Size and Colour).


Changing The Size Of Your Mouse Pointer.
To change the size of your mouse pointer (cursor), drag the slider left or right. To the left makes the pointer smaller and to the right makes it larger.
In case you’re wandering, there isn’t a “correct” size for a mouse pointer. It really is a personal choice. It’ll depend very much on the screen that you’re using, and of course, your own eyesight. But if you want a recommendation, then I’d set the size to either 2 or 3.
When you’re happy, there isn’t an OK button to click. Just close the window by clicking on the X in the top right corner.


How To Change The Mouse Pointer Size.
- Click Start – Type “mouse settings” – Click Mouse Settings (system settings).
- Windows 10 – click Adjust Mouse & Cursor Size
- Windows 11 – click Mouse Pointer (pointer size & colour)
- Use the slider to change the size of your mouse pointer.
The Computer Keyboard Basics.
Apart from the usual numbers and letters that you’d expect to find on a computer keyboard, there some very useful keys that you should know about. So before you move on to the next page in the course, I’d urge you to take a few moments to find these keys on your keyboard.
Please note that this image is of a standard UK layout “qwerty” keyboard from a laptop. The exact location of at least some of the keys on your computer keyboard will probably be different. But they will be there somewhere.

Starting from the top left and moving around anti-clockwise –
- The Tab key – often marked with two opposing arrows but sometimes has Tab written on it.
- The Shift key – an upward-facing arrow or the word Shift.
- Control Key – often marked as CTRL.
- The Windows key – marked with the Windows logo, but that has changed over the years. See below.
- The Alt key – always marked Alt.
- Enter or Return key – could be marked with either a crooked arrow, Enter or Return or a combination of the three.
- Arrow keys – marked with the direction arrows.
- The Backspace key – marked with an arrow pointing left or the word Backspace.
Notable Keys.
Whilst the majority of these keys are generally used when typing and are pretty much understood by everyone, there are 3 keys that you really should find and note, namely the CTRL (Control) key, the Windows key, and the ALT key.
Although you may never have used these 3 keys at all, they are incredibly useful. They’re positioned in the bottom left-hand corner of the keyboard for a reason, and that is to make it easy to use them with your left hand, whilst your right-hand remains on the mouse.
As you move through the At Home Computer Course, I’ll introduce you to how and when to use these 3 keys, and you’ll see just how good they are.
How To Find The Windows Key On Your Keyboard.
The Windows key usually has the Windows logo on it, but if you’re using an older keyboard, the logo might be different from the one shown here. If you’re not sure about the Windows key, you can test it.
In both Windows 10 & 11, pressing the Windows key opens the Start menu. So press the key you think is the Windows key and if the Start menu opens, you’re good to go. Press it again to close the Start menu.


Keyboard And Mouse Basics – Summary.
I’m sure that for many people, changing the mouse settings will seem like a bit of a challenge, maybe a bit scary, but that’s why you’re here. To learn how to use your computer and to get the most from it. You can only do that if you can control the computer properly. And for most of us, the mouse is the main way that we control the computer. So it just has to work.
Remember that you can always change your mouse settings again. If you make the pointer size a little too big, or you want to go a little bigger, do it. Follow the guides above and get it right for you.
As for the keyboard, most of the keys you’ll already know, but if there’s a couple you didn’t, try to make a note of them. Find them on your own keyboard, it will make life a little easier going forward.
Next up, we’ll be looking at your desktop. Specifically, how you can move things around to better suit you. See you there.
At Home Computer Guides.
These easy to follow guides aren’t part of the course, rather, they are standalone guides. They extend beyond the basics that we’re covering on the course.