In this guide, I’ll walk you through the process of restoring files or folders from a Windows 10 backup. The guide refers specifically to the built-in Windows back up facility.
To create a Windows backup click How To Create A Windows System Image Backup.

How To Restore Files/Folders From Backup.
So let me give you a scenario, I’ve lost some files. My computer works fine, so I don’t want to do a full system restore. I just need to get a couple of files and a folder back.
They seem to have disappeared from my computer, but I know they were there when I made my last backup.
So let’s get them back. Make sure your backup drive is connected to your PC.
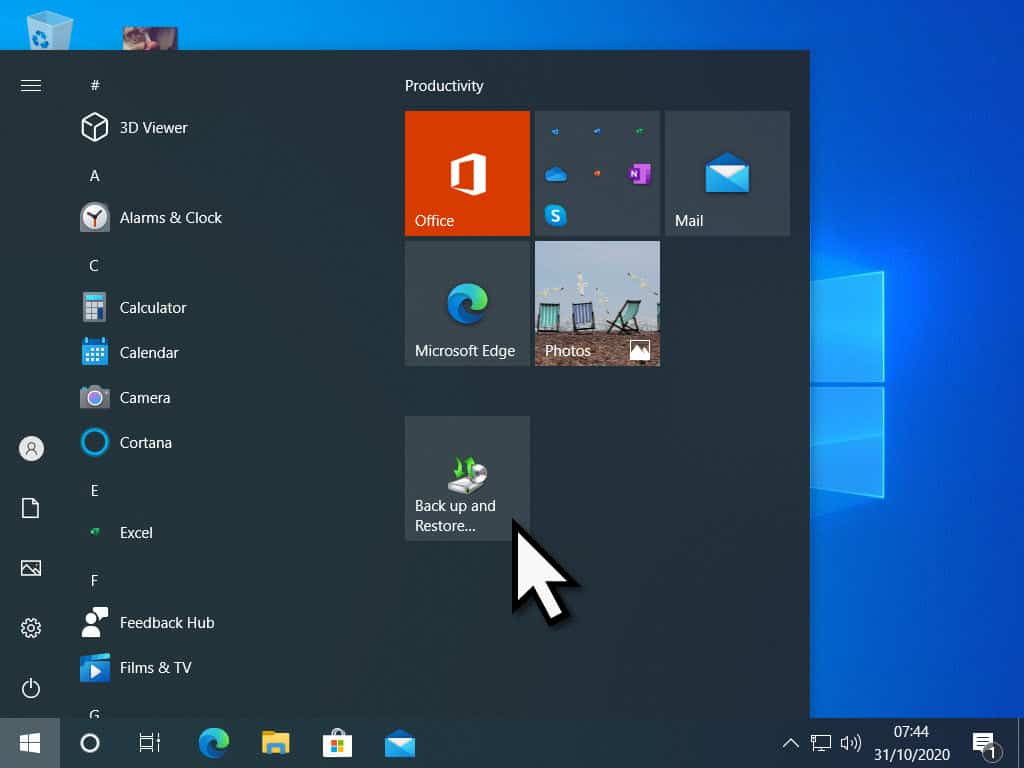
To get our files back, we need to open Backup & Restore. If you pinned it to the Start Panel, left-click it.
If you didn’t, open it through the Control Panel.
On the Back & Restore page, click the RESTORE MY FILES button.
Select Files To Restore.
Now you have to tell the computer whether you want to restore complete folders or individual files.
In my example, I’ve lost a folder containing audio files (music) and 3 individual files (2 pictures and a document).
It helps immensely if you know where the files/folders were before they got “lost”. But if you don’t know where they were, you can search for them, which we’ll deal with later down the page.
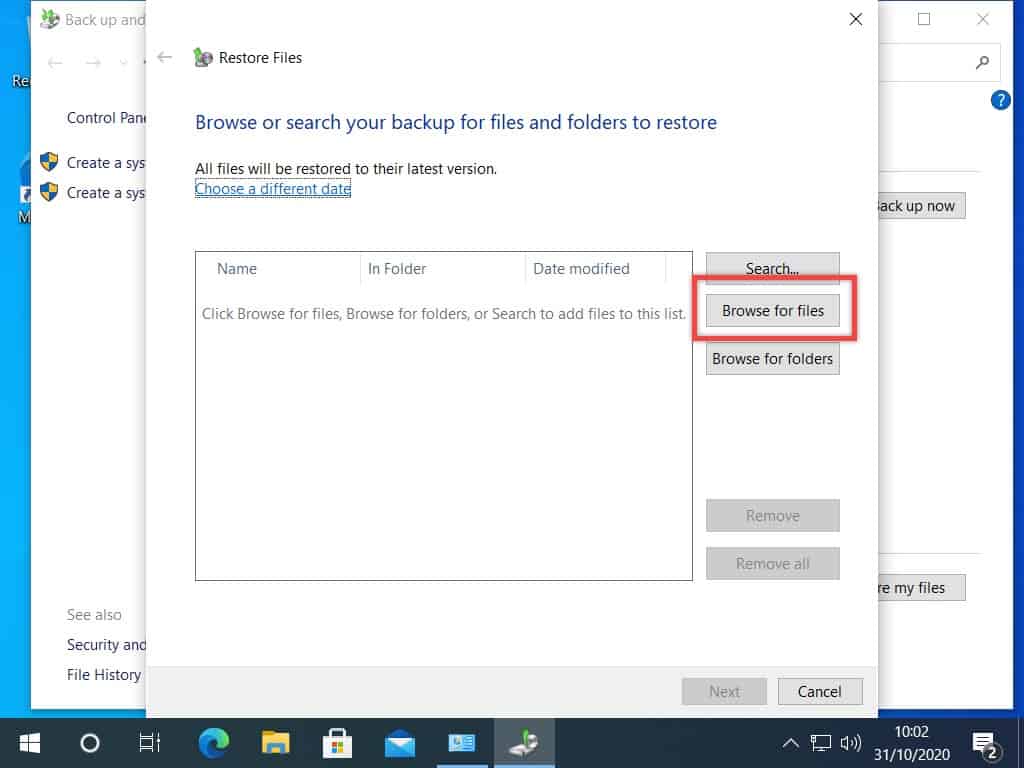
To restore individual files, click the BROWSE FOR FILES button.
Navigate Through Your Backup.
The backup files are arranged just as they would be on your computer. You’ll need to navigate through the various folders to find the file/files that you need.
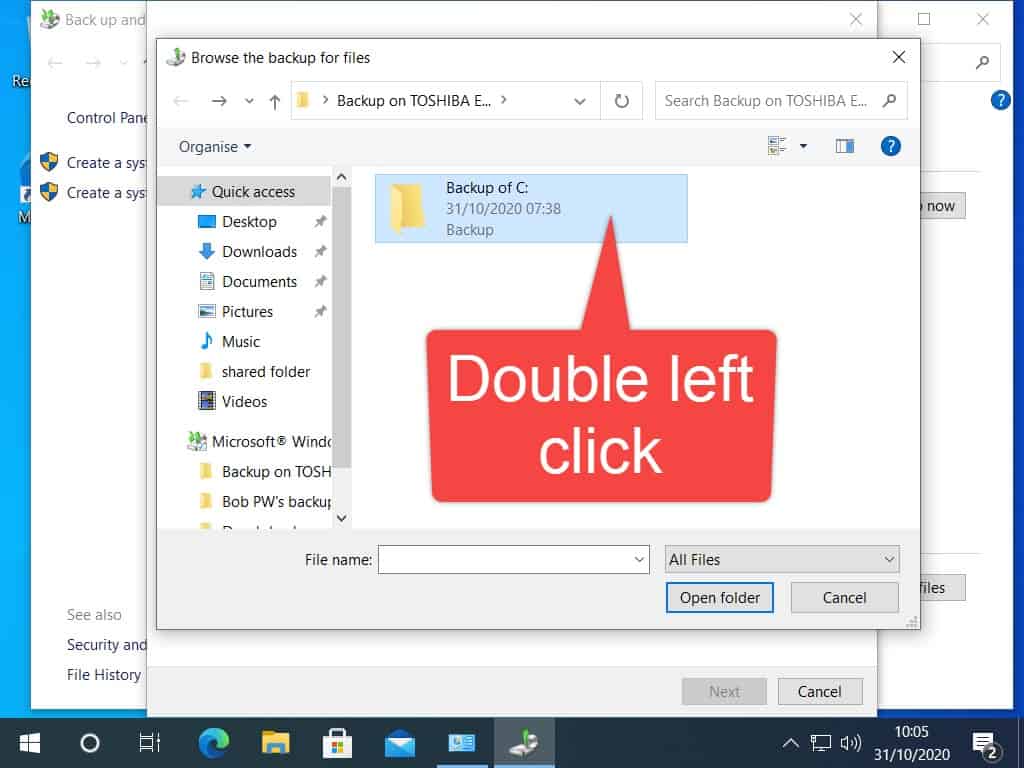
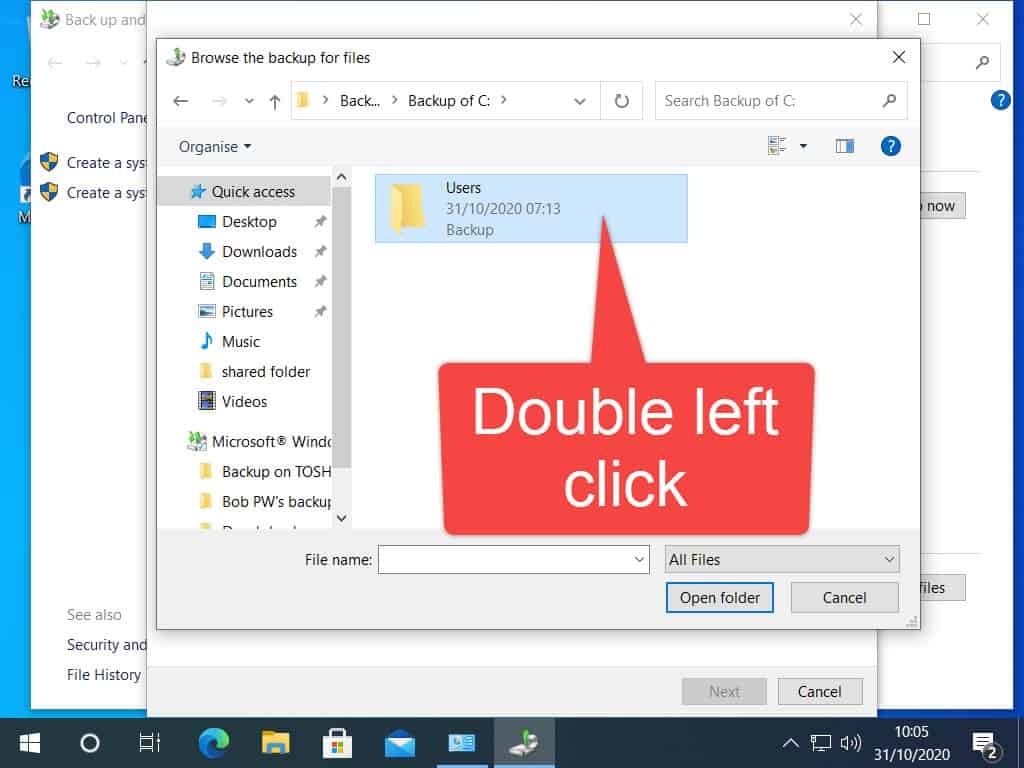
- Double left click on the Backup of C: folder.
- Double left click on the Users folder.
- Finally, double left click on your Account Name folder.
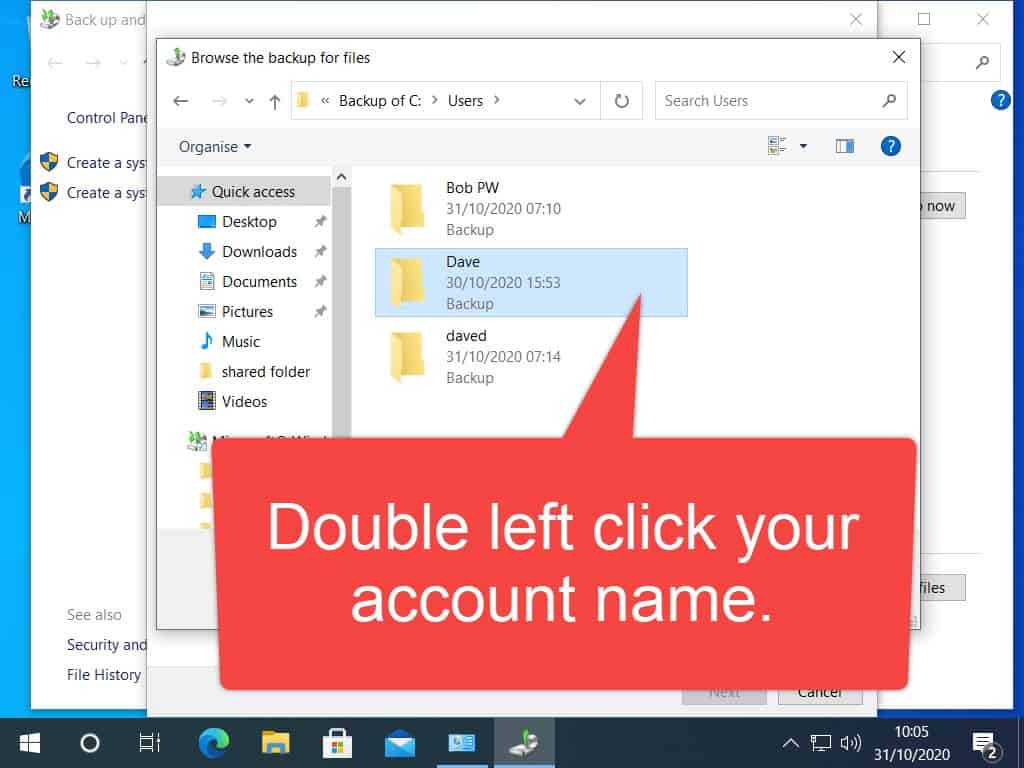
Now we can see all the folders that have been backed up.
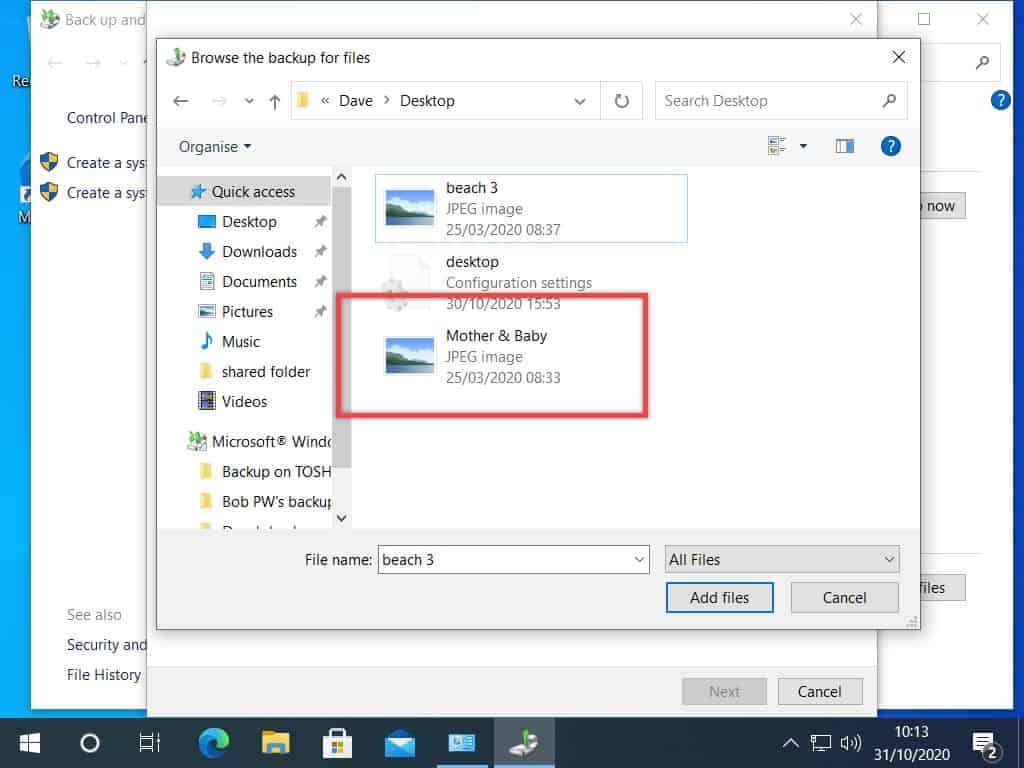
The first file that I want should be on my Desktop.
So double left-click the Desktop folder to open it.

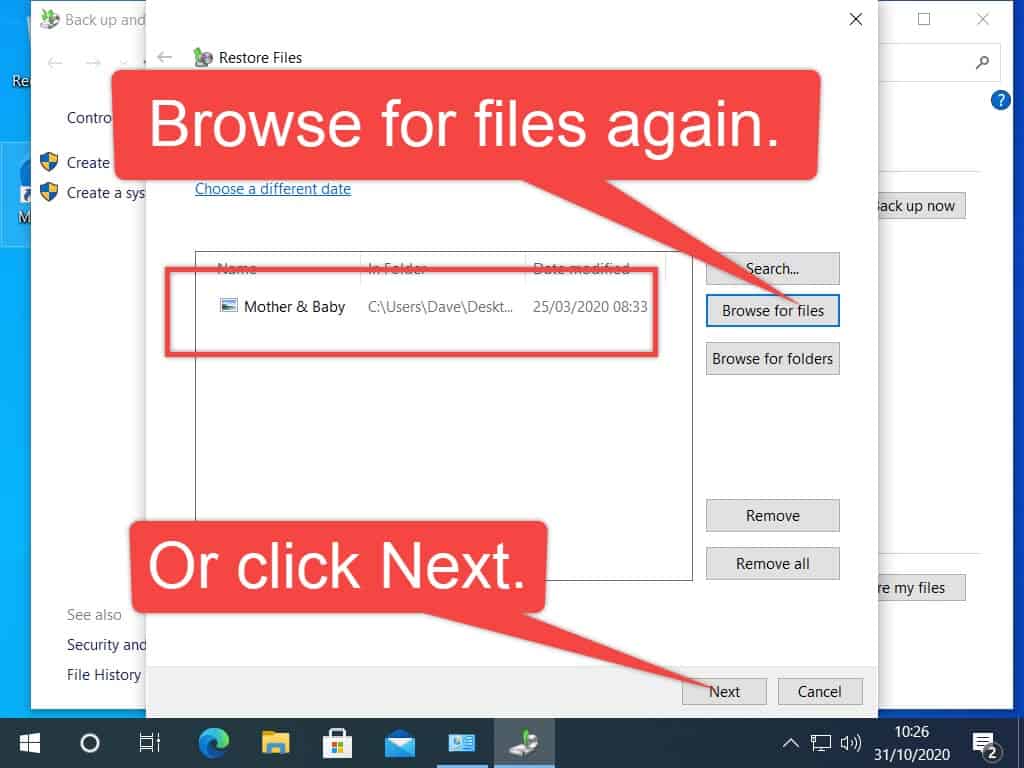
Aha, there it is. The picture is called “Mother & Baby”. Lifesaver.
Double left-click the file you want to restore.
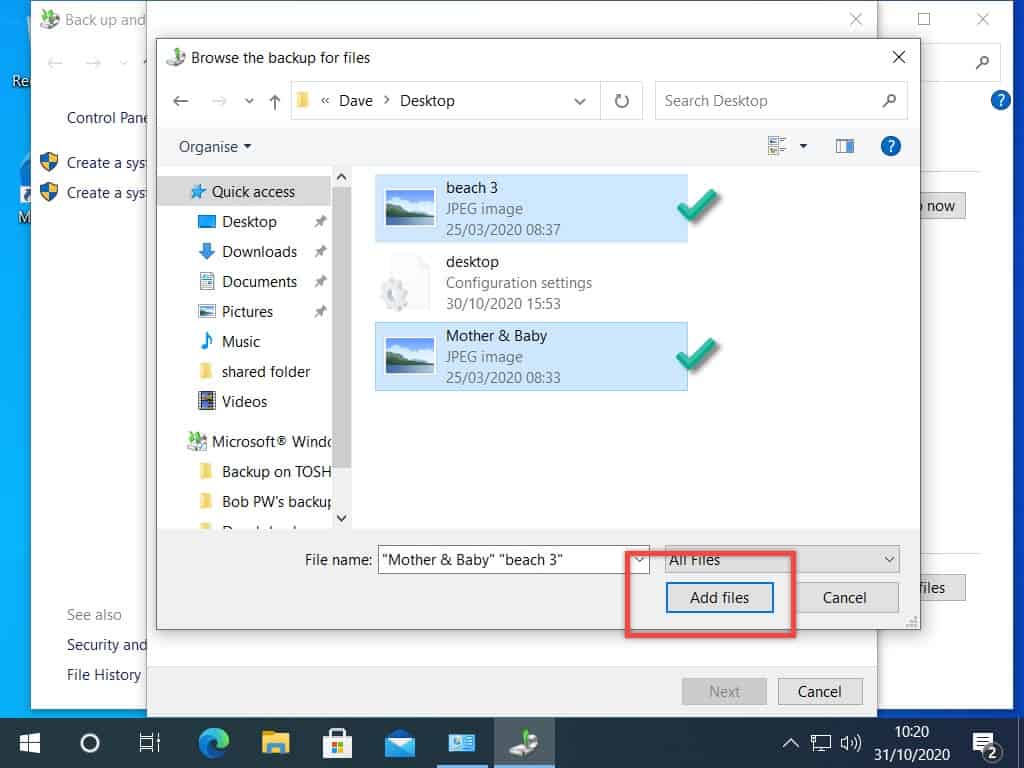
If you want to restore more than one file from this folder, hold down the CTRL key, then left-click once on each file to select it. How To Select Multiple Files In Windows
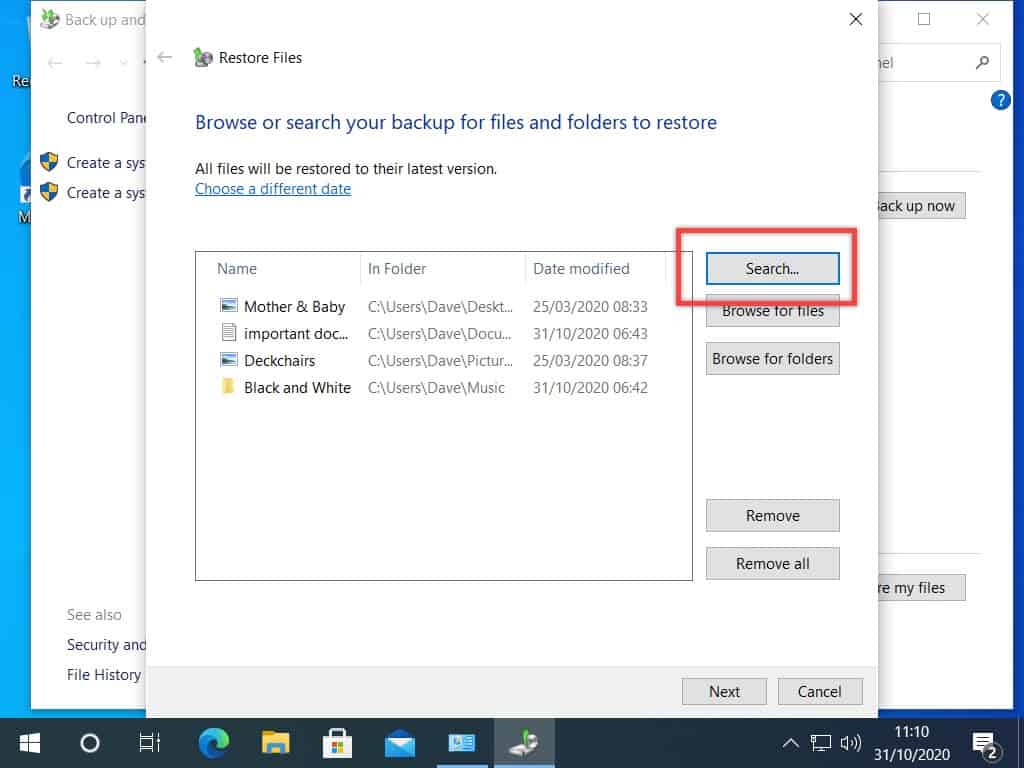
Once you’ve selected all the files you require, left-click the ADD FILES button.
Once you’ve added the file or files that you want to restore, you’ll be returned to the Restore files page.
If you’ve got all the files you want, click the NEXT button.
But if you need more files, you’ll have to click the BROWSE FOR FILES button and start again.
When you need to add files for restoration from several folders, it can get a little annoying having to restart over and over.
But at the end of the day, with a little patience, you’ll get your files back. Lifesaver.
Select Folders To Restore.
The process for restoring folders from your backup is very similar to restoring files.
In my example below, I’ve added my individual files, now I need to add my folder.
To add a folder for restoration, click the BROWSE FOR FOLDERS button.
That’ll tell the computer that we’re looking to restore a complete folder.
You’ll have to dig through the folders again, just like we did for files.
Backup of C: – Users – Account name.

Now we need to find that folder.
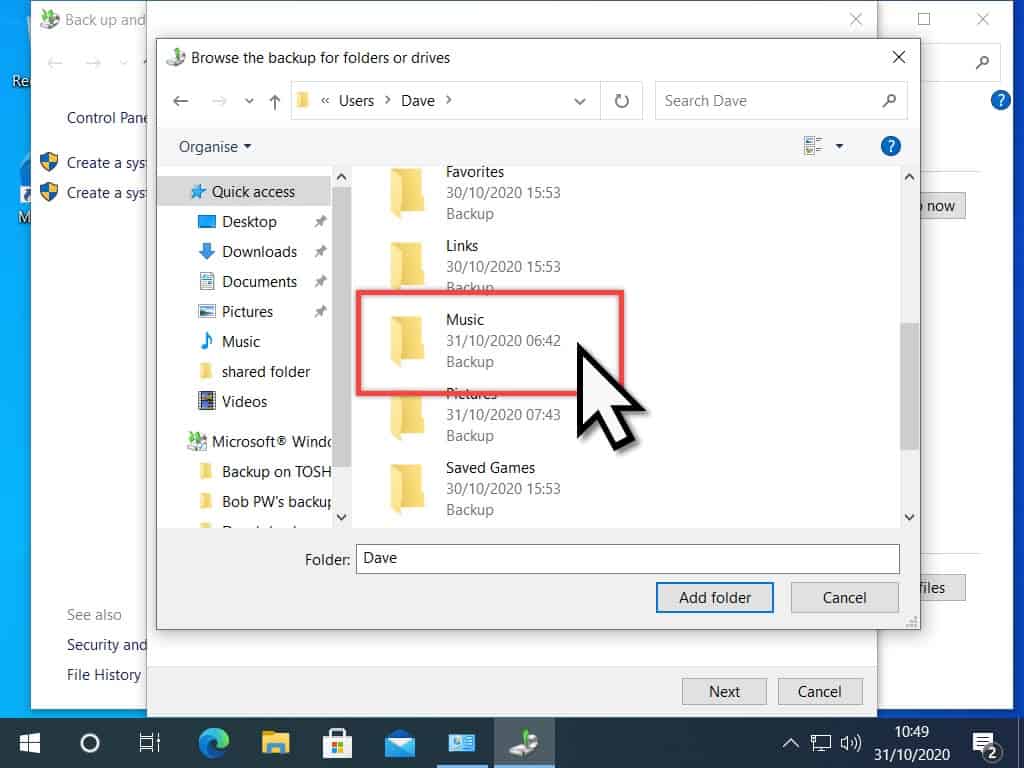
So scroll down the list of backed up folders, and double left-click on the desired folder.
In my case, the folder I want is in the Music folder.
Obviously, if the folder you’re looking for was on your Desktop, then you’d open the Desktop folder. And if it was in your Documents folder, etc.
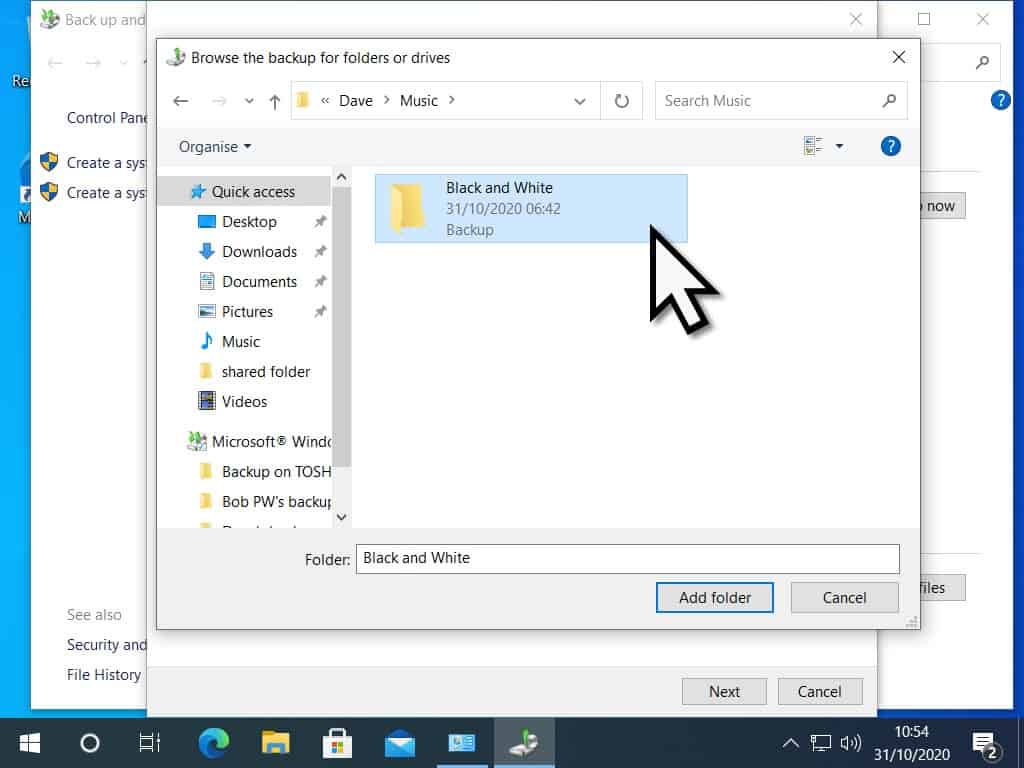
When you’ve found the folder you want to restore, single left-click it to select it, then click the ADD FOLDER button.
If you’re restoring multiple folders, you can hold down the CTRL key and click each folder in turn to select multiple folders. Then click the ADD FOLDER button.
Searching For Files/Folders To Restore.
OK, so you don’t know where the file or folder was originally.
It could have been on your Desktop, but then again, maybe it was buried in your Documents folder. All you know is that it’s missing (sounds like me).
Well, you’ve got two options open to you.
If you know or have a good idea what the file/folder was called, then you can search for it.
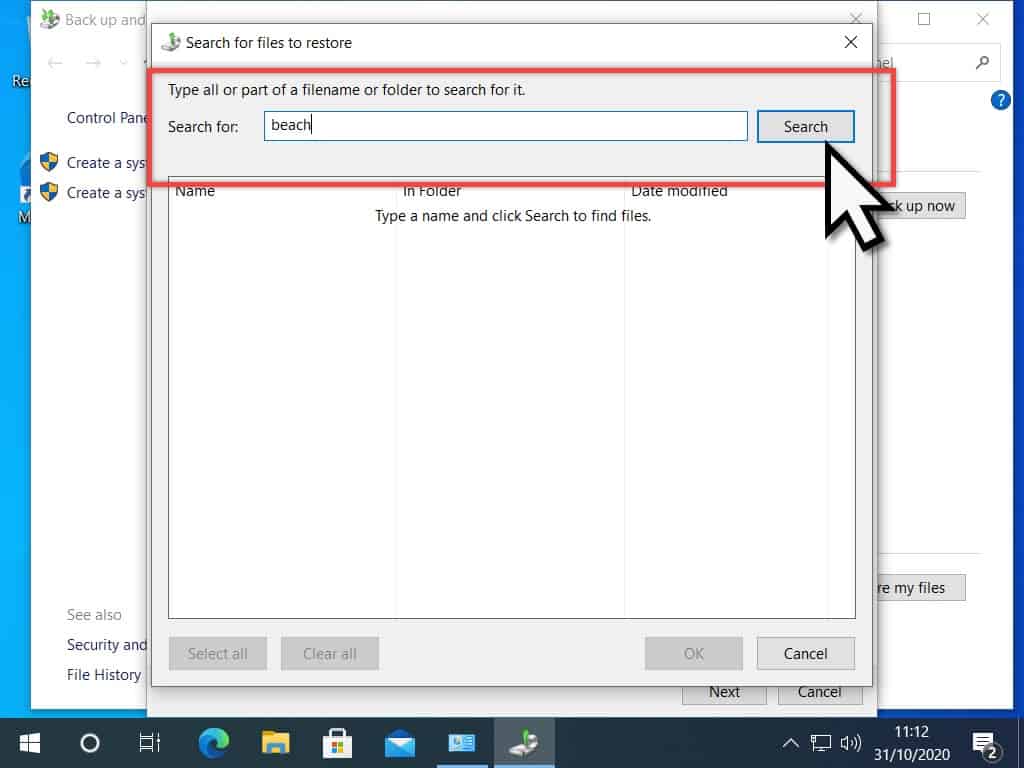
Let’s say I think I’ve lost another file, a picture. I don’t know where it was, or where it should be, but I do know it was called “beach” something.
To try to find the file, click the SEARCH button.
This is exactly the same for folders too.
The “Search for files to restore” window opens.
Type the name of your file/folder into the Search Box.
Then click the SEARCH button.
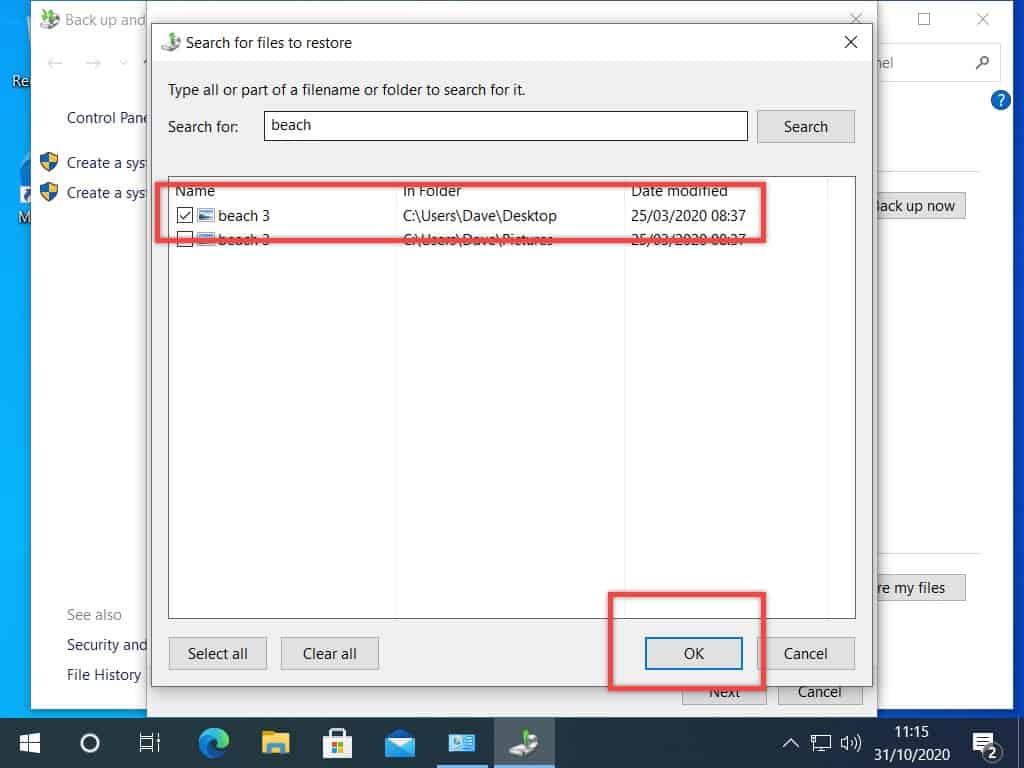
Windows will search through your backup looking for files/folders with the name you’re searching for.
When you find the file/folder, put a tick in the box next to it to select it, and then click the OK button.
If You Don’t Know The Nmae Of The File/Folder?
If you don’t know the name of the file/folder, you maybe don’t know where it was, then there’s only one thing left for you to do.
Click the BROWSE FOR FILES button, and then search through each and every folder until you find what you’re looking for.
It’s tiring and tedious, but we’ve all been there.
Restoring Files And Folders.
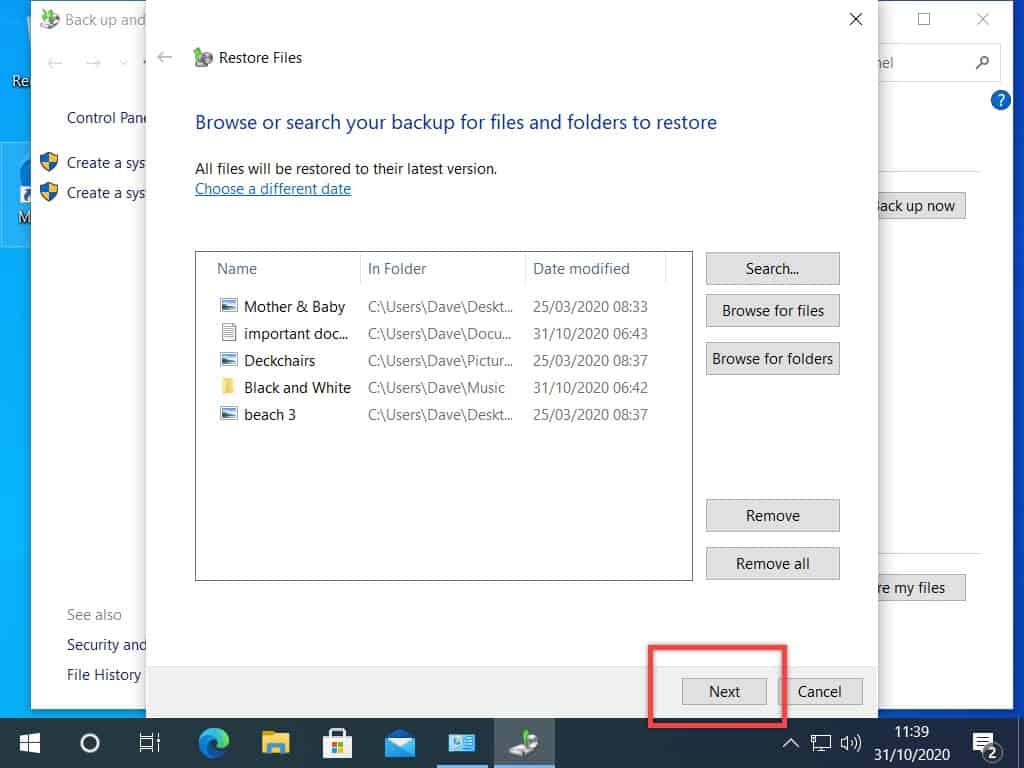
Now we’re ready to actually restore the files and/or folders.
We’ve got all the files and folders that we want to restore from the backup. Brilliant.
Click the NEXT button.
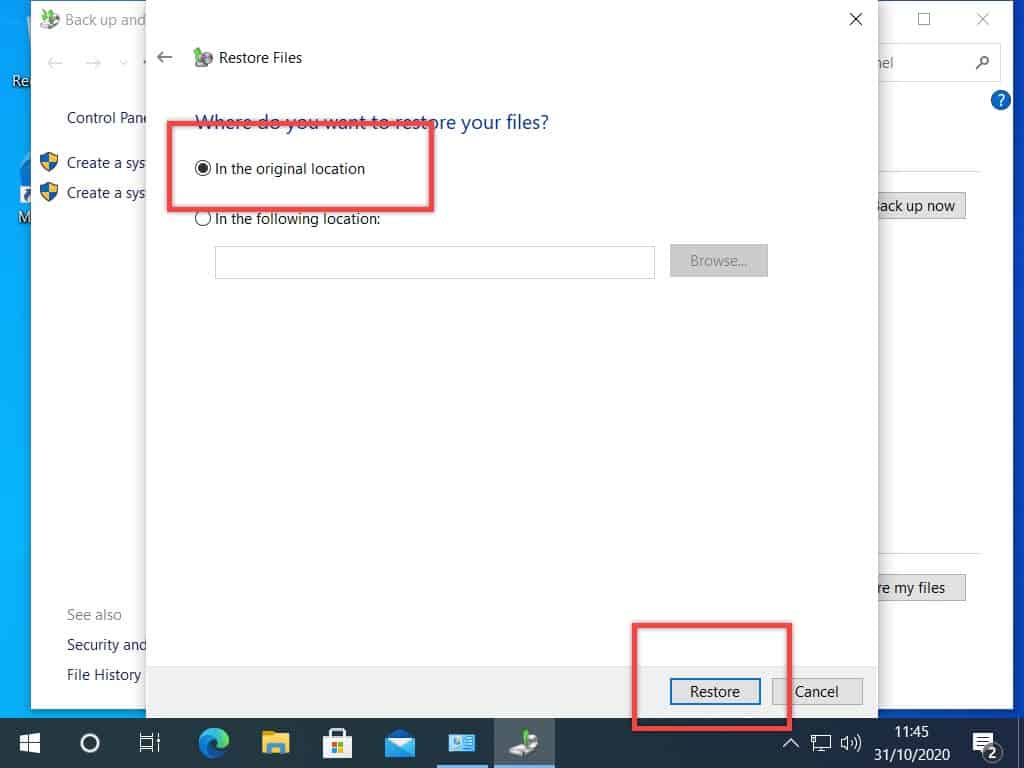
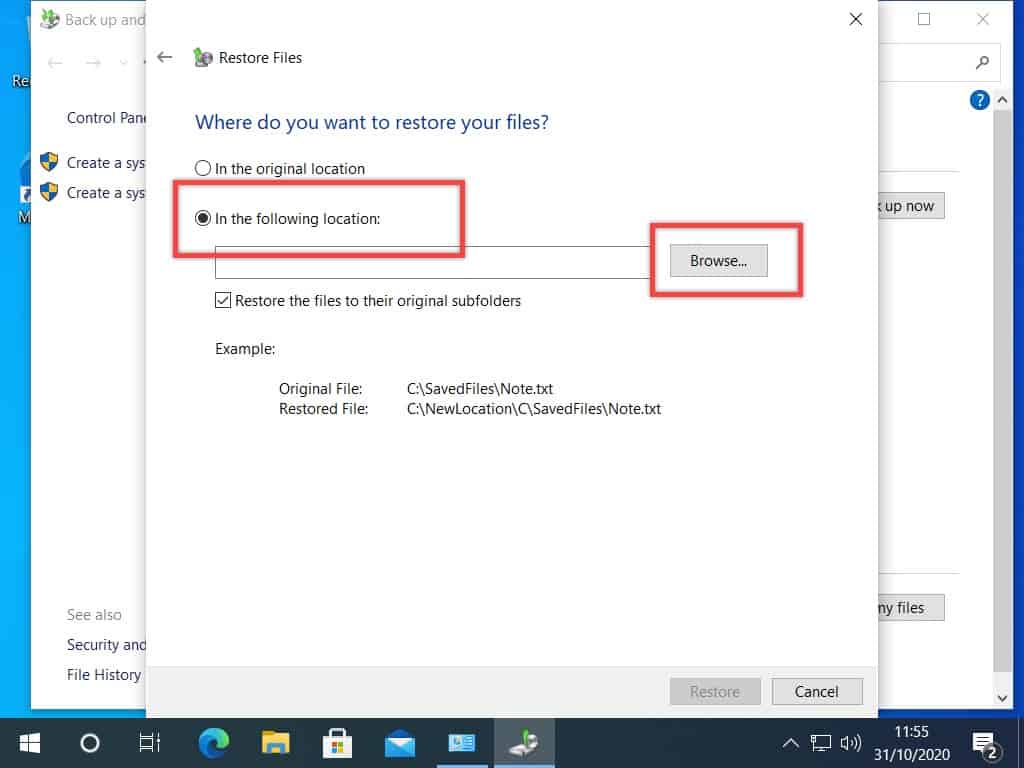
Where To Restore The Files/Folders To?
We now have a choice to make. We can restore the files/folders to their original location, or we can restore them to a new location.
We’ll look at how both options work.
If you know where the files/folders were before they got lost, then you can restore them to their original location.
This is the default action.
You should see that IN THE ORIGINAL LOCATION is selected.
If this is OK for you, click the RESTORE button.
But sometimes, after searching for these files/folders, we’ll want to drop them somewhere that we can easily find them.
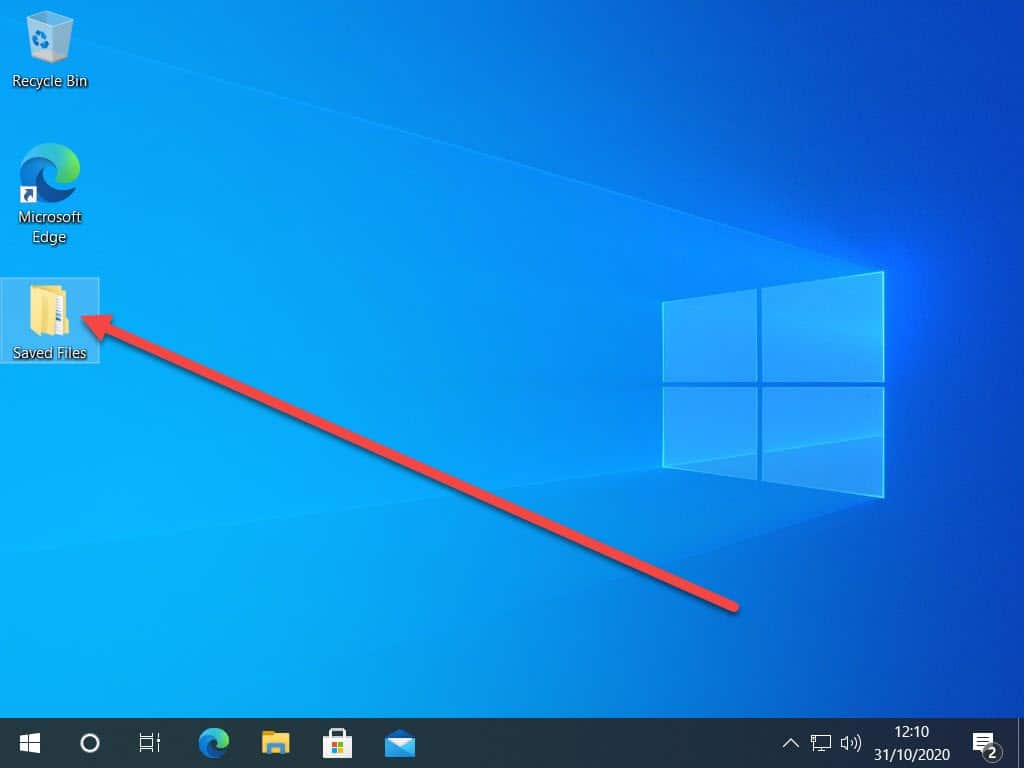
I’ll save them into a folder on my Desktop, but obviously, if you want to put them somewhere else, you can.
After clicking the NEXT button, select the option IN THE FOLLOWING LOCATION.
Then click the BROWSE button.
In the window, click Desktop (or whichever folder you’d like to use), Then click the MAKE NEW FOLDER button.
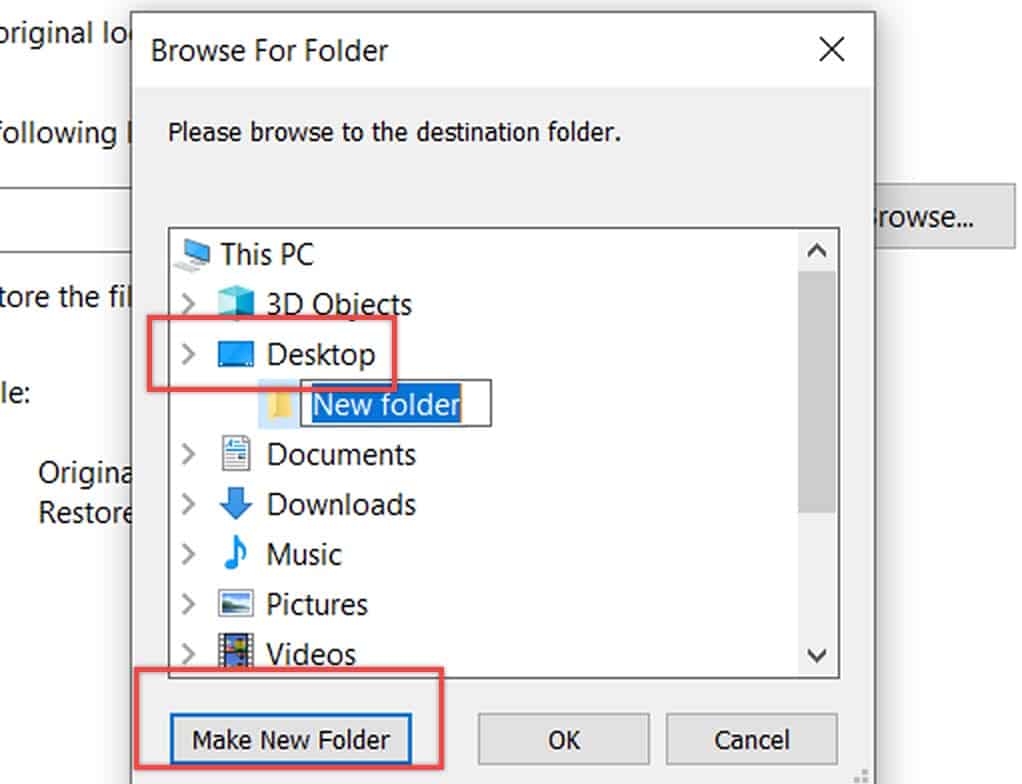
Give the folder a name so that you’ll know what to look for.
I’ll call mine Saved Files.
Once you’ve given the folder a name, click the OK button.
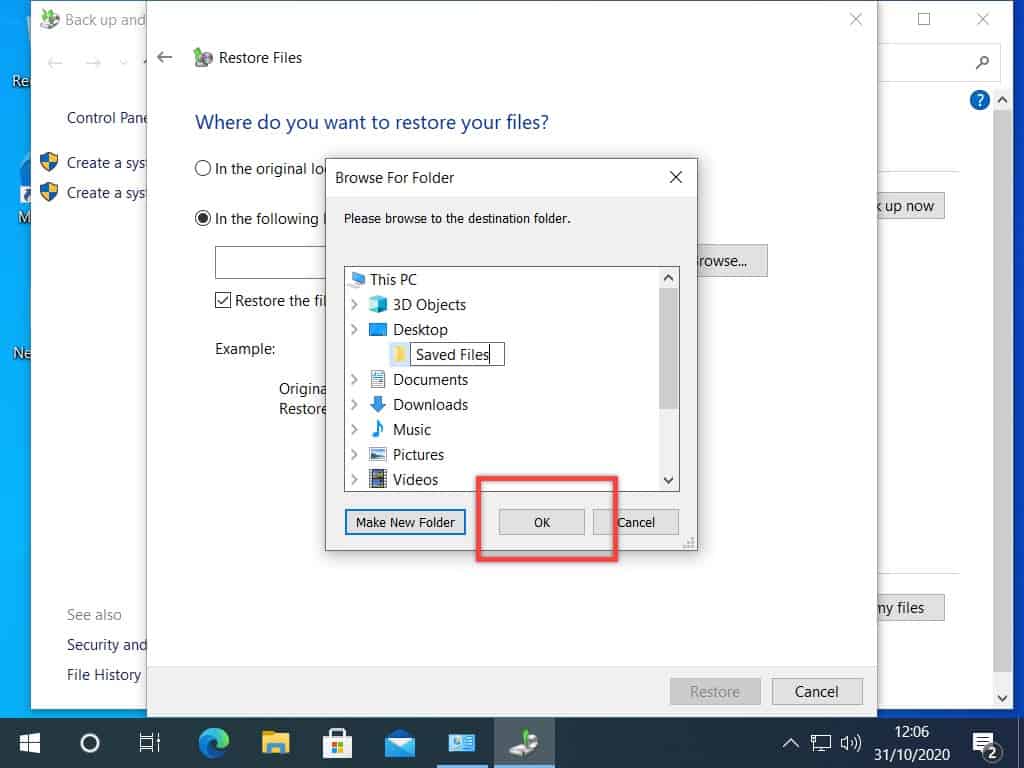
Click the RESTORE button and all your selected files and folders will be restored and saved into the new folder you just created.
The only thing for you to do now is to go check that they’re all in there.