If you use Gmail as your email service, then it’s really easy to add pictures directly into your messages. You can insert them from either your Google Photos account or from your local computer.
How To Add Pictures To A Gmail Email.
Images really do help you to get your message across. Advertisers add pictures to emails all the time to show off their latest offers.
You can do the same thing.
Adding A Picture.
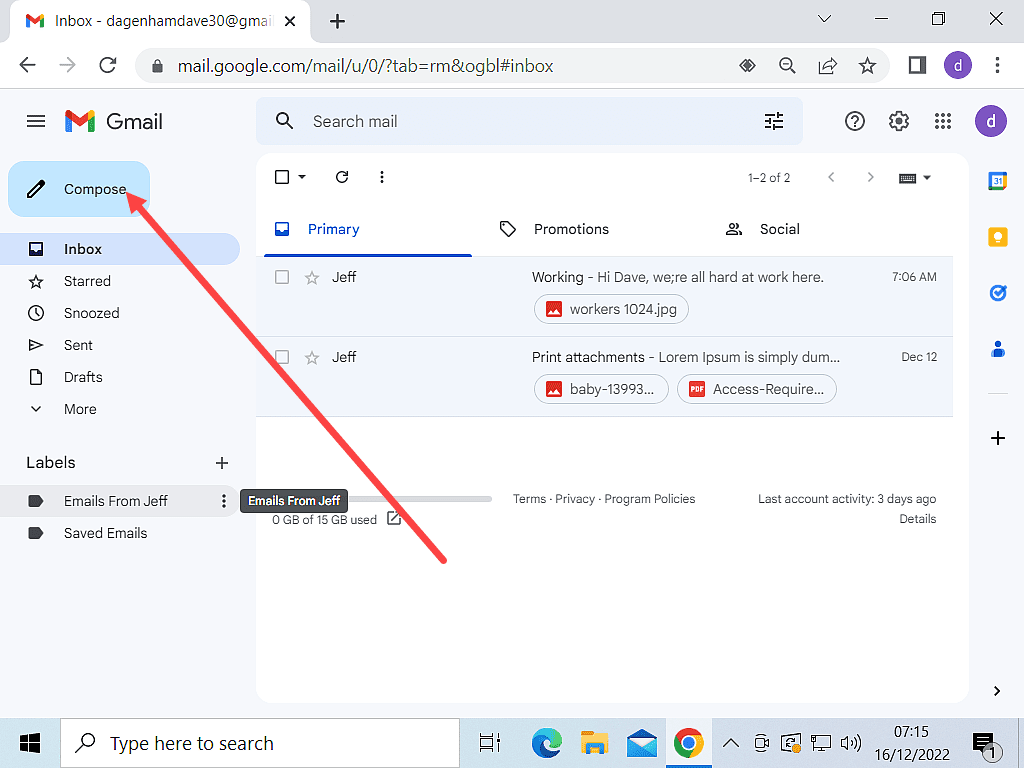
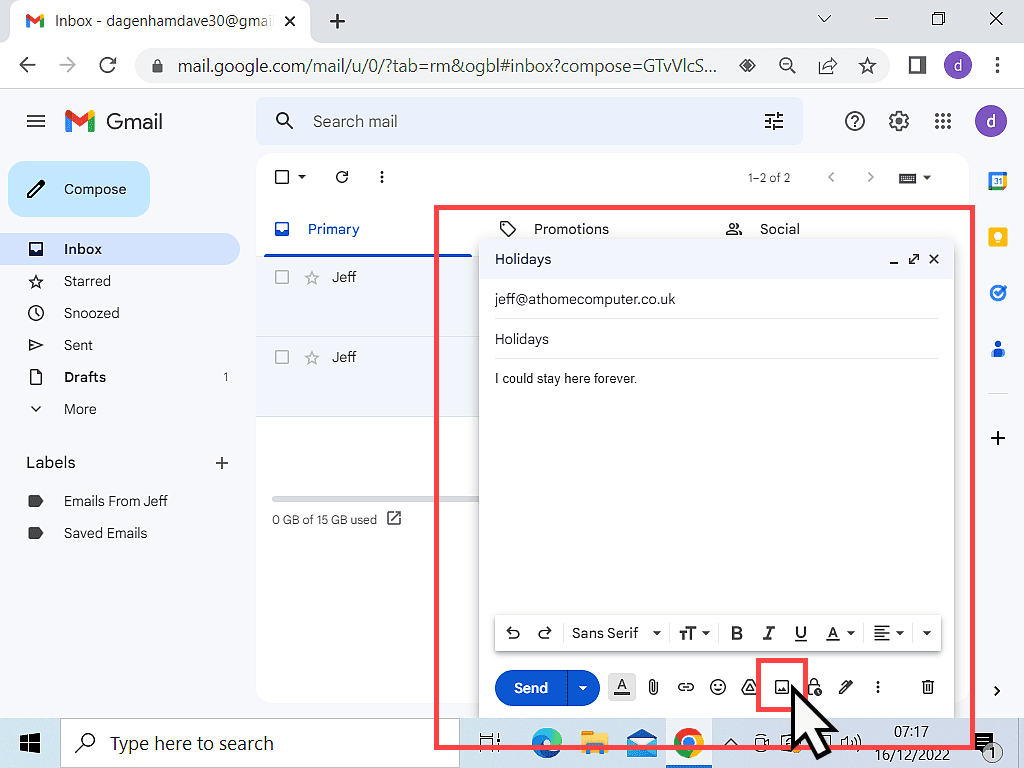
To add an image to your email, log into your Gmail account and then click the Compose button to begin a new message.
Fill out the address and subject boxes and add some text to the message body, just as you would for a standard email.
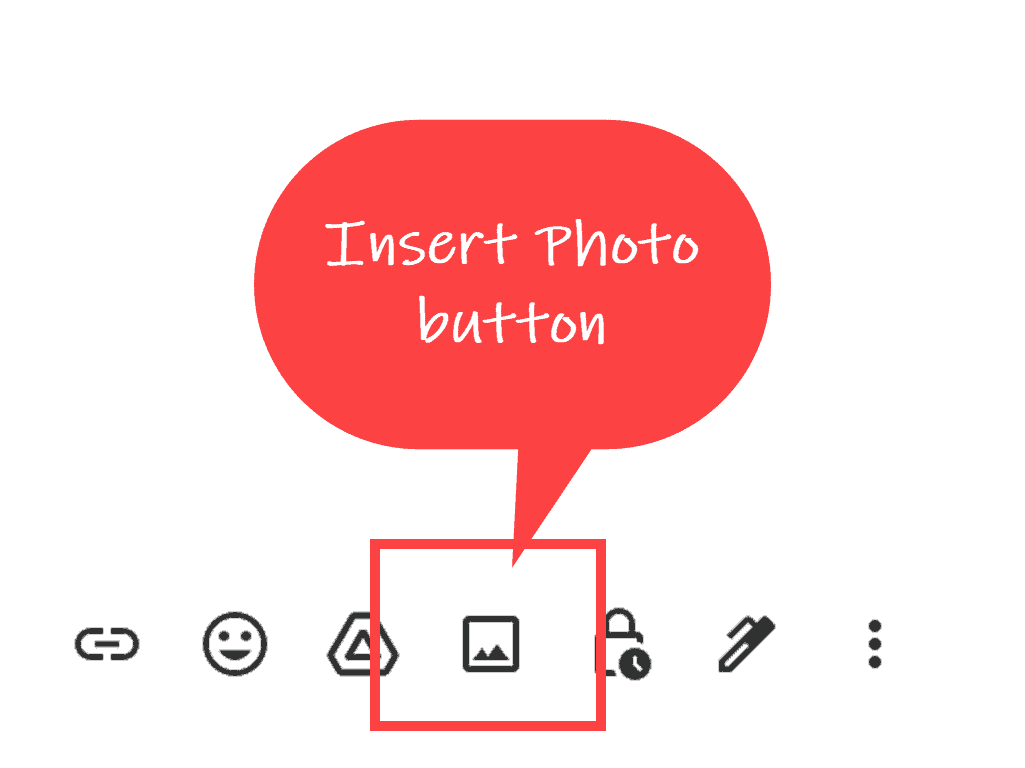
When you’re ready to add your image, click the Insert Photo button (icon).
Use Images From Google Photos Or Your Local Computer.
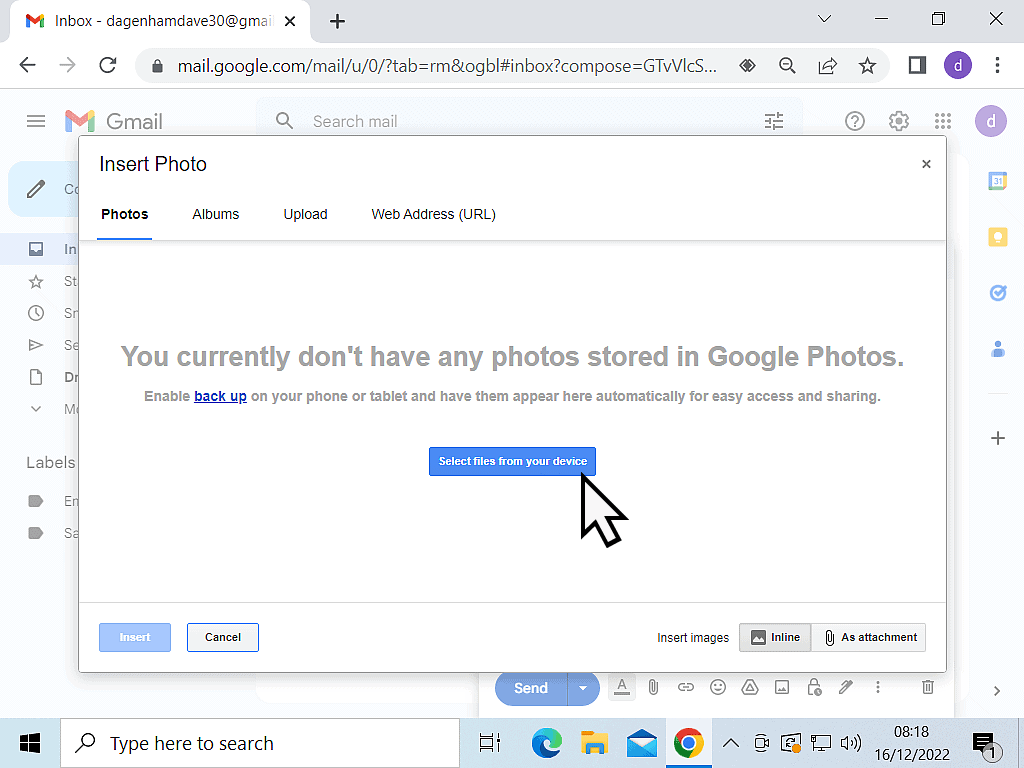
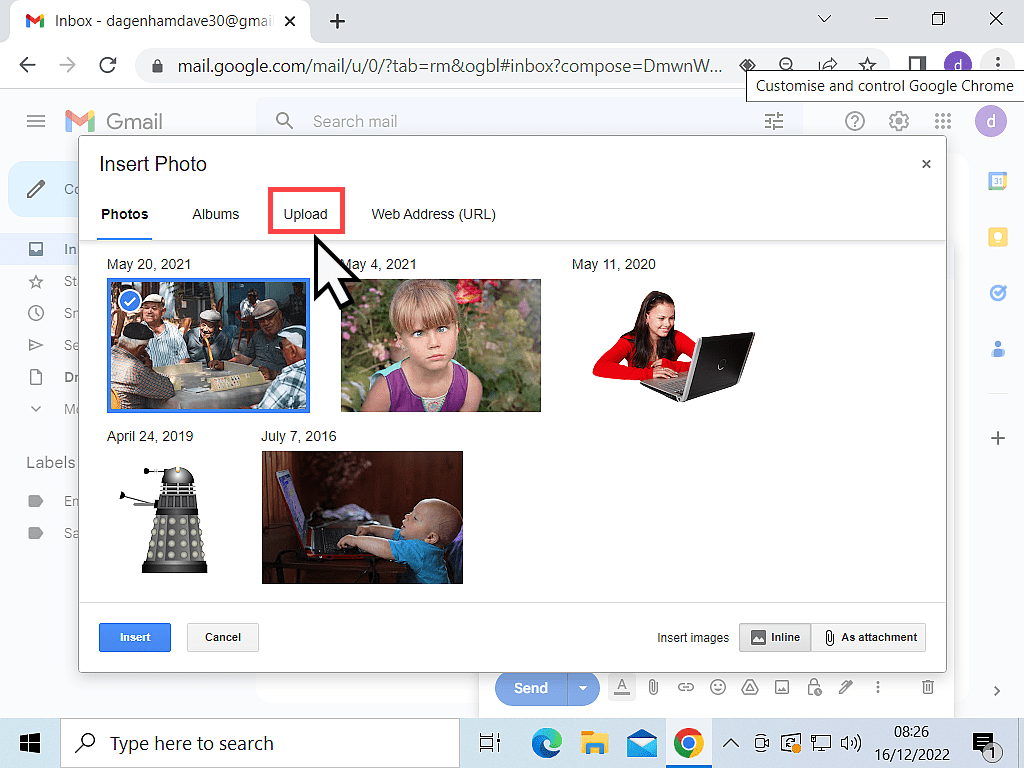
In Gmail, after you click the Insert Photo button, the Insert Photo window will open. From here you can choose to add pictures from your Google account or from your computer.
If you haven’t got any pictures stored in Google Photos, click the Select Files From Your Device button.
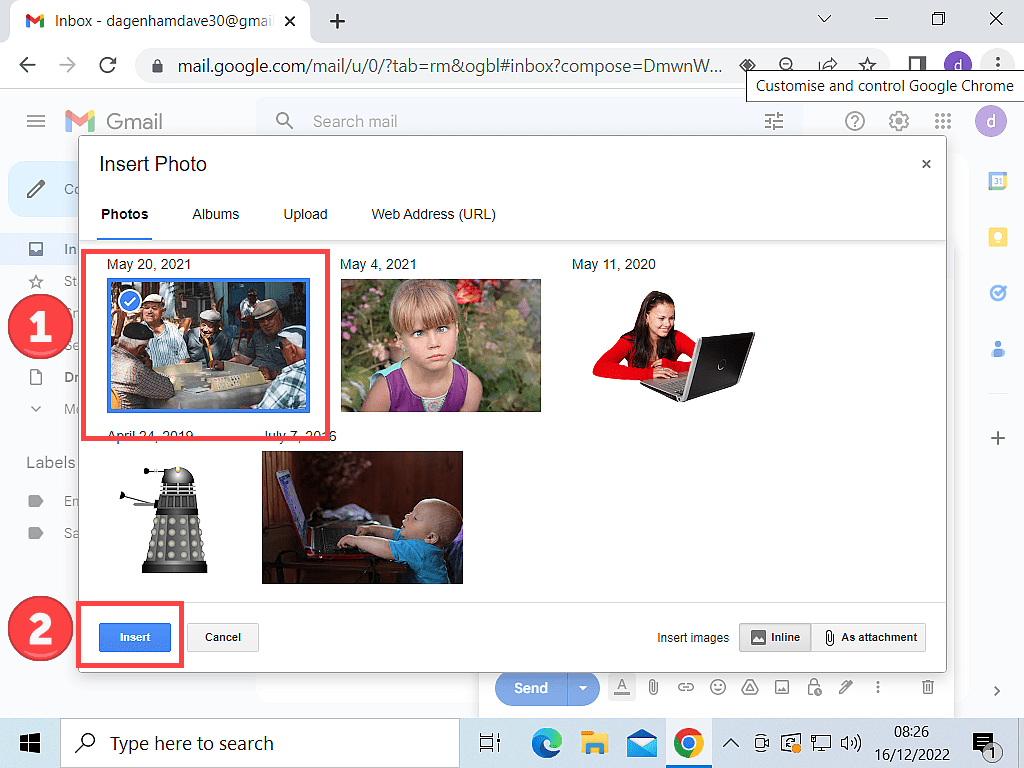
If you have got pictures stored in Google Photos and want to use one of them, simply select it and then click the Insert button.
But if you don’t want to use any of the photos that are currently saved in your Google account, click the Upload button.
From Google Photos.
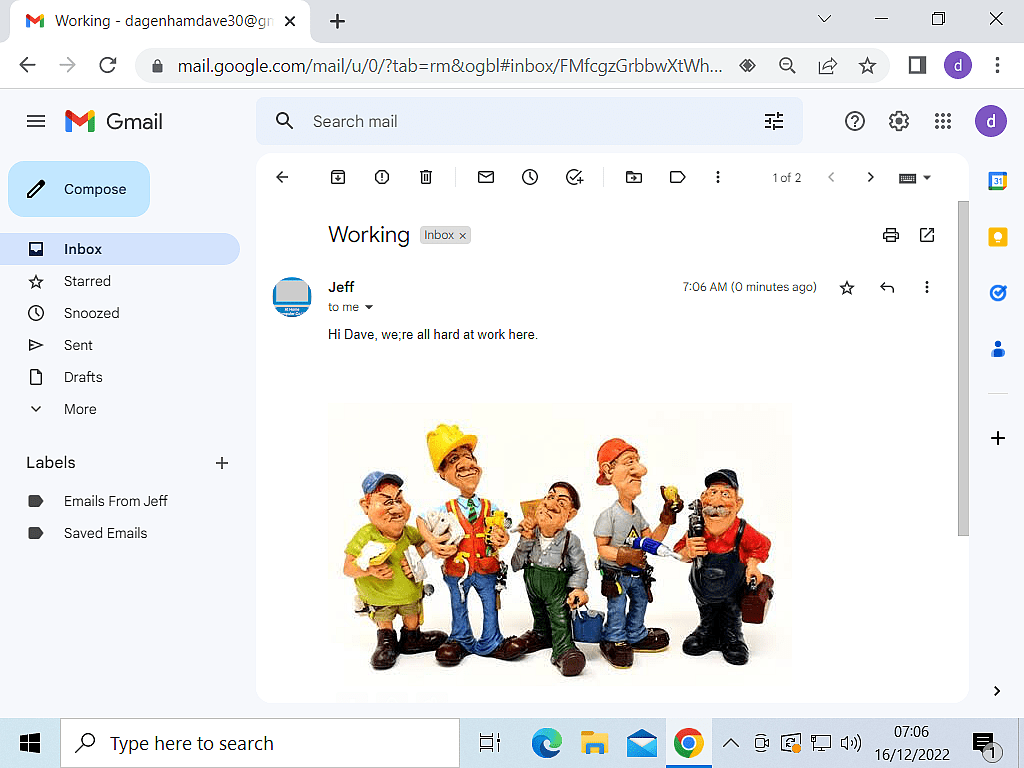
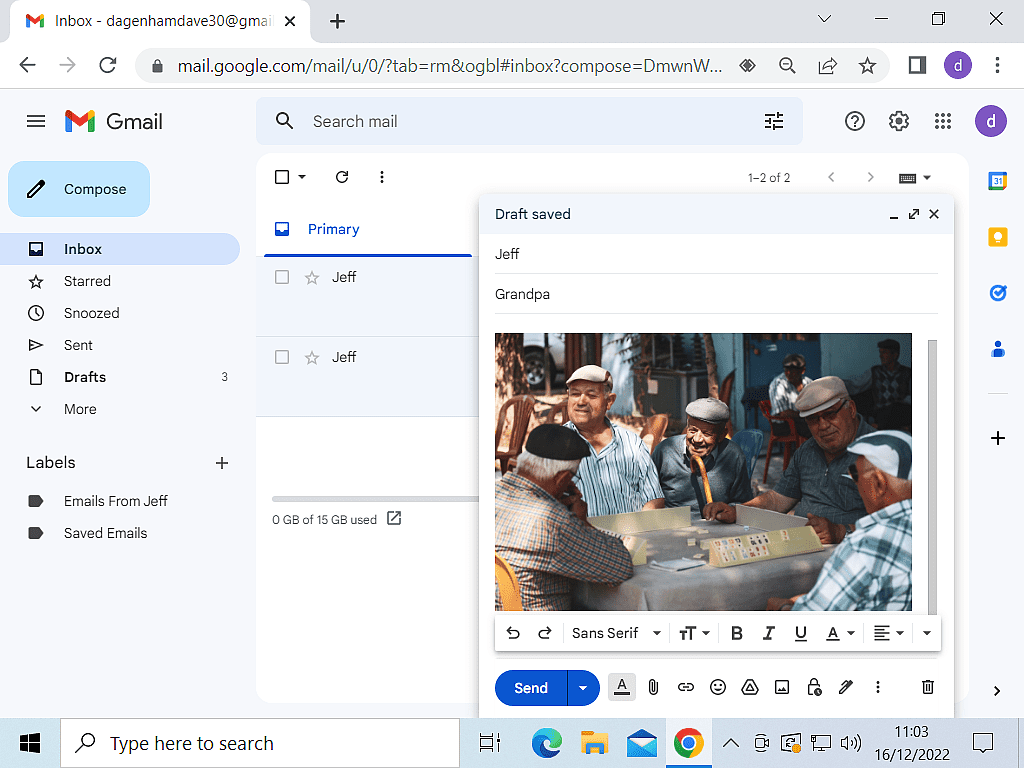
If you’re adding a picture from Google Photos, then after you click the Insert button, it’ll just appear in the body of your email.
From Your Computer.
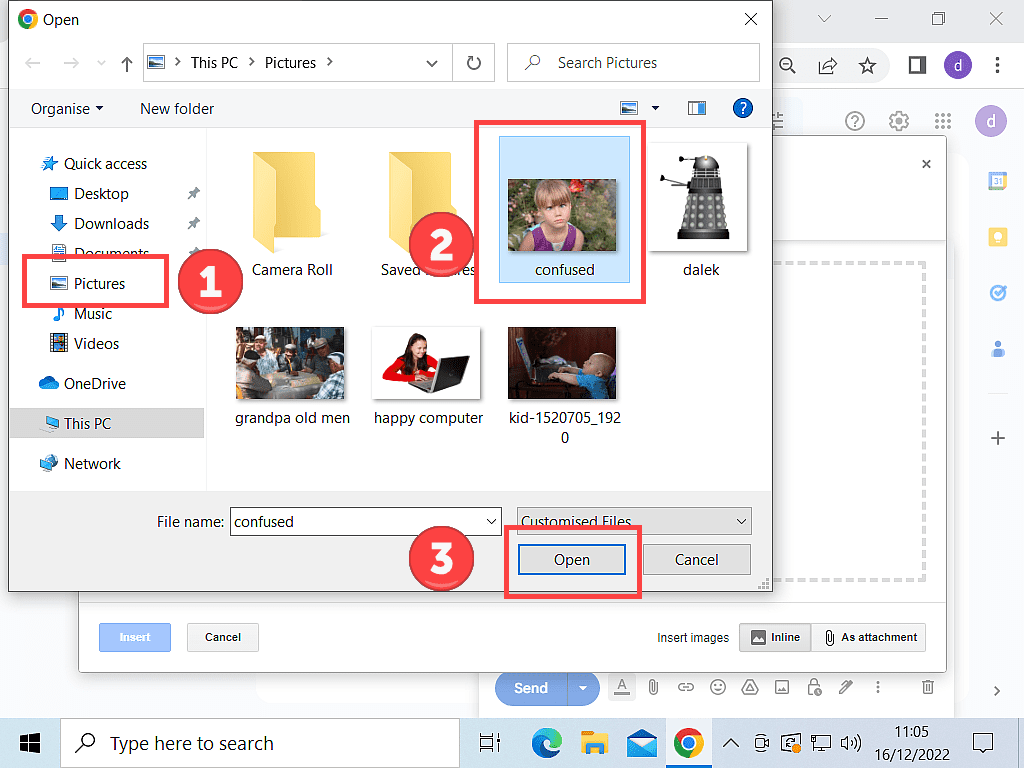
If you’re inserting an image from your PC, then after clicking the Upload button, File Explorer will open.
Now all you need to do is to navigate to your picture, select it and then click the Open button.
How To Resize The Image.
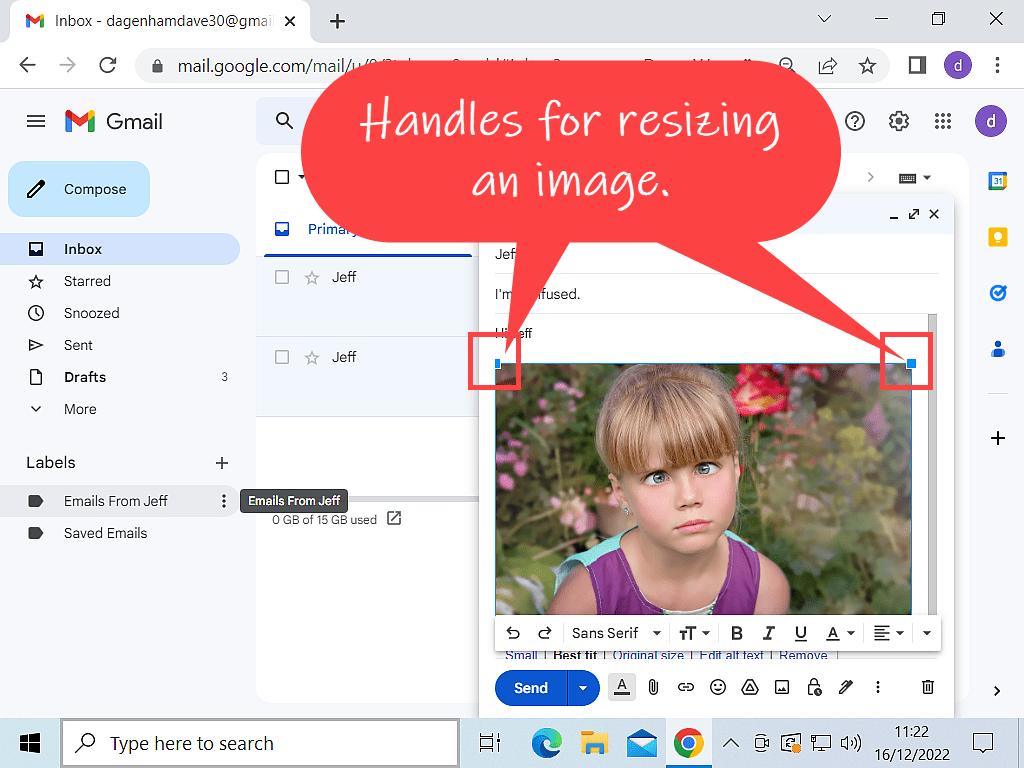
Once your picture appears inside your email message, you can resize it to better fit the look of the email.
To resize the image, click once directly onto the picture. You’ll see some “grab” handles appear around it.
Hover your mouse pointer over one of the handles and the normal pointer will change to a double-headed arrow.
Hold down the left mouse button and then drag the handle inward to reduce the size of the image, or outward to increase the size.
Release the mouse button when you’re happy with the result.
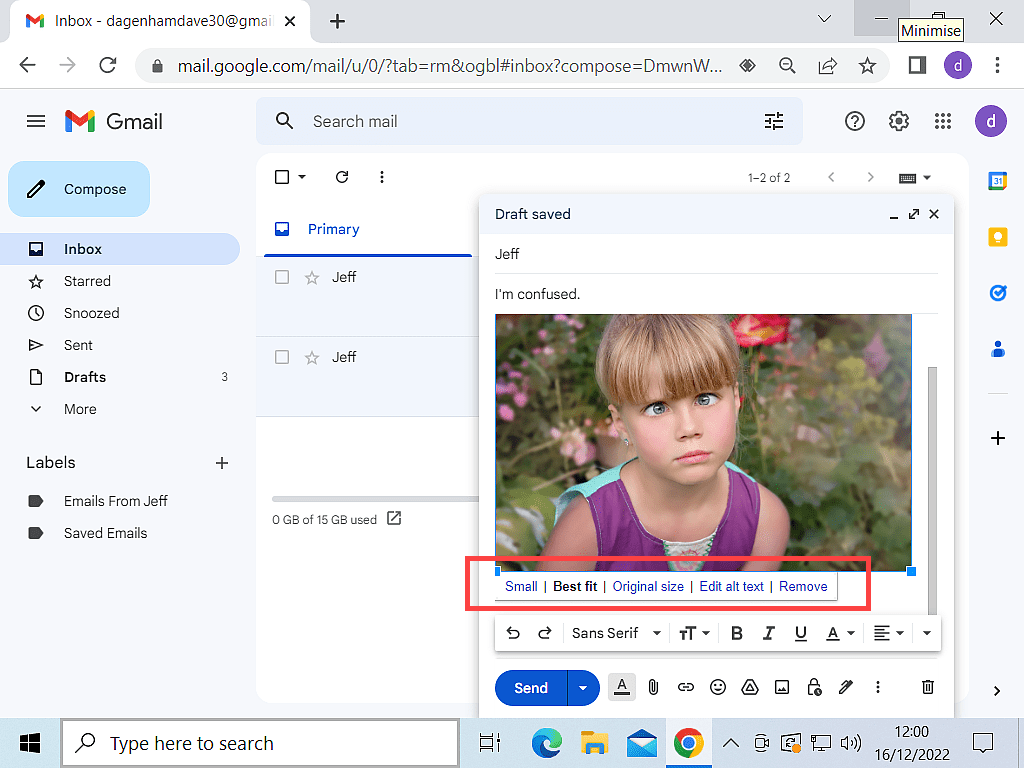
The Image Options Toolbar.
To help get the picture just perfect, Gmail provides an options toolbar just below the selected image. The options available are Small, Best Fit, Original Size and Delete.
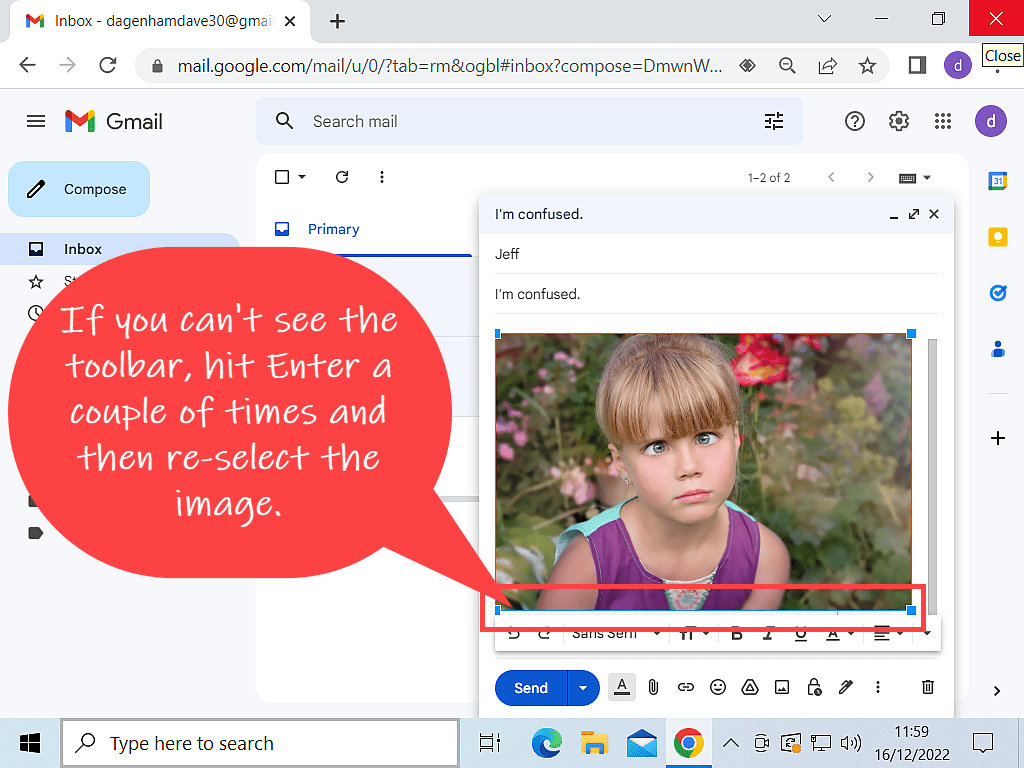
The toolbar only appears when the image is selected. To select the image, simply left-click on it once.
There are occasions when you won’t be able to see the toolbar, even though the picture is selected. If you can’t see the toolbar, press the Enter key on your keyboard a couple of times and it’ll appear.
When you’ve sized to picture to just how you want it to appear, you can continue adding more pictures or simply click the Send button.
Summary.
You can continue adding more photos if you want or need to. There isn’t really any limit on the number of pictures, but you do have to bear in mind the size limits of emails. In Gmail the total size of the message (including all images, attachments etc) can’t be more that 25MB. Personally, I’d try to stay well below that limit if you can.