How to restore a Windows 11 computer using a system image created using EaseUS Todo backup. If you find yourself in the unfortunate position that you need to use a system image to recover your PC then this guide will walk you through the steps.
There are 2 scenarios that you might find yourself in –
- The PC boots up – Ok so you can get your computer to start up. In that case you can recover it from within the EaseUS program. I’ll show you how to do that first.
- The PC won’t boot up – If the computer won’t boot up then you’ll need to use the emergency disk (flash drive) that you created. I’ll show you this method next.
Restore Windows From A System Image
If you can get your computer to boot up, to get to the desktop, then this is the easiest way to restore it from an EaseUS backup.
Attach the backup drive and then open EaseUS Todo.
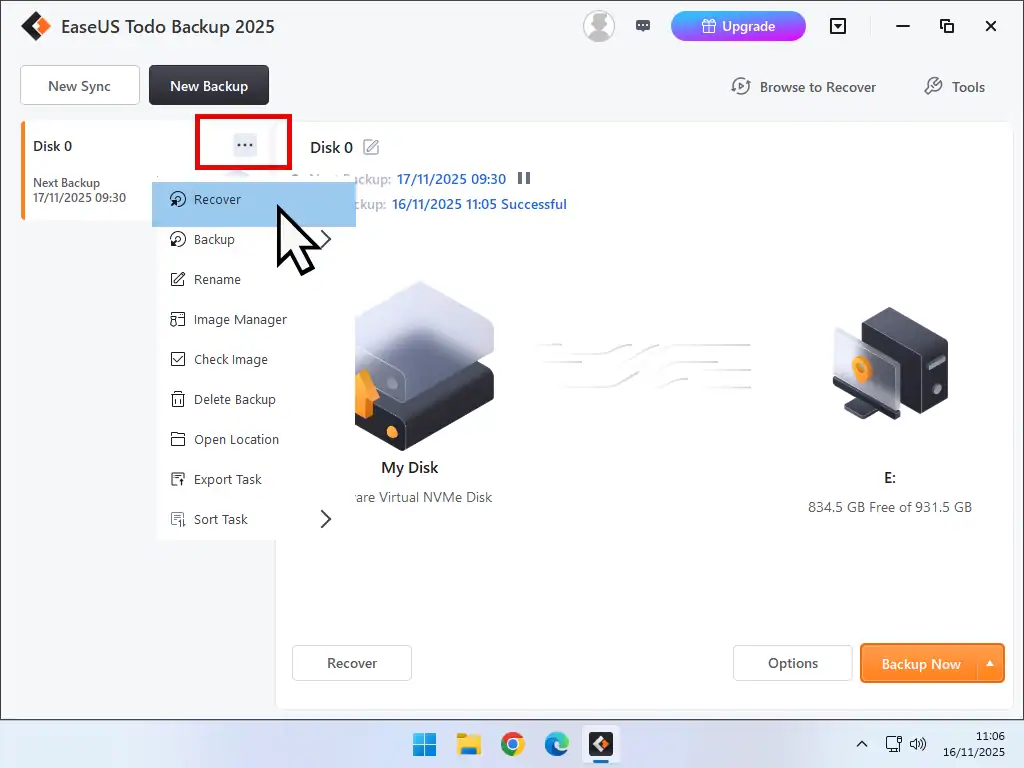
- On the Home screen, click the 3 horizontal dots beside the Windows 11 backup that you want to restore. On the menu that opens, click Recover
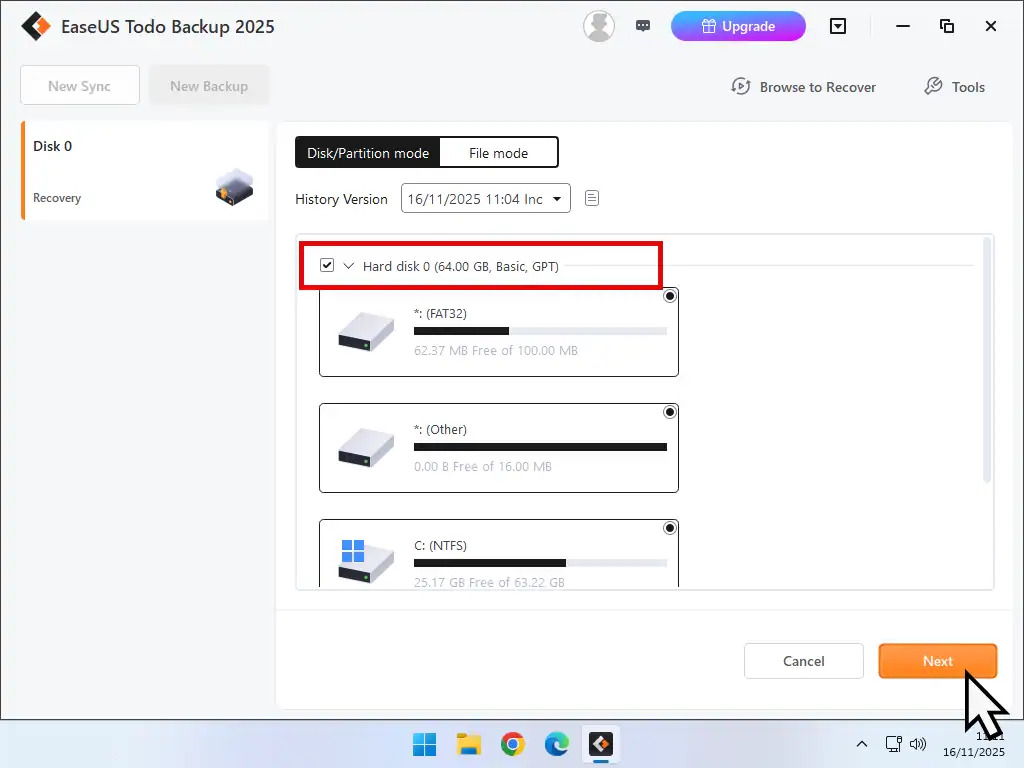
- Click inside the checkbox to select all the partitions and click Next
- Select the hard disk that you want to restore your PC to. If you’ve only got a single hard drive, then (which will be most people) then choose that one. If you have multiple drives in your computer then you’ll need to scroll through the list and choose the correct one. Click Next
- Then you’ll see a warning popup. “The system partition on the destination disk will be overwritten”. Click Yes.

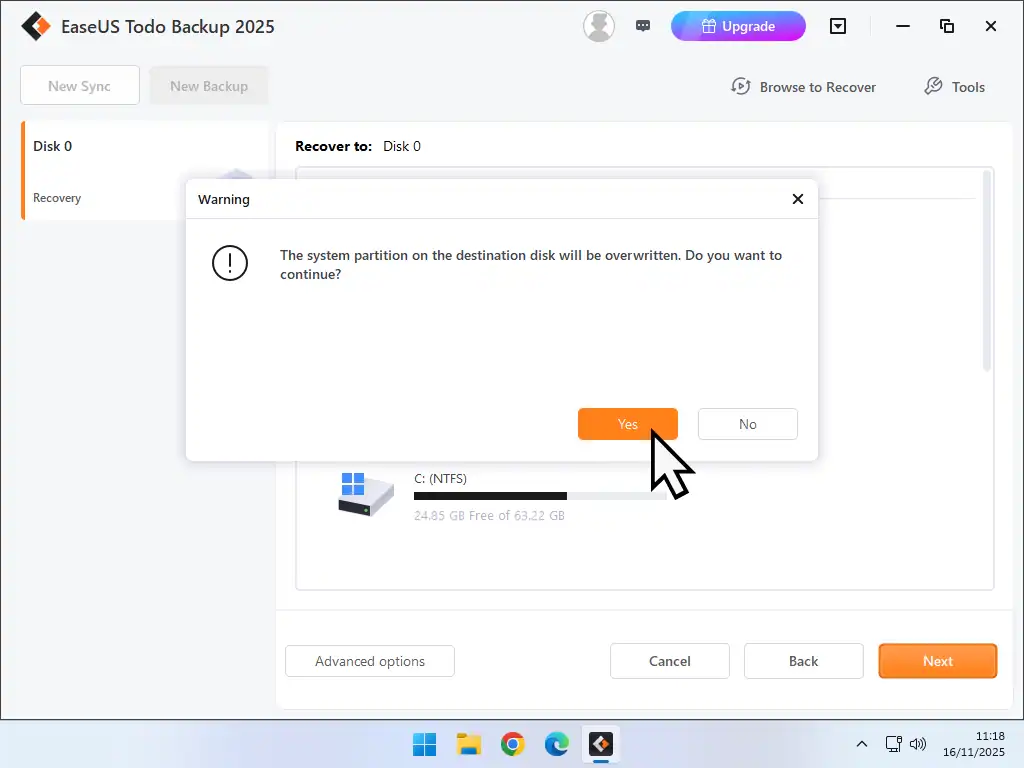
Overwriting The System Partition
What that warning message is saying is that everything on the hard drive that you selected will be deleted and replaced with the system image backup. When you’re trying to recover your PC that’s what you want.
Confirm Recovery
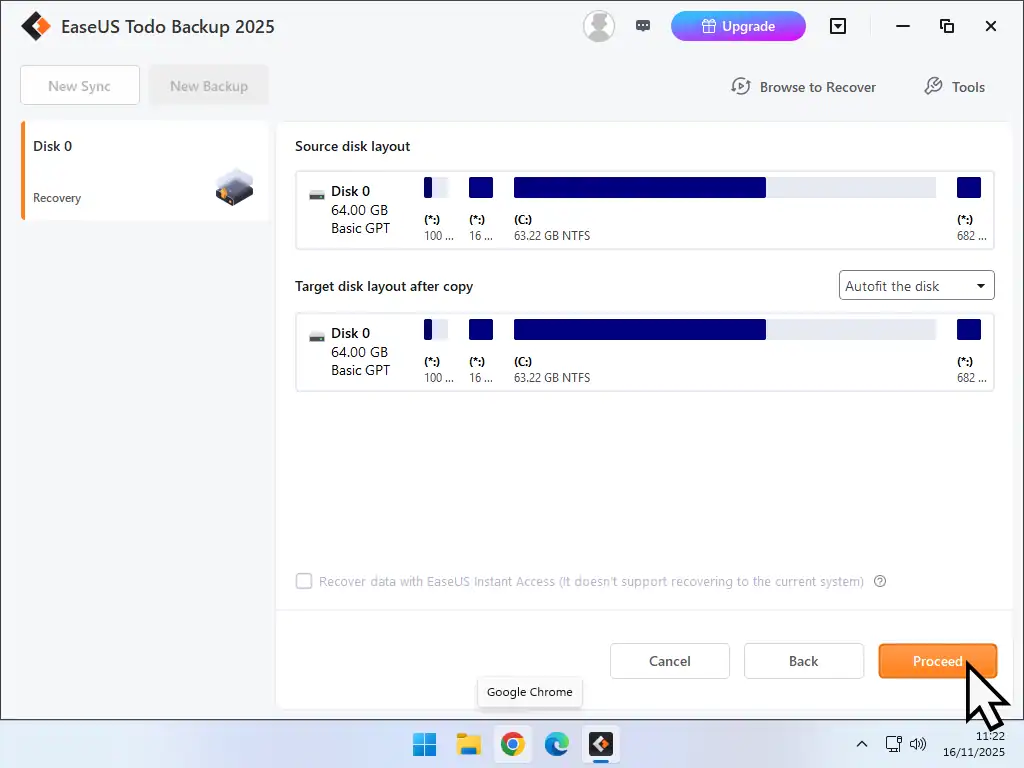
You’ll see a confirmation screen. It shows the disk layout of the system image file (Source disk layout) and the layout of your hard drive after the recovery has finished (Target disk layout after copy).
They should match each other. Click the Proceed button.
Reboot
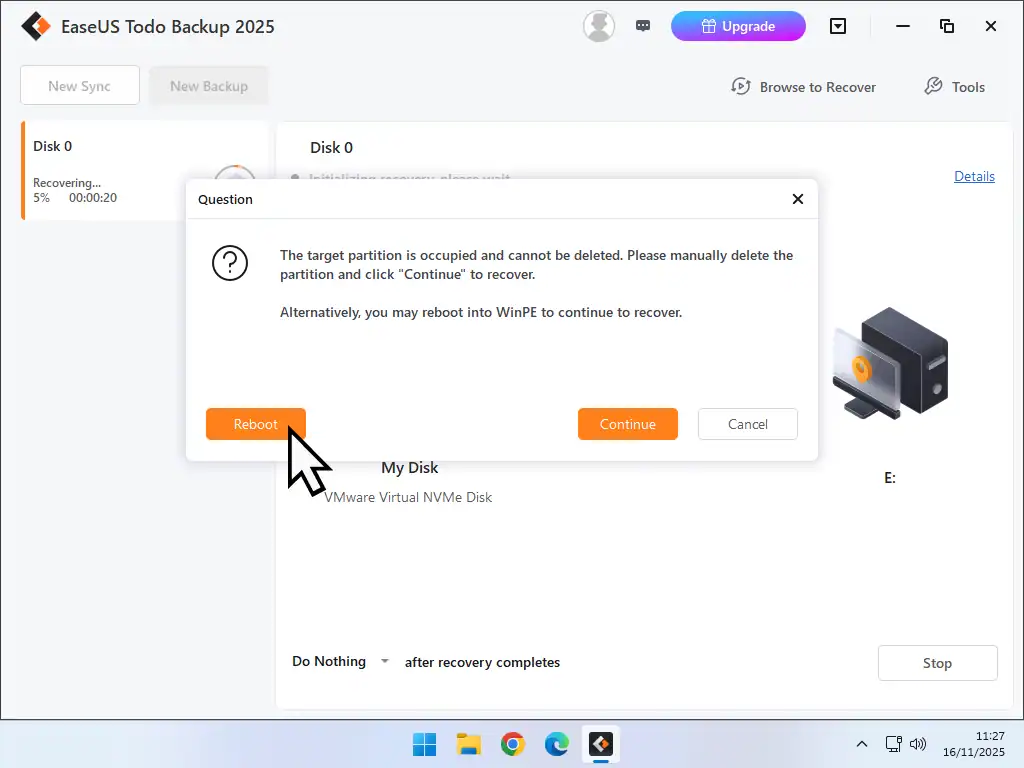
Then a popup will appear. “The target partition is occupied and cannot be deleted etc”. It can’t be deleted because Windows is on it and your using Windows right now.
The recovery has to be done outside of Windows 11. It’s important to click the Reboot button.
Recovering Windows 11 From System Image
To restore your PC from a system image EaseUS will need to boot into a “mini” version of Windows that’s known as WinPE.
- Make sure that “Download from Microsoft” is selected and click the OK button
- EaseUS will download WinPE and then create a bootable image on your backup drive. You don’t need to anything, it’s all automatic. It might take some time depending on download speed and your PC.
- Eventually your computer will restart and boot into the EaseUS WinPE. Again this’ll probably be quite slow because it’s loading from the external backup drive.
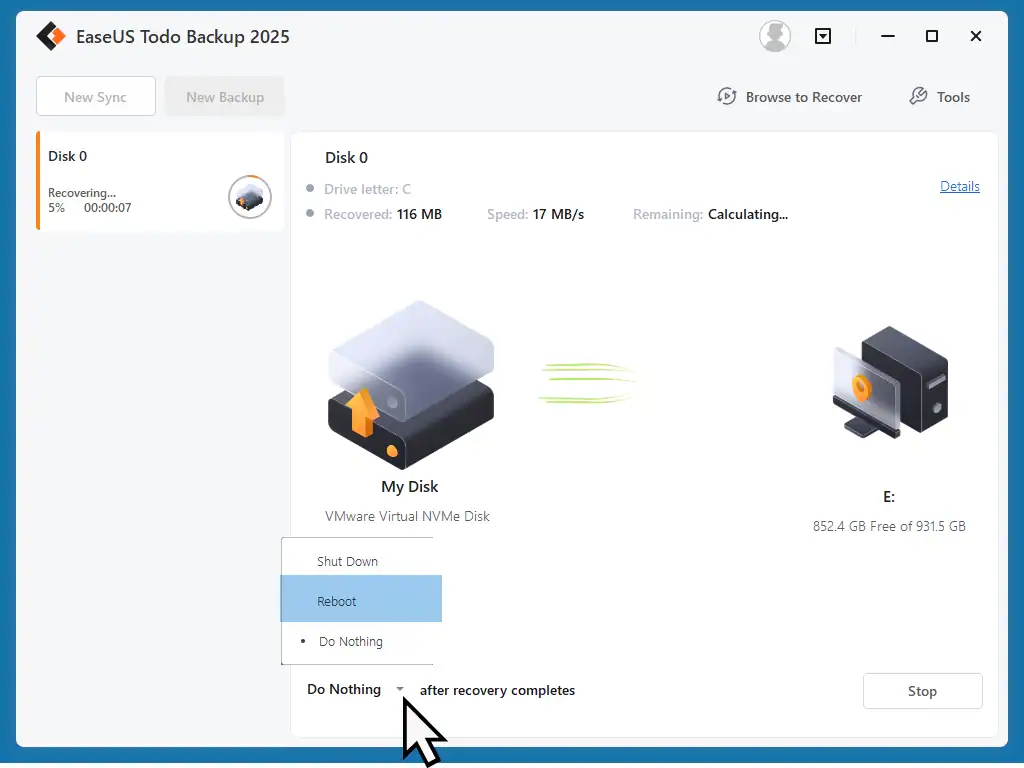
- When the recovery process starts click the downward arrowhead beside “After recovery completes”. On the menu, select Reboot.
That’s all you need to do. EaseUS will restore your computer from the system image and restart (reboot) it when it has finished.


WinPE
WinPE (Windows Preinstallation Environment, is a small version of Windows that acts as a minimal, bootable operating system used for installing, deploying, and repairing Windows computers.
It’s downloaded direct from Microsoft and EaseUS will use it to restore your computer from the system image.
I can’t say how long the recovery will take, or even give an estimate, but eventually your PC will reboot and you’ll be presented with the usual log in screen.

Restore Windows Using The Emergency Rescue Disk
If your computer won’t boot up. It keeps crashing or bule screening and you can’t get to the Windows desktop to start the recovery process from within EaseUS, then you’ll need to use the “emergency disk” that you created.
Turn off the computer and connect the emergency rescue disk (flash drive) then power up the machine and immediately start tapping the “Hotkey” to open the one time boot menu.
Most PCs have a specific key on the keyboard that allows you to access a one time boot menu, from which you can select the emergency disk (flash drive). Commonly used keys are F2, F10, F11, F12 and Esc. How To Boot From A USB Drive
- Select USB flash drive from the one time boot menu and after a slight pause you’ll see the EaseUS Todo Backup screen appear
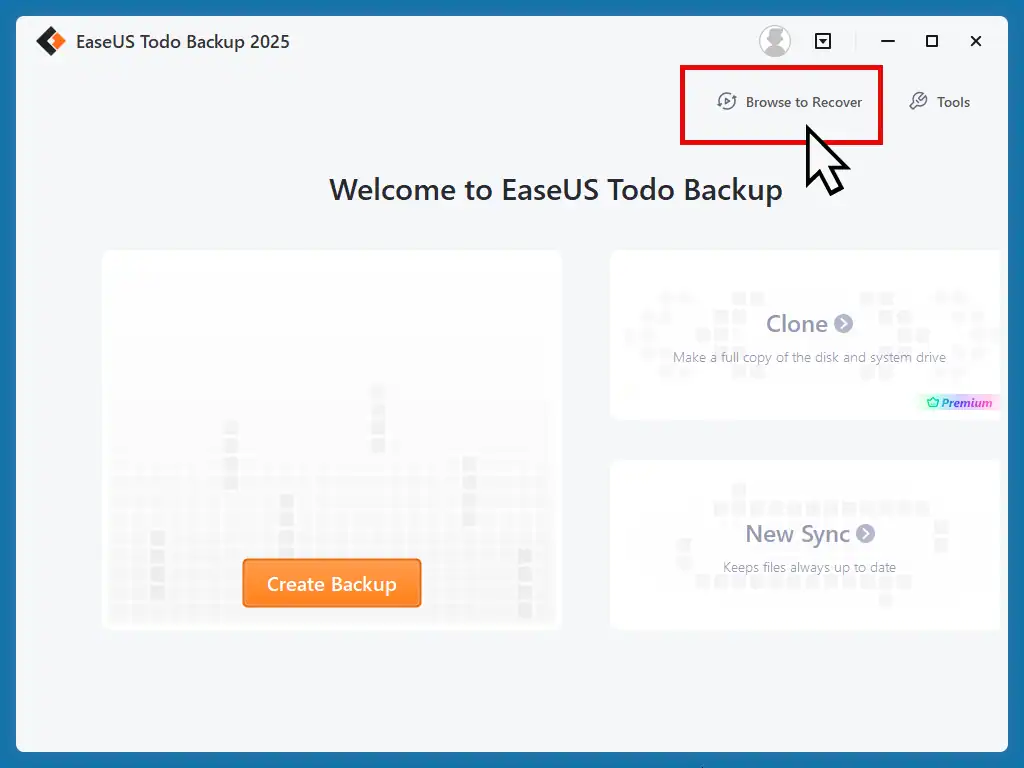
- You need to tell EaseUS where the Windows 11 system image is stored. So when it’s fully loaded, click the Browse To Recover link in the top right of the screen
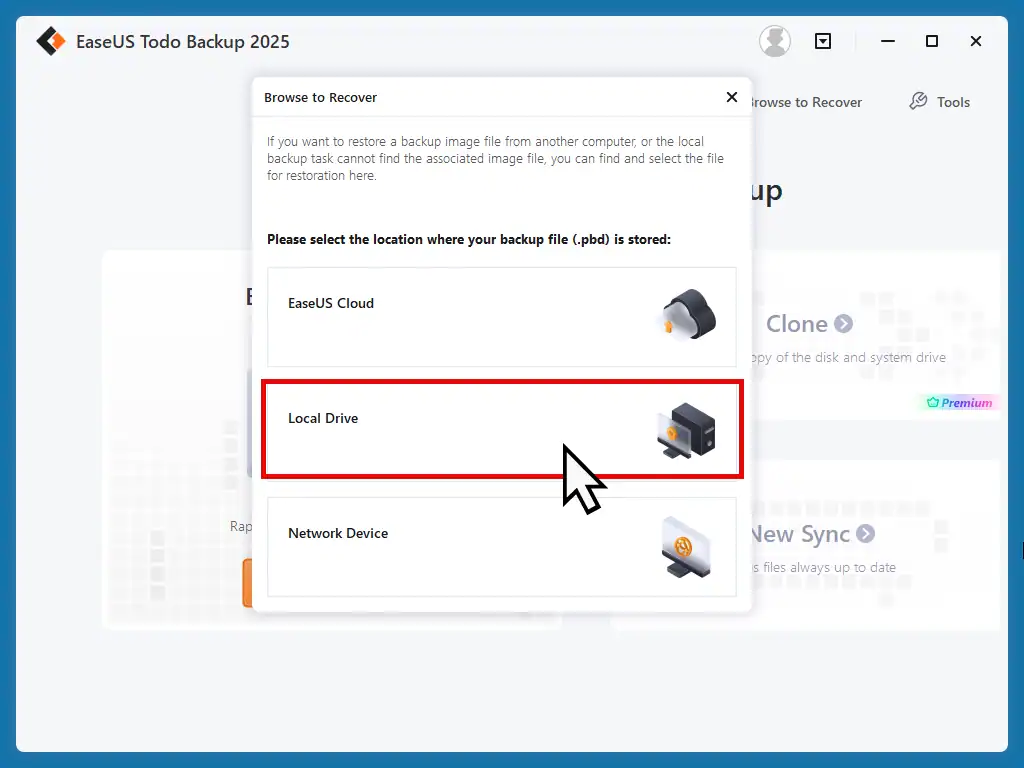
- Assuming the system image is on an external hard drive, click Local Drive
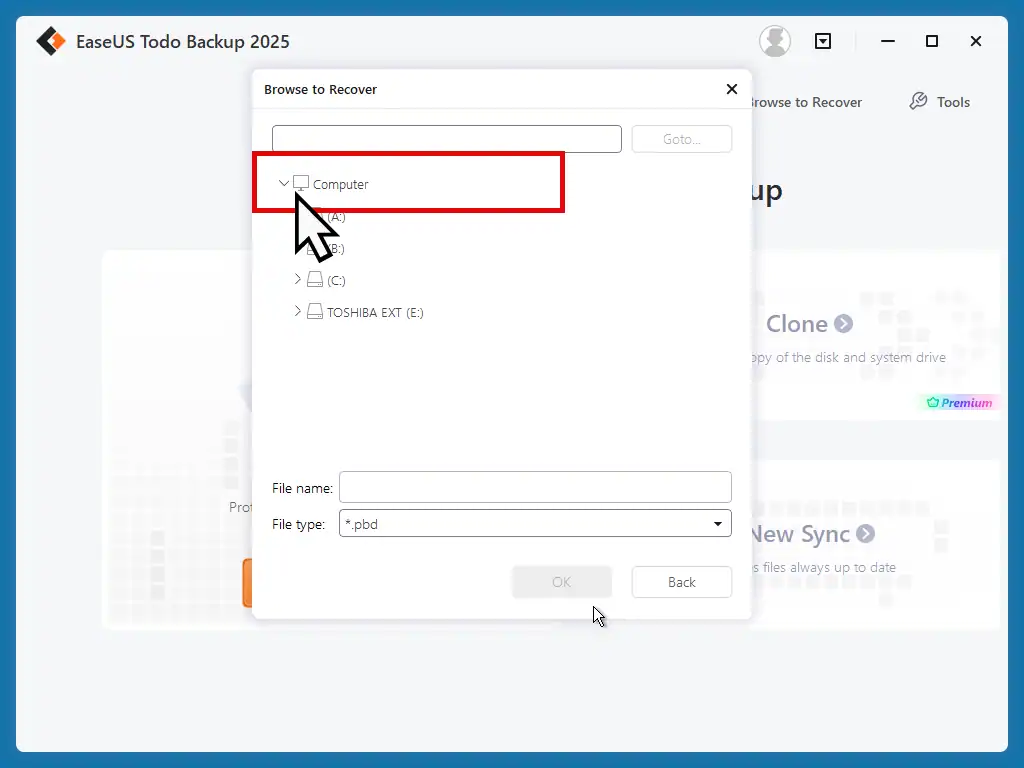
- Then click the downward facing arrowhead beside Computer to expand it

If You Don’t Have An Emergency Disk
Maybe you didn’t create an emergency disk, or perhaps you did but you either can’t find it or it doesn’t work.
You’re best option here is to use a different computer (borrow one or beg a friend to let you use theirs). Then download and install EaseUS Todo. And then create an emergency disk on that PC.
- Scroll down and find your external hard drive. Click the arrowhead to expand it. Open the backup folder and select the system image that you want to use for the recovery. Generally that’d be the latest one.
- After scanning through the system image EaseUS will ask which partitions you want to restore. Select them all
- Select which hard drive to restore Windows to. For most users that’ll be the first one
- You’ll see a warning message that the destination disk will be overwritten. Click Yes
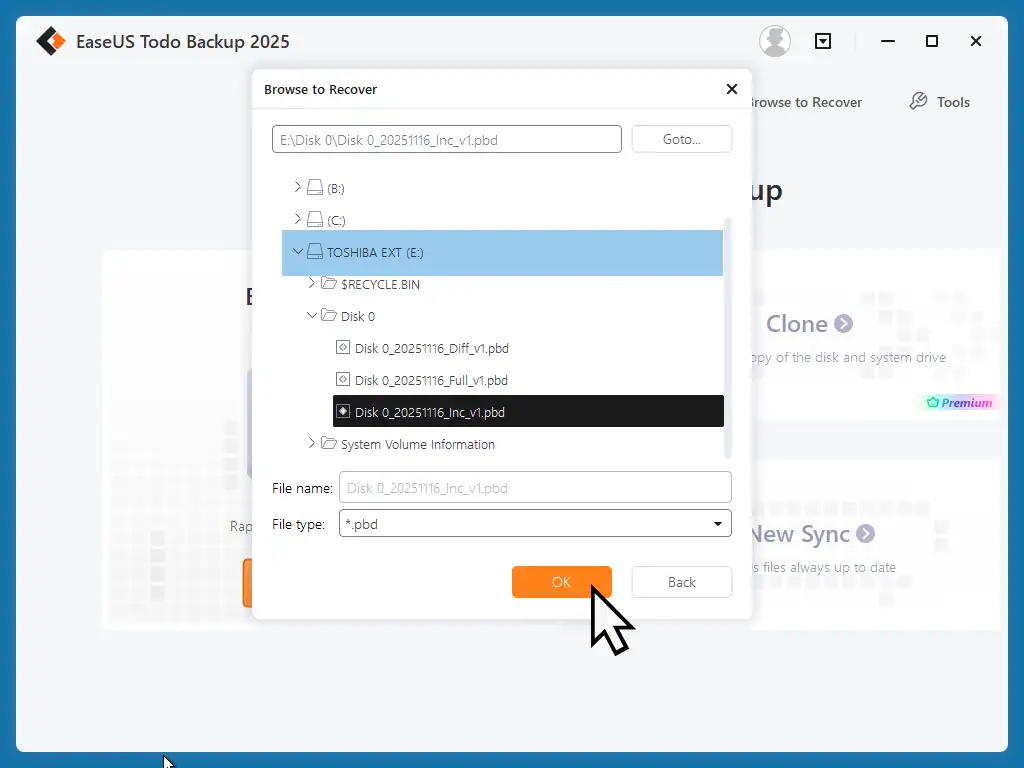


While your system is being restored open the small “After recovery completes” menu at the bottom of the screen and select Reboot.
If all goes well your Windows 11 PC will reboot and start up exactly the way it was when the system image was made.


