Having the wrong time set on your computer is not only annoying but can lead to other complications. Loss of Internet connection, wrong date/time stamps on files, Windows updates gets confused and generally, things just don’t behave themselves.
You may have the wrong time set because you’ve moved time zones, Windows didn’t update summer/winter hours or maybe you’ve just unboxed a brand new machine.
Whatever the reason, setting the correct time is fairly painless.
How To Set The Correct Time On Your PC.
On a standard Windows desktop, the clock is in the bottom right hand corner.
To set the correct time on your computer, right-click on the clock.
When you’re doing this, put your pointer directly onto the clock.
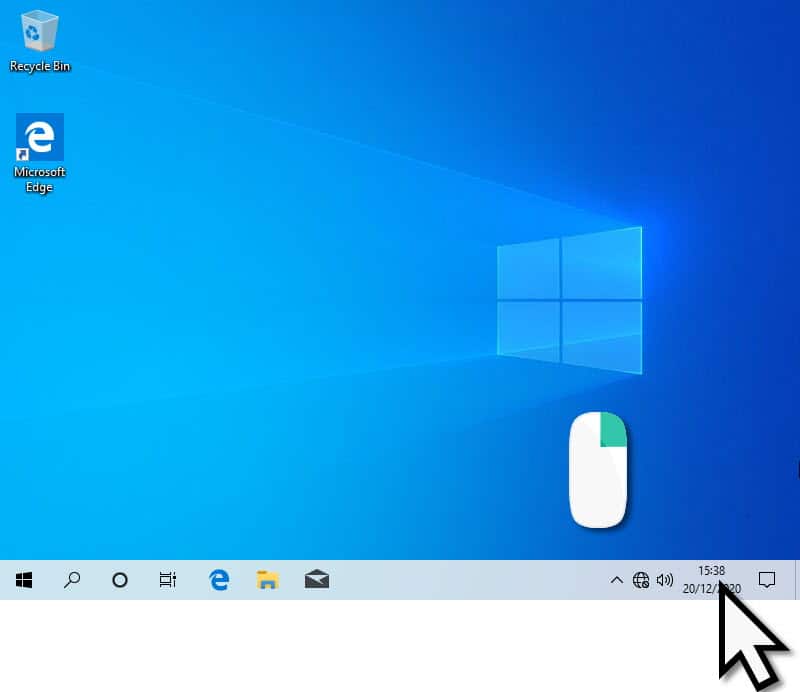
Note.
If a calendar opens, you left clicked. Click somewhere on the Desktop to make the calendar disappear, then try again. But this time, make sure you right click.
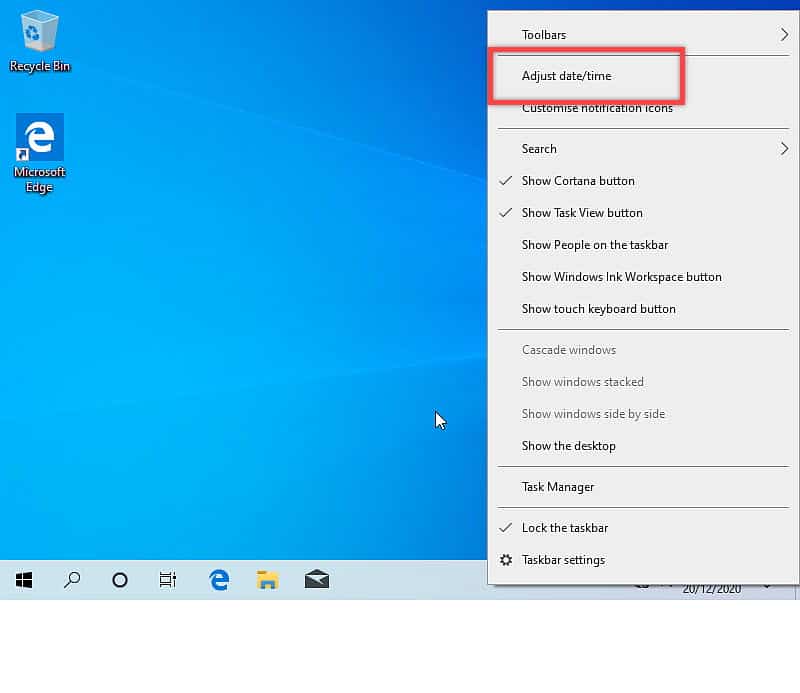
On the menu that opens, left-click ADJUST DATE/TIME.
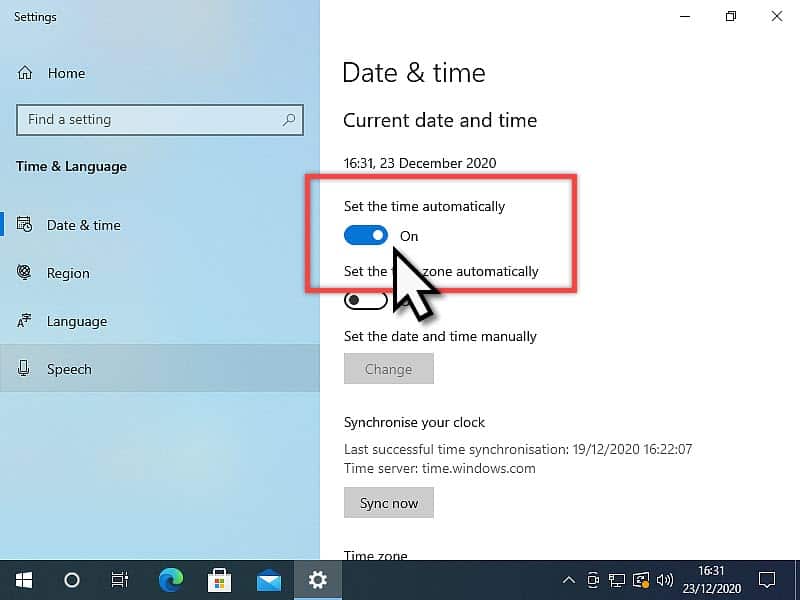
On the Date & Time page, you’ll generally see that “Set time automatically” is turned on.
Before you can change the time on your PC manually, you’ll need to turn this off.
Left-click the switch.
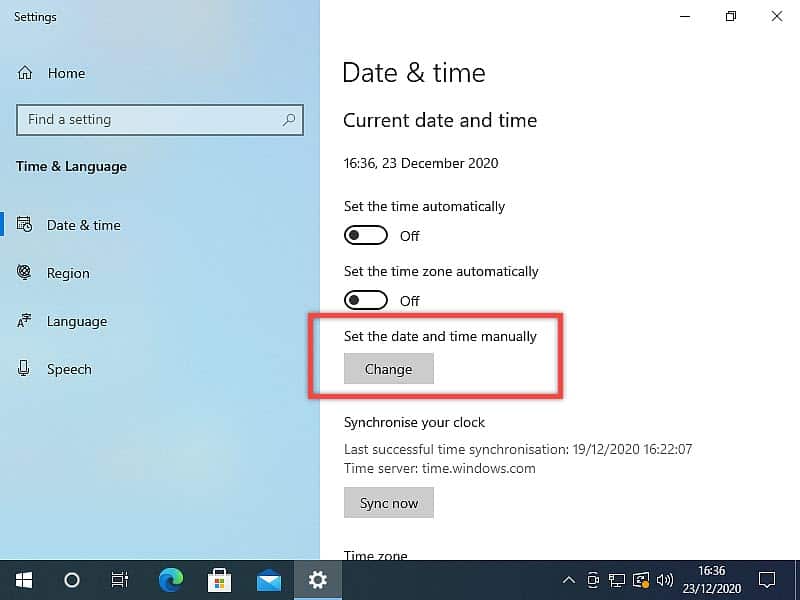
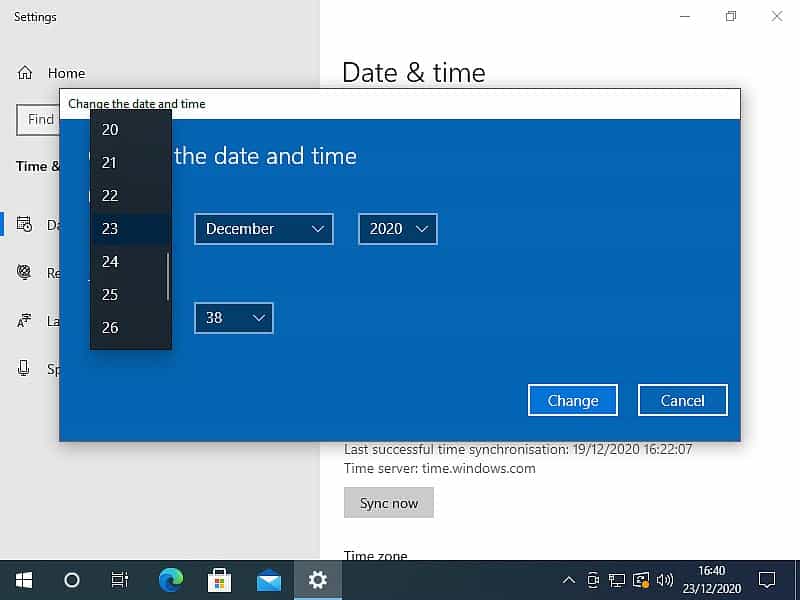
With the “Set time automatically” switched off, you can click on the CHANGE button to set the correct time on your PC.
Click the drop-down arrowheads beside each box and choose the right time and date.
You may have to scroll through the list to find the correct setting.
Once you’re done, click the CHANGE button.
The computer’s date and time will be updated when you click the CHANGE button.
Before you move on, if you’re connected to the ‘net, I’d turn ” Set time automatically” back on.
Sync Time Over The Internet.
If you’re connected to the Internet, you should be able to synchronise your computer’s clock with Microsoft’s Internet clock.
This will work whether you have “Set time automatically” set to on or off.
Scroll a little further down the Date and Time page and you’ll see the “Synchronise your clock” section.
Simply click the SYNC NOW button.
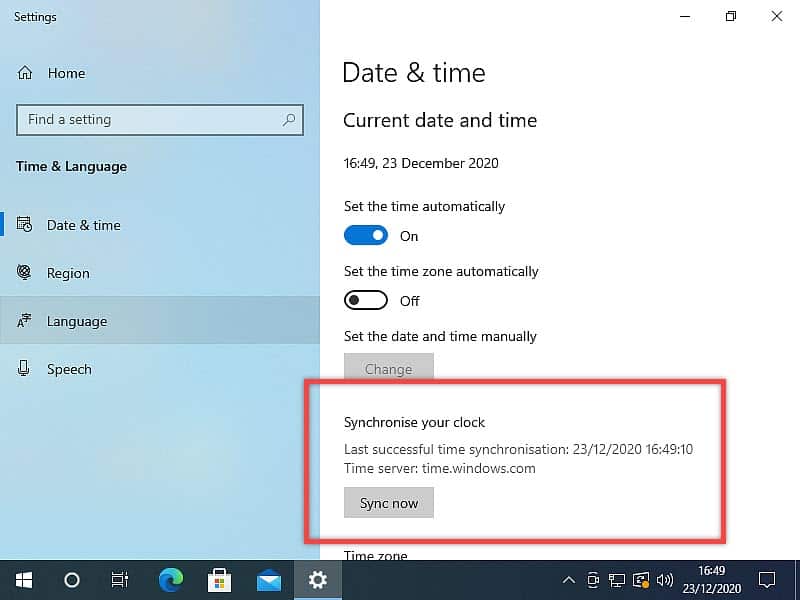
It’s a weird thing, but if your computer’s clock is a long way out, sometimes the SYNC NOW doesn’t work. The way around this is to set the time on your computer manually, as close as you can get it, then hit the SYNC NOW button. Be very sure to double-check the date too. That can cause issues.
Change How The Date & Time Are Displayed On Your Computer.
You can change how the clock on your computer displays the date and time.
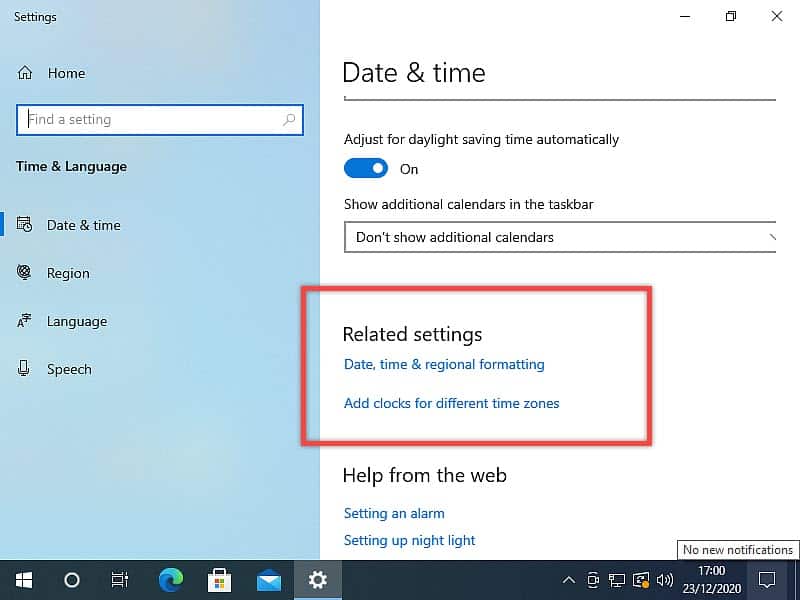
Still on the Date & Time page, scroll down further, until you reach the Related Settings section.
Left-click “Date, time & regional formatting”.
Scroll down the page a little.
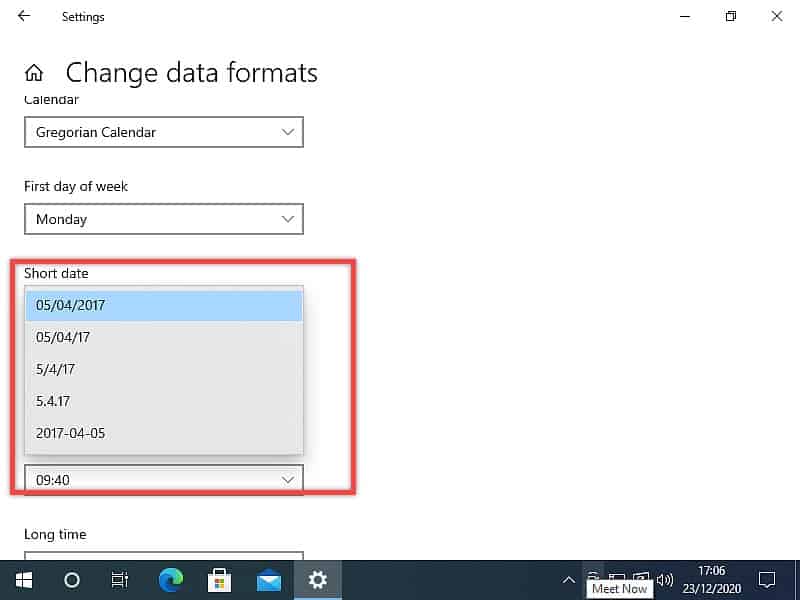
In the Regional Format Data section, click “Change data formats”.
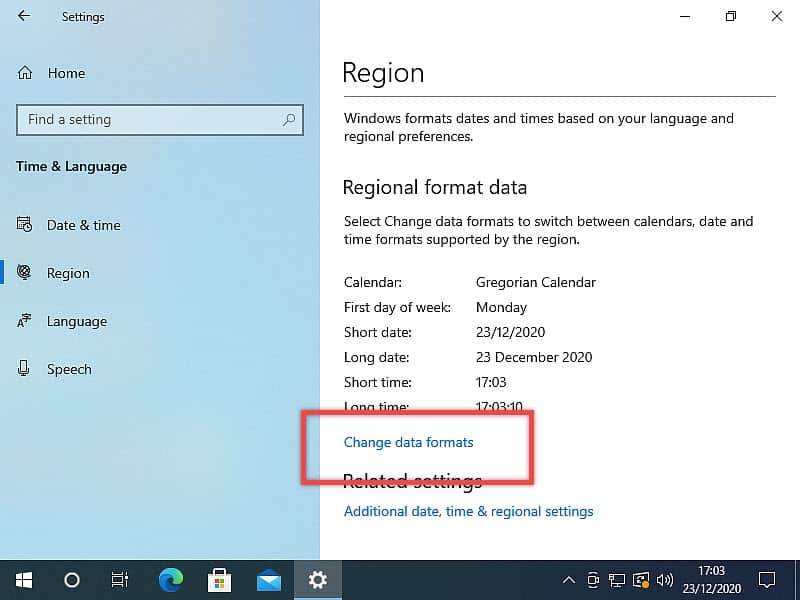
You can change any of these settings by clicking the drop-down arrows and then making your selection from the list.
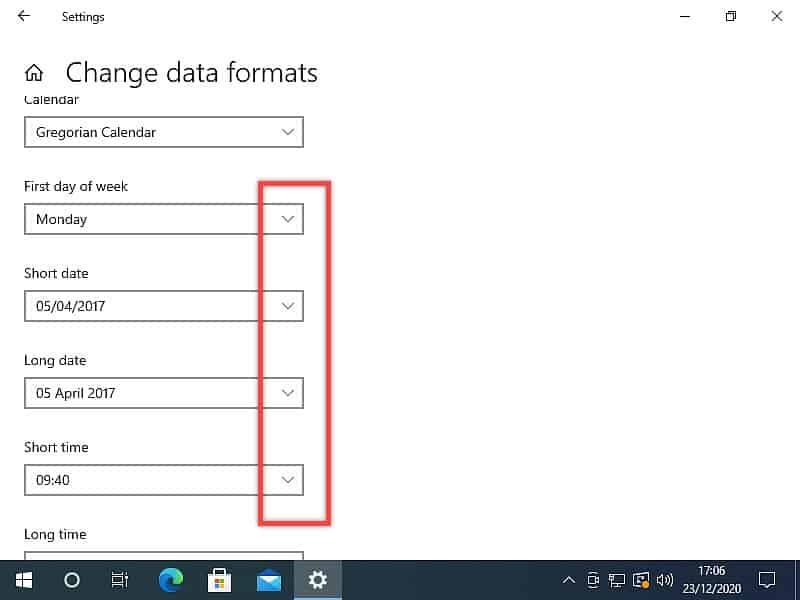
Incidentally, when you click any of the date or time entries, they’ll show an example of how each option will look.
This is only there as an example. You’re not going to re-set the time or date to the one shown.
