7-Zip is a file compression program. Compressing (often called zipping) files means that they take up less space on your computer. Because the files are smaller, they can also be transferred across the Internet faster.
If you’re simply looking to zip a few files/folders, then both Windows 10 & 11 can do that for you How To Zip And Unzip Files On A Windows PC.
7-zip takes file compression to the next level. adding much more to the basic compression abilities of Windows. Using 7-zip you can encrypt and password-protect your files create self extracting archives and split larger files into smaller, more manageable sizes.
Download And Install 7-Zip.
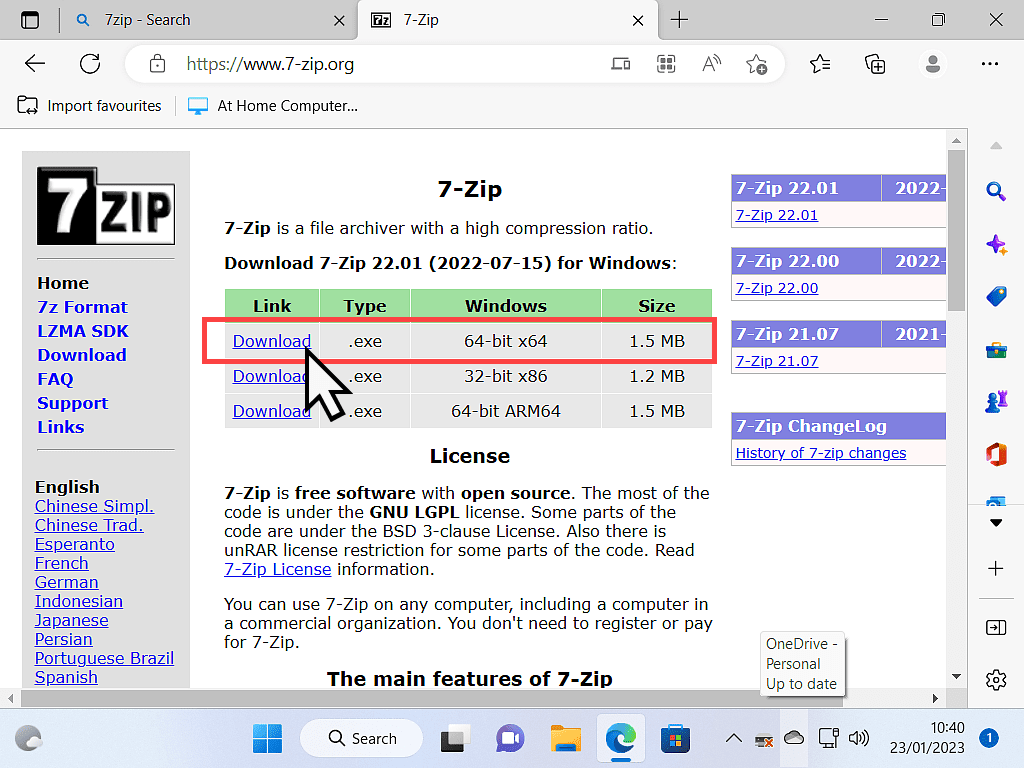
You can download 7-zip from here https://www.7-zip.org/
On the download page, you’ll see 3 options. Generally speaking most Windows computers these days are 64bit (X64). So it’s the top option that you should click on.
Download and install 7-zip onto your computer. It only takes a few seconds.
How To Compress (Zip) A File With 7-Zip
To compress a file with 7zip, it’s slightly different depending on whether your using Windows 10 or Windows 11.
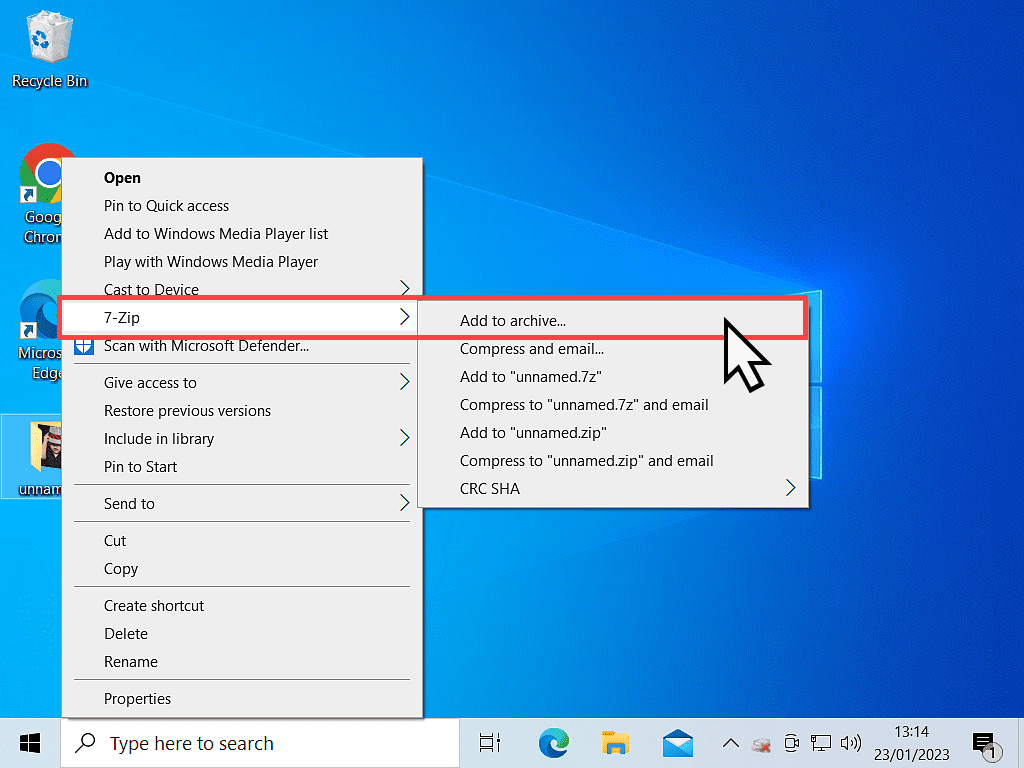
Windows 10. Right-click on the file/folder that you want to compress. The options menu will open. Hover your mouse pointer over the 7-Zip entry to open a second menu. On the second menu, left-click “Add to archive”. The Add To Archive options page will open.
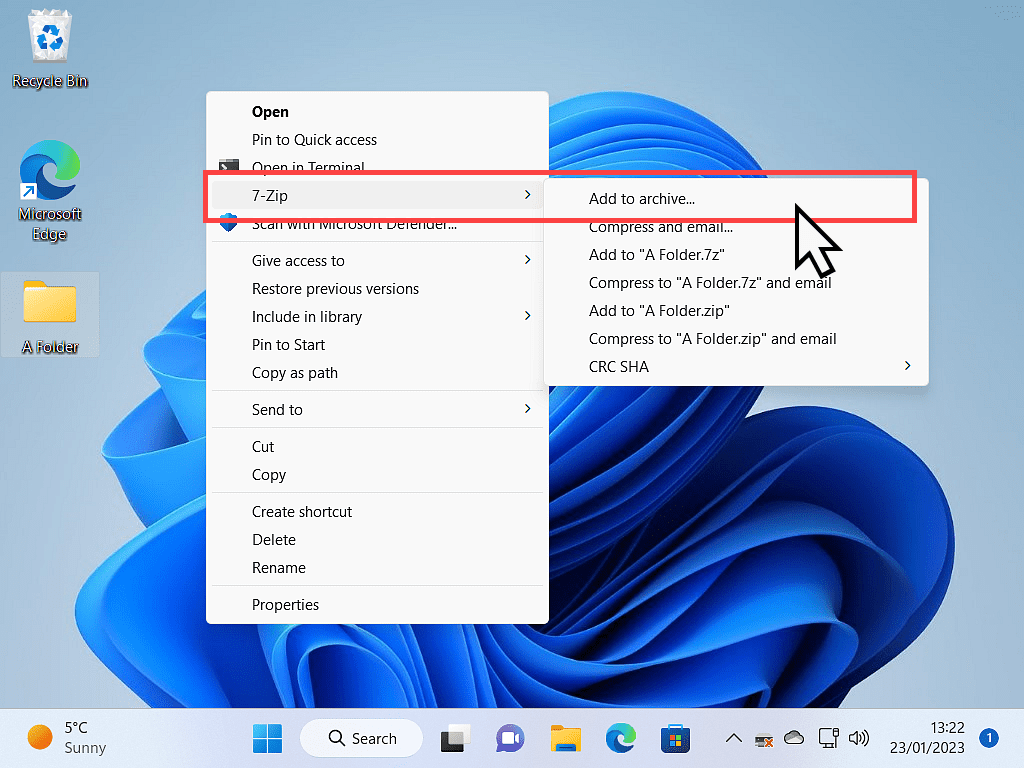
Windows 11. For Windows 11 users, right-click on the file/folder you want to compress, then click “Show more options”. On the expanded menu, hover your mouse pointer over 7-Zip and then click “Add to Archive”. The Add To Archive options page will open.
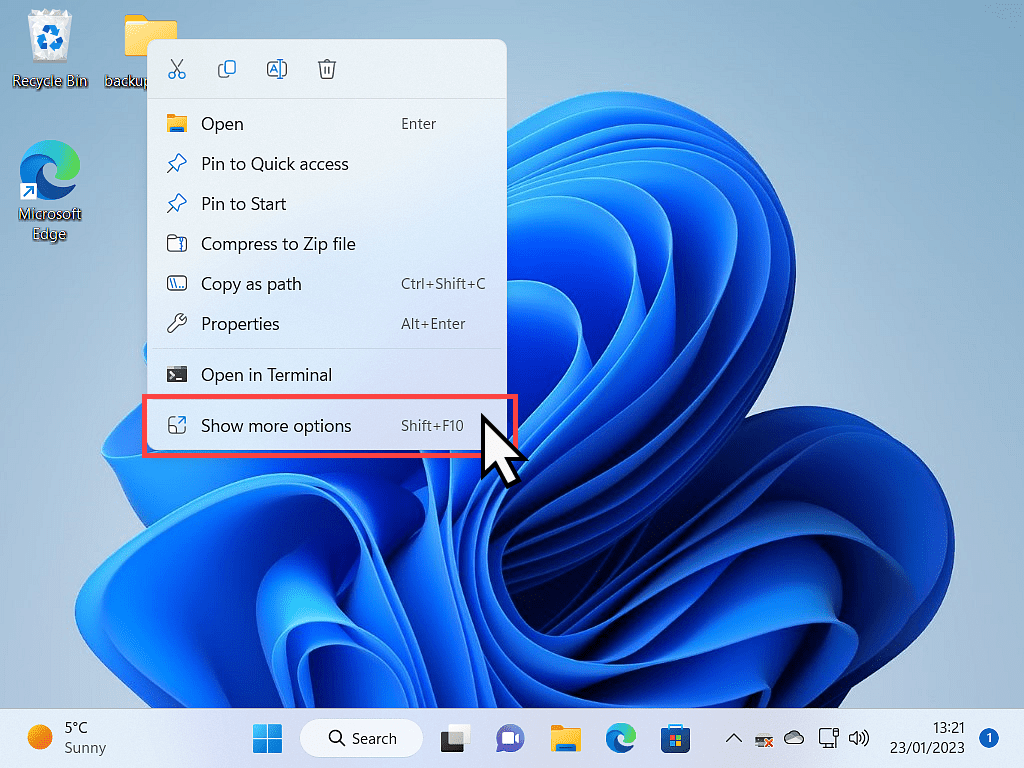
Windows 11 Options Menu.
In Windows 11, the right-click context menu has been redesigned to make it easier to use. By easier to use, what we really mean is that most of the options have been removed.
If you’d like to bring back the full menu, as in Windows 10, you can How To Restore All Options To The Windows 11 Right Click Context Menu.Add To Archive Options Page.
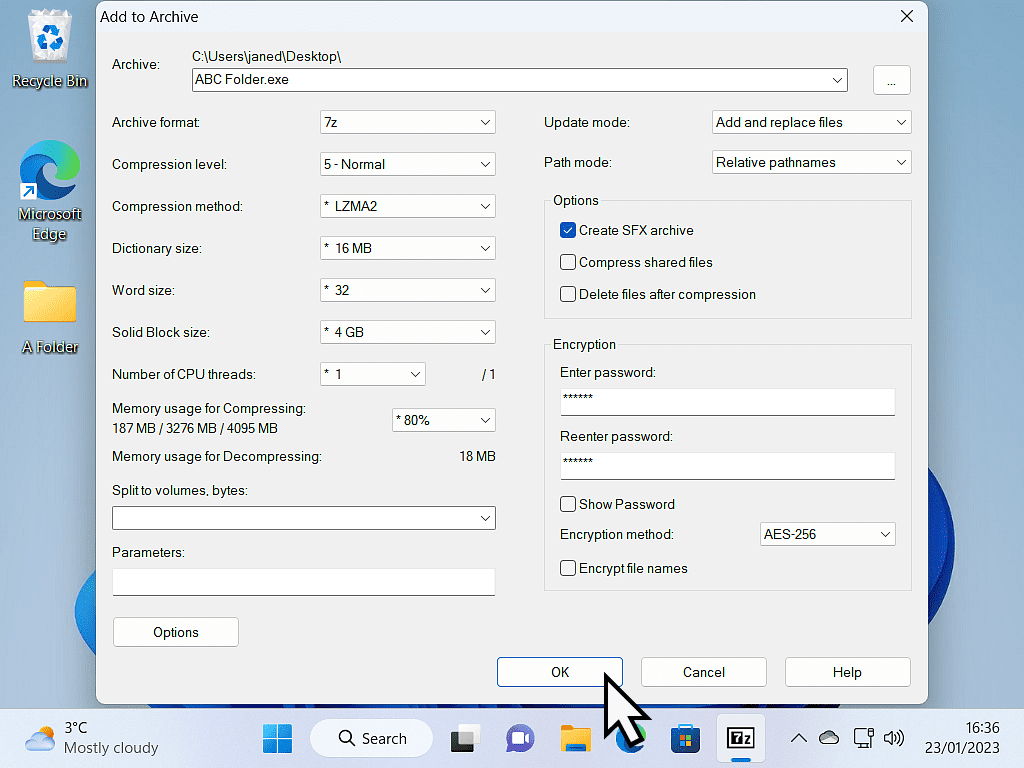
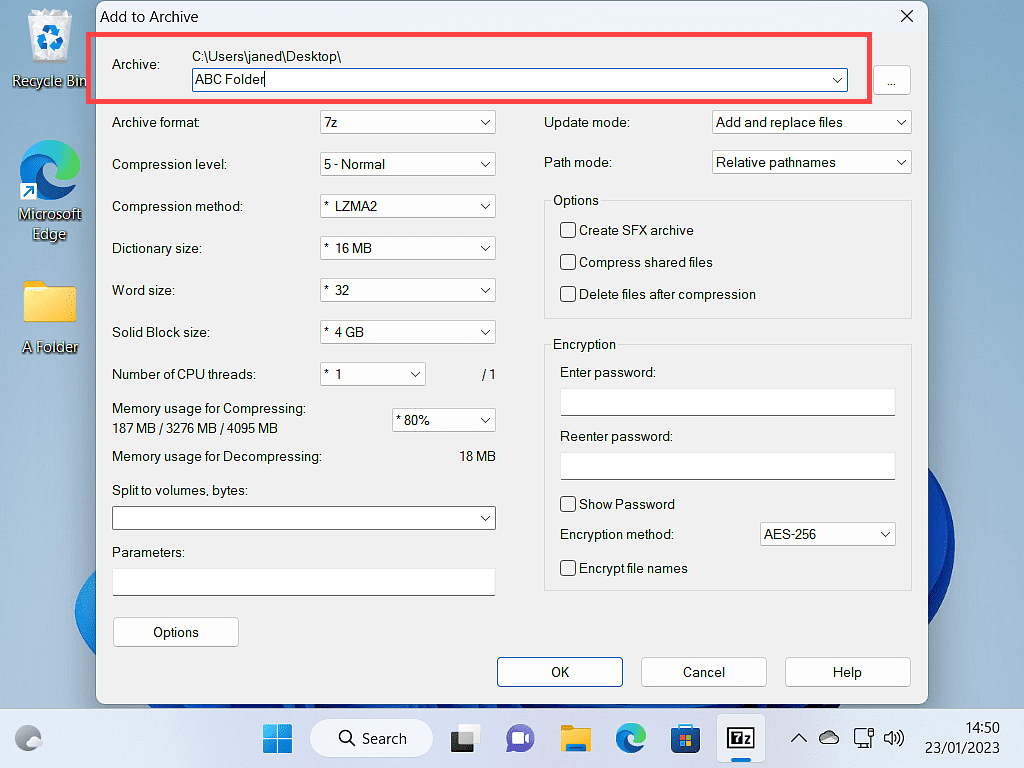
On the Add To Archive page, there are various options available to you. In this guide, I’m not going to bore you with every possible option, just the main ones that you might actually use.
Archive.
At the top of the window is the file/folder name box. By default, the zipped file will take the same name as the original file, but you can change it to anything you like.
Archive Format.
The Archive Format is the way in which the file/folder will be compressed.
By default, it’ll be set to the 7z format, which is (obviously) 7-zip’s own format.
However, you can change the compression format by clicking the small drop-down arrowhead beside the box.
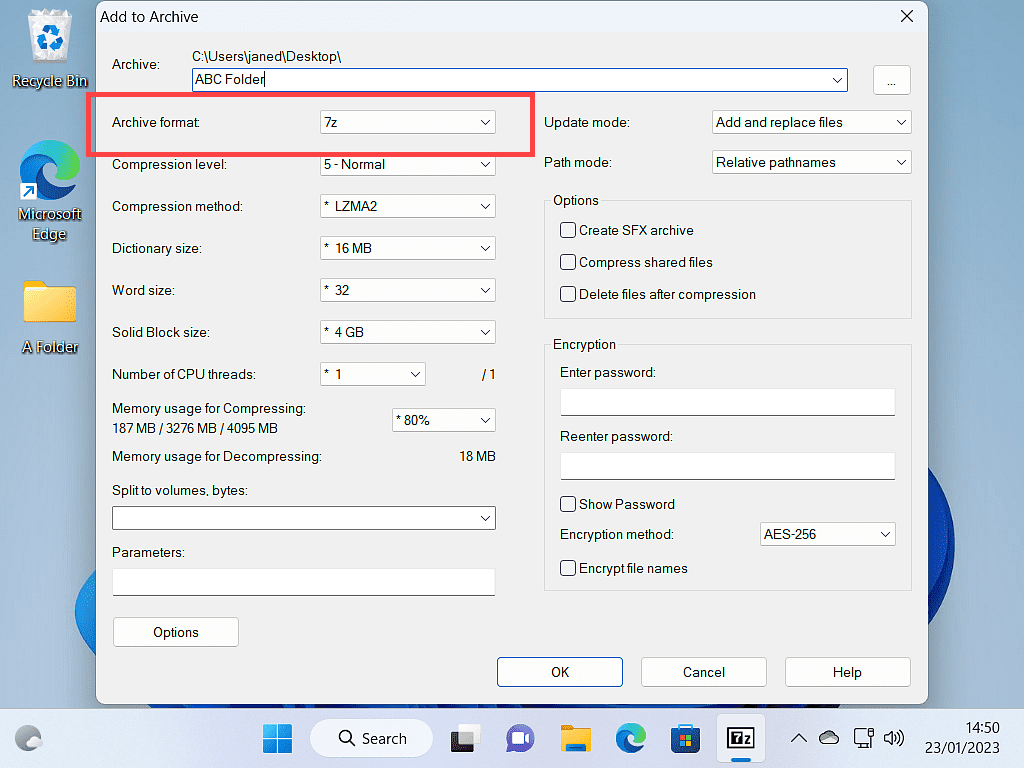
When To Change The Archive Format.
Alternatively, you could use a Self Extracting Archive (SFX), which we’ll look at later.
Split To Volumes, Bytes.
The “Split to volumes, bytes” box is where you can choose whether the file/folder being zipped should be split into smaller sizes and if so, specify the sizes in bytes.
Click the drop-down arrowhead to choose one of the pre-set sizes or simply type into the box the size you require. All sizes are shown in bytes, so to split a folder into 25-megabyte archives, you’d need to type 25M
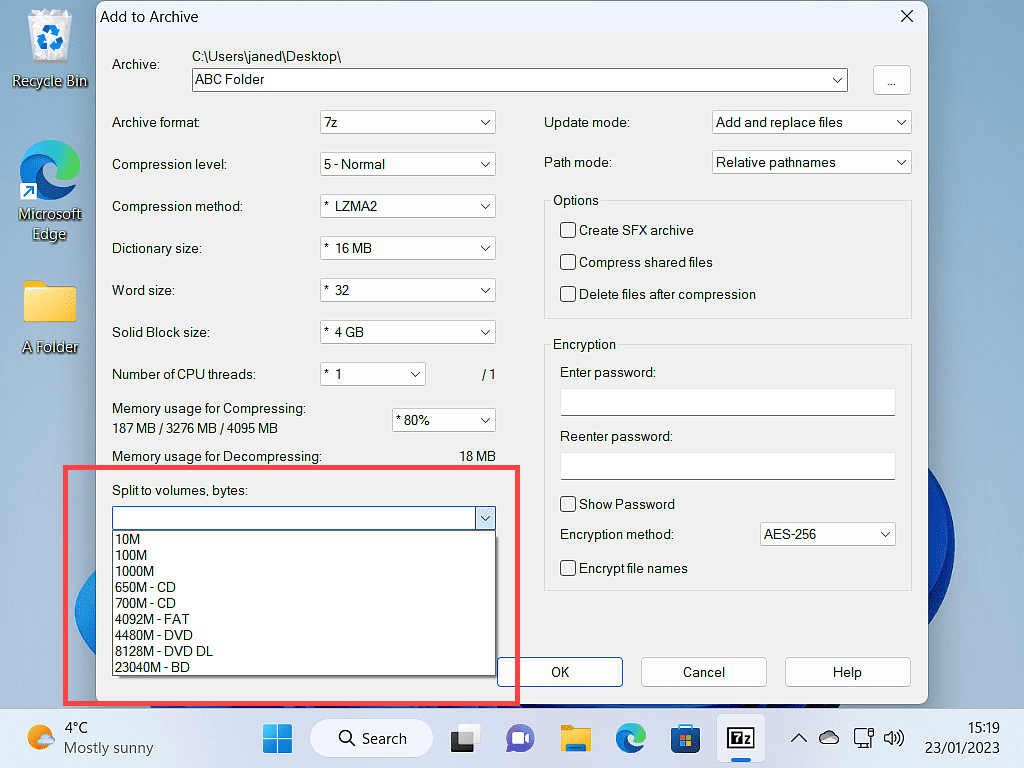
Splitting your zipped files/folders into smaller archives is handy if you’re intending to upload your files to the Internet. For instance, if you have a particularly large file that you wish to email, you could split it into several smaller files.
7-Zip Self-Extracting Archive (SFX).
A self-extracting archive is just a zipped (compressed) file or folder that when clicked will unzip itself.
That makes it perfect for sending to someone else since they won’t need to install any other software in order to open the archive.
If you want 7-Zip to make the archive a self-extracting archive, select the “Create SFX archive” option.
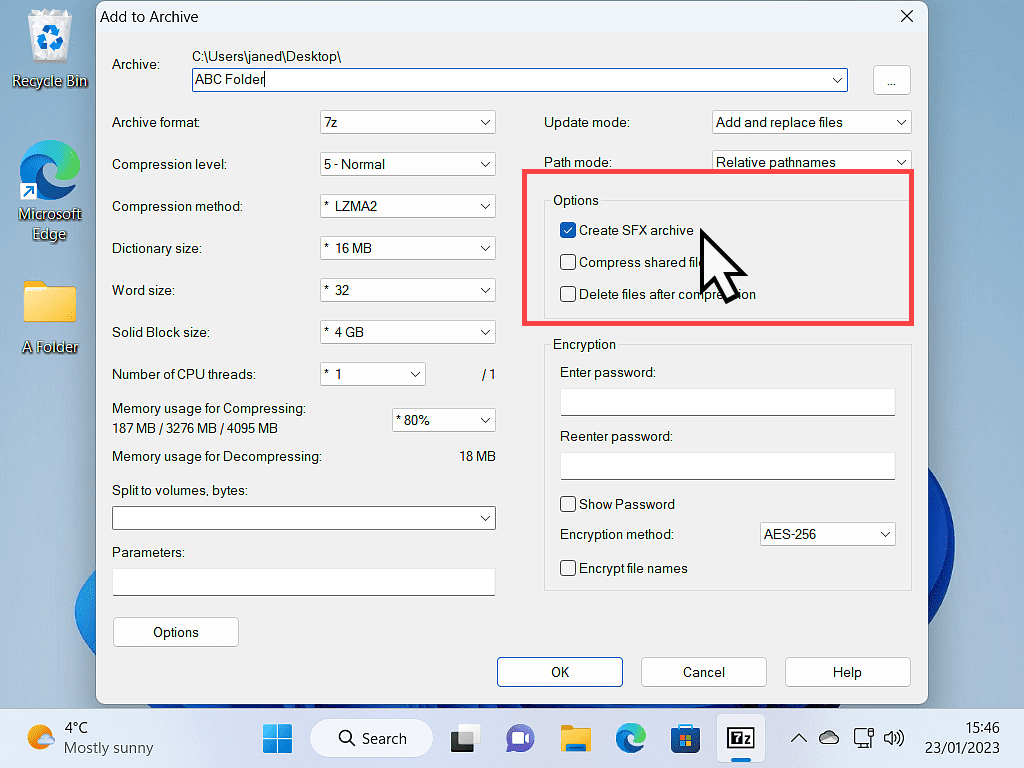
Encryption And Password Protection.
7-zip can encrypt your files so that no one without a password can open them.
To have your archived files password protected, simply type in your required password in the Enter Password box and then retype it into the Reenter Password box.
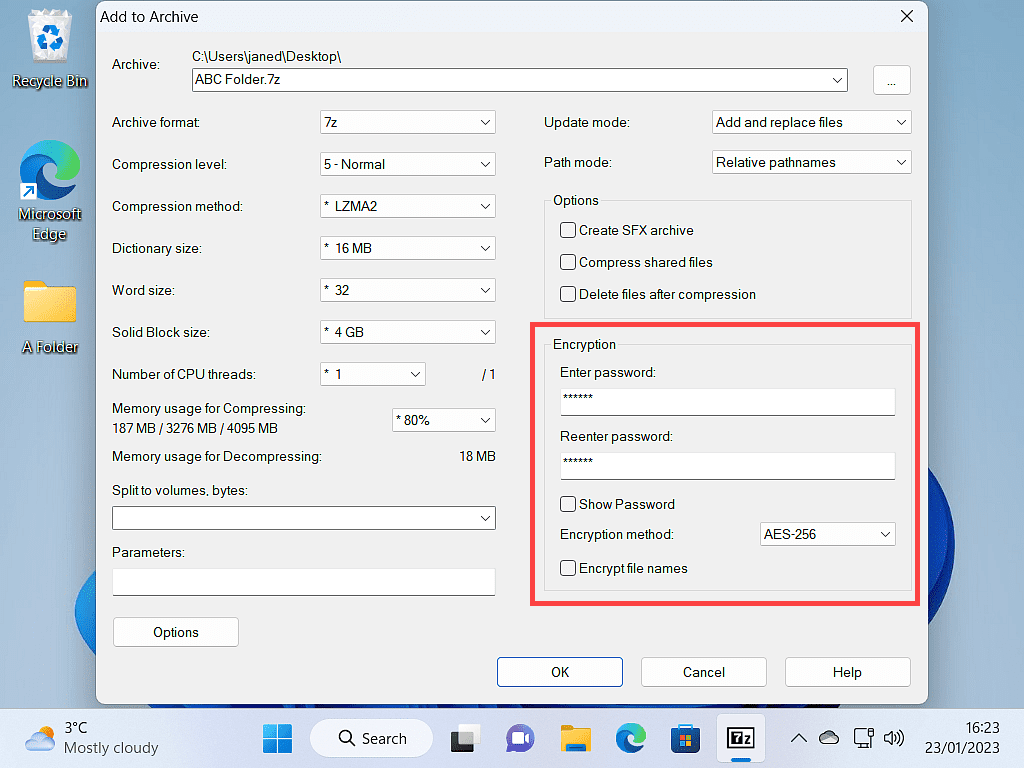
Password protecting your files/folders like this with 7-Zip is perfect for archives that your going to store away. Or for when you want to send sensitive data to someone else and you only want them to be able to access it.
It’s not so good when the files are going to be in constant use but you still want them to be kept private. If that’s the case, then you’d probably be better off using a program like VeraCrypt How To Password Protect And Encrypt A File Or Folder On Your PC.
Ready To Zip.
After making your selections on the “Add to Archive” page, the final thing to do is to click the OK button. 7-zip will then do its thing as per your choices.
Bare in mind that you really don’t have to make or change any of these settings. They are strictly options that you can use if you want or need to.
