Windows 11 comes with a shiny new, streamlined, right click context menu. Not everyone is pleased about it.
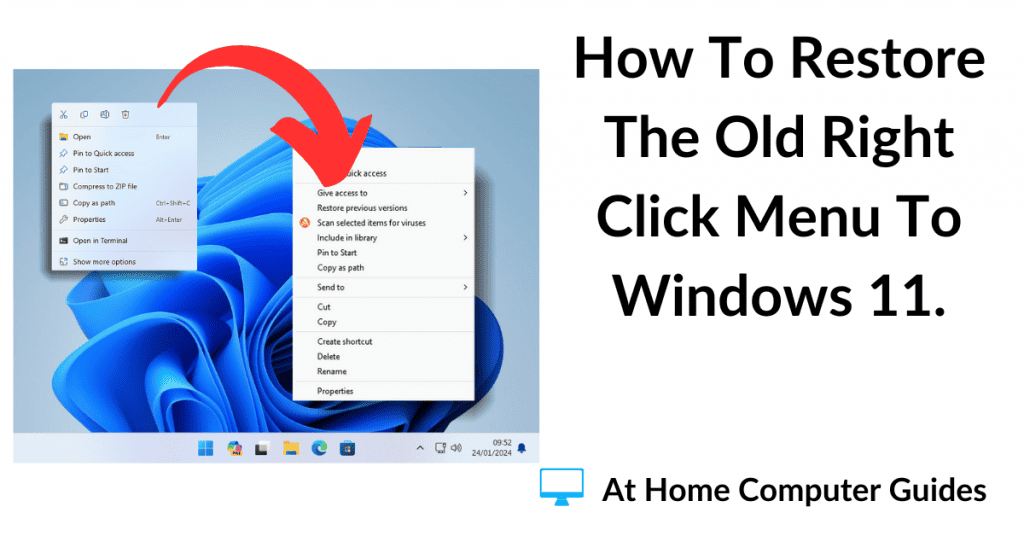
The old context menu (the one all previous versions of Windows used) displayed all the available options in one long menu. In Windows 11, Microsoft have cut that down to display only the most used options.
However you can restore the old right click menu to Windows 11. All you need to do is add an entry to your registry.
The Right Click Context Menu In Windows.
In all previous versions of Windows (before Windows 11), when you right clicked on an item the full options menu would open.
Depending on which item you actually right clicked, the old style menu could be rather long, making it difficult to find the option you’re looking for. Or at least that’s what Microsoft think.
In Windows 11, the context menu has bee redesigned to make it easier to find the most commonly used options.
That doesn’t suit everyone. Some of us still prefer to see the old context menu.
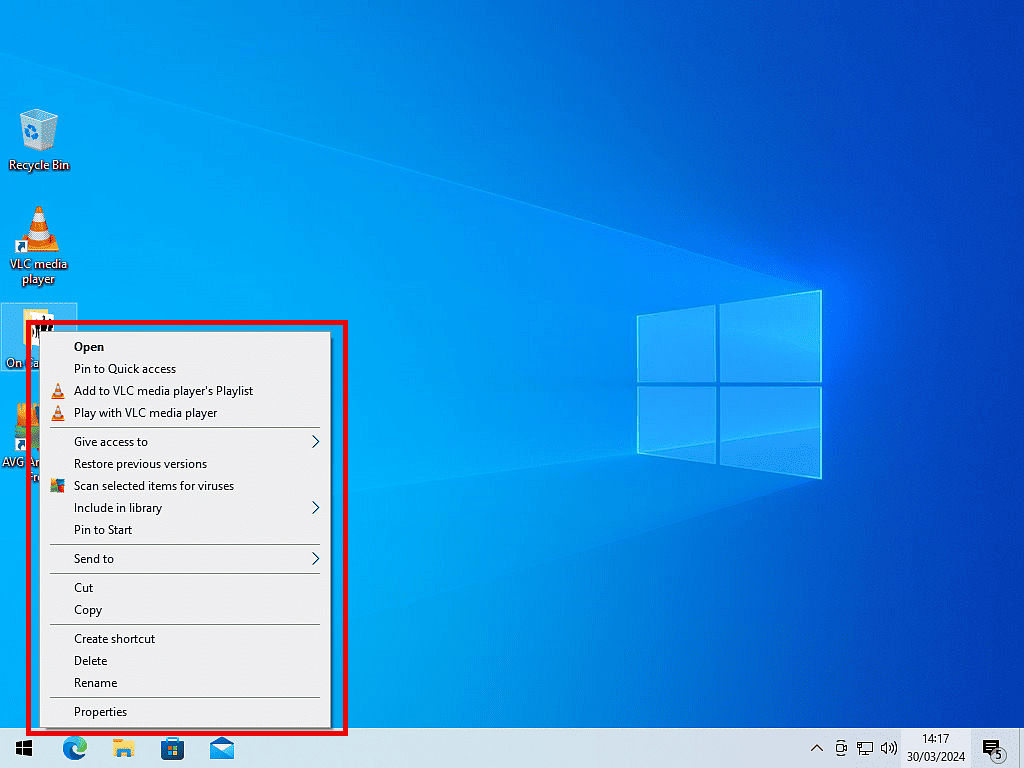
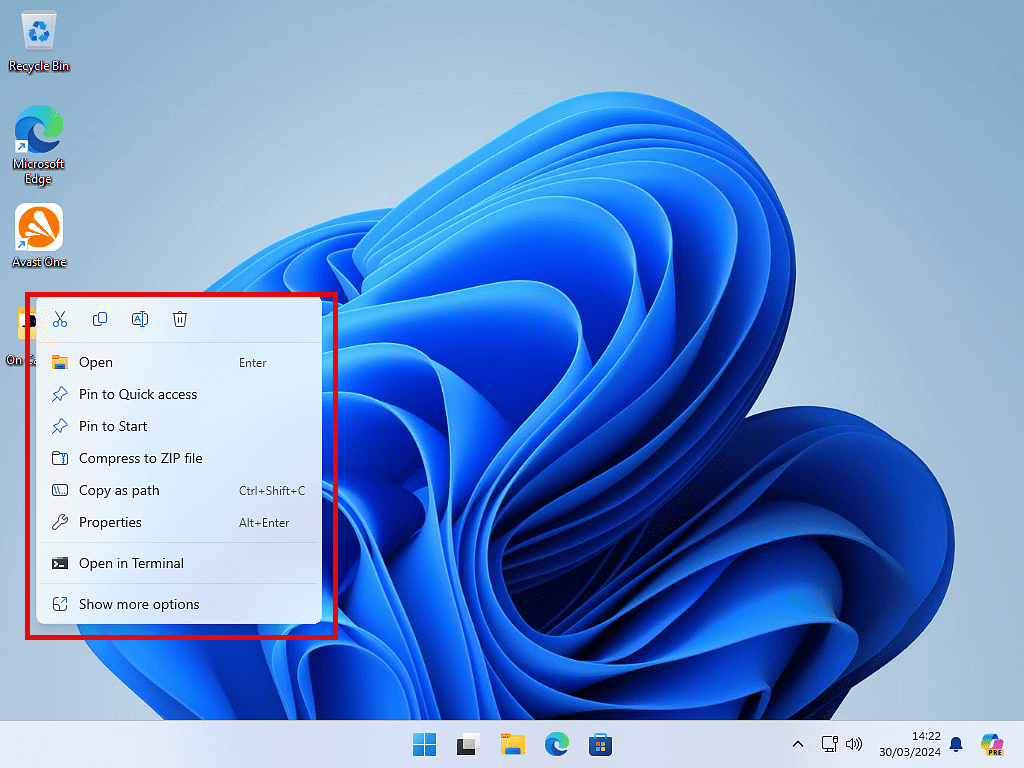
You can still get to all the available options in the right click menu by clicking on Show More Options at the bottom of the menu.
But if you find you’re doing that more often than you’d like to, you can get the old menu back.
How To Restore The Old Right Click Menu To Windows 11.
In order to restore the old right click menu to Windows 11 you have to create a couple of registry keys.
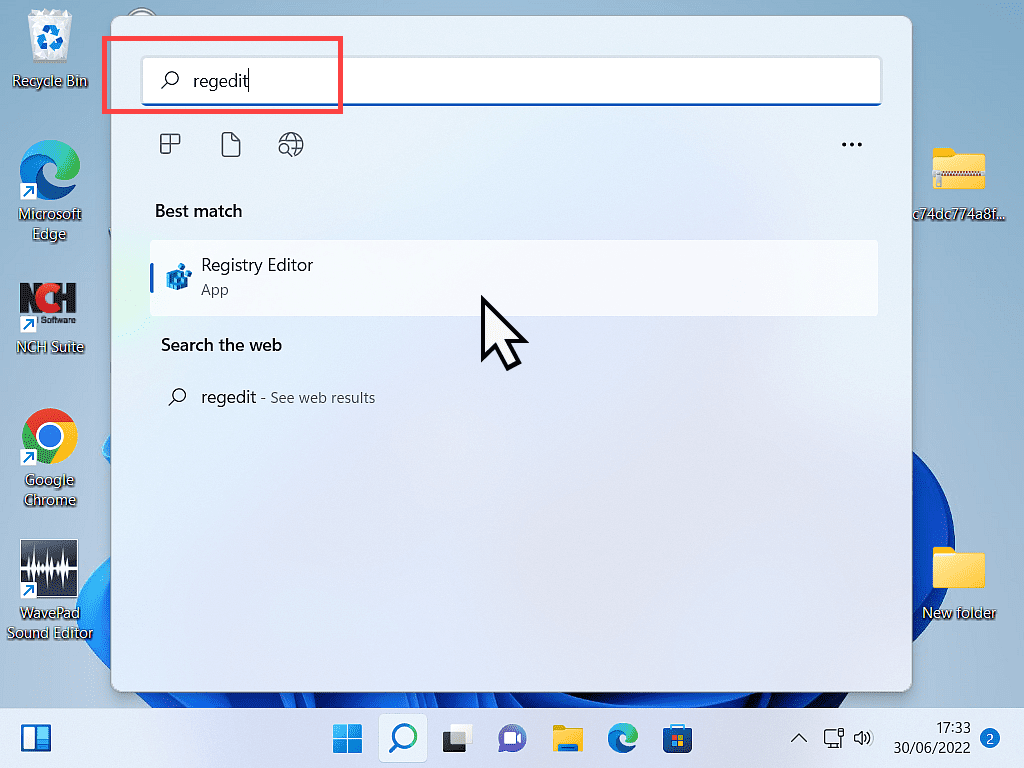
Click the Start button and type “regedit“
Then click Registry Editor (App) on the search results panel.
Windows User Account Control will popup, click the Yes button.
Editing The Windows Registry.
Editing the Windows registry is always a risky business. While it’s not difficult to do, mistakes can happen. You could easily render your computer unusable.
Be sure to make some sort of backup before attempting this.
Inside The Registry.
If you’re familiar with the Windows registry, then you need to navigate to –
HKEY_CURRENT_USERSoftwareClassesCLSID
If that doesn’t mean anything to you, then I’ll guide you through it.
What you need to do to restore the old context menu to Windows 11 is to add a couple of keys to the registry.
But they need to be created in the right place.
To get there, looking at the registry, left-click the small arrowhead beside HKEY_CURRENT_USER
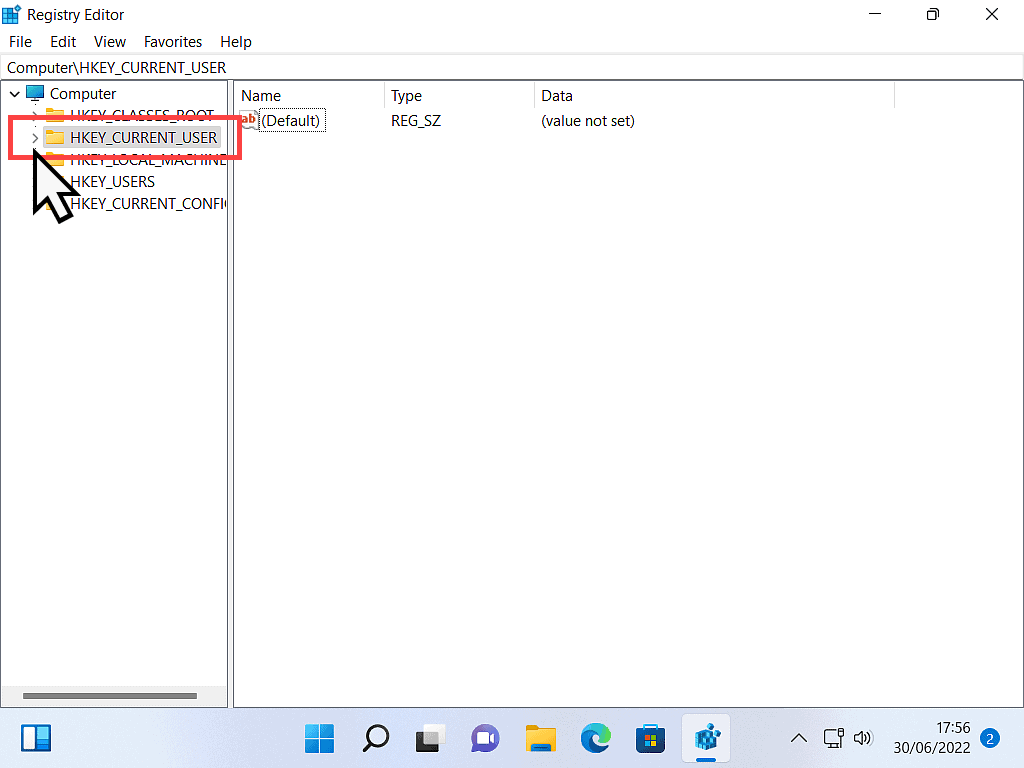
You’ll see the HKEY_CURRENT_USER expand to reveal more folders.
Scroll down and click the arrowhead beside the Software folder.
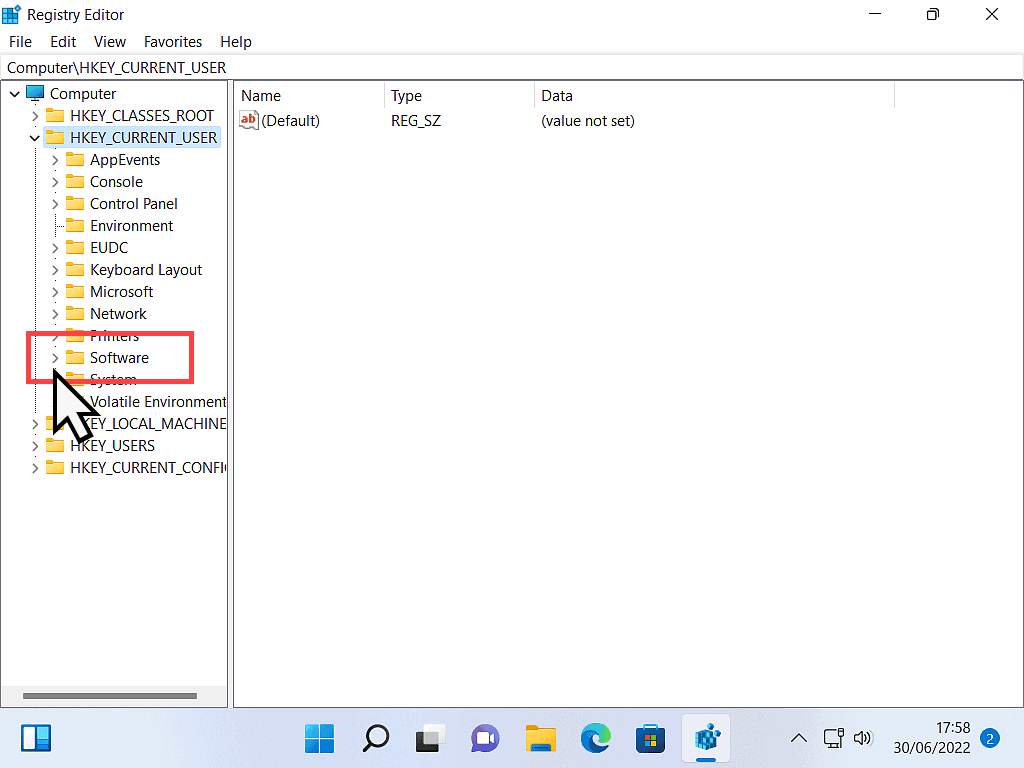
The Software folder will expand.
Left-click the arrowhead beside Classes.
The Classes folder will expand.
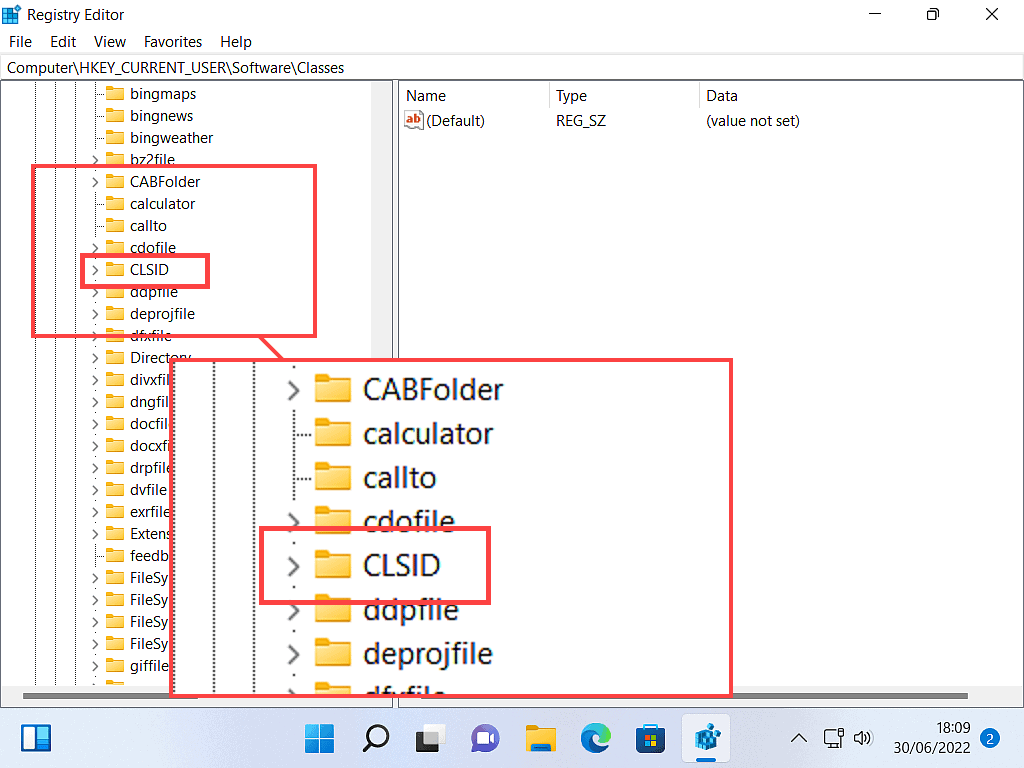
Scroll down the list to the folder CLSID.
It’s a long way down the list. More than halfway down. The folder you’re looking for is CLSID. It’s all in capitals.
Create The Registry Keys To Restore Windows 11 Old Context Menu.
Now you’ll need to create the registry keys that’ll enable the old right click menu in Windows 11.
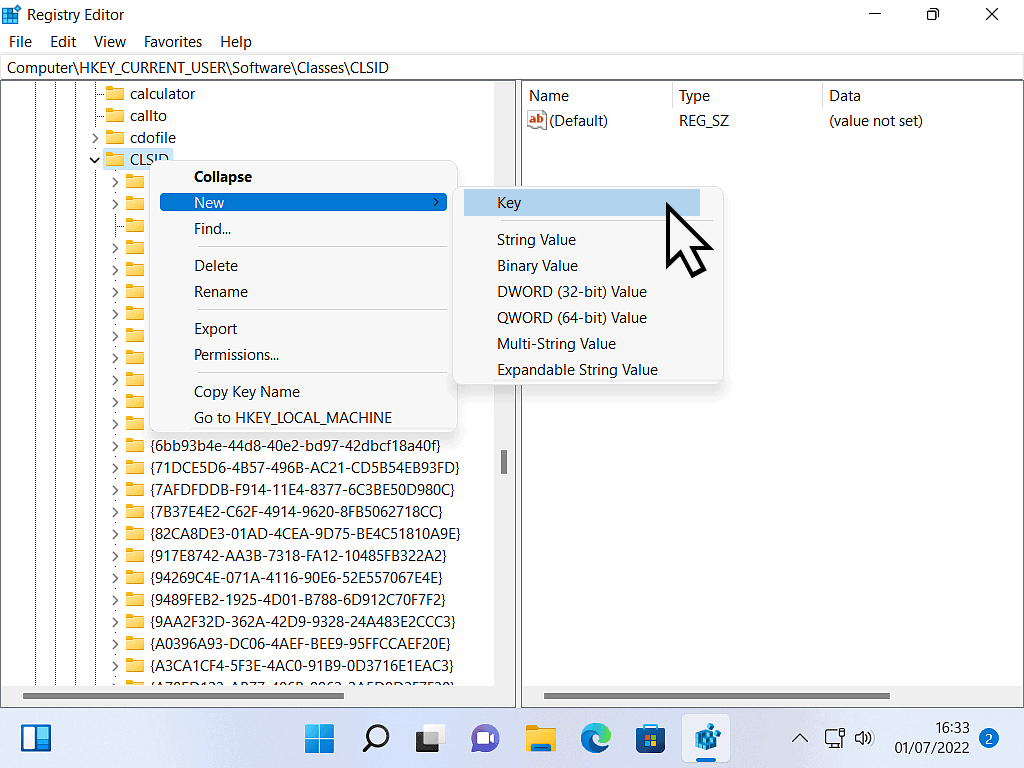
When you find the CLSID folder, right-click on it.
On the menu that appears, put your pointer onto NEW and then left-click KEY on the second menu (submenu).
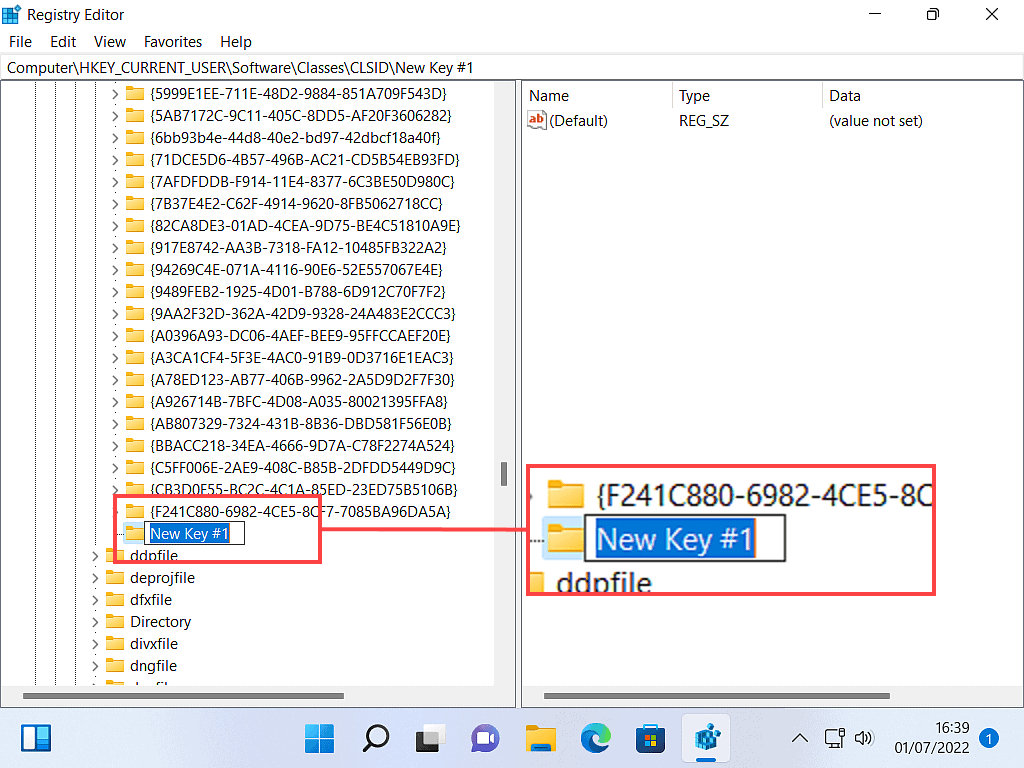
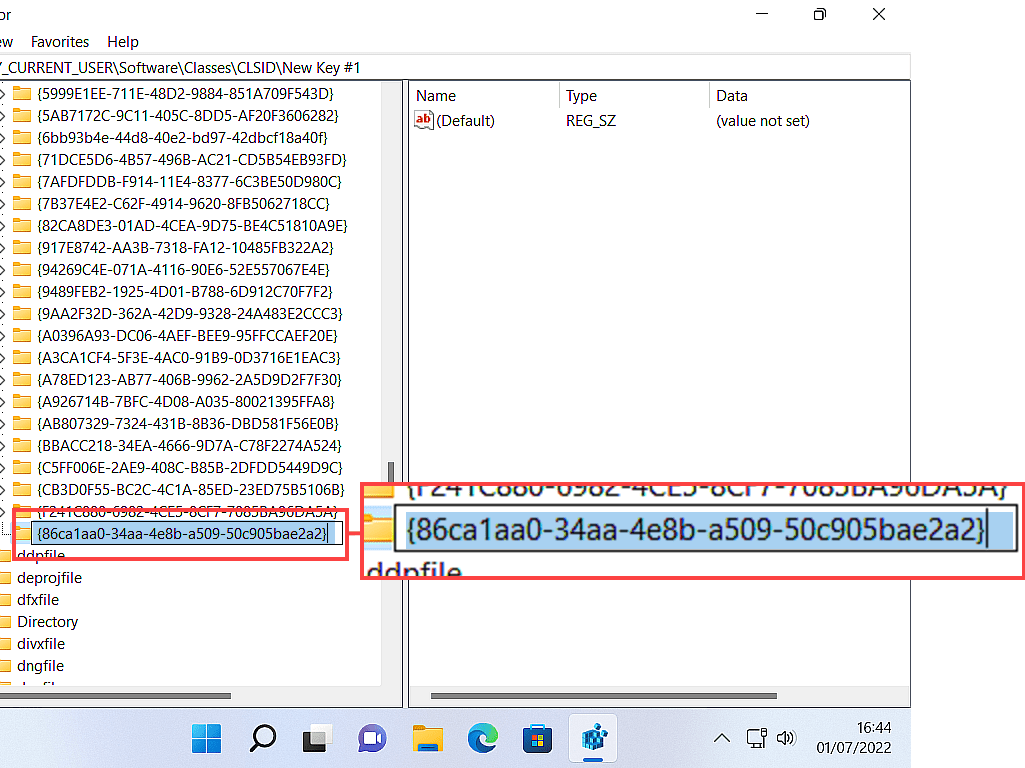
The new registry key folder will be created. It will have the usual temporary name New Key. You need to rename the key folder to be
{86ca1aa0-34aa-4e8b-a509-50c905bae2a2}
You need to type the name exactly as it’s written here, including the brackets. Or better still, copy and paste it.
Create A Subkey.
Once you’ve named the folder, you then need to create a subkey inside it.
Right-click on the folder {86ca1aa0-34aa-4e8b-a509-50c905bae2a2}
Move your pointer onto NEW and then left-click Key.
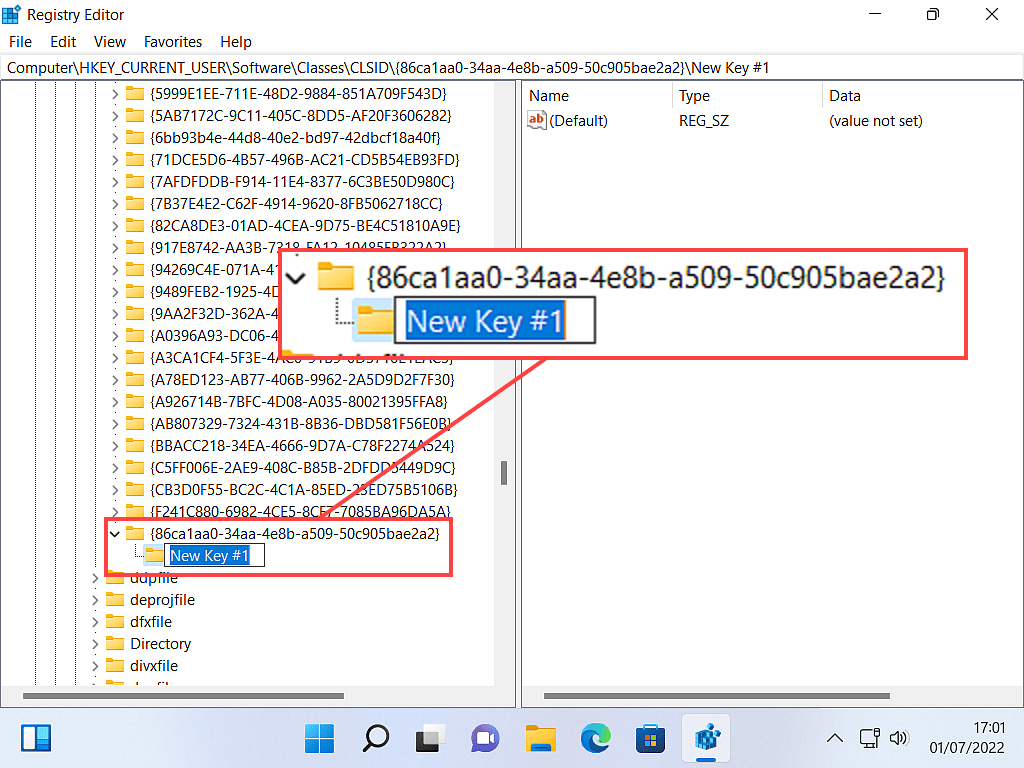
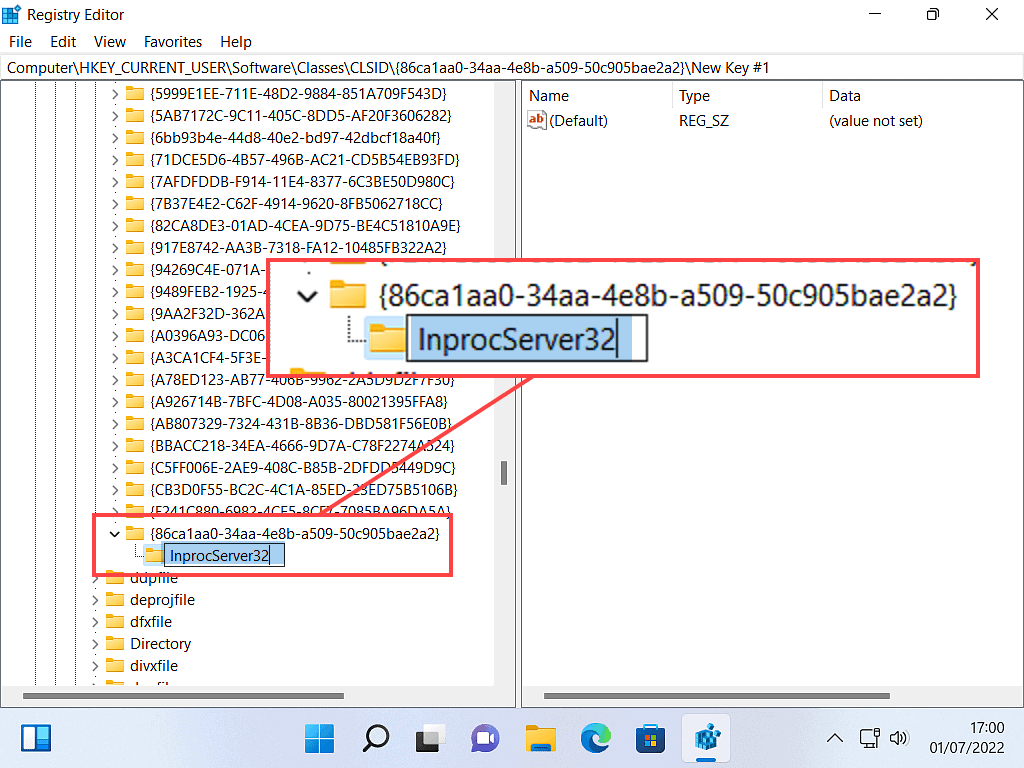
Just as happened earlier, the new key will have a temporary name, something like New Key. You need to change the name to be InprocServer32

Left-click once on the subkey InprocServer32 (the one you just created) to select it. It will become highlighted.
Then double left click on DEFAULT in the right-hand panel.
The Edit String box will open.
Make sure there isn’t anything in the Value Data box. It should be completely empty.
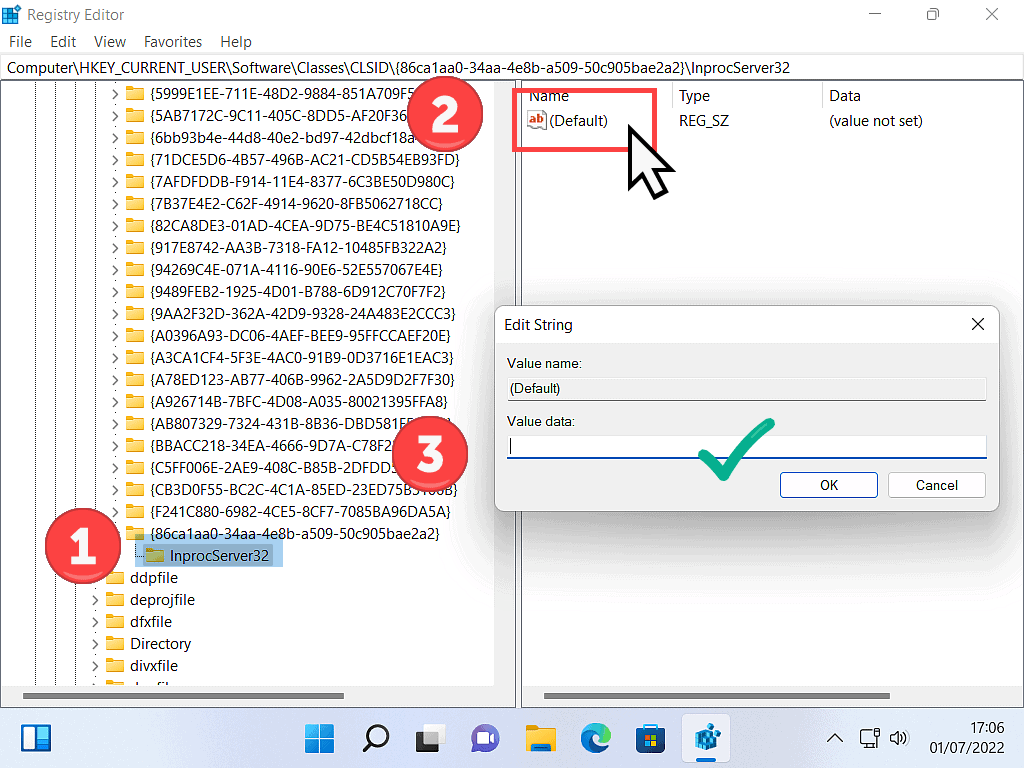
If it’s empty, click the OK button, close the registry editor and restart your computer.
If you see something inside the Value Data box, delete it. Then click the OK button, close the registry editor and restart your computer.
The Old Right Click Menu In Windows 11.
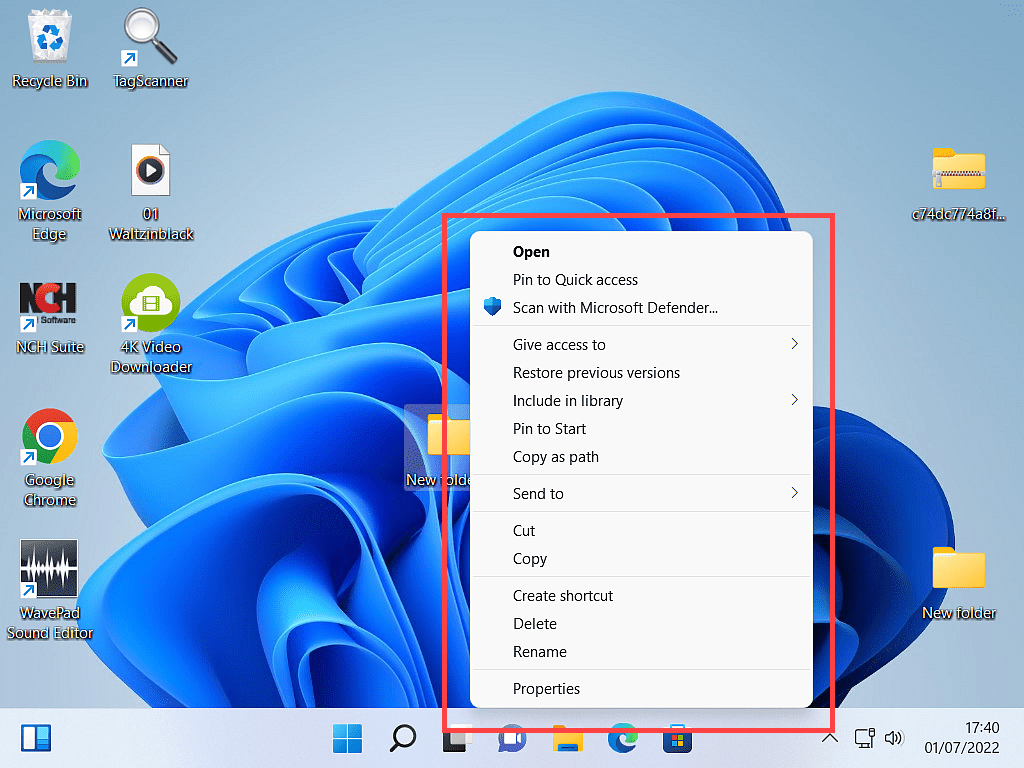
After a restart you’ll find that the old right click menu has been returned to Windows 11.
All the usual options are there without the need to click Show More Options.
Summary.
Getting the old style context menu back in Windows 11 isn’t difficult to do. It’s just a matter of creating a couple of registry keys.
If you’re a little worried about doing this, then I’d definitely suggest trying it out on a virtual machine first. That way you can check that it does work, and if you make a mistake, no harm done.
Keep Up With Home Computer Guides.
All the latest guides and articles published on At Home Computer delivered to your inbox.
No account needed, just add your email address.

