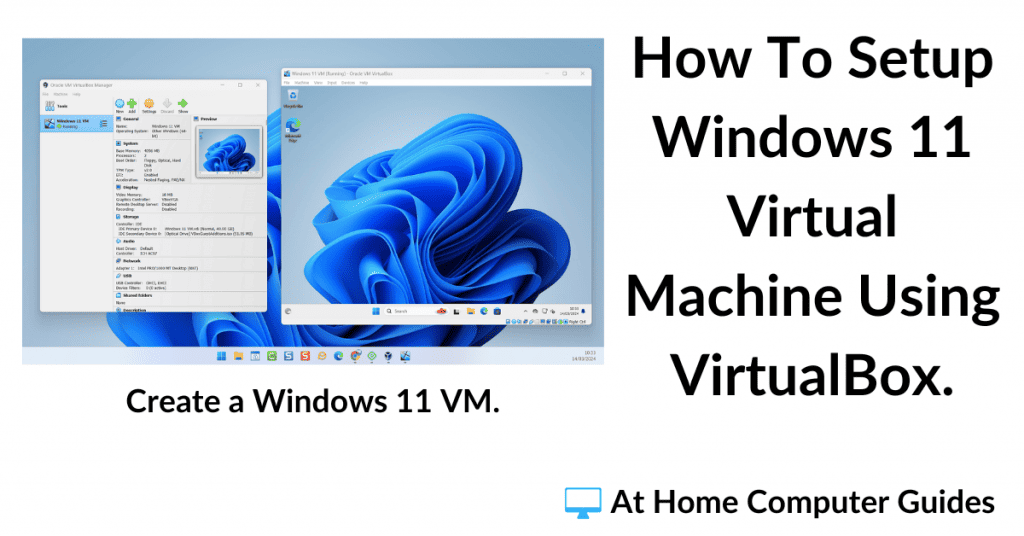
In this tutorial, I’ll show you how to setup a Windows 11 virtual machine using VirtualBox.
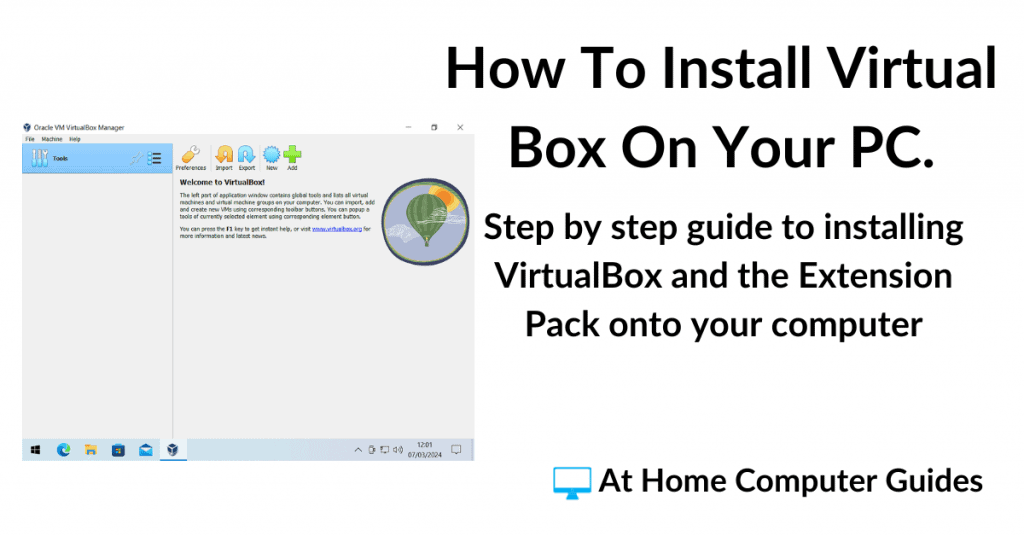
You’ll need to have VirtualBox already installed on your computer along with the Extension Pack. You find find a step by step guide here How To Install VirtualBox On Your Computer.
VirtualBox will install Windows 11 as the guest operating system from an ISO file which you’ll need to download from Microsoft.
How To Setup A Windows 11 VM In VirtualBox.
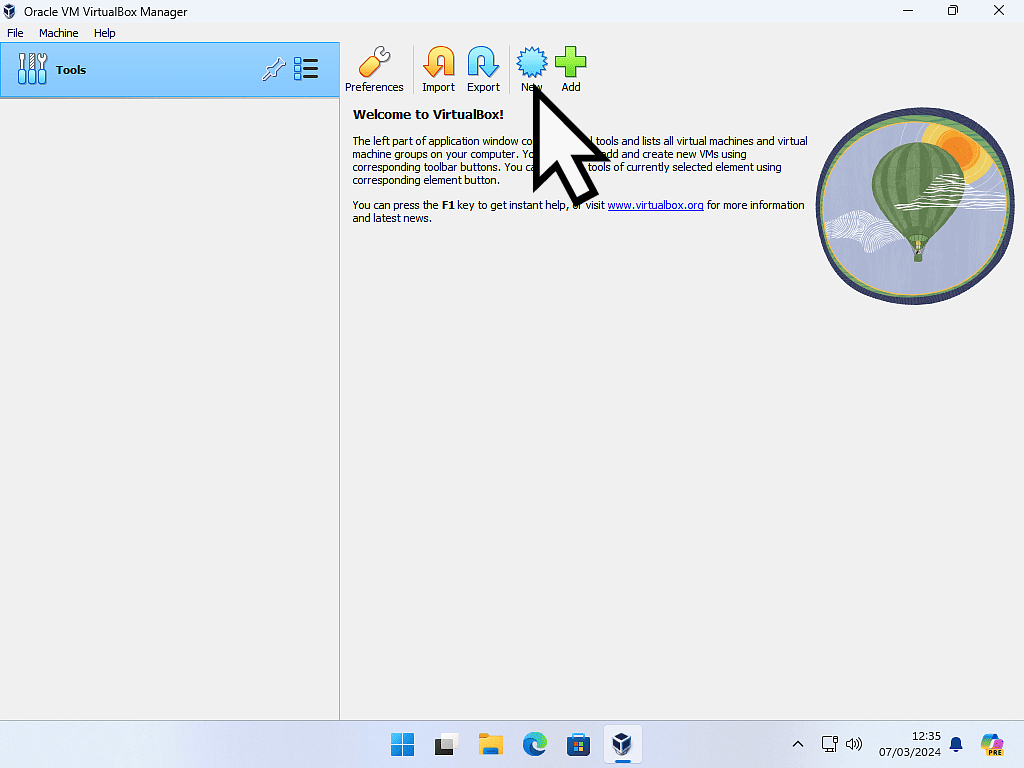
To install Windows 11 as your guest operating system, launch VirtualBox and then click the New button.
Virtual Machine Name And Operating System.
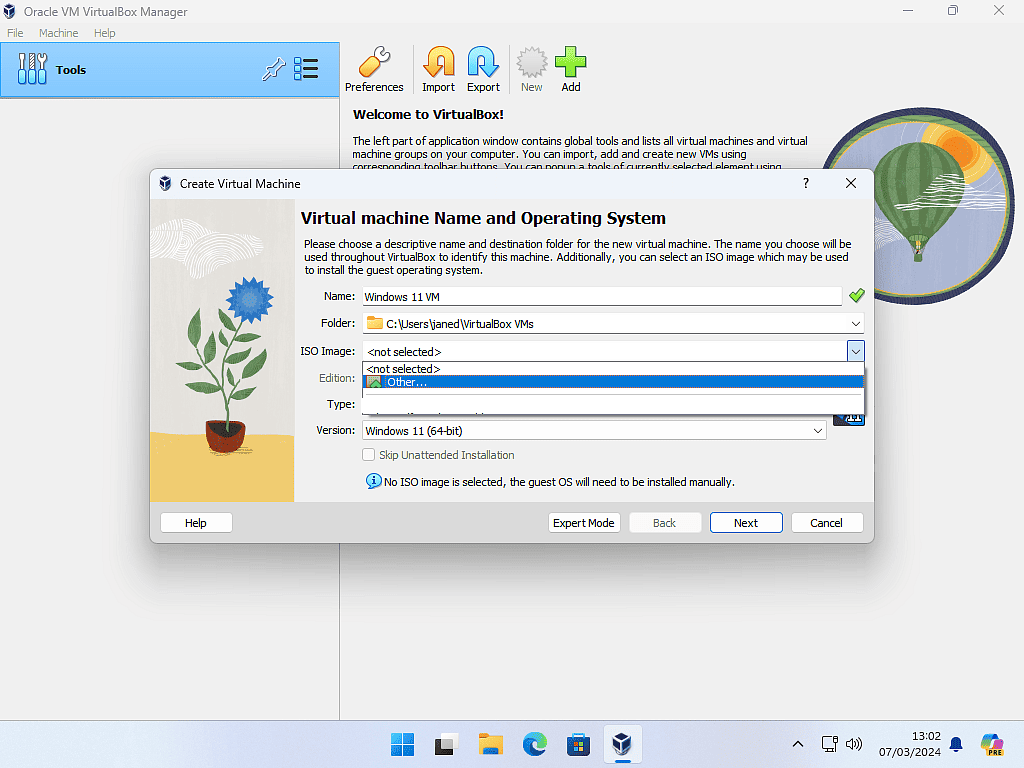
The Virtual Machine Name And Operating System popup will appear.
Name – This is the name of the virtual machine. It can be anything you like. It simply helps you to identify the VM if you install more than one.
Folder – All the files that will make up your VM are stored inside a single folder on your host computer. You can change the default location if you wish.
ISO Image – For the ISO image, click the drop down arrowhead and click Other. Then navigate to where you downloaded your Windows 11 ISO file and select it.
Virtual Hardware Settings
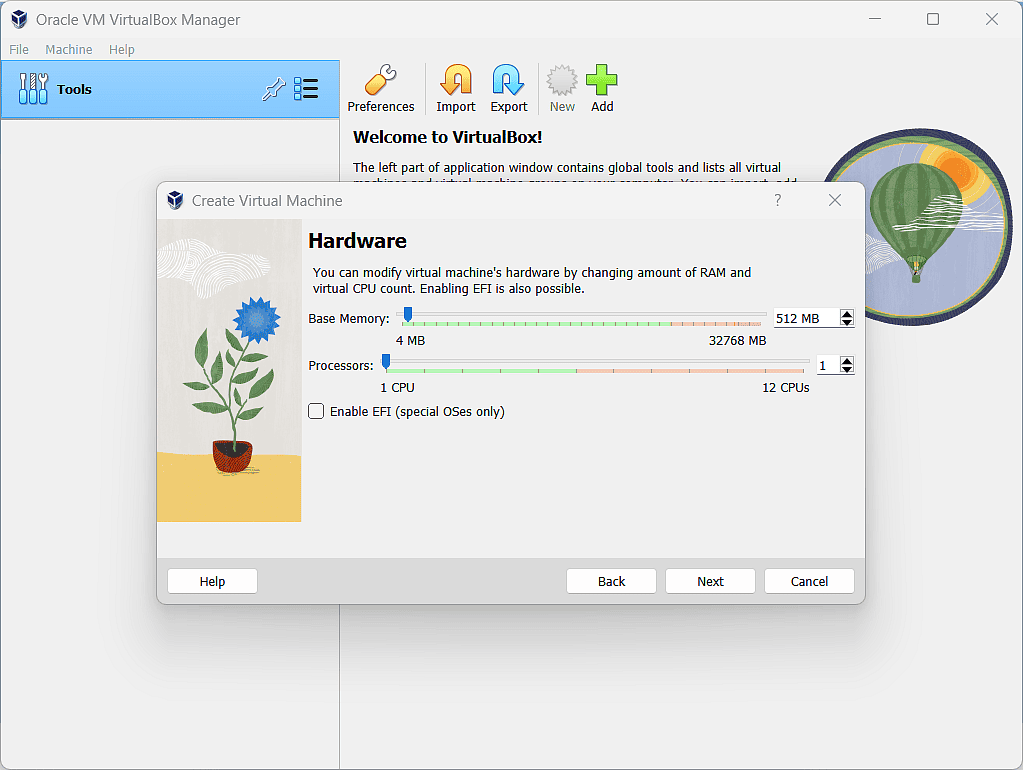
The virtual computer will obviously need to run on virtual hardware. So the first thing to do is to specify what hardware will be available to your VM.
By default, VirtualBox will allocate 512MB of RAM and 1 CPU for the virtual machine. That’s nowhere near enough when you’re installing Windows 11 as the virtual machine.
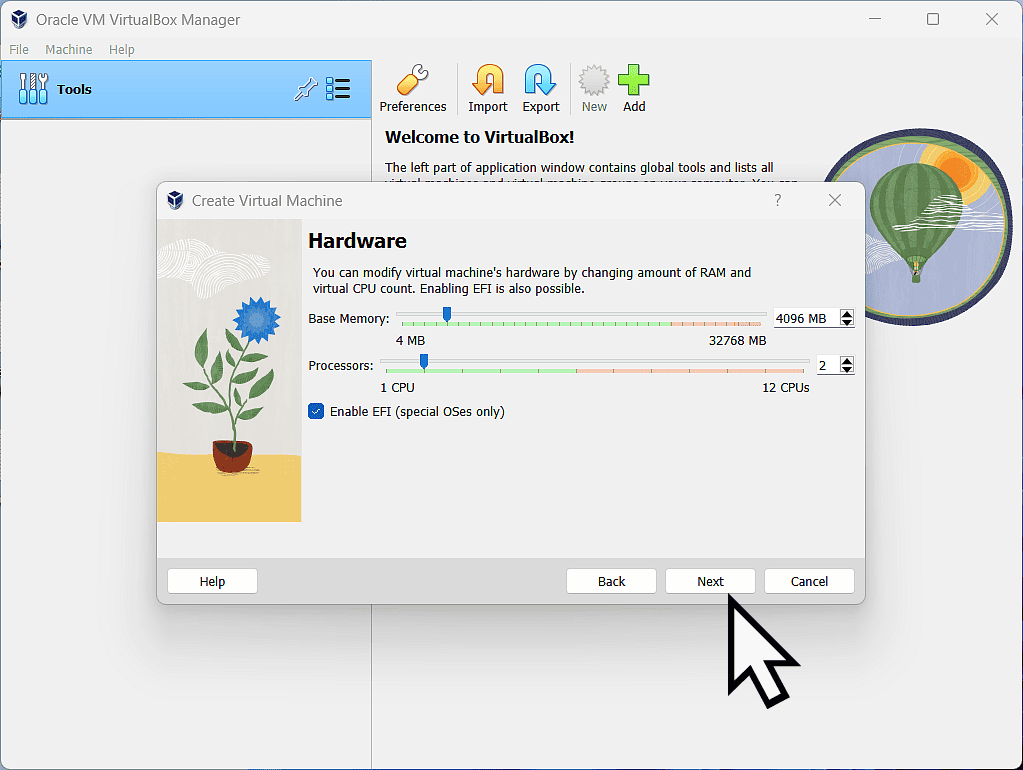
Change the Base Memory setting to be at least 4GB (4096MB) and give your virtual machine 2 Processors (or more if you have a high core count on your host system).
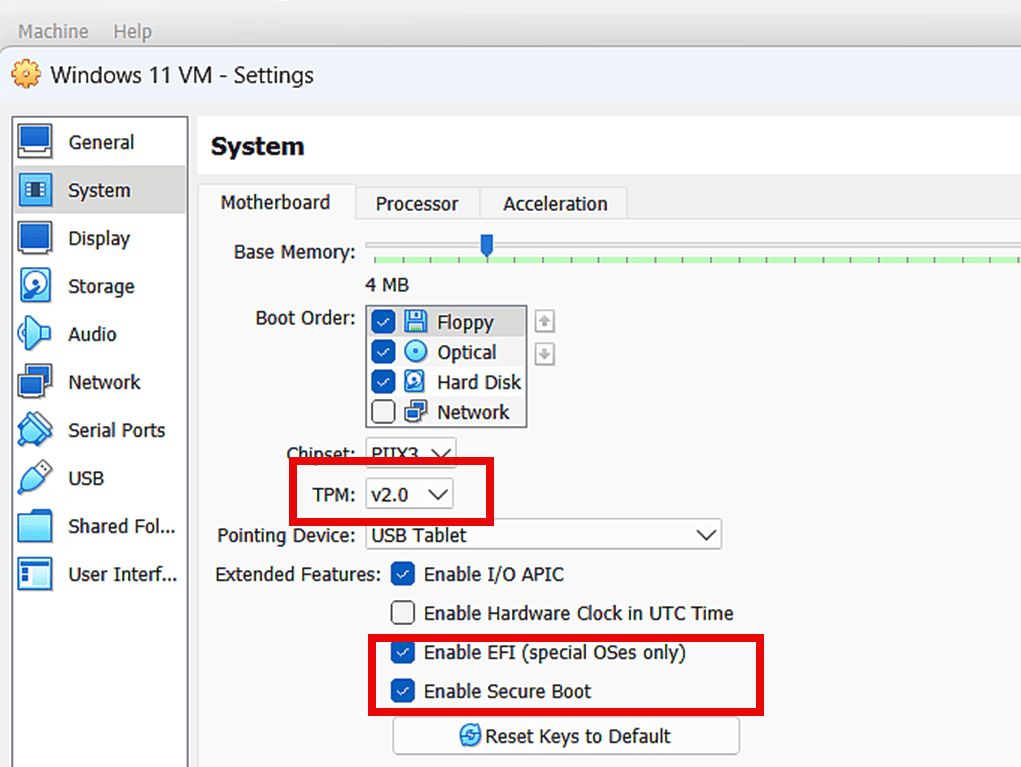
Then select “Enable EFI (special OSes only)”. To install Windows 11 (even as a virtual machine) you’ll need to have a TPM (Trusted Platform Module) and Secure Boot enabled. These are both features of EFI (Extensible Firmware Interface).
Click the Next button.
Virtual Hard Disk Capacity.
VirtualBox has various options when it comes to virtual hard disks.
For this guide I’m going to keep it simple and assume that you’re creating your first Windows 11 virtual machine.
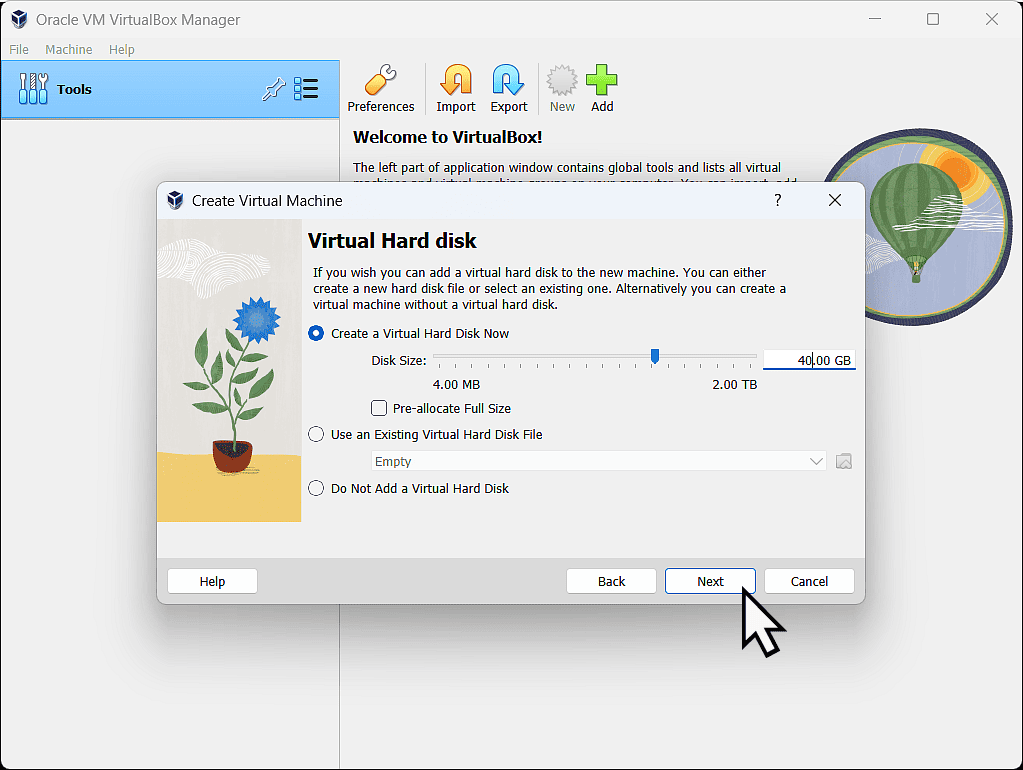
Ensure that “Create a Virtual Hard Disk Now” is selected.
For the capacity, the default is 20Gb. That’s a little skinny for Windows 11, I’d change that to be at least 40 Gb.
Click Next.
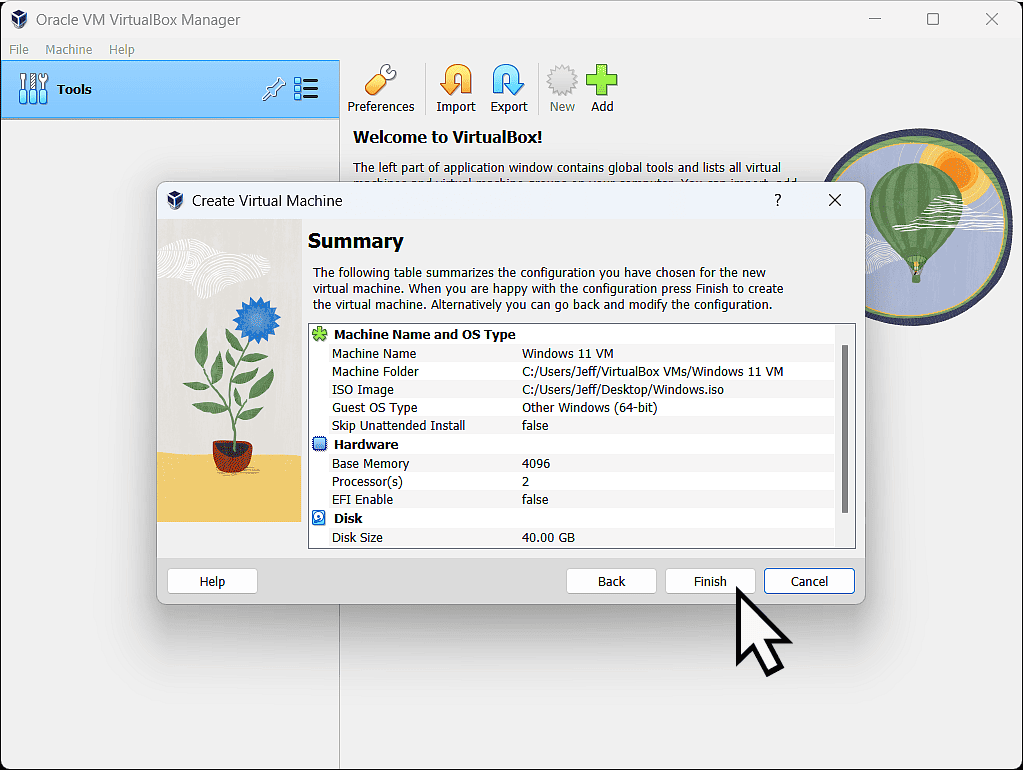
VirtualBox VM Summary.
Finally you’ll see a summary screen of the VM you’re about to create in VirtualBox. Click the Finish button to continue.
We’re not quite done yet though.
How To Enable TPM And Secure Boot In VirtualBox.
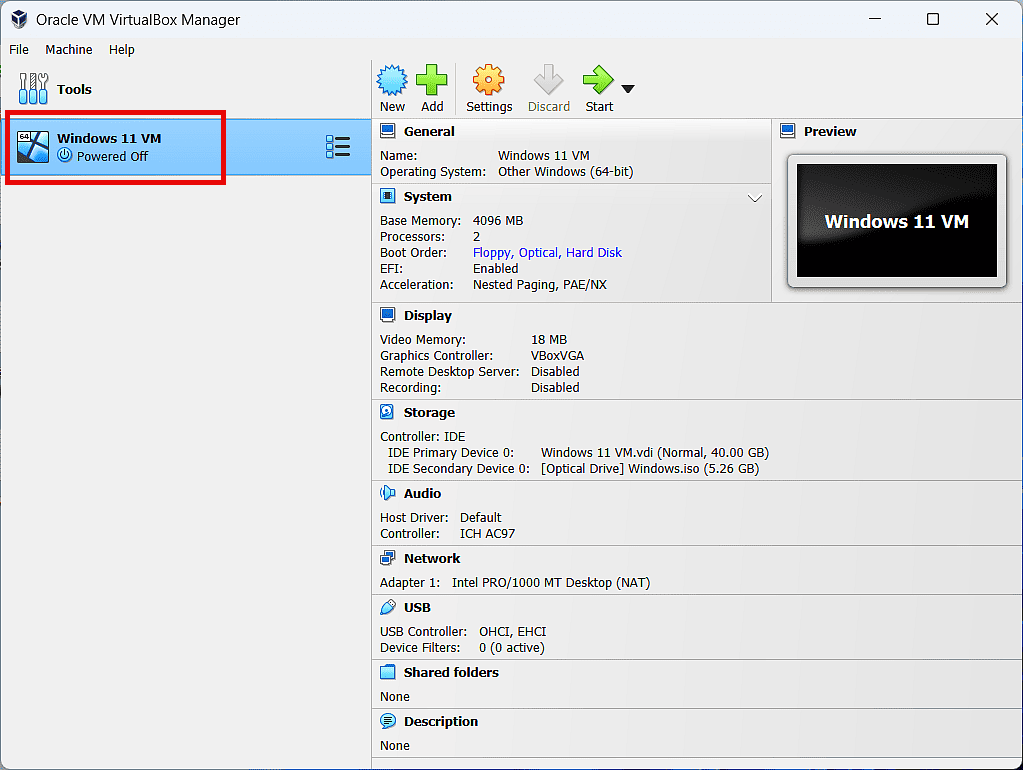
After clicking the Finish button VirtualBox will create the virtual hardware for your new Windows 11 VM. Before you can start installing Windows, you’ll need to enable a TPM and Secure Boot.
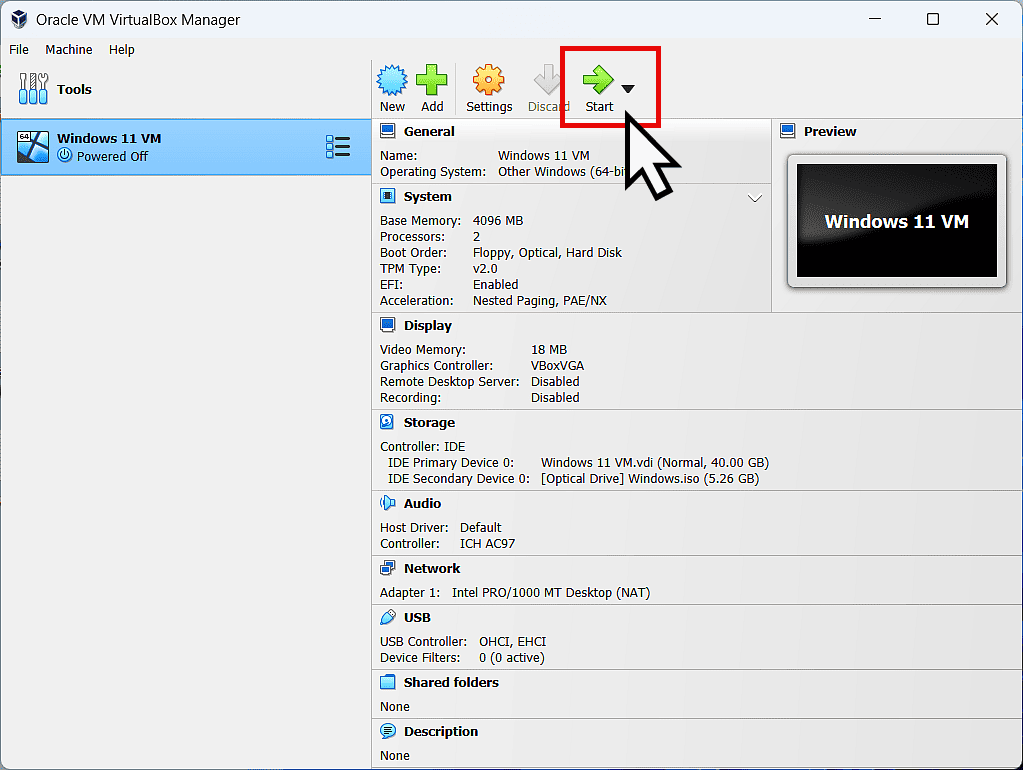
- In VirtualBox, you’ll see that the VM is powered off at the moment. That’s great, it’s what you want because you’ll need to change a couple of settings.
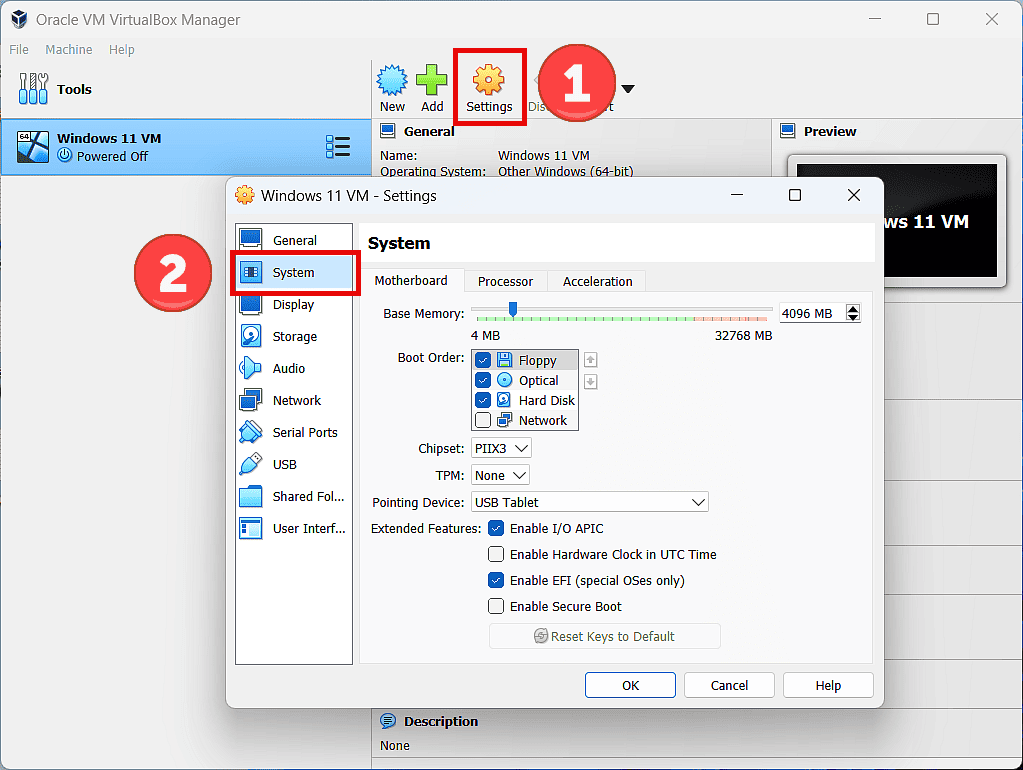
- Click the Settings button (gear wheel) and then click System in the left hand panel.
- In the TPM box, click the drop down arrowhead and select TPM v2. Then enable Secure Boot by checking the box. Click the OK button.
- You’re now ready to install Windows 11 as a virtual machine. Click the Start button to power up the VM.
Installing Windows 11 As Guest In VirtualBox.
So far, what you’ve done is to setup the virtual hardware and point VirtualBox to the location of the Windows 11 ISO file. The virtual machine is currently powered off.
After clicking the Start button, the virtual computer will be powered up and you’ll install Windows 11 onto it.
As the virtual machine boots up, you’ll need to direct your mouse clicks and keyboard toward the VM.
You usually do that by clicking inside the VM window.
To release the mouse and keyboard back to your host computer, press the right hand CTRL (Control) key.
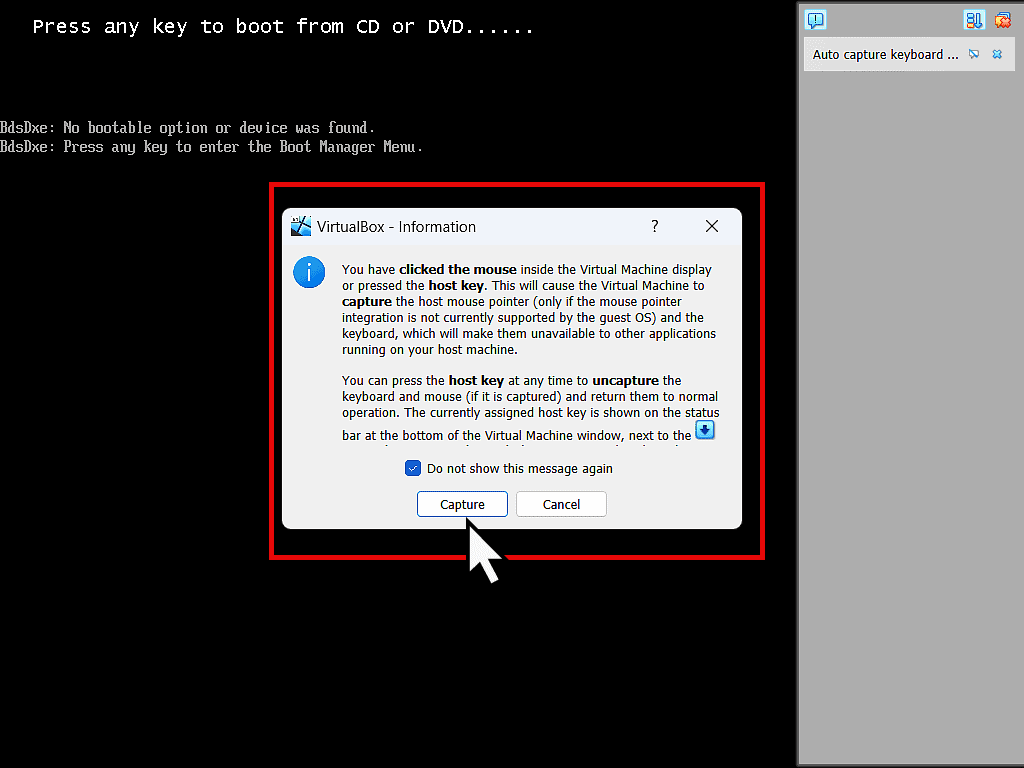
In the VirtualBox Information popup, select “Do not show this message again.” and then click the Capture button.
Rebooting Your Virtual Machine.
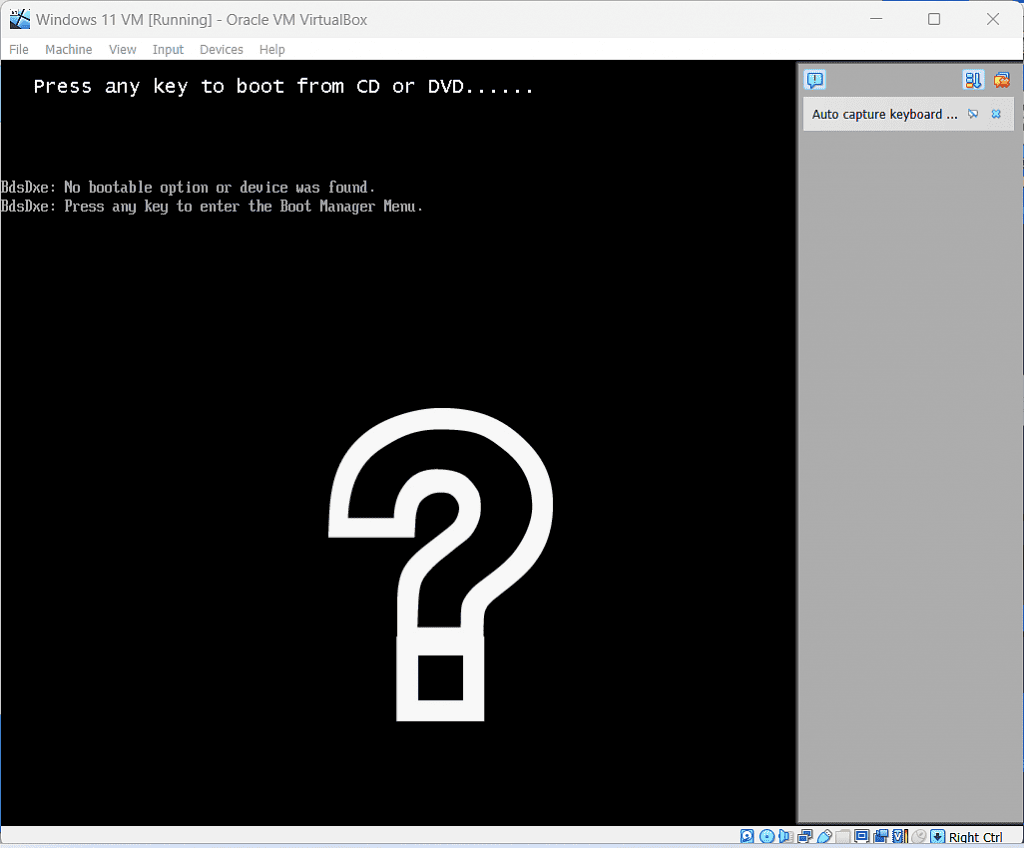
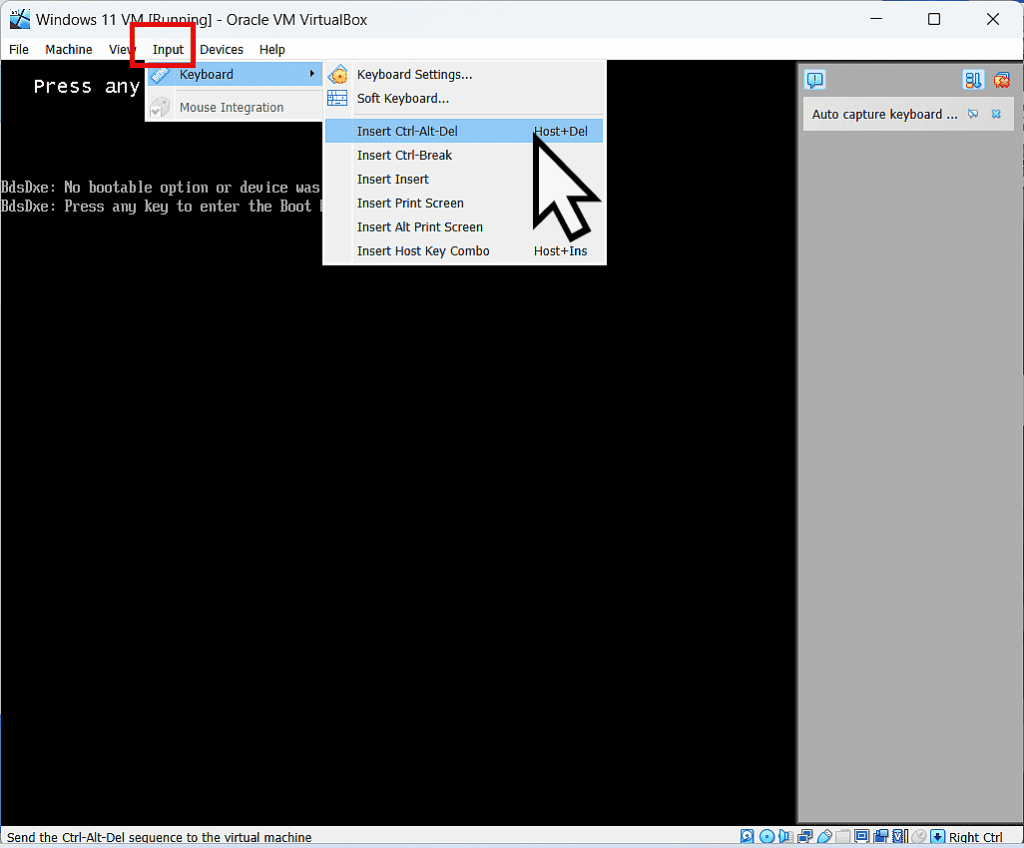
Quite often, you’ll find that you didn’t have time to “Press any key to boot from CD or DVD”. And you’re left facing the “No bootable device” message with no apparent means of restarting the setup.
On the VirtualBox toolbar, click Input. Then hover your mouse pointer on Keyboard and finally click Insert CTRL-Alt-DEL.
That’ll send the CTRL-Alt-Del signal to your VM which will reboot it. This time you should have time to “Press any key etc”.
Windows 11 Setup.
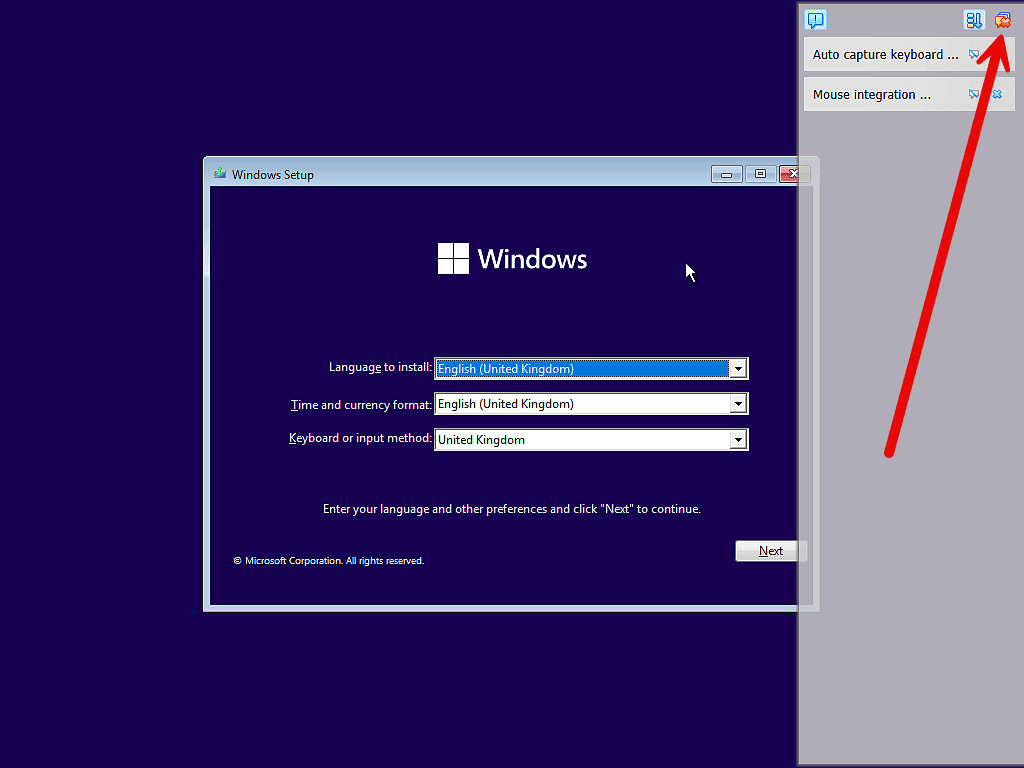
The Windows 11 setup screen will appear.
One thing that can be annoying is the VirtualBox notification panel.
You can get rid of it by clicking the Hide Messages button in the top right hand corner.
Installing Windows 11.
Windows 11 will install onto the virtual machine just as it would onto a “real” machine. Every step, every screen that you’ll see is exactly the same as setting up a real computer.
I have a complete guide for installing Windows here How To Install Windows 10 Or 11 From A USB Drive.
Install The VirtualBox Extension Pack Onto The Virtual Machine.
Once Windows 11 has been installed as your virtual machine, you’ll need to install the VirtualBox Extension Pack. The Extension Pack is basically a set of drivers that will give you better control over the VM.
Just like any other drivers, the Extension Pack has to be installed on the operating system.
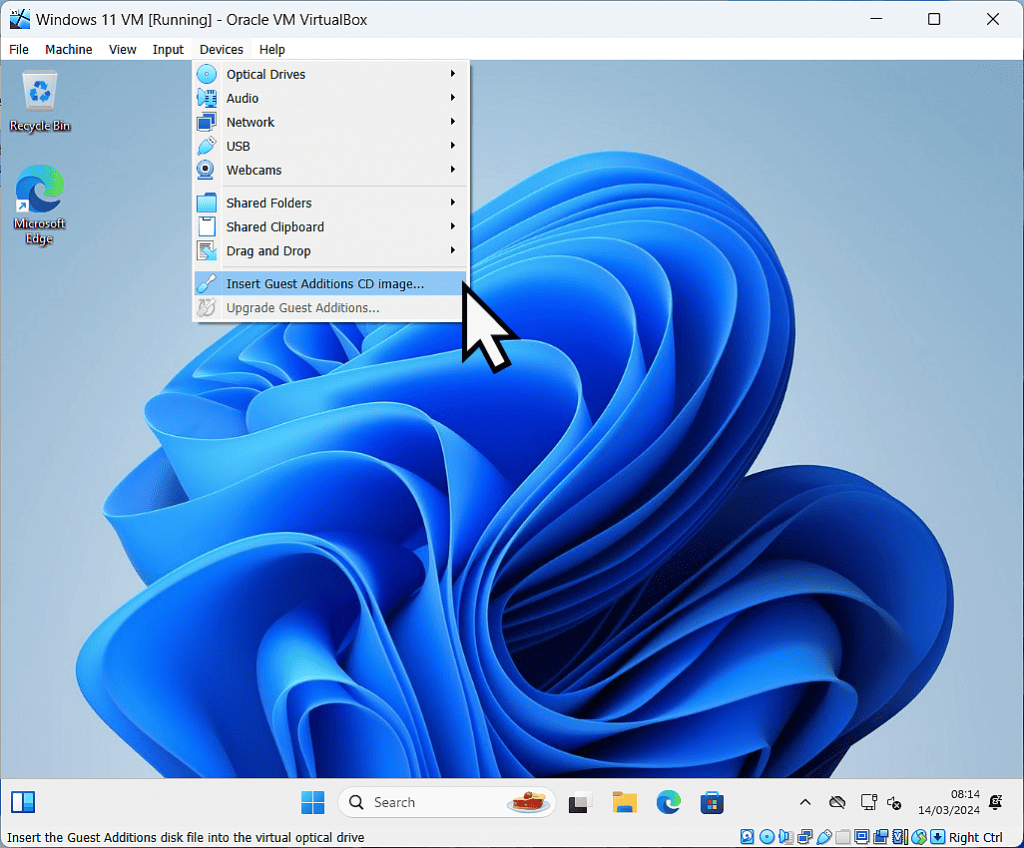
On the VirtualBox toolbar, click Devices.
Then on the menu, click “Insert guest additions CD image”.
That’ll mount the Extension pack as a virtual CD in your VM.
VBox Guest Additions Installation.
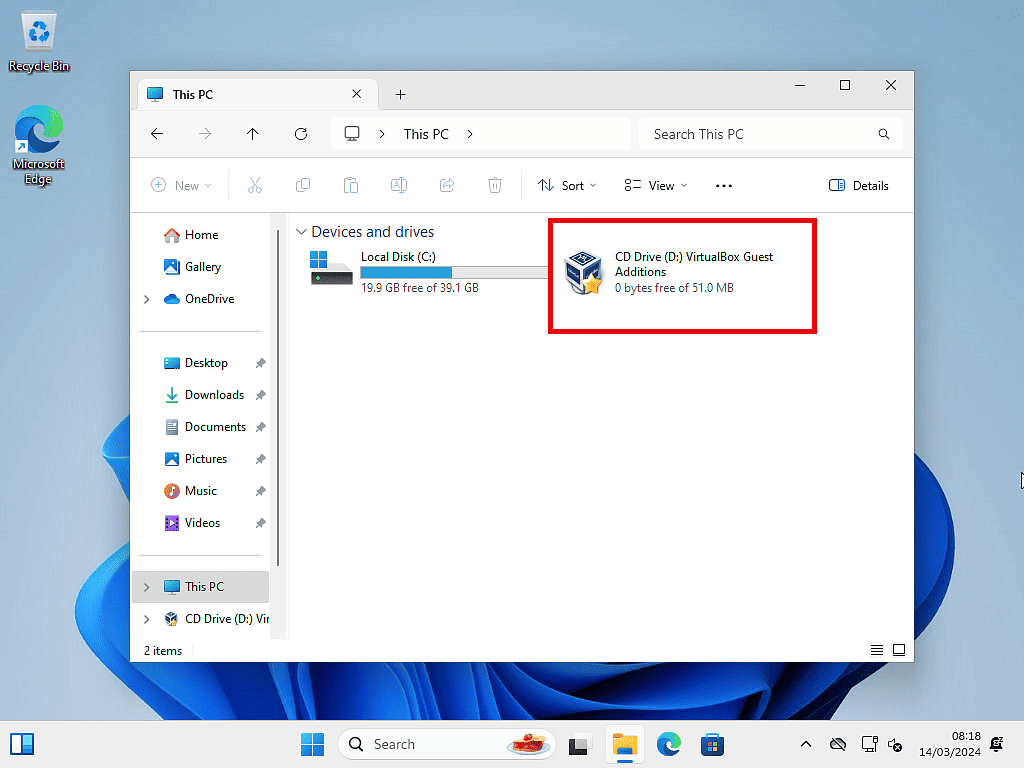
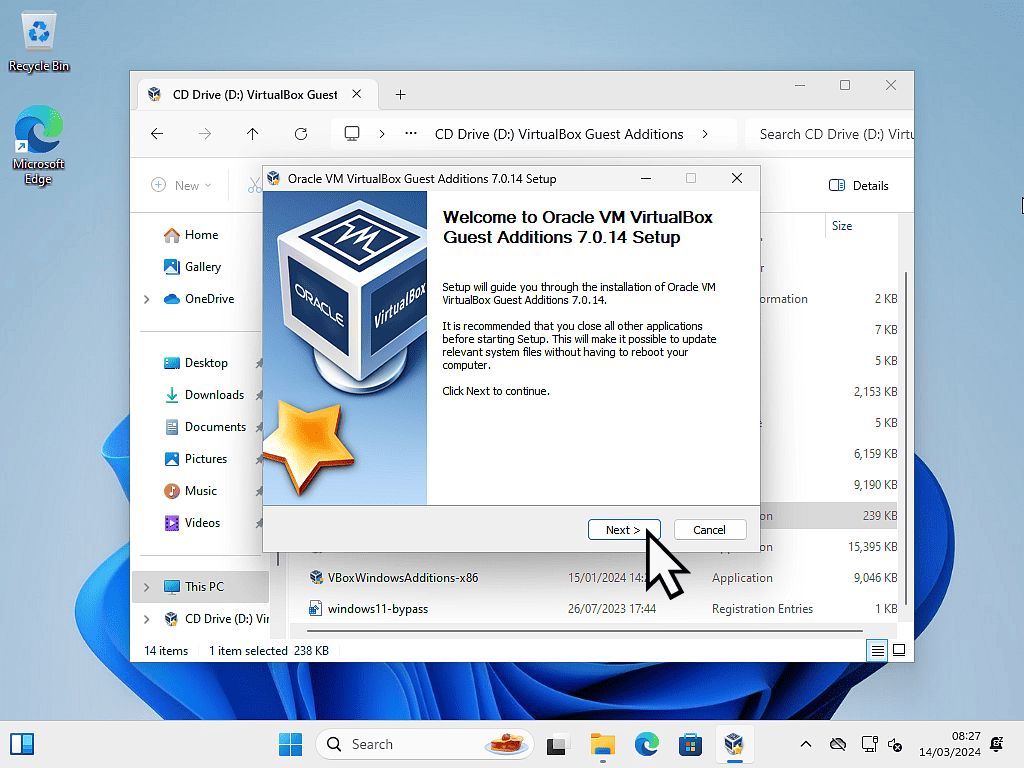
Inside your virtual machine, open File Explorer and you should see the extension pack mounted in a virtual CD drive.
Double left click the CD drive to open the VirtualBox Guest Additions setup.
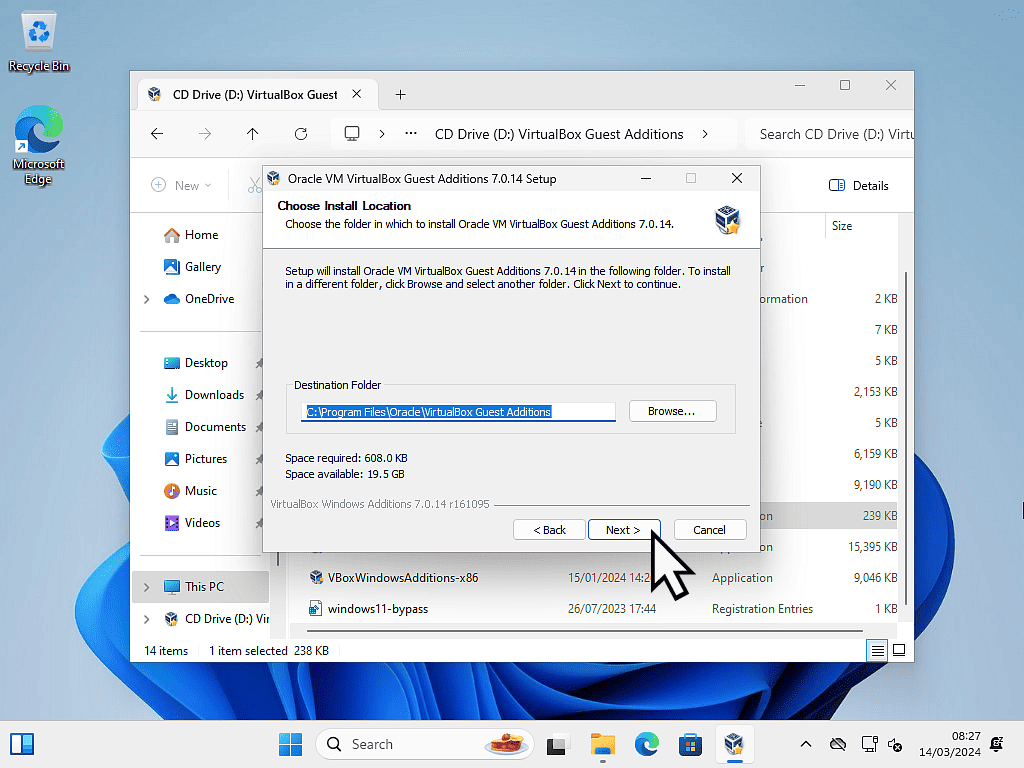
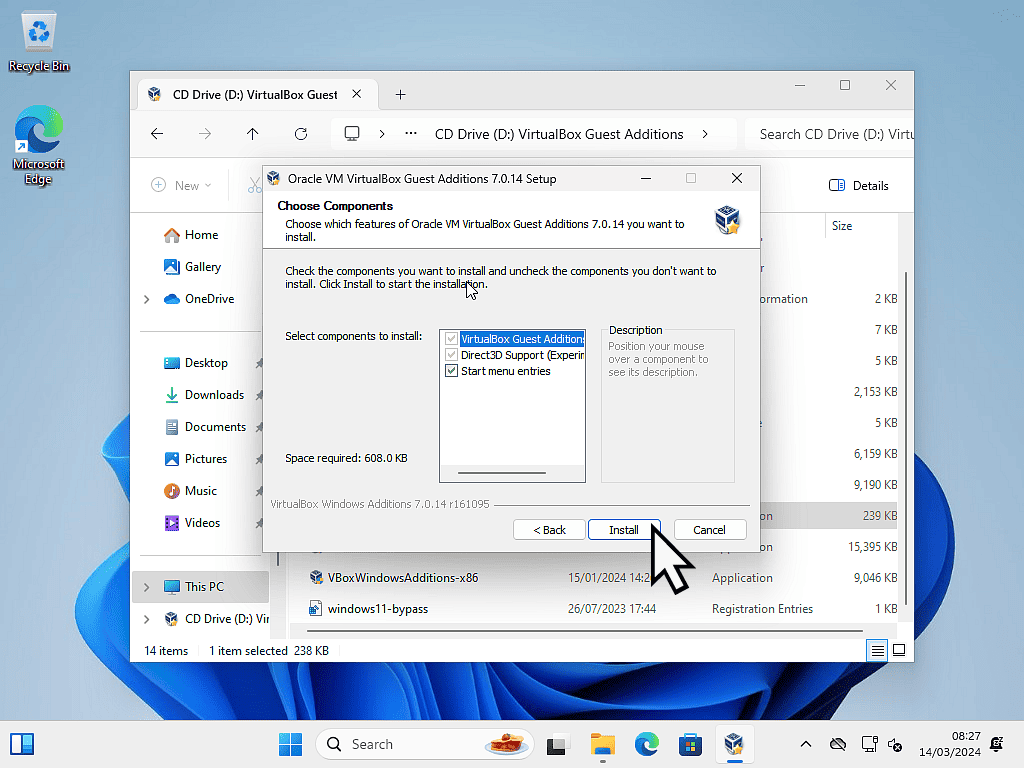
Installing the VirtualBox Guest Additions is pretty much a standard as for any other software. When the setup has finished, you’ll need to reboot your virtual machine.
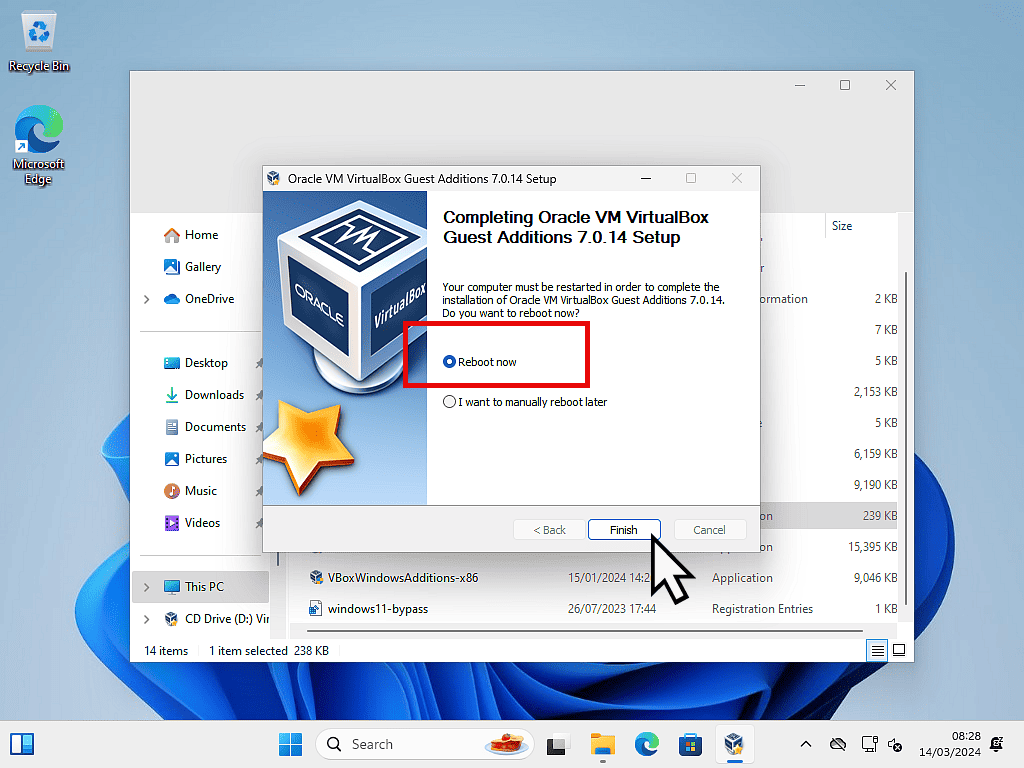
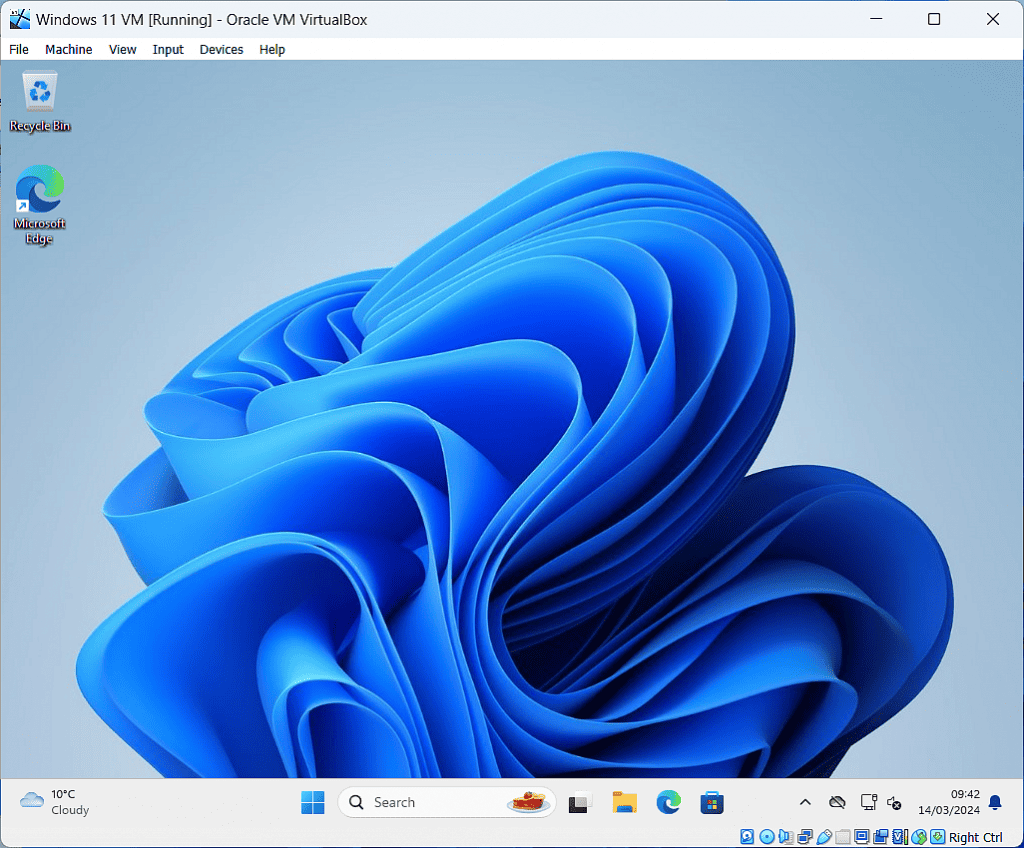
After rebooting, you’ll have a brand new Windows 11 virtual machine.
You can access the Internet, install any software and just use it as you would any other computer.
The only real difference is that as a guest operating system it’s isolated from your host machine.
Keep Up With Home Computer Guides.
All the latest guides and articles published on At Home Computer delivered to your inbox.
No account needed, just add your email address.

