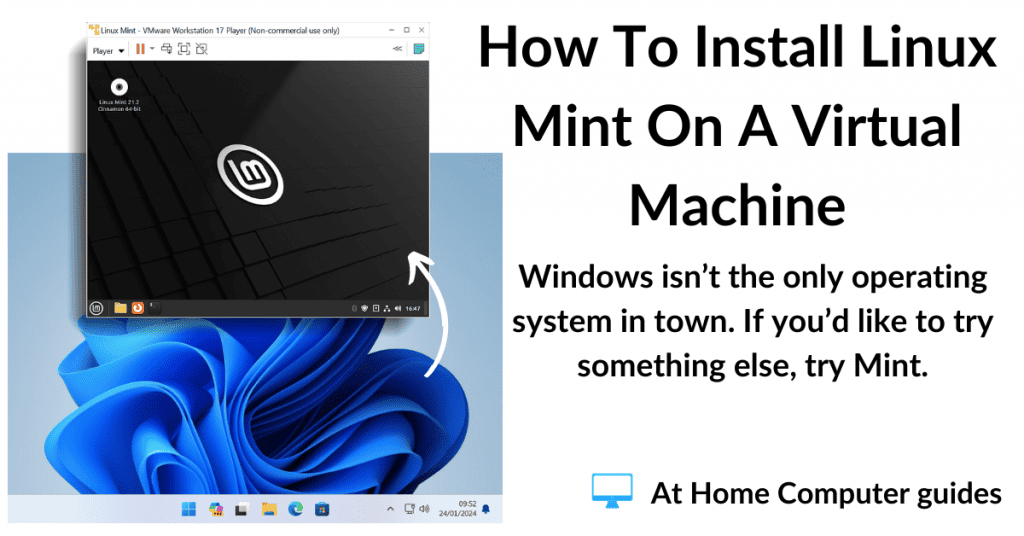
Install Linux Mint as a virtual machine using VMware Player. Linux is a great alternative to Windows but it does have a steep learning curve. However if you install it as a virtual machine, then you can try it out without committing to anything permanent.
There are many Linux distros (distributions) that you can choose from, but I’m reliably informed that this one, Linux Mint, is as close to using Windows as you can get.
Download And Install VMware Workstation Player.
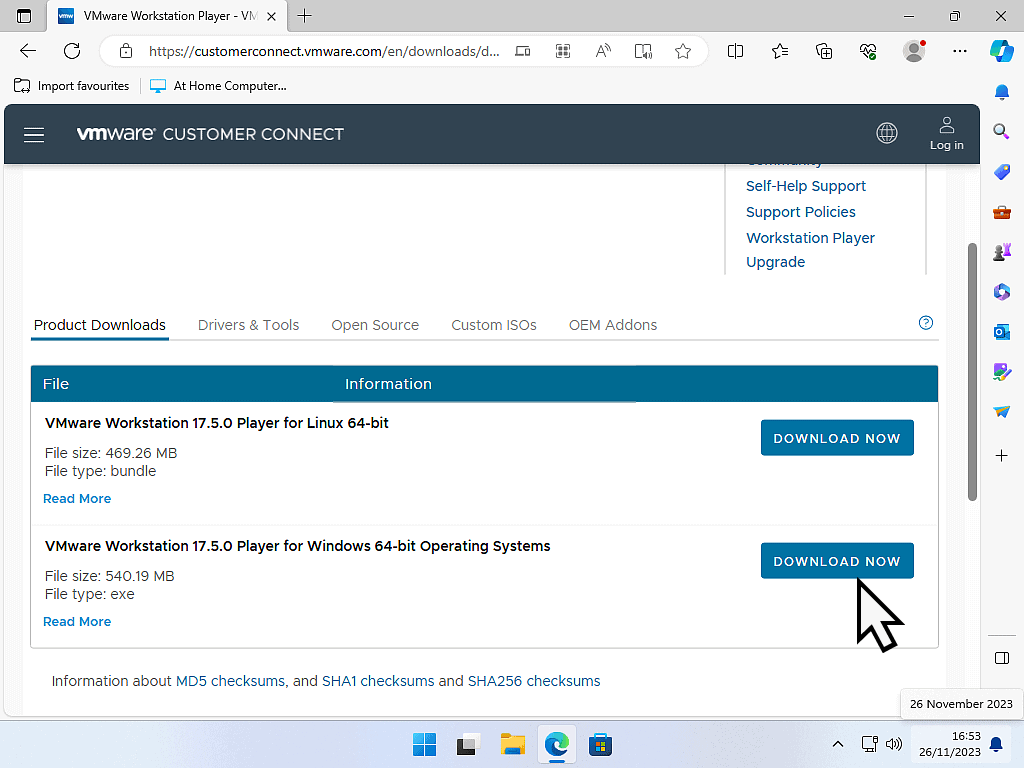
If you haven’t already, download and install VMware Player. It’s completely free to use on your home computer and you don’t need to log in or register or anything like that.
You can download the Player from here or simply search Google for it.
- On the download page, click the Download Now button. Be sure to download the Windows version.
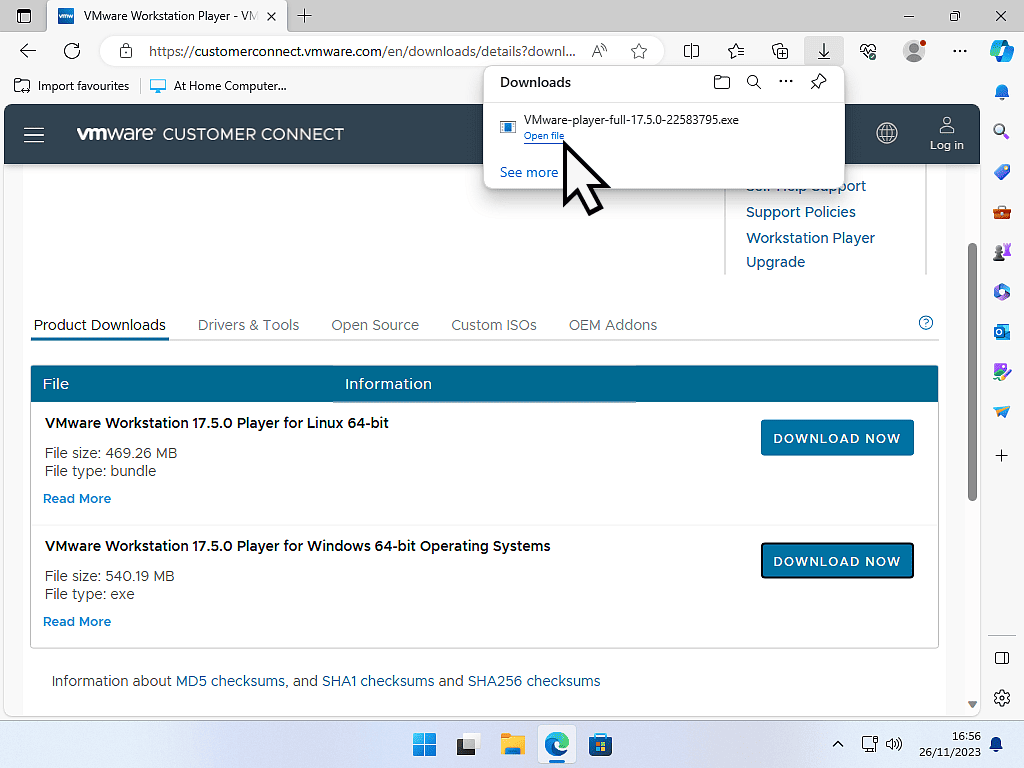
- When the download has finished, start the install process.
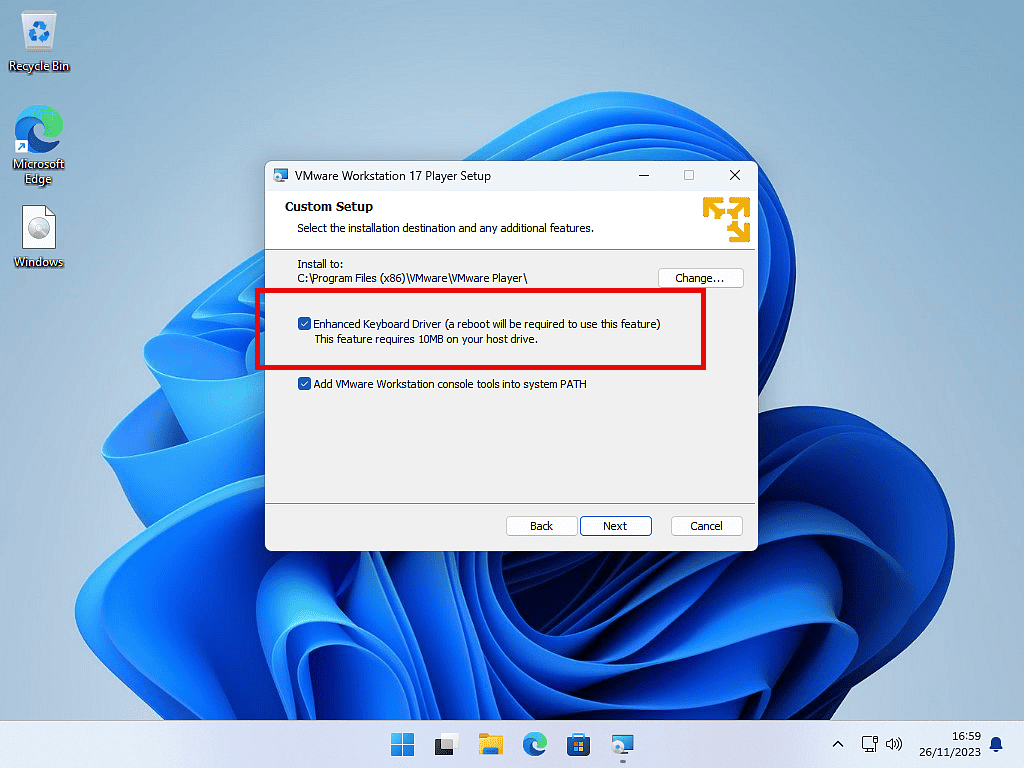
- It’s pretty much a standard installation so I’m not going to detail it all here except to say that you should select the “Enhanced keyboard driver” option. After the installation has finished you’ll need to restart your PC.
Download And Install The Windows Version Of VMware Player.
Even though you intend to install Linux as the virtual machine, you need to install the Windows version of VMware Player. That’s because the Player needs to be installed onto your “real” computer. And if you’re running Windows then you need the Windows version.
Download A Linux ISO.
In order to install any Linux distro as a virtual machine you’ll need to download an ISO of that distro. They’re all available as ISO files so you shouldn’t have any difficulty.
There are many to choose from but for this guide I’m going to use Linux Mint. I’ve chosen to go with Mint because I’m reliably informed by friends that Mint is probably the best option for Windows users to get started with.
You can of course experiment with any Linux distro. I’ll be posting another guide soon for running a more light weight distro for people with computers that have less system resources available.
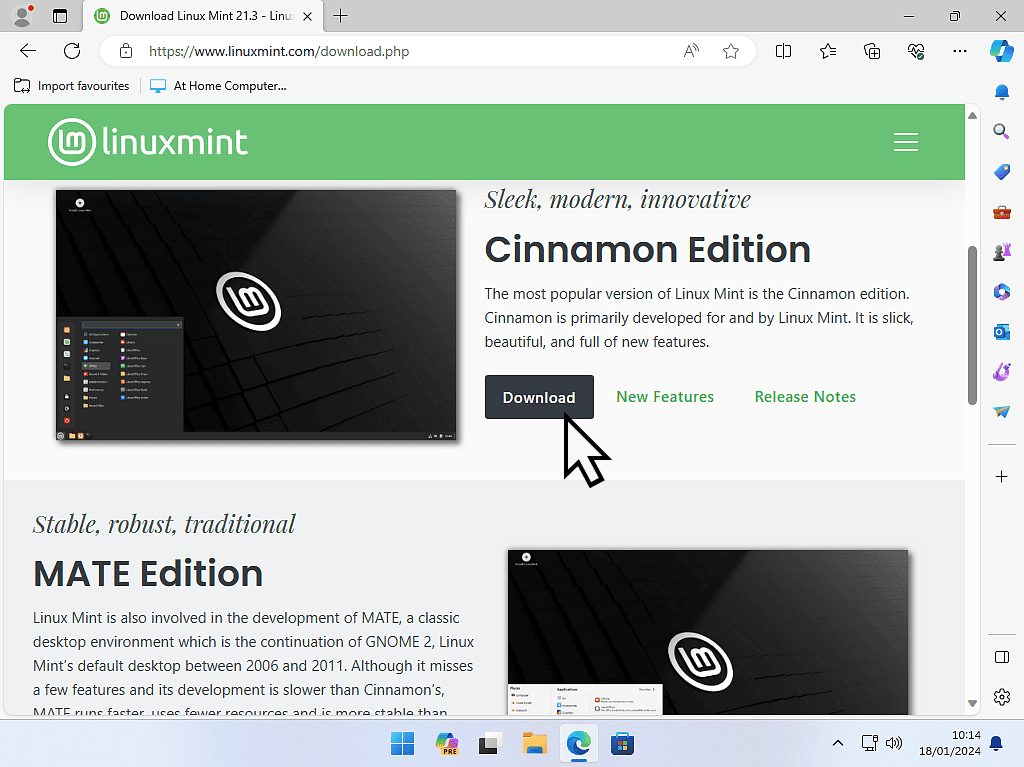
For now though, it’s Linux Mint. You can download the ISO from the link below or by searching Google for it.
https://linuxmint.com/download.php
Linux Mint is available in 3 editions. Cinnamon, MATE and Xfce. Again I’m relying on advise here and downloading the Cinnamon edition.
The ISO is around 3GB in size, so it may take a while to download.
How To Install Linux Mint As A Virtual Machine In VMware Player
Now that you’ve installed VMware Player and also downloaded the Linux Mint ISO (or whichever Linux distro you’re going with) it’s time to create a virtual computer.
Open VMware Player.
In the left hand panel you’ll see all your other virtual machines (if you have any).
Using VMware Player, you can create as many VMs as you want or need and using any operating system.
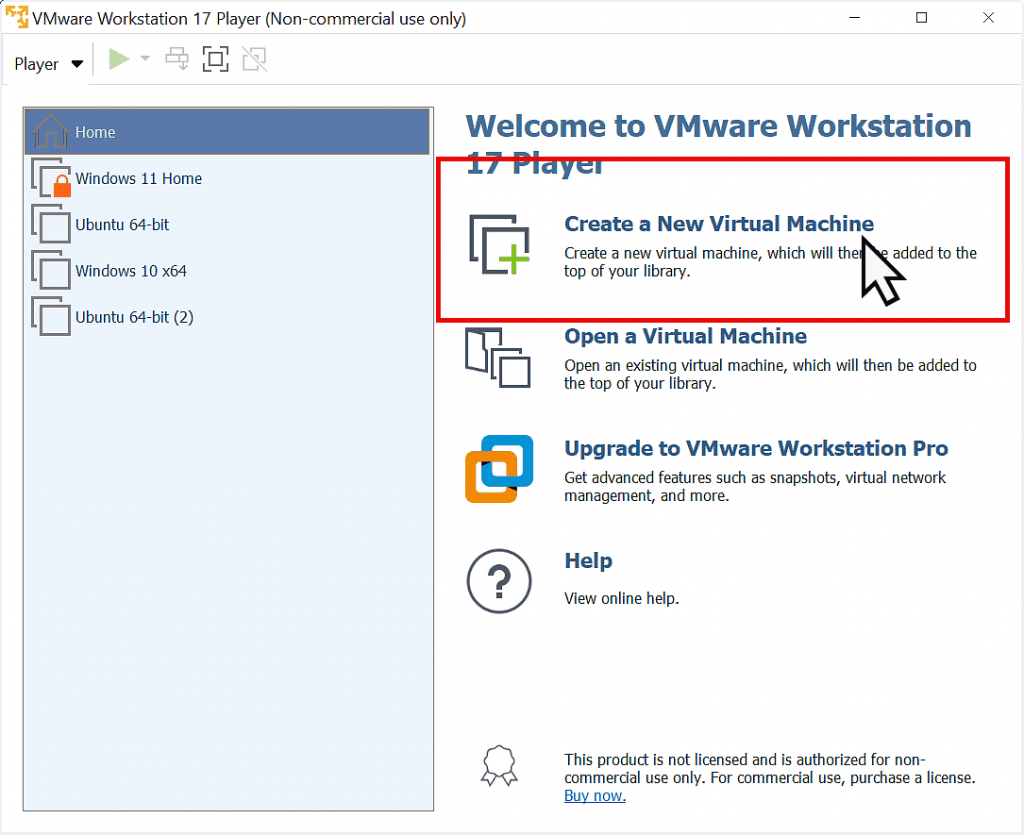
To get started creating your Linux Mint VM, click “Create a New Virtual Machine” in the right hand panel.
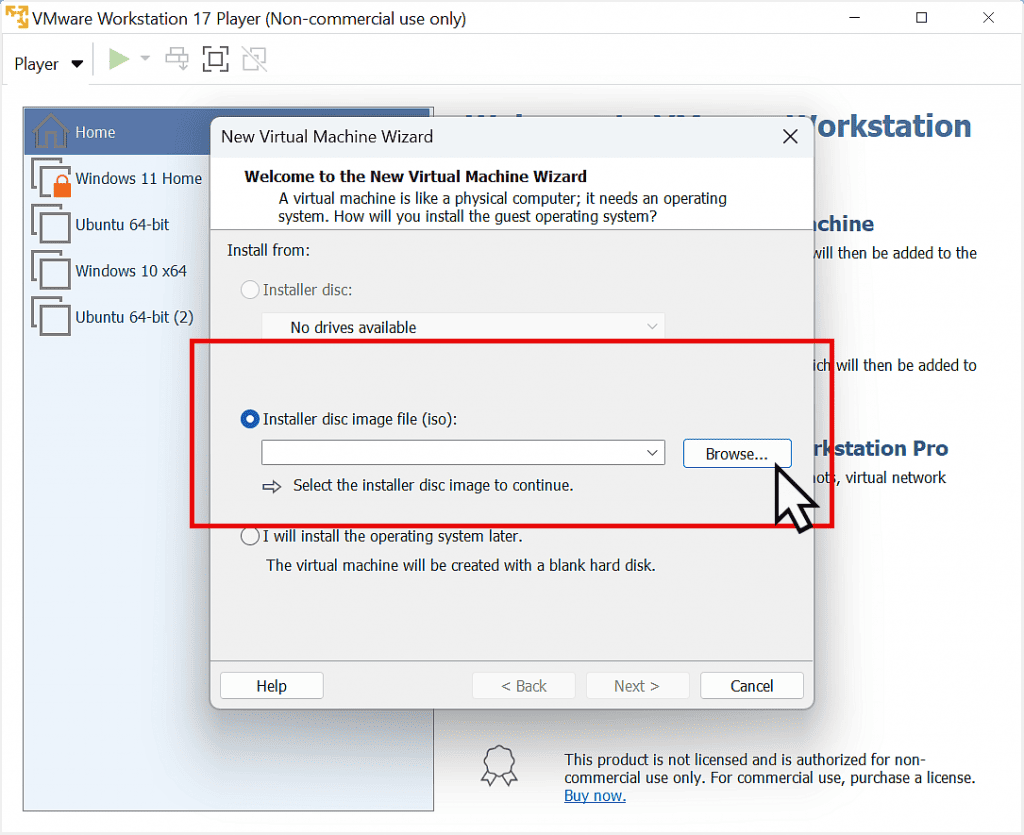
The New Virtual Machine Wizard Opens.
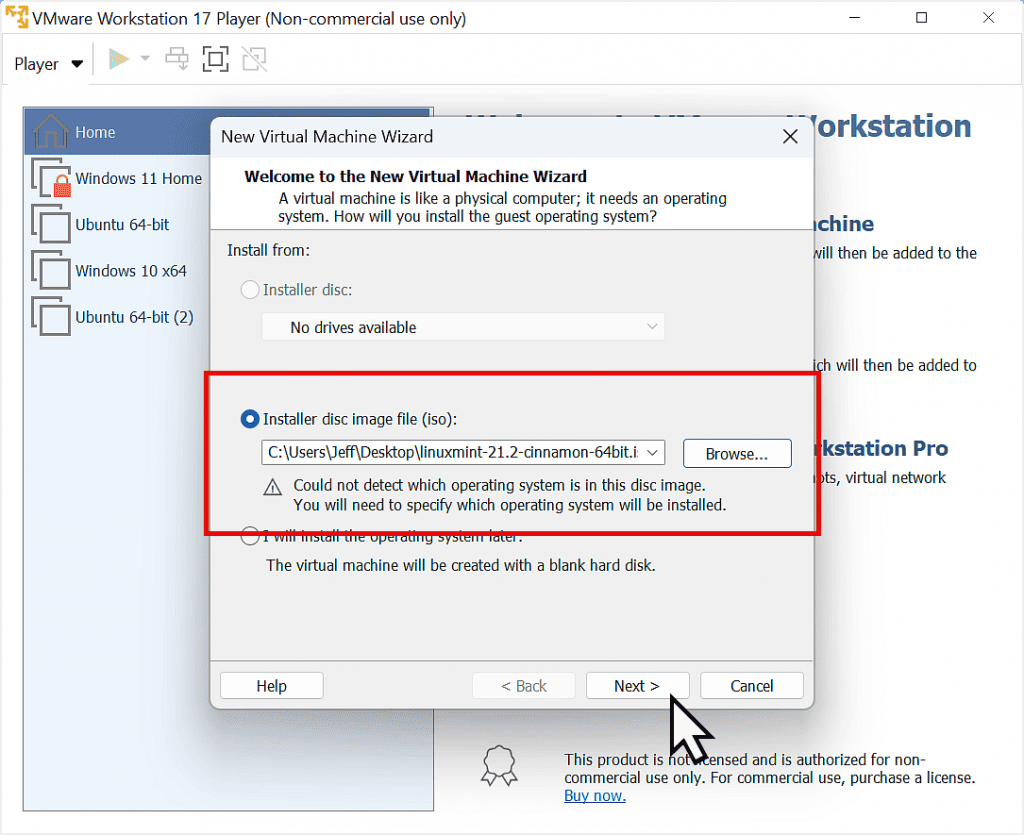
The VMware Player “New Virtual Machine Wizard” will open. Select the “Installer disc image file (ios) option by clicking the radio button. Then click the Browse button to locate the ISO file for Linux Mint that you downloaded earlier.
Once you’ve loaded the ISO file, click the Next button.
Select A Guest Operating System.
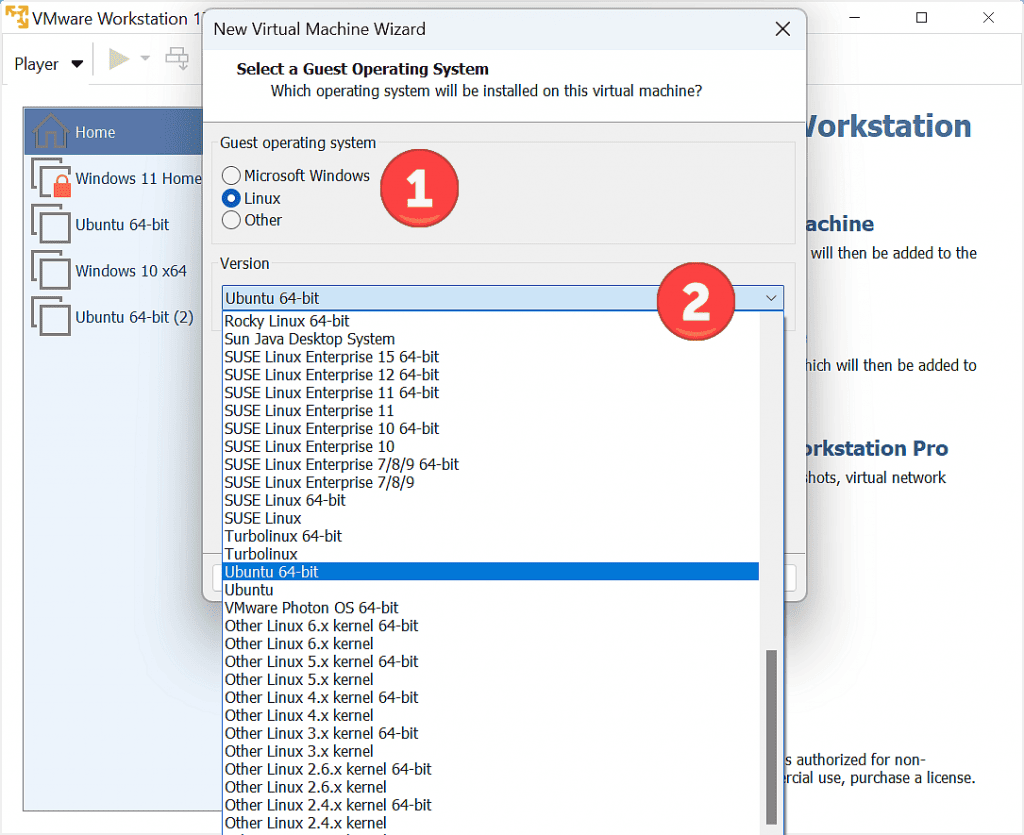
For the guest operating system, select Linux (if it isn’t already selected).
Then for the version, click the drop down arrowhead and select Ubuntu 64-bit.
Although in this guide we’re actually creating a Linux Mint virtual machine, Mint is based upon Ubuntu. So that’s the version you need to select.
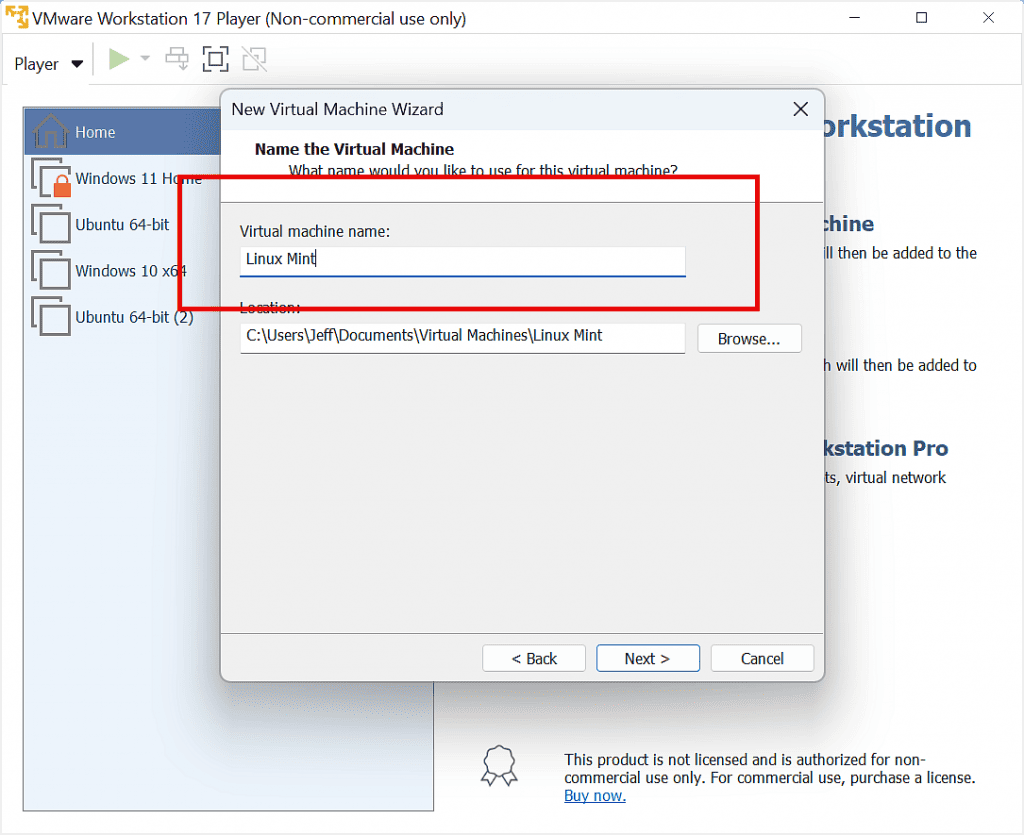
Naming Your Virtual Machine.
You can give each virtual machine that you create a name to help you to differentiate between them.
If you’re only going to create a single VM, then naming it isn’t really an issue, but if you’re planning on having several, then a descriptive name will help.
By default, VMware Player will assign a standard name for your new virtual machine.
Click in the Virtual Machine Name box and type in a new name if you want to change it. Otherwise just leave it as is.
Click the Next button.
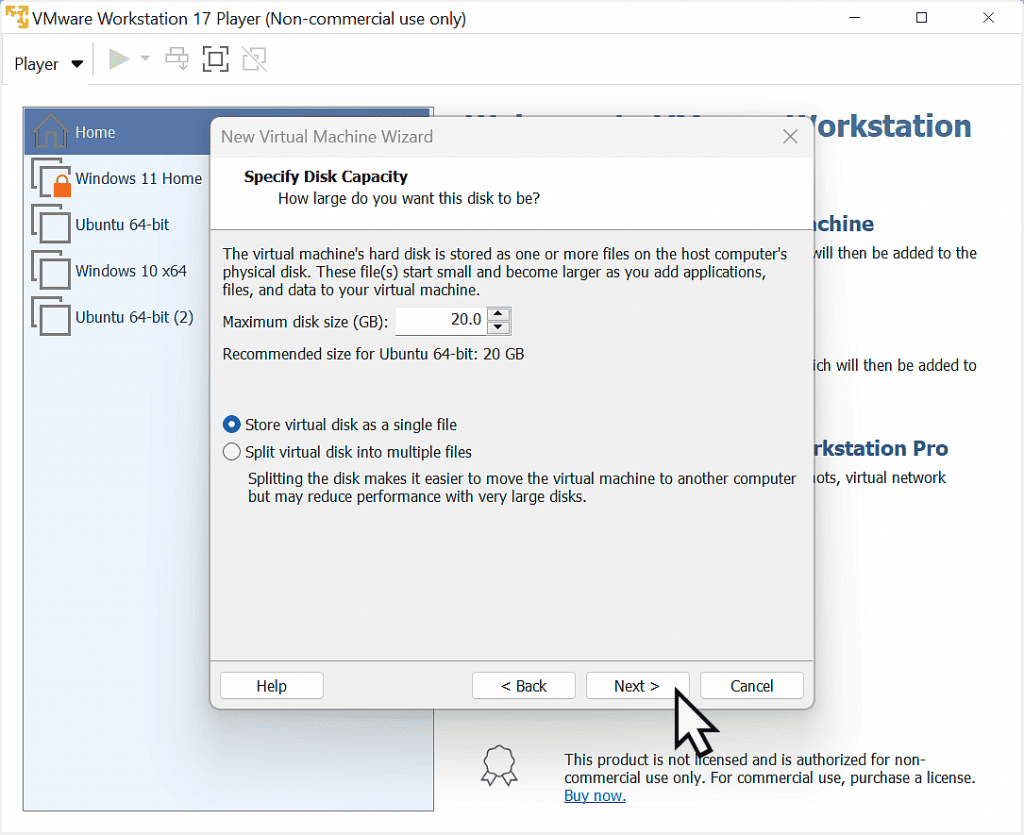
Specify A Disk Capacity For Your VM.
The virtual machine will need a virtual hard disk. Specify the capacity in Gigabytes that you think you’ll require. It can be changed later if needed.
You have the option of either storing the virtual drive as a single file or splitting it into multiple files.
It’s not a make or break choice since both work well. For me, I prefer to keep the drive as a single file.
Installing Linux Mint As A Virtual Machine.
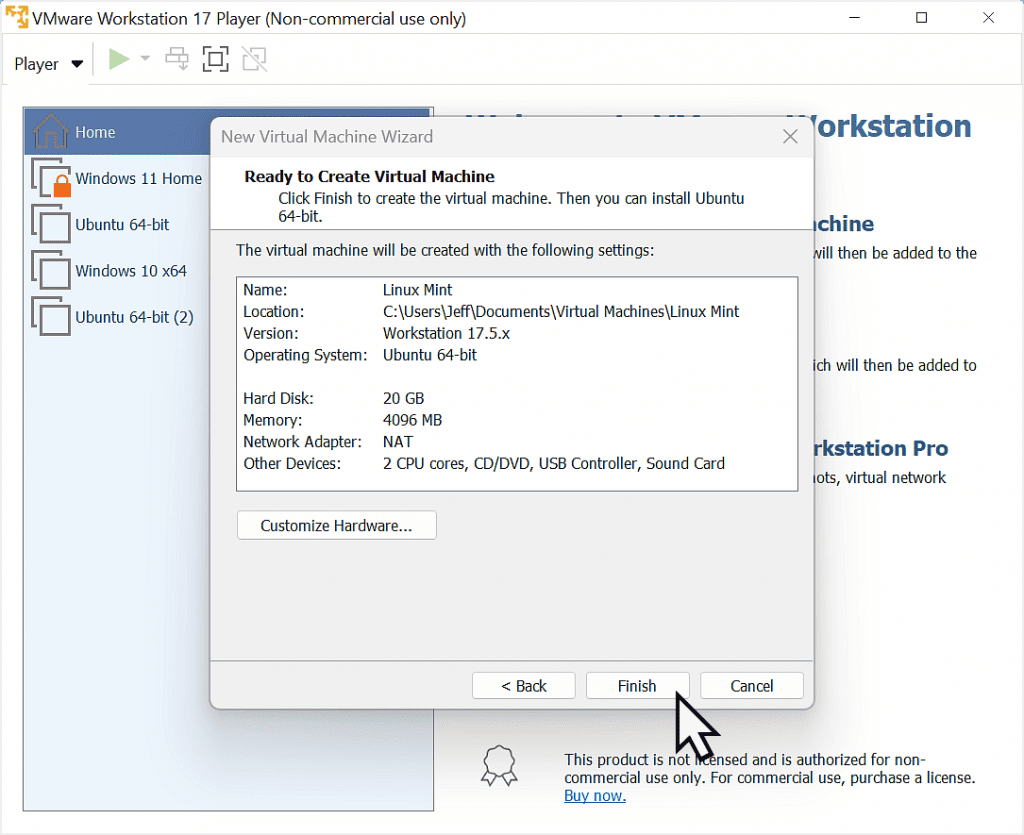
VMware Player has now created your virtual machine. Now it’s time to get Linux Mint installed onto it.
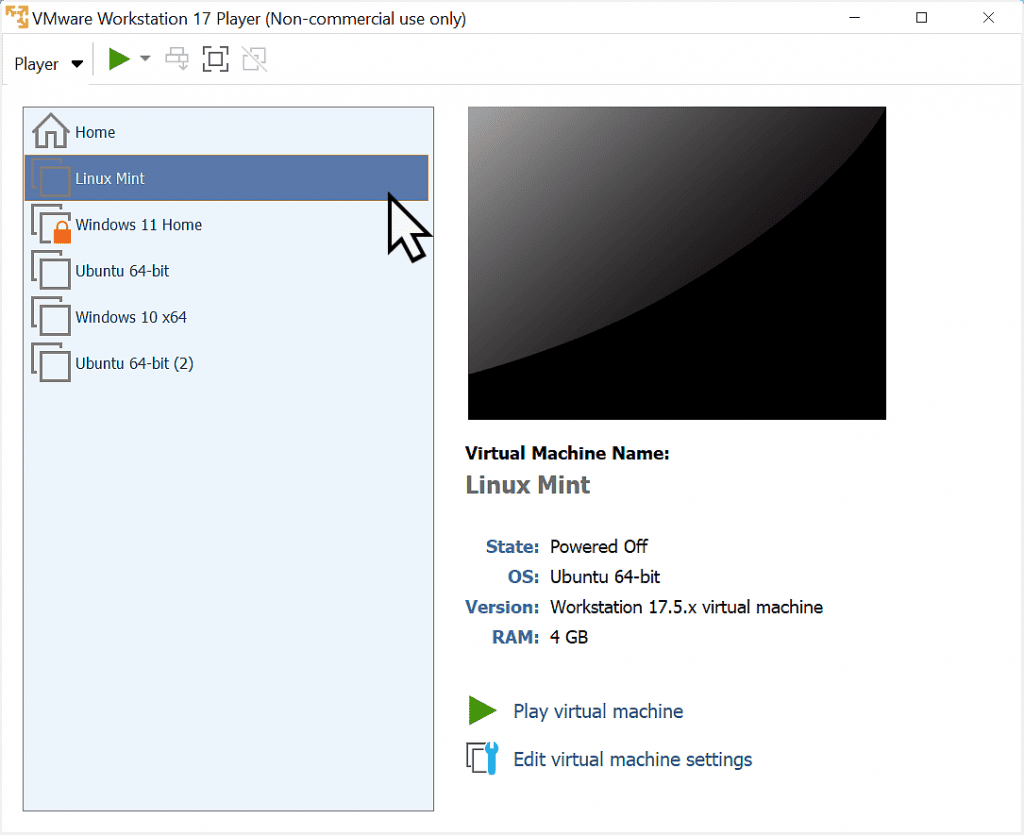
In the left hand panel of VMware Player you’ll see a new entry for the VM you just created.
Double left click on it.
Starting Linux Mint.
Up until now all your mouse clicks and keyboard strokes are sent to your host computer (your real computer). However you now need to send all your inputs to the guest computer (virtual computer).
To send keystrokes and mouse clicks to the guest, simply left click once inside the guest window. The virtual machine will then “grab” all further keystrokes and clicks.
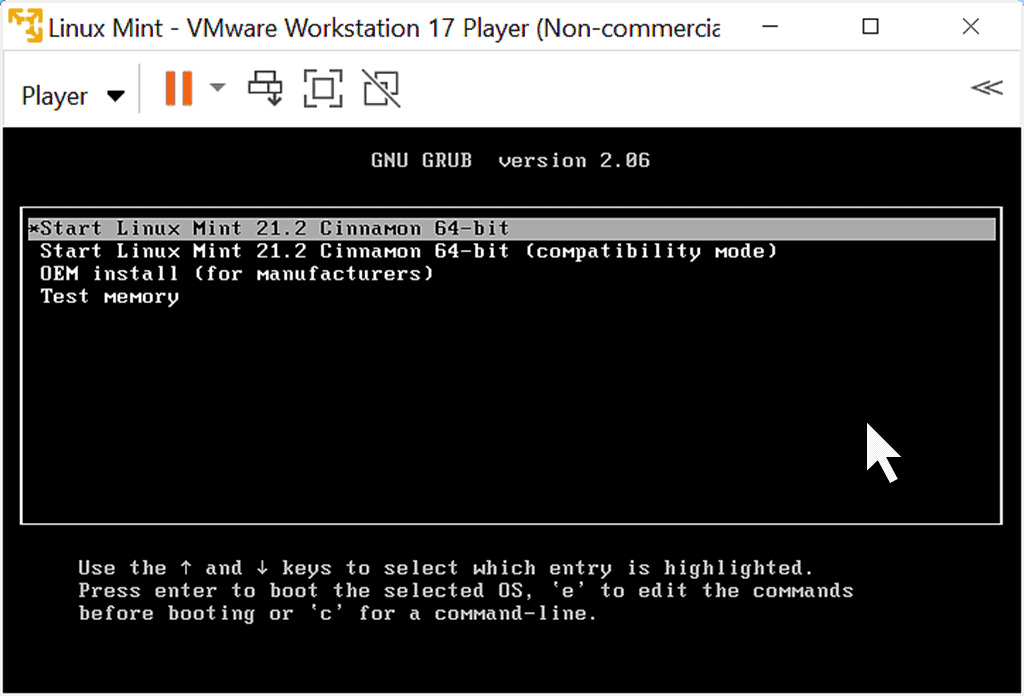
So to start Linux Mint in your virtual machine, left click once in the window and then press the Enter key on your keyboard.
How To Release Keystrokes & Mouse Clicks.
After left clicking in the VM window, all your keystrokes and mouse clicks are sent to the virtual machine rather than your “real” computer.
To release the mouse and keyboard from the VM and back to the host computer, press the CTRL and Alt keys at the same time.
Linux Loads As A Live CD/DVD.
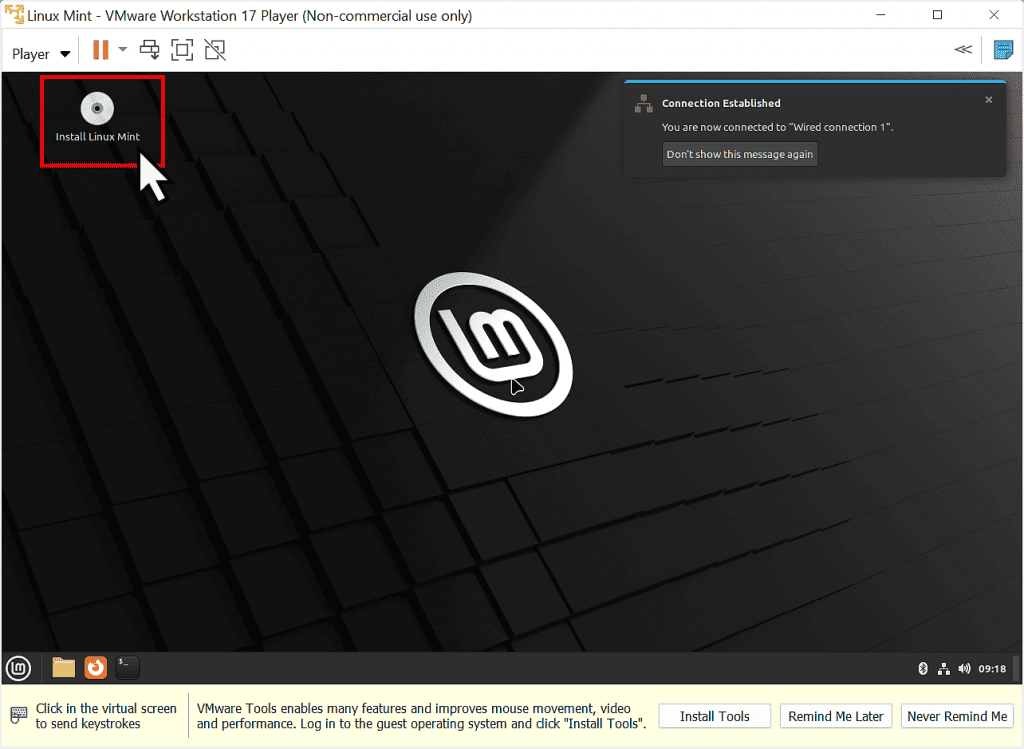
After a few moments you’ll see Linux Mint load up. The desktop will appear. But Mint isn’t actually installed on your virtual machine yet.
Instead, what it’s done is to load as a “live CD”. That is, it ‘s running directly off the ISO file that you downloaded earlier. It isn’t installed on your virtual hard drive.
To instal the operating system onto your virtual machine, double left click the “Install Linux Mint” icon in the top left corner of the desktop.
That’ll start the installation process.
Live CD/DVD/ISO.
Many Linux distros use the concept of a live CD/DVD, or in this case a live ISO file. The operating system runs in RAM rather than being installed on the virtual hard drive.
The Installation Process.
Installing Linux Mint onto a virtual machine is exactly the same as installing it onto a real computer. Other Linux distros will be similar.
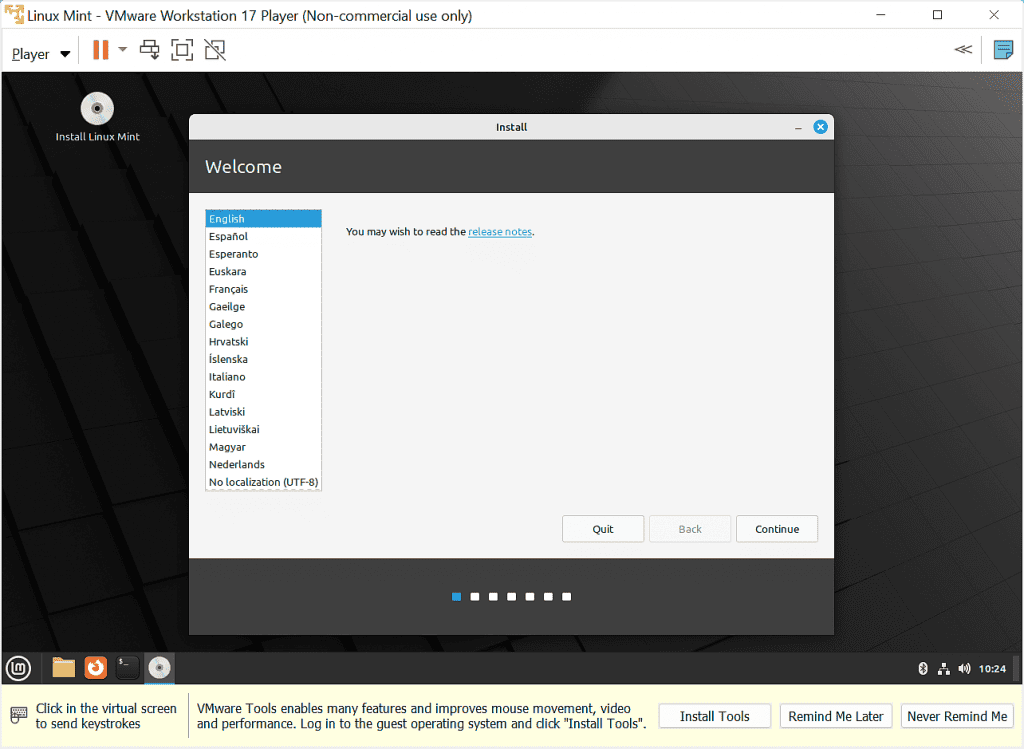
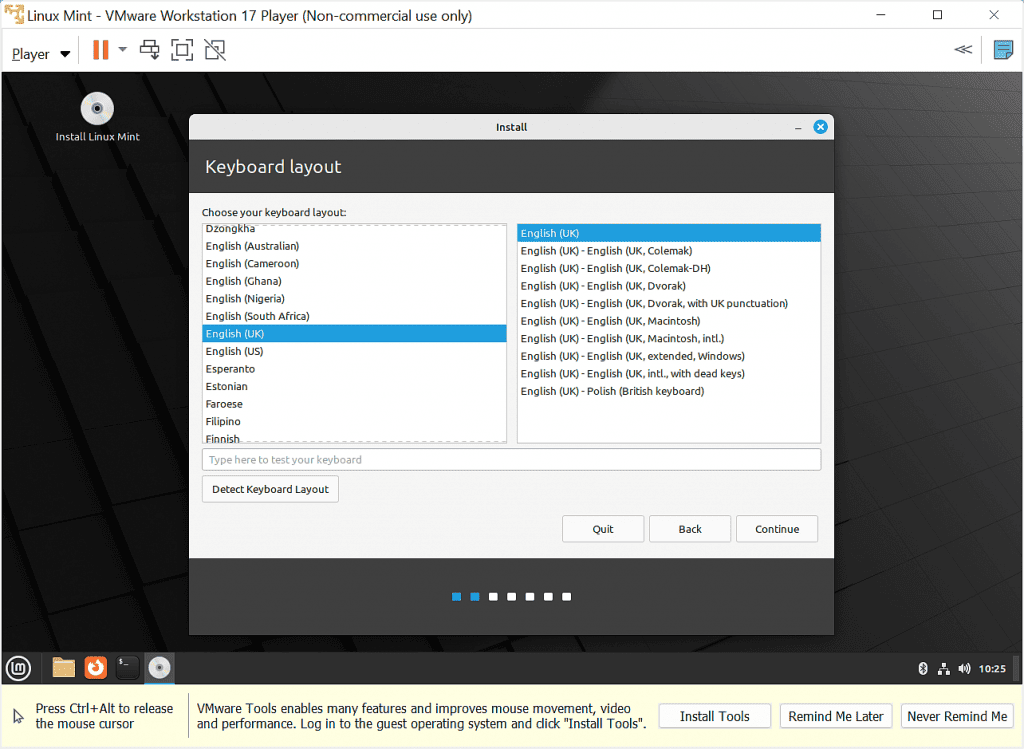
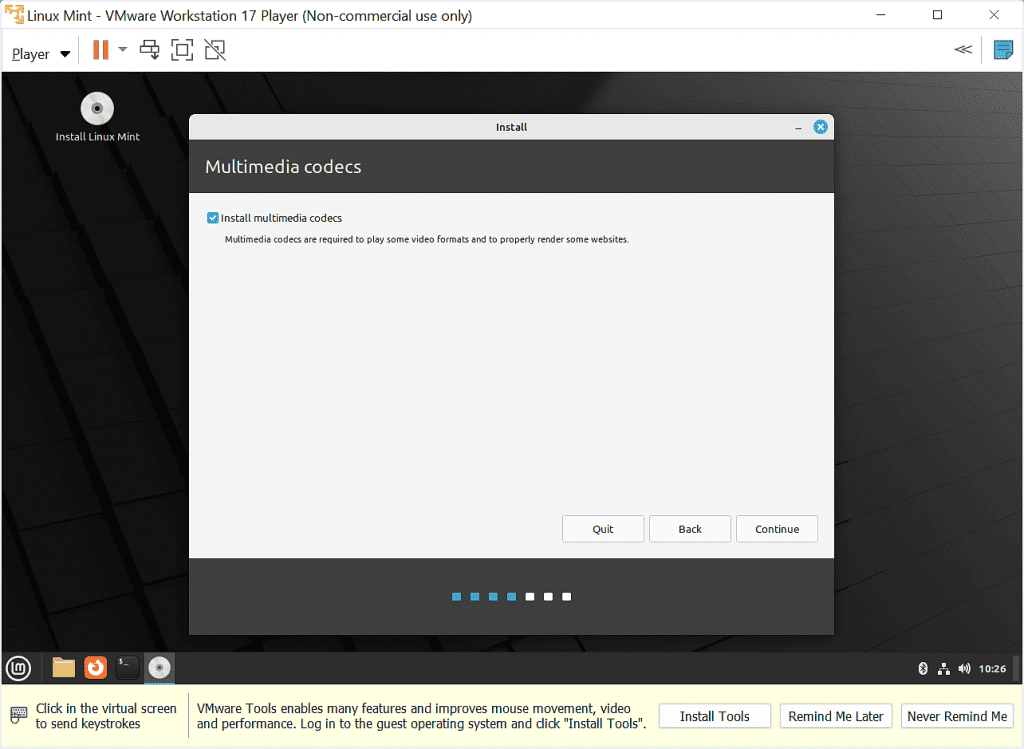
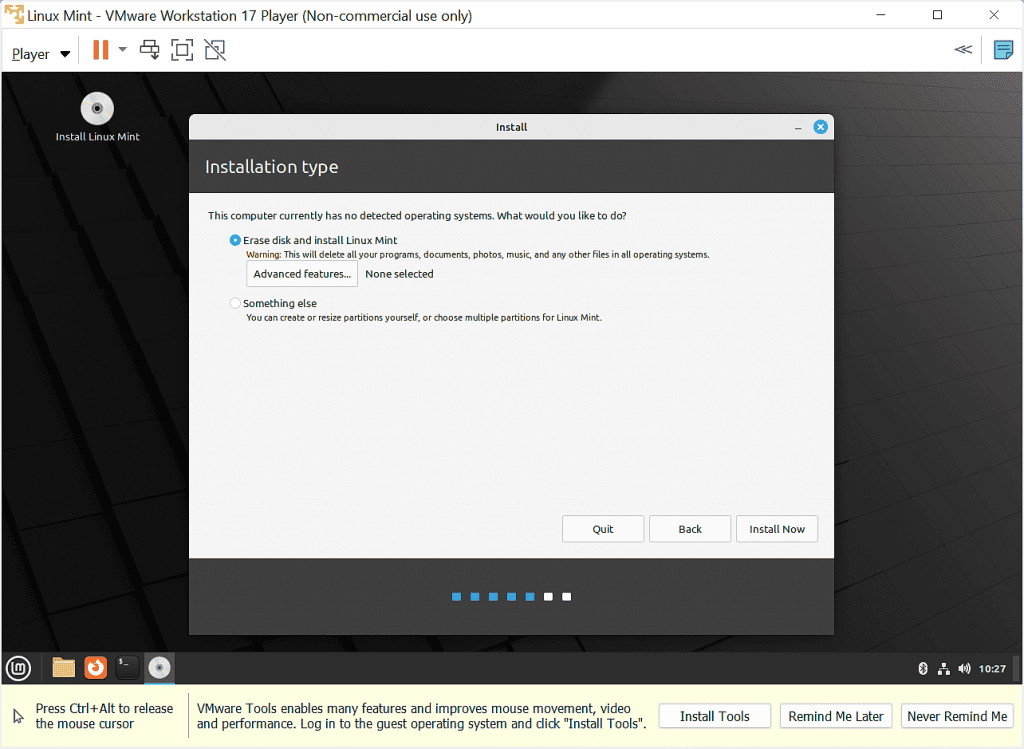
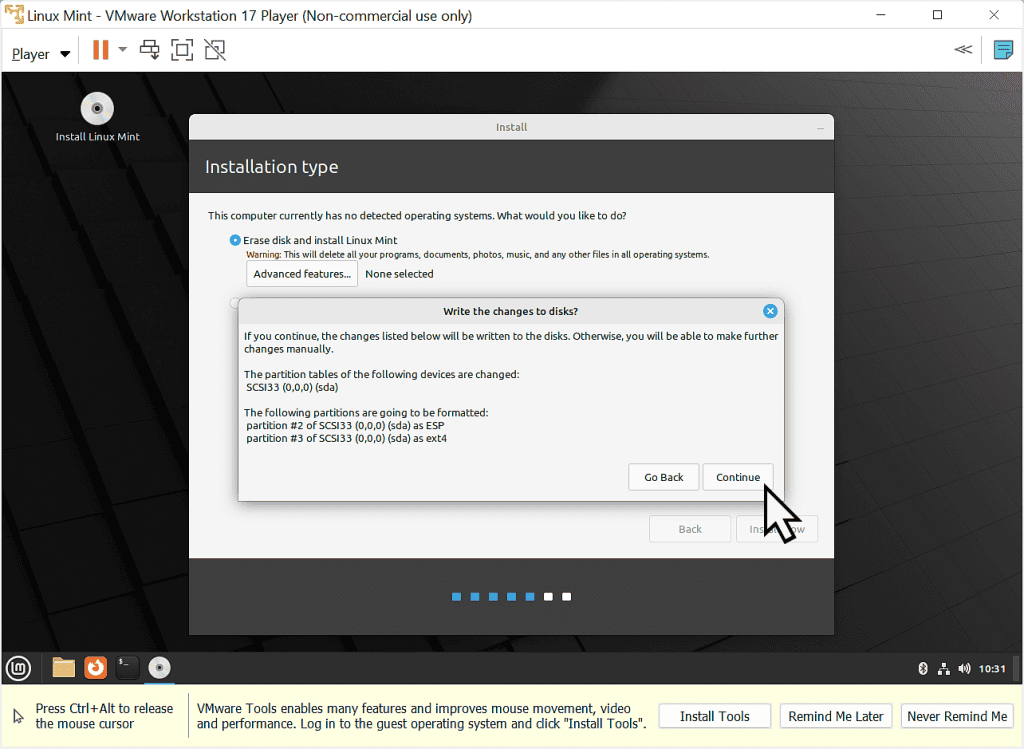
Linux mint will throw up a warning that changes are going to be made to your hard drive.
On a real computer, you should take notice.
But this is a virtual computer. The virtual drive is completely empty at the moment.
Click the Continue button.
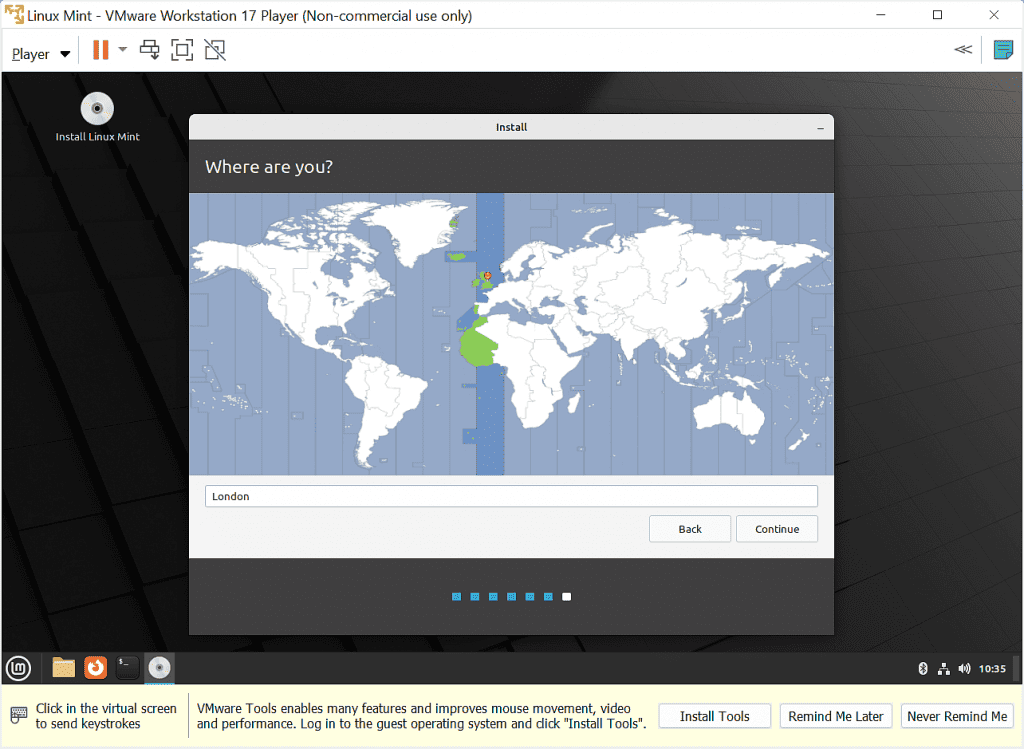
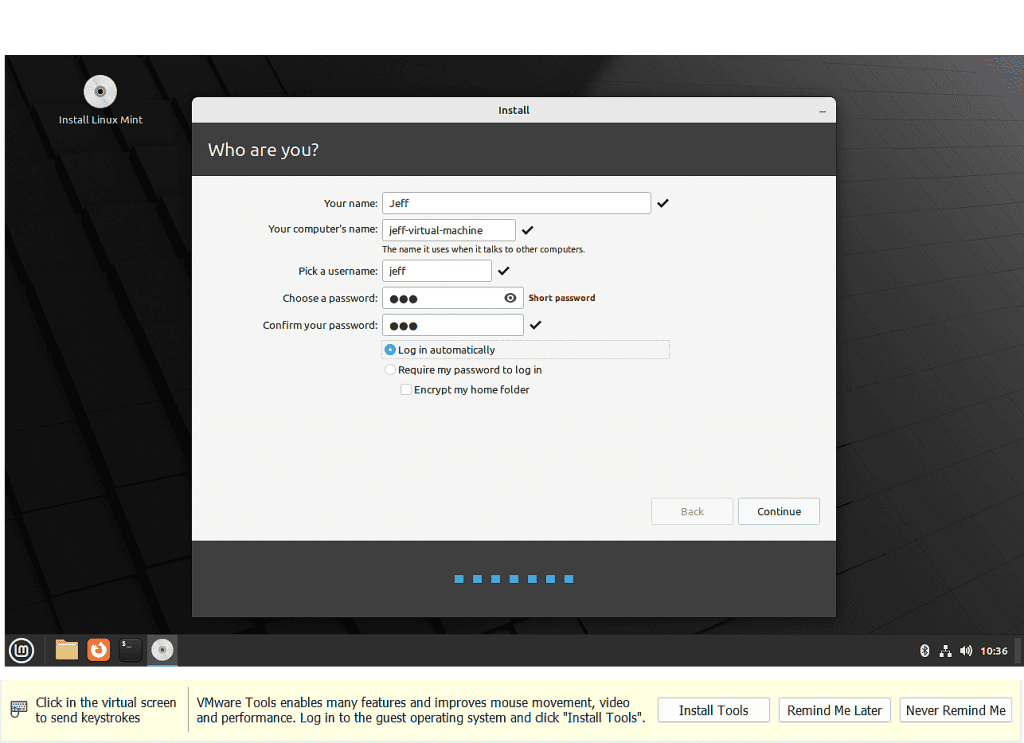
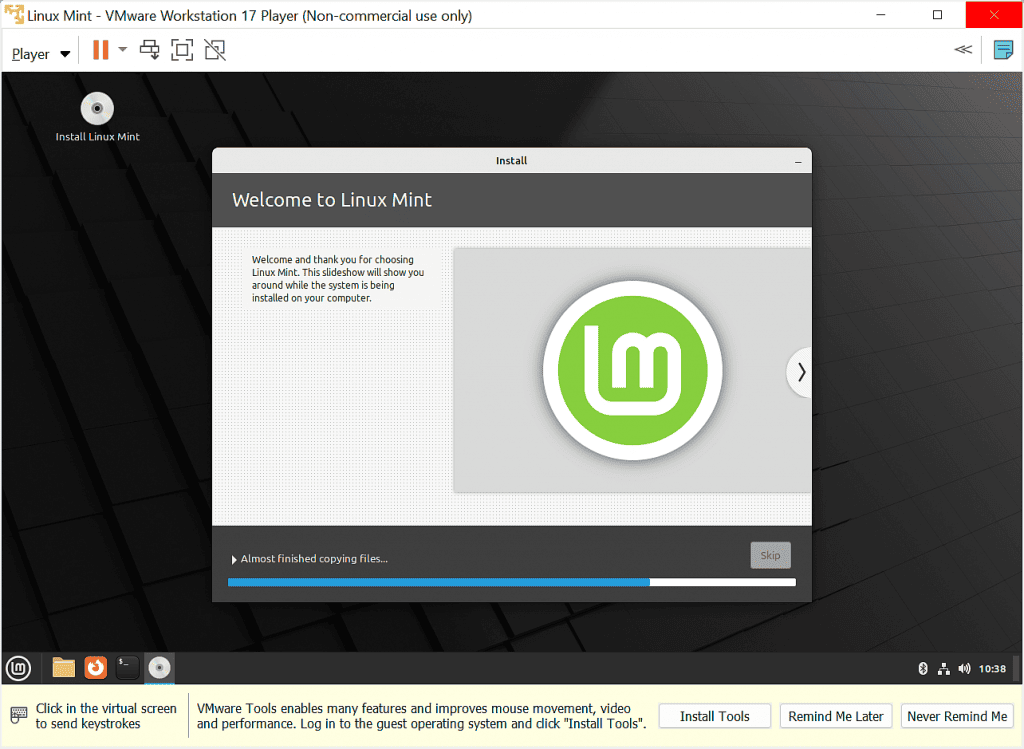
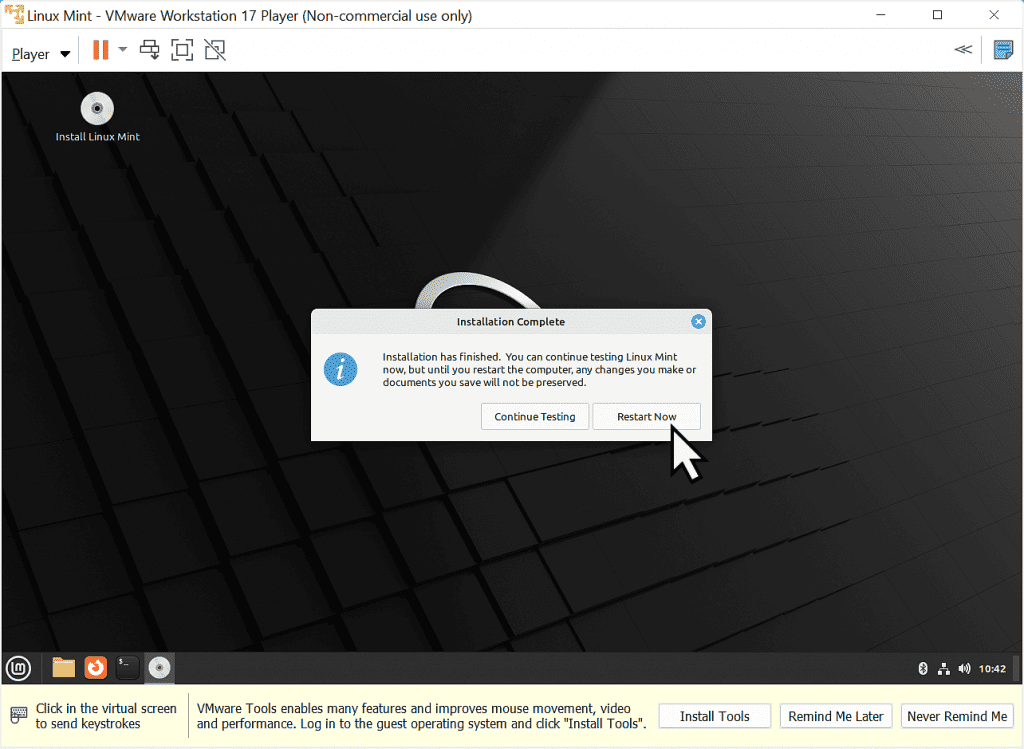
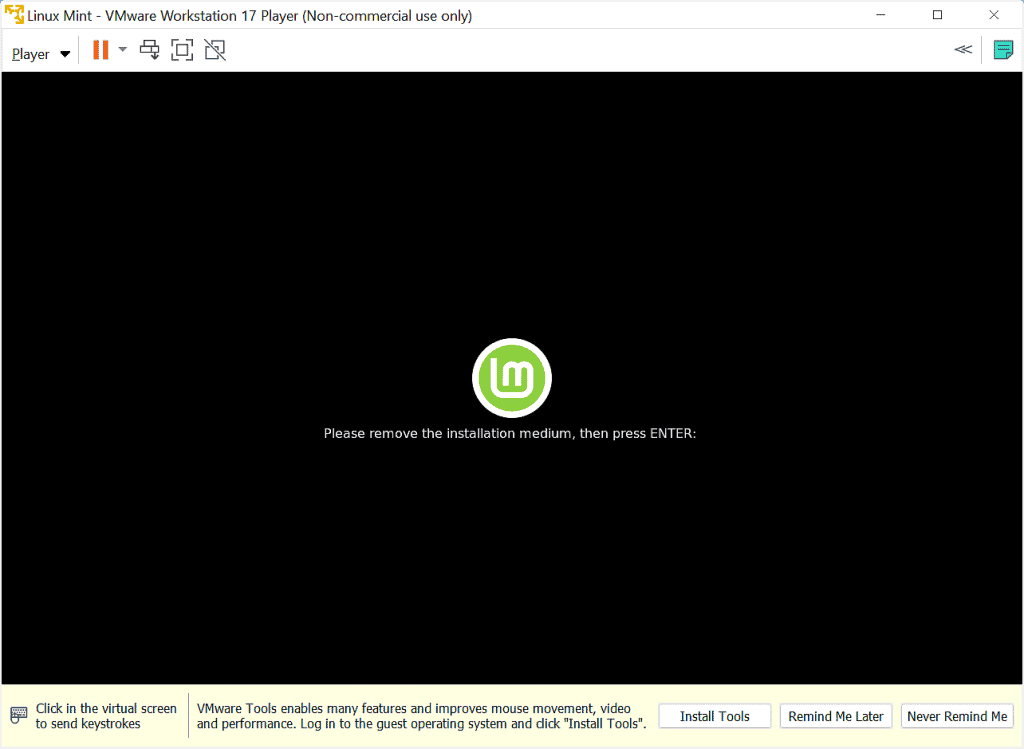
If you were installing Linux Mint from a physical drive, you’d need to remove the drive before pressing the Enter key.
But since this is a virtual computer you don’t need to do anything. Simply hit the Enter key on your keyboard.
Welcome To Your Linux Mint Virtual Machine.
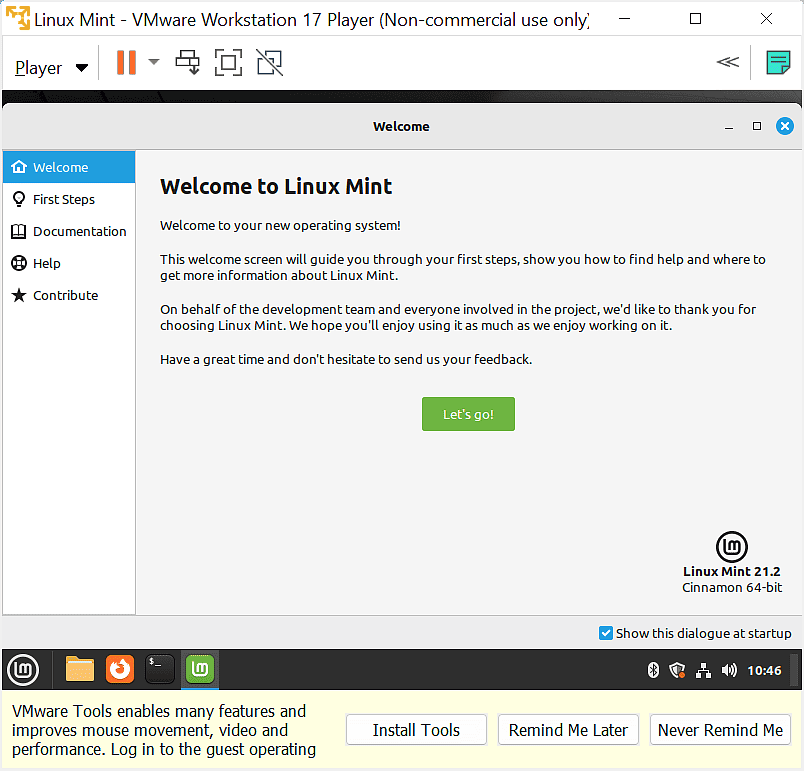
After your virtual machine restarts you’ll see the “Welcome to Linux Mint” splash screen. Click the Let’s Go button for a short guided tour of Mint and how to update the system.
The final thing to do is to close the “Install VMware Tools” reminder at the bottom of the screen.
Linux Mint will already have an open version of VMware Tools installed and so it isn’t necessary to install them.
Click the Never Remind Me button.
Linux Mint Virtual Machine In VMware Player Summary.
Generally everything works great. Linux Mint is a capable operating system and after running the suggested updates most things seem to be working fine with one exception. The sound. I don’t have any audio sounds at all on my setup.
I’m not sure whether that’s an issue with my host system, a compatibility problem with VMware Player or with Linux Mint itself.
I’ve cast around the Internet for a fix, but so far to no avail. I’ll update this post when I find the answer in case any of you are experiencing the same problem. Or if you fix it before me, then let me know how.
Keep Up With Home Computer Guides.
All the latest guides and articles published on At Home Computer delivered to your inbox.
No account needed, just add your email address.

