How to install Windows XP as a virtual machine in VMware Player.
Windows XP was around for many years and it just worked, so it’s not surprising that many people still want to use it. Although you’ll find it difficult to access the Internet using XP, running older software is a different matter.
Set Windows XP up as a virtual computer and you can install and run all the old programs you like. It’s just like a “real” computer, only it runs on your main PC.
XP Virtual Machine Prerequisites.
To setup your Windows XP virtual machine you’ll need to have a few things ready.
- Virtualisation Enabled. You’ll need to have virtualisation enabled on your computer CPU. Either Intel VTx or AMD V/RVI. Usually it’ll be enabled by default, but it isn’t always so you should check your UEFI/BIOS. You can click this link if you’re not sure How to enable virtualisation.
- An ISO Image or CD. If you have an old Windows XP installation CD, then that’s great, you can use that. If not, then you’ll need to have an ISO image file of XP. I’ll show you how to get one below.
- Download and install VMware Player. This is the software that we’ll be installing your XP VM on to. It’s free to use on your home PC.
Download And Install VMware Player.
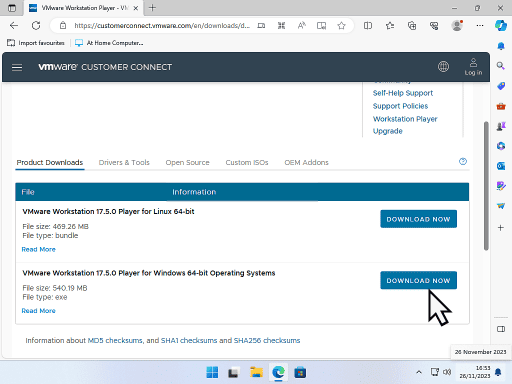
To begin with, you’ll need to download and install VMware Player. You can download it from here.
- On the download page, click the Download Now button. Be sure to download the Windows version.
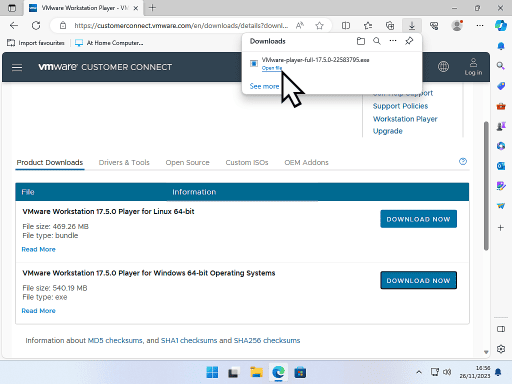
- When the download has finished, start the install process.
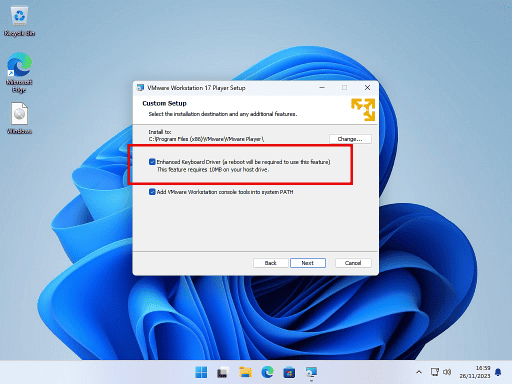
- It’s pretty much a standard installation so I’m not going to detail it all here except to say that you should select the “Enhanced keyboard driver” option. After the installation has finished you’ll need to restart your PC.
How To Download Windows XP ISO Image File.
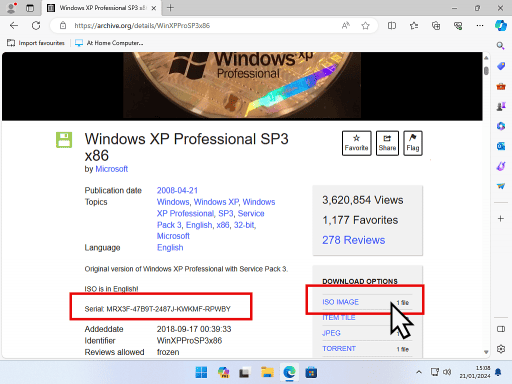
If you don’t have an original Windows XP CD available, then you can download an ISO image from the Internet Archive website.
Downloading Windows ISO Files.
Generally speaking I really wouldn’t advise using a downloaded copy of Windows that’s come from anywhere other than Microsoft. You simply don’t know what, if anything, has been added to the file.
In the case of Windows XP, you just can’t grab an ISO from Microsoft. All the servers have been turned off. So if you don’t have, or can’t get a genuine CD, you’re kind of stuck.
One other thing, I really don’t know for sure if this ISO is clean. If you prefer to download an XP ISO from somewhere else, that you trust, then please go ahead. As for this particular file, it seems to be fine. That’s all I can say.
How To Install Windows XP Virtual Machine In VMware Player.
If you’re going to install XP from a CD, now would be the time to load the disc into your disc drive. Cancel any autorun prompts and close any windows that open.
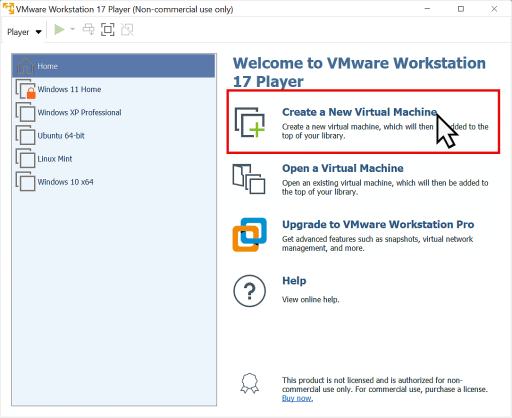
Start VMware Player. On the left hand panel you’ll see all the virtual machines that you’ve currently got setup.
Obviously if you haven’t created any yet, the left hand panel will be blank.
To install Windows XP as a VM, click “Create a New Virtual Machine”.
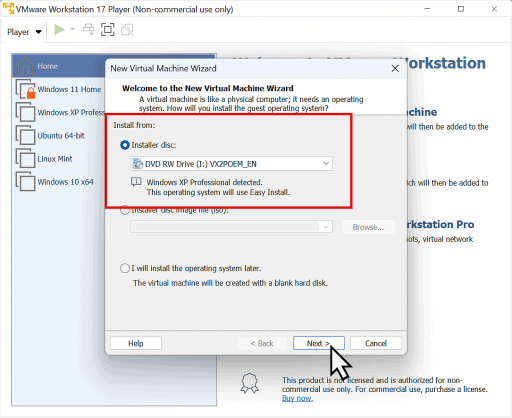
Installing XP From A Disc Or An ISO Image.
- If you’re installing from a CD, then VMware Player will auto detect it and identify it as a Windows XP disc. Click the Next button.
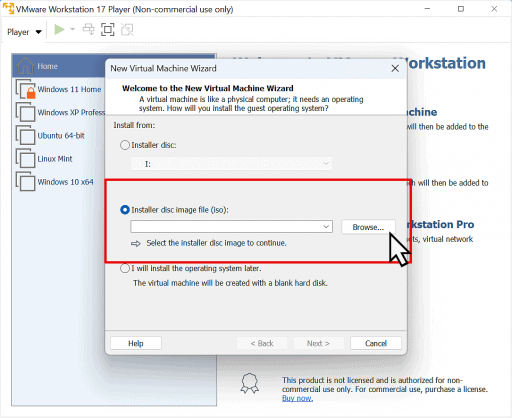
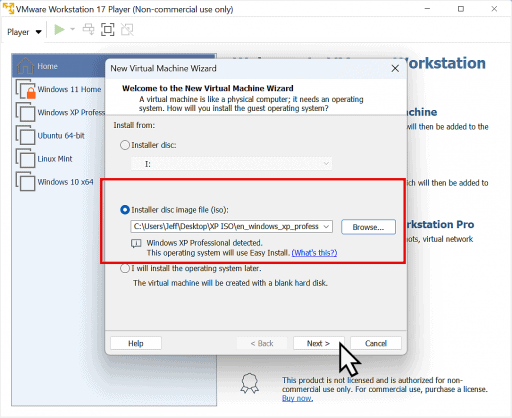
- To install XP from an ISO image, select “Installer disc image file (ISO)”. Then click the Browse button to navigate to your ISO file.
- When you’ve loaded the XP ISO file, click the Next button.
VMware Player Easy Install.
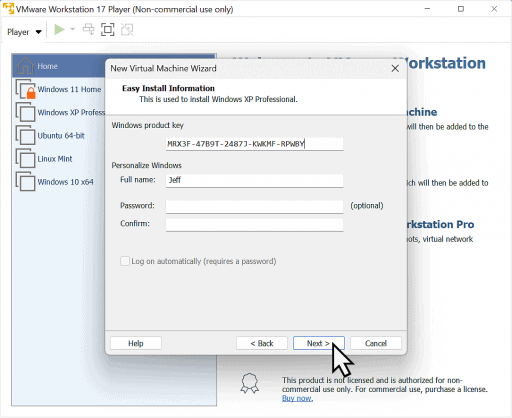
Windows XP requires a serial number in order to install, even as a virtual machine.
Using the VMware Player Easy Install, you enter all the information that’s required by the Windows XP setup.
Type in, or copy and paste, the serial number for your copy of Windows XP.
Add the username that you want to use and a password if required. If you don’t want a password, then just leave the boxes blank.
Click the Next button.
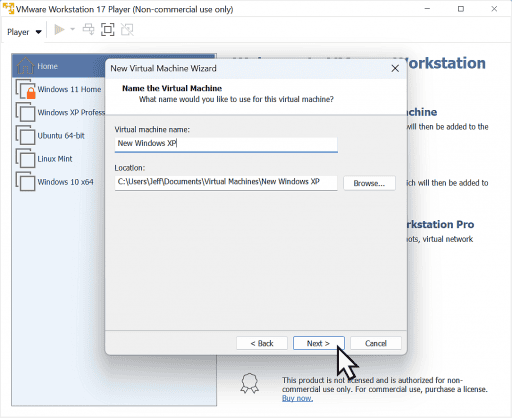
Give Your Virtual Machine A Name.
You can give your Windows XP virtual machine a descriptive name.
You don’t have to, you can just leave it as the default, but if you intend creating several VMs, then names really do help.
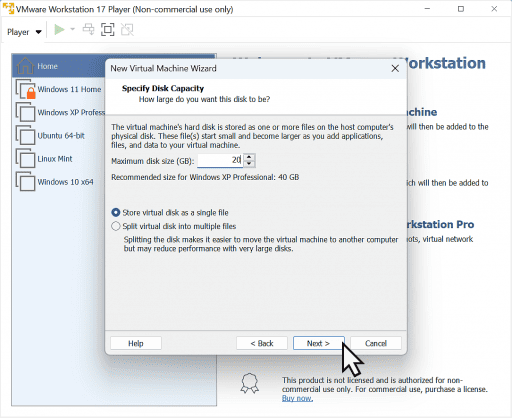
Virtual Hard Disk Capacity.
Your virtual machine will need to have a virtual hard drive.
On this screen you can set the maximum size of the drive. By default VMware Player will set it at 40GB, but you can change that if you want to.
You can also choose to store the virtual disk as either a single file or split into multiple files.
Personally I find that a single works best, but it’s entirely up to you.
XP VM Final Settings.
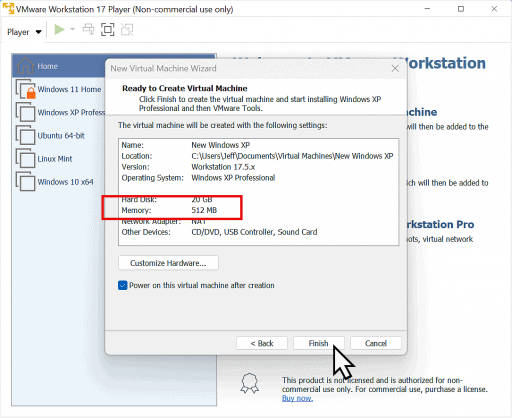
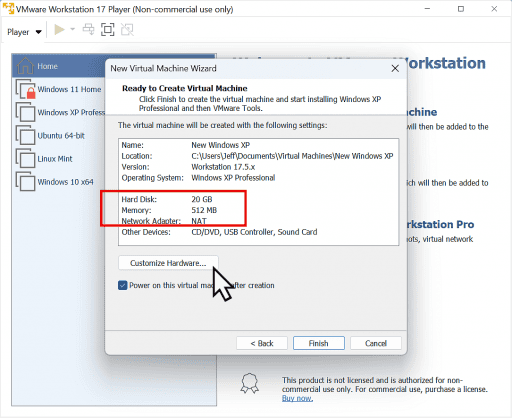
Then the “Ready to create virtual machine” page will open. This is really just a final confirmation of your XP virtual machine settings.
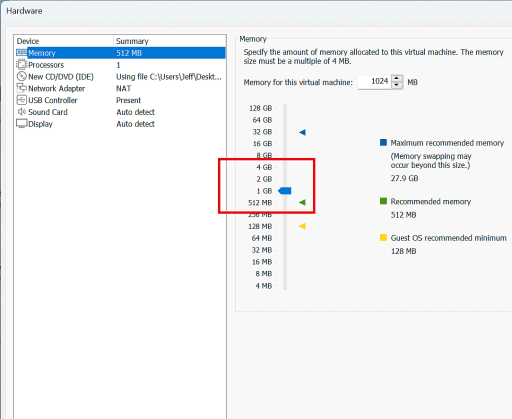
You’ll notice that VMware Player allocates 512 MB of RAM (memory) to the virtual machine. Windows XP doesn’t require anywhere as much RAM as later versions of Windows and will work quite well on 512 MB. But I’d give it a little more (assuming your host computer has enough to spare).
- To accept all the default settings for your XP virtual machine, click the Finish button.
- If you want to make any changes, click the Customize Hardware button.
- Make any required changes and then click the Close button, then click the Finish button.
Installing Windows XP As A Virtual Machine.
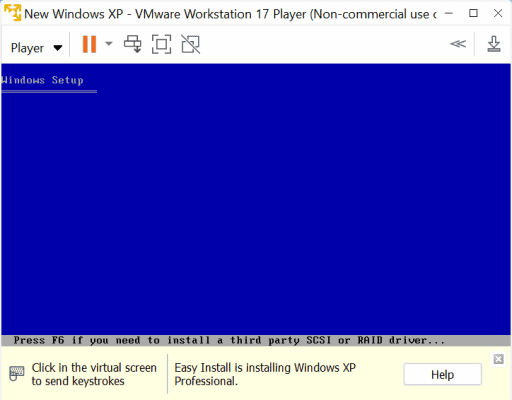
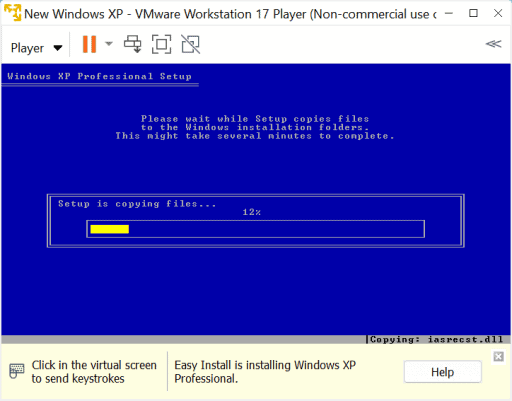
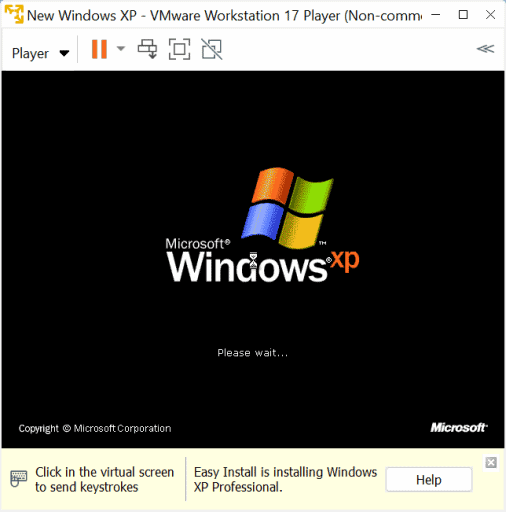
After clicking the Finish button, VMware Player will create a virtual hard disk for your VM and then launch Windows XP setup from either the CD or ISO file that you specified earlier in this guide.
The virtual machine may reboot several times, just as if you were installing XP on a “real” computer. There’s nothing for you to do. Sit back and watch the magic happen. Easy Install will handle everything for you.

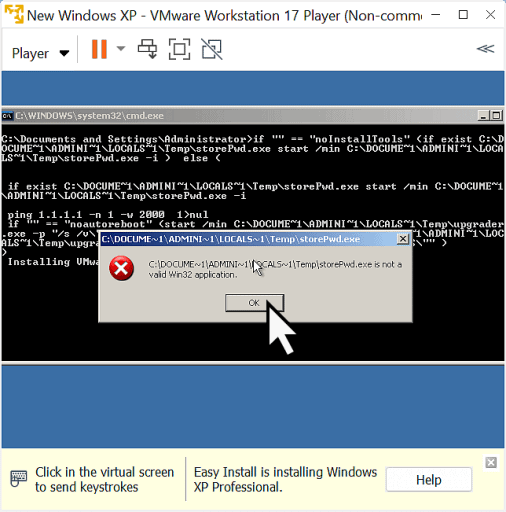
You might get this error message appear just before Windows XP starts.
Nothing to worry about, click the OK button and everything will resume.
Installing VMware Player Tools.
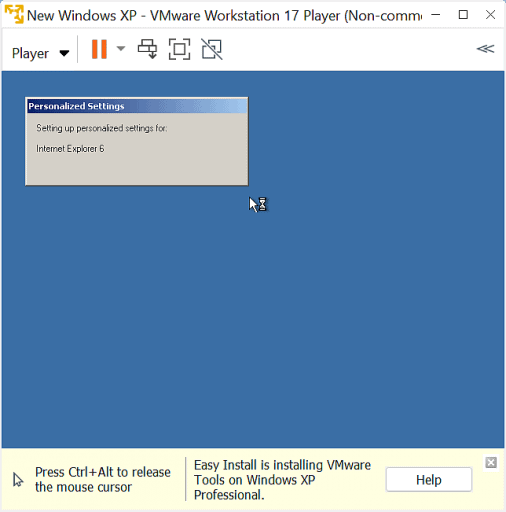
Windows XP will continue to install itself onto your virtual machine. You’ll see the Personalized Settings popup appear.
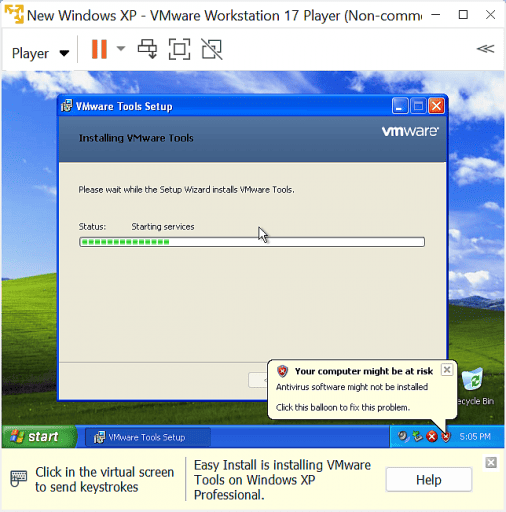
After that has finished the old familiar Windows XP desktop will come into view. You’re not done just yet. VMware Player needs to install the VMware Tools. They’re a set of drivers that need to be installed onto the guest operating system.
You don’t have to do anything. It’s all automatic. After a few moments at the desktop, you’ll see the VMware Tools installer appear. Just let it run.
When it’s finished, XP will reboot.
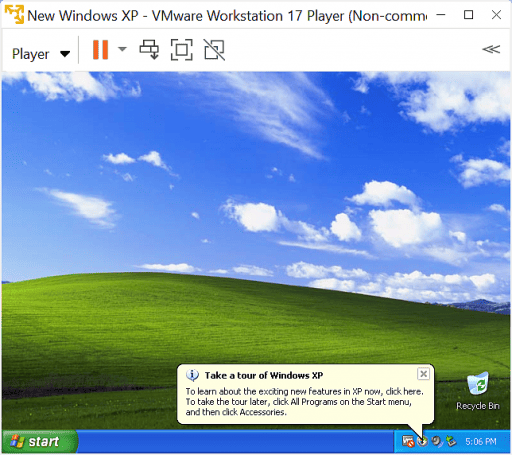
Take A Tour Of Windows XP.
After that last reboot, your Windows XP VM will be all yours.
The “Take a tour of Windows XP” pop up will appear. Ah, those were the days.
Now all you need to do is to create a backup of your VM How To Backup A VMware Player Virtual Machine.
Summary.
If you really do need to run a copy of Windows XP then using it as a virtual machine is probably the way to go. You could try setting it up on real hardware, a real computer, but you’ll find it increasingly difficult to do as older PCs disappear. And that’s not to mention the cost of buying the computers in first place.
Setting up a VM in this way is free. VMware Player is free to use at home, you should already have the serial number for XP, so all you need to invest is a little time and effort.

