Computers that came with Windows 11 preinstalled should already have virtualisation enabled.
But if your computer has Windows 10 installed, or you’ve upgraded to Windows 11 from Windows 10, then virtualisation may not be enabled.
How To Check If Virtualisation Is Enabled.
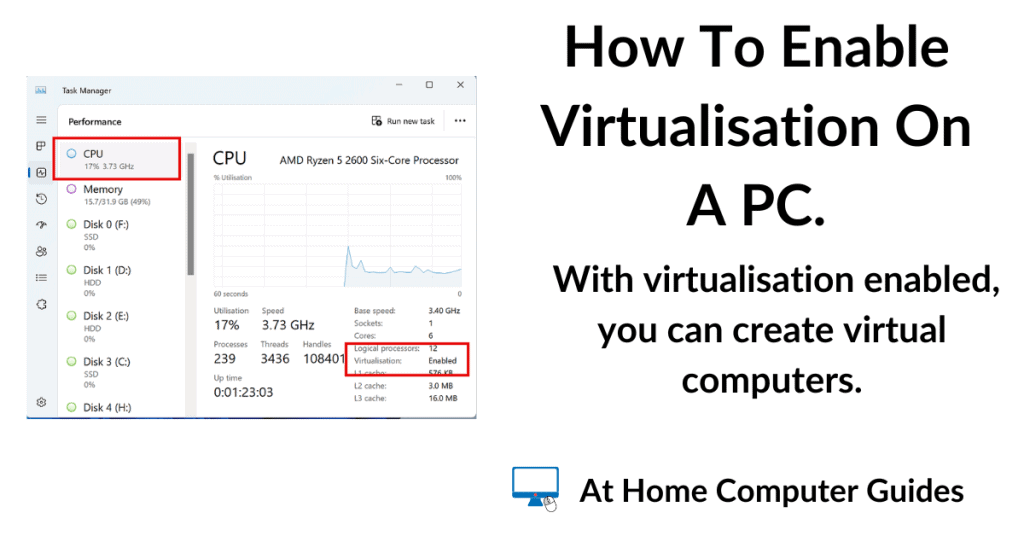
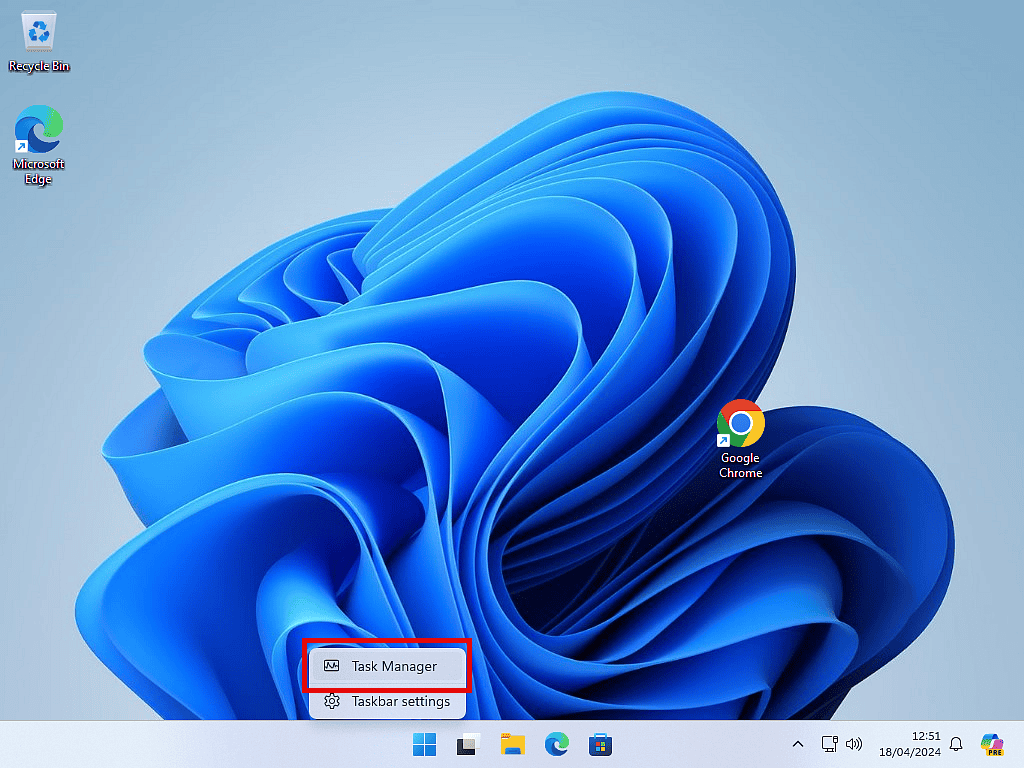
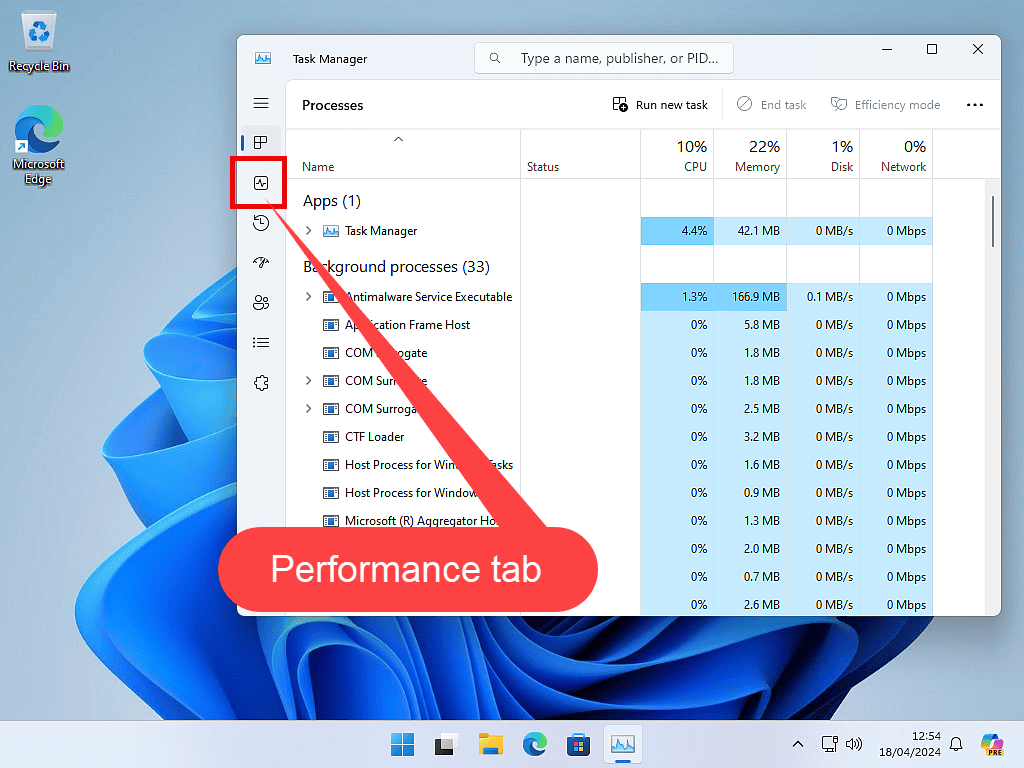
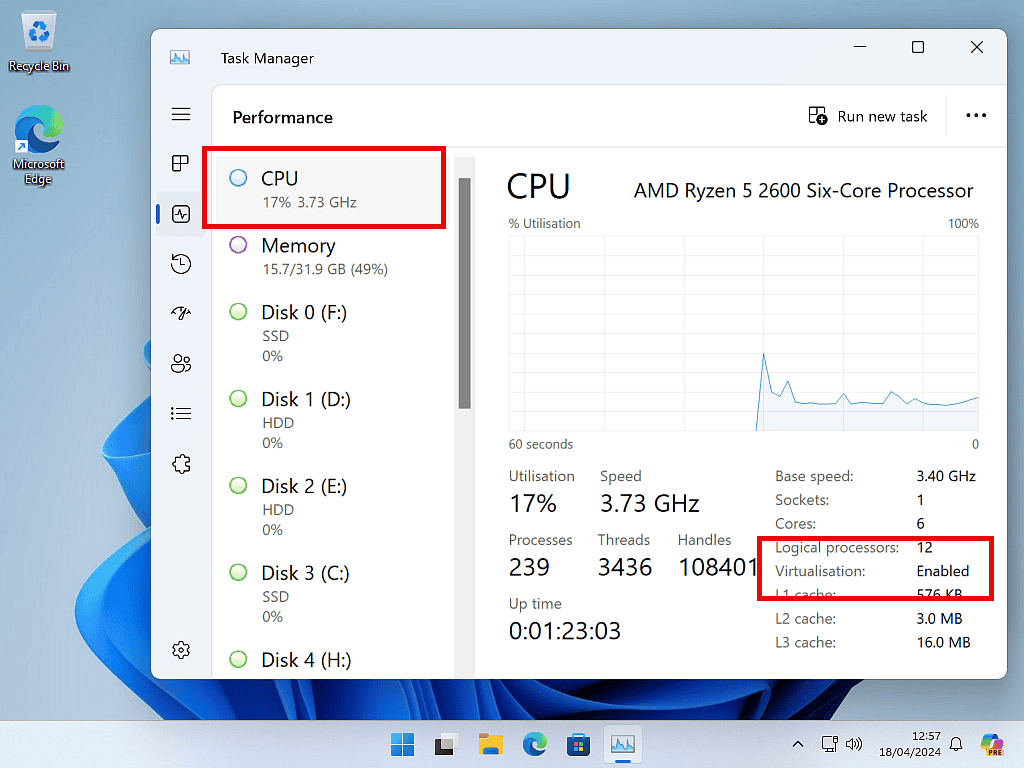
You can quickly check to if if virtualisation has been enabled on your computer by opening Task Manager and checking on the Performance tab.
- Right click on the Windows taskbar. On the menu left click Task Manager
- In Task Manager, click on the Performance tab.
- Select the CPU (if it isn’t already) and then check to see if virtualisation is enabled or not.
How To Enable Virtualisation.
Virtualization has to be enabled within the UEFI (BIOS) of your computer motherboard. Although it’s not difficult to do, simply a matter of clicking a button to enable it, finding that button can be a real chore.
There just isn’t any sort of standardization amongst the various motherboard and system manufacturers about how they lay out the UEFI that they’re using. They’re all different. And as ever, they often use different terms to mean the same thing.
Enabling Virtualisation On Intel And AMD Systems.
If you have an Intel CPU then you should search through the various menus and find and enable Intel VTX and Intel VTD.
On an AMD system, enable AMD-SVM and AMD-IOMMU.
You’ll probably find these settings under the Advanced menu, sometimes under the CPU options sub-menu. But I can’t be more specific than that, it all depends on your own system.
Pre-Built Systems.
If you’re using a pre-built computer, your manufacturer should be able to give you the specific details of how you can enable virtualisation on your computer. Below are a few links to popular maker’s websites.
How to enable virtualisation on –
How To Access Your Computer UEFI (BIOS).
To enable virtualisation you’ll need to access the computer UEFI/BIOS.
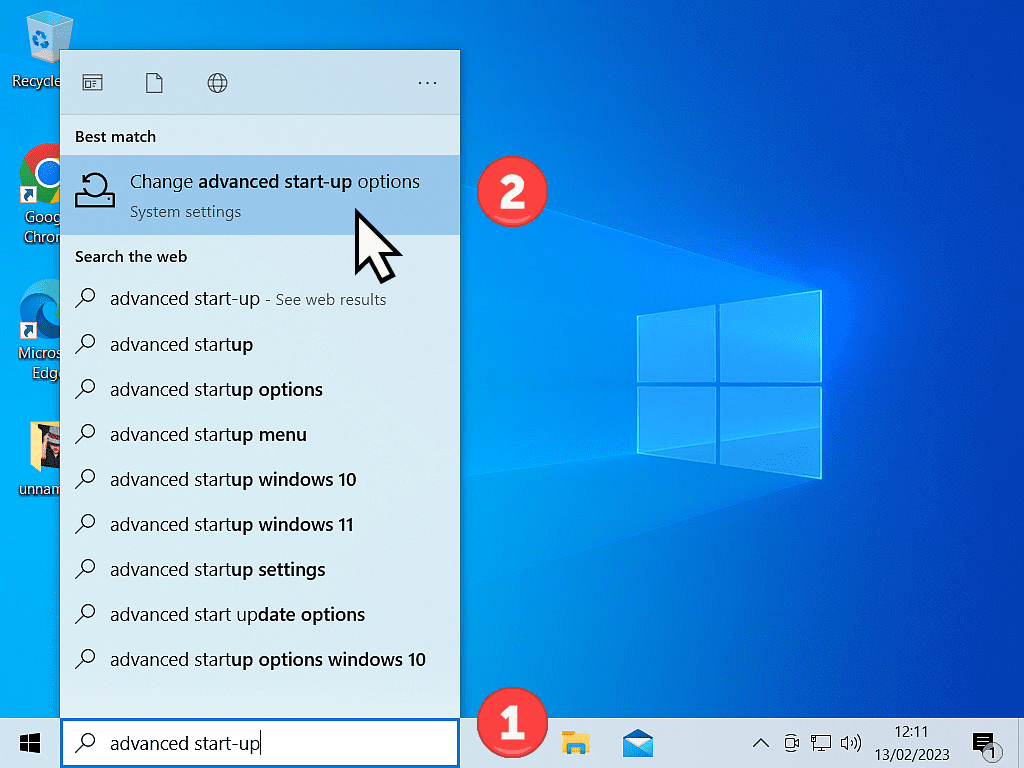
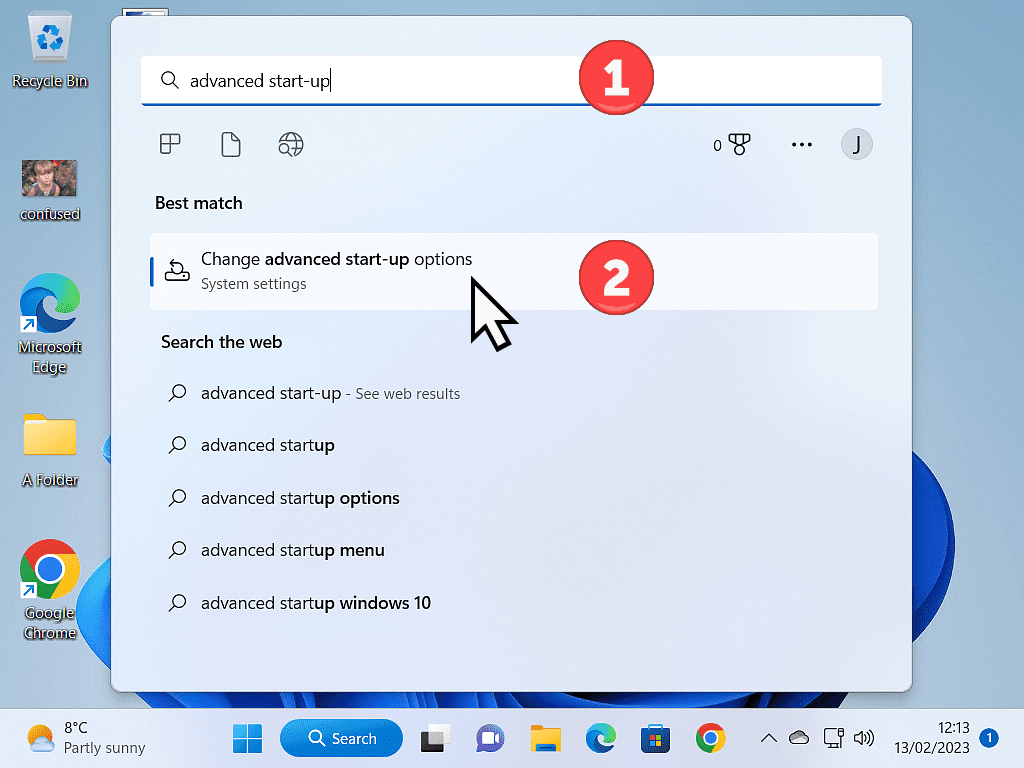
The easiest way to enter the UEFI (BIOS) of your computer is through Windows itself. Click the Start button and type “advanced startup“
Then left-click Change Advanced Start-Up Options (System Settings).
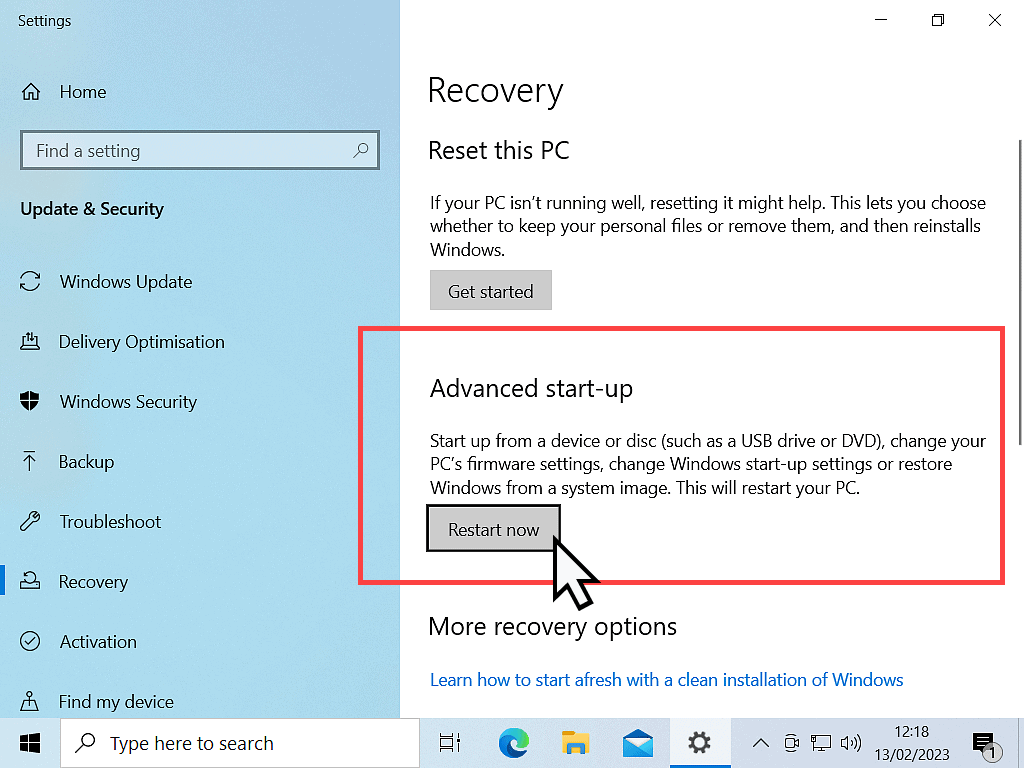
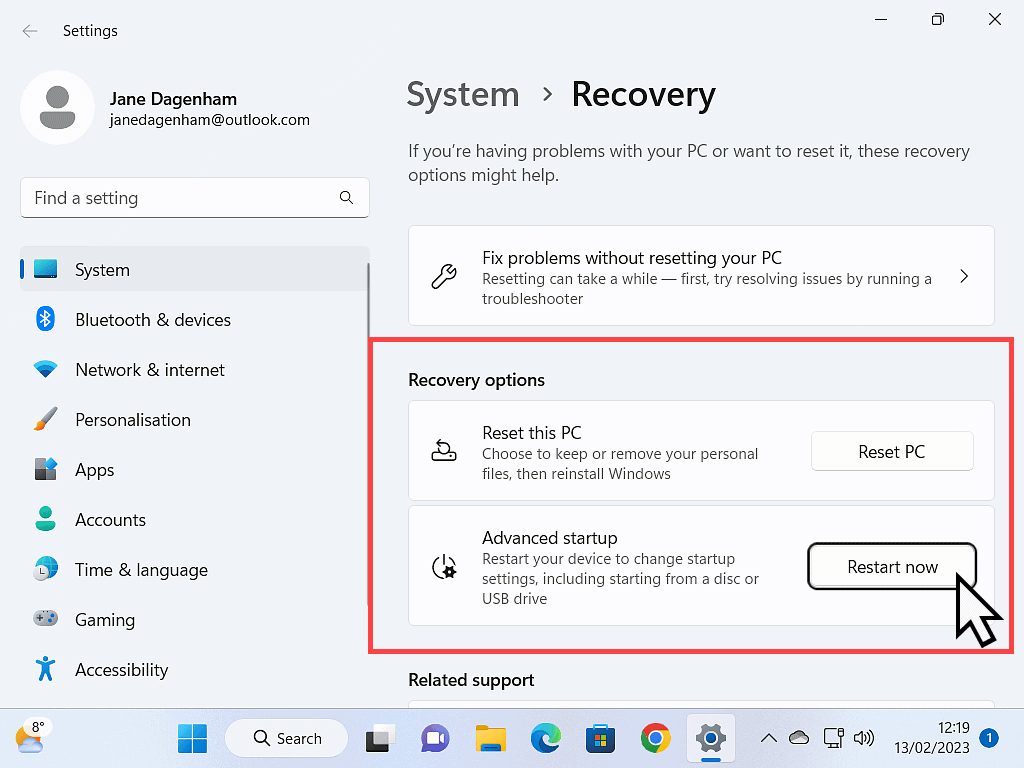
Advanced Start-Up.
In Windows 10 – Under the Advanced Start-up section, click the Restart Now button.
In Windows 11 – Under the Recovery Options section, click the Restart Now button.
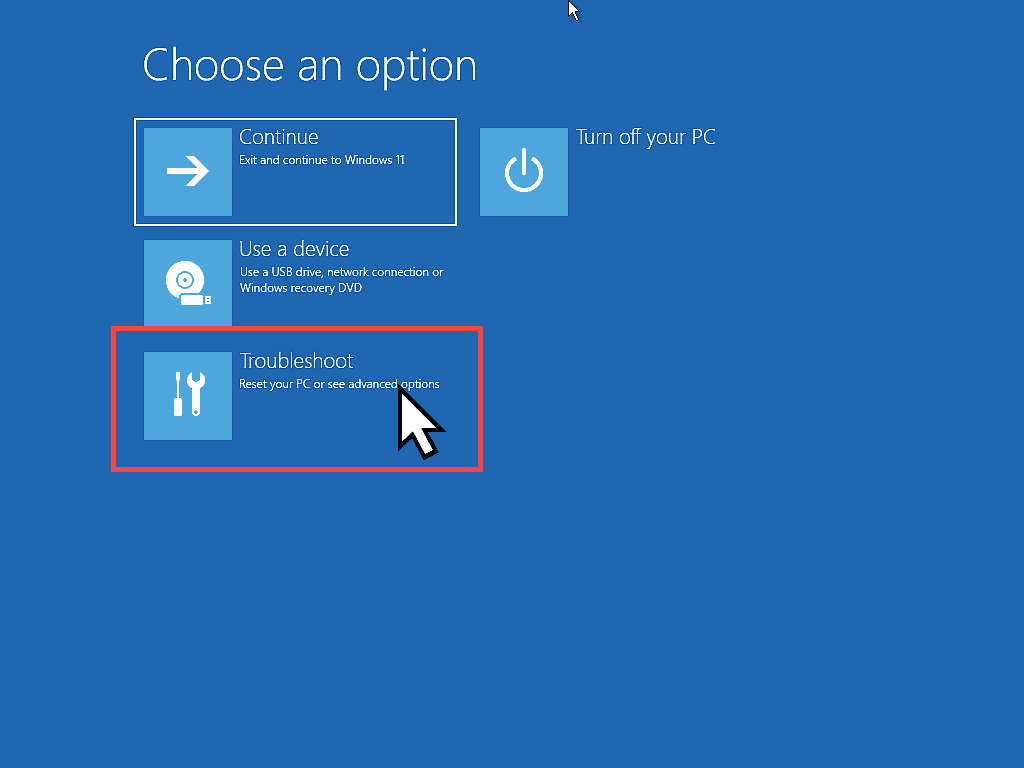
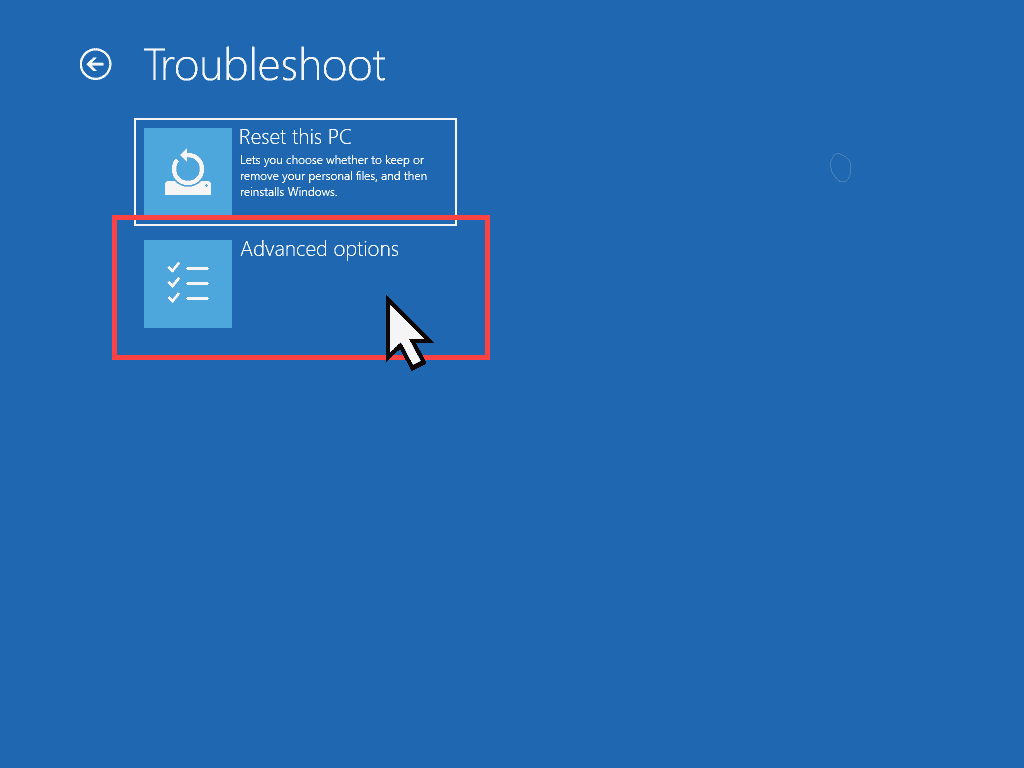
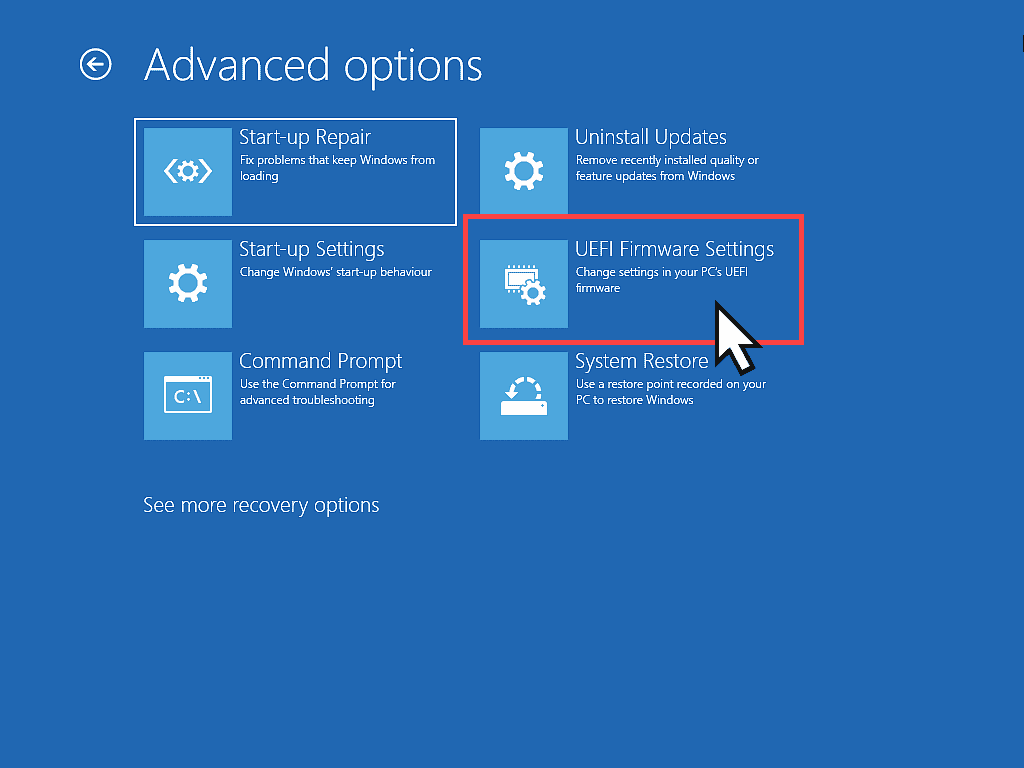
After your computer restarts, you’ll need to go through 3 screens (or pages) to access your computer UEFI/BIOS.
- Choose An Option – Click the Troubleshoot option.
- Troubleshoot – Click the Advanced Options.
- Advanced Options – Click the UEFI Firmware Settings option.
You’re computer will re-boot into the UEFI/BIOS.
Summary.
Once you’re inside your computer UEFI/BIOS you’ll need to enable either Intel VTX and Intel VTD or AMD-SVM and AMD-IOMMU. They’ll probably be under an Advanced settings tab, or CPU settings/options.
If you really can’t enable virtualisation on your own, then the best option is indeed your manufacturers website.
Keep Up With Home Computer Guides.
All the latest guides and articles published on At Home Computer delivered to your inbox.
No account needed, just add your email address.

