How to install Windows 10 or Windows 11 as a virtual machine using VMware Player. VMs allow you to test out new operating systems, new software and to surf the Internet without exposing you’re real computer.
If you were looking to create a Windows 7 VM, then that’s a little different, click here How To Create A Windows 7 Virtual Machine.
There are several virtualisation software packages that you could use, but in this guide I’ll be focusing on using the free version of VMware Workstation Player. For more information, check out this guide What Are Virtual Machines?
Virtual Machine Prerequisites.
In order to successfully setup and run a virtual machine, you’ll need to have 3 items in place.
- Virtualisation Enabled. You’ll need to have virtualisation enabled on your computer CPU. Either Intel VTx or AMD V/RVI. Usually it’ll be enabled by default, but it isn’t always so you should check your UEFI/BIOS. How To Enable Virtualisation On A PC.
- An ISO Image. Download an ISO image of whichever operating system you’re going to install as the virtual machine. In this guide I’ll be using Windows 11, but you could use any OS.
- Download and Install VMware Player.
How To Download A Windows ISO Image.
To install Windows as a virtual machine, you’ll need to have an ISO image ready. You can download the ISO image directly from Microsoft.
If you want to install Windows 10, download it from here https://www.microsoft.com/en-gb/software-download/windows10
Or if you want to install Windows 11, download it here https://www.microsoft.com/en-gb/software-download/windows11/
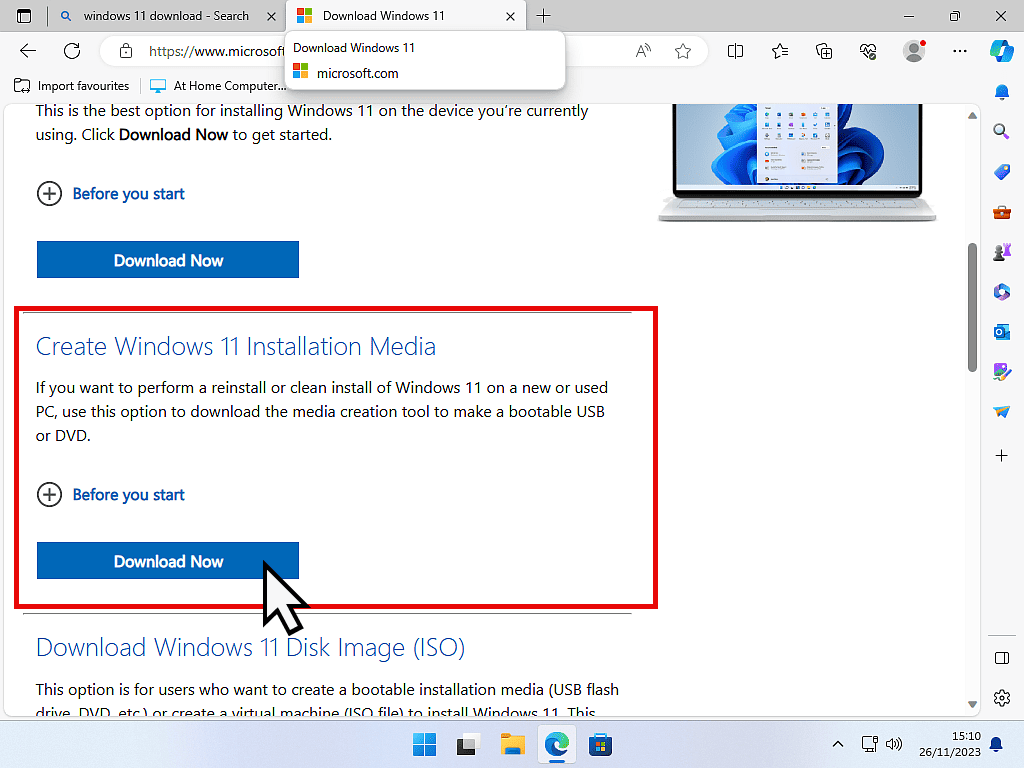
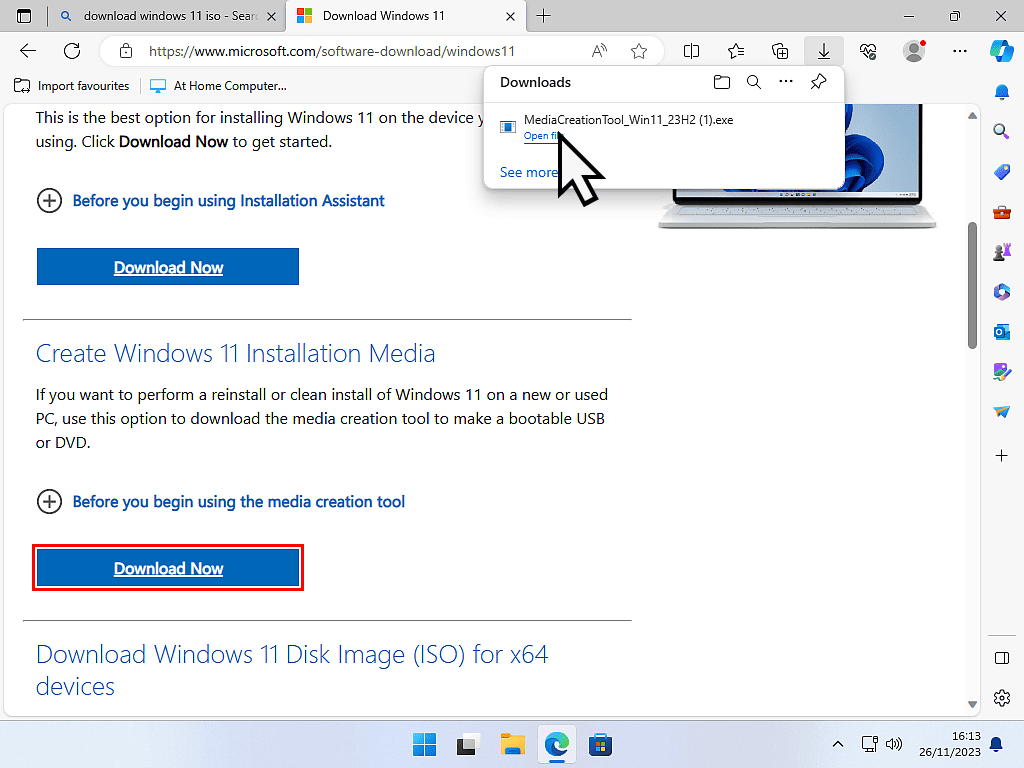
- On the relevant Windows download page, scroll to the Create Windows Installation Media section and click on the Download Now button. That will download the Windows Media Creation Tool to your computer. It’s a very small file and so shouldn’t take long.
- Next, run the Media Creation Tool either from within your browser or from wherever you downloaded it to (generally your Downloads folder).
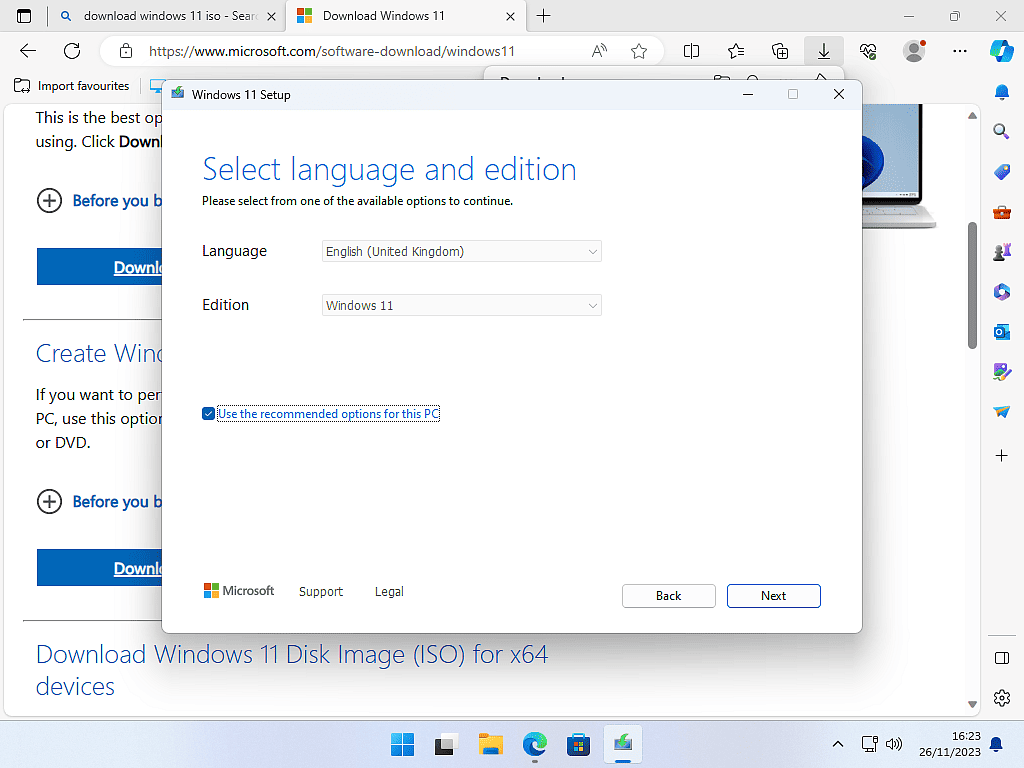
- After accepting the Terms and Conditions you’ll see the Language & Edition screen. The links above are for the English UK editions of Windows. Assuming that’s OK with you, click the Next button.
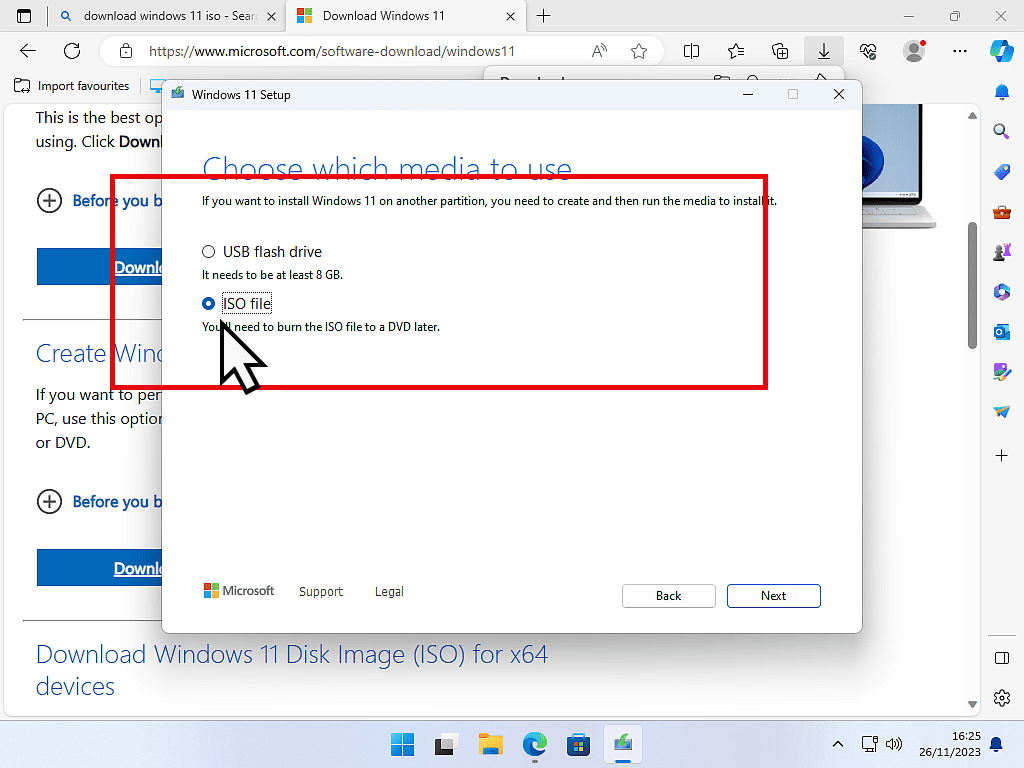
- On the “Choose which media to use” screen, be sure to select ISO File. Click the Next button.
- Finally select which folder to save the download into and then click the Save button. In this example, I’ll just save it to my desktop.
Setting Up A Windows Virtual Machine.
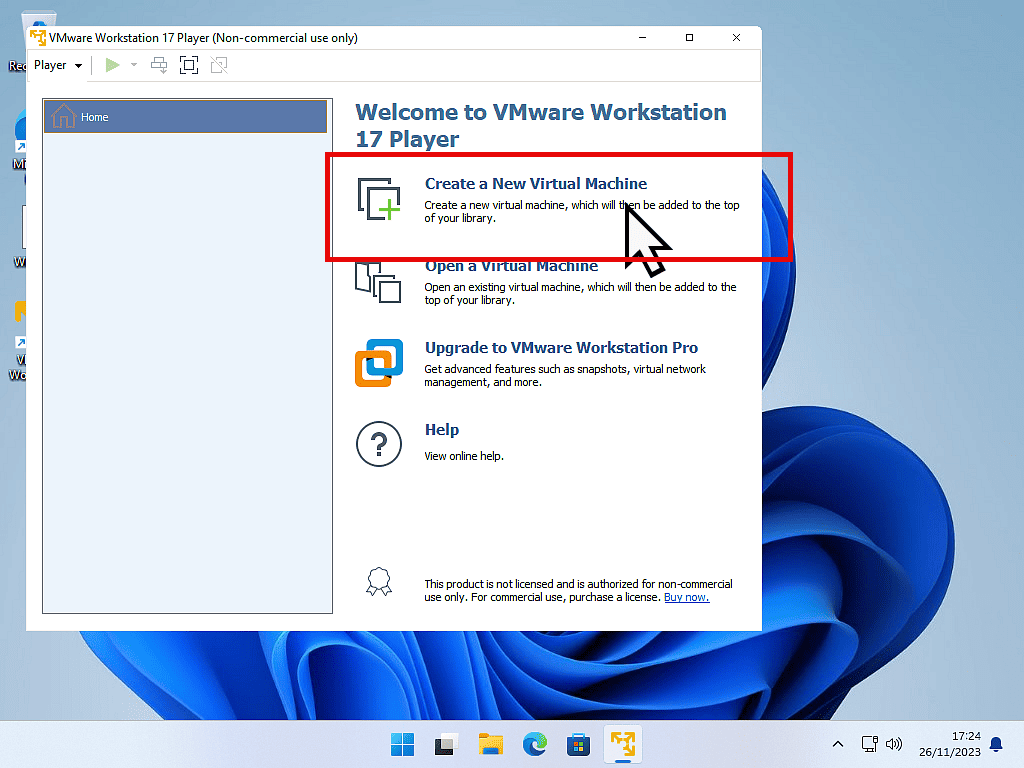
Launch VMware Player.
On the Welcome screen, click Create A New Virtual Machine.
Mount The Windows ISO File.
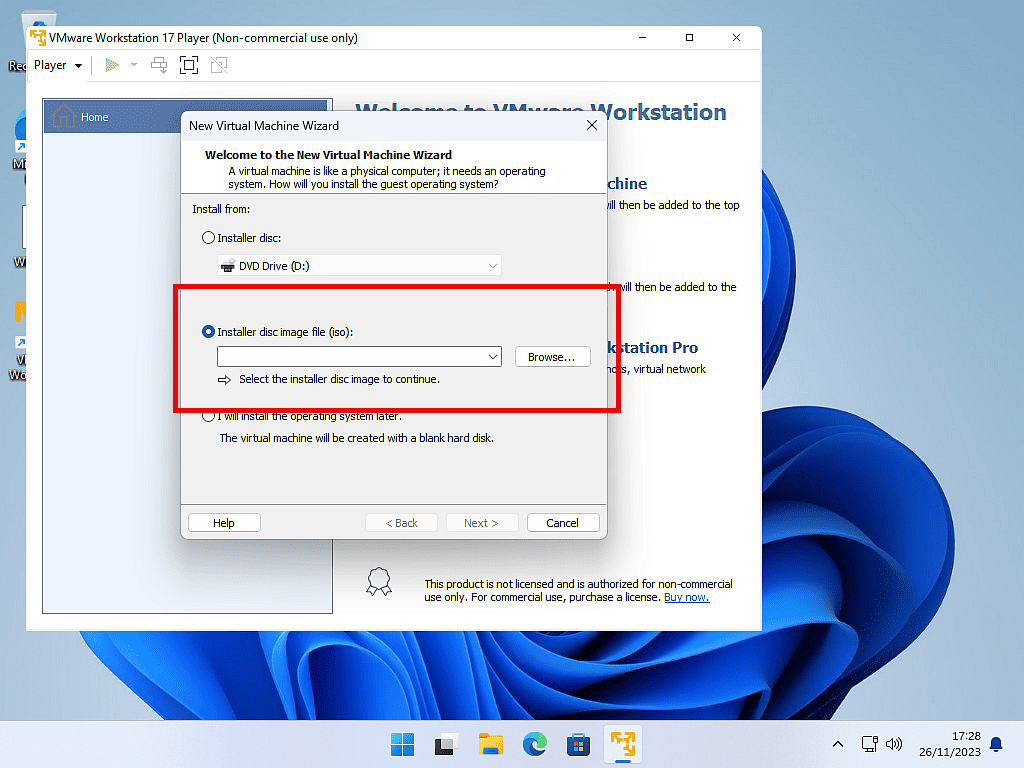
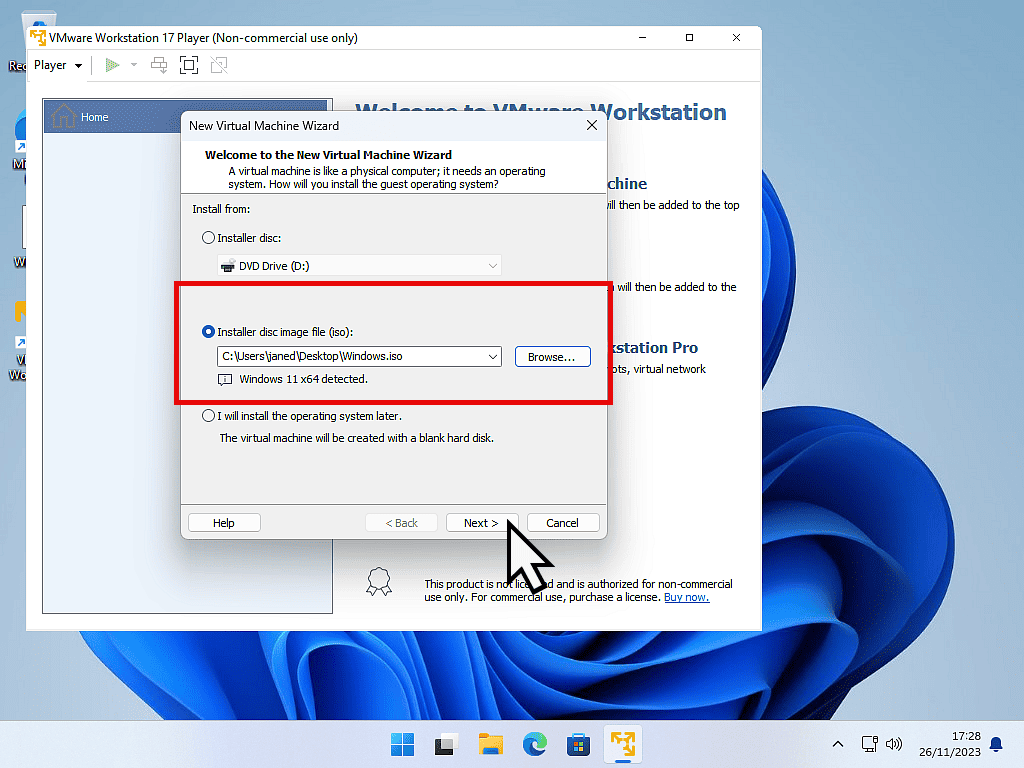
On the New Virtual Machine Wizard screen, select Installer Disc Image (ISO). Then click the the Browse button.
Navigate to and select the Windows ISO file that you downloaded earlier. You’ll see it appear in the image box. VMware Player will auto detect whether you’re using Windows 10 or 11. Click the Next button.
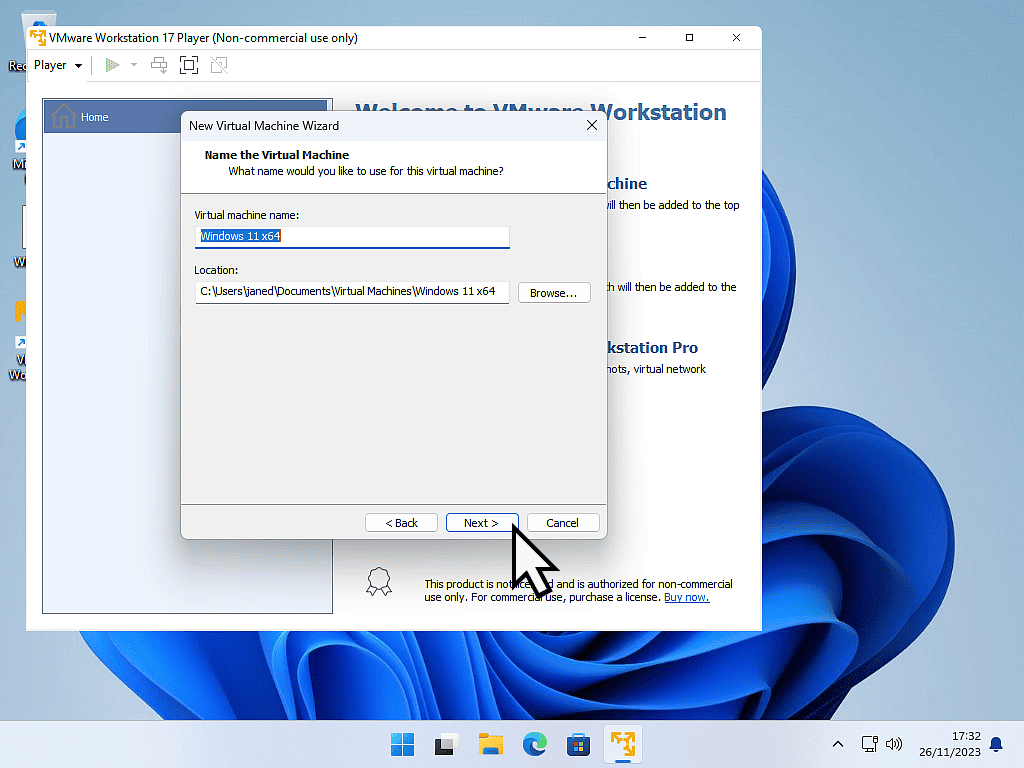
You can give your new VM a name if you wish. This is handy if you’re going to install more than one virtual machine.
You can also change the location of you VM. Again that might be useful if you wanted to store it on another drive.
For me, I’ll just leave them both as is. Click the Next button to proceed.
Encryption Information.
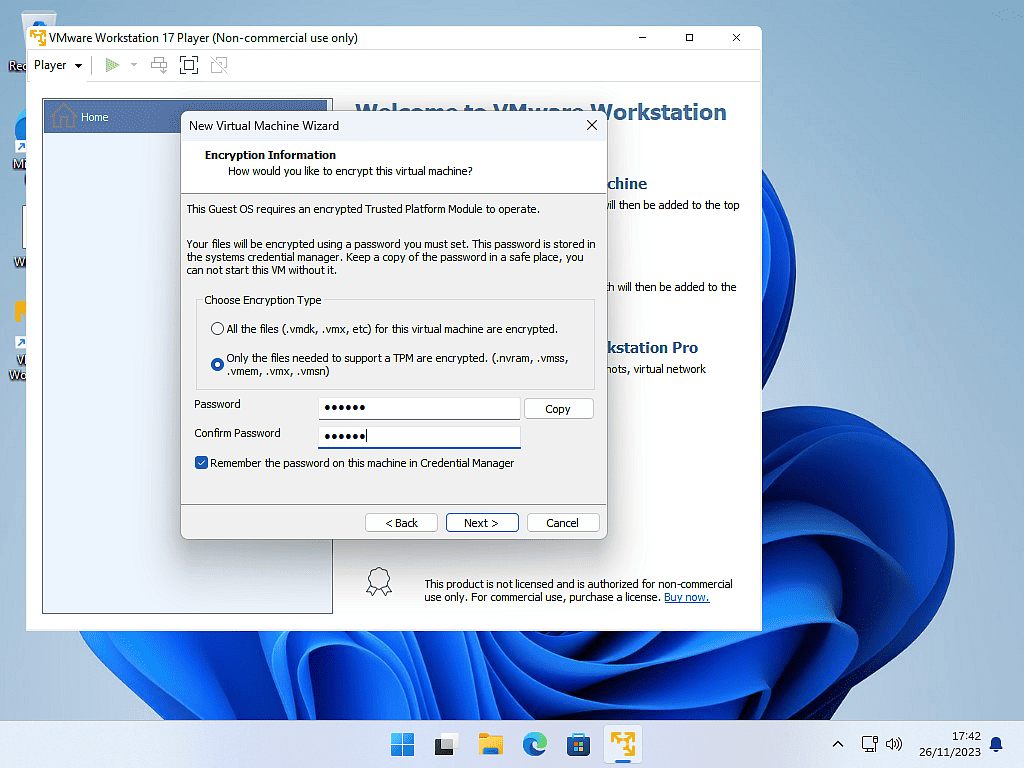
As this is going to be a Windows 11 VM, we’re going to need to enter a machine password for the TPM. You probably wouldn’t see this screen if you were installing Windows 10 or a Linux distro.
For the Encryption Type, I’d leave it at the default selection of “Only the files needed to support a TPM”
Then enter a password and confirm the password.
Make a note of the password that you’ve used. If you move your virtual machine later on, you might need it.
About This Password.
The password you’re entering here isn’t the usual Windows log on password. Instead it’s a password for the TPM encryption. You won’t be asked for this password again unless you move the virtual machine from one folder to another. My advice would be to use a simple password here and then make a note of it.
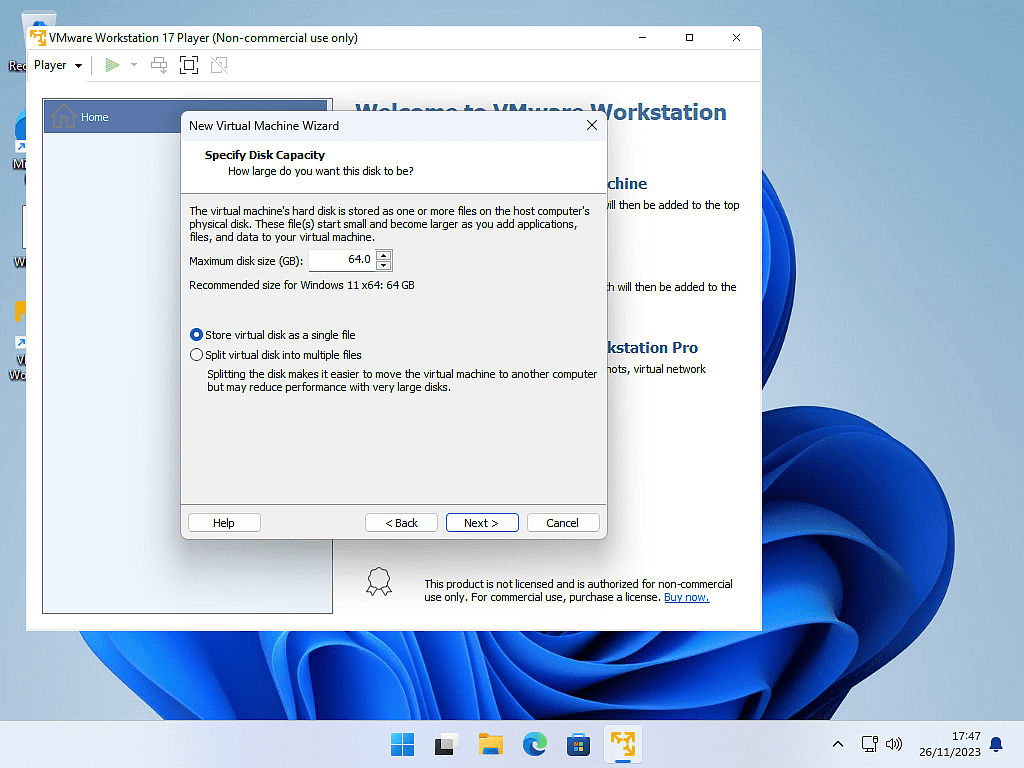
Your new virtual machine will need to have a hard disk (hard drive).
On this screen you can specify the size (or capacity) of the drive.
You can also choose whether to store the virtual disk as a single file or allow it to be split into several files.
It’s entirely your choice, but I find that the VMs work a little better when the disk is a single file.
You’re Ready To Create Your Virtual Machine.
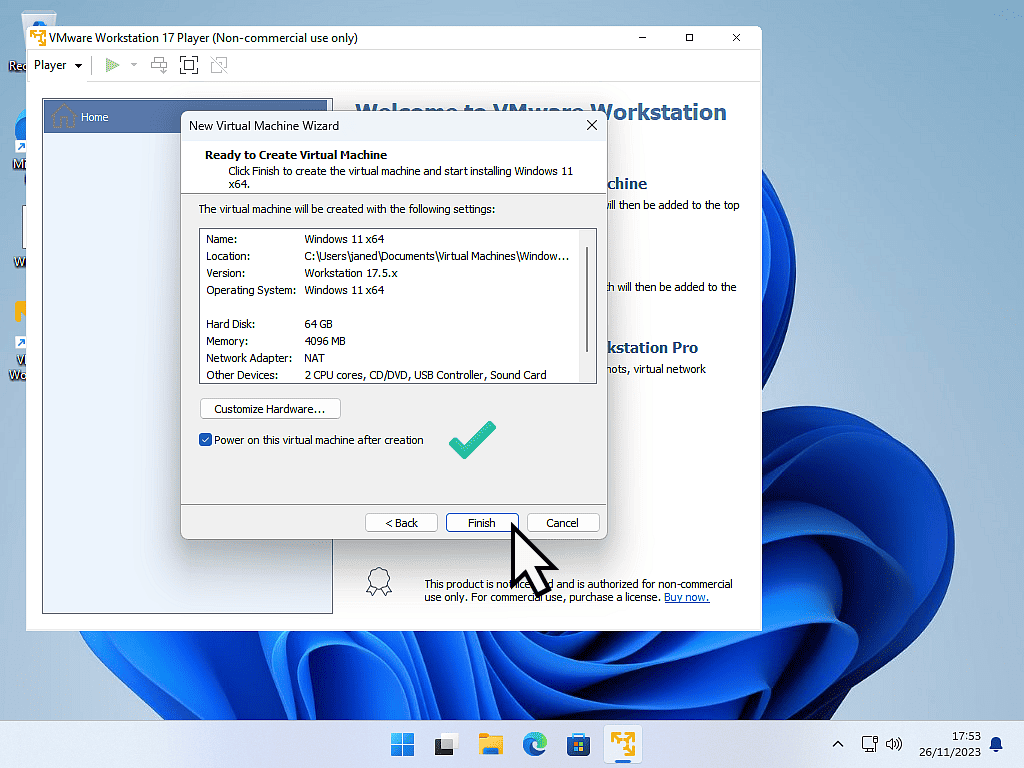
The final screen will show you a summary of the virtual machine settings.
Ensure the “Power on this virtual machine after creation” option is selected and then click the Finish button.
Installing Windows As A Virtual Machine.
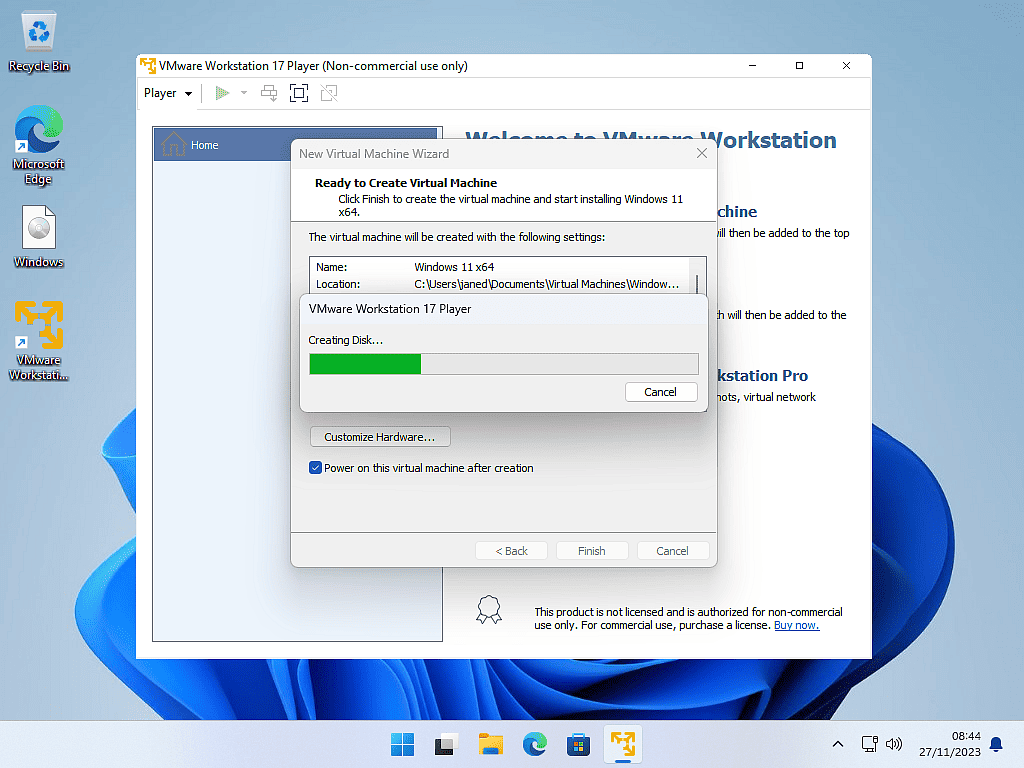
After clicking the Finish button, VMware Player will create the virtual disk for your new virtual machine.
Redirect Your Keyboard And Mouse Input To The Virtual Machine.
As your virtual machine boots, your keyboard and mouse are currently sending signals to your “real” computer. Not to the VM.
To direct your keyboard and mouse actions towards the virtual machine you need to left click once on it.
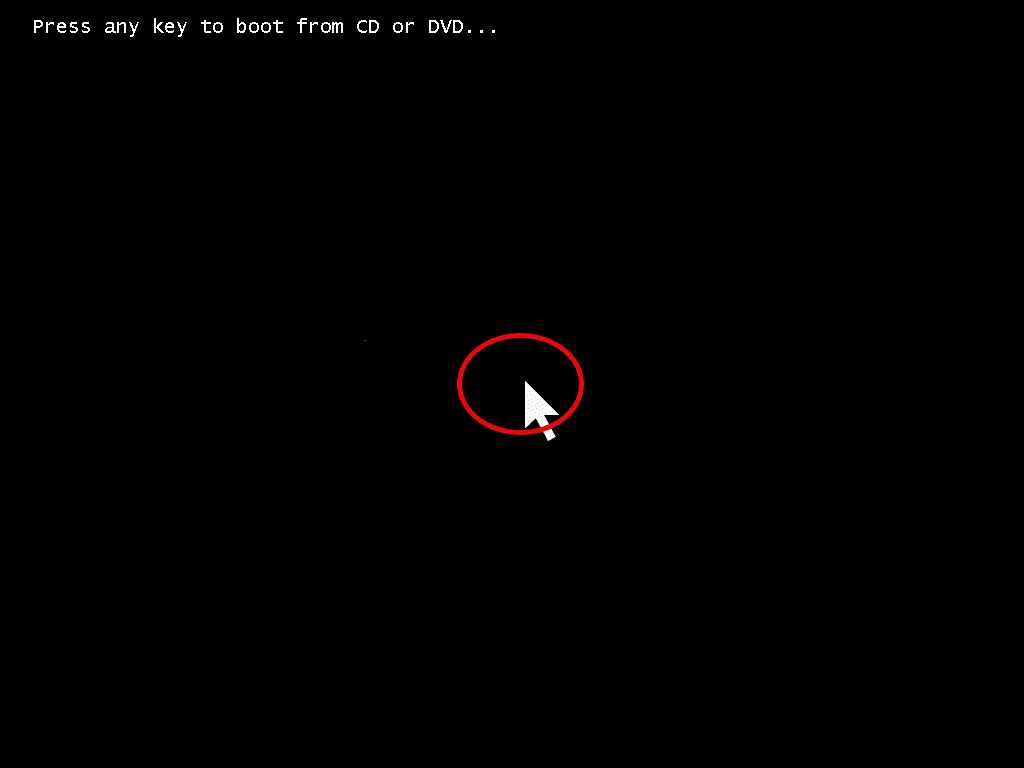
When you see the “Press any key to boot from CD or DVD” message, you need to left click once on the VM.
Then you can press any key on your keyboard.
Quick Note About Mouse & Keyboard Capture.
When you click on the VM, it will “capture” all further mouse and keyboard actions. To release your mouse and keyboard from the virtual machine press CTRL + Alt on your keyboard. That will return control to your “real” computer.
Install Windows.
Windows doesn’t know that it’s being installed onto a virtual machine. As far as it’s concerned there isn’t any difference between a VM and a real computer.
As such the installation will proceed exactly the the same as installing Windows onto any other computer, so there really isn’t any need for me to go through the process here. If you do need a guide to installing Windows click here How To Install Windows 10 Or 11 From A USB Drive.
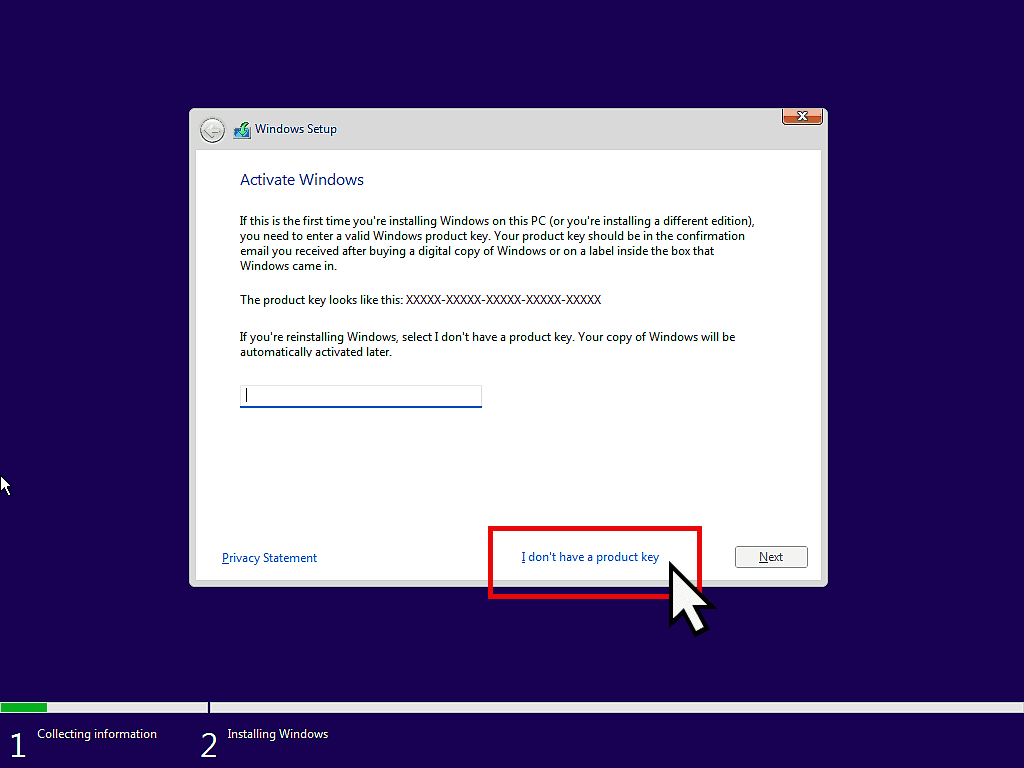
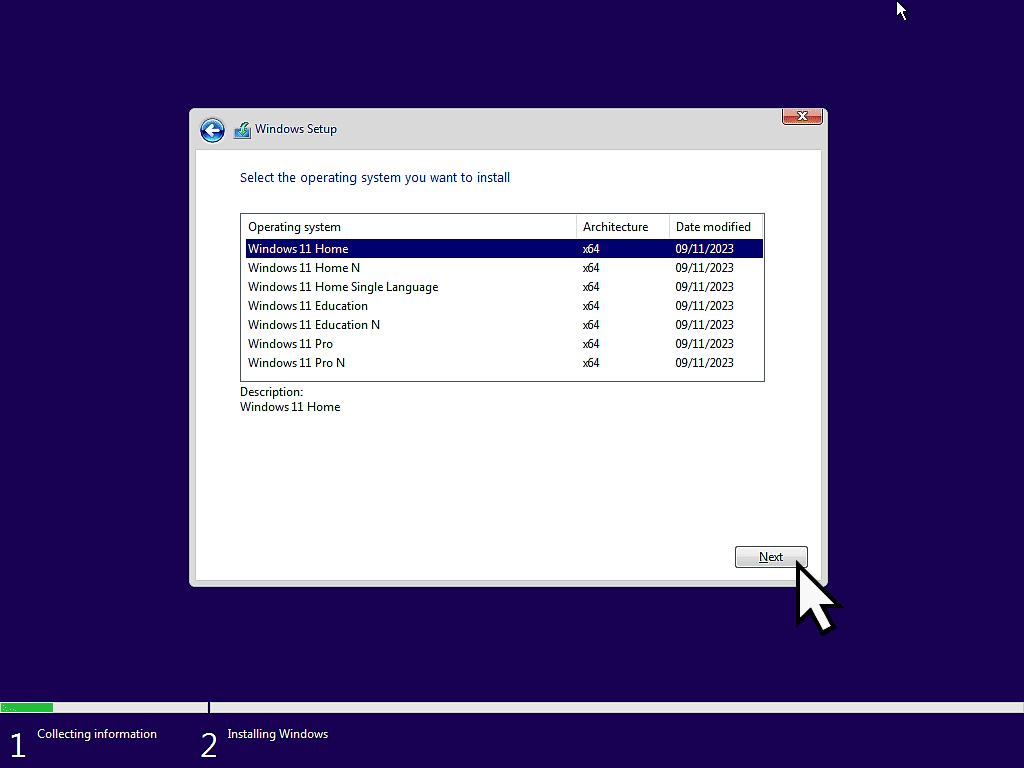
The only thing that I’d strongly suggest is that if you have an activation key (product key) you don’t use it at this stage. Instead click the “I don’t have a product key” link. Then on the next screen select the Windows version that you’re installing and click the Next button.
Why You Shouldn’t Activate Right Now?
As a general rule, it’s best to get Windows up and running before entering your product keys. Install it, test it and make sure you’re happy that everything is working. Then you can enter your product key and activate Windows.
Install VMware Tools.
VMware Tools is a software product that helps to improve the performance of your virtual machine, particularly the mouse and video.
The tools have to be installed directly onto the virtual machine. It’s rather like installing drivers onto a real computer after doing a clean install.
After Windows has finished installing, click the Install Tools button.
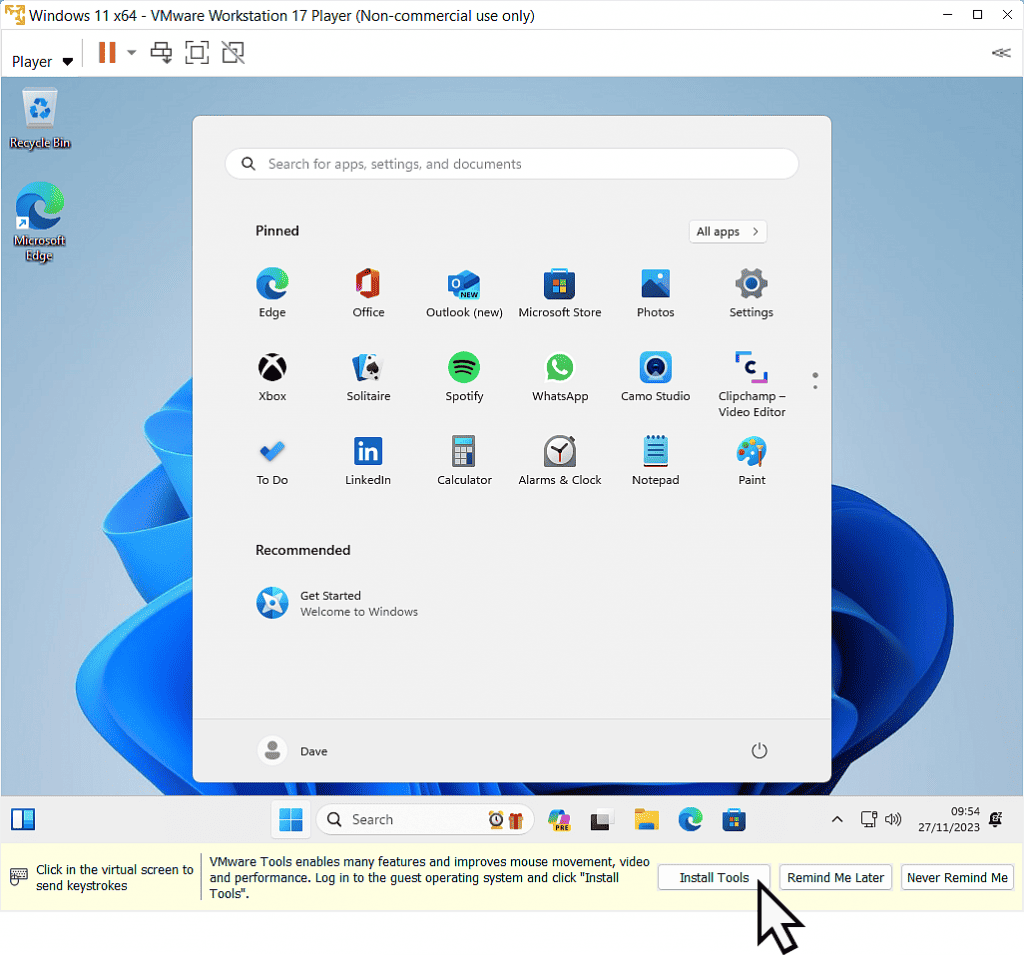
The VMware Tools will be loaded up as a CD mounted into a virtual CD drive.
You’ll simply install it as you would any other program on any other computer.
Usually you’ll need to do a re-start after the installation completes.
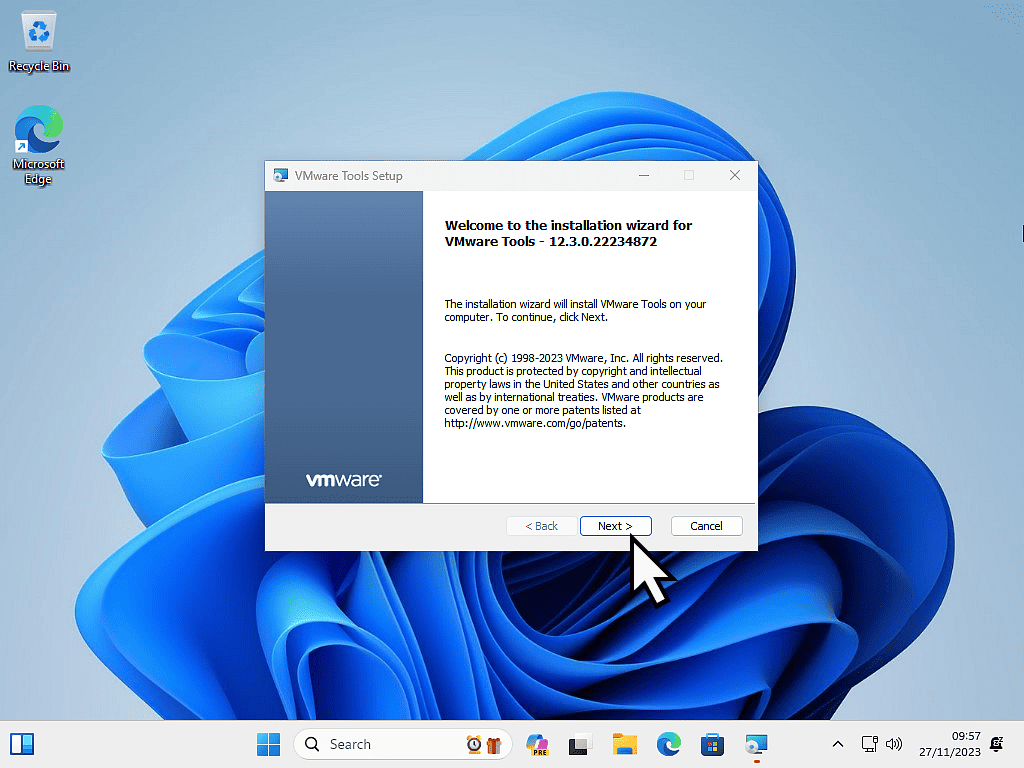
After you’ve installed VMware Tools, run you’re Windows updates and get your virtual machine setup the way you want it. You can install programs/apps onto the VM just as you would a real computer.
To Launch Your New Virtual Machine.
When you’ve finished setting up your virtual computer, you can shut it down in the usual way (Start – power – shutdown). When you shut down your virtual machine, VMware Player will automatically close.
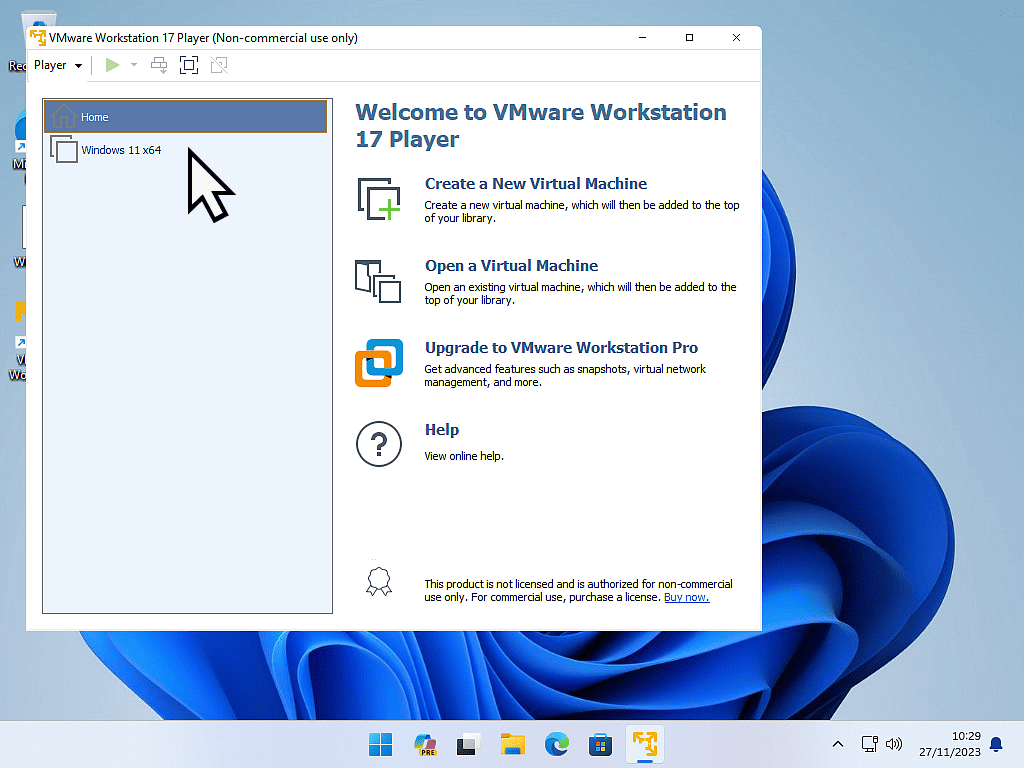
To start your VM again, simply open VMware Player.
In the left hand panel double left click on your VM. It will boot up just as any other Windows would.
Back It Up.
When you’ve finished installing and setting up your new VM, back it up. Create a complete backup and save yourself all the time and effort of re-installing when things go wrong. How To Backup A VMware Player Virtual Machine.
And don’t ignore System Restore when you’re tinkering with the virtual machine. System Restore works on the guest computer just as it does on the host How To Use System Restore In Windows 10 & 11.
Summary.
Once installed the virtual machine will behave as if it were a “real” computer. You’ll have Internet access on it and you’re free to install any software or apps.
Nothing that you do on your VM will affect your real computer. So you’re free to experiment and test and surf the ‘net.
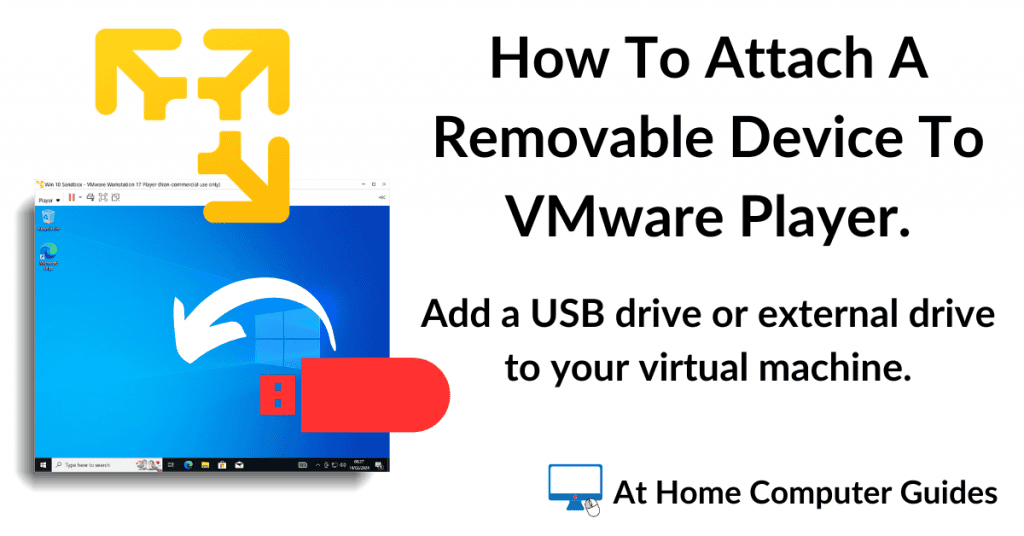
If you want to pass files and folders between your host computer (the real PC) and the guest system (the virtual machine), then you’ll need to setup a shared folder. How To Setup A Shared Folder And Attach Removable Devices In VMware Player.
Keep Up With Home Computer Guides.
All the latest guides and articles published on At Home Computer delivered to your inbox.
No account needed, just add your email address.
