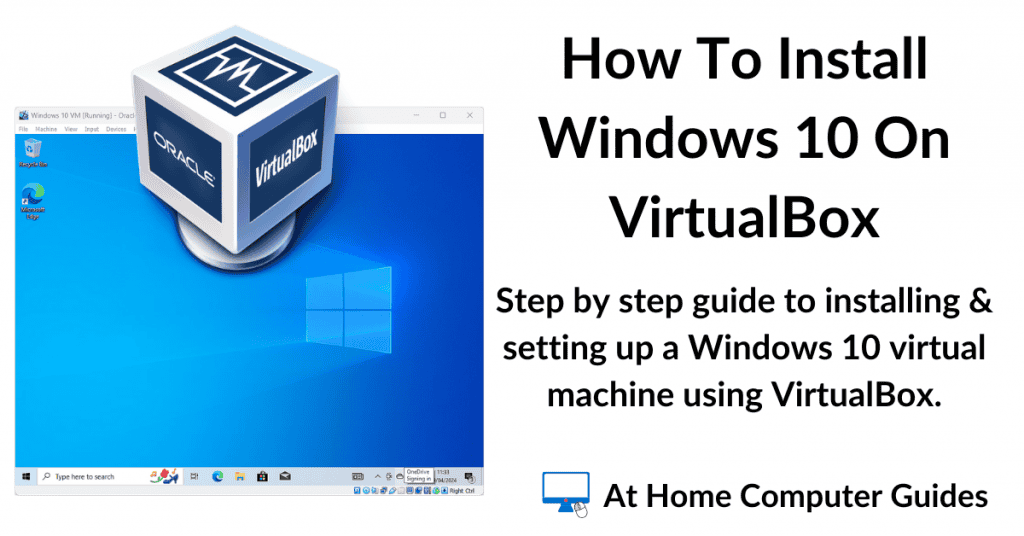
Setting up Windows 10 in a VirtualBox virtual machine isn’t that difficult. There’s not much more to it than a clean install of Windows.
To get started you’ll need to have VirtualBox (along with the expansion pack) already installed on your system How To Install VirtualBox On Your Computer.
Download The Windows 10 ISO file.
To get started download the Windows 10 ISO file from Microsoft. You can grab it from here https://www.microsoft.com/en-gb/software-download/windows10
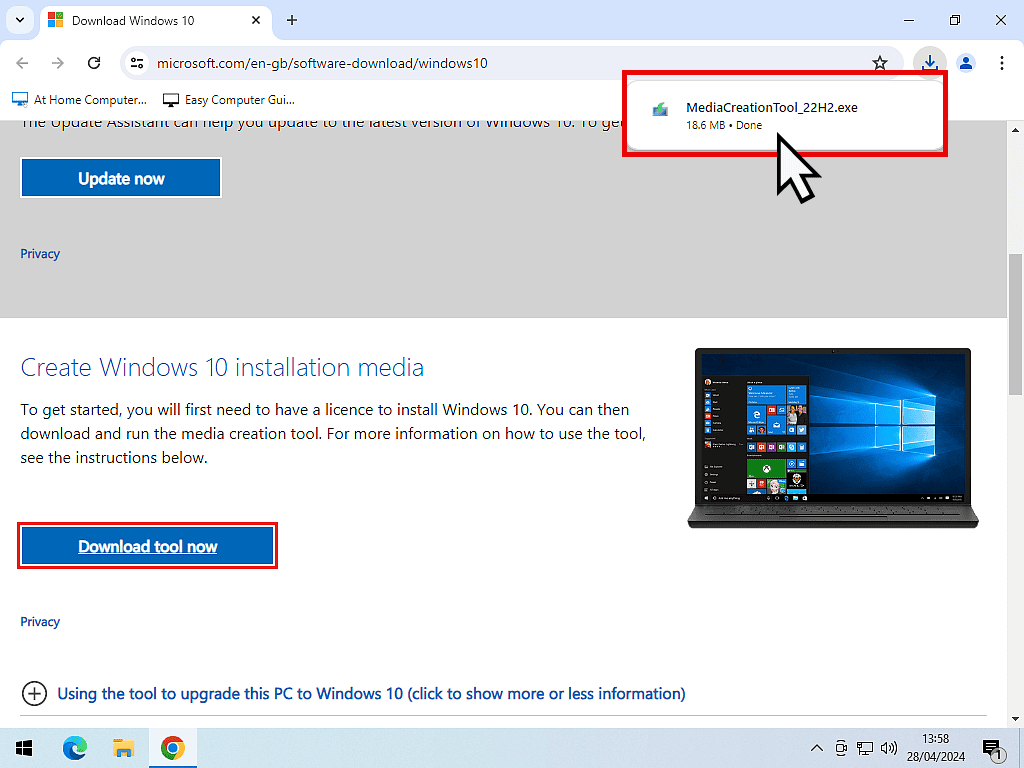
- Download and run the Windows 10 Media Creation Tool.
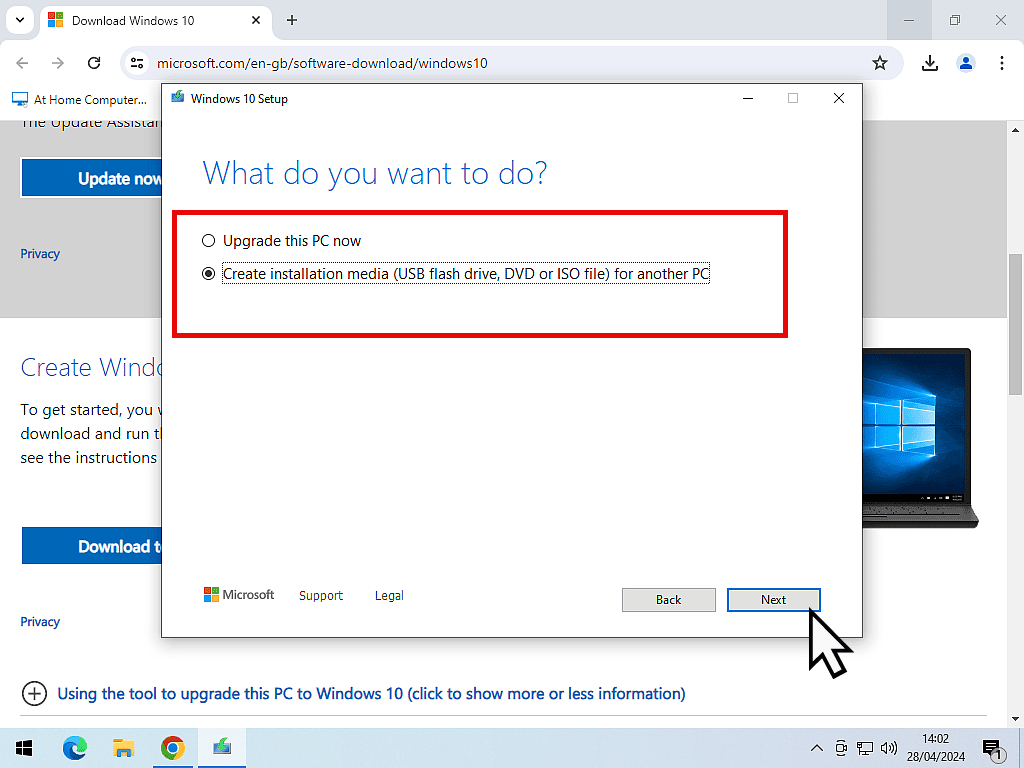
- Select Create installation media (USB flash drive, DVD or ISO file) for another PC.
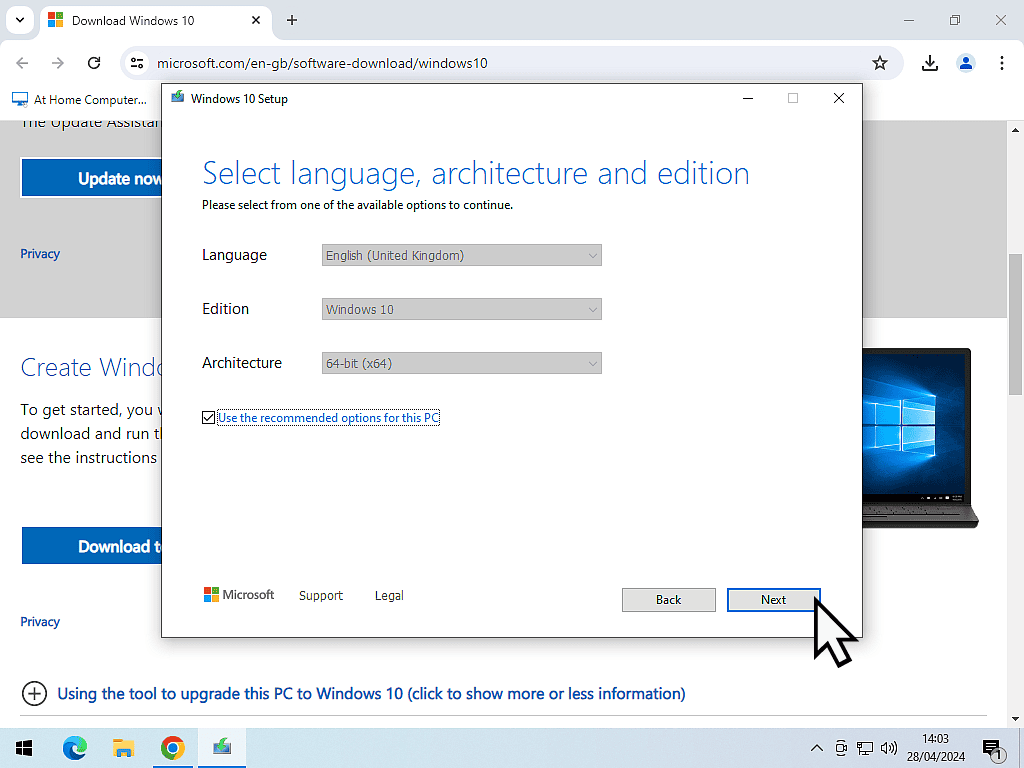
- You can change the language, architecture and edition of Windows 10 if you wish, but generally just leave it as is, click the Next button.
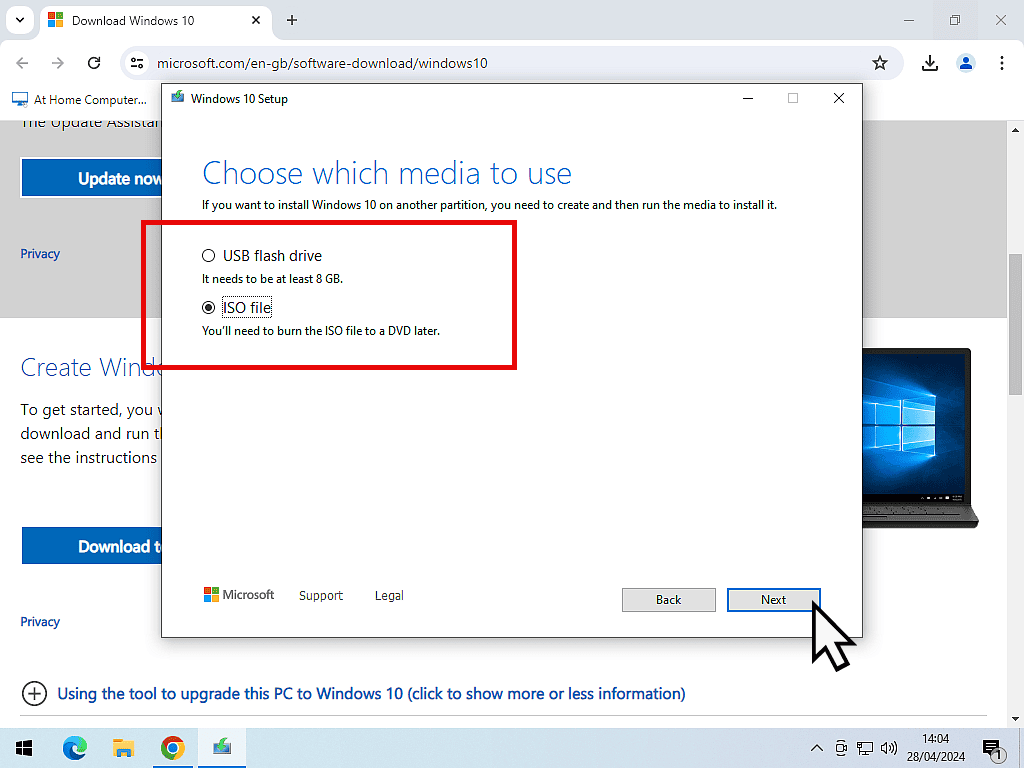
- Select ISO file and click Next.
Save the ISO file somewhere handy on your computer. Your going to need it to install Windows 10 onto VirtualBox.
Setting Up A Windows 10 Virtual Computer On VirtualBox.
To install Windows 10 as a virtual computer, launch VirtualBox.
When installing an operating system, such as Windows 10, as a virtual machine in VirtualBox, there are two distinct parts.
Firstly VirtualBox will create the virtual machine hardware for the VM to run on. Once that’s been done, the second part is to install the operating system onto the virtual hardware.
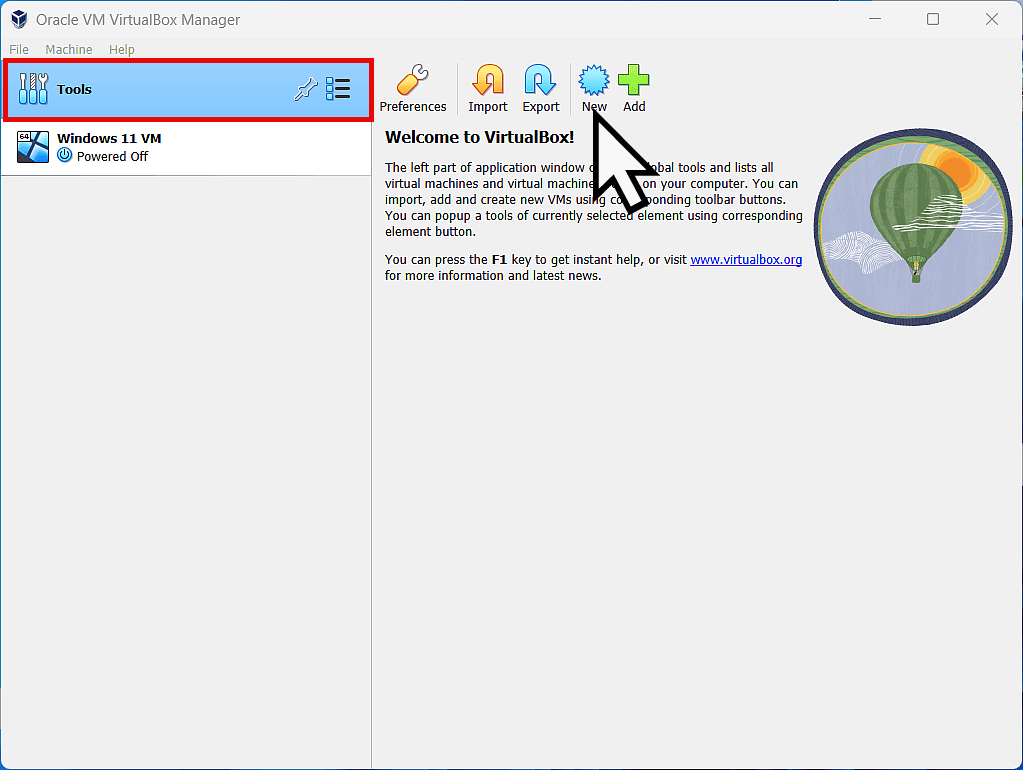
In VirtualBox, click the New button.
If you already have some virtual machines in VirtualBox, you might not be able to see the New button. In that case, click Tools in the left hand panel.
Now you should be able to see the New button.
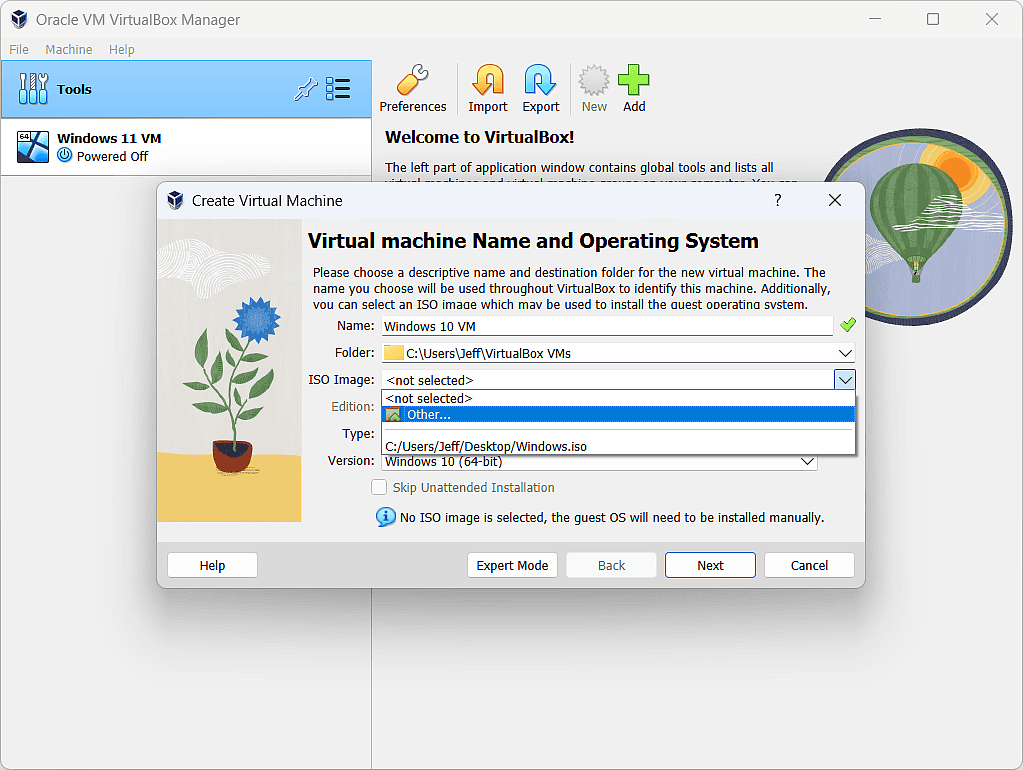
Give your virtual machine a name. It can can be anything you like.
This name is what you’ll see later, so choose something that’s identifiable.
For this demo I’ve called mine Windows 10 VM.
Next, in the ISO Image box, click the drop down arrowhead and select Other.
Navigate To The Windows 10 ISO File.
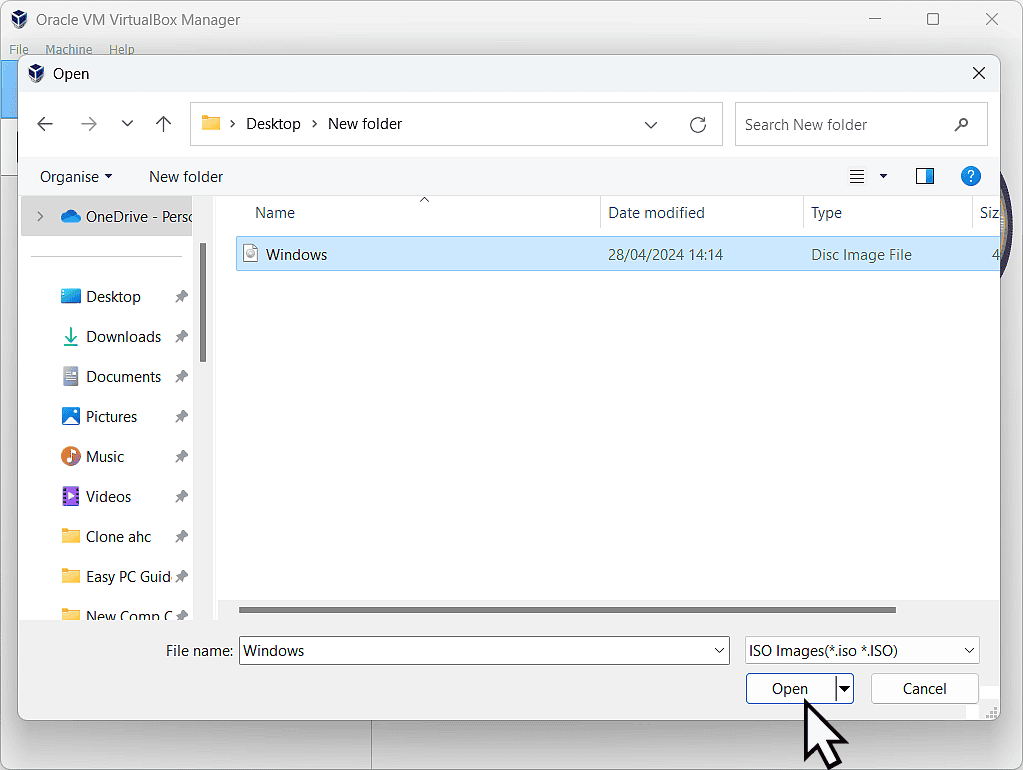
A File Explorer window will open. Use it to navigate to where you downloaded the Windows 10 ISO file.
Find the ISO, select it and then click the Open button.
Skip Unattended Installation Of Windows 10 Virtual Computer.
Be sure to select “Skip unattended installation”. You probably don’t want that.
Click the Next button.
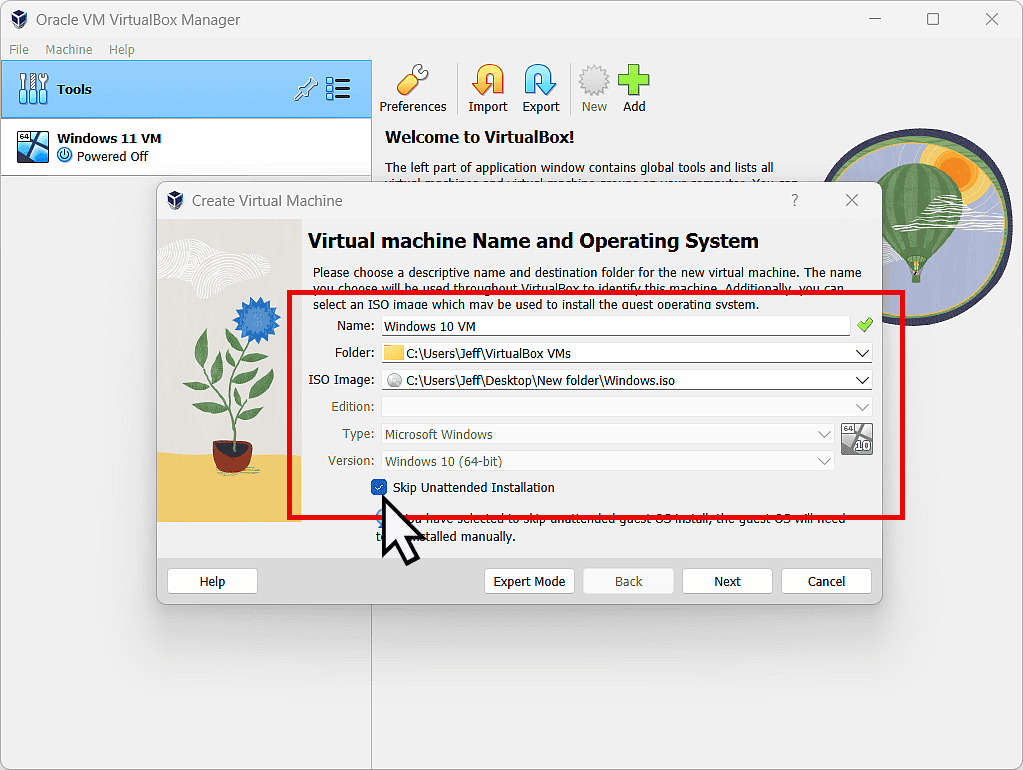
Unattended Installation.
Unattended Installation will falter when the Windows 10 installation gets to the point where you need to sign in to a Microsoft account and create PIN. To make the install as pain free as possible, skip this option.
Hardware Settings.
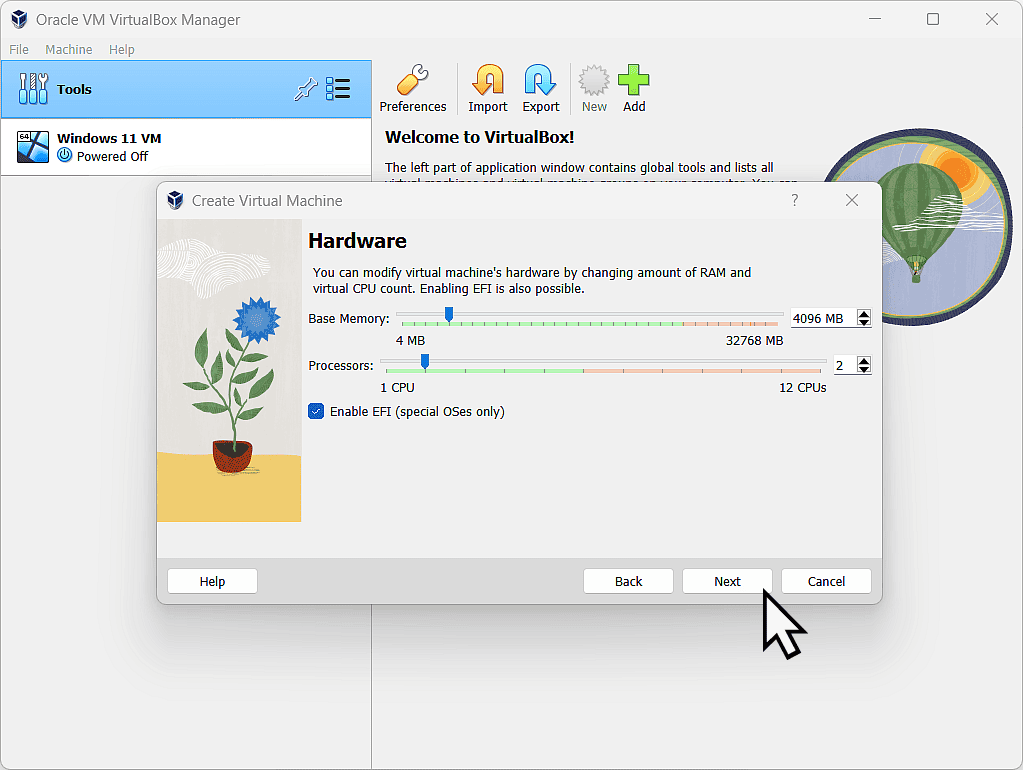
By default, VirtualBox will assign 2 Gb of RAM and only a single Processor to your new Windows 10 virtual computer. That’s not really enough. Although Windows 10 will work, it’ll be slow and cumbersome.
Change the Base Memory setting to be 4 Gb (4096 Mb) and allocate 2 processors.
Then enable EFI.
Click the Next button.
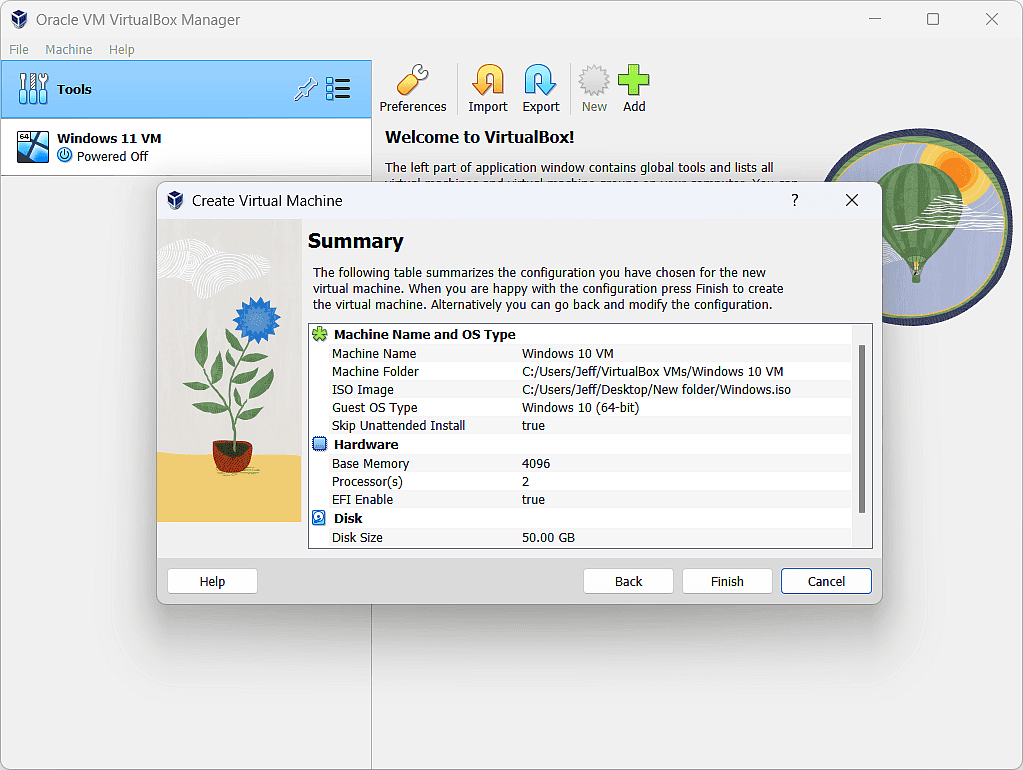
Finally you’ll see a summary of all the settings for the Windows 10 virtual computer.
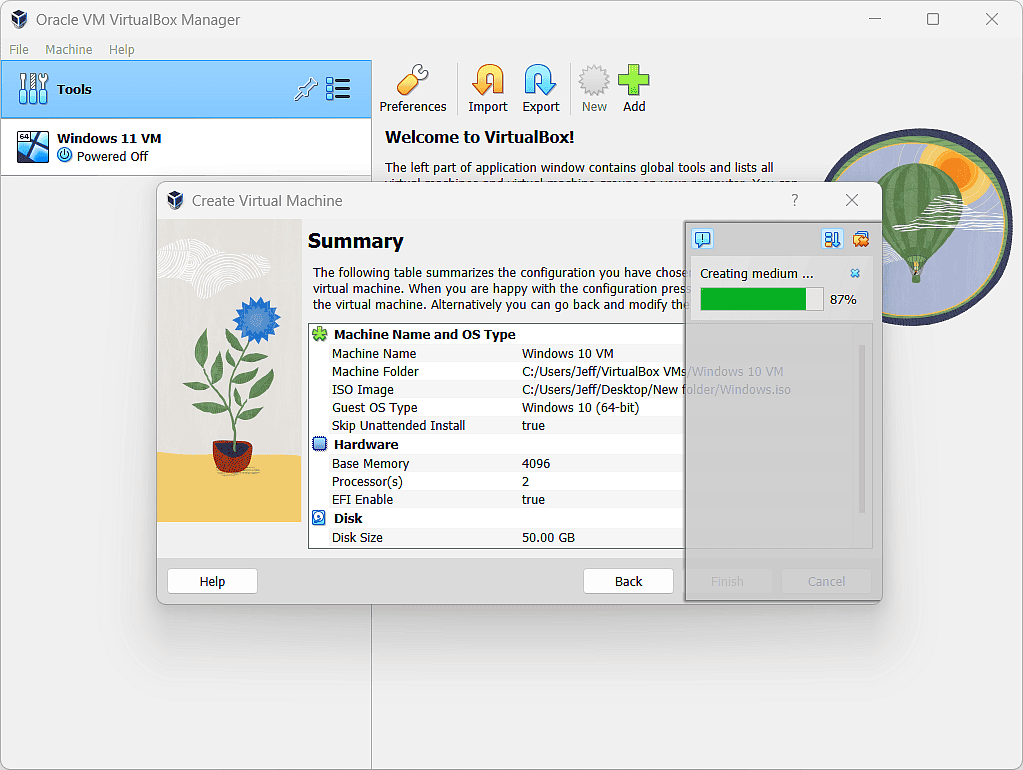
Click the Finish button and VirtualBox will create the virtual machine for you.
It may take a few minutes, it all depends on your host computer.
How To Install Windows 10 On VirtualBox.
What VirtualBox has done thus far is to create the virtual computer, the virtual hardware, for your computer.
Now you have to install the operating system (Windows 10) onto the virtual hardware. And you do that pretty much exactly the same as installing onto a bare metal computer.
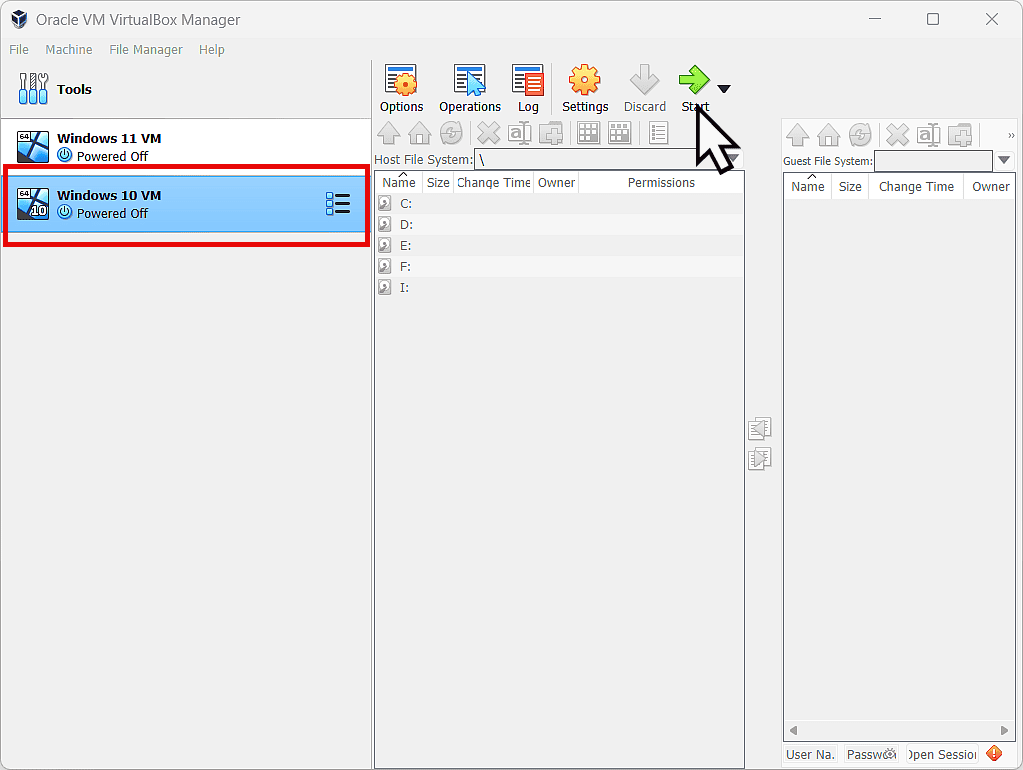
To install Windows 10, select it in the left hand panel.
Note that your virtual machine will be called whatever you named it earlier.
After selecting Windows 10, click the Start button in VirtualBox.
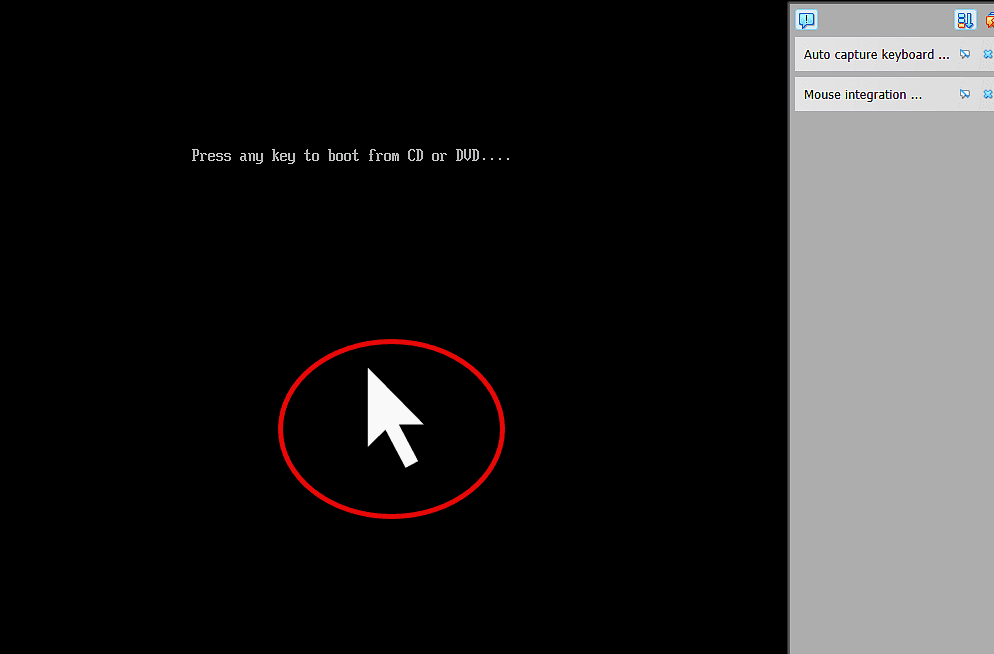
Press Any Key To Boot from CD Or DVD.
To send clicks and keystrokes to the guest computer (the virtual machine) click inside the virtual machine window. VirtualBox will then capture your mouse clicks and keystrokes and direct them towards the virtual machine.
To release your mouse and keyboard from the VM, press the right hand CTRL key.
As soon as you see the “Press any key to boot from CD or DVD” message appear, left click once inside the VM window and then press a key on your keyboard.
You need to be quick because the message doesn’t hang around for long, so be ready for it.
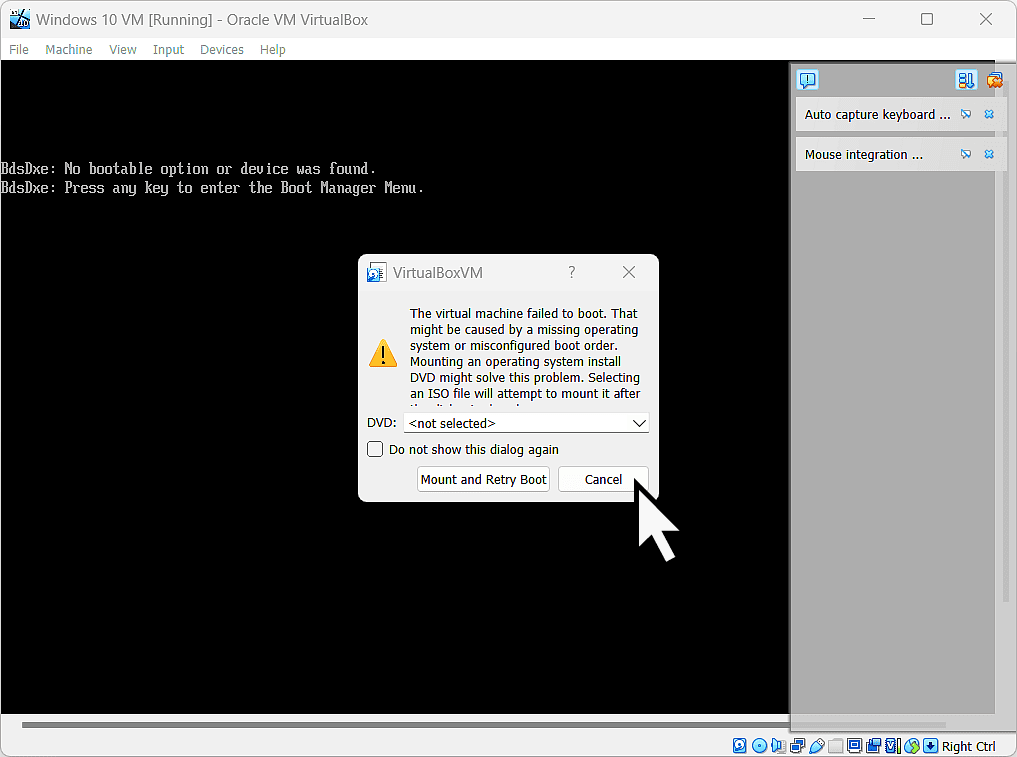
The Virtual Machine Failed To Boot.
To make the virtual machine boot from the Windows 10 ISO, you need to left click once inside the VM window. That directs all further mouse clicks and keyboard keystrokes towards the virtual machine and away from the the host computer.
If you weren’t quick enough, then the virtual machine will fail to boot. To try again, click the cancel button.
Then click the Input button on the VirtualBox toolbar. On the menu hover over Keyboard and then on the second menu, click Insert CTRL – Alt – Del, which we all know will reboot your computer and you can have another try at “Pressing any key”.

You Might Need Several Attempts.
Don’t worry if you miss it again. The “Press any key” message doesn’t hang around for long. Simply click Cancel again and reboot the virtual machine using CTRL – Alt – Del and keep trying.
As soon as the message appears, left click once inside the window and then hit a key on your keyboard.
Windows 10 VM Setup – VirtualBox.
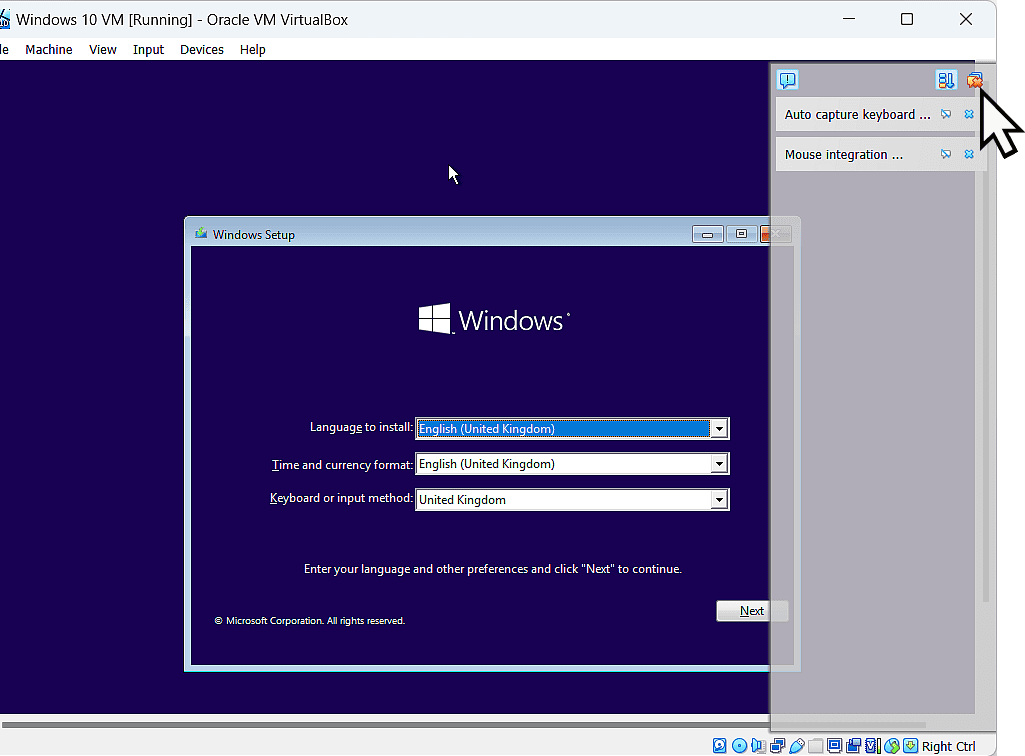
After “pressing any key etc”, the Windows 10 setup will start. VirtualBox has a rather annoying habit of opening a side window over the top of the setup window. If it’s in your way, you can close it by clicking the button in the very top right corner.
- On the Windows 10 setup screen, click Next.
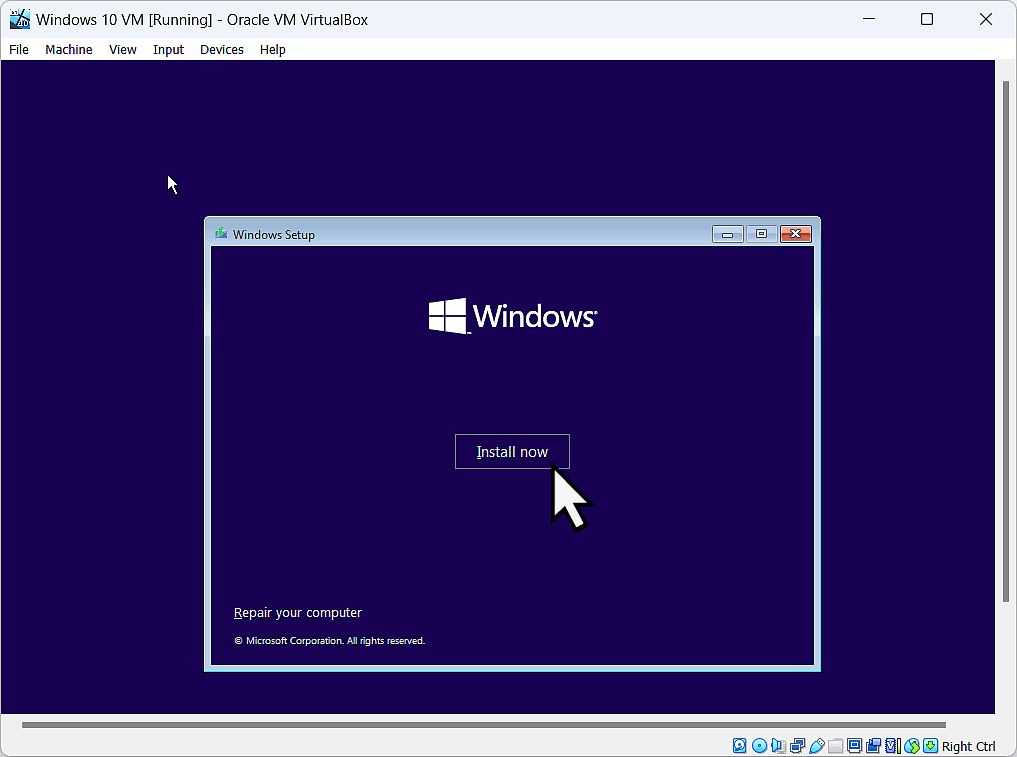
- Then click the Install Now button.
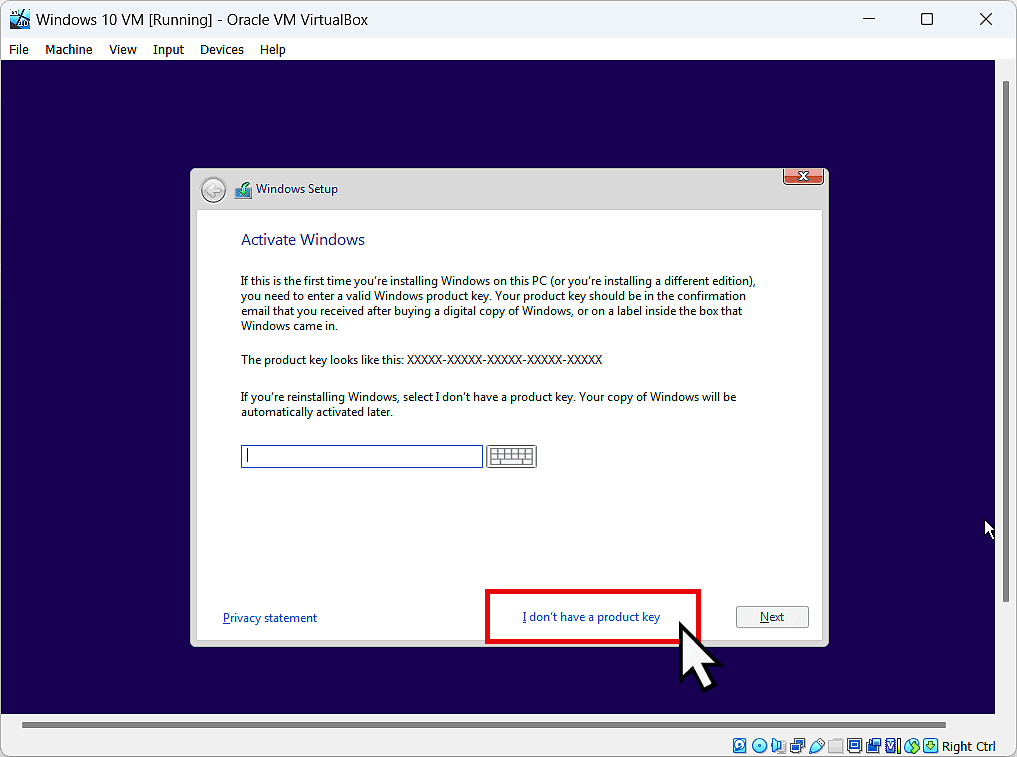
- Although you could enter a serial key here, I’d strongly advise against it. Click “I don’t have a product key”.
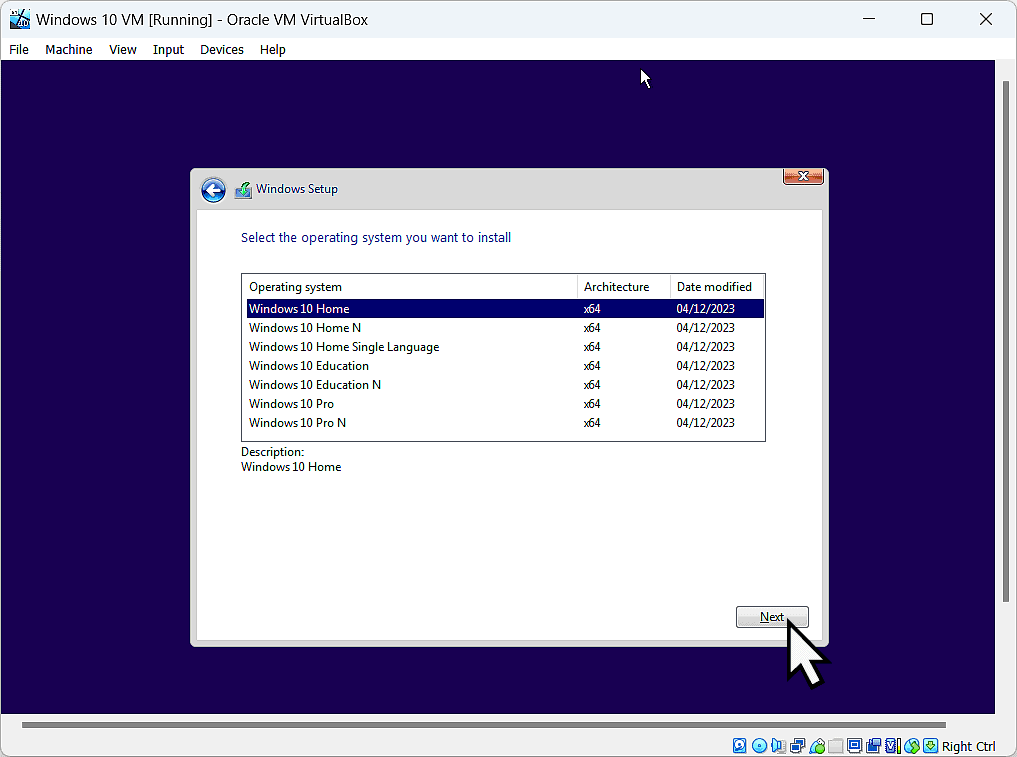
- Select which edition of Windows 10 you want to install. If you already have a product key, then choose the edition that the product key is for.
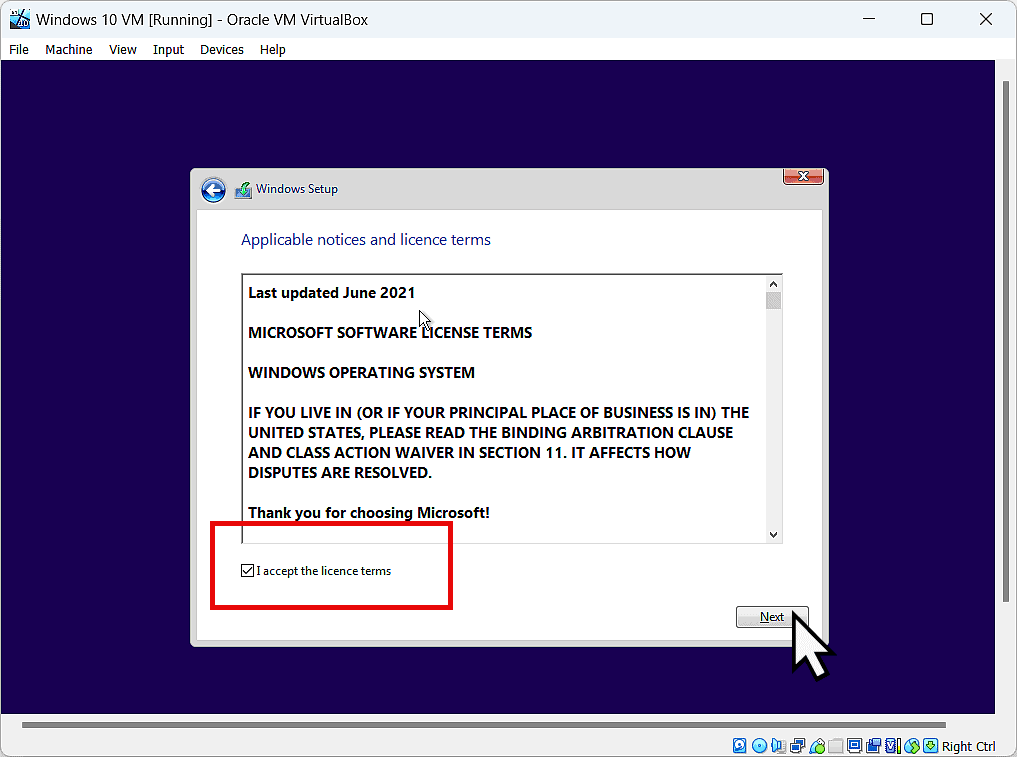
- Accept the licence terms and click Next.
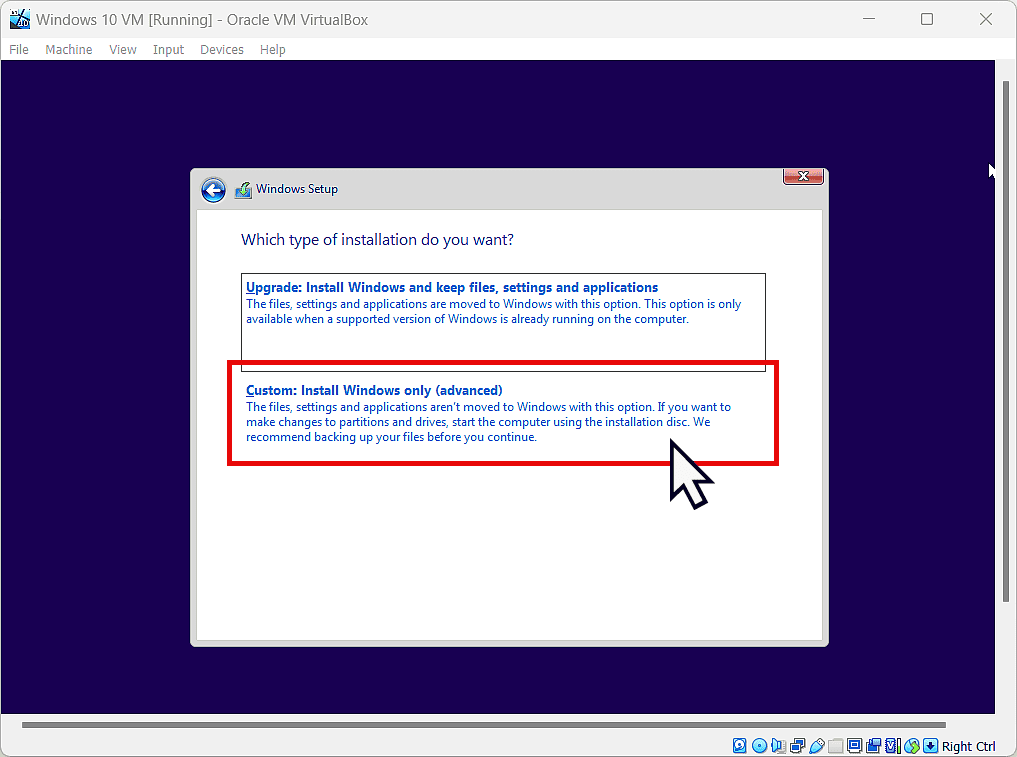
- Click “Custom Install Windows Only (Advanced)”.
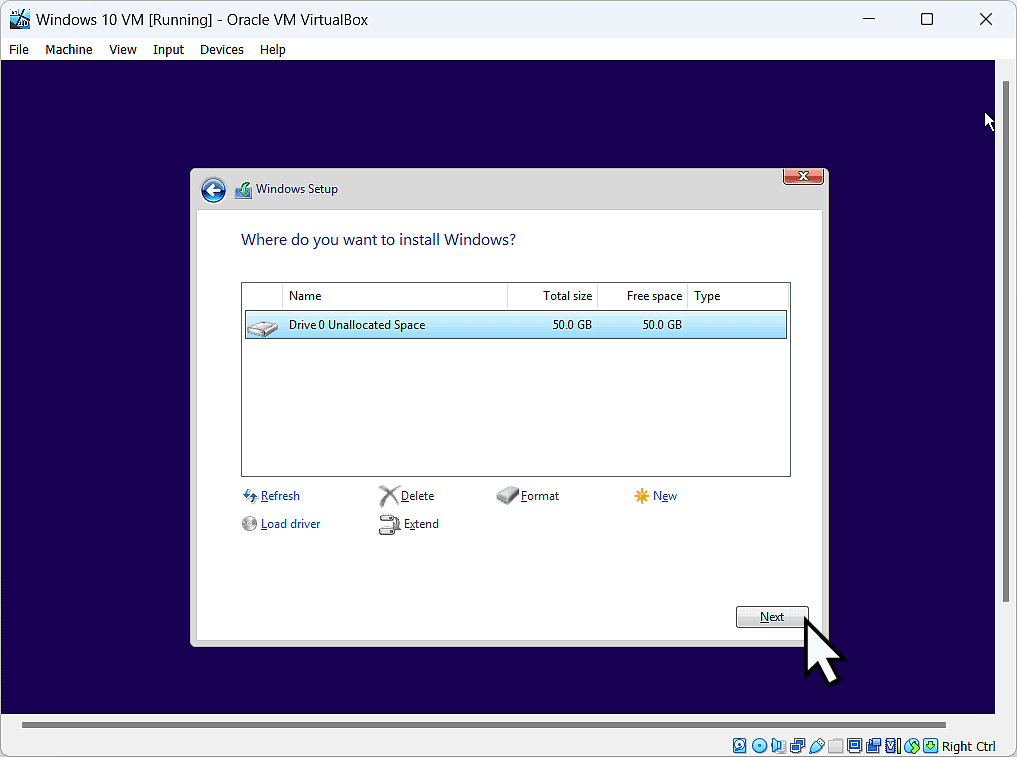
- Click the Next button.
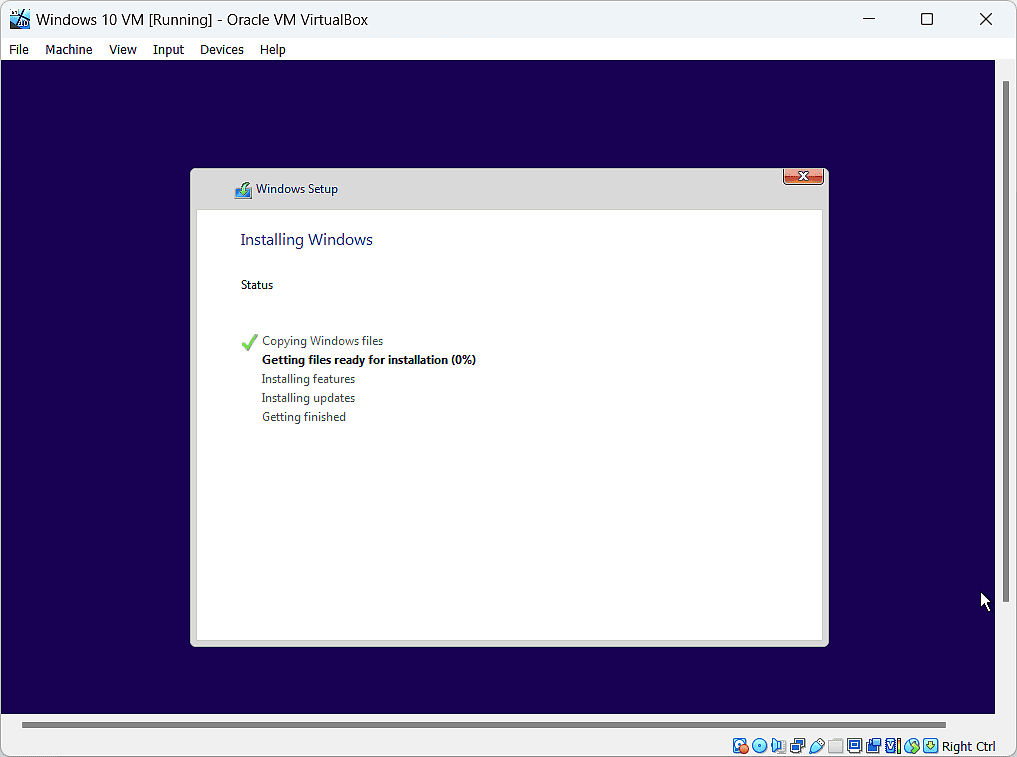
- Relax while Windows 10 installs on your virtual computer.
Setting Up Windows 10 VM.
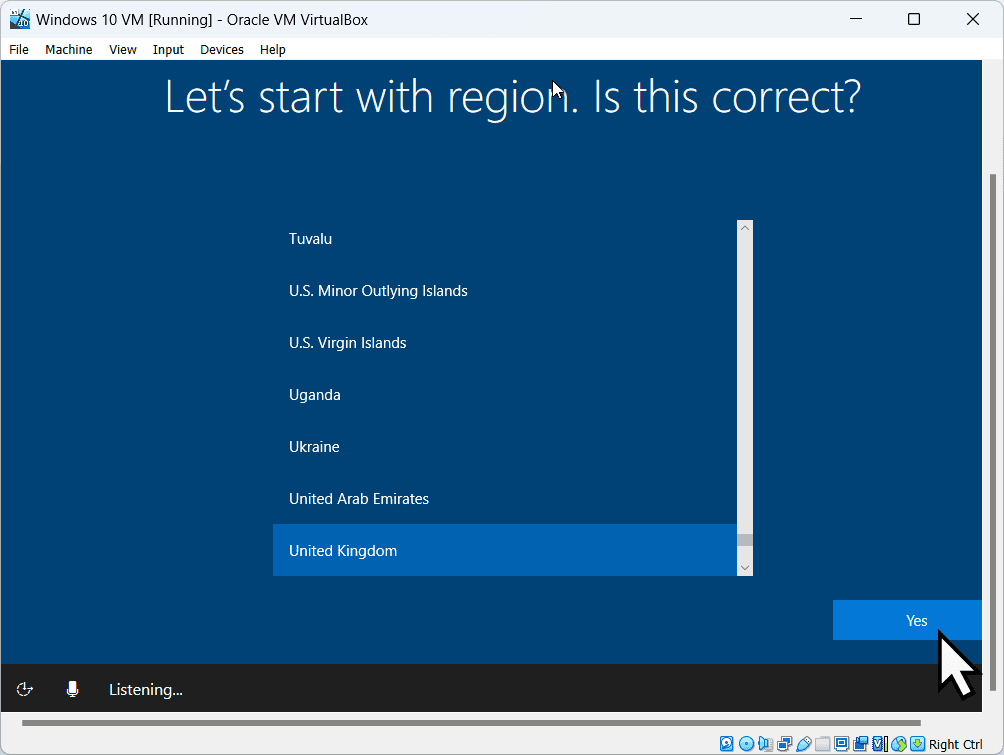
Windows should set your region correctly, but if it didn’t, you can select a different one. Click Yes to continue.
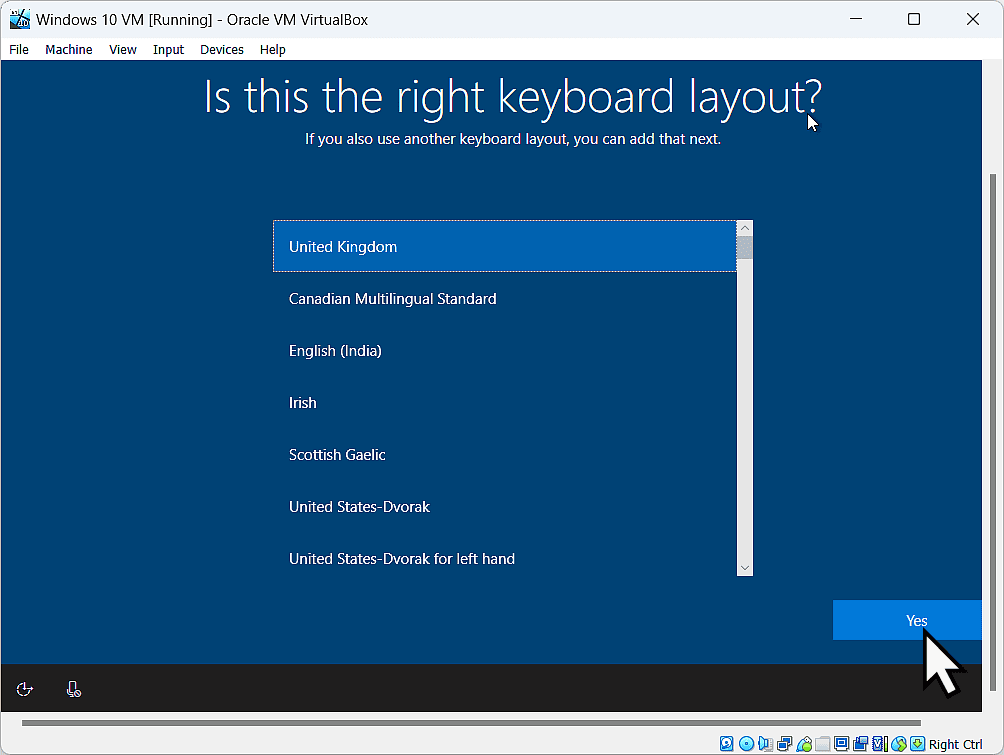
The keyboard should be set to the same as the region, but you can select a different layout if you’d prefer. Click Yes to continue.
Sign In To Your Microsoft Account.
Both Windows 10 & Windows 11 are fairly insistent that you use a Microsoft account. That’s not always going to be what you want to do, especially since this is a virtual computer.
If you’d rather just sign in using a local account, check out this guide How To Install Windows Without A Microsoft Account.
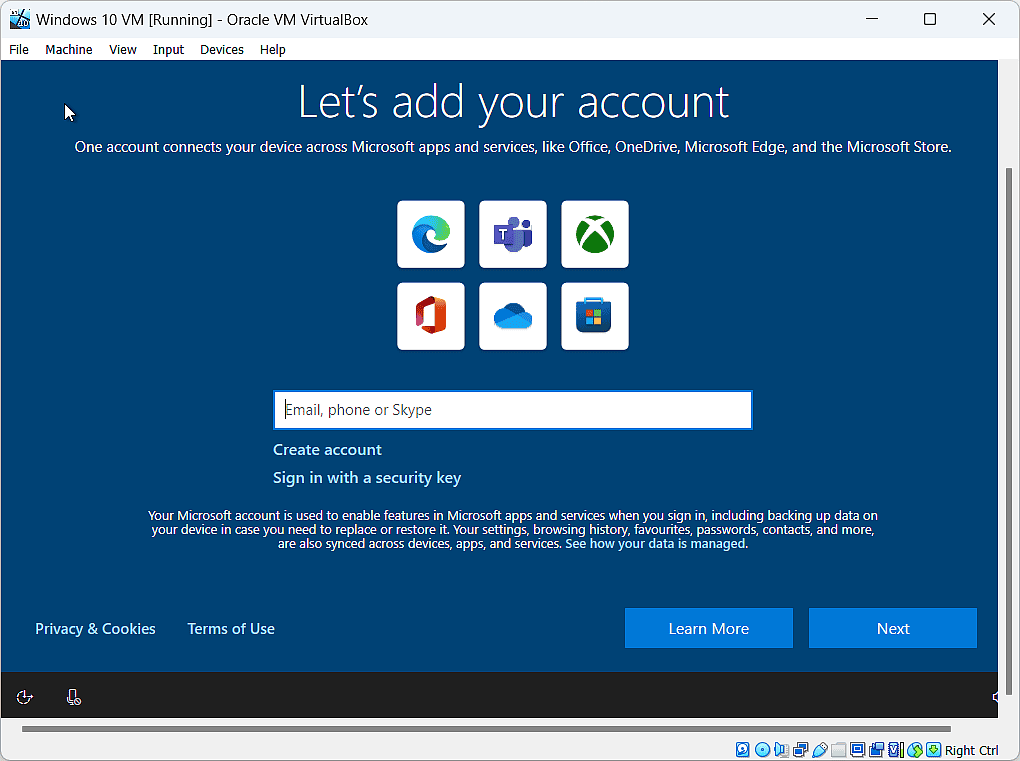
Sign in to your Microsoft account.
You can create a new account if you don’t want to use your current one on the virtual machine.
Continuing The Setup.
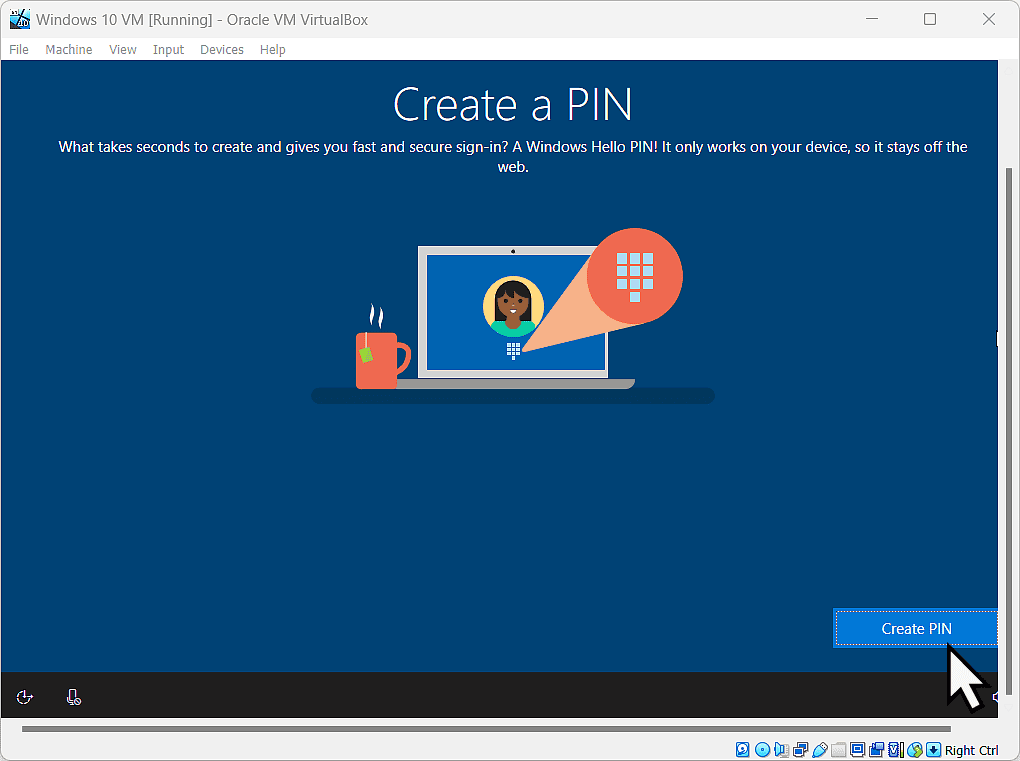
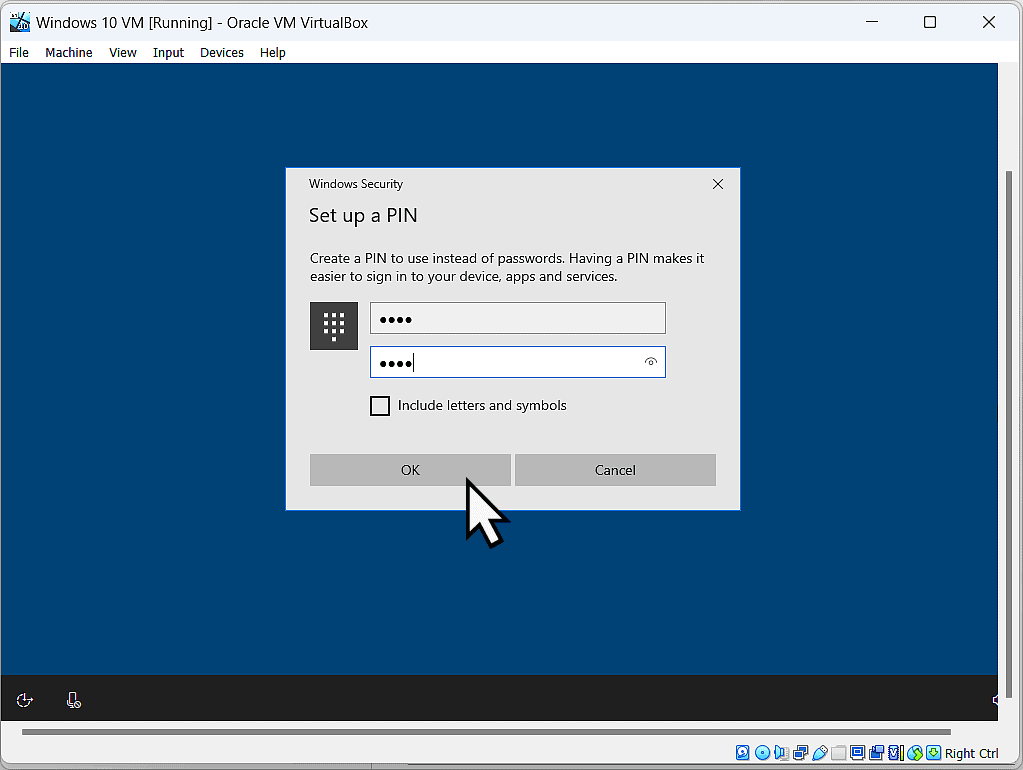
After signing in or creating a new Microsoft account, you’ll have to create a PIN. Be sure to remember both the password and the PIN. Write them down somewhere.
Then you’ll see several screens related to your privacy and data collection by Microsoft.
- Click Create PIN button.
- Type a PIN into the boxes and click the OK button.
- Then you’ll see several privacy notification screens. It’s entirely your choice as to which option you choose.
- Customising your experience won’t make any difference to how your virtual computer performs.
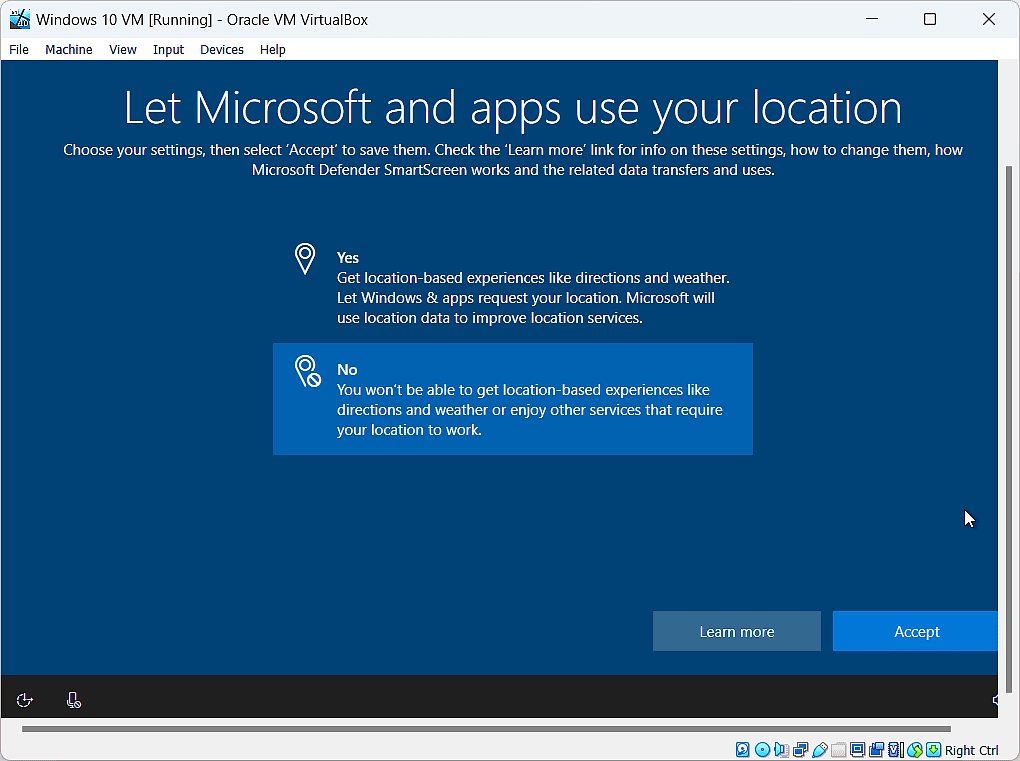
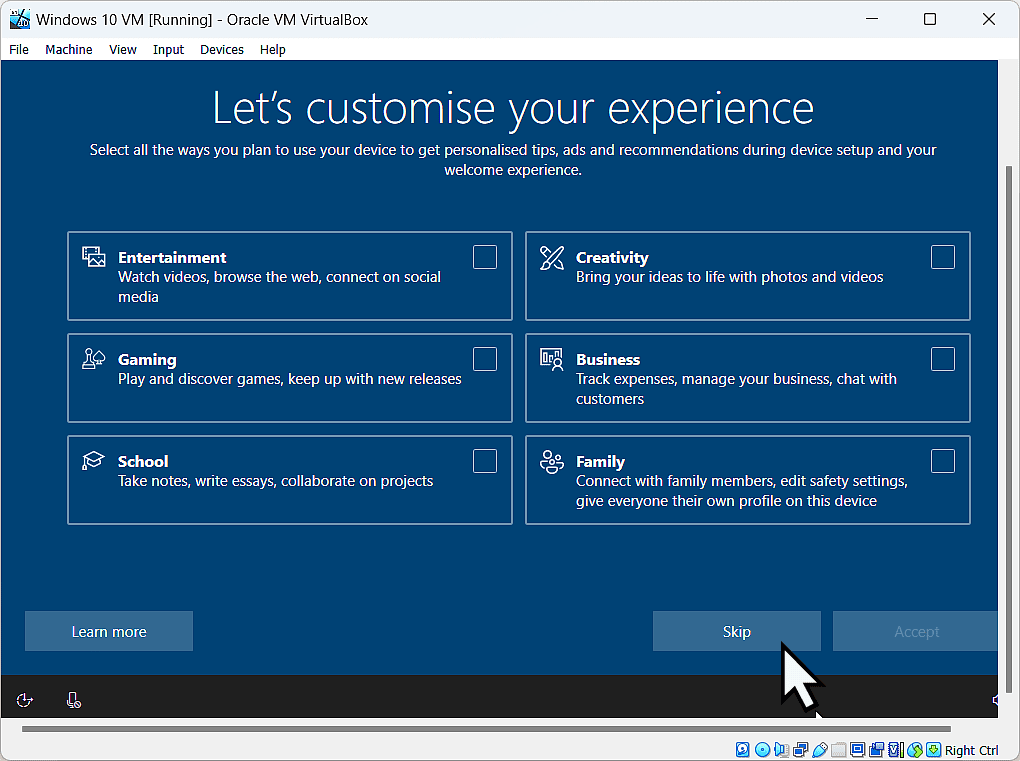
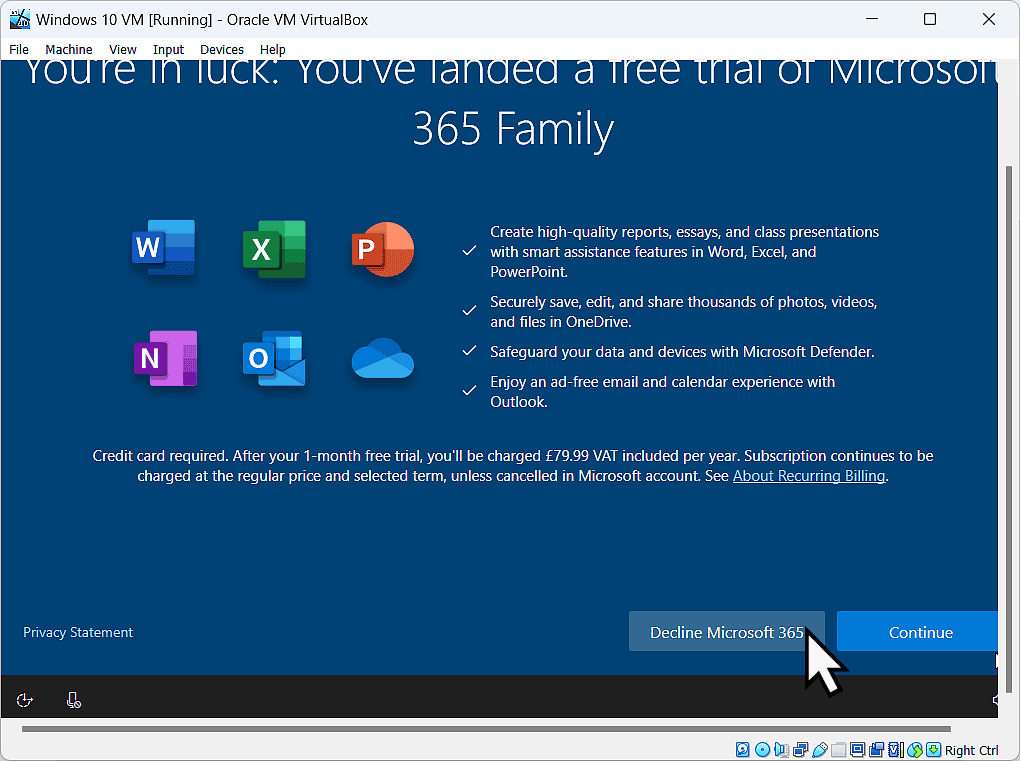
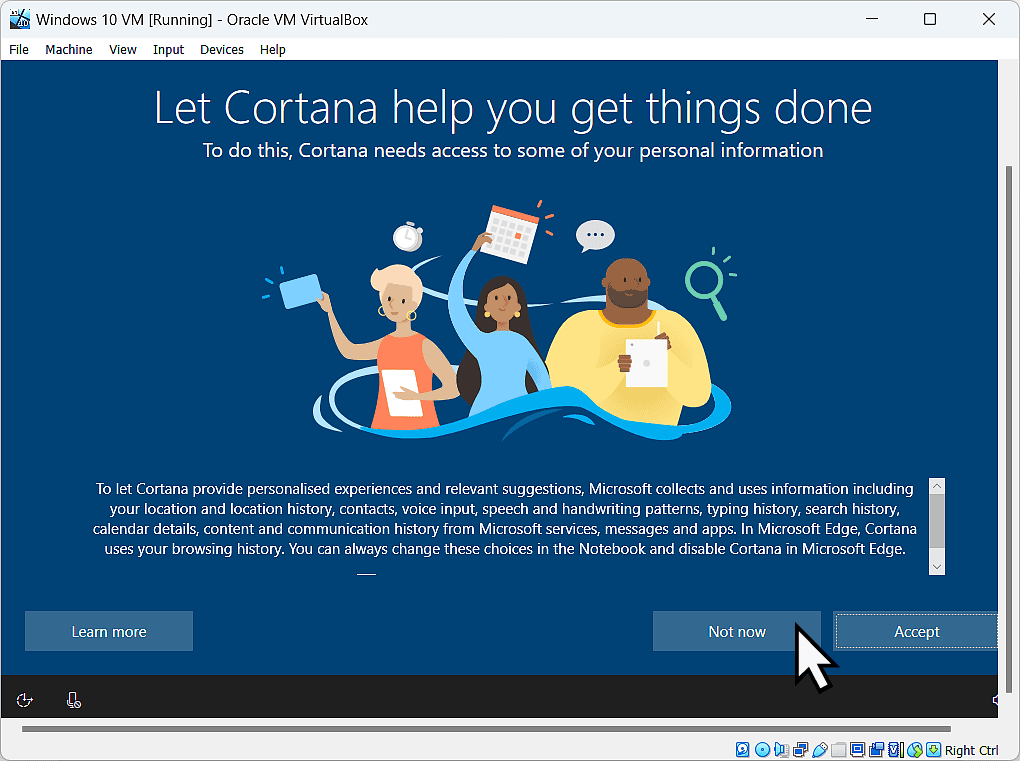
Next you’ll see various screens with different offers and options. Personally I’d suggest that you turn down all the offers. What you’re creating here is a virtual computer. VMs on a home computer tend to be temporary. So don’t sign up to anything you don’t have to.
Besides, everything can be setup later once you’ve got Windows 10 running.
- Don’t backup your files to Onedrive. If you want to, that can be setup later once you’re into Windows.
- Decline the offer of a trial version of MS 365.
- Don’t setup Cortana.

Windows 10 On VirtualBox.
After several restarts you’ll eventually have a Windows 10 virtual machine running on VirtualBox.
The next thing to do is to install the Extension Pack.
At the top of the VirtualBox window, click Devices and then click on “Insert Guest Additions CD Image”.
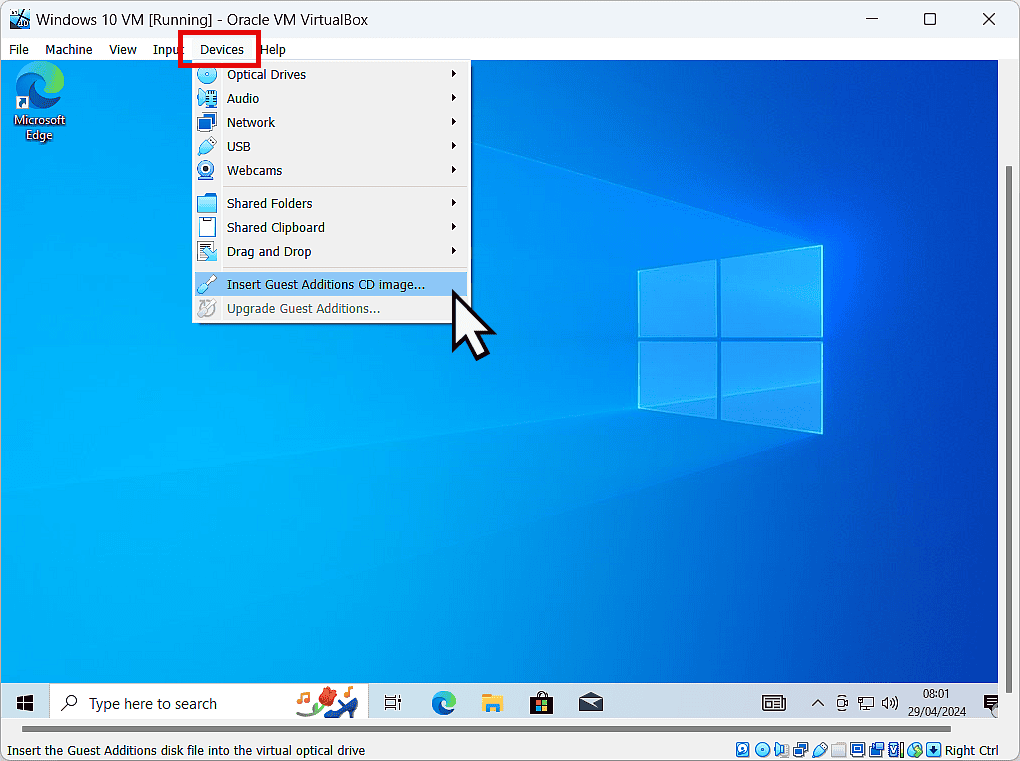
Installing VirtualBox Guest Additions CD.
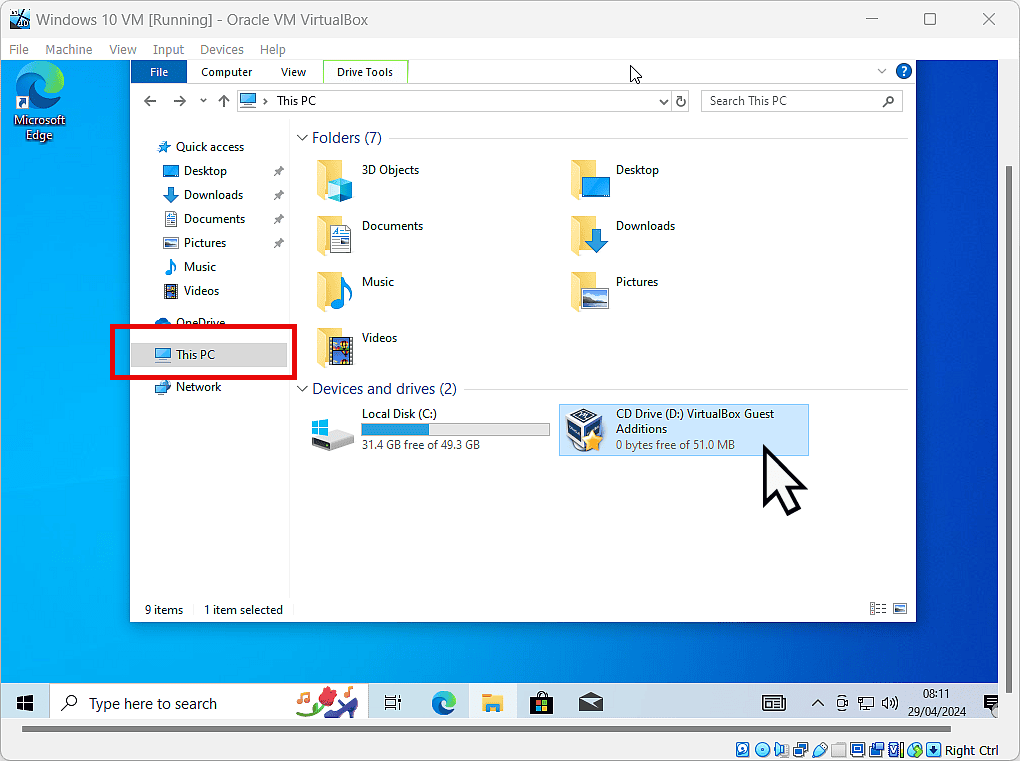
After clicking on “Insert Guest Additions CD Image”, the CD will be mounted as a virtual CD drive.
Open File Explorer, then click This PC in the left hand panel and then double left click on the virtual CD drive.
Installing the VirtualBox extension pack is a fairly straightforward affair, similar to installing any other software on Windows.
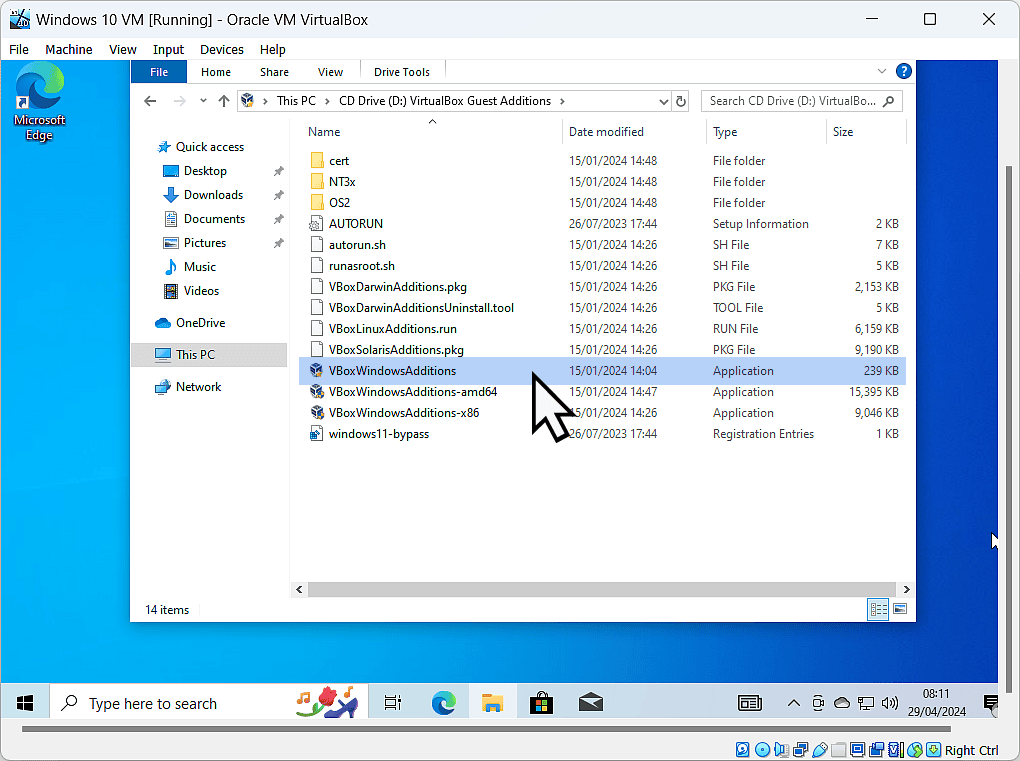
- After double clicking on the CD drive, the CD image will open. Double left click on “VBoxWindowsAdditions”.
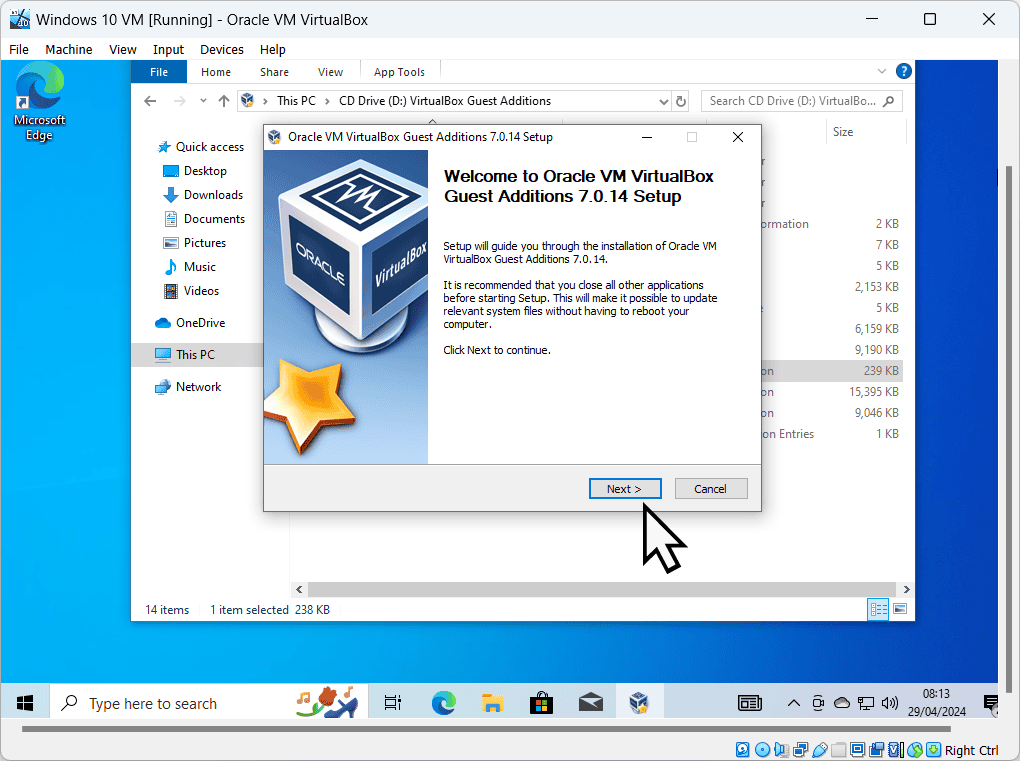
- At the welcome screen, click Next.
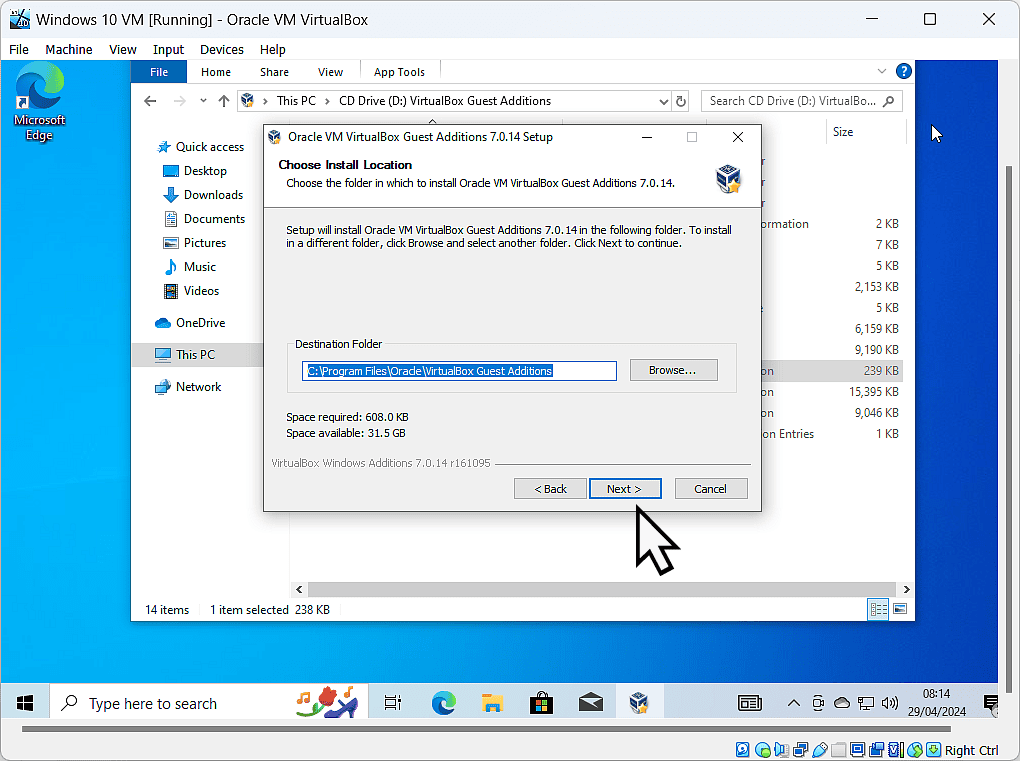
- You can change the installation directory if you wish but I’d just accept the default location. Click Next.
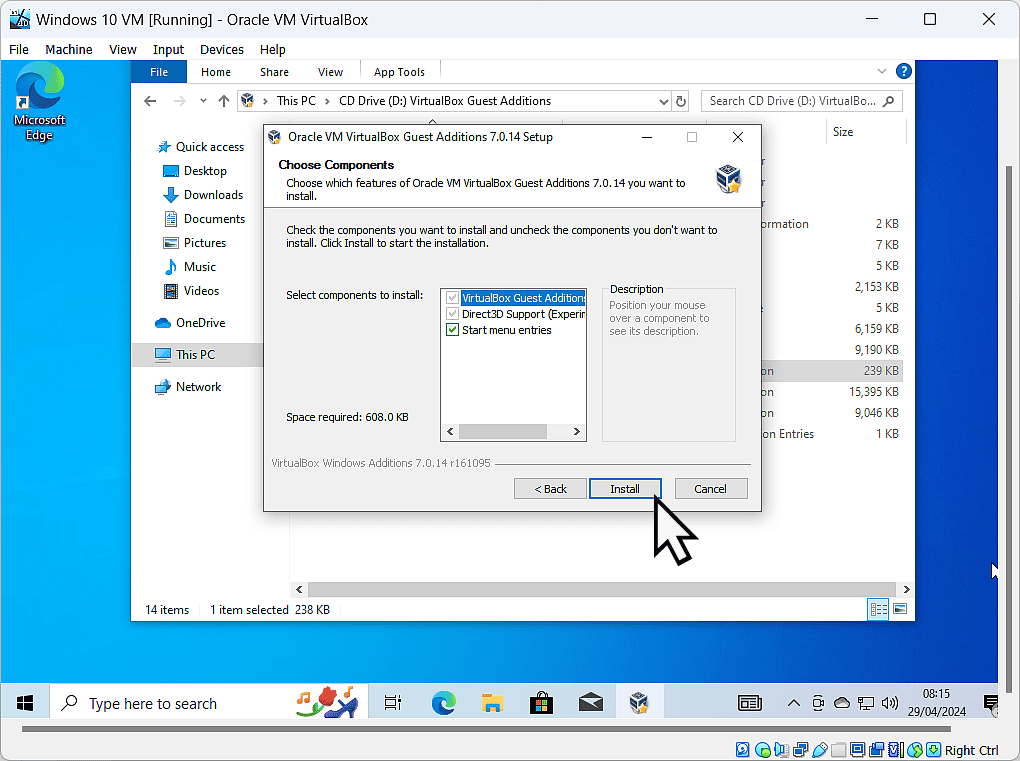
- While you can choose which components get installed, again I’d recommend accepting the defaults. Click Install.
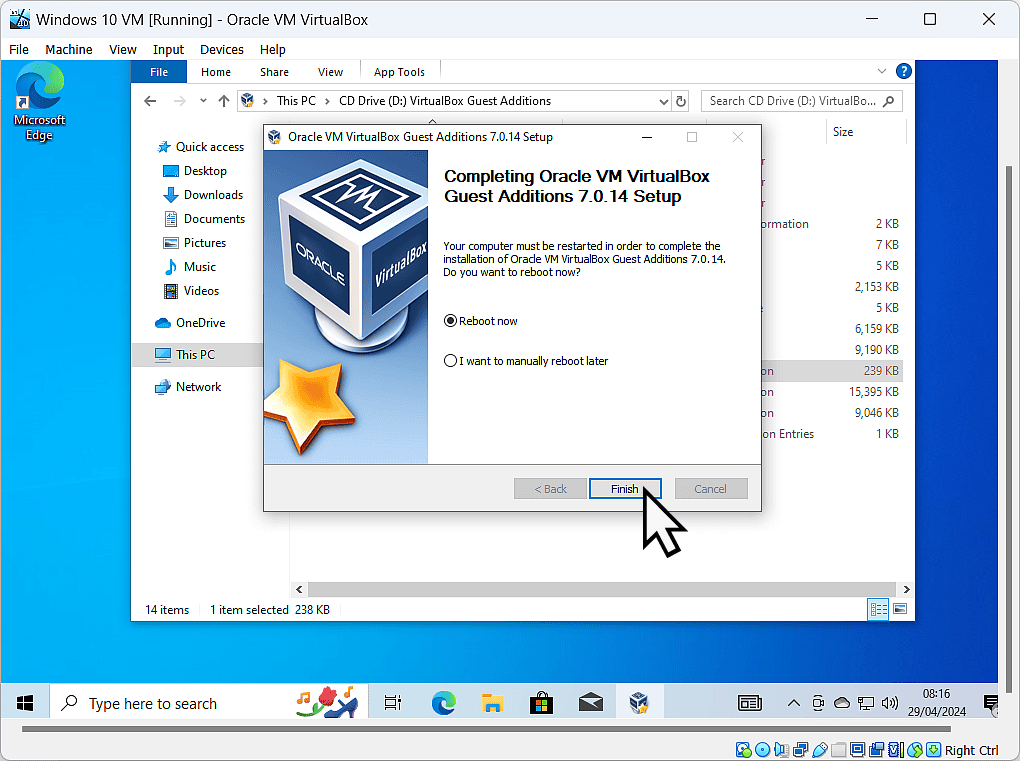
After the Guest Additions has finished installing you’ll need to reboot the virtual computer.
When the virtual machine restarts, run Windows update in the usual way and then I’d strongly suggest that you create a complete backup of the virtual machine.
Summary.
Setting up a Windows 10 virtual machine in VirtualBox is something that you can do on your home computer. Once you’ve got it setup, create a backup, don’t rely on the VBox snapshots to get you out of trouble.
Keep Up With Home Computer Guides.
All the latest guides and articles published on At Home Computer delivered to your inbox.
No account needed, just add your email address.

