How to import (attach) a VHD file into VirtualBox to use as a virtual machine.
A VHD file (Virtual Hard Disk) is a disk image file format that acts like a physical hard drive. It can contain everything found on a real hard drive, including disk partitions, operating system and a file system (like NTFS or FAT), files, and folders.
If you’re trying to virtualise an older PC using VirtualBox, then this is for you.
Setup VHD Image In VirtualBox
To get started you’ll need to have VirtualBox and its accompanying Extension Pack (Guest Additions) installed on your host computer. How To Install VirtualBox On A Windows PC.
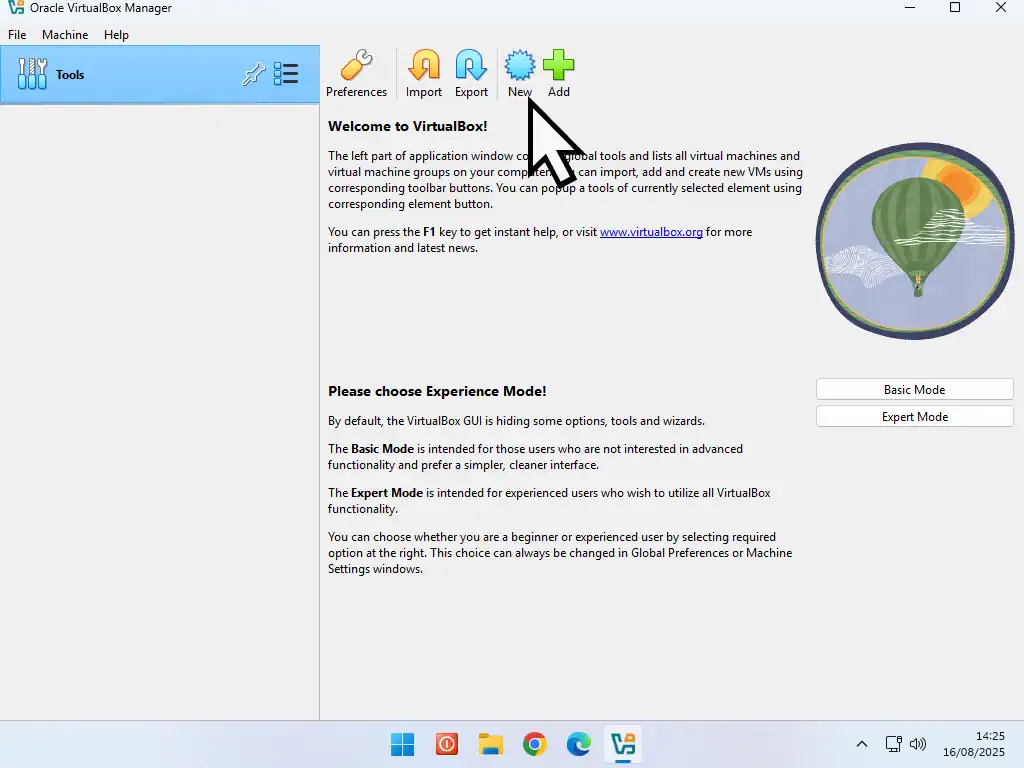
To use a VHD file open VirtualBox and click the New button to setup a new VM.
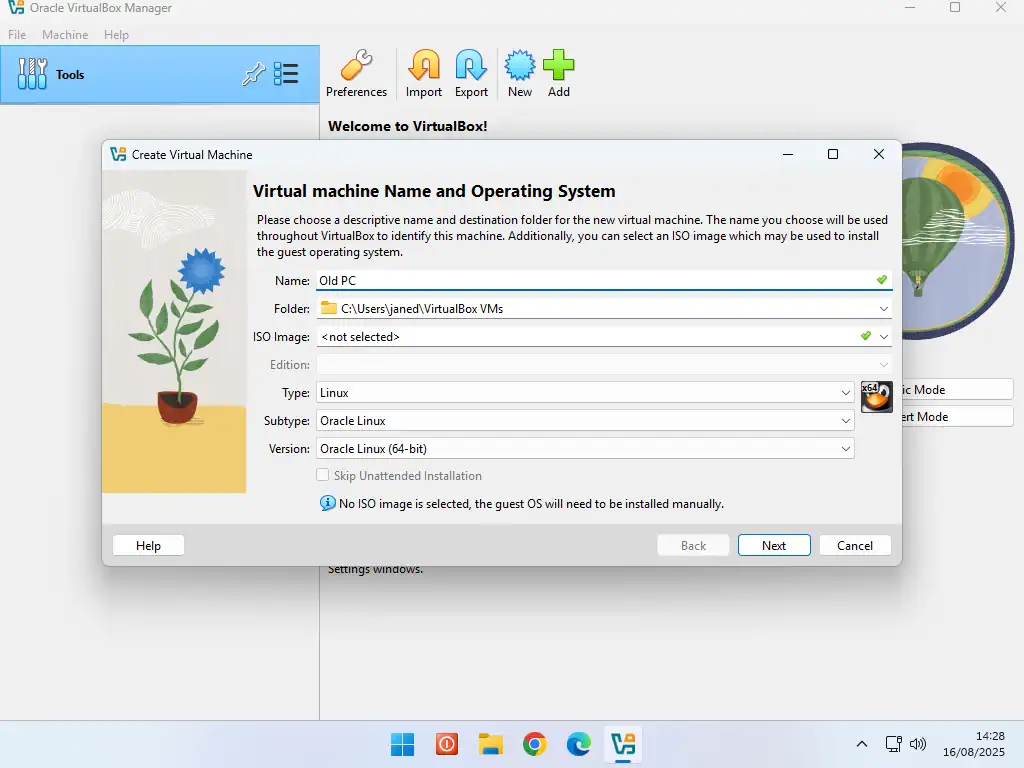
Add a name for the virtual machine in the Name field. The Folder field is going to be the location that the new virtual machine will be stored. You can change that if you wish by using the drop down arrow and selecting a different folder.
Make sure the ISO Image field is set to Not Selected. The rest of the options can be left as is. Click Next.
Note
If you’re VHD file is still on an external drive (USB drive), then copy and paste it to the host computer before you begin attaching it.
While it is possible to attach an image file from an external drive, it’ll be extremely slow. So copy it over onto the host PC before you begin.
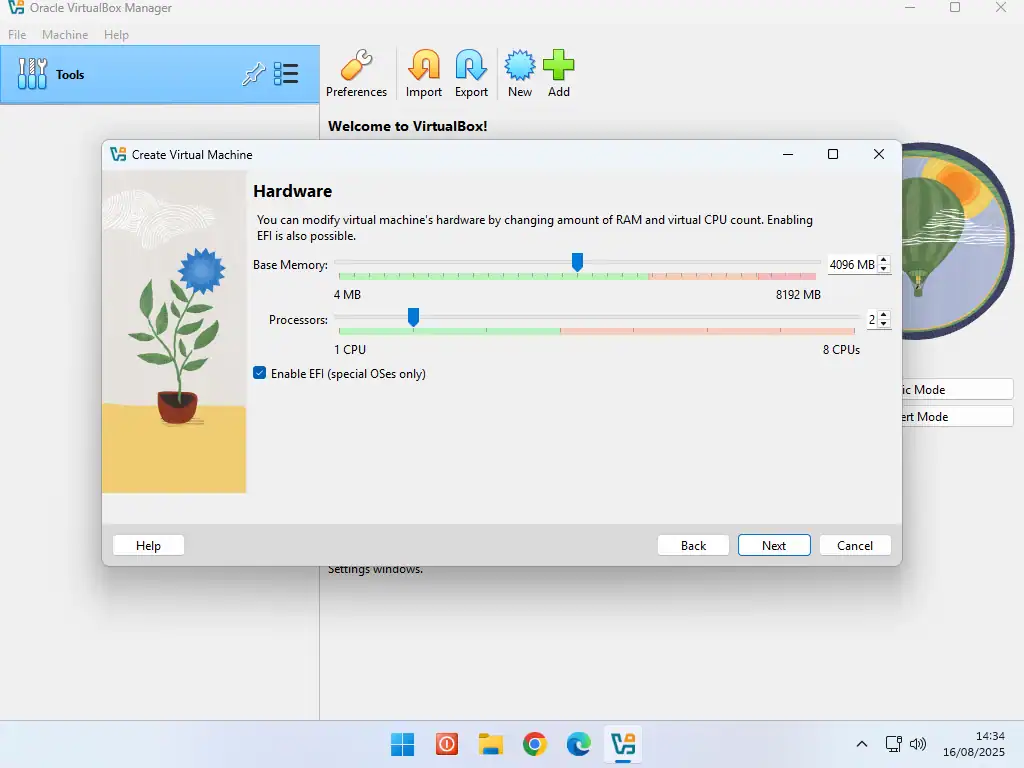
For the hardware settings, try to match those of the VHD file.
Use the slider to adjust both the amount of RAM and CPUs.
Select Enable EFI if the VHD file is from a Windows 10 or Windows 11 PC then click Next
Selecting EFI
For most Windows 10 and Windows 11 VHD images, you’ll have to use EFI. However that’s a generality that may not be true for you.
Some older computers running Windows 10 may not have had EFI enabled.
Attaching The VHD File To VirtualBox
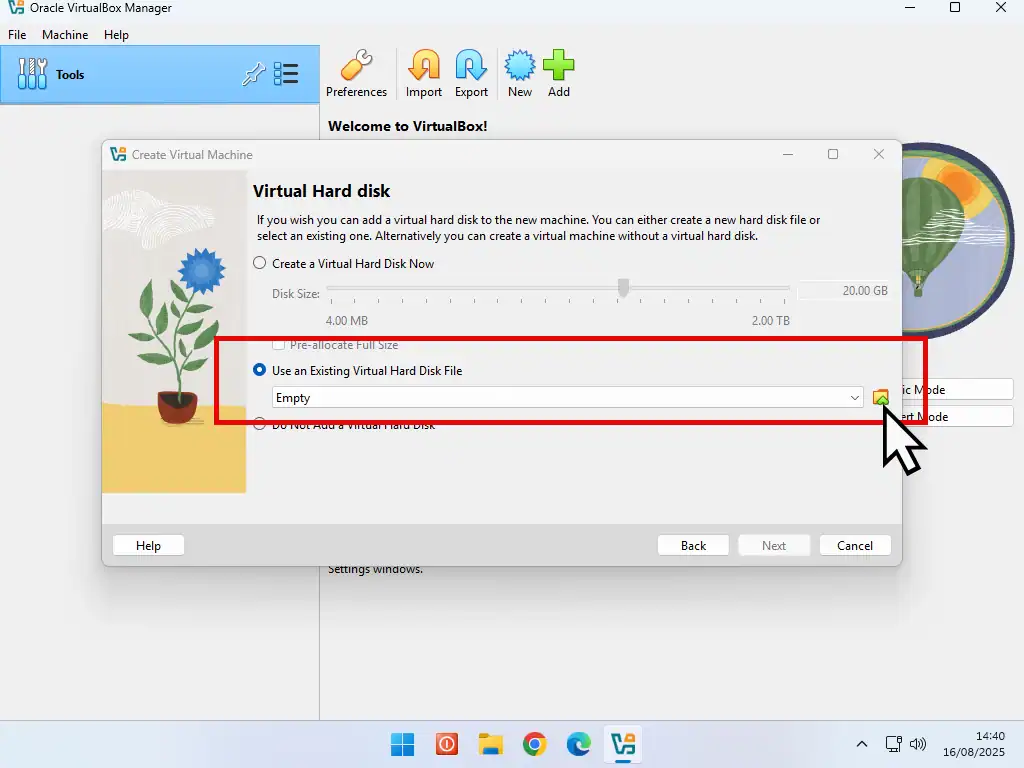
The next screen is the Virtual hard Disk screen.
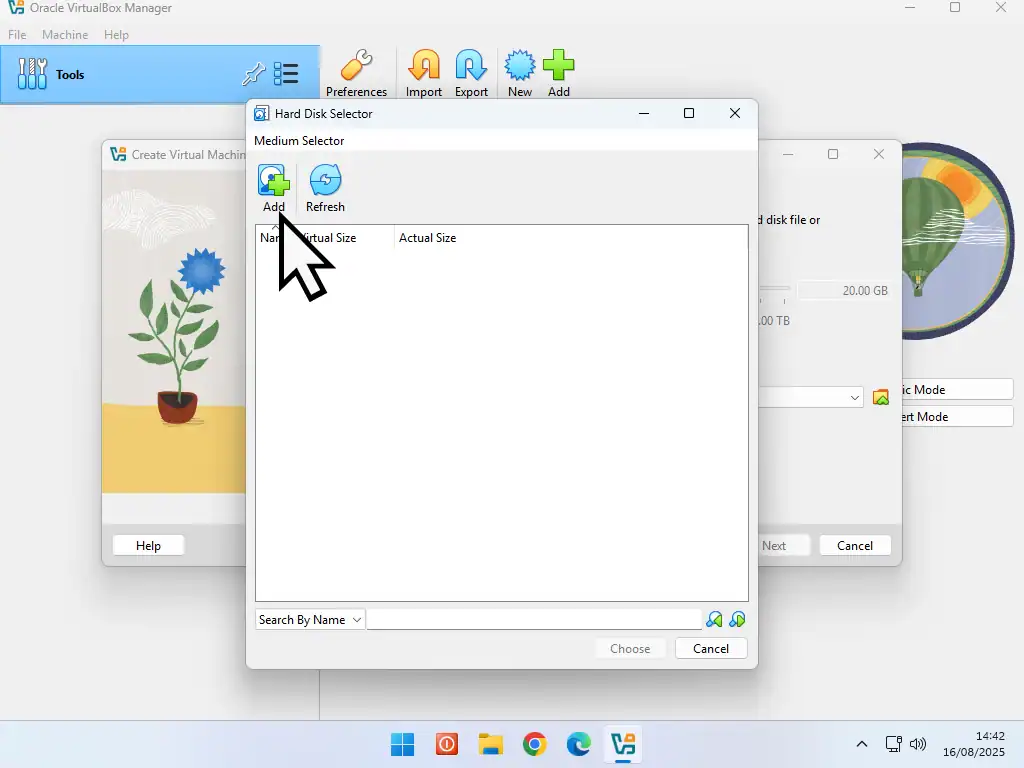
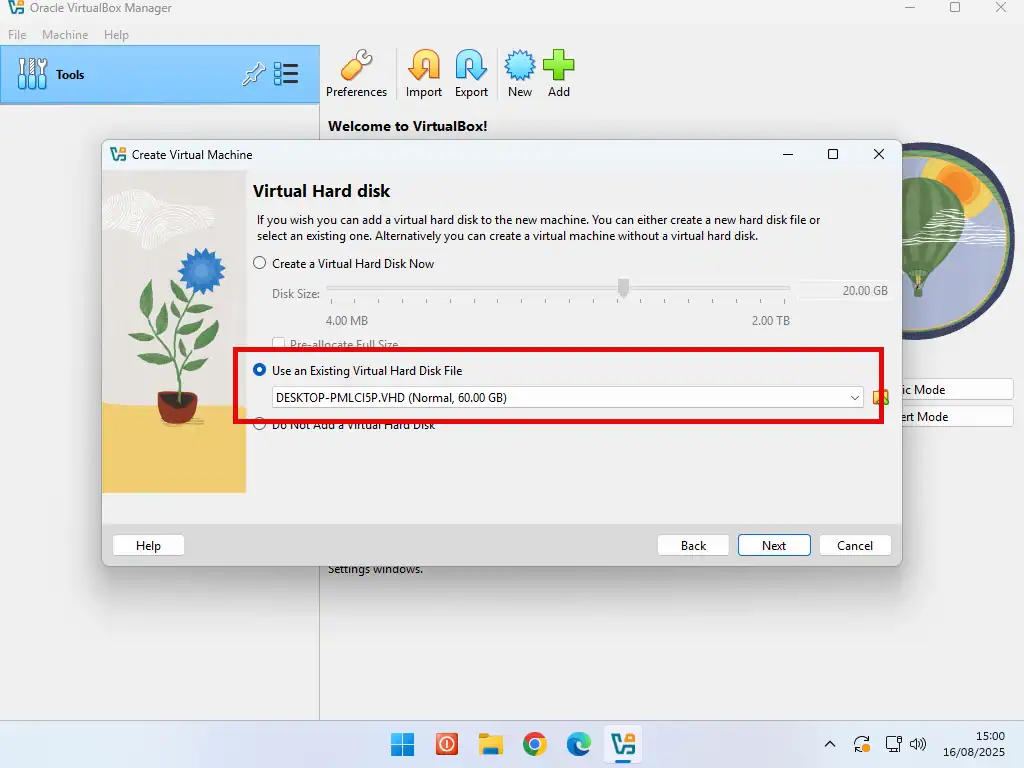
- To attach a VHD image to VirtualBox select Use An Existing Virtual Hard Disk File. Then click the browse button.
- Click the Add button in the top left corner of the next screen.
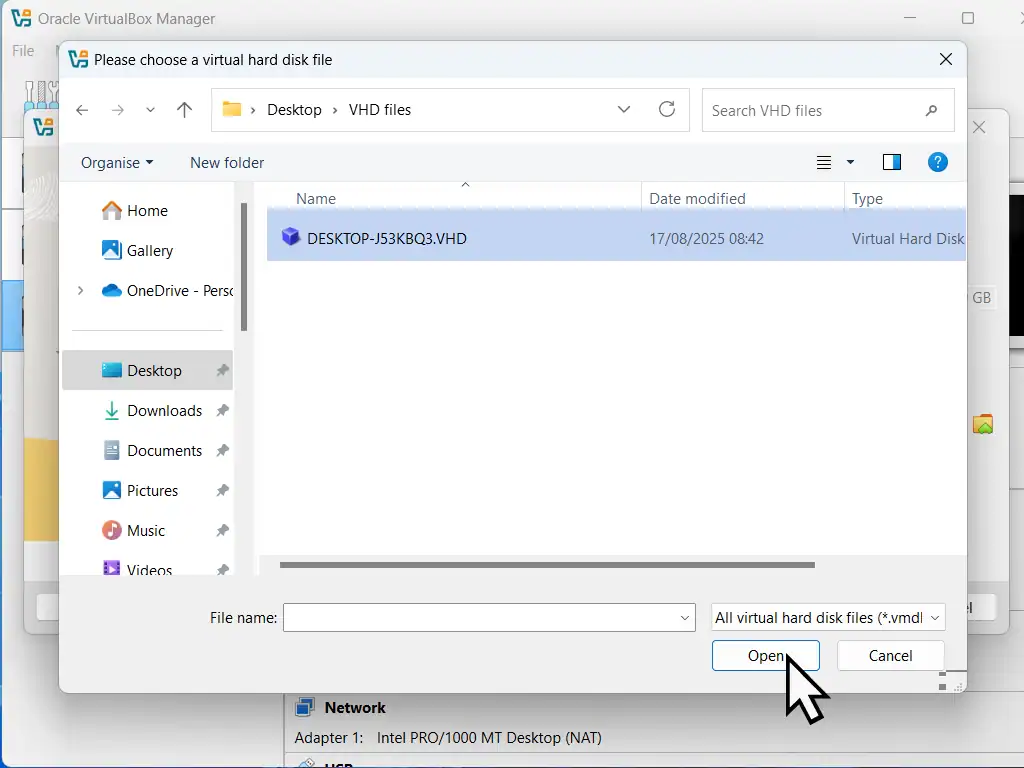
- Navigate to and select your VHD file.
- Finally click the Choose button.

- With the VHD image selected, click Next.
- On the VirtualBox summary screen, check your settings and click Finish.
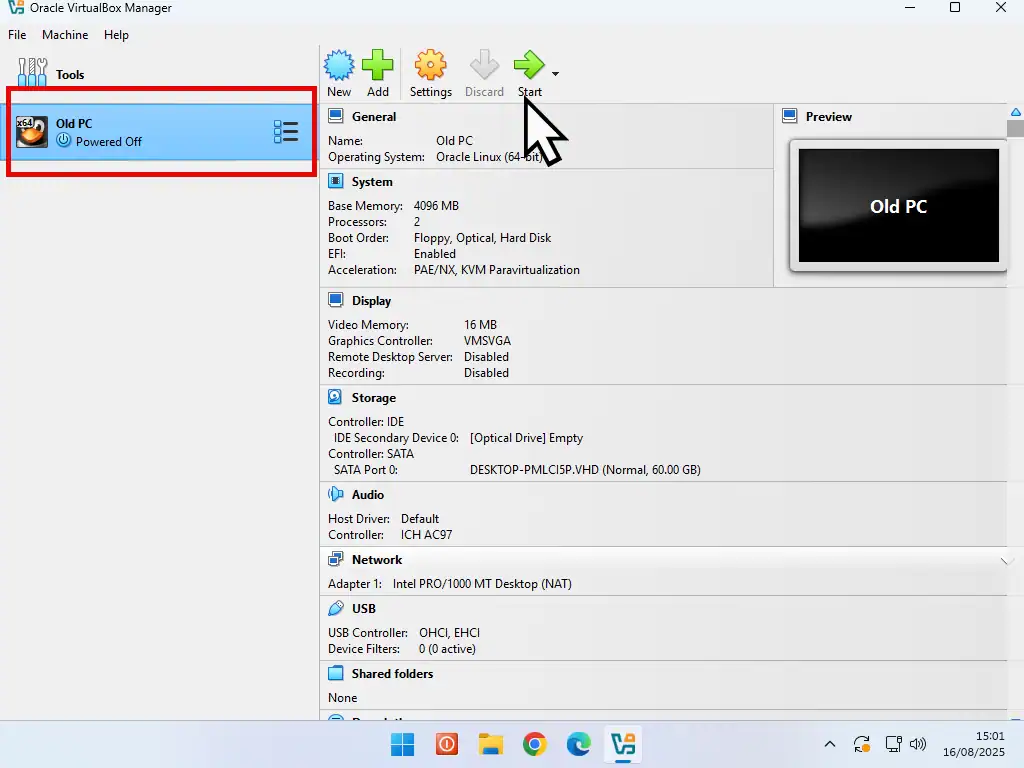
- The attached VHD image will appear as a virtual machine. To run it (boot it up), select it in the left hand panel and then click the Start button.
- After several restarts and reboots you eventually have a working virtual machine.

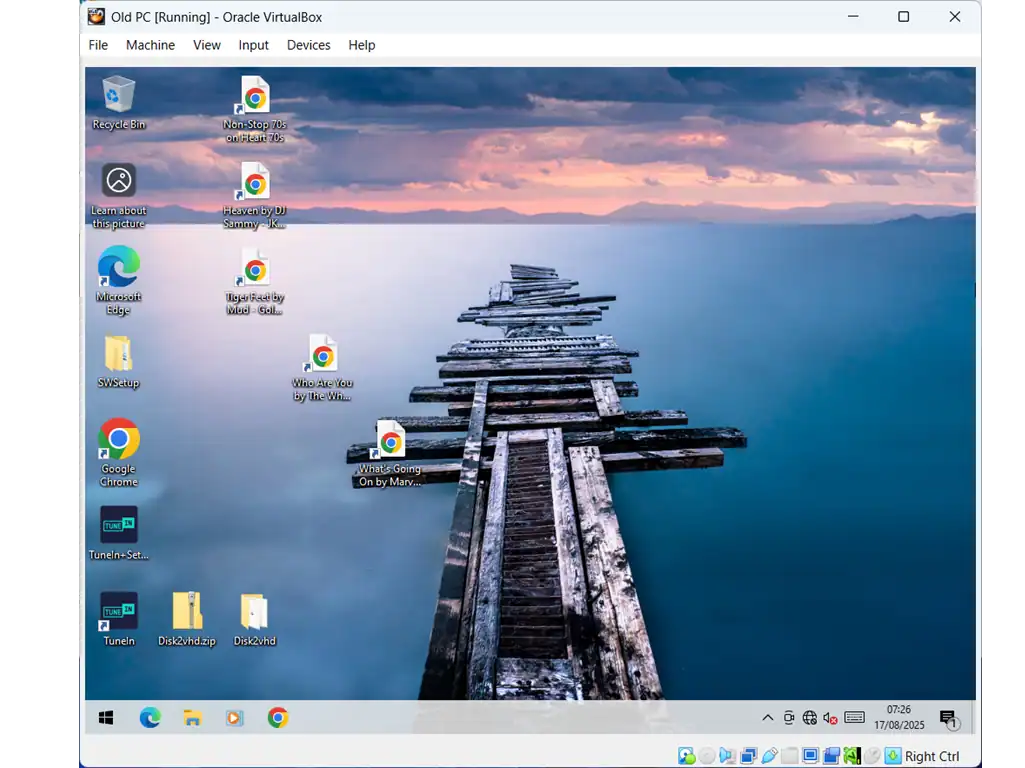
It Can Take Some Time To Import The VHD File To VirtualBox
During the first boot you’ll see the VM restart several times. You might also see a few error messages appear. This is normal. Be patient and let VirtualBox get on with the job in hand.
Install VirtualBox Guest Additions
Now that you’ve successfully imported the VHD file into VirtualBox you’ll need to instal the Guest Additions (Expansion Pack).
The Guest Additions is a set of virtual drivers for your new virtual PC.
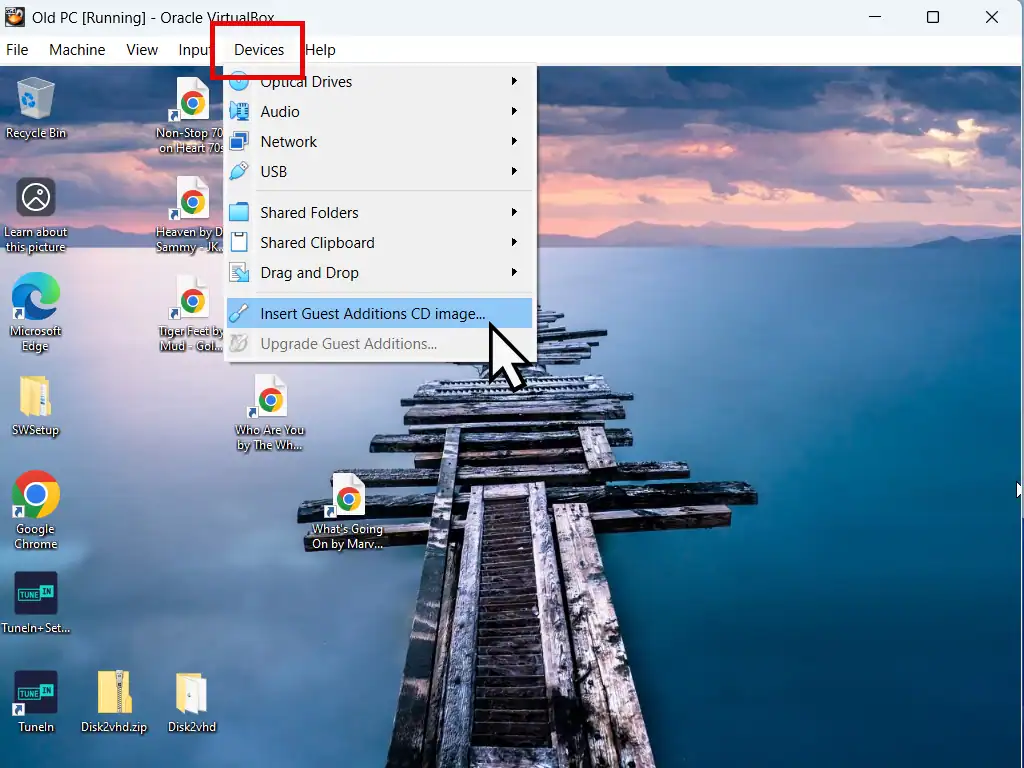
- On the VirtualBox toolbar click Devices then click Insert Guest Additions CD Image.
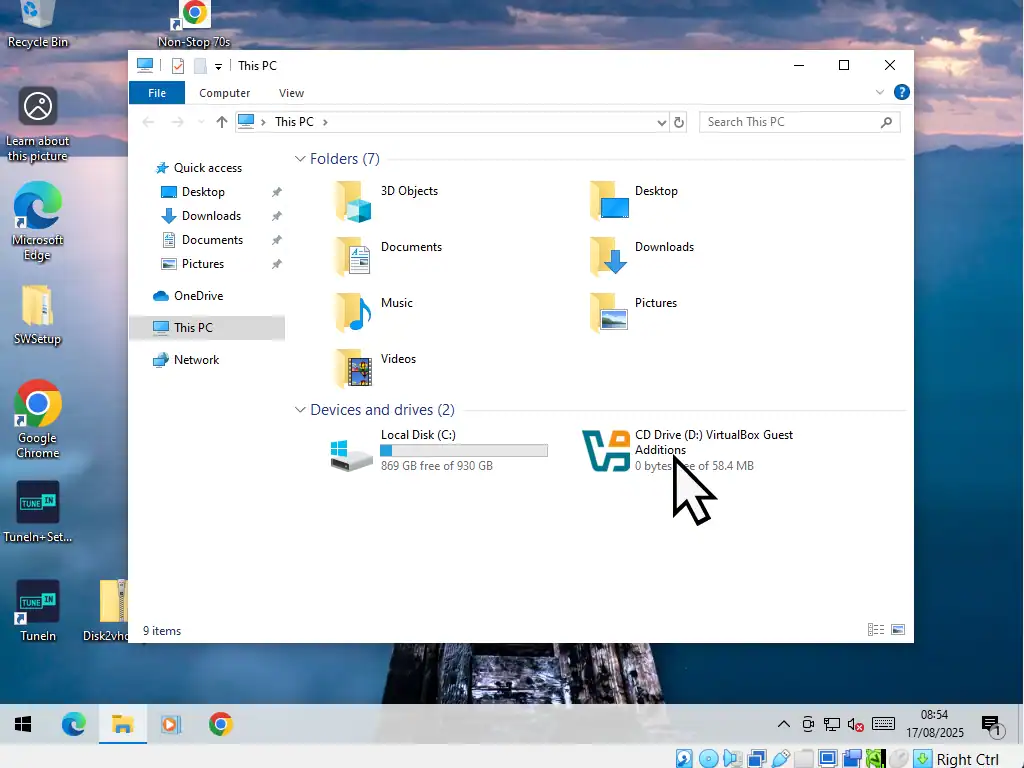
- Double left click on the virtual CD drive to launch the Guest Additions installer.
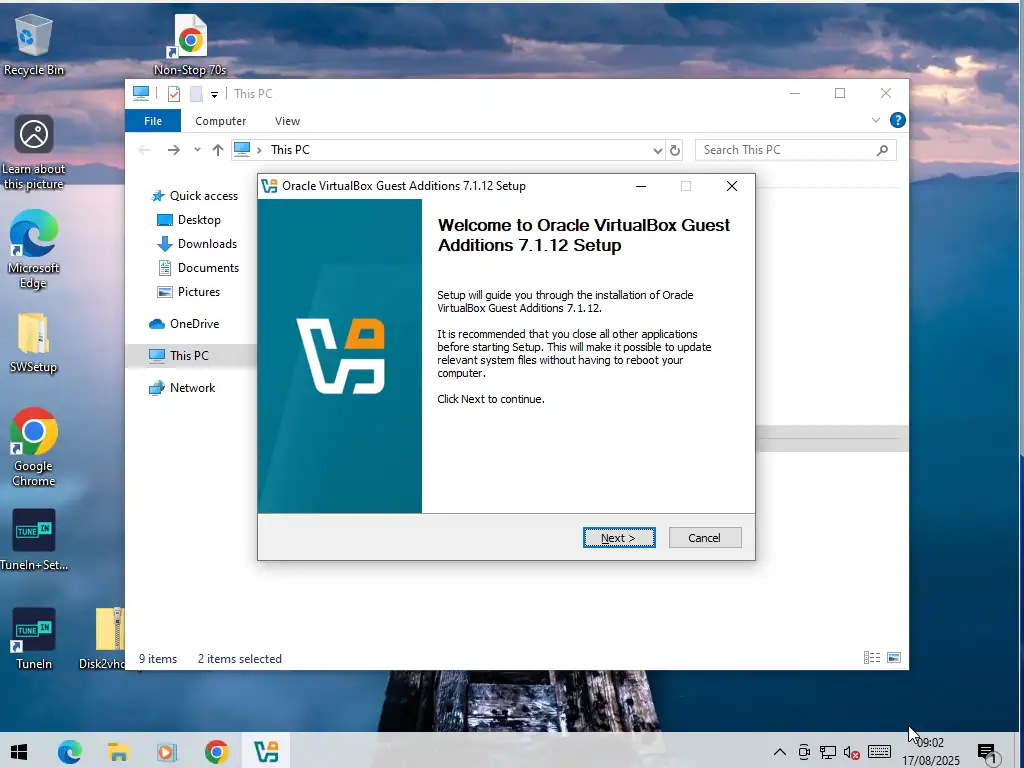
- Then simply follow the onscreen prompts.
Summary.
Hopefully that’ll all just work for you and you’ll have successfully imported your VHD file into VirtualBox. Every setup is different so there aren’t any guarantees, but following these guides is a good start.
Related Posts
Convert An Old Windows 10 PC Into A Virtual Machine
Create a VHD image file from an old Windows 10 PC to run as a virtual computer.
How To Import VHDX File Into Microsoft Hyper V
If you find VirtualBox isn’t working out for you, then try Hyper V. You’ll need to have a Pro version of Windows, but other than that it’s free.


