With a Windows system image backup, you can back up your entire computer to an external hard drive. A system image includes all your files and folders, all your installed programs and apps, all your settings, and Windows itself, together with all the installed drivers.
A system image is, in effect, a complete copy of your computer as it is when you create the image.
Creating a system image backup is pretty much the same on both Windows 10 and Windows 11. All you’ll need is an external hard drive of sufficient capacity to hold your backup.
How To Create A System Image Backup In Windows 10 & Windows 11.
To get started creating a system image of your Windows 10 or Windows 11 computer, turn on your machine and plug in an external hard drive that has a capacity large enough to hold your backup. Ignore any Autoplay pop-ups and close File Explorer if it opens.
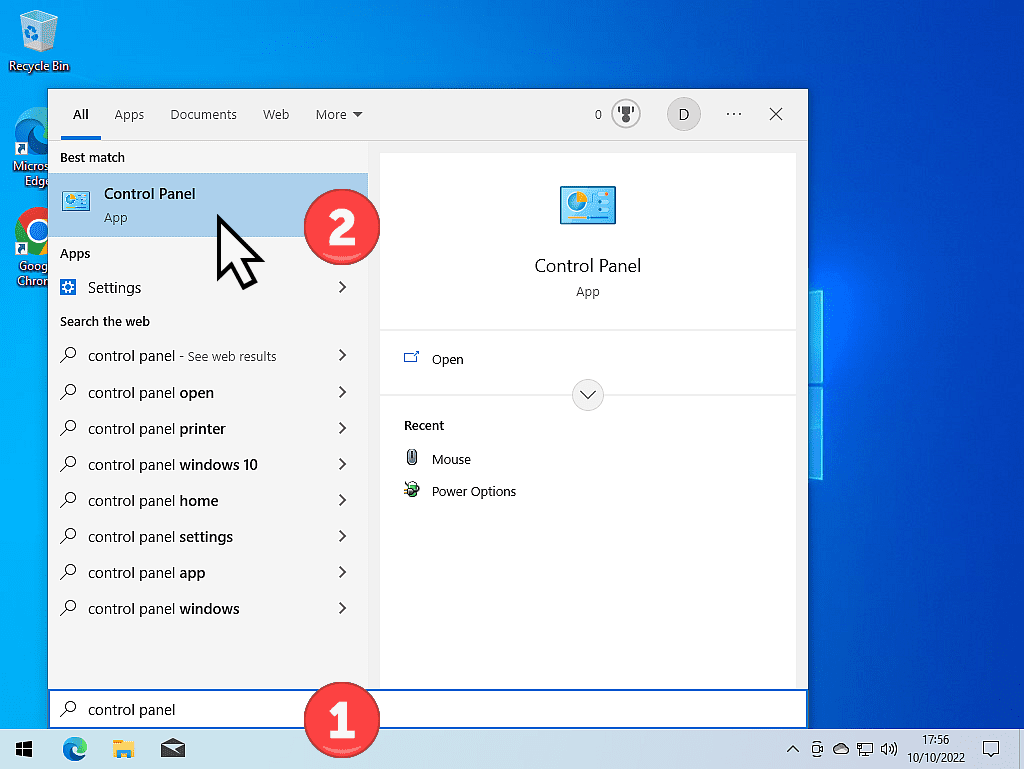
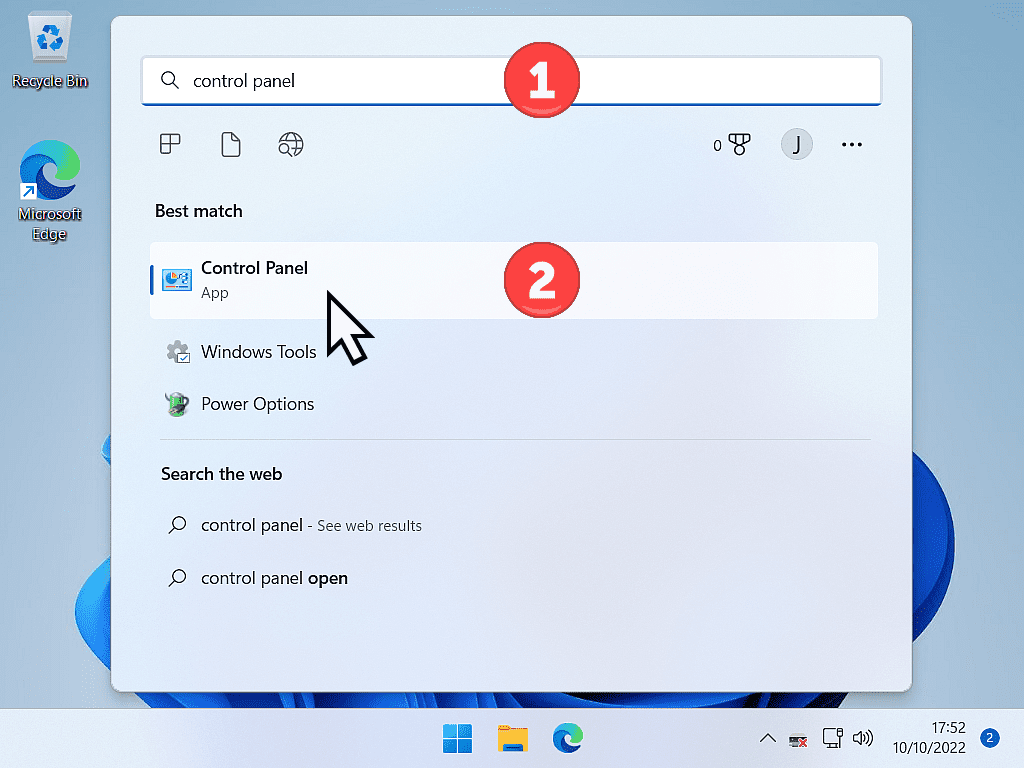
Left-click the Start button and type control panel. Click Control Panel (App) in the search results.
Control Panel Views.
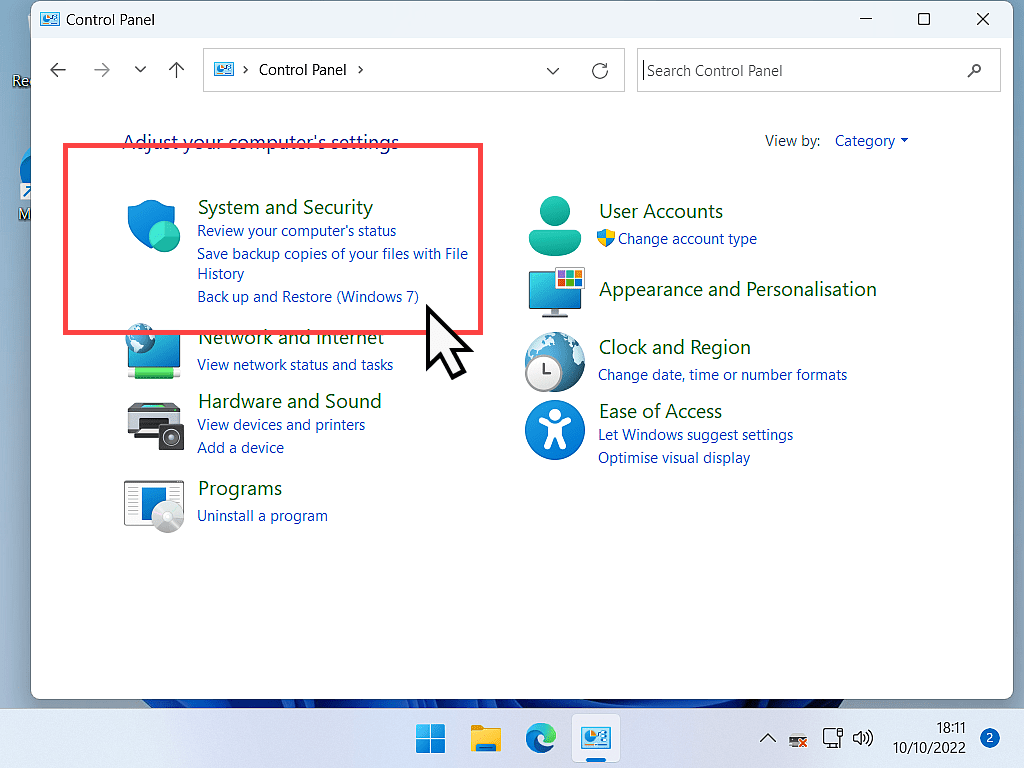
When the Control Panel opens, it could open in one of two different views. You could be looking at it in Category view or Icons view.
If your Control Panel has opened to Category view, then click “Back up and Restore (Windows 7)” which is in the System and Security category.
If, on the other hand, your Control Panel opens to the Icons view, then click Back up and Restore (Windows 7), which is right at the top of the screen.
Why Windows 7?
Create Your First System Image Backup.
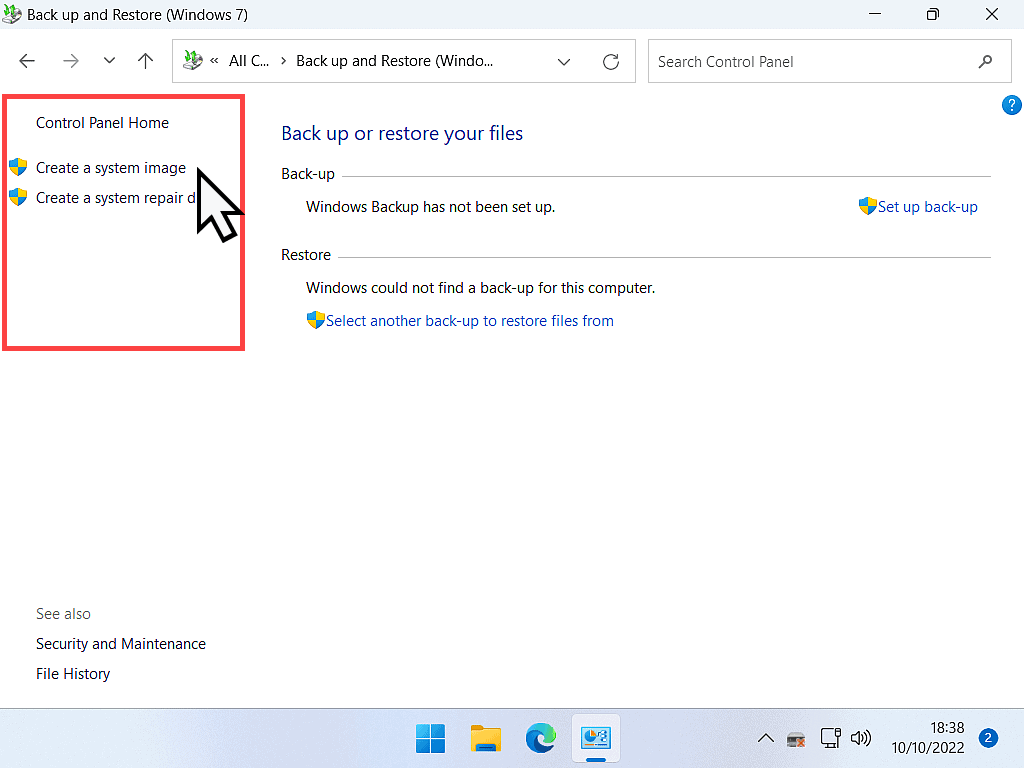
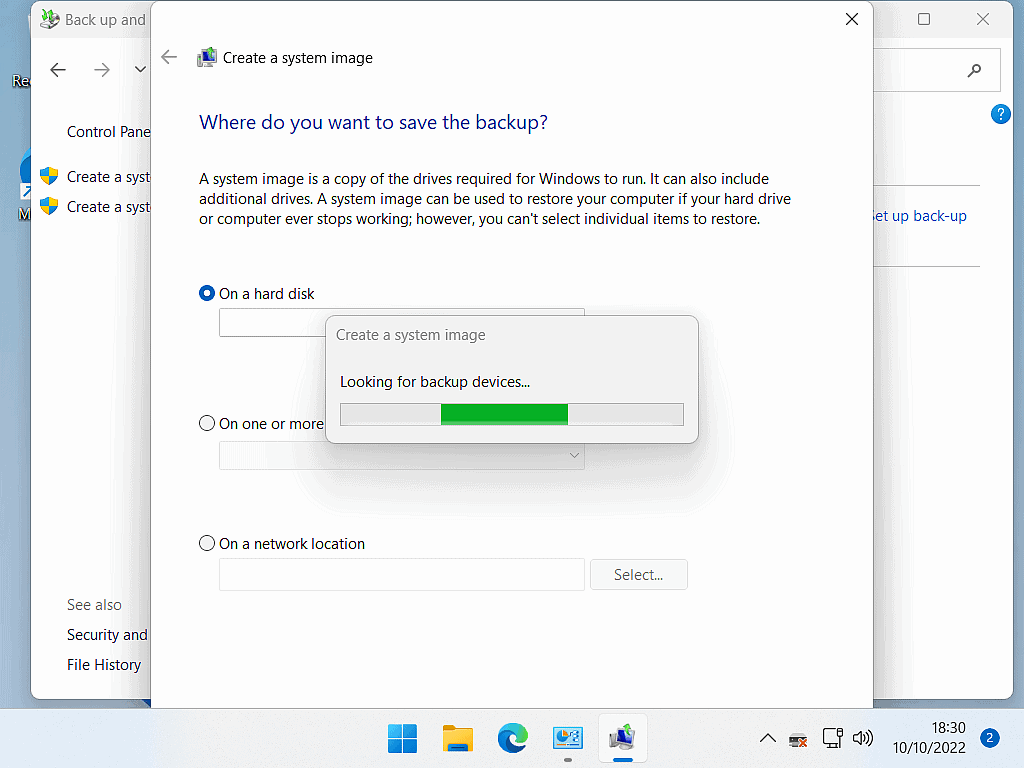
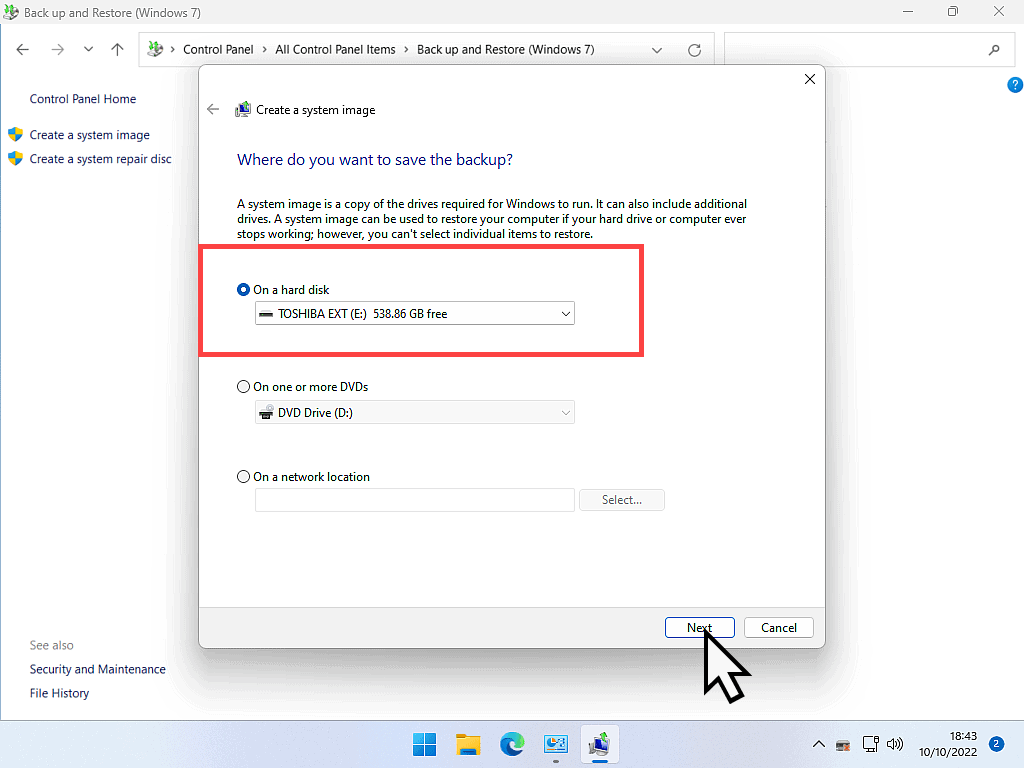
In the left-hand panel, click “Create a system image”. Windows will then search for an external hard drive to use as the backup device.
When it finds your external hard drive, it’ll be listed.
Click the NEXT button to proceed.
1
2
3
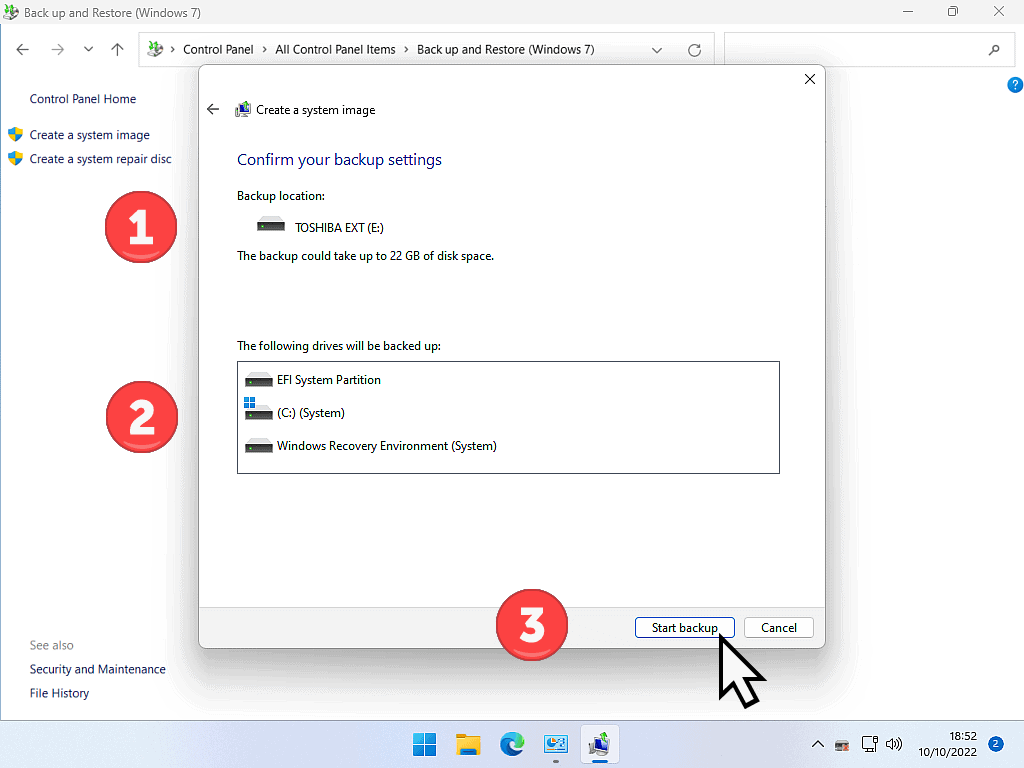
Confirm Your Backup Settings.
Windows will show you a confirmation of your chosen backup settings.
- Backup location – This will be your external hard drive. It will also show an estimate of how much disk space will be used by the backup.
- The following drives will be backed up – Confirmation that your entire c: drive will be included in the system image.
- Click the Start Backup button.
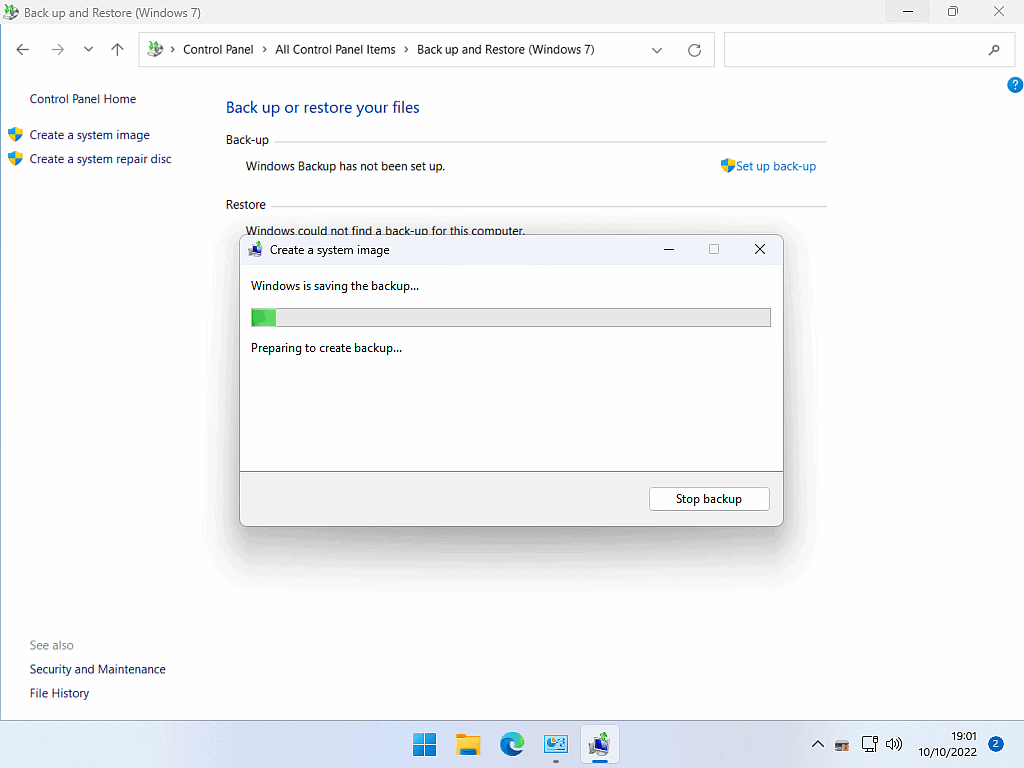
After a few moments, your system image backup will start.
How long it will take depends entirely on your individual computer.
My advice here is to try to leave your machine alone. Let it get on and do its thing. Trust me, there’s nothing to be gained from a backup that doesn’t work when you need it.
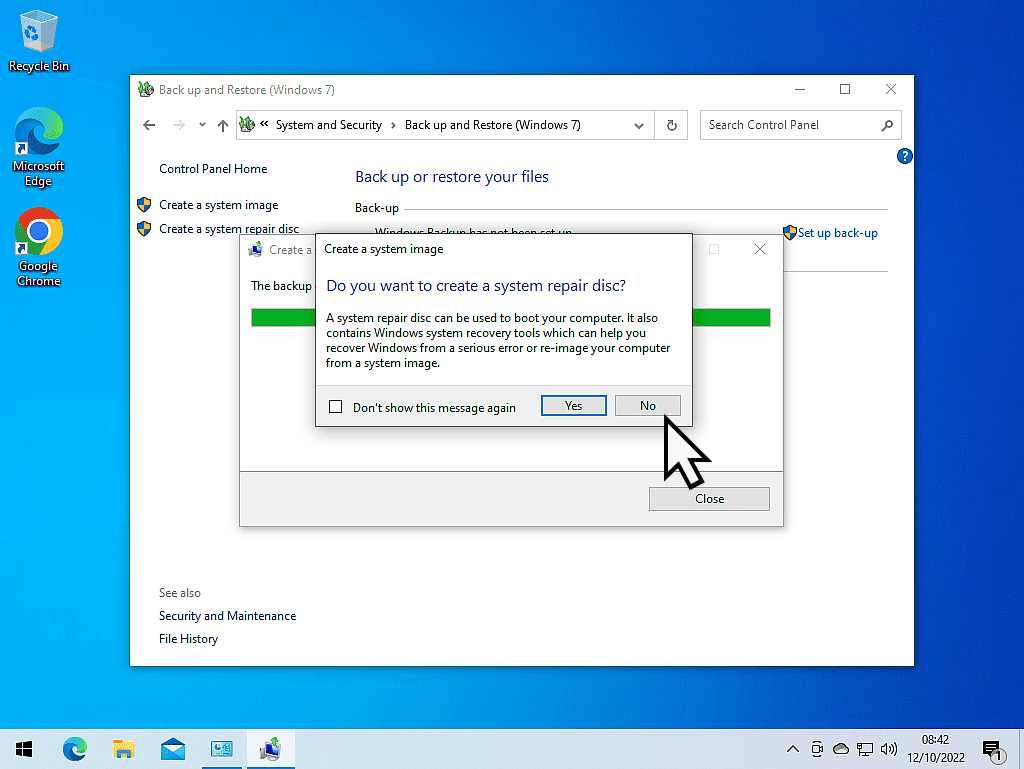
The System Repair Disc.
After the backup has finished, Windows will ask you if you’d like to create a system repair disc.
Click the NO button to finish.
About The System Repair Disc.
However, you need a CD/DVD drive and most modern machines don’t have those anymore.
This is a throwback to Windows 7 computers, when everyone had a CD/DVD drive. On the next page, we’ll look at creating a USB recovery drive, which is a much better option.
Summary.
Your Windows system image backup is a “snapshot” of how your computer is right now. It includes everything that’s installed on your system along with all your files/folders.
However, as time goes by, it’ll become more and more out of date. That’s not much of an issue for some of us, especially if you don’t store that many files on your PC. But for others, it’ll be an important consideration.
To keep your backups up to date, you can run them regularly, just like this, whenever you feel the need. Or you can run them on an automated schedule. We’ll look at automating your backups later in the course.
At Home Computer Guides.
These easy to follow guides aren’t part of the course, rather, they are standalone guides. They extend beyond the basics that we’re covering on the course.