How to convert your old Windows 10 computer into a virtual machine that’ll run on your new Windows 11 computer. That’s right, converting an old computer into a virtual machine allows you to run it on your new computer.
This process takes all of your Windows 10 PC’s settings, programs, and data and packages it into a single file that acts as a virtual computer. That can then be imported as a VM to run on your Windows 11 PC.
With this method, you don’t have to worry about losing data, serial keys, logins, or bookmarks. The virtual machine will run exactly as your old computer did, giving you access to everything without needing the physical hardware.
Converting your physical computer to a virtual PC is free and fairly easy to. However you will need to have an external drive on which to store the virtual file.
Convert Windows 10 PC Into A Virtual Machine
To convert the Windows 10 computer into a virtual machine you’ll need to have an external hard drive with enough spare capacity to hold the file, which can be very large.
To be clear, everything that you’ll be doing will be done on the old computer. Not your new one.
Connect your external storage drive and then download Disk2vhd, which is a free Microsoft tool that you can get from here –
https://learn.microsoft.com/en-us/sysinternals/downloads/disk2vhd
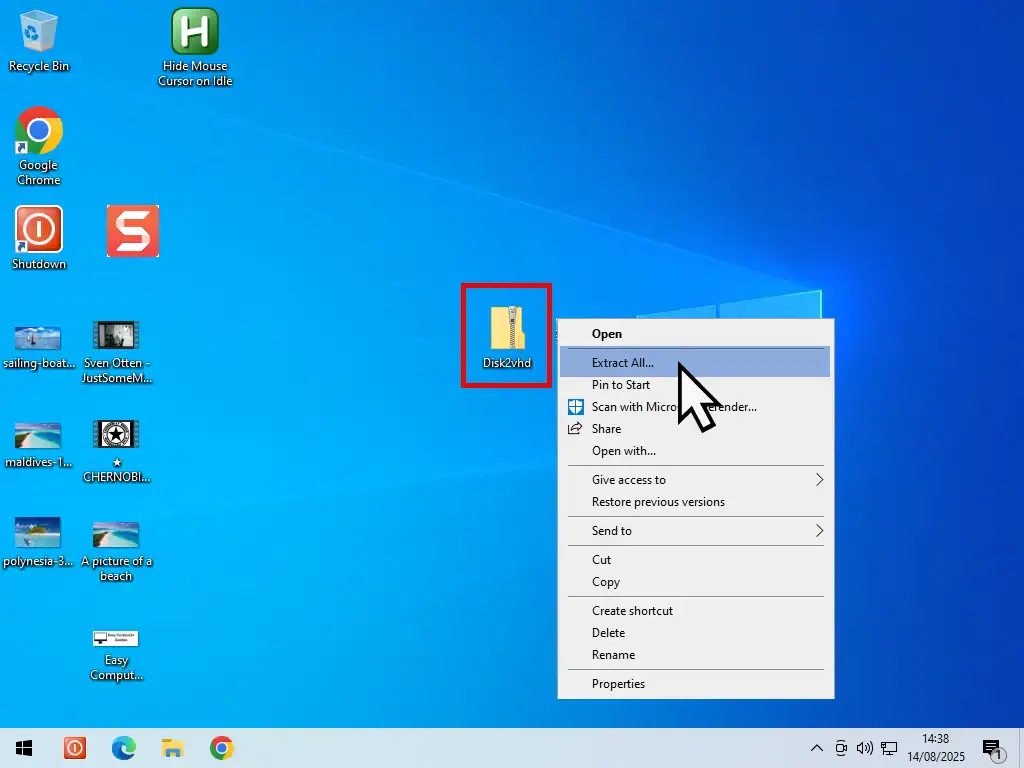
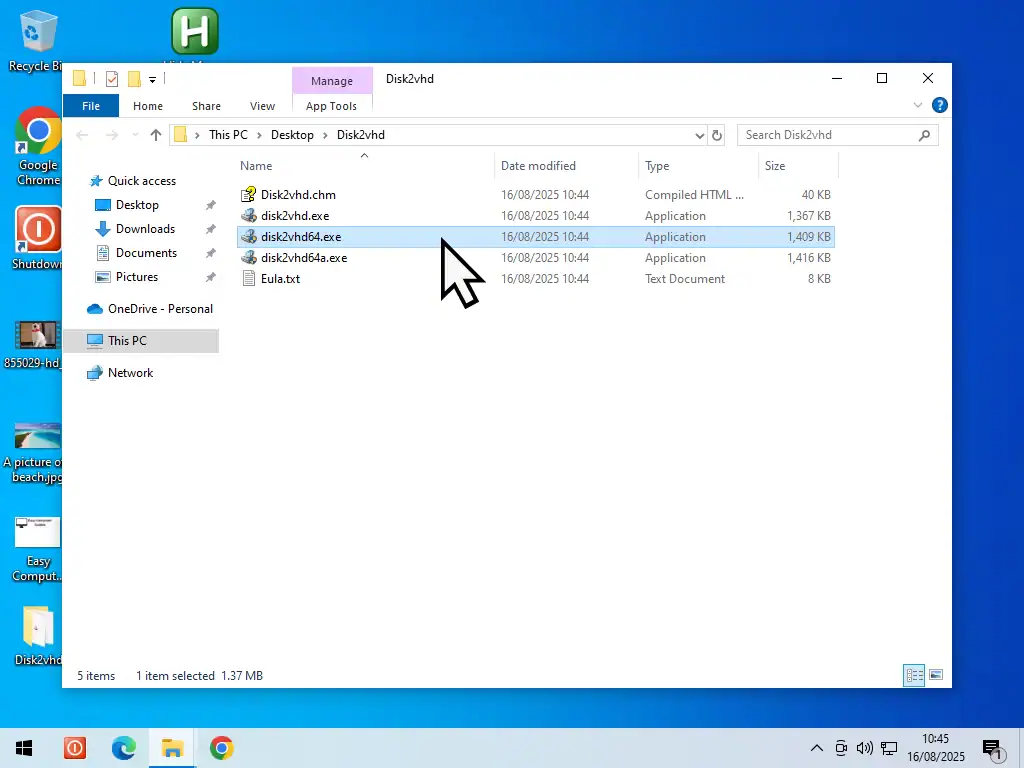
Disk2vhd will download as a zipped folder. Extract it and then open the extracted folder. Double left click Disk2vhdx64.exe. Agree to the terms and conditions etc.
Tip
To reduce the overall size, quickly sift through all your files and folders and delete anything that you don’t need. Also uninstall any programs/apps that you won’t be needing. Finally run Disk Clean-up to clear out any hidden junk files.
32 Bit Or 64 Bit?
Most Windows 10 computers will be 64 bit (x64). But there is a slight chance (if your PC is really old) that it could be 32bit (x86), especially if it was previously updated from Windows 7.
If you receive an error message when running Disk2vhdx64 then your computer is probably a 32 bit version of Windows 10. In that case, close the error message and then double left click the file Disk2vhd instead.
Disk2vhd
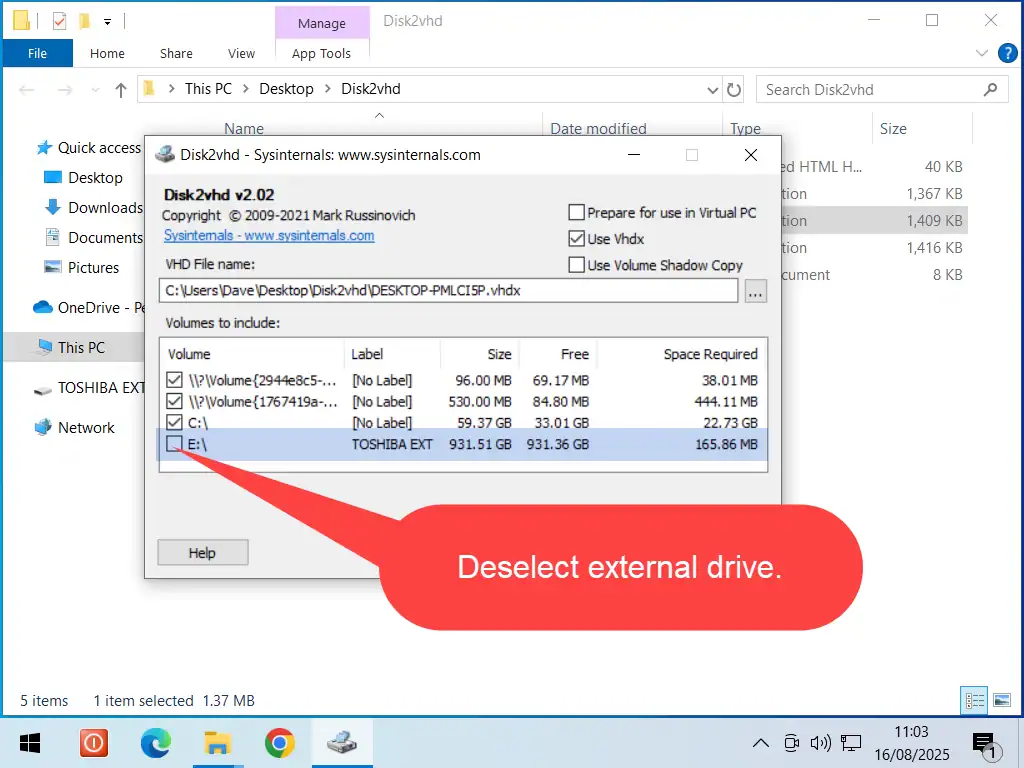
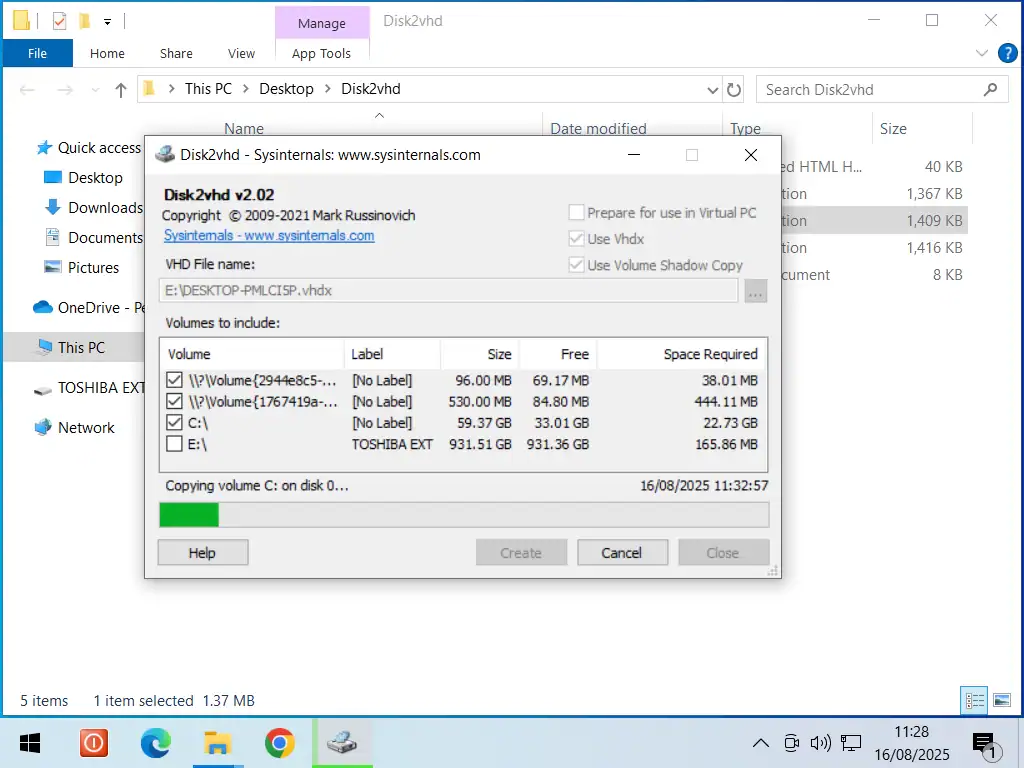
By default Disk2vhd will select all the drives attached to your Windows 10 PC.
Deselect the external drive that you’re using to save the VHD image to.
VHD Or VHDX ?
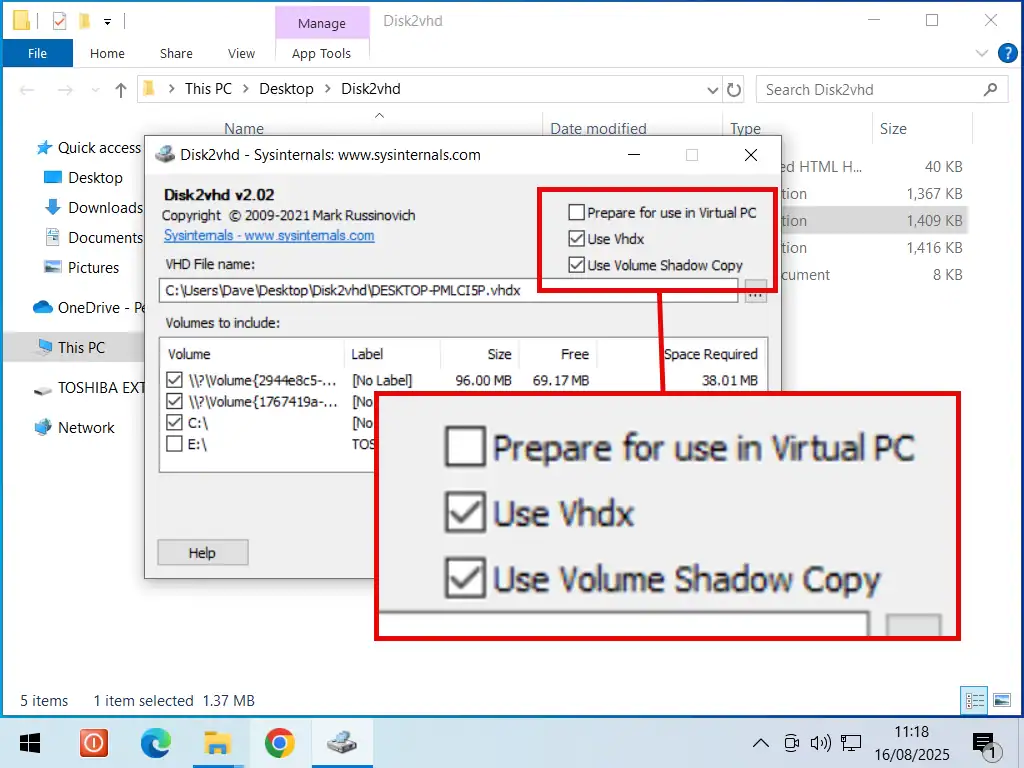
Disk2vhd can create a virtual image file of your Windows 10 PC using one of two different formats, VHD or VHDX. VHDX is the newer format and will be selected be default.
Which format you choose will depend on how you intend to mount the old PC as a virtual machine.
You can use it in VirtualBox, Microsoft Hyper V, or as a virtual hard drive.
VirtualBox – Only supports VHD images. But you don’t need to convert them since VirtualBox supports them natively.
Microsoft Hyper V – Supports both VHD and VHDX but Hyper V is only available for Pro versions of Windows. So if your host machine (the new one), has either Windows 10 Pro or Windows 11 Pro installed, then you can Hyper V.
A Virtual Hard Drive – You could use either format, but since VHDX is the newer format, use that.
VMware Workstation Pro – Doesn’t support VHD or VHDX files and while you may be able to convert them it’s better to simply create you’re image in a VMware file format from the start. So if you were intending to mount the VM in Workstation Pro, follow this this guide Convert A Physical PC To A Virtual Machine On Workstation Pro
Disk2vhd can create a virtual image file of your Windows 10 PC using one of two different formats, VHD or VHDX.
VHDX is the newer format and will be selected be default.
If you require a VHD image, remove the check from the Use Vhdx box.
Finally select Use Volume Shadow Copy.
Tip 2
Since you’re making a virtual machine out of an old computer, presumably the old PC will be put to one, or maybe wiped and passed on afterwards.
That being the case, I think it’d be prudent (assuming that you’ve got enough storage space) to create two images, one in the VHD format and the other in the VHDX format. That way you’re covered for whichever way you choose to mount the VM.
Select the Save Location
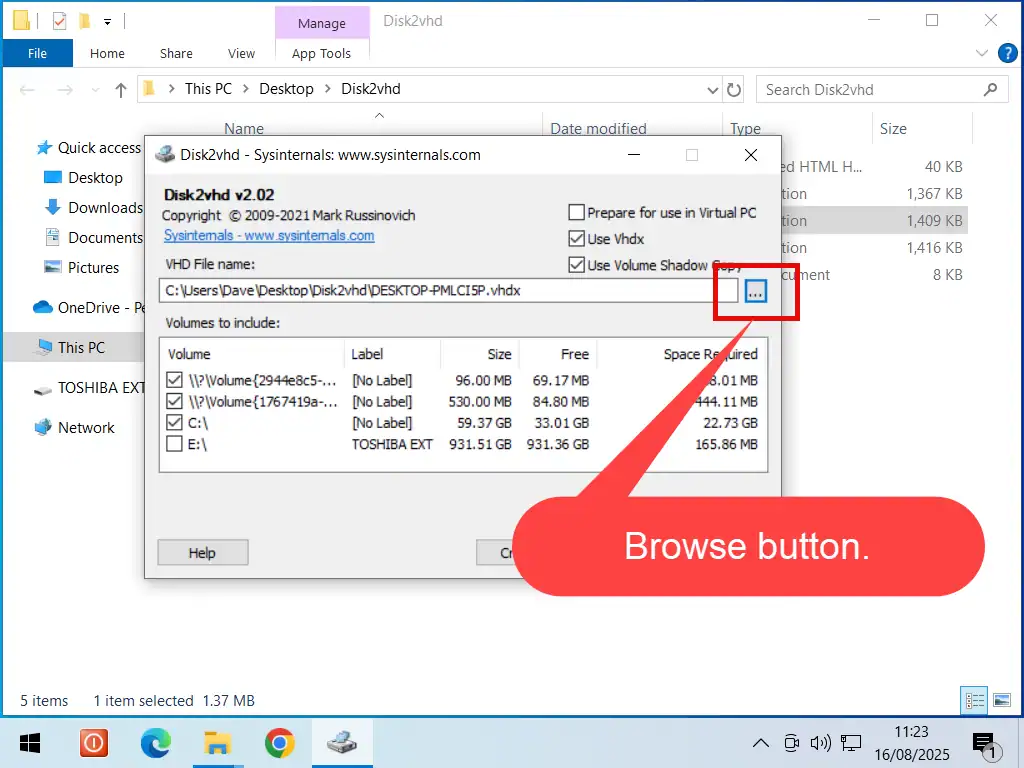
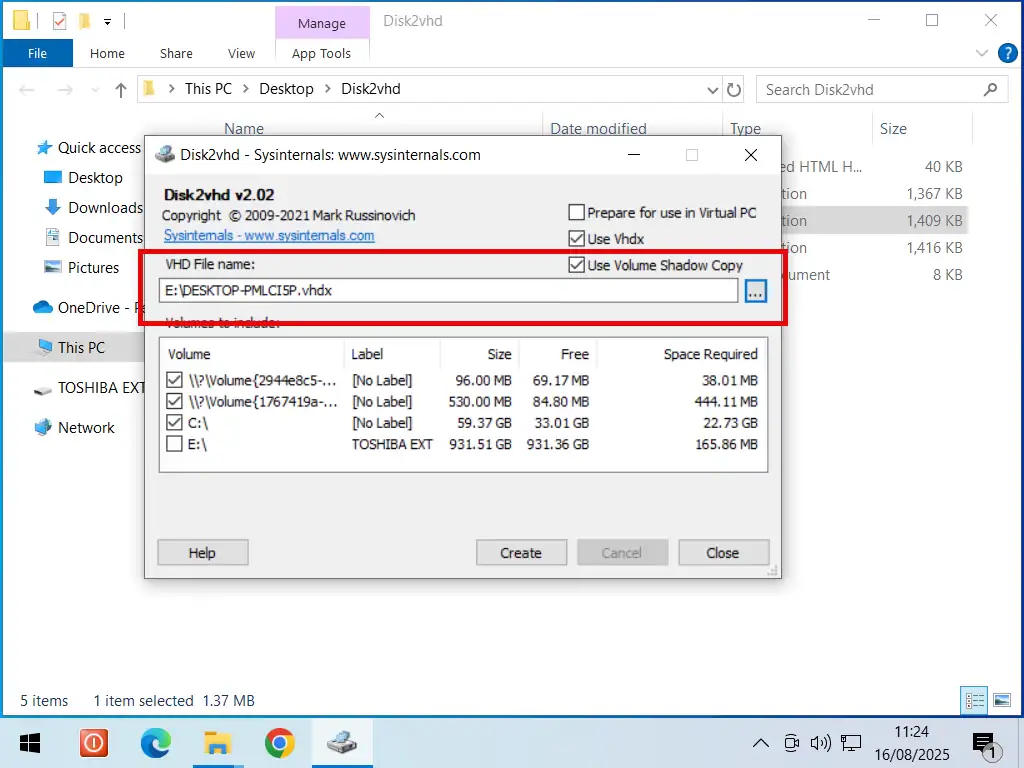
To specify your external drive as the save location, click the Browse button beside the VHD File Name box. Navigate to and select your external drive.
Create Image File
Finally click the Create button and Disk2vhd will build a virtual image file of your old PC and save it to your external drive ready for use as a virtual machine on your new computer.
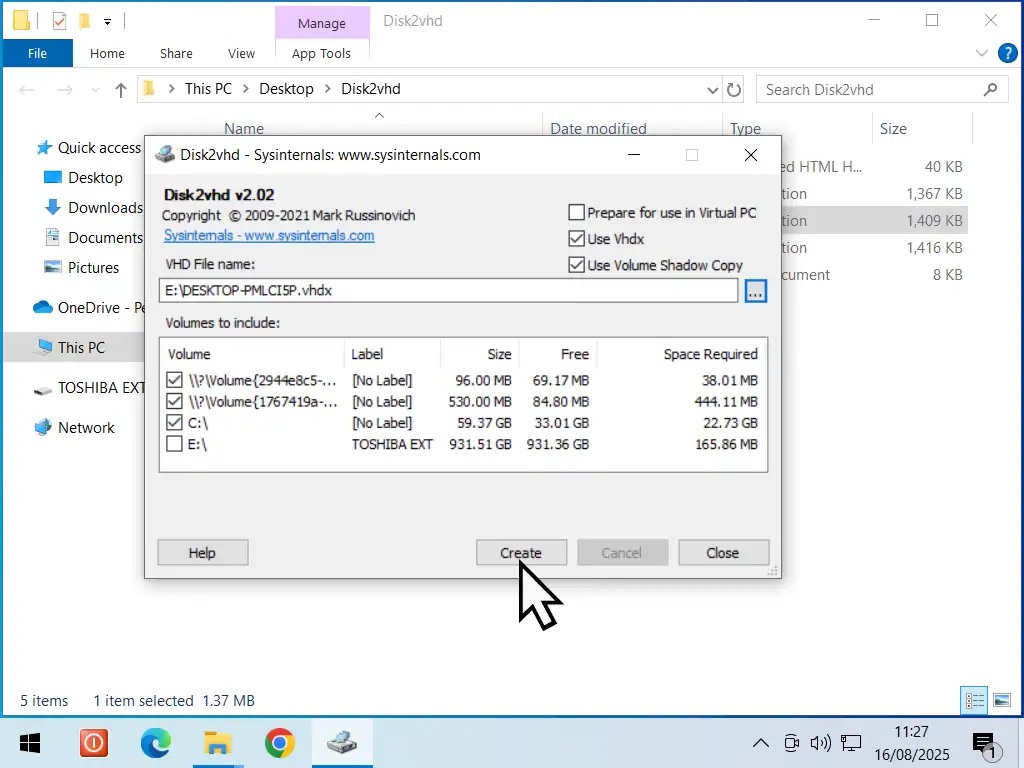
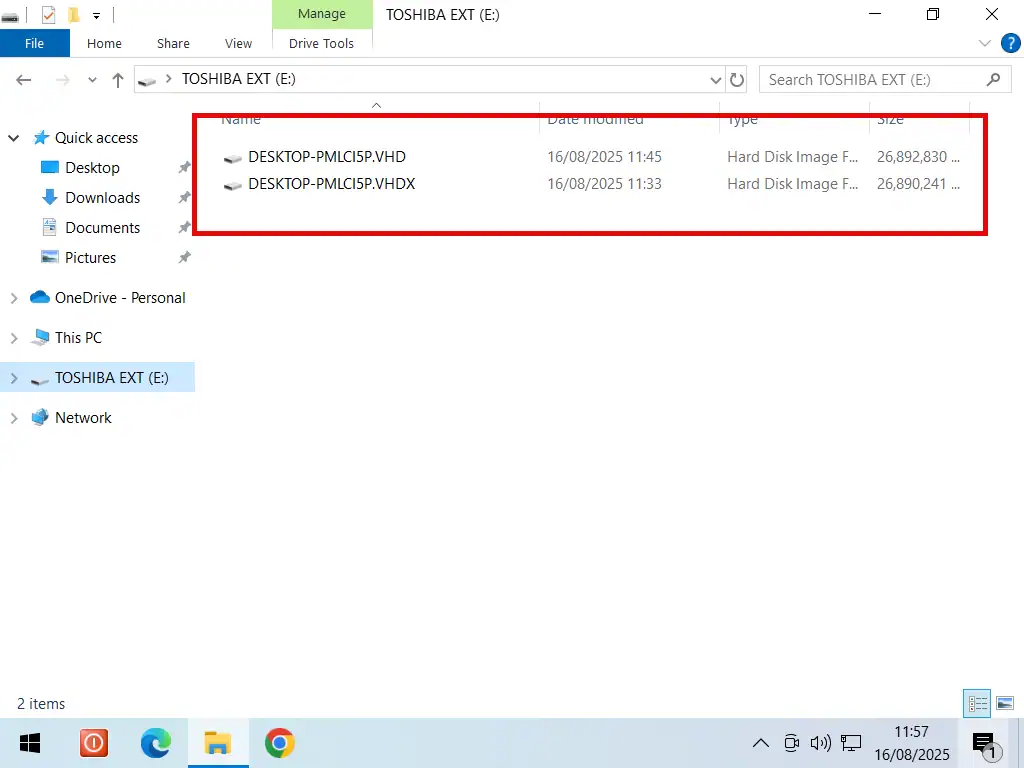
When Disk2vhd has finished you’ll see your old computer saved as an image file on your external drive.
So the next thing to do is to mount or import it as a virtual machine on your new computer.
Summary.
When Disk2vhd has finished creating your image file/files you’ll have a perfect copy of your old Windows 10 computer on your external drive.
The next thing to do is to set the image up as a virtual machine. For that you have several choices.
Related Posts
How To Import VHD File Into VirtualBox
Setup your Windows 10 PC as a virtual machine using VirtualBox.
How To Import VHDX File Into Microsoft Hyper V
Hyper has the advantage of being a Microsoft product. On the other hand it only runs on Pro versions of Windows.

