How to move a hard disk partition to create a desired disk layout. Windows Disk Management can shrink or extend a volume (partition) but it does have limitations, which can make it frustrating to use. What Are Drive Partitions
In most cases it’s much easier to use a third party tool to manage your disk partitions. In this step by step guide I’ll show you how to move a partition for free.
Move Recovery Partition To The End Of The Drive
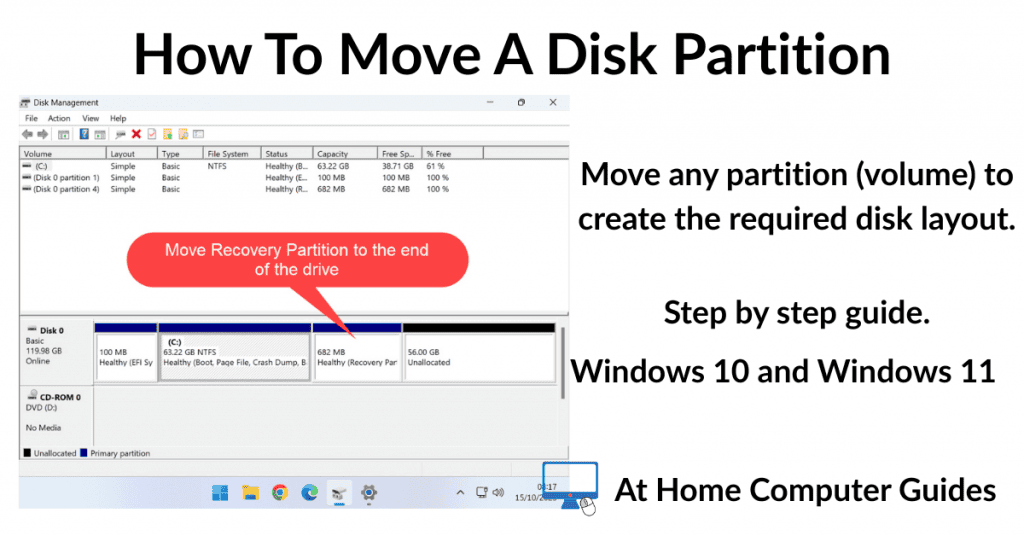
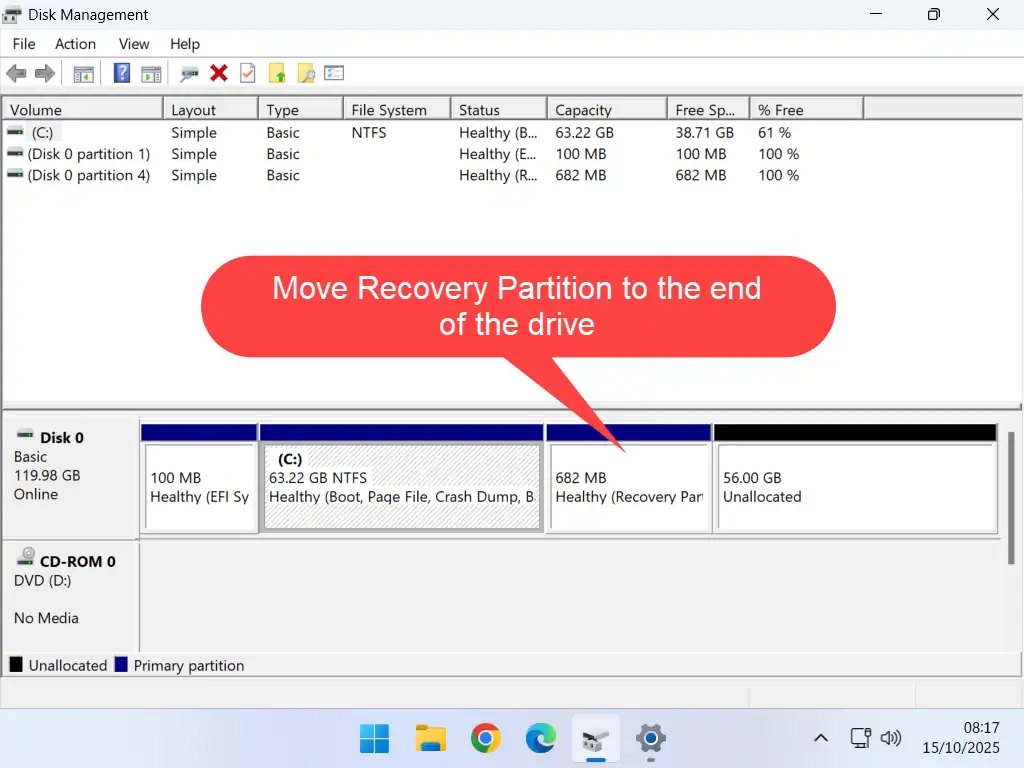
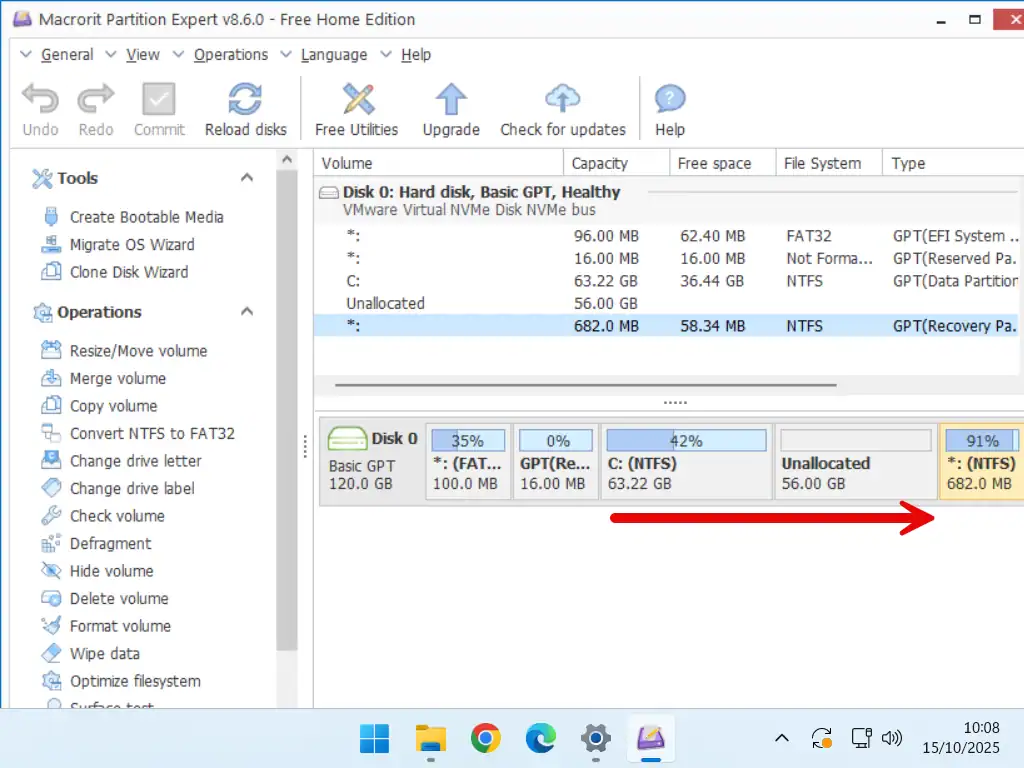
Here we have a typical reason for wanting to move a partition. We can’t extend the C: drive (system partition) into the available unallocated space because the Recovery Partition is sitting between to two partitions.
By moving the Recovery Partition to the end of the drive, the unallocated space will then be adjacent the system partition making it easy to extend it.
The problem is that Disk Management simply doesn’t give you any options for the Recovery Partition.
Make A Backup
Moving and resizing partitions is very risky. Not only are the partitions going to be moved but also all the data contained within those partitions has to be moved. That leaves a lot of scope for something to go wrong.
If at all possible, make a complete system image backup before you start. Or at the very least backup your files and folders.
How To Move A Partition
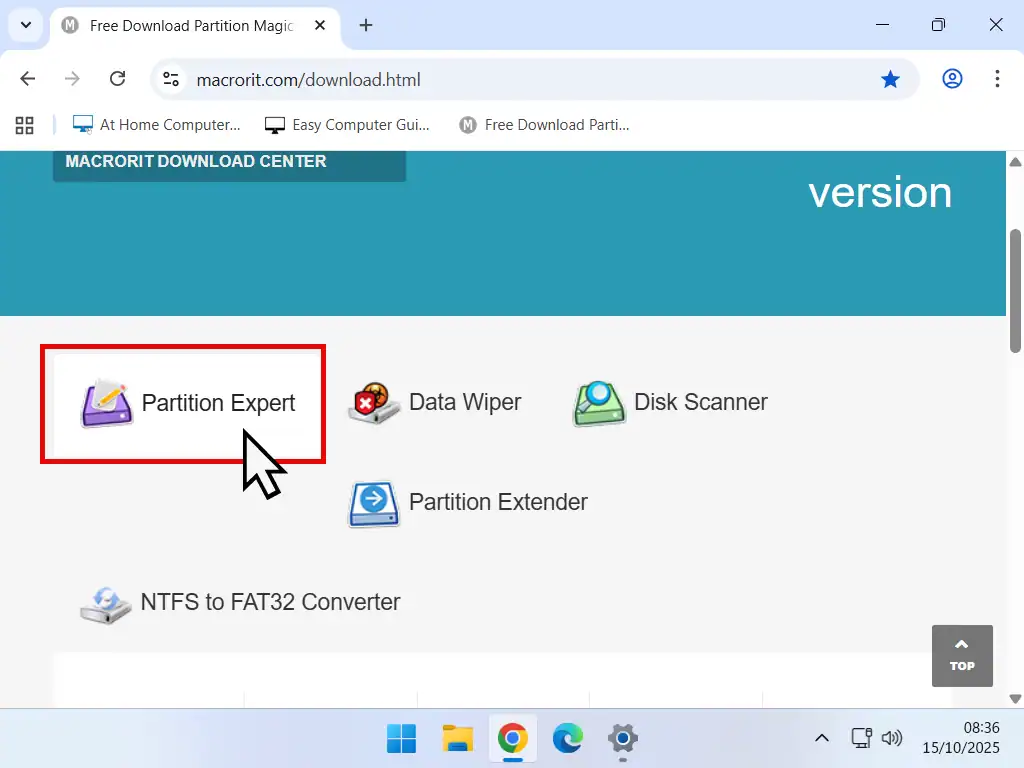
While there are many options and recommendations across the internet the one I’ve found to be the easiest to use for free is called Macrorit Partition Expert. You can download it from here –
https://macrorit.com/download.html
- On the download page click Partition Expert.
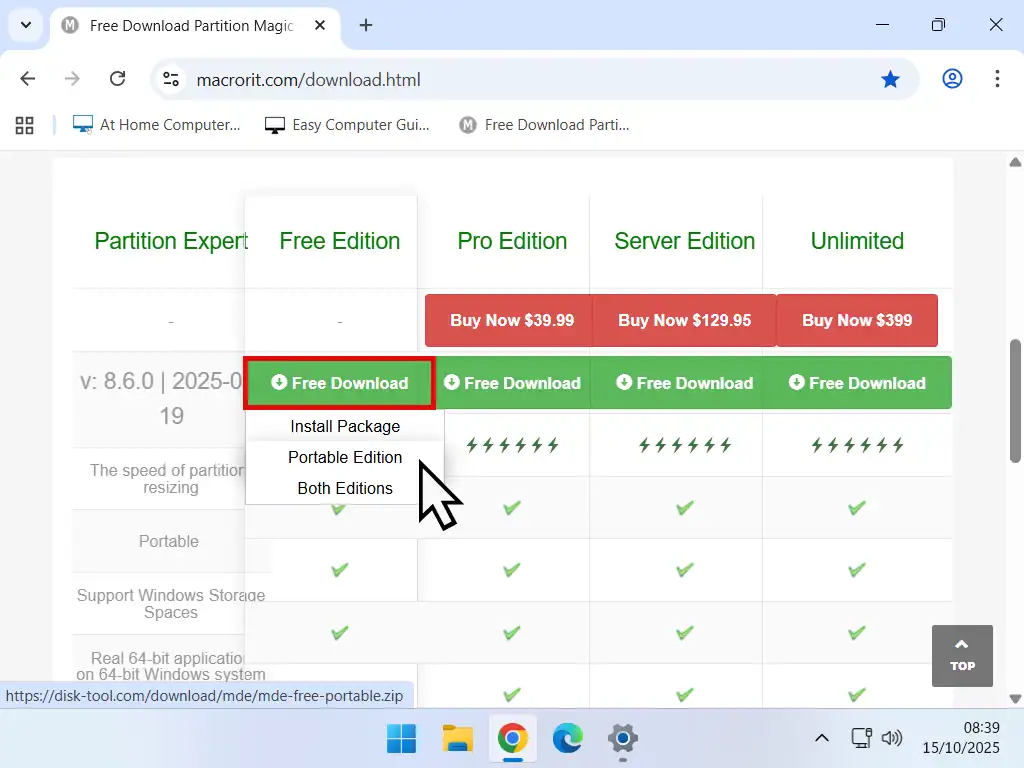
- Scroll down a little and you’ll find a comparison table describing capabilities pf the various editions. If all you need to do is to move a disk partition on your home PC, then the Free edition will suffice. Hover over Free Download and select either Install Package or Portable Edition. For this guide I’m going to use the portable edition.
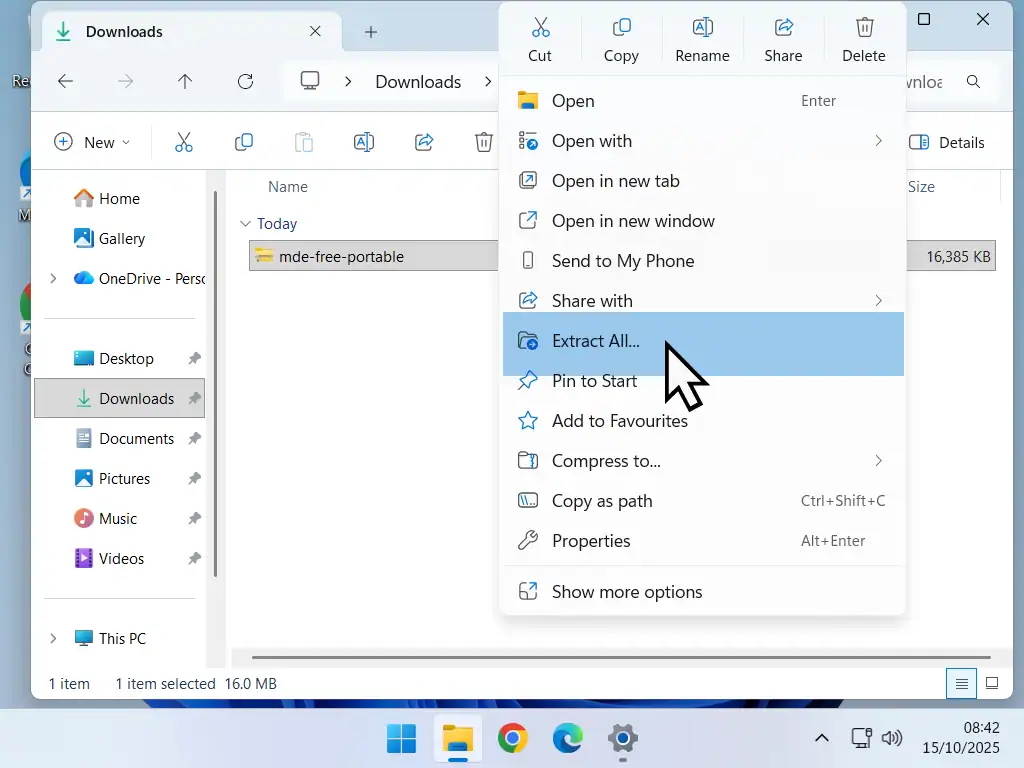
- When the download has finished extract the zipped MDE folder.
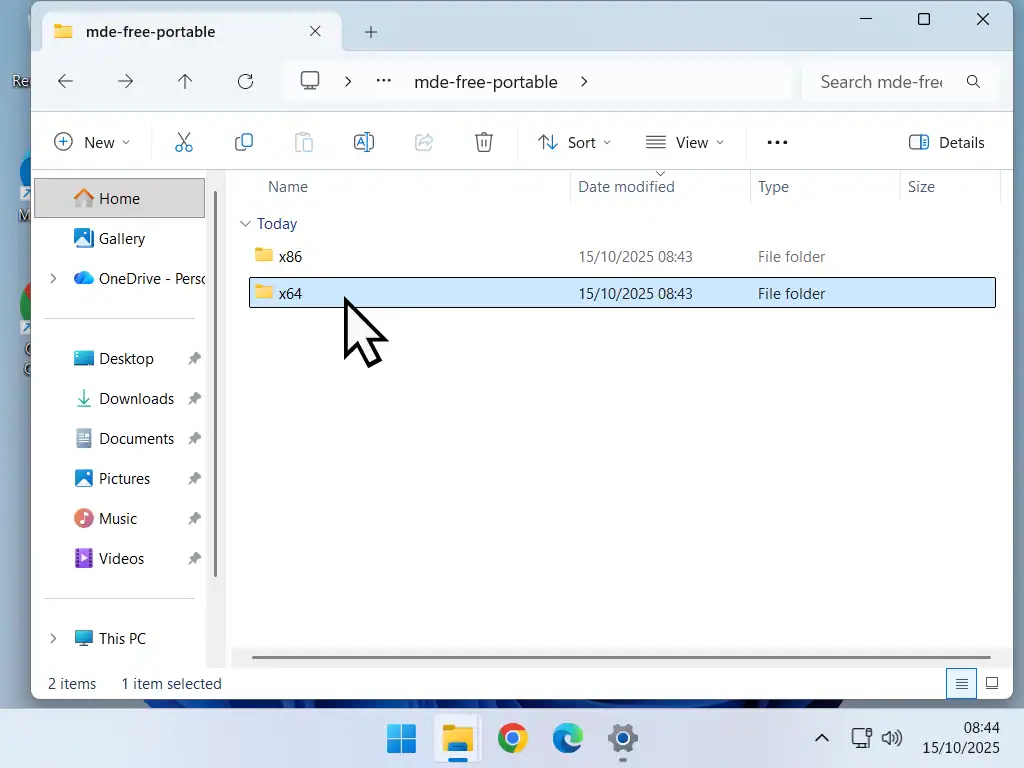
- Open the unzipped MDE folder and then open either the X64 folder for 64 bit systems or the x86 folder for 32 bit systems. Most Windows 10 and Windows 11 systems will be x64 (64 bit).
Run The Application
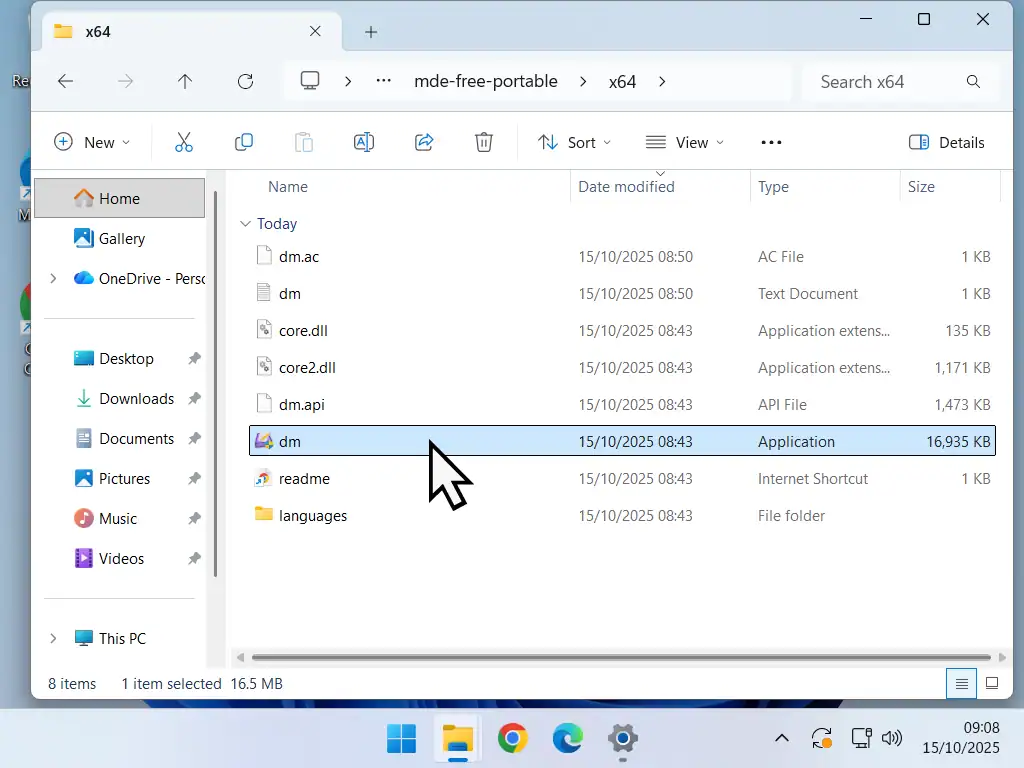
- Inside either the x64 or x 86 folder (whichever you selected), double left click the DM application to run it. You’ll need to click Yes on the User Account Control popup.
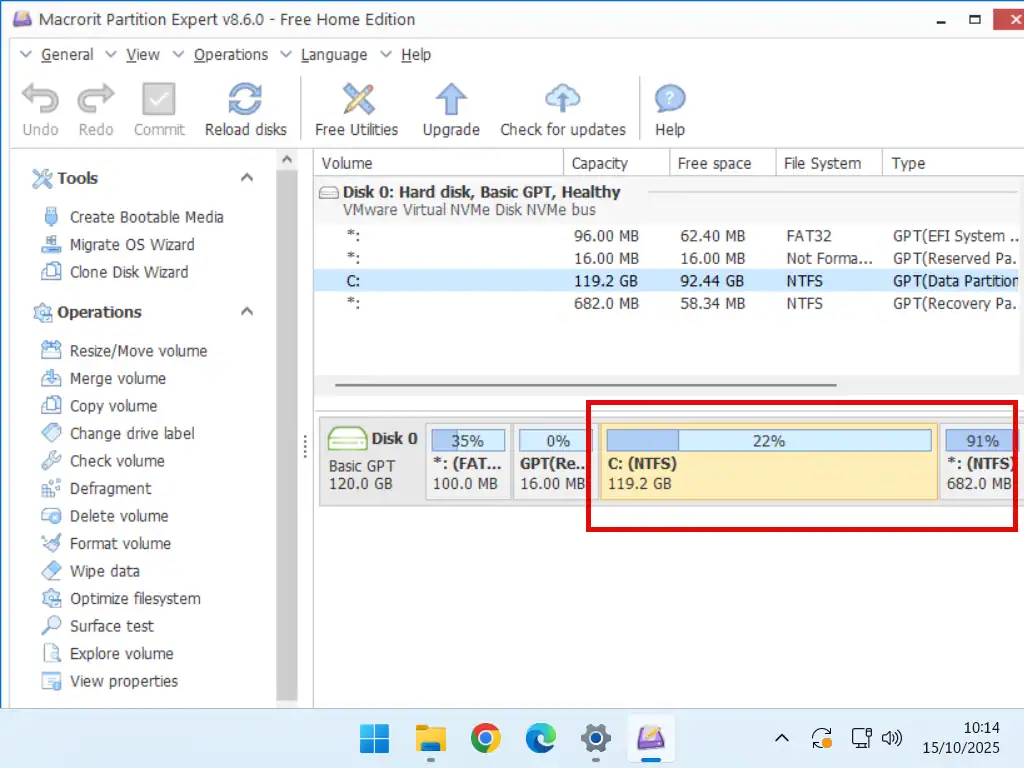
- Macrorit Partition Expert will show you the current layout of your disk. Select the partition (volume) that you want to move and also make a quick note of its current size. Then click Resize/Move Volume in the left hand panel.
- Drag the end of the partition into the unallocated space. In this example I’m moving the Recovery Partition to the very end of the disk, so I’ll drag it to the end of the disk.
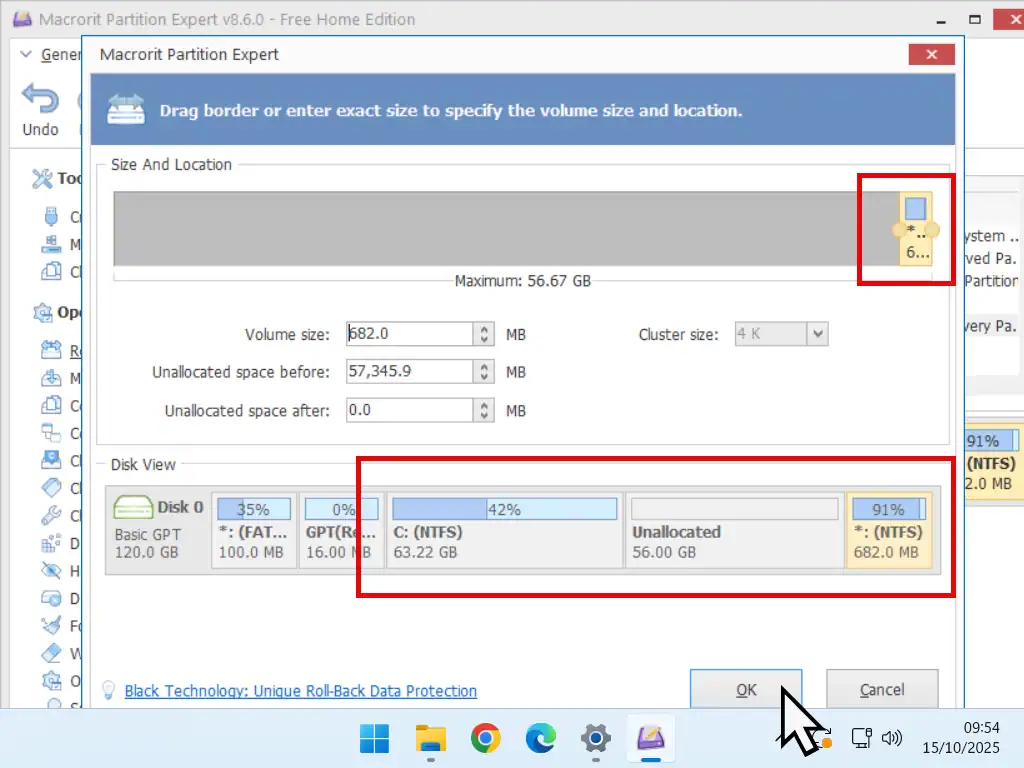
- Next you need to shrink the volume back to its original size. Drag the beginning of the partition until it’s the correct size.
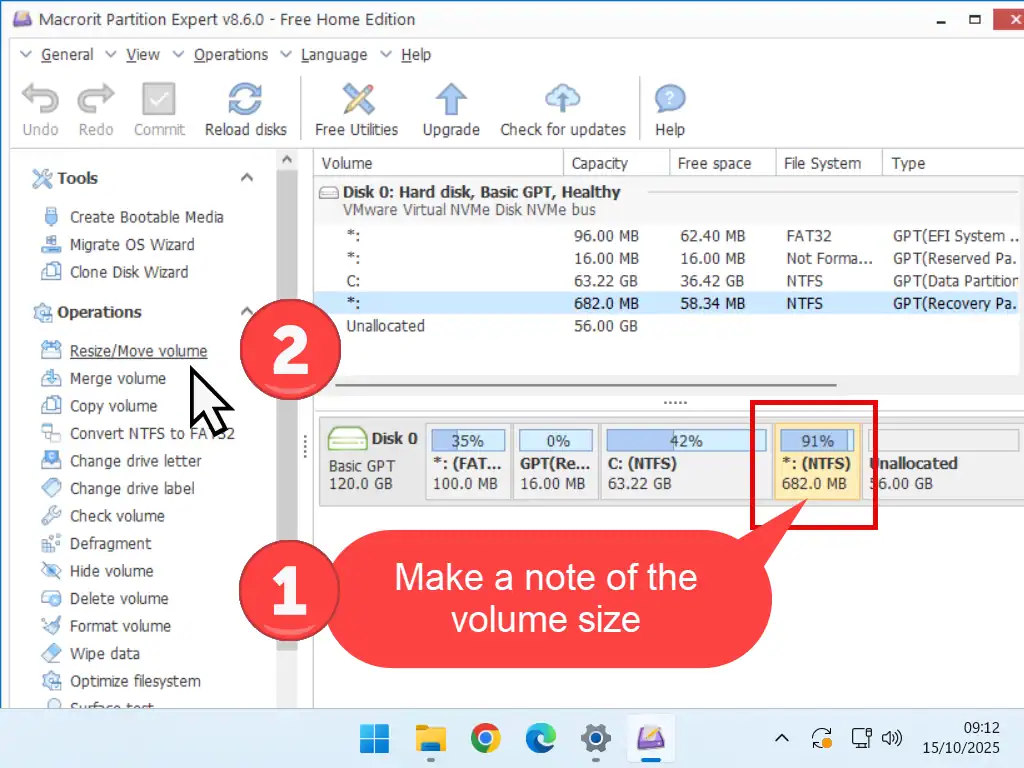
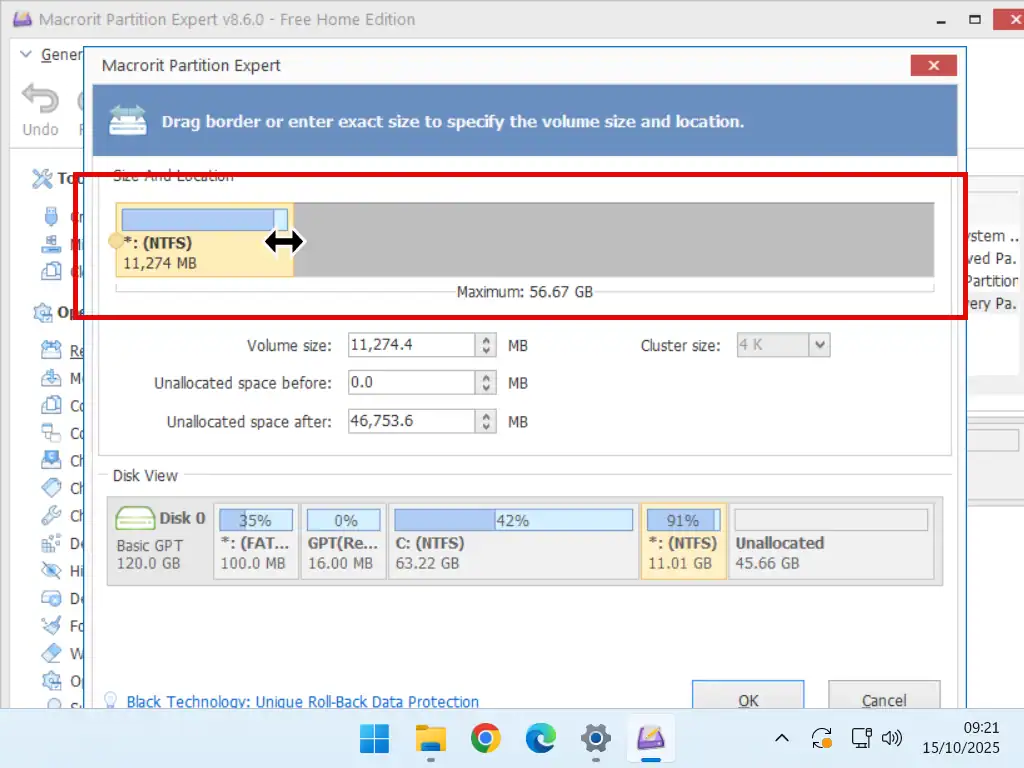
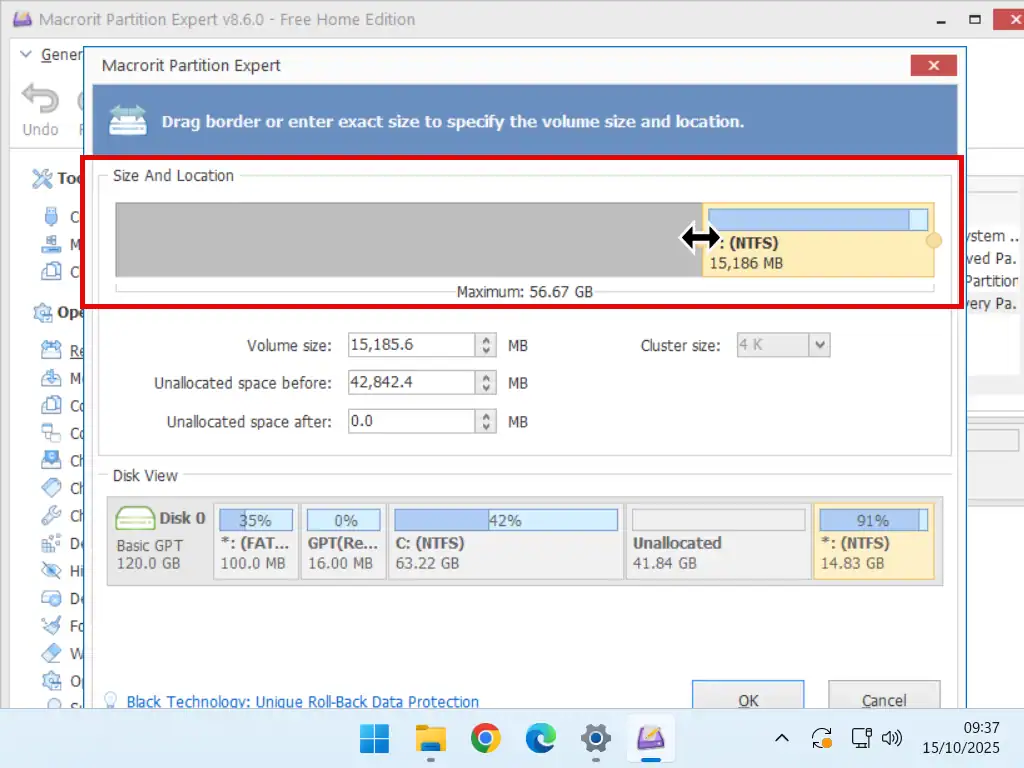
Recovery Partition Size.
If you’re moving a data partition, then you can make it any size (capacity) that you require provided you leave enough space for the data that’s stored on it.
But when you want to move the Recovery Partition, always return it to the same size that it was originally. A little larger won’t hurt anything, but no smaller.
Moving The Partition
In this example we’re moving the recovery partition to the end of the drive. Click the OK button and the drive will be locked pending the operation.
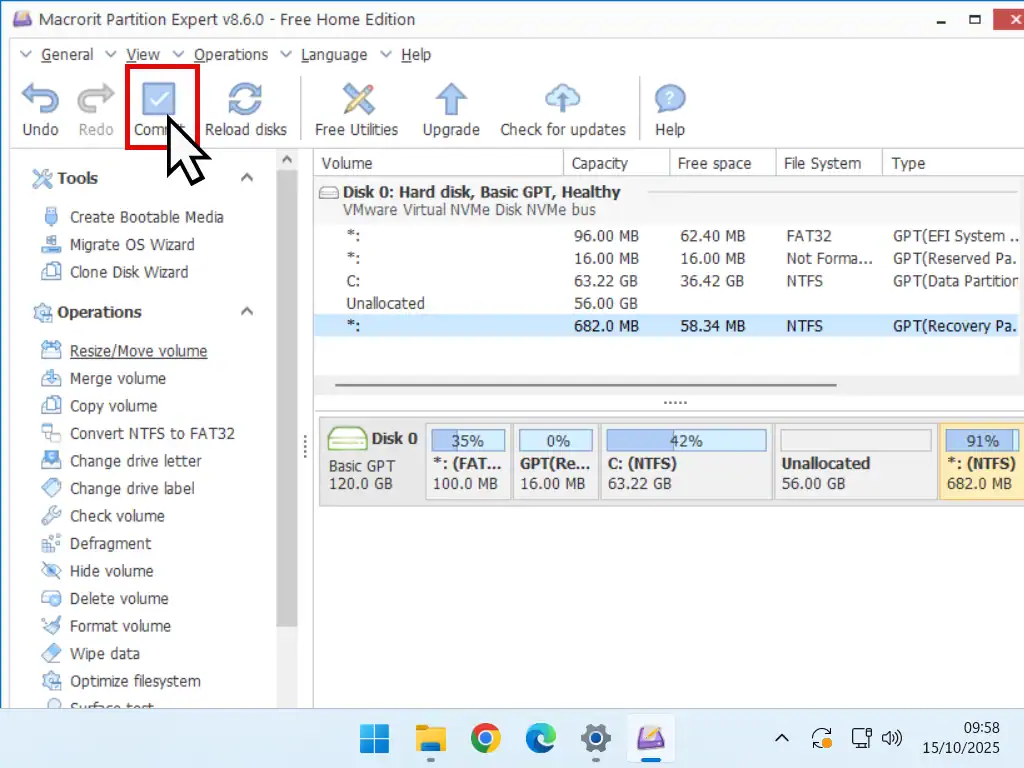
Nothing has been moved yet. To actually move the volume (partition), you’ll need to click the Commit button. You’ll see a couple of waring popups, just click OK or Yes to proceed. And that’s it. The partition will be moved.
Extending A Partition
To extend a partition into adjacent free space you could just use Windows Disk Management but for the purpose of this guide I’ll continue with Partition Expert.
- Now that the recovery partition has been moved to the end of the drive, you can extend the C: drive into the adjacent unallocated space. The procedure is much the same as moving a partition.
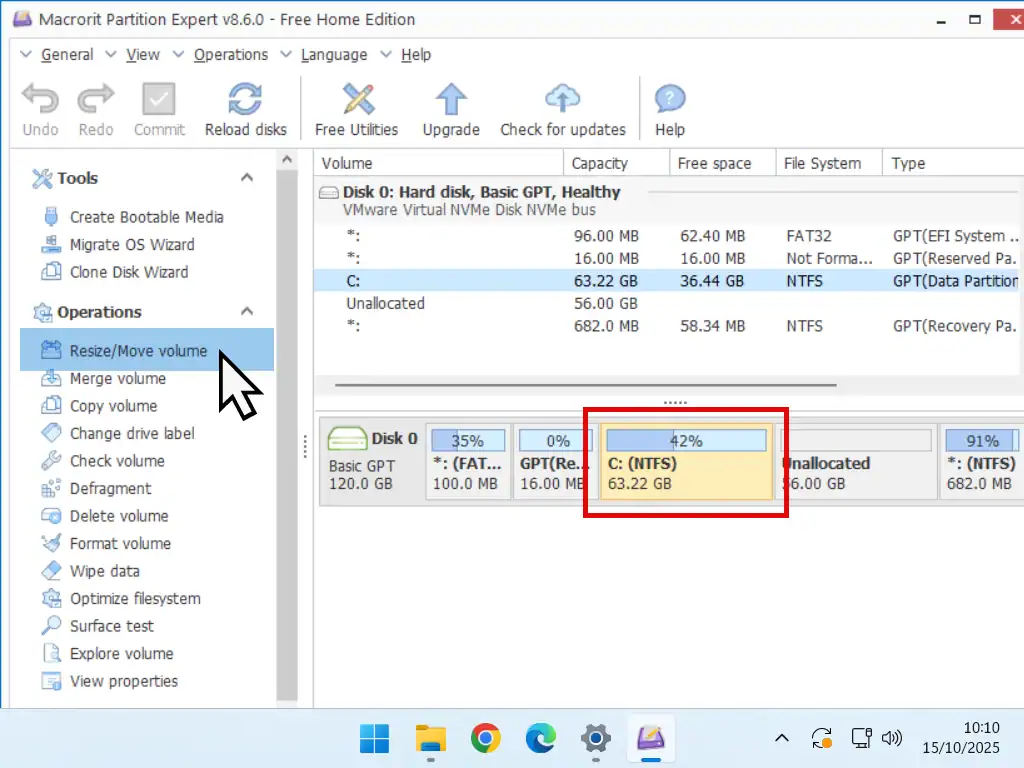
- Select the partition that you want to extend and then click Resize/Move Volume.
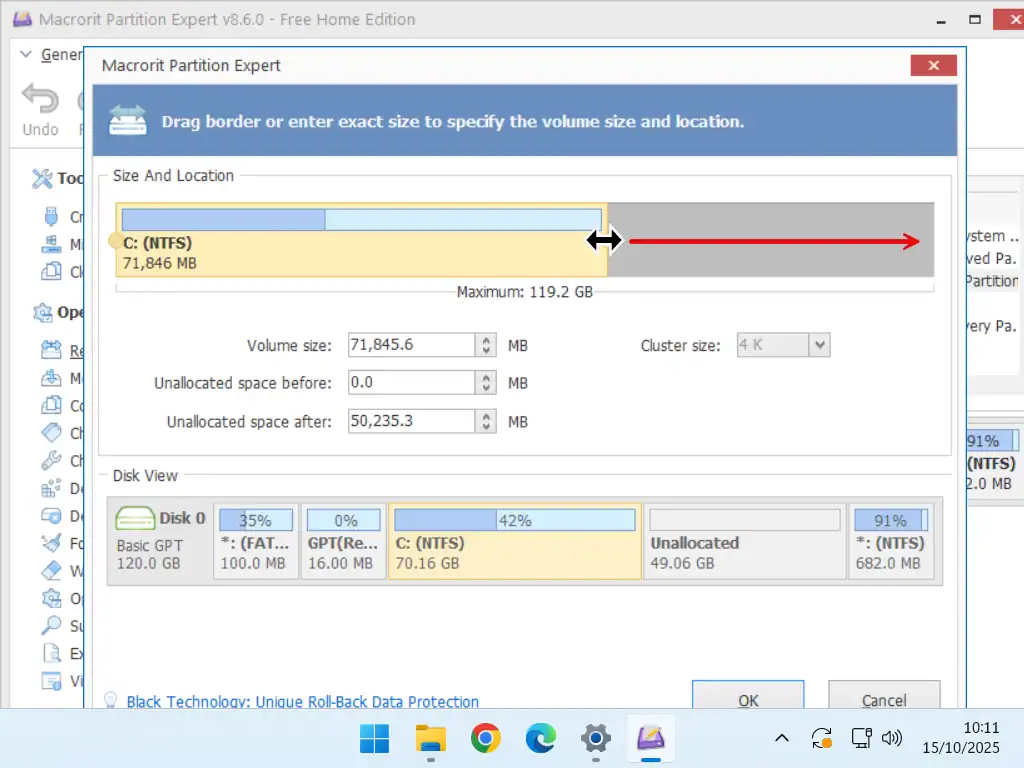
- Drag the end of the partition to fill the available space. Click the OK button and then click the Commit button.
- After the process has finished the partition will be extended.
Other Third Party Tools You Could Use
There’re many third party tools that you could use to move or extend a partition (volume) on your computer. In this guide I’ve used Macrorit Partition Expert but I thought it be useful to give my thoughts on a few of the applications that always seem to be “recommended” in Google search results.
On a home computer you’re only likely to move a partition once. It’s not something that you’ll be doing regularly, so I was looking for a free application.
Also I wanted something that’s easy to download and install or run. Keep everything as easy as possible.
| EaseUS Partition Master Free. | EaseUS forces you to create an account, otherwise it just won’t work, or at least I couldn’t get it to work. For context, I didn’t want to create a new account since I already have one with them. I do use some of their products which I’ve paid for including Partition Master. |
| AOMEI Partition Assistant Free. | This does work but I found it difficult to actually download the free version. They’re very pushy about the paid editions and I really didn’t want to go into detail about what to click on to get the free version. |
| GParted. | GParted does work but you have to create a bootable USB flash drive and boot into that. It doesn’t work from within Windows itself. |
Summary
Moving and resizing partitions (or volumes as Windows sometimes refers to them) isn’t something that you’re likely to need to do often on your home computer. Be sure that you have an up to date working backup that you can use to recover your PC if something goes wrong.
New Home Computer Guides
Latest step by step guides on At Home Computer.

