Hard drive partitions allow you to organise your data in manageable areas of your computer. For example you can store different types of data on different partitions. Maybe have your photos on one partition and games on another.
Running different operating systems is another great use of partitions. For example you could run Windows and a Linux distro on the same computer. Although you can do that using Virtual Machines, you can never give a VM the total power and resources of your computer.
They also add a layer of security. Malware will take time to spread through your computer and although it will infect any extra partitions that you have, it’s possible that you could intercede before it spreads across those partitions.
How to Create a Disk Partition in Windows
You don’t need any specialist software to create partitions, you can just use Windows own tools. It’s eactly the same procedure in both Windows 10 and Windows 11.
Click the Start button and then type “computer management“. Then click on Computer Management (System), which should appear at the top of the search results.


When Computer Management screen opens, click Disk Management in the left hand pane.
That’ll show you all your drives and partitions in the centre pane.

Disk Management
In the Disk Management tool, you can see many disks you have and how each disk is currently partitioned.
The lower section gives you a graphical representation of how the partitions are laid out.
The upper section gives you more details about each partition.

System Drive
When Windows is installed onto a hard drive, it’ll create extra partitions that are generally hidden. These partitions are necessary in order to boot Windows properly.
Your PC manufacturer may also add hidden partitions in order to store any recovery software.
Shrink Volume
In order to create a new partition on a disk that’s already in use, you’ll need to make some space for it. The way to do that is to shrink a partition that already exists.
In the lower section of Disk Management, right click on the partition that you want to divide.
Then left click on Shrink Volume.

Partitions and Volumes
In Windows volumes and partitions are the same thing. Windows will alternate between the two words depending on which tool or action you’re trying to carry out.
The Shrink Volume popup window will appear. All the sizes are given in megabytes. It can be a little confusing because we’re much more used to describing hard drive (hard disk) capacities in gigabytes.
You have to keep this in mind 1 gigabyte = 1000 megabytes.
- Total size before shrink – The total capacity of the partition before you’ve done anything to it.
- Size of available shrink space – Gives you the amount of free space that’s available on the partition.
- Enter the amount of space to shrink – This is going to be the size of the new partition that you’re trying to create.
- Total size after shrink – The new size of the current partition after it has been shrunk.

Shrinking a Volume
By default Windows will use the total amount of free space as the amount to shrink the volume. That’s never really a good idea. You’ll almost always want to reduce that amount so as to leave extra space on the current partition.
Enter the Size of the New Partition
In the “Enter amount to shrink” box, type in the size that you’d like the new partition to be.
Remember that you’re entering megabytes, not gigabytes.
In this example, I’d like a 20 GB partition, so I’ve entered 20,000 megabytes.
Then click the Shrink button.

The New Partition is Created
It might take a few moments or a few minutes in order for Windows to create the new partition, but eventually it will appear.
Next you need to format it.

Unallocated Partition
The newly created partition will appear as “Unallocated”. You can’t actually use the partition until you “initialise” it. That’s to say you need to format it.
- Right click on the Unallocated partition and then left click New Simple Volume.
- The New Simple Volume Wizard will appear. Click the Next button.
- Specify volume size – you can leave this at the default value, click Next.
- Assign a drive letter – Windows treats partitions as separate hard disks, as such each partition (or volume) needs to have its own drive letter. You can accept the default letter, or click on the drop down arrowhead to select a different one.


The Volume Label
The volume label is going to be the name of the partition when you view it in File Explorer.
By default, Windows will call it New Volume.
But you can change that to be anything that you’d like it to be.
For example, if you intend to keep your pictures on the partition, you could name it Photos.

The New Partition is Created
Finally Windows will give you a confirmation screen. Just click the Finish button to complete initialising the new partition. It doesn’t usually take long to do.
Then close the Computer Management screen and open File Explorer. There you’ll see the new partition that you just created.


Summary
Partitioning a hard disk isn’t difficult to do and Windows will handle all the heavy lifting for you. However there are a few precautions that I’d generally advise you to take before beginning.
Firstly, and probably the most important precaution is to make a backup of your system. You can use third party backup solutions or just go with Windows System Image.
Then I’d run a Check Disk on your drive. This’ll make sure that the drive is working correctly and that the file system is all in order.
Finally run a System File Check. This’ll find and correct any issues with Windows itself.
Related Posts
Windows 10 System Image Backup.
When modifying partitions on a live PC, it’s always best to create a system image first.
Windows 11 Backup
The same is true for a Windows 11 computer.
How To Use CHKDSK
Scan your computer hard drive for errors and corruption.
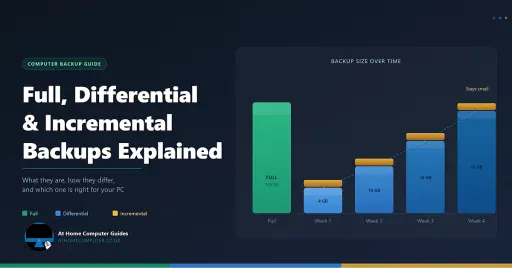
Differential Vs Incremental Backups
What they are, how they differ, and which one to use on your home PC?
This guide explains all three backup types in plain English, so you can make the right choice for your home PC.
You can find this and other related step by step guides in – At Home PC Tech Guides
At Home Computer Step By Step Guides
![]() Easy to follow tutorials for users of Windows 10 and Windows 11 computers.
Easy to follow tutorials for users of Windows 10 and Windows 11 computers.
Gmail Storage Full? Here’s Why (and How to Fix it)
A Beginner’s Guide to File Formats and Filename Extensions
How to Protect Your Data When Sending Your PC in for Repair

Why I Use Virtual Machines and You Should Too
How to Install Windows XP as a Virtual Machine on VMware Workstation Pro
Is VMware Player Coming Back?

How to Setup OneDrive to Backup Your Files
OneDrive allows you to backup files to the cloud. It…
How to Share a Folder in OneDrive
One of the best features of OneDrive is the ease…
How to Setup RealTimeSync
RealTimeSync is a companion tool for the popular sync program…