Chkdsk, also known as check disk, is a tool that’s built into both Windows 10 & 11 that will scan your computer hard drive looking for errors.
Check disk can find and repair issues with the hard drive filing system as well as scanning the surface of the drive for bad sectors (dead sectors).
How To Use Chkdsk.
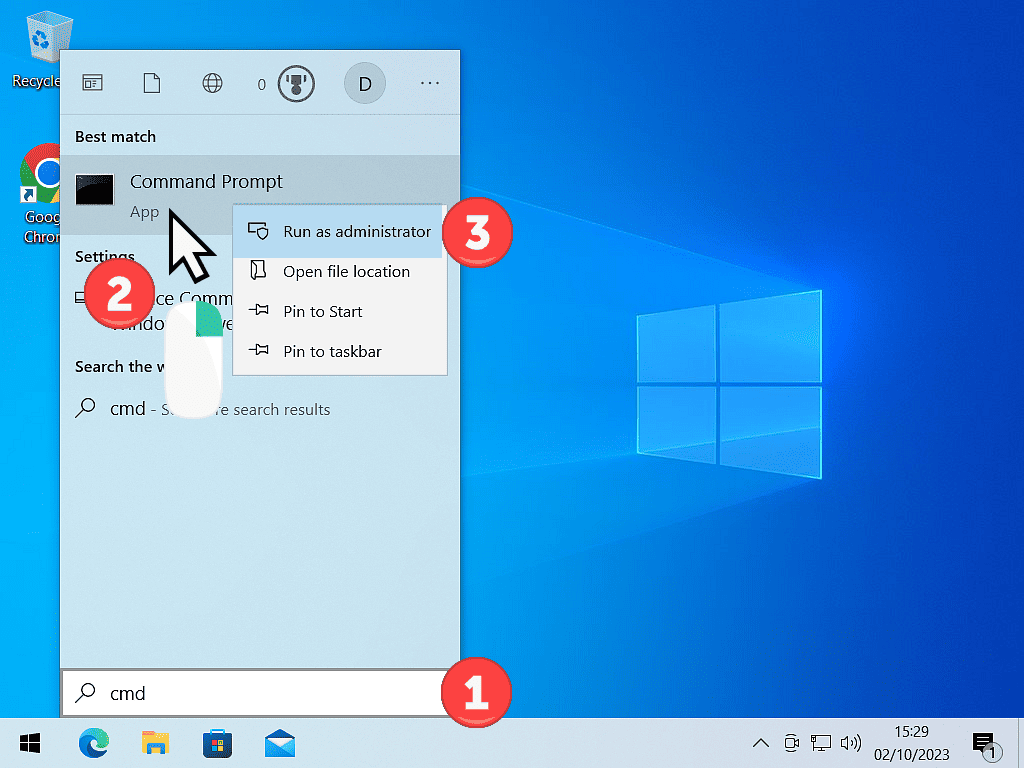
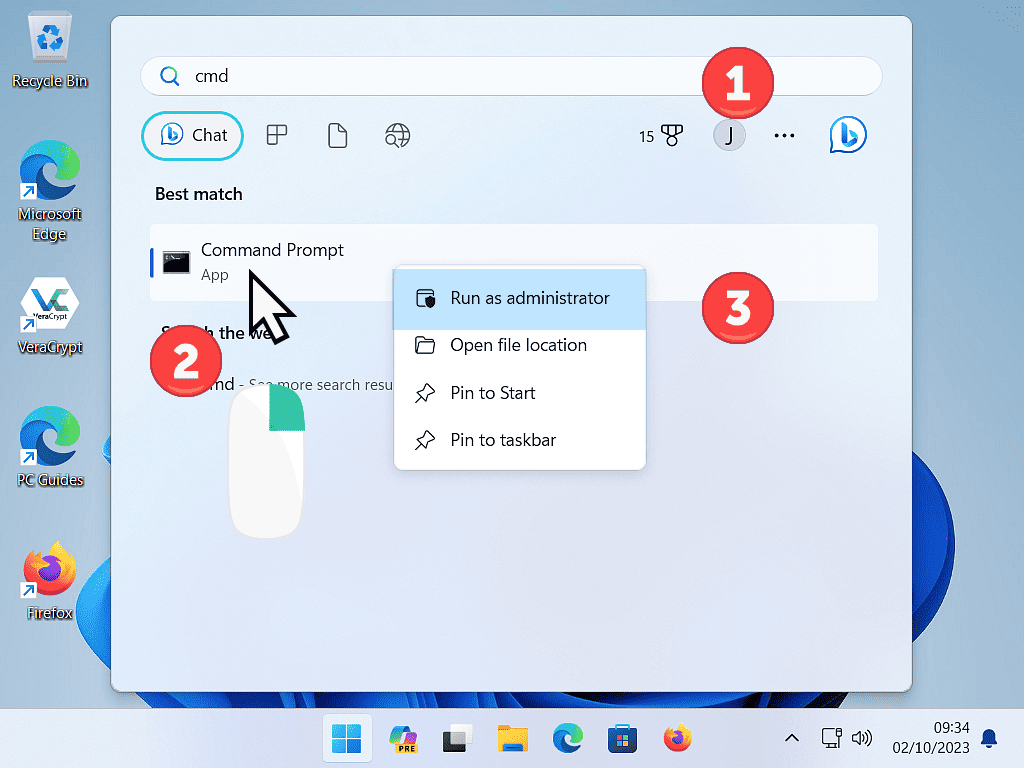
To use chkdsk in both Windows 10 & 11, click the Start button and then type “cmd“
Then right click on Command Prompt (App). On the menu that opens, left click Run As Administrator.
You’ll need to click Yes on the UAC pop up that appears.
Enter The Chkdsk Command Into The Command Prompt.
When the Command Prompt window opens you need to type in the chkdsk command along with the drive letter of the hard drive that you want to scan. The command is typed like this chkdsk c:
Then you need to add what’s called a switch.
Chkdsk Switches
A switch tells chkdsk what type of scan it should launch. Switches are added to the end of the command.
While there are many chkdsk switches that you could use, the two most useful for home computer users are the /f switch and the /r switch.
- /f – initiates a chkdsk scan of the computer file system on the drive. Using the /f switch, chkdsk will attempt to fix any corruption that it finds.
- /r – this switch causes chkdsk to scan and fix the file system and check the disk surface for bad sectors. The /r switch will attempt to recover data from bad sectors and then mark them as unusable.
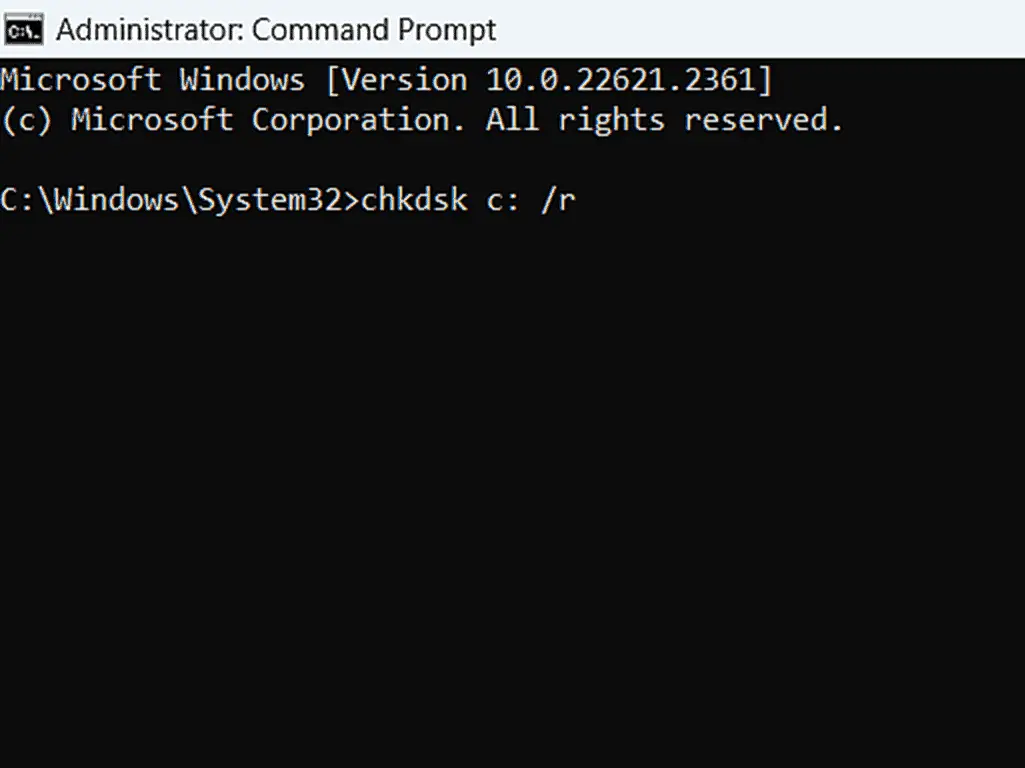
In the Command Prompt window, enter the check disk command and switch like this
chkdsk c: /f
Or to use the /r switch, enter it like this
chkdsk c: /r
and then press the Enter key on your keyboard.
Which Chkdsk Switch To Use?
Which chkdsk switch you should use really depends on your computer and what you think may be the problem.
The /f switch only scans and repairs the file system, as such it’s much quicker.
The /r switch scans and fixes both the file system and the drive surface. It will take much more time but is obviously much more thorough.
Just be aware that using the /r switch can take a very long time, especially on large capacity hard drives.
- Traditional “spinning” hard drives – if your checking a spinning hard drive then I’d generally recommend you use the /r switch. Hard drives (particularly those in laptops) can get damaged and so a surface scan would probably be helpful.
- SSDs – SSDs don’t really have a surface to scan, so I think that using the /f switch would be better. If you suspect a issue with the drive itself, you’d probably be off using the diagnostic software that’s usually available from your drive manufacturer.
Cannot Lock Current Drive Message.
If you’re running chkdsk on your system drive, then after pressing the Enter key you’ll probably see this message appear in the Command Prompt window.
“Chkdsk cannot run because the volume is in use by another process. Would you like to schedule this volume to be checked the next time the system restarts? (Y/N)“
What it means is that chkdsk requires exclusive access to the drive. It cannot operate properly if you (the user) or any programs try to access the files stored on the drive.
To continue, type the letter “Y” and then press the Enter key.
To begin the scan, restart your computer.
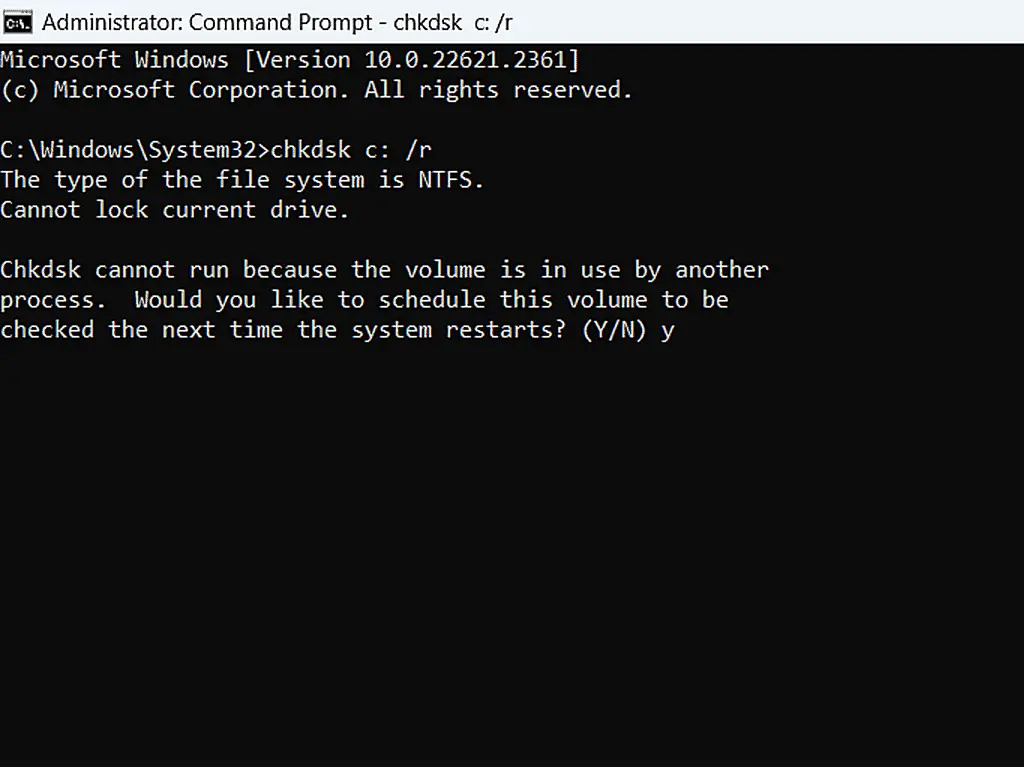
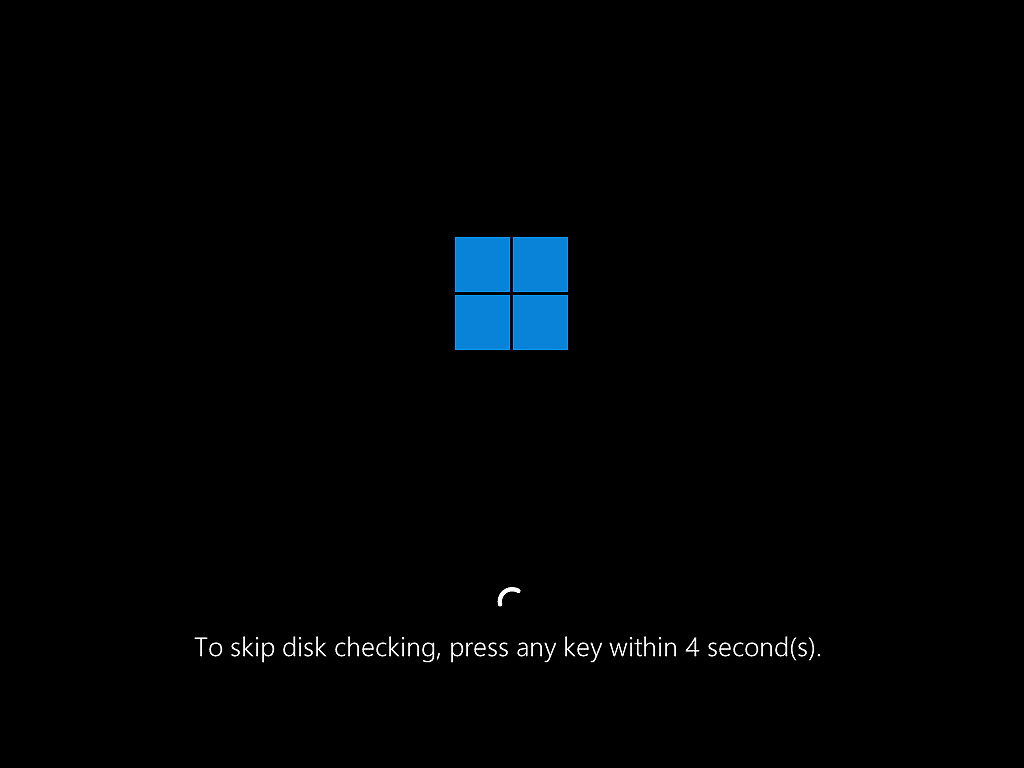
The chkdsk scan will begin as your computer reboots, before Windows has loaded. If you’ve changed your mind about running the scan, you get around 10 seconds to cancel it by pressing a key on your keyboard.
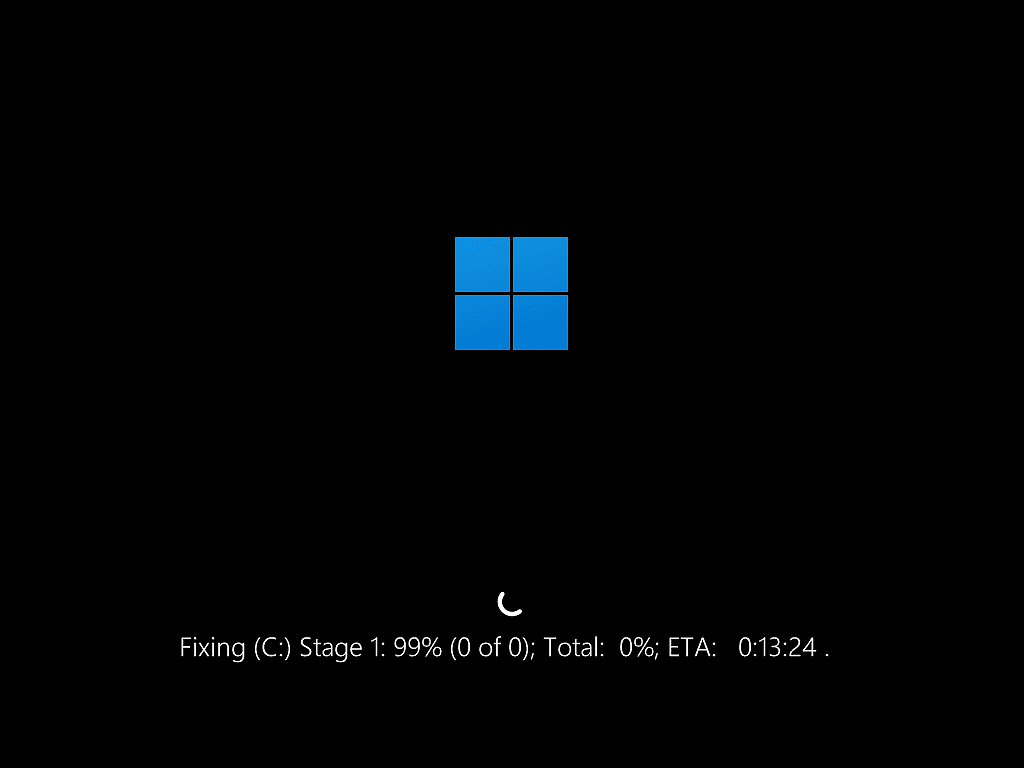
After that the scan will start. If you used the /f switch, then you’ll see 3 “stages”. If you used the /r switch, then there’ll be 5 “stages”. The last 2 will take the longest.
Scanning A Storage Drive (Non System Drive).
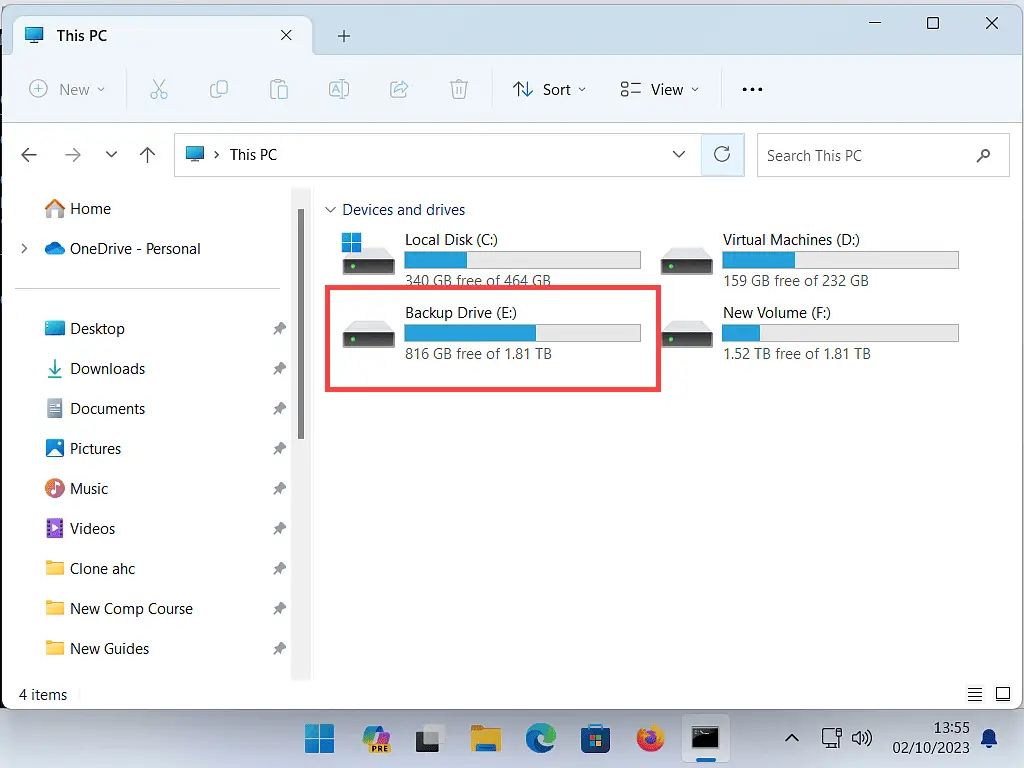
Chkdsk can check any drive on your computer for errors, not just the system drive. If you need to check other drives within your PC, simply change the drive letter in the command.
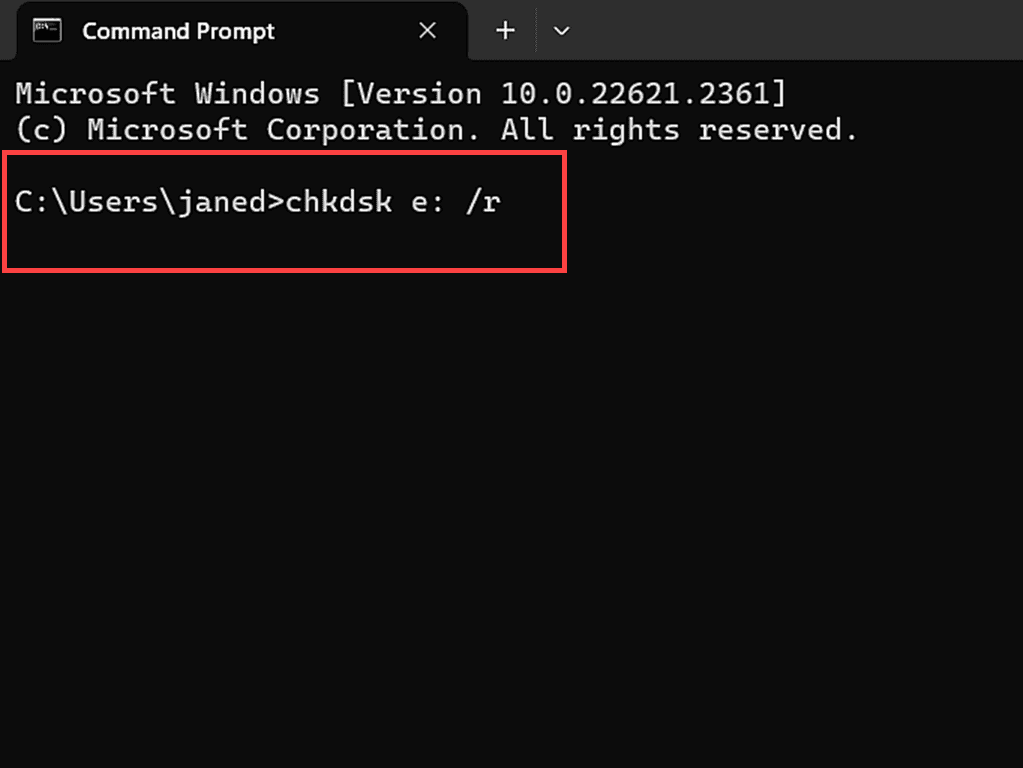
For example, on this computer I have a second hard drive, Backup Drive (e:).
To check the file system of the Backup Drive with the /f switch, I’d type – chkdsk e: /f
Or to check the entire drive, change the switch to /r – chkdsk e: /r
After locking the drive, the disk will be checked. Since it’s not the system drive, it can be checked while your still using your computer.
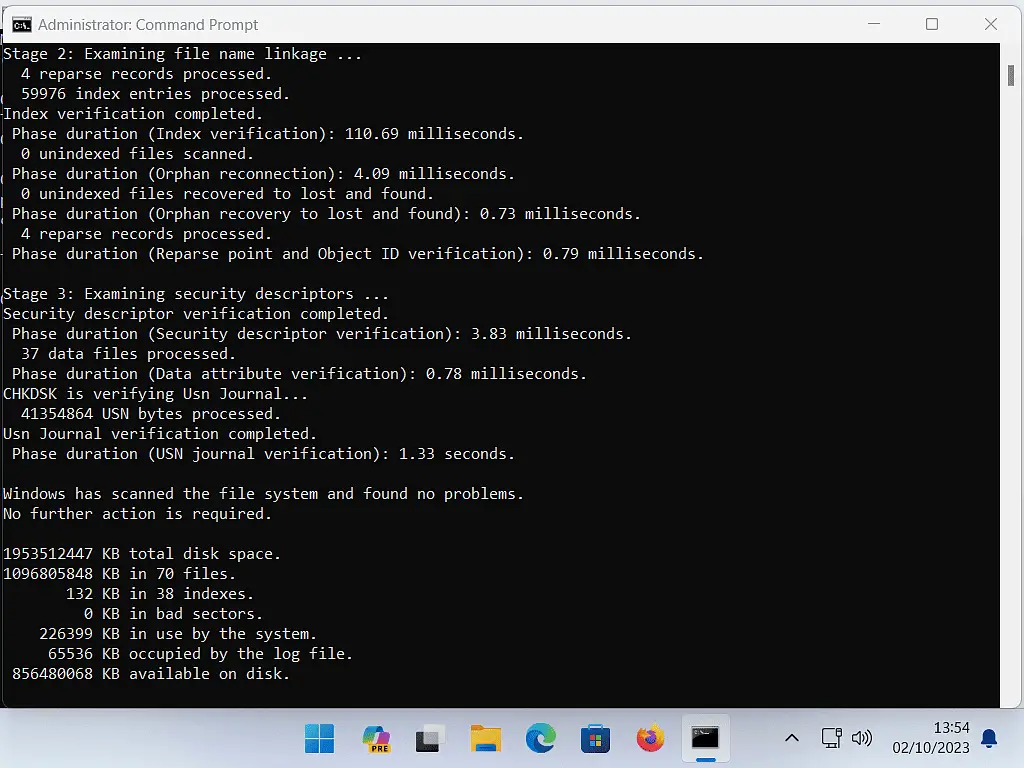
Your Drive Will Be Unavailable During A Disk Check.
Even though you don’t need to restart your computer to run chkdsk on storage drives (non system drives), they won’t be available for you to use while the check is in progress.
Since chkdsk locked the drive, you won’t be able to access any of the files, folders and any other data on the drive.
When To Use Chkdsk?
Run chkdsk periodically. Depending on how much use the computer gets, running a disk check 2 to 4 times a year should help to keep both your hard drive and file system in tip top shape.
Ideally you should also run a disk check after what is often called “an unexpected shutdown”. In other words a system crash.
Any time your PC suddenly goes off (maybe because it crashed or suddenly lost power), that can cause corruption in the Windows file system. It can also cause physical damage to your hard drive, resulting in bad sectors (unreadable areas of the disk).
Check Disk Can’t Repair A Failing Drive.
If your hard drive is beginning to fail, then replace it as soon as you possibly can. Neither chkdsk nor any other hard drive utility can save or repair failing drives.
Backup your data immediately and then get the drive replaced.
