Windows System File Checker (SFC) is a tool built into both Windows 10 & Windows 11 to scan and repair protected Windows files. It can help fix problems that arise within Windows due to corrupt or missing files.
Run a system file check to fix issues with Windows features and third party applications not working properly.
SFC can even fix the odd computer crash (blue screen). All can be caused by missing and/or corrupt system files.
How To Run A System File Check (SFC) Scan.
A System File Checker scan needs to be run from the Command Prompt as an Administrator.
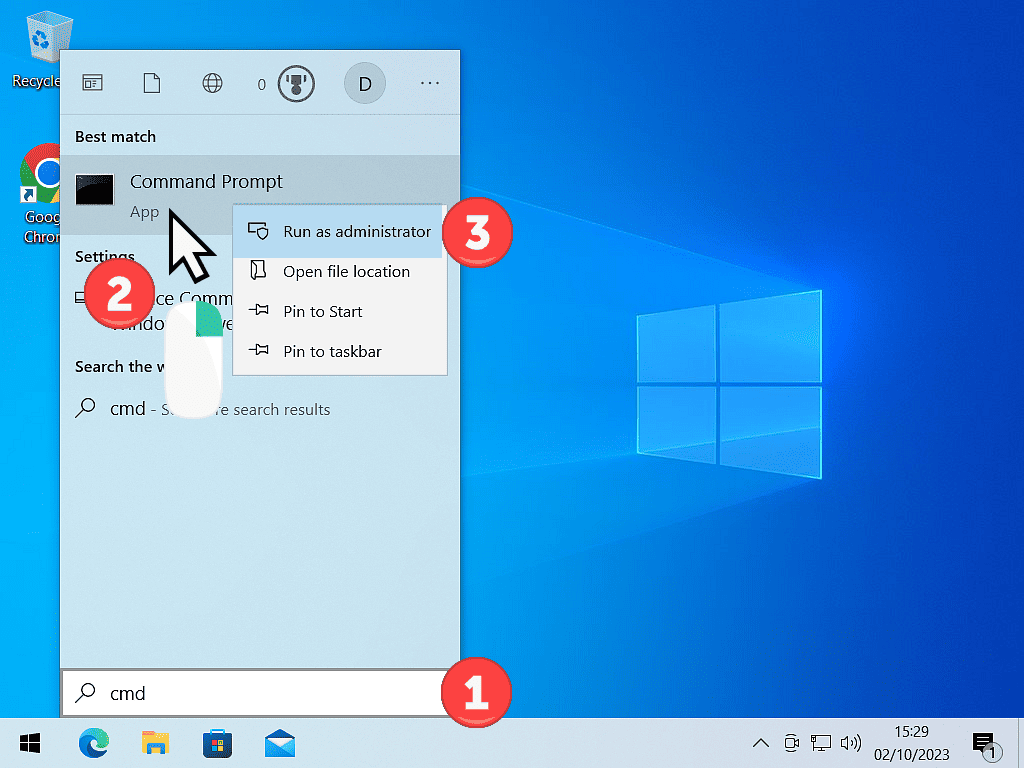
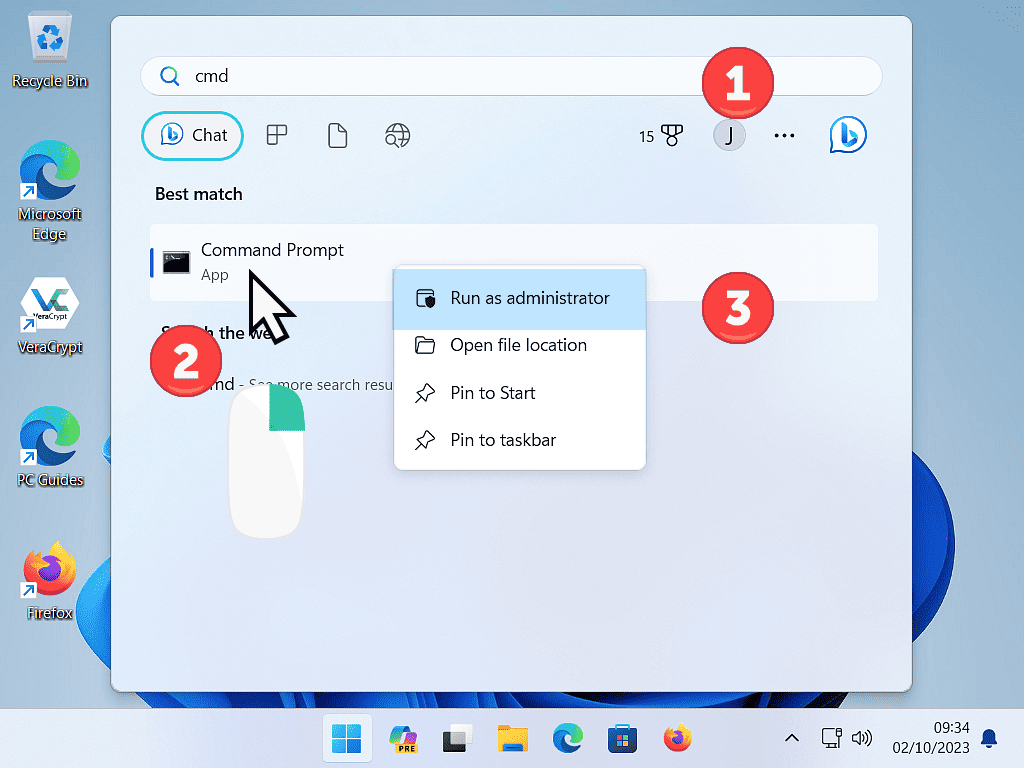
To launch the Command Prompt as an Administrator , click the Start button and then type “cmd”. Right click on Command Prompt (app). Then left click “Run As Administrator”.
You’ll need to click Yes on the UAC pop up that appears.
SFC /Scannow
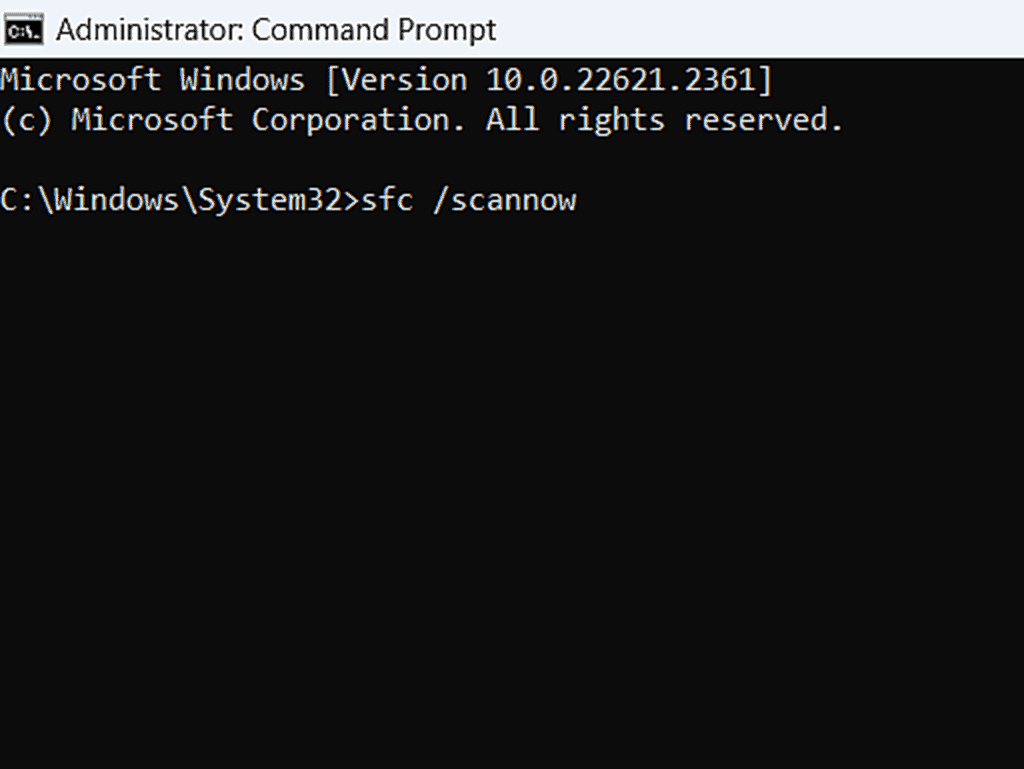
To run a System File Checker scan you need to type in the following command “sfc /scannow“
The /scannow modifier tells SFC to scan all the protected system files and repair any files that have problems. Which is generally what you want it to do.
In the Command Prompt window type
sfc /scannow
Then press the Enter key on your keyboard.
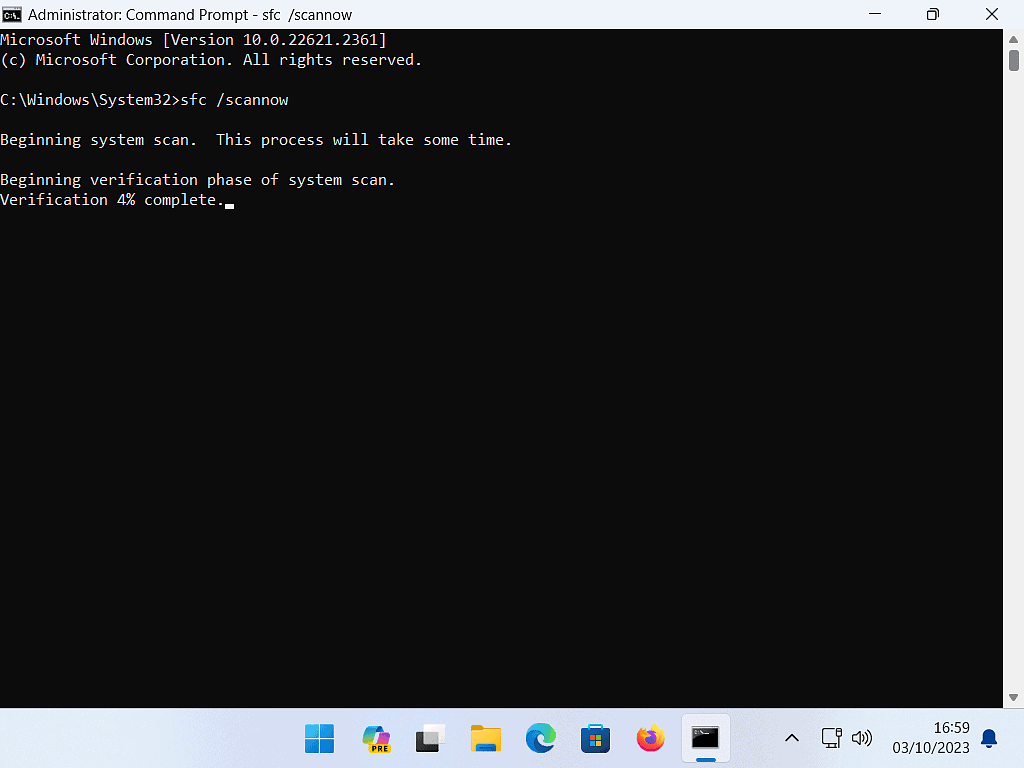
SFC Scanning Windows Files.
After hitting the Enter key, the SFC tool will start scanning all the Windows Protected system files.
Because you used the /scannow modifier, any files that it finds to be corrupted or missing will be repaired/replaced.
How long it takes is entirely down to your computer, but something between 5 to 30 minutes is about right.
Try to leave the PC alone during the scan, just moving the mouse occasionally to stop it going to sleep.
When The System File Check Has Finished.
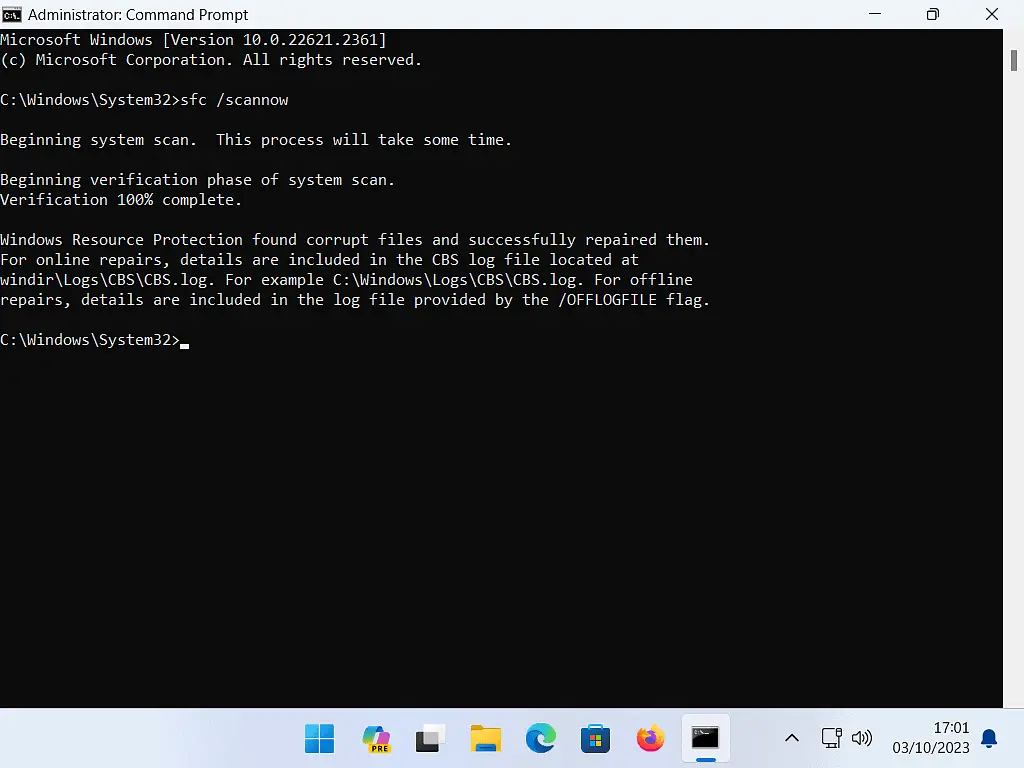
When the System File Checker scan has finished you’ll see one of three messages.
- Windows Resource Protection (SFC) did not find any integrity violations. Which means that all the Windows files are fine.
- Windows Resource Protection found corrupt files and successfully repaired them. Brilliant news, problems solved. Restart your computer to allow any changes to take effect.
- Windows Resource Protection found corrupt files but was unable to fix some of them. Oh no, this is perhaps the worst message you can get. SFC has identified at least one issue but can’t help you with it.
SFC Found Corrupt Files But Was Unable To Fix Them.
When the System File Checker runs a scan and finds corrupt or missing files, it will attempt to replace those files from a cached copy. Sometimes though, the cached copy is either missing or corrupt. In that case SFC will simply draw a blank and report the file as unrepairable.
The standard advice in this situation is to run SFC again, but this time run it in Safe Mode. It’s entirely possible that antivirus/anti malware or some other application has interfered with the file check. Running the scan in Safe Mode should alleviate the issue.
Personally I’ve never known this to actually work, but it’s easy and quick and probably worth giving it a go.
The more likely answer is to run a DISM scan. DISM (Deployment Image Servicing and Management) can scan and repair the very cache that System File Checker is using to repair the missing/corrupt files in your Windows installation. In effect, DISM can be used to repair SFC How To Use DISM.Exe
Stay Informed. Stay In Touch.
Now that you’ve found me, keep in touch. I publish new articles and update older ones constantly.
Let me send you a monthly email with all the latest guides for you to see if there’s anything you’re interested in.
