Have you connected a new hard drive only to find that it’s not showing up in File Explorer. Hard disks should be available under This PC in File Explorer, if yours isn’t then you can’t use it until it is.
In this guide, I’ll walk you through the most common fixes, from simple cable checks to using the Windows Disk Management tool.
How to Fix Hard Drive Doesn’t Appear in File Explorer (This PC)
OK, so you’ve added a hard drive to your PC, maybe to use as a storage drive, and after rebooting and opening File Explorer you can’t see the drive.
The system drive, C: is there and maybe any other drives that you already had.
But the one you just added is absent. Not there. I’ll show you how to fix it below.

The Quick Fix Checklist
Before diving into the settings it’s worth checking the simple (but often overlooked) stuff.
- SATA power connector: If the drive is an internal drive, check the power connector. Make sure that it’s a nice snug fit. If it’s loose, use a different one, most power supplies have several SATA connectors. In the case of a HDD, lay your finger lightly on the top of the drive and you should be able to feel it spinning.
- Data cable: Check the data cable (it’s the smaller cable). is it connected properly at both ends (drive and motherboard). Again you want a nice snug fit, if it feels loose, change it. Make sure each connection is as straight as possible. SATA data connectors aren’t that strong. Have you used a cable tie? Bending the data cable too much can crack it. Try replacing it with a new cable, but this time don’t use a cable tie, just leave it as it is while you test it.
- USB drives: If it’s a USB hard drive try using a different USB port. Ideally try using a USB port on the back of your PC. These ports connect directly to your motherboard.
- Restart your PC: It’s now a cliché, but you’d be surprised at how many times a fresh reboot will fix problems. That’s because a restart forces Windows to re-scan for new hardwear.
Check Windows Disk Management (Most Likely Fix)
If the drive is properly connected and working but still not showing up in File Explorer, it usually means that it’s “Unallocated” or missing a drive letter. You can check and correct both issues in Disk Management:
- Right click on the Start button and then left click Disk Management on the menu.
- As Disk Management opens you’ll probably be greeted with the Initialise Disk popup window. This means that Windows has detected the new drive and is asking you to get it ready for use. You can select to format it using either MBR or GPT. Generally I’d select GPT. Click the OK button to proceed.
- Next you’ll need to format the drive and assign a drive letter. Right click on it and then left click New Simple Volume. The New Simple Volume wizard will open. Click Next.
- Follow the steps by clicking Next at each window. Usually the default settings will be fine.


Update Your Disk Drivers
If Windows Disk Management doesn’t “see” the drive at all, and you’re convinced that it’s working and connected correctly, then there is a chance that the disk driver is either outdated or corrupt. This is unlikely but worth checking.
- Right-click Start and select Device Manager.
- Expand Disk drives.
- Right-click your hard disk and select Update driver.
- Choose Search automatically for drivers.
Troubleshooting External Hard Drives
If your external drive isn’t showing up, the problem might be power-related.
- USB Power: Some large external drives require their own power cable plugged into a wall outlet. Make sure that it is firmly plugged in.
- Faulty Cable: USB cables fail more often than the drives themselves. Try a spare cable if you have one.
Common Questions (FAQ)
Does initializing a disk erase data?
Yes. If the drive has data on it, do not initialize it. Use a data recovery tool first. Initializing is only for drives that are empty.
What if the drive makes a clicking sound?
If you hear physical metallic clicking sound coming from the hard disk it’s likely that the drive is damaged and is about to fail. Don’t use it. If you’re trying to recover data from it then you may need to contact a professional since continuing to use the drive will damage it further..
Summary
Most new hard drives will be preformatted and ready for use. As soon as you boot your PC they’ll appear in File Explorer. The ones that don’t show up in Explorer are usually the reconditioned, refurbished drives. These have most likely had all the data (including formatting data) wiped.
Related Posts
How To Partition A Hard Disk In Windows.
Add a data partition to very large hard disks to make things more manageable.
How To Move A Hard Disk Partition
You can also move partitions around on the drive if you need to.
How To Completely Wipe A Computer.
Securely remove everything from your computer and re-install Windows easily. Great for making a fresh start or selling your PC.
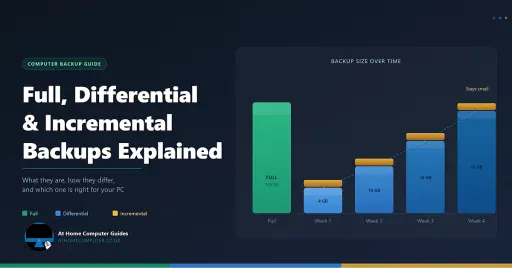
Differential Vs Incremental Backups
What they are, how they differ, and which one to use on your home PC?
This guide explains all three backup types in plain English, so you can make the right choice for your home PC.
You can find this and other related step by step guides in – At Home PC Tech Guides
At Home Computer Step By Step Guides
![]() Easy to follow tutorials for users of Windows 10 and Windows 11 computers.
Easy to follow tutorials for users of Windows 10 and Windows 11 computers.

How to Setup OneDrive to Backup Your Files
OneDrive allows you to backup files to the cloud. It…
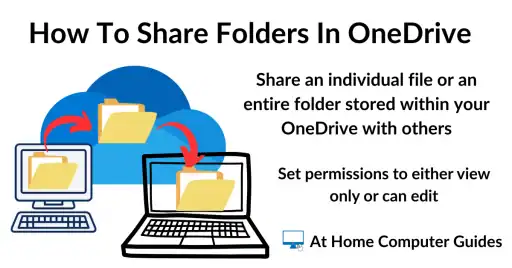
How to Share a Folder in OneDrive
One of the best features of OneDrive is the ease…
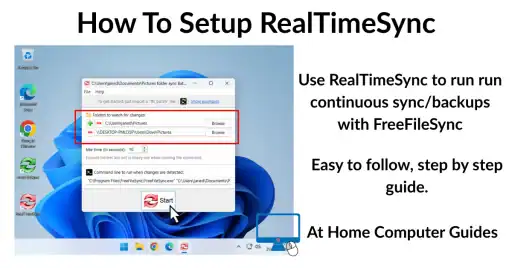
How to Setup RealTimeSync
RealTimeSync is a companion tool for the popular sync program…
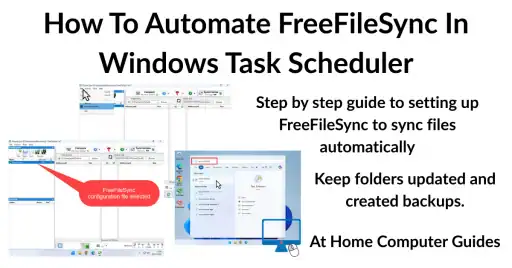
How to Automate FreeFileSync in Task Scheduler
How to automate FreeFileSync in Windows Task Scheduler so that…
How to Setup FreeFileSync
FreeFileSync is a free and open source program that allows…
How To Use VeraCrypt To Encrypt A Folder
Use VeraCrypt to encrypt and password protect files and folders….
Device Encryption on Windows Home Editions
Device Encryption is silently being enabled on all Windows 10…
How to Restore Windows 11 from EaseUS System Image Backup
How to restore a Windows 11 computer using a system…
Windows 11 Backup
How to create a Windows 11 backup for free. Make…