Windows XP remains a favourite for retro gaming and running legacy software that modern Windows 10 & Windows 11 PCs simply can’t handle.
The problem is that XP itself often won’t install on modern hardware. By setting up a Windows XP virtual machine (VM) on VMware Workstation Pro you can enjoy all the benefits of this classic OS in a completely isolated, safe environment on your modern computer.
This beginner-friendly guide walks you through everything: downloading a safe Windows XP ISO, creating and configuring your VM, completing the installation, and installing VMware Tools for the best performance.
What Is a Virtual Machine – and Why Use One for Windows XP?
A virtual machine (known simply as a VM) is a software based computer that runs inside your real PC. VMware Workstation Pro acts as the hypervisor (you can think of it as an emulator), which is the software layer that creates and manages virtual machines on your host computer.
- Host computer: The host is the “real” physical computer. Either the desktop or laptop PC that you’re using right now. It could be running Windows 10 or Windows 11 or any other OS.
- Guest computer: The guest is the virtual machine. It runs inside a program window in much the same way as any other program does. It doesn’t have any physical components but “borrows” them from the host.
Running Windows XP in a VM gives you several advantages:
- It’s completely isolated from your main OS, so any malware or crashes in XP can’t affect your real system
- You can install and run any software on the virtual machine just as you would if it were a real, physical PC
- It runs on modern hardware because VMware emulates the virtual components for XP
- You can take snapshots and roll back to a clean state instantly
Prerequisites: What You Need Before You Start
Before creating your Windows XP VM, make sure you have the following:
- Virtualization enabled in your BIOS/UEFI. Your processor must support hardware virtualization — Intel VT-x or AMD-V — and it must be enabled in your BIOS settings. Most modern PCs have this enabled by default, but if VMware shows a warning, restart your PC, enter BIOS (usually by pressing Del or F2), and enable the virtualization option. How to Enable Virtualization (VT-x & AMD-V) in BIOS
- VMware Workstation Pro installed. VMware Workstation Pro is now free for personal use. Download it directly from Broadcom’s website. The current version is VMware Workstation Pro 25H2. How To Download VMware Workstation Pro For Free.
- A Windows XP ISO file or CD. Microsoft no longer sells or distributes Windows XP. The most widely used source for a clean, unmodified image is the Internet Archive, where you can find the Windows XP Professional SP3 ISO. Always verify the file’s checksum after downloading to ensure it hasn’t been tampered with.
- A product key. Unlike later versions of Windows, XP won’t install without a product key. If you have one from an old PC you can use that, if not the Internet Archive download mentioned above provides one.
XP ISOs and Discs
Ideally you’d have your own Windows XP CD that you can use. That’s obviously the best option because you know it’s safe to use. After that you could buy a genuine disc from market places like eBay. Failing that your only option is the download route.
Another issue is that although you might have a CD your current PC may not have a CD/DVD drive. Many modern machines now don’t have them. You could use a portable USB drive, or maybe use a friends PC to create an ISO image file from your CD How To Create An ISO File From A Disc.
System Requirements for the Host PC
Your host computer (the real PC running VMware) should comfortably meet these specs to avoid performance issues:
A Windows XP VM doesn’t actually require that much in regards PC specifications by today’s standards. It’s a surprisingly light OS when compared to, say, Windows 10. Your host computer (the real PC running VMware) should comfortably meet these specs to avoid performance issues:
| Component | Minimum | Recommended |
|---|---|---|
| RAM (memory) | 4 GB (host) | 8 GB+ |
| Free Disk Space | 20 GB | 40-120 GB+ |
| CPU | Any dual core CPU | Quad core or higher |
| OS | Windows 10 | Windows 10 or Windows 11 |
Required OS
In the table above I’ve specified a Windows operating system. Workstation Pro does run on Linux as well, so you could install an XP VM on a Linux distro by following this guide.
Step 1: Create a New Windows XP Virtual Machine in VMware
Once you have VMware Workstation Pro installed, follow these steps to build your virtual hardware:
- Open VMware and select Create a New Virtual Machine from the Home screen.
- On the following screen choose Typical (Recommended) and click Next.
- To install XP from a CD, select Installer Disc and then select your CD drive.
- To setup XP from an ISO image file, select Installer Disc Image File (iso). Then click the Browse and select your ISO file.
- Give your VM a name, for example, “Windows XP Pro” and choose a save location, preferably on an SSD for faster performance. Click Next.
- Set the maximum disk size to at least 40 GB (the default of 40 GB is a good minimum for a Windows XP VM, but it really depends on What you intend to use it for). Select “Store virtual disk as a single file” for better performance.
- On the “Ready to create virtual machine screen”, click Customise Hardware.
- By default Workstation Pro will allocate only 512 MB of RAM to your Windows XP virtual machine. That’s not really enough. Increase it to between 1 GB and 2 GB depending on the specs of your host PC. Anything above 2 GB offers diminishing returns. Click Close and then click Finish.


Pro Tip – VM Name and Location
The name of the virtual machine isn’t the same as the Windows computer name. It’s only purpose is to allow you to identify this VM from others that you might create in VMware.
By default VMware will save the virtual machine files to your Documents folder. If you make use of OneDrive, Google Drive for Desktop or any other cloud backup service that’s backing up your Documents folder then you should definitely change the default location. Virtual machines folders are very large and could easily fill up your available cloud storage space.
Step 2: The Windows XP Installation Process
After clicking the Finish button, VMware Workstation Pro will create the virtual hardware for your VM to run on. After that it’ll boot the VM from your chosen Windows XP installation media.
You’ll see the XP setup screen start and then you’ll see the Welcome To Setup screen.
- Left click once inside the VM window (on the blue screen) to direct your mouse clicks and keystrokes to the guest system and away from the host. Now you can press the Enter key on your keyboard to begin installing Windows XP on VMware.
- Accept the licensing agreement by pressing the F8 key. On the next screen, press Enter to begin installing Windows XP.
- Partitioning and Formatting the Drive: Use the arrow keys on your keyboard to select “Format the partition using the NTFS file system (Quick)” and press Enter (NTFS provides better stability and faster startup times compared to FAT32).
- When the formatting is complete you’ll see the Windows XP setup begin copying the necessary files to your virtual computer.


Windows is Installing
- After a restart Windows XP will begin installing itself on to your VM.
- When the Regional and Language Options screen appears, click the Customise button and change the settings for your language, time, currency and keyboard.
- In the next screen add a user name and click Next.
- Then type in your product key. Note that unlike later versions of Windows, you have to enter a valid key in order to continue installing Windows XP. Click next
- Enter a computer name. You can leave this at the default. As for a password, I’d leave that blank at this point. You can always create a password later, when the VM is up and running if required.
- Set the time and date using the drop down menus.
- For the network settings, select typical and click Next


Welcome to Microsoft Windows XP
After a few restarts Windows XP will start it’s final setup stage. The Welcome to Microsoft Windows screen will appear. Click Next and then follow the prompts. At the end your Windows XP virtual machine till open at the desktop.
Step 3: Install VMware Tools (Essential)
VMware Tools is a set of virtual drivers that need to be installed directly on to your VM. Without VMware Tools, your Windows XP VM will feel sluggish. The screen resolution will be stuck at a low value, mouse movement will be choppy, and features like drag-and-drop or shared folders won’t work.
Important note for 2026: Modern versions of VMware Workstation no longer bundle legacy VMware Tools for Windows XP. You need to download Legacy VMware Tools (version 10.0.12) separately. I have a complete step by step guide here How To Install VMware Tools On Windows XP And Vista VMs.
Common Issues and How to Fix Them
Blue Screen of Death (BSOD) during installation
This is usually caused by VMware using hardware settings that Windows XP doesn’t understand. Fix it by lowering the virtual hardware compatibility version, and make sure the disk controller is set to IDE (not SCSI or NVMe).
Black screen after VMware Tools install
Some users encounter a black screen due to VMware attempting to use Vulkan rendering, which XP doesn’t support. In the VM’s .vmx configuration file, add the line: mks.gl.allowBlacklistedDrivers = TRUE
Network adapter not working
Windows XP may not recognise newer virtual network adapters. In VM Settings, change the network adapter type to “AMD PCNet” (a legacy adapter), which XP supports natively.
VMware Tools fails to install
If the modern Tools installer refuses to run on XP, confirm you’re using version 10.0.12 or earlier — newer versions dropped support for Windows XP.
Frequently Asked Questions
Can I install Windows XP on VirtualBox instead?
Yes, the process is very similar. Create a new VM, choose the “Windows XP (32-bit)” template, mount your ISO, and follow the same general steps. VirtualBox is a free and open source alternative to VMware. You can follow this step by step guide if you’d like to try it out Windows XP Virtual Machine.
Is Windows XP free to download now?
Technically, no. Windows XP remains proprietary software owned by Microsoft, even though it’s no longer sold. Many users source ISOs from the Internet Archive for personal, educational, or retro-gaming use, but this exists in a legal grey area. If you have an old licence key from a previous purchase, that is the most legitimate route.
Why is my Windows XP VM running slowly?
The most common causes are: VMware Tools not installed, or too little RAM allocated. Also check that you’re not running the VM from a slow mechanical hard drive, an SSD makes a significant difference.
Can Windows XP still be activated online?
Microsoft’s activation servers for XP are largely offline. For offline/personal use, many users skip activation or use telephone activation as a fallback. This is another reason keeping the VM offline is practical as well as safer.
Can I use Windows XP for retro gaming in a VM?
Yes, and this is one of the most popular reasons to run a Windows XP VM. Most games from the early-to-mid 2000s run well. For games requiring 3D acceleration, results vary since VMware provides limited Direct X support inside Windows XP, so some older 3D titles may need additional configuration or won’t run at all.
How can I install games or programs on to my Windows XP VM?
If your applications are on an optical disc (CD or DVD), then you use your host PC optical drive, or use an external USB CD/DVD drive Add A USB Device To VMware Workstation Pro.
Summary
Windows XP reached end-of-life in April 2014, but there are still plenty of legitimate reasons to keep it running retro gaming, legacy business software or simply preserving a workflow that depends on an old application. Using a virtual machine is by far the best way to do it.
The biggest advantage is isolation. The VM is completely sandboxed from your real operating system, so any crashes, malware, or bad installs inside it can’t affect your main PC.
A VM also means you don’t need dedicated hardware. There’s no hunting for an old laptop or keeping a dusty desktop running just for one application. Everything lives as a folder of files on your modern PC, which means it’s easy to back up, copy to another machine, or restore from scratch.
Related Posts
How to Backup VMware Workstation Pro Virtual Machines: The Complete Guide
After taking the time to setup your Windows XP virtual machine, back it up. A full backup, not just a snapshot. It’ll save you a lot of time and hassle going forward.
VMware Shared Folders
Set up a shared folder that allows you pass files and folders between the guest and host machines.
How To Create A Windows 7 Virtual Machine.
Windows 7 also works great as a virtual machine.
Scan Your PC for Malware
Whether you’re using a third party antivirus like Norton, McAfee, Avast, Bitdefender etc, or simply relying on good old Windows Defender, they can and will miss some malware.
I’ll show you how to use Malwarebytes for free as an on-demand scanner.
You can find this and other related step by step guides in – At Home Computer Antivirus Guides
At Home Computer Step By Step Guides
![]() Easy to follow tutorials for users of Windows 10 and Windows 11 computers.
Easy to follow tutorials for users of Windows 10 and Windows 11 computers.

Gmail Storage Full? Here’s Why (and How to Fix it)
A Beginner’s Guide to File Formats and Filename Extensions
How to Protect Your Data When Sending Your PC in for Repair

Why I Use Virtual Machines and You Should Too
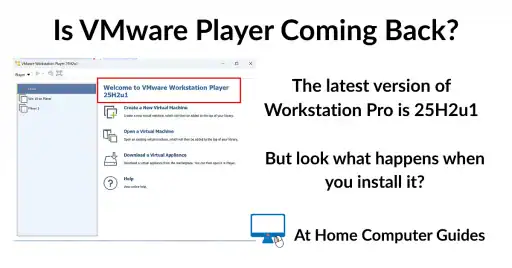
Is VMware Player Coming Back?

How to Setup OneDrive to Backup Your Files
OneDrive allows you to backup files to the cloud. It…
How to Share a Folder in OneDrive
One of the best features of OneDrive is the ease…
How to Setup RealTimeSync
RealTimeSync is a companion tool for the popular sync program…
How to Automate FreeFileSync in Task Scheduler
How to automate FreeFileSync in Windows Task Scheduler so that…