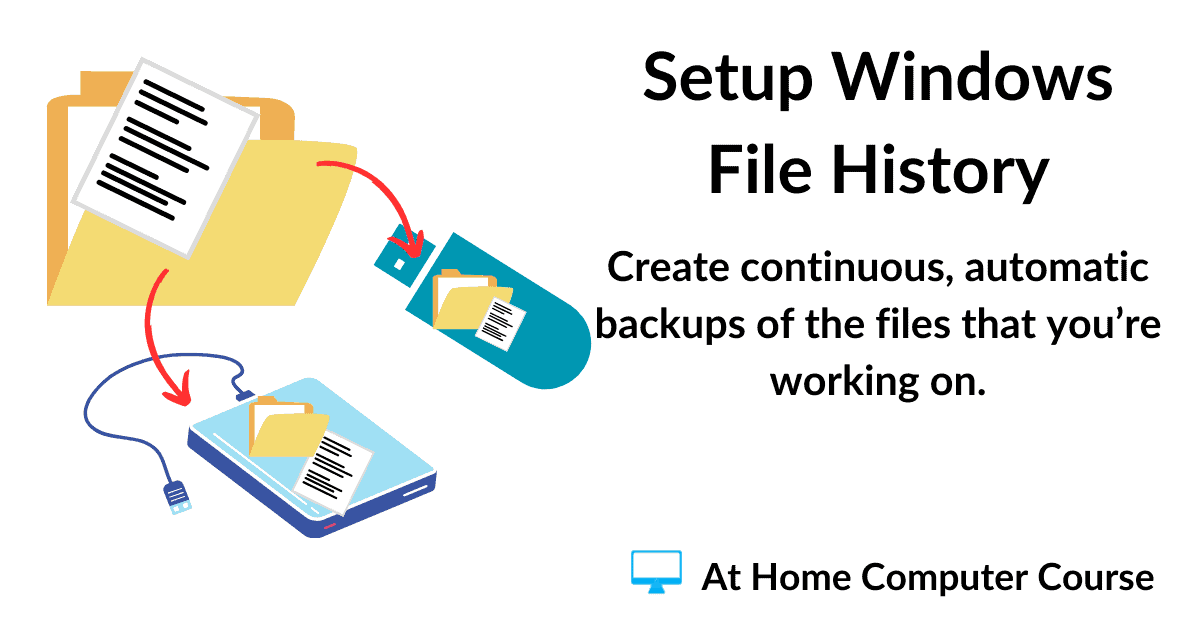
The File History backup service in Windows 10 & 11 creates backup copies of your files on an external drive.
You can run it manually or set it to run automatically on a schedule, anything from every 10 minutes to daily.
By default File History will back up everything inside your Contacts, Desktop, Documents, Downloads, Music, Pictures and Video folders. You can. however, exclude any of these folders from the backup.
How To Set Up Windows File History.
To get started with Windows File History, plug in the USB drive that you intend to use for your backups. It’s better to use an external USB hard drive if you have one, but you could use a USB flash drive, provided it has enough spare capacity.
File History works pretty much the same in both Windows 10 and Windows 11, but getting to, or opening, File History is a different matter.
In Windows 11, it’s really easy, but in Windows 10, not so much. It’s not difficult, just a bit of a circuitous route to get to it. We’ll look at both below, starting with Windows 11.
How To Open File History In Windows 11.
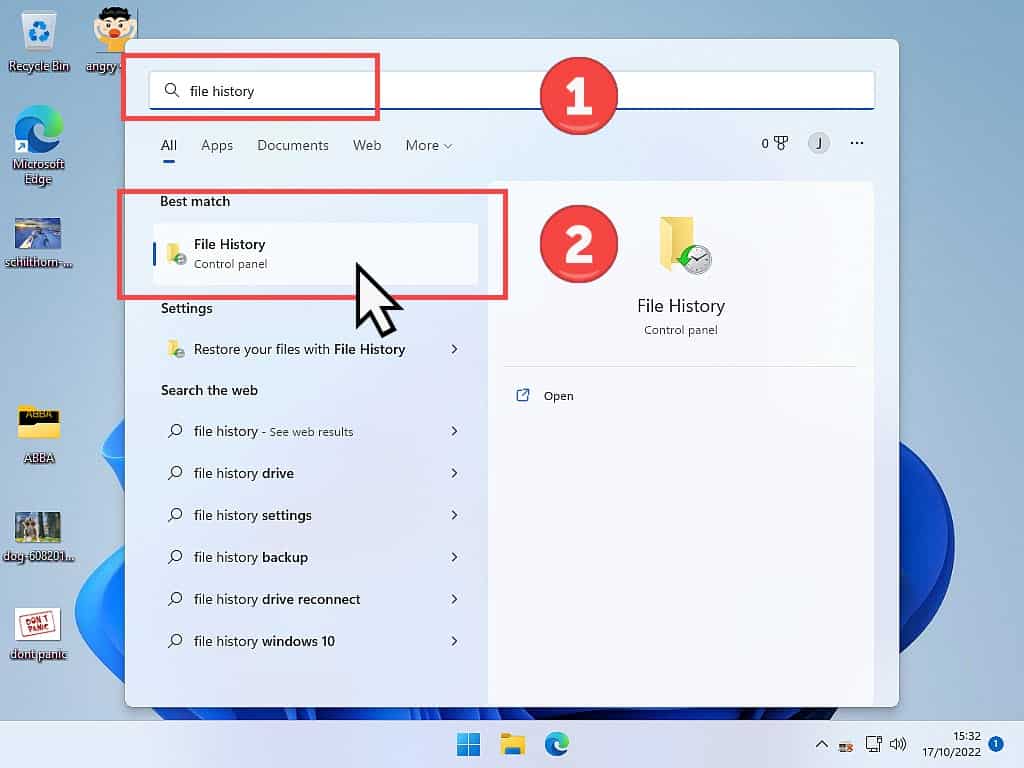
If you’re using Windows 11, click the Start button and then type
file history
Click File History (Control Panel).
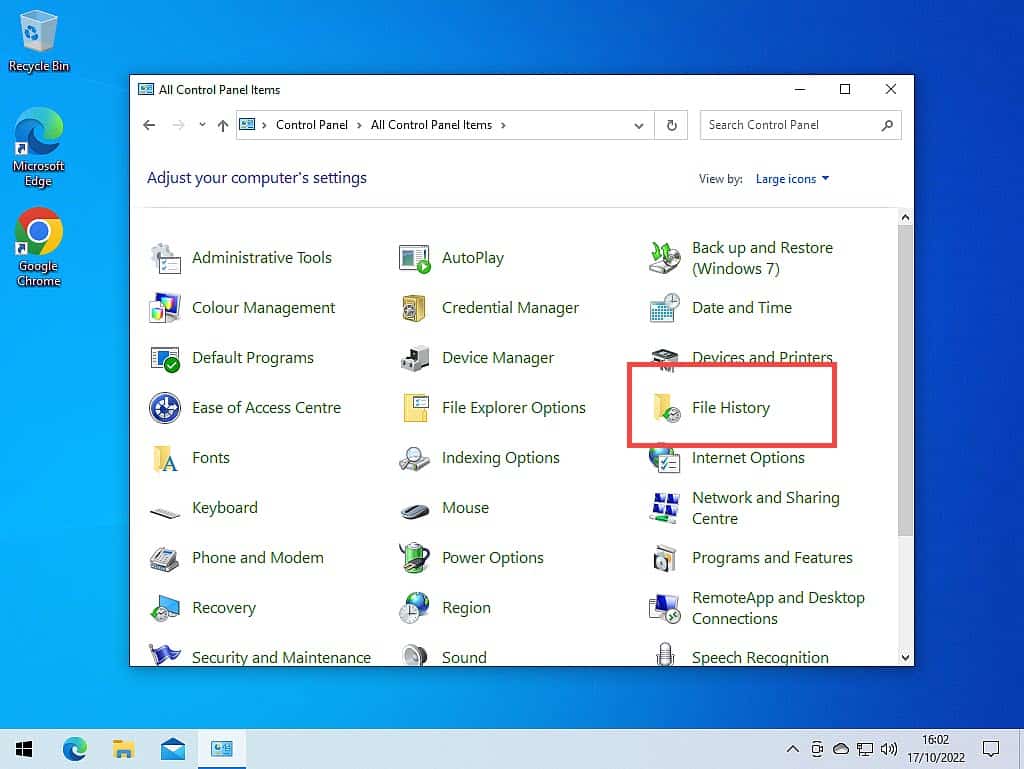
How To Open File History In Windows 10.
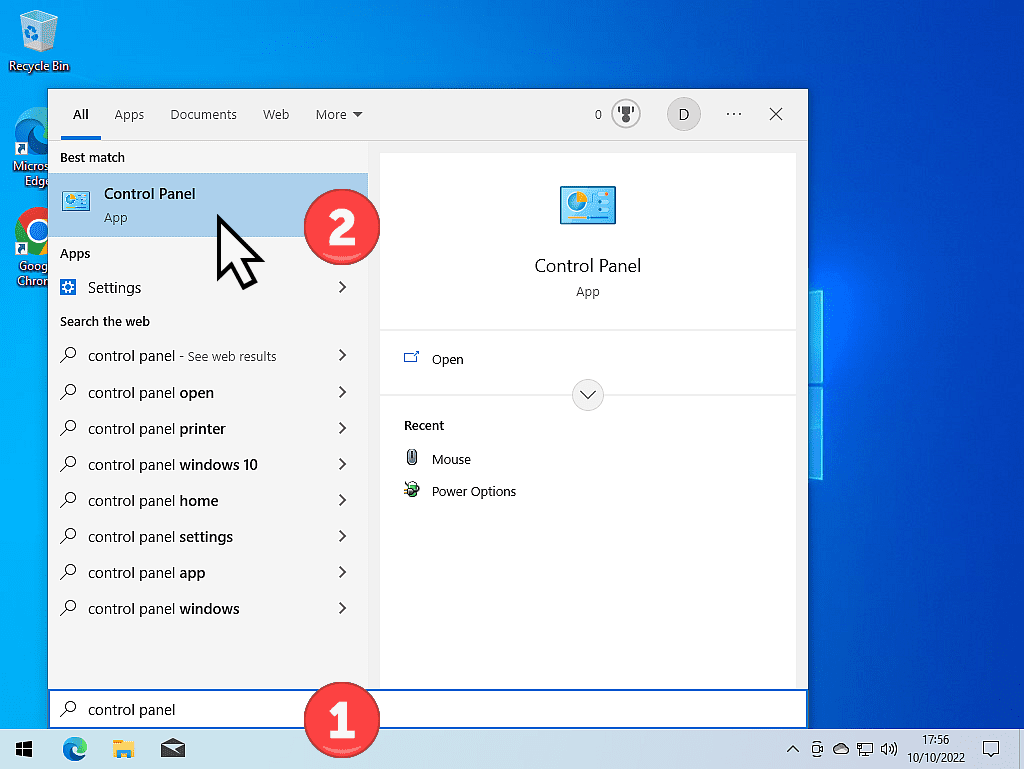
In Windows 10, you’ll need to go through the Control Panel to get to File History.
Click the Start button and then type
control panel
Click Control Panel (App).
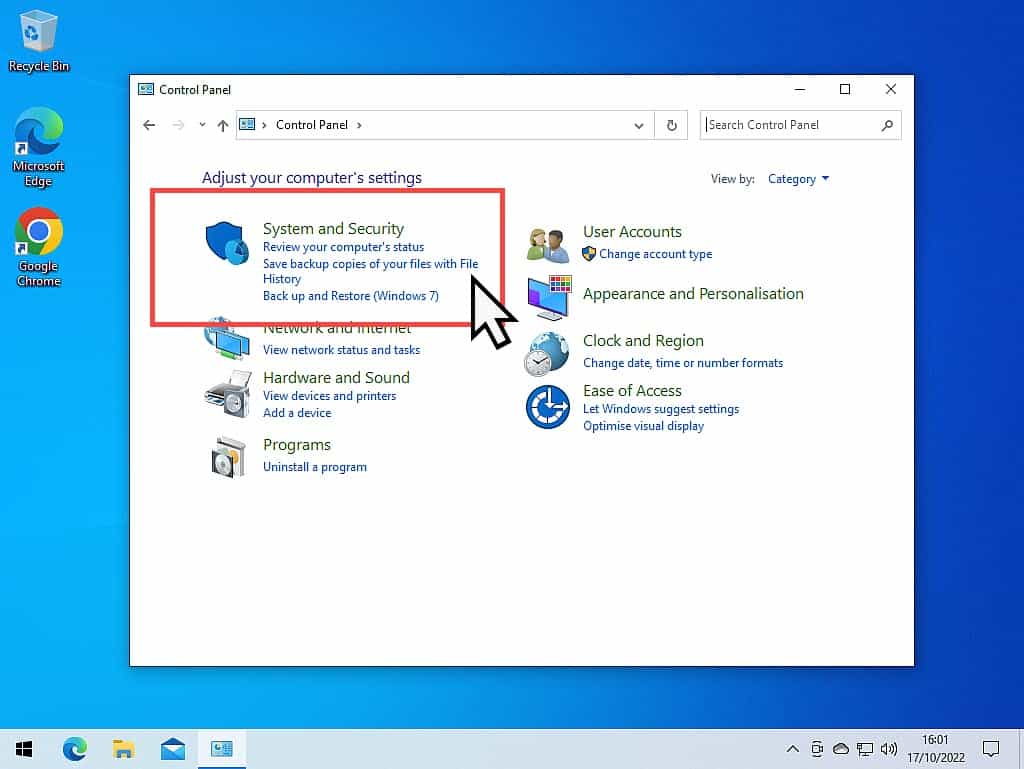
The Control Panel could open in one of two different views.
On your computer, if Control Panel opens in Category View, under System and Security, click on “Save backup copies of your files with File History”.
If you’re in Icons View, click File History.
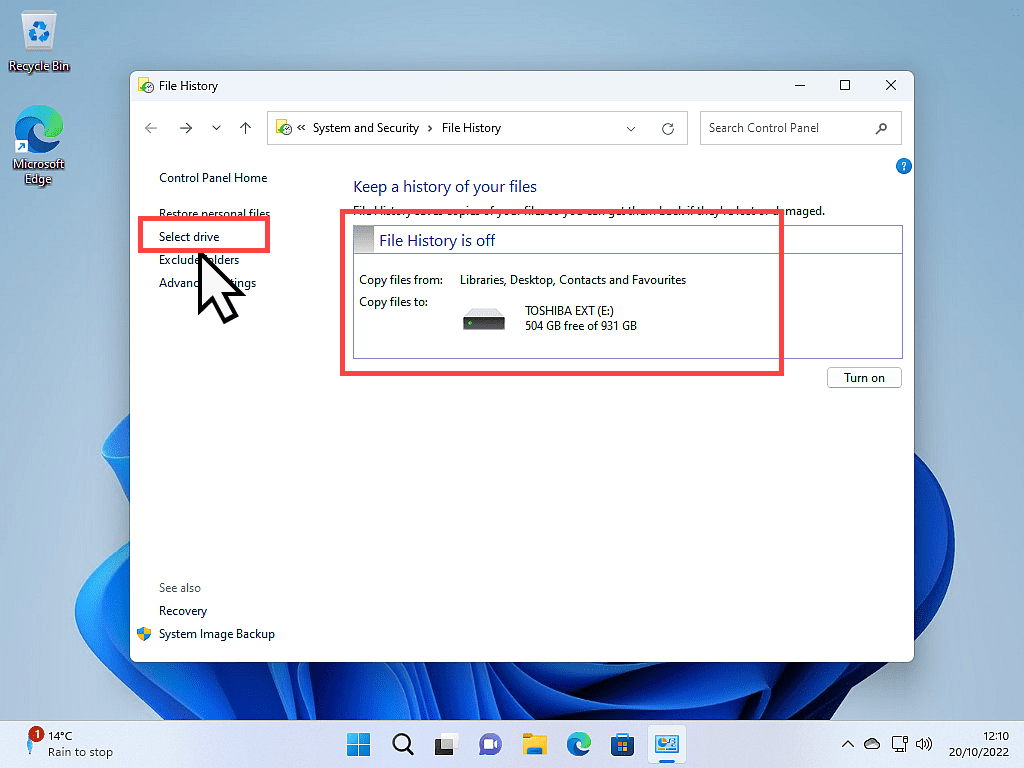
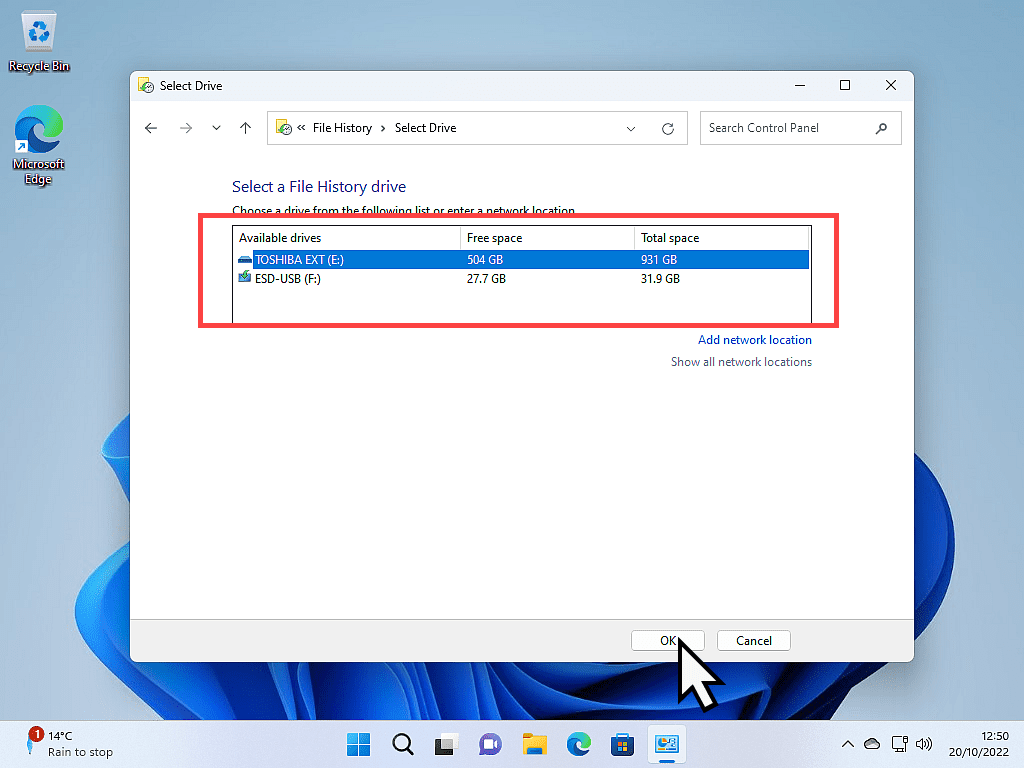
Select A Drive To Use For File History Backups.
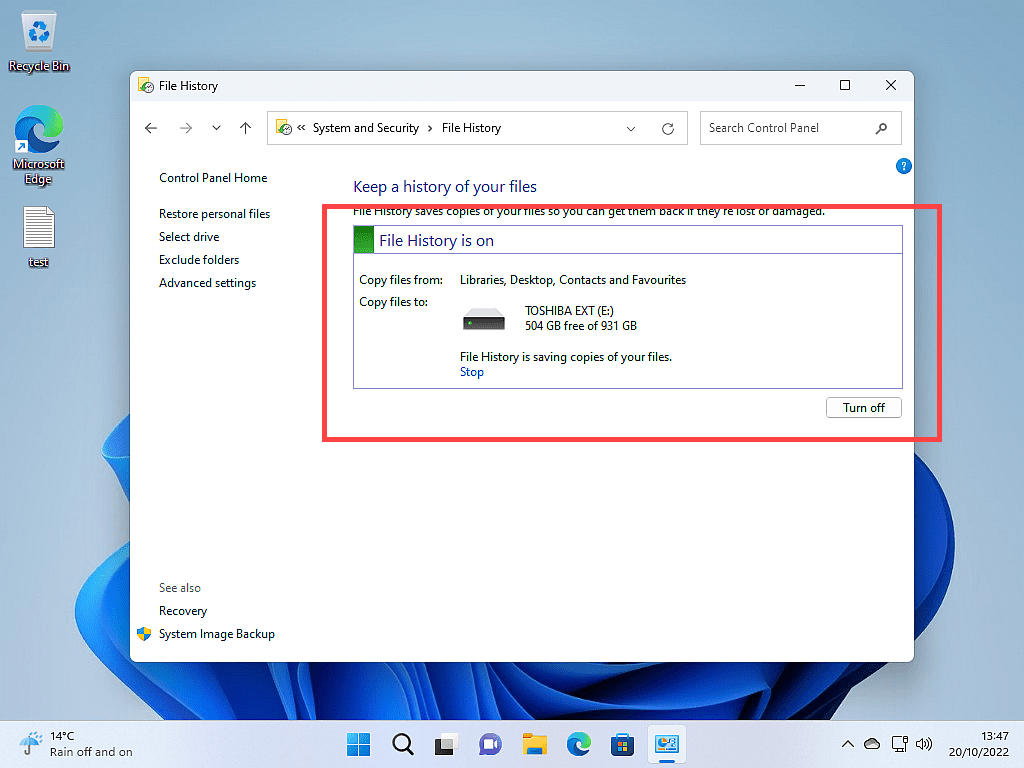
The “Keep a history of your files” page opens. It will usually detect any external USB drives that you’ve attached to your computer and auto-select the one with the largest capacity.
If you wanted to use a different drive from the one selected, click Select Drive in the left-hand panel. Then select the drive you want to use and click the OK button.
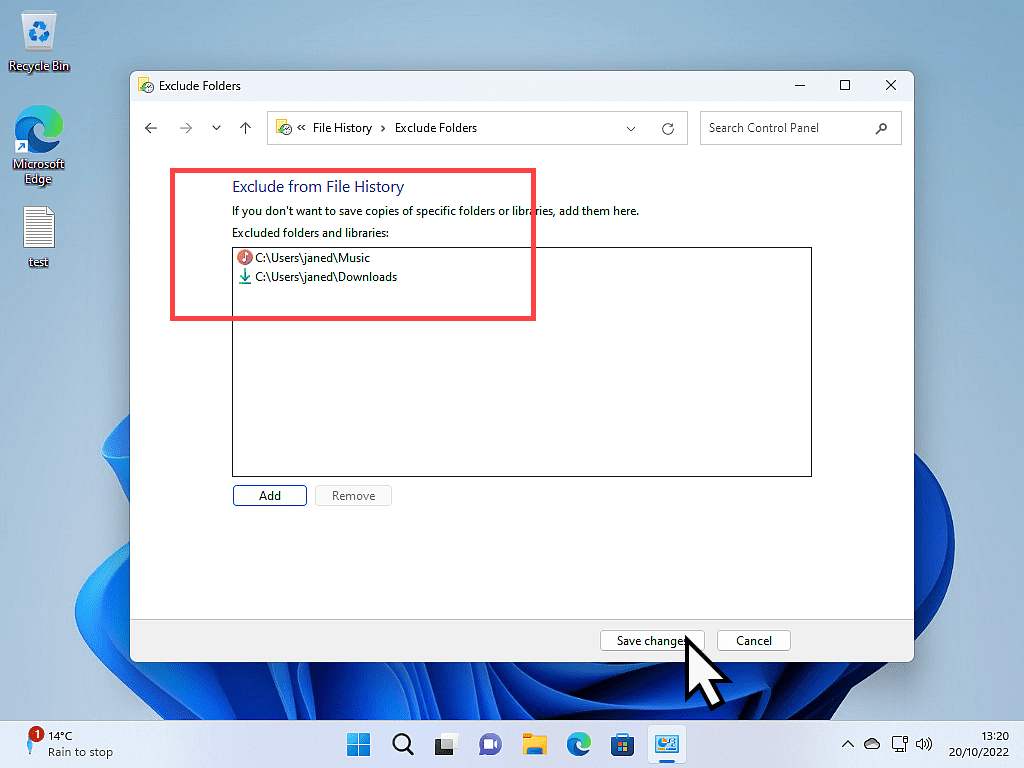
How To Exclude Folders From File History Backups.
Depending on how you use your computer and how much data you’ve got stored on it, File History backups can be, or can become, very large. However, you can exclude folders from being backed up.
As an example, I don’t need my Music folder (which is around 100 GB) included in the File History backup because it’s already backed up on a separate drive.
Neither do I want my Downloads folder included since everything in there can be simply re-downloaded should anything happen.
To exclude a folder, left-click on Exclude Folders. On the next screen, click the ADD button.

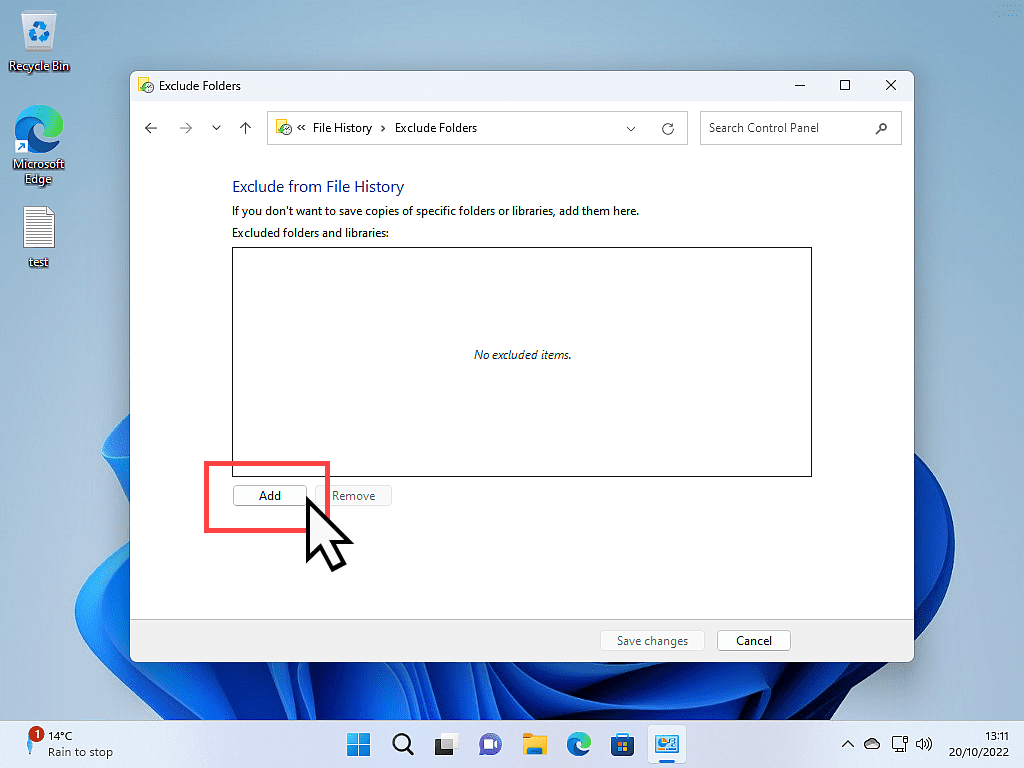
After clicking the ADD button, a File Explorer window will open allowing you to select a folder to exclude from File History.
Select the folder in the navigation panel and then click the SELECT FOLDER button. If you’re going to exclude other folders. simply click the Add button again and select another folder.
When you’ve finished excluding folders from the File History backup, click the SAVE CHANGES button.

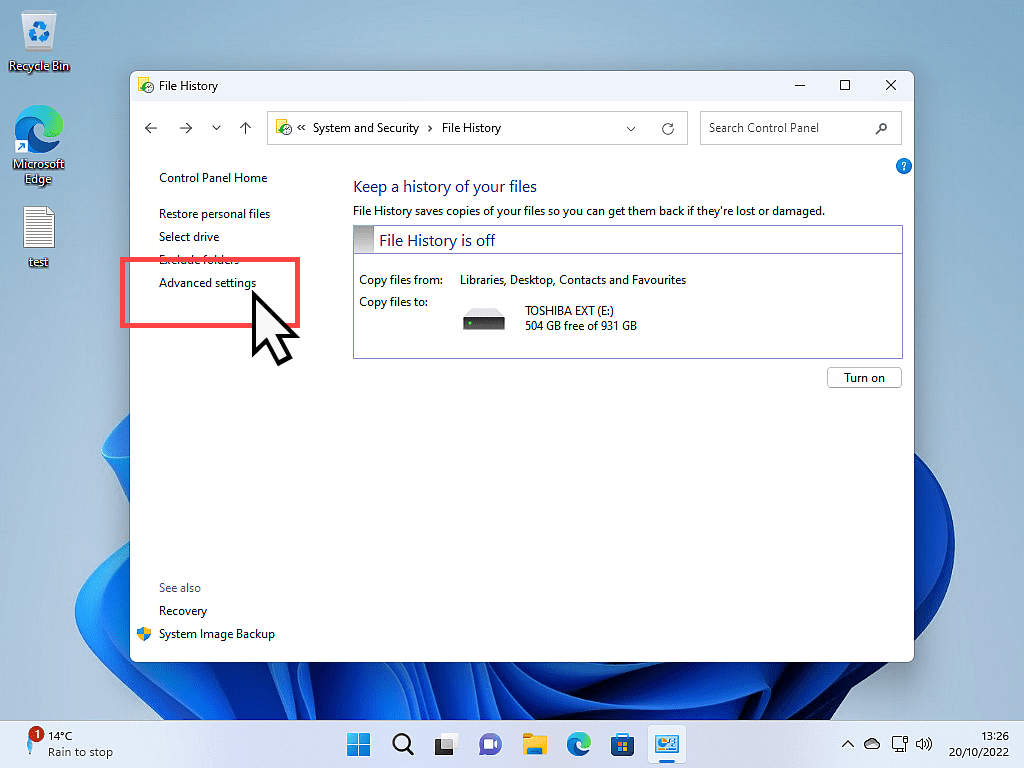
How To Set The File History Backup Schedule.
The final thing to do before turning on File History is to set the schedule. The schedule governs how often File History should run a backup.
To set the schedule, click ADVANCED SETTINGS.
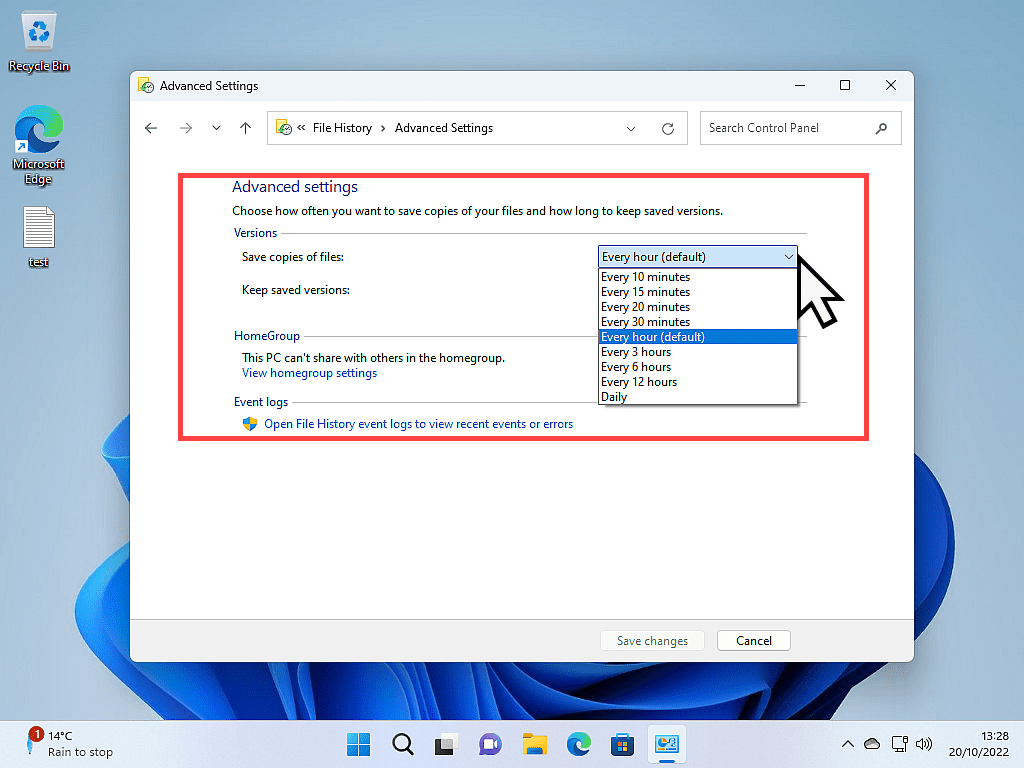
On the Advanced Settings page, click the drop-down arrow beside the “Save copies of files” box and select how often you want File History to back up your files. Click the Save Changes button when you’re done.
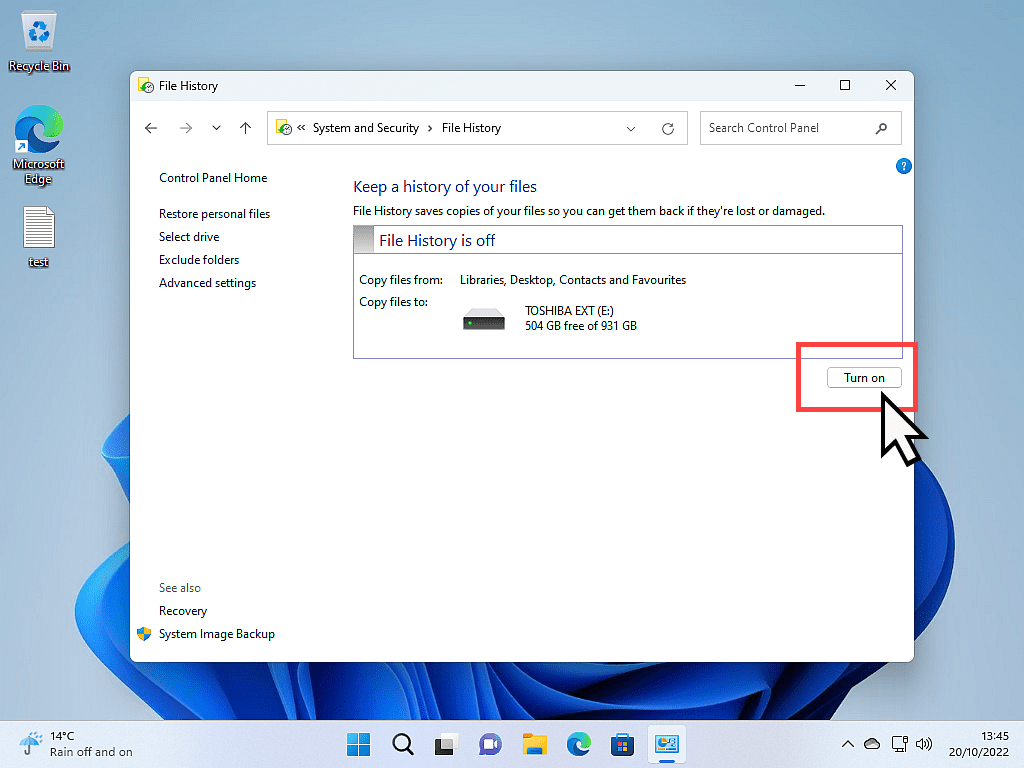
Turn On Windows File History Backup.
With all your settings done, it’s time to turn File History on. Click the TURN ON button.
After clicking the TURN ON button, File History will make an initial backup of everything inside the folders that are included in the backup, ie all the folders that you haven’t excluded.
This first backup can take some time, it all depends on how much data there is to backup and the speed of your computer.
Summary.
After the first run has finished, you can close File History. It will now run automatically according to the schedule that you set.
Be sure to take the time to exclude folders that don’t need to be backed up because File History backups can consume a huge amount of space. It all depends on what type of files you’re including. Text files aren’t going to use that much space, but video files will (if your Video folder is included in the backup).
At Home Computer Guides.
These easy to follow guides aren’t part of the course, rather, they are standalone guides. They extend beyond the basics that we’re covering on the course.