How to fix Windows 7 updates not working in 2025. If you’ve recently installed Windows 7 onto a bare metal (physical) computer or maybe set it up as a virtual machine, then you’ll almost certainly run into problems when trying to update it.
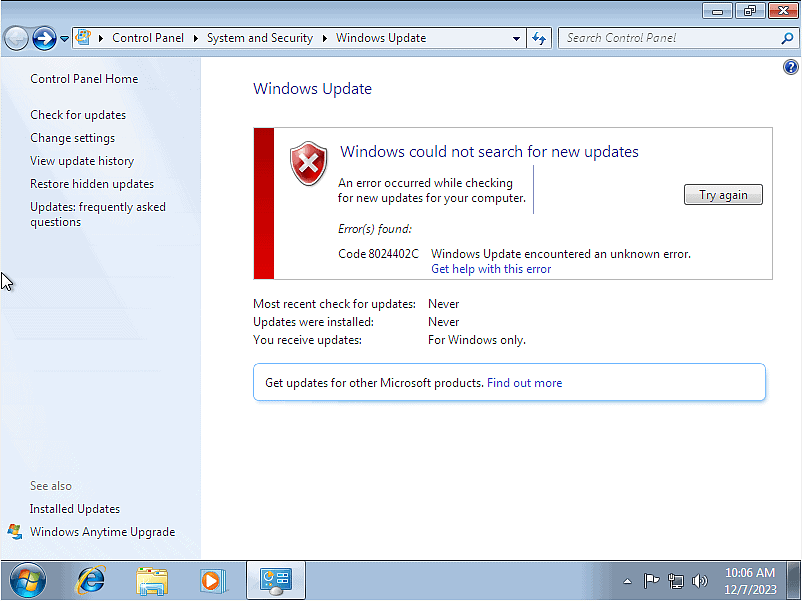
Windows 7 updates often don’t work. Windows could not search for new updates. It’s frustrating since the updates that you want are still available on Microsoft’s servers.
In this guide I’ll show you how to fix Windows 7 updates.
Windows 7 Could Not Search For New Updates.
If you’ve recently installed/reinstalled Windows 7 onto a computer or maybe setup a Windows 7 virtual machine, you’ll run in to this problem “Windows could not search for new updates”.
To get Windows 7 update working again, you’re going to need a couple of updates.
That’s right, you need to install two updates manually to get the automatic updater working again.
How To Fix Windows 7 Updates
To fix Windows 7 Update you need to download and install two updates manually. The two updates that you need are kb3020369 & kb3125574
The updates need to be installed in the correct order, install kb3020369 first and then install kb3125574.
Both updates are available for either x86 (32 bit) and x64 (64 bit) versions of Windows 7 so be sure to grab the right one for your computer.
Here are the links to the updates you’ll need on the Microsoft website.
kb3020369 x86 You’ll need this one for 32 bit versions of Windows 7.
kb3020369 x64 And this one is the same update but for 64 bit versions.
kb3125574 Both the 32 bit and the 64 bit versions of this update are on the same webpage. Be sure to grab the correct one for your PC.
Download the two updates and install them onto your Windows 7 computer in the correct order.
kb3020369 first and then kb3125574.
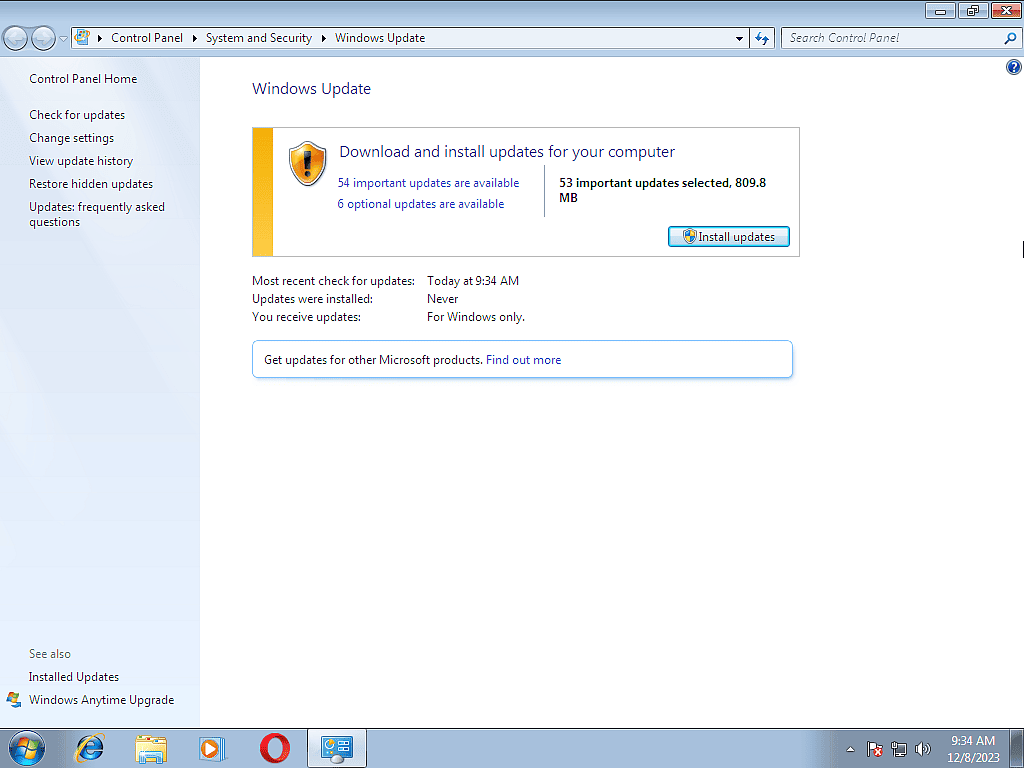
Restart your PC and then try Windows Update again.
This time you’ll find that it actually works just fine.
Getting The Two Updates On Physical Or Virtual Computers.
You’ll probably have problems getting Windows 7 to access the internet so that you can download the required updates, since it only has Internet Explorer as a web browser.
If you’re using a physical Windows 7 computer, then use a different, modern PC to download the required updates and then transfer them to your Windows 7 computer using a USB drive. That’s by far the easiest way to solve the problem.
But if you’re setting up a Windows 7 virtual computer, then using a USB drive may not work. By all means try it first, but if you don’t have any luck, then read on and I’ll show you how to do it.
How To Fix Windows 7 Update On A Virtual Machine
If you set up a Windows 7 virtual machine in VMware Workstation Pro, then you’ll probably find that installing kb3020369 and kb3125574 from a USB drive isn’t possible because the drive isn’t recognised.
Equally you can’t simply pass the updates to the Windows 7 VM using a shared folder because VMware Tools isn’t installed and you can’t install VMware Tools until you update Windows 7. It really does become very frustrating. It’s a kind of Catch 22 situation.
Windows 7 Updates In VirtualBox.
Unlike VMware, the VirtualBox Guest Additions (Expansion Pack) probably will install on to the Windows 7 virtual machine. Assuming it does, then you can either setup a shared folder to pass the updates to the VM, or use a USB drive.
Create An ISO File.
In order to pass the Windows 7 updates kb3020369 and kb3125574 to a virtual machine in Workstation Pro, you’ll need to create an ISO file of the two updates and then mount the ISO in a virtual CD/DVD drive.
On your host computer, copy the two updates kb3020369 and kb3125574 into an otherwise empty folder.
Then use any software that can create ISO images from files and folders. For this guide, I’ll use ImgBurn which is free, lightweight and gets the job done.
Download ImgBurn and install it. You can get it from here –
https://www.imgburn.com/index.php?act=download
Copy the Windows 7 updates kb3020369 and kb3125574 to an otherwise empty folder.
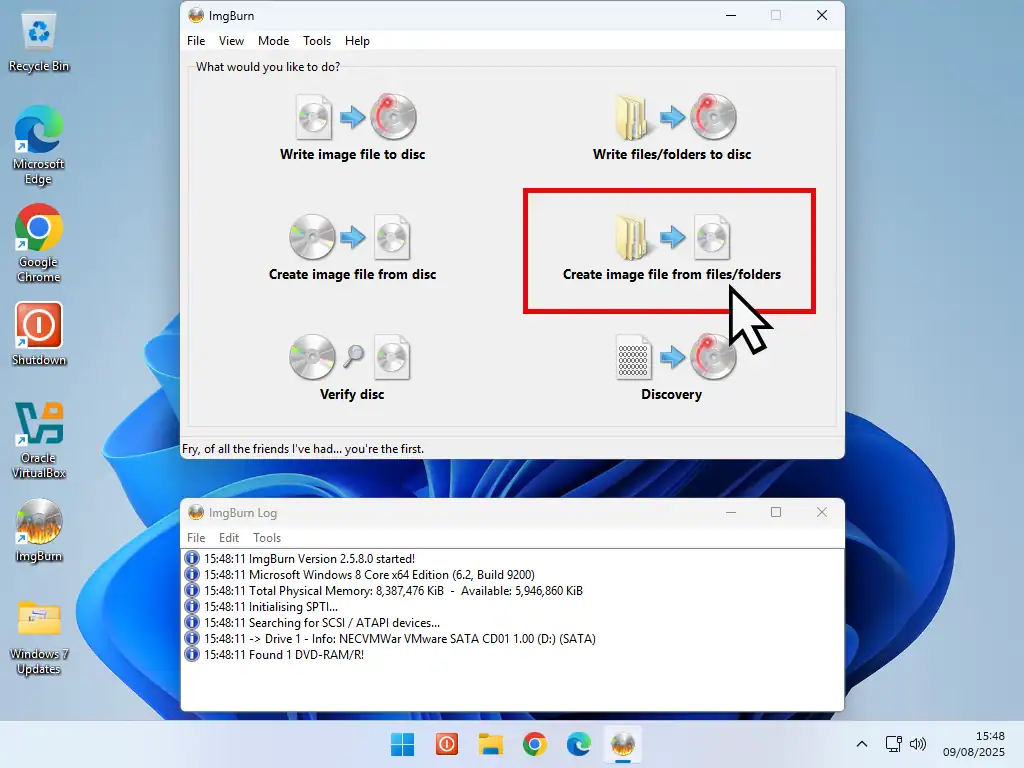
Then start ImgBurn.
On the home screen, click “Create image file from files/folders”
Source And Destination Folders
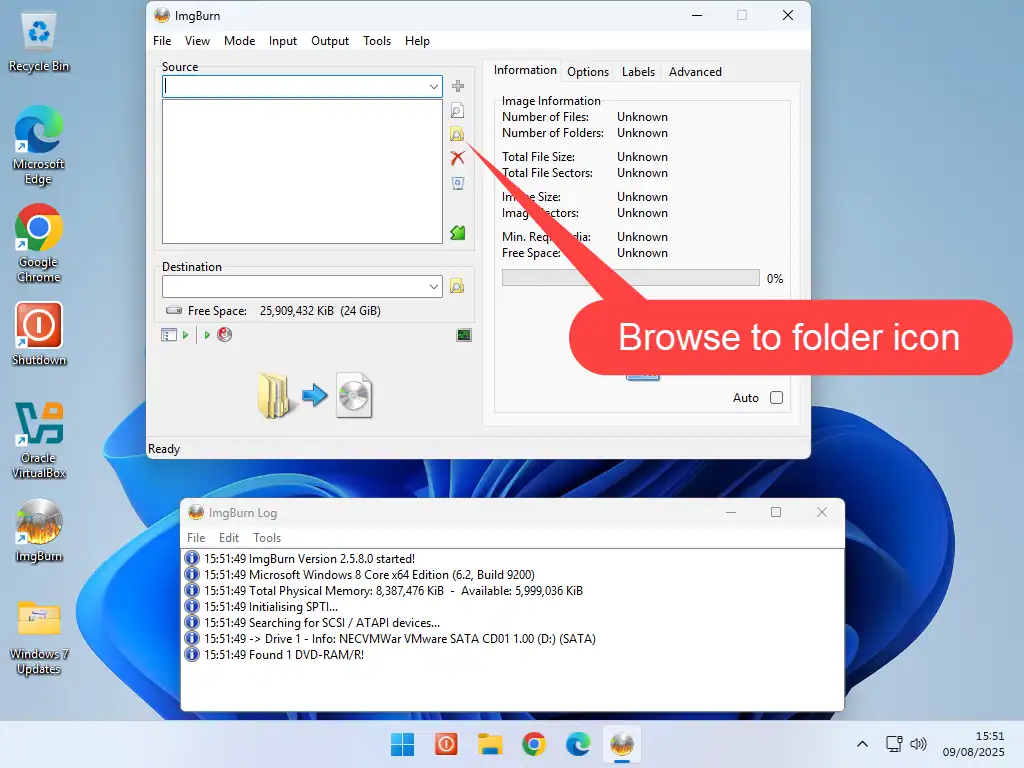
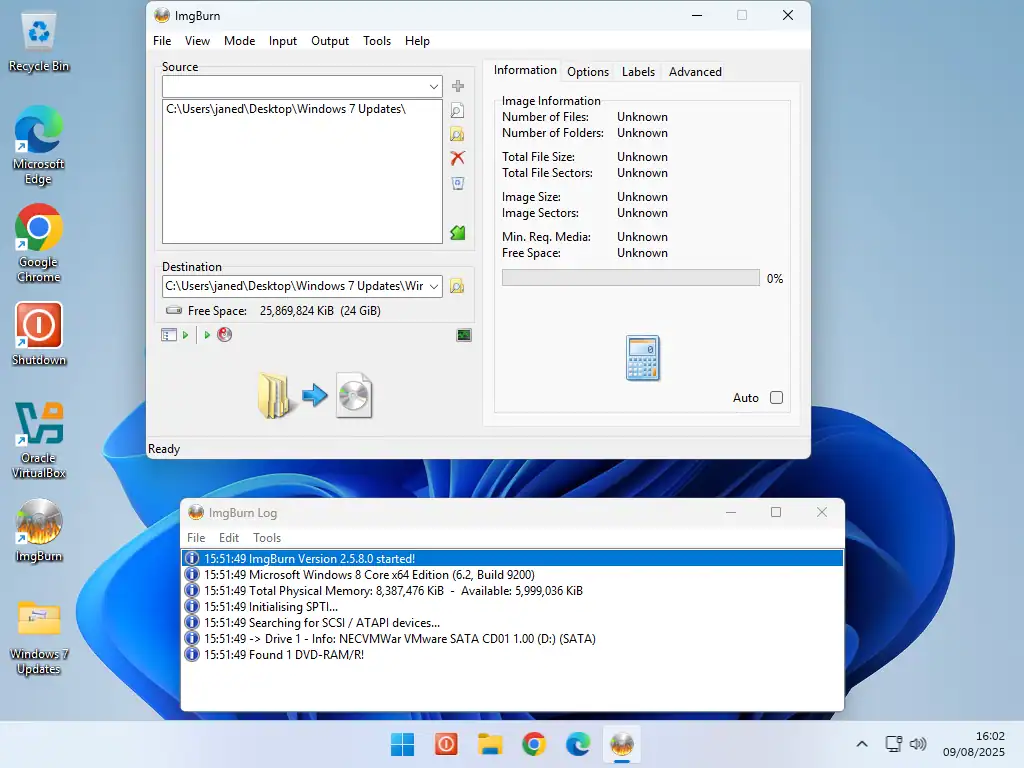
You need to give ImgBurn the source folder that it should use for the ISO file and also a destination folder to save the file in to.
- In the Source section, click the Browse To Folder icon to open an Explorer window.
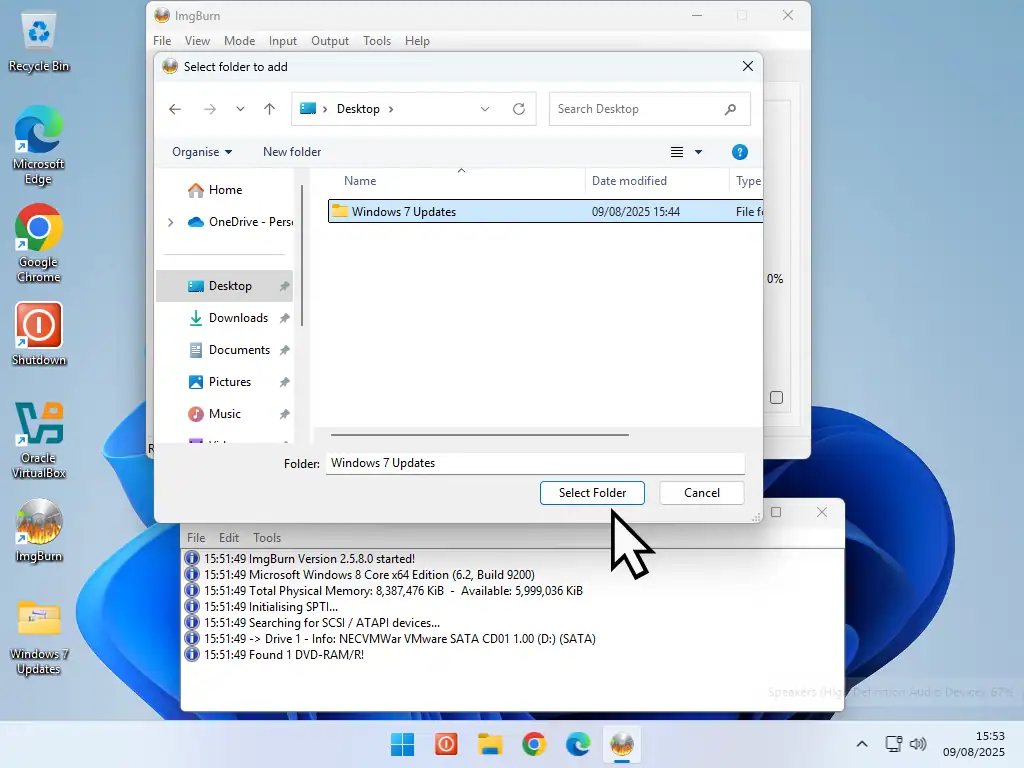
- Find the folder where you saved the Windows 7 updates into and select it.
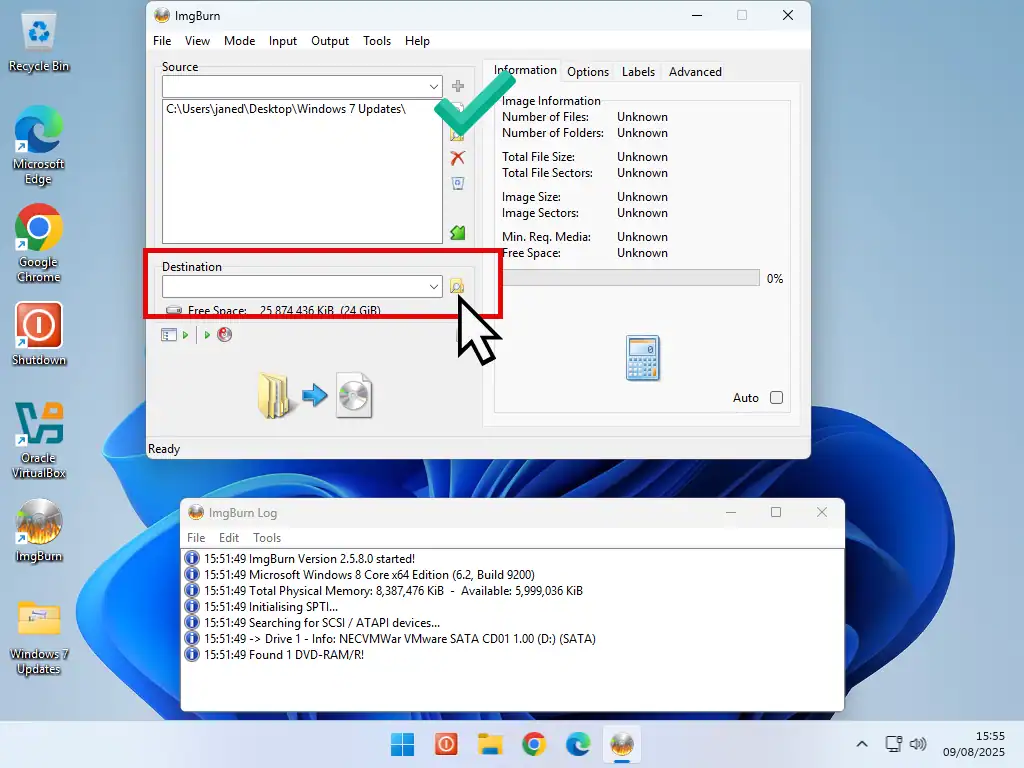
- In the Destination section, click the Browse button to open another Explorer window.
- Select a folder to save the image file in to. Select the same folder that has the Windows updates in it.
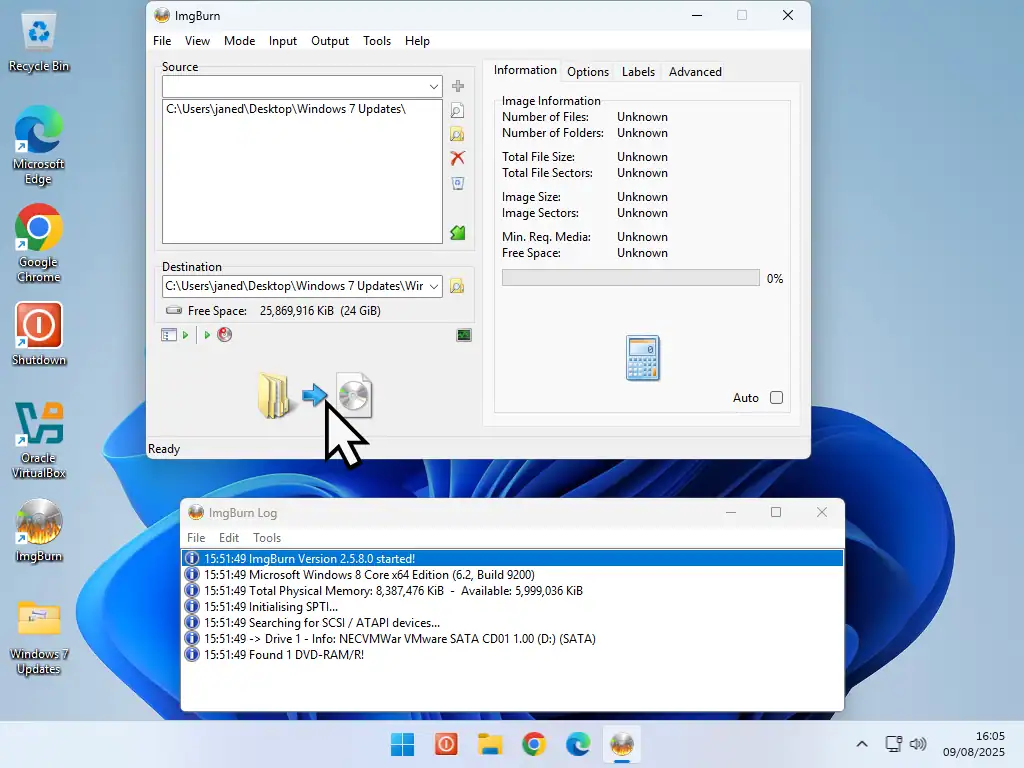
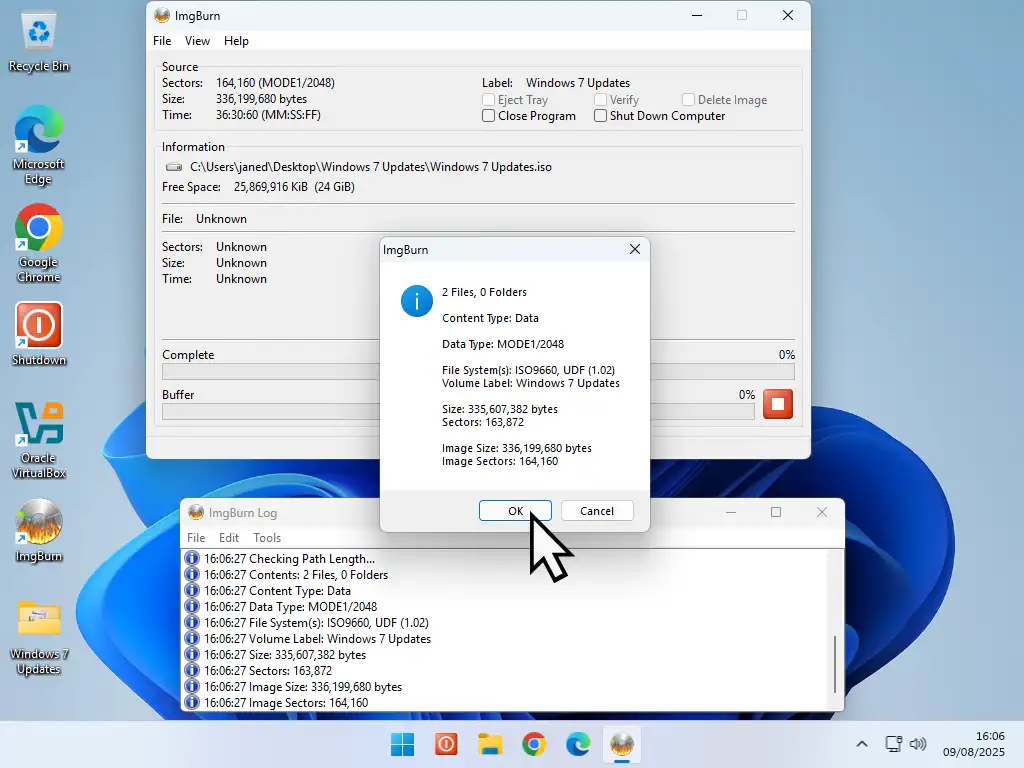
- Click the Build button.
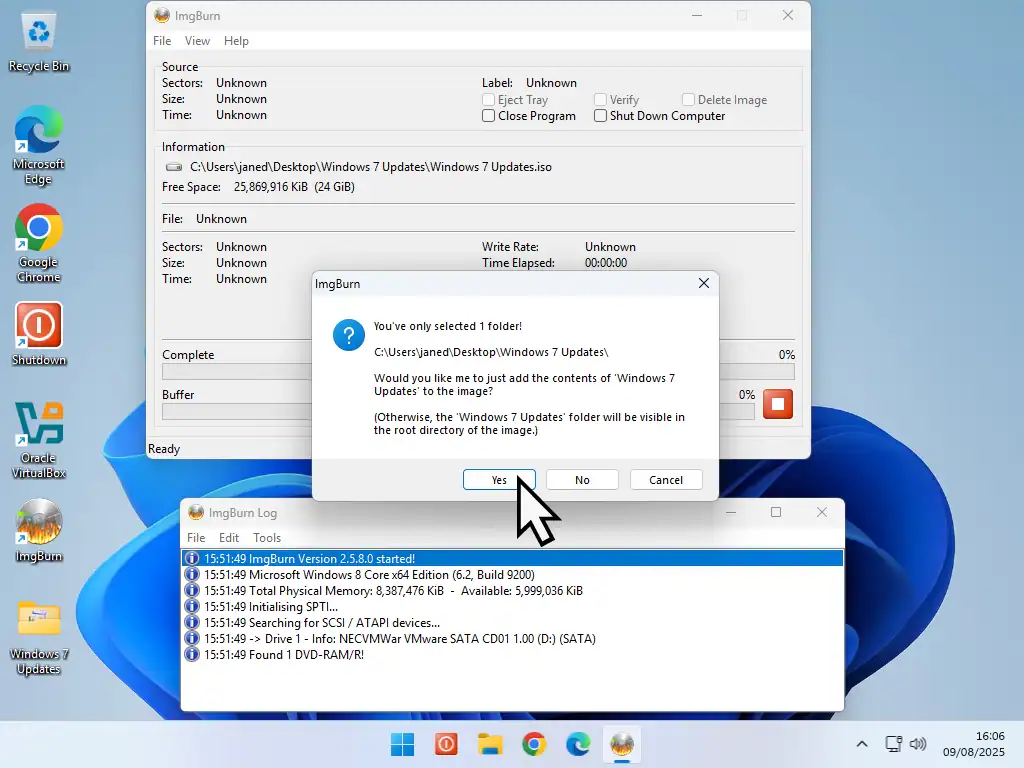
- Because you’re saving the image into the same folder as the source files, ImgBurn will ask if you want to continue. Click Yes.
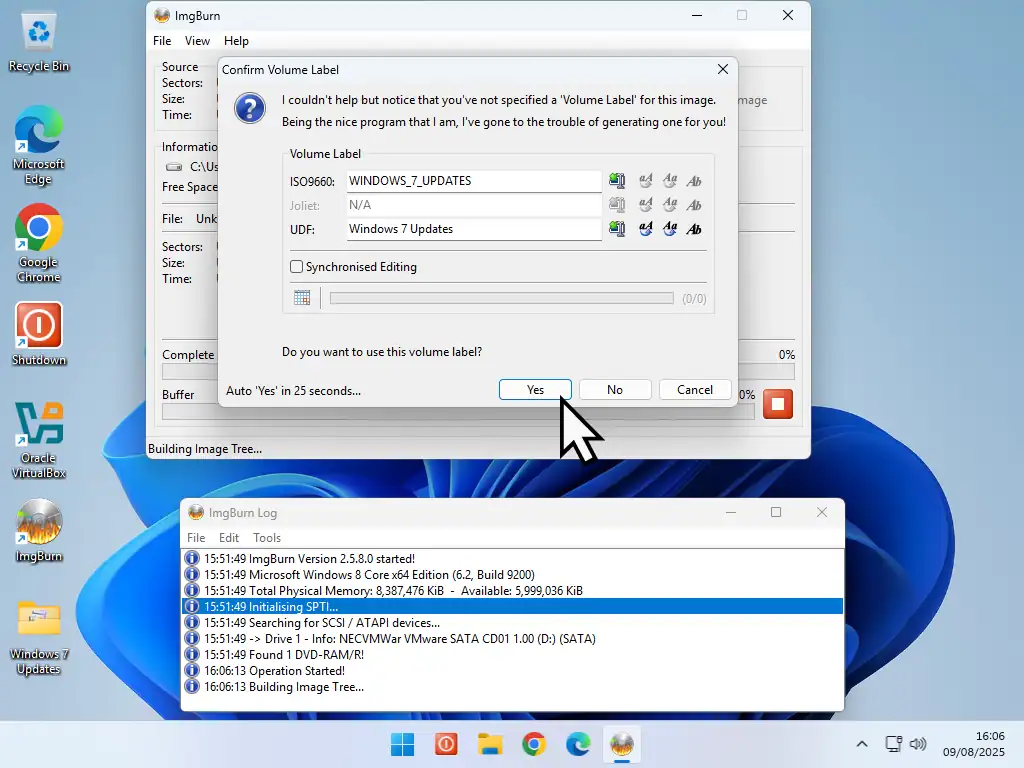
- A volume label will be added automatically. Click Yes to accept it.
- The image will be built and you can click OK. That’s it, you’ve successfully created an ISO file of the Windows 7 updates.
Update The Windows 7 Virtual Machine
Start your Windows 7 VM in VMware Workstation Pro.
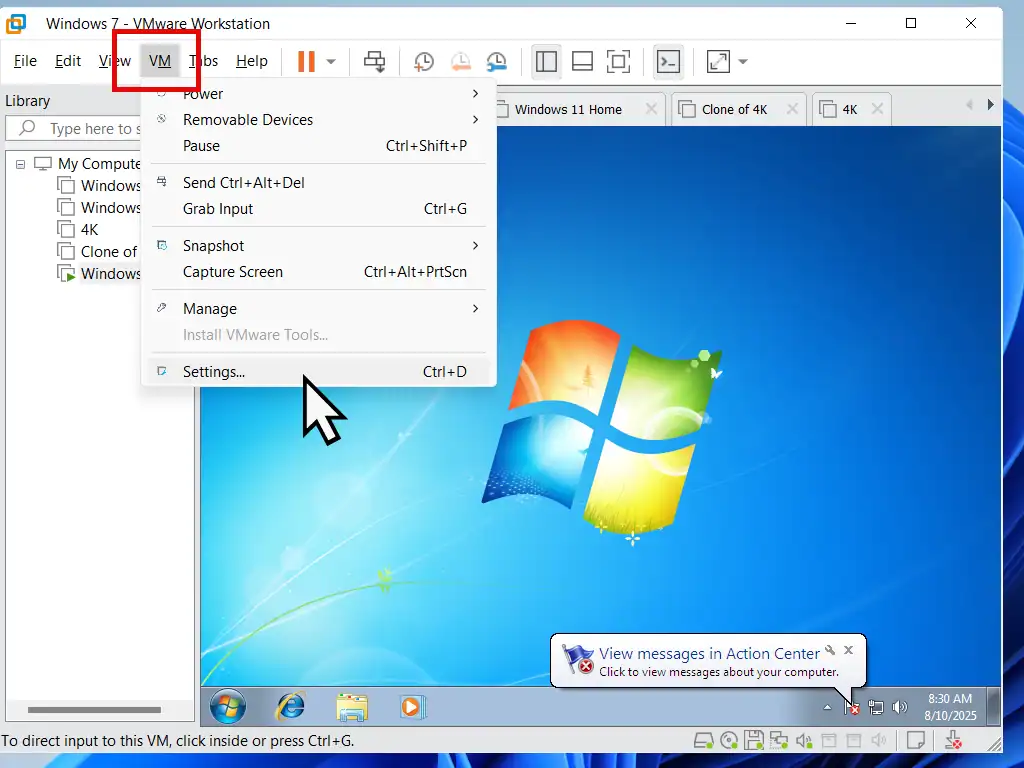
- Click the VM button on the toolbar and then Settings on the menu.
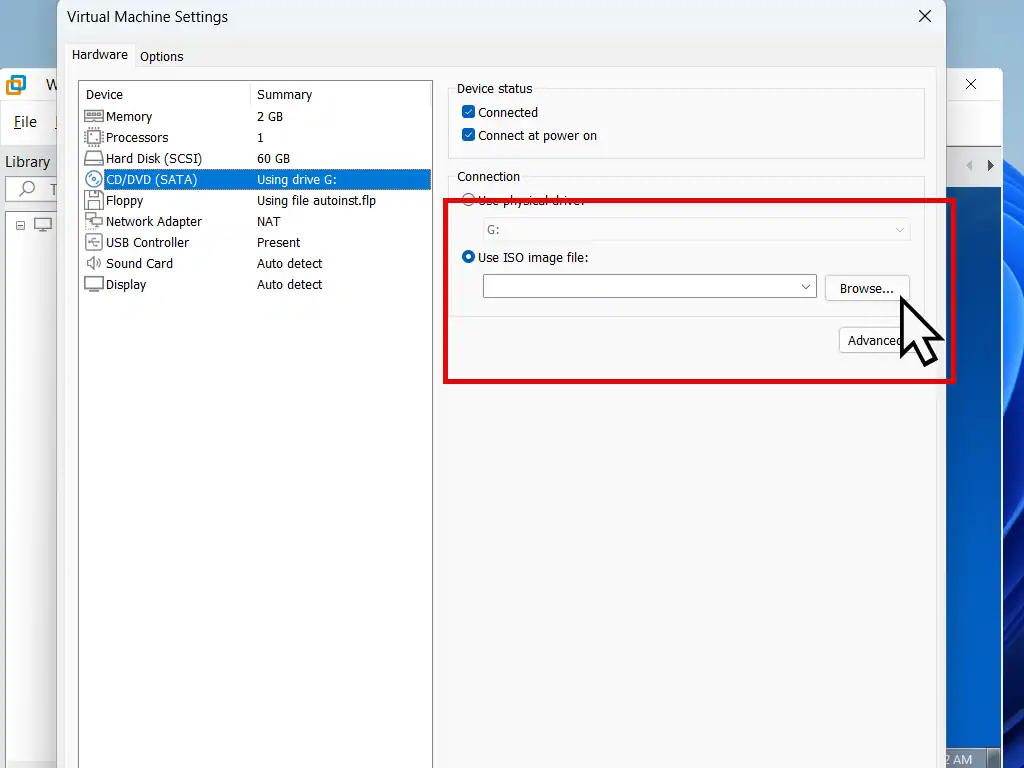
- Select CD/DVD in the Hardware pane, then select Use ISO Image File (if it isn’t already). Click the Browse button.
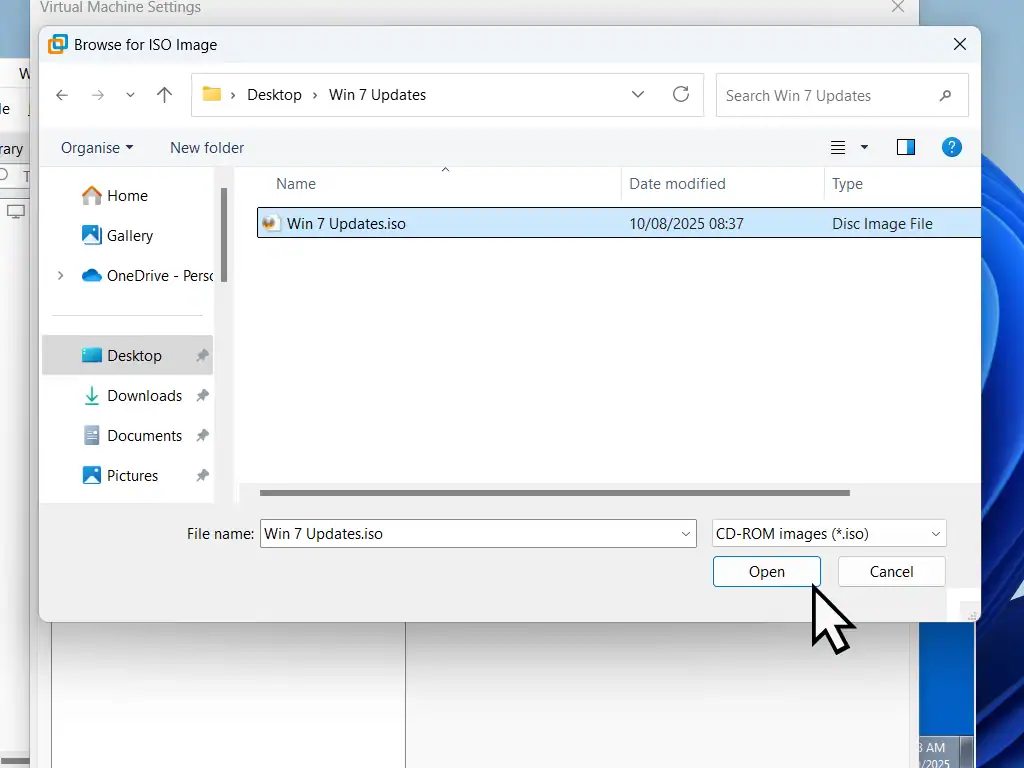
- Navigate to the ISO file and select it. Click OK at the bottom of the screen.
- After a few moments Windows 7 Autoplay should offer to open the newly loaded virtual CD/DVD. Click Open Folder To View Files.
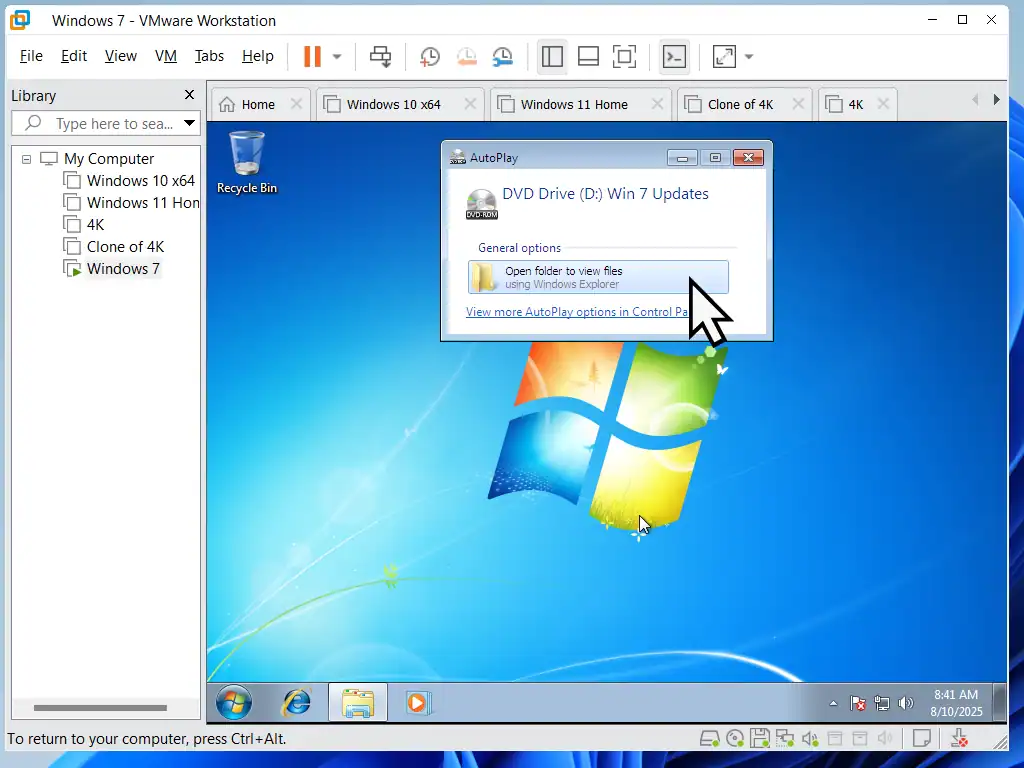
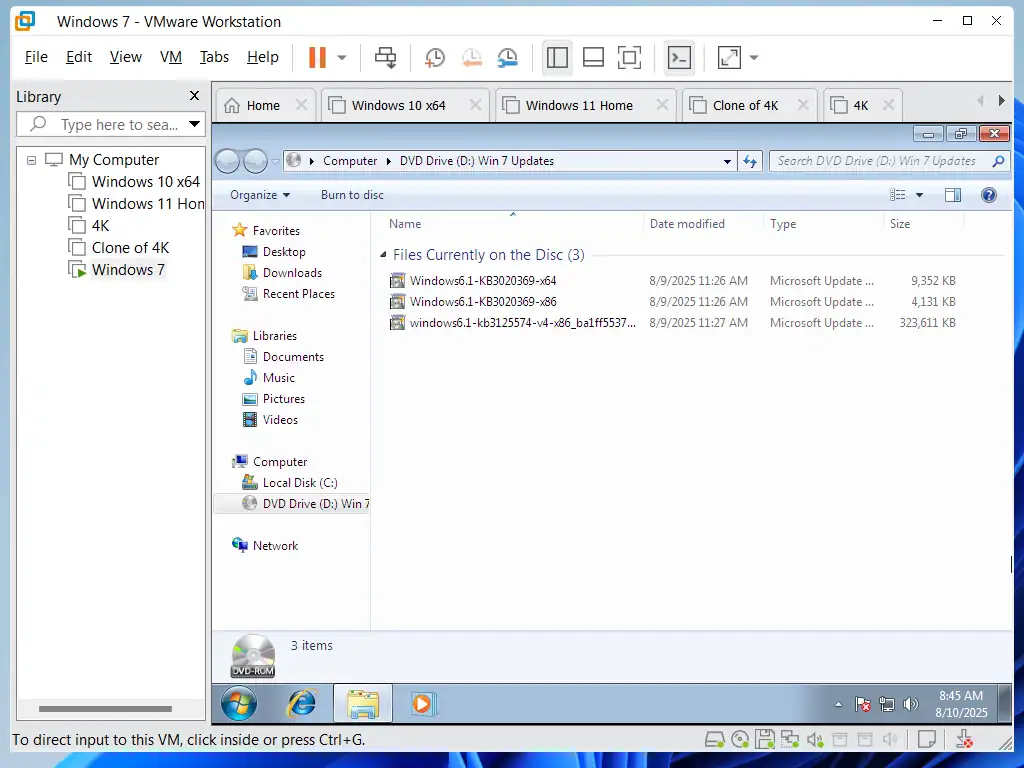
When the virtual CD/DVD opens it’ll reveal the Windows 7 updates kb3020369 and kb3125574.
You can just install them both directly from the virtual drive, but I much prefer to copy the files to the VM desktop first.
Summary.
Fixing Windows 7 updates not working can be a real headache, but if you follow along with guide you’ll get there.
Good Luck, Jeff
Related Posts
Setup Windows 7 As Virtual Machine On VMware Workstation Pro.
Still need a Windows 7 PC, set it up as a virtual machine.
How To Install Windows 10 Virtual Machine In Workstation Pro.


