Windows 7 may be well past its end-of-life date (January 2020), but thousands of people still use it to run older software that simply won’t work on Windows 10 or 11.
If you’re one of those people the safest way to do this is inside a virtual machine (VM). In short a virtual machine is a self-contained environment that keeps Windows 7 completely isolated from your main system. It’ll work perfectly and you can install whatever programs and games Just as would on a bare metal machine.
In this step-by-step guide I’ll show you exactly how to set up a Windows 7 virtual machine using VMware Workstation Pro, which has been free to download for personal and commercial use since November 2024. By the end, you’ll have a fully working Windows 7 VM ready to run your legacy apps safely.
What You’ll Need Before You Start
Before creating the virtual machine, make sure you have these three things ready:
- Virtualisation enabled on your CPU. Your processor needs Intel VT-x or AMD-V/RVI turned on. This is usually active by default on Windows 11 PCs, but it’s worth checking your UEFI/BIOS settings first. If you’re not sure your computer has virtualisation enabled check out this guide How to Enable Virtualization (VT-x & AMD-V) in BIOS
- A Windows 7 ISO file or installation DVD. You’ll need an installation source, it could be either a Windows 7 ISO image saved to your PC or the original DVD disc. Microsoft no longer officially provides Windows 7 downloads, so use a disc or ISO you already own and are licensed to use.
- VMware Workstation Pro installed. VMware Workstation Pro is a type-2 hypervisor (desktop virtualisation software) that lets you run multiple operating systems inside your main OS. It’s now completely free, you don’t need a licence key to run it on your home PC. See my guide: How to download VMware Workstation Pro for free.
Create an ISO File from a CD/DVD Disc
With modern computers shipping without a CD/DVD drive using a physical Windows 7 disc can seem to be a challenge. You could use a portable USB type drive, they work well and are handy to have around. Or you could create an ISO file from your disc using a different PC.
Step 1: Create a New Windows 7 Virtual Machine
Open VMware Workstation Pro. On the home screen, click Create a New Virtual Machine.
If you already have VMs set up, click the Home tab first, then click Create a New Virtual Machine.
The New Virtual Machine Wizard will appear. Leave the configuration type set to Typical and click Next.

Step 2: Choose Your Windows 7 Installation Source
VMware will ask how you want to install the guest operating system. You have two options:
- Installing from a DVD disc: If you have a physical Windows 7 disc in your DVD drive, Workstation Pro should detect it automatically. Confirm it’s selected and click Next.
- Install from an ISO image file: Select Installer disc image file (iso), click Browse and navigate to your Windows 7 ISO file and select it. Once loaded, click Next.


Step 3: Name Your Virtual Machine and Choose a Storage Location
Give your VM a name to help identify it in Workstation Pro (especially useful if you plan to run multiple virtual machines). By default, VMware names it ‘Windows 7’, which is fine.
The VM files will be stored in your Documents folder by default. If you’d prefer a different location (for example, on a drive with more space), click Browse and select a folder. Click Next when ready.

Important Note About VM Location
If your Documents folder is synced to OneDrive, or any other online storage, consider saving the VM in a local-only folder instead. VM files can be large and may cause sync issues or max out your storage limit.
Step 4: Set the Virtual Hard Disk Size
Your Windows 7 VM needs a virtual hard disk. VMware Workstation Pro assigns 60 GB by default, which is a reasonable starting point. Windows 7 can technically run on as little as 25 GB, but you’ll want more space for applications, updates, and files.
For storage format, select Store virtual disk as a single file. This can give slightly better read/write performance compared to splitting the disk across multiple files.

VM Disk Capacity
Unlike other virtual machine settings (such as RAM, CPU etc) the virtual hard disk size isn’t easy to change. It can be done How To Expand A Virtual Hard Disk but it’s a little more work that simply ticking boxes. So put a little thought into what exactly you’re going to be installing onto your VM.
Windows 7 can run on as little as 25GB. But that won’t leave much space for apps and other data. Normally I go for around 40GB for Windows 7, but obviously your situation will be different to me.
Step 5: Review Settings and Customise Hardware (Optional)
The “Ready to Create Virtual Machine” screen shows a summary of your configuration. Look this over before proceeding.
One thing worth checking is the amount of RAM that VMware assigns by default for Windows 7 VMs. VMware assigns only 1 GB of RAM. That’s the minimum Windows 7 will run on and it’ll be slow. For a better experience, click Customize Hardware and increase the memory. 2 GB is a reasonable minimum; 4 GB will feel much more responsive.
You can also adjust the number of virtual CPU cores here if you have a multi-core processor and want to give the VM more processing power.
Recommended minimum specs for your Windows 7 VM:
- RAM: 2 GB minimum, 4 GB recommended
- Virtual hard disk: 60 GB+ (single file format)
- Virtual CPUs: 2 cores (improves responsiveness)
When you’re happy with your settings make sure Power on this virtual machine after creation is ticked, then click Finish. VMware will take a few moments to setup the virtual hardware and then boot from your Windows 7 source disk.


Step 6: Install Windows 7
VMware Workstation Pro will create the virtual machine and boot it from your Windows 7 disc or ISO file. If you see the message ‘Press any key to boot from CD/DVD‘, left-click anywhere on the black screen first (to give your mouse and keyboard focus to the VM), then press any key on your keyboard.
The familiar Windows 7 installation process will begin. Follow the on-screen prompts exactly as you would on a physical PC. VMware handles the virtual hardware automatically in the background.
The only thing to note is when you get to the “Type your Windows product key” screen.
I’d always advise you to not enter anything at this stage. Just click the Skip button to carry on with the installation.
The reason for this is I think it better to get the computer working first, then activate it.

Once installation completes, you’ll be greeted by the Windows 7 desktop – running inside a Workstation Pro window. Apart from that, it behaves just like Windows 7 on a physical machine.
Step 7: Install VMware Tools
VMware Tools is a package of virtual drivers and utilities that significantly improves your VM’s performance, display resolution, and usability. Think of it like installing the chipset and graphics drivers on a new PC, it makes everything run properly.
When the Windows 7 desktop appears, click the I Finished Installing button at the bottom of the VMware window. That’ll load VMware Tools as a virtual CD/DVD drive.
Then click the VM menu button at the top of the Workstation Pro window and select Install VMware Tools. Follow the prompts, leaving everything at the default settings. You’re VM will need a reboot after the installation completes.


Common Problems Regarding VMware Tools and Windows 7 VMs
VMware Tools is no longer shipped with VMware Workstation for this guest operating system:
Download the legacy VMware Tools and install those. How To Install VMware Tools On Windows XP And Vista VMs.
VMware Tools is greyed out (disabled):
This is the most frequently reported issue with Windows 7 VMs in Workstation Pro. If the menu option appears greyed out and unclickable, check our dedicated guide: How to fix Install VMware Tools greyed out.
VMware Tools Fails to Install:
Because Windows 7 is so far out of date, VMware Tools may refuse to install until the OS has been updated. Run Windows 7 Update first. If Windows Update itself isn’t working (another common issue with older VMs), see my guide: How to fix Windows 7 Update not working in a virtual machine.
Summary and What to do Next
Following this guide (and with a bit of luck) you’ll now have a fully functional Windows 7 virtual machine running inside VMware Workstation Pro. It’s isolated from your main system, so your host PC stays protected from any security risks associated with the unsupported OS.
Here’s my recommendations for what to do next:
- Create a full backup of the VM. Back up the entire virtual machine folder before making any changes. This is your safety net if anything goes wrong. Backup Workstation Pro Virtual Machines.
- Use snapshots before big changes. A snapshot saves the exact state of the VM at a given point in time, similar to System Restore in Windows. Take a snapshot before installing software or making configuration changes.
- Activate Windows 7. When you’re happy that your new VM is working, enter your product key through the Start menu > Computer > Properties > Activate Windows.
- Keep the VM offline if possible. Once you’ve finished applying all the updates you need, I’d recommend taking the VM offline. Windows 7 no longer receives security updates. For safety, consider keeping network access disabled in the VM settings unless you actively need it.
Related Posts
Virtual Machine Snapshot In Workstation Pro
Use snapshots to create a fast restore point for your virtual machines.
VMware Shared Folders
When you need to move files between your VM and host machine, use a shared folder.
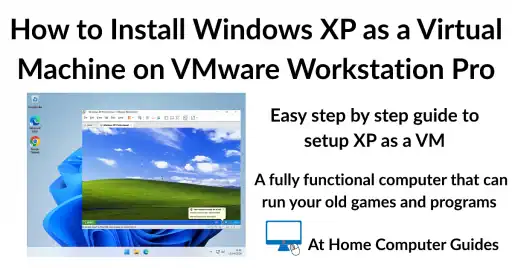
How to Install Windows XP as a Virtual Machine on VMware Workstation Pro
Got an old dusty PC that you keep around to run older games or programs? Setup XP as a VM on your new computer and then install them onto it.
Windows 11 Virtual Computer
Create a Windows virtual machine. It’s free and not that difficult to do.
Virtual machines are great for experimenting with. You can try out new operating systems, you can browse the web safely and open suspicious emails. Download new software to try it out, all without risking your host (real) computer.
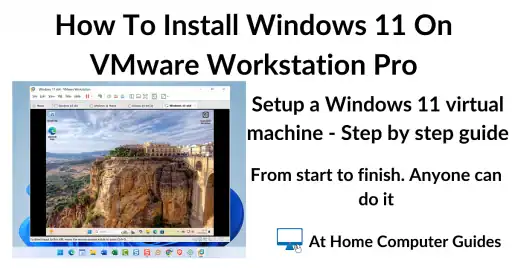
Setup a Windows 11 VM even if your current PC doesn’t currently support it.
You can find this and other related step by step guides in – At Home Computer VMware Guides
At Home Computer Step By Step Guides
![]() Easy to follow tutorials for users of Windows 10 and Windows 11 computers.
Easy to follow tutorials for users of Windows 10 and Windows 11 computers.

Gmail Storage Full? Here’s Why (and How to Fix it)
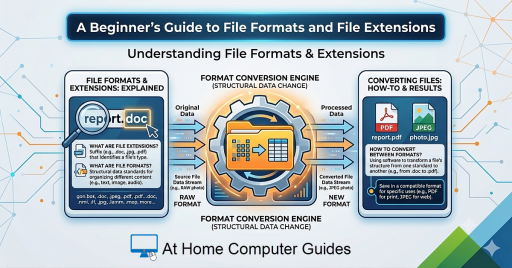
A Beginner’s Guide to File Formats and Filename Extensions

How to Protect Your Data When Sending Your PC in for Repair

Why I Use Virtual Machines and You Should Too
How to Install Windows XP as a Virtual Machine on VMware Workstation Pro
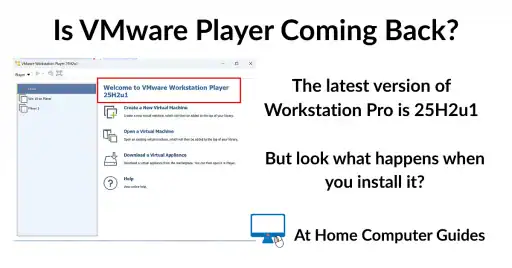
Is VMware Player Coming Back?

How to Setup OneDrive to Backup Your Files
OneDrive allows you to backup files to the cloud. It…
How to Share a Folder in OneDrive
One of the best features of OneDrive is the ease…
How to Setup RealTimeSync
RealTimeSync is a companion tool for the popular sync program…