Complete walkthrough guide to setting up Windows 11 as a VMware Workstation Pro virtual machine.
You can use Windows 11 as a VM even if your host computer doesn’t meet the system requirements. Workstation Pro will emulate all the system requirements for you.
You’ll need to have Workstation Pro installed on your host computer, so if you haven’t already, follow the link below to download your free copy.
Download Windows 11 ISO File.
In order to set up a Windows 11 virtual machine, you’ll need to download the ISO file from Microsoft. It’s a free download and you don’t need to sign in or anything like that.
You can grab the ISO image from the link below.
https://www.microsoft.com/en-us/software-download/windows11
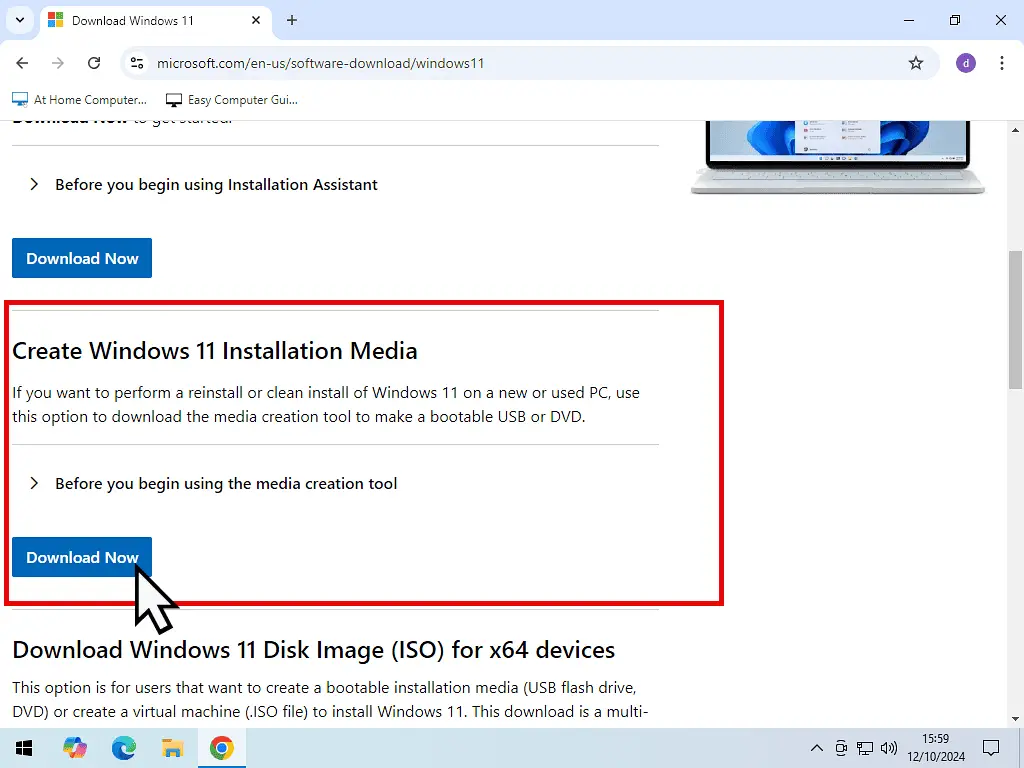
When you reach the Windows 11 download page, scroll down a little to the “Create Windows 11 Installation Media” section. Click the Download Now button.
That’ll download the media Creation Tool to your computer. It’s a very small file, something around 10 MB, so it shouldn’t take long. Once it’s downloaded, launch it.
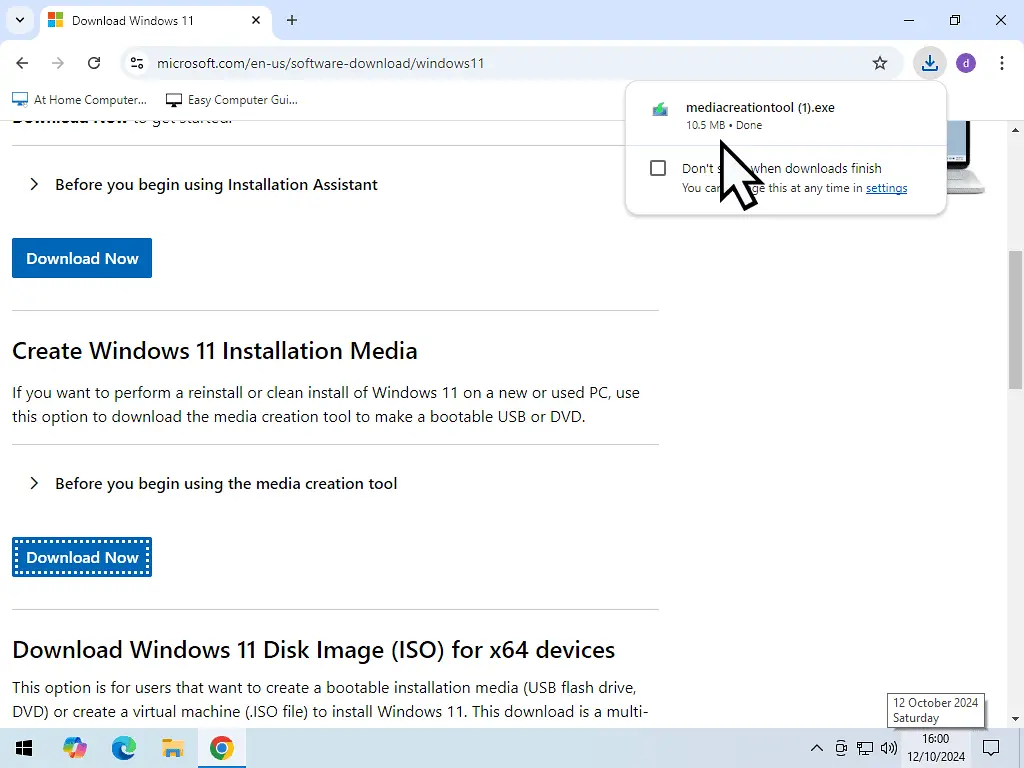
Windows 11 Media Creation Tool.
- As soon as the Windows 11 Media Creation Tool starts up, you’ll need to accept the Terms and Conditions.
- Language & Edition options. Click the Next button.
- Choose which media to use. Select ISO file and click Next.
- Finally select a folder/destination to save the ISO file into. For example, I’ll save it to my desktop.
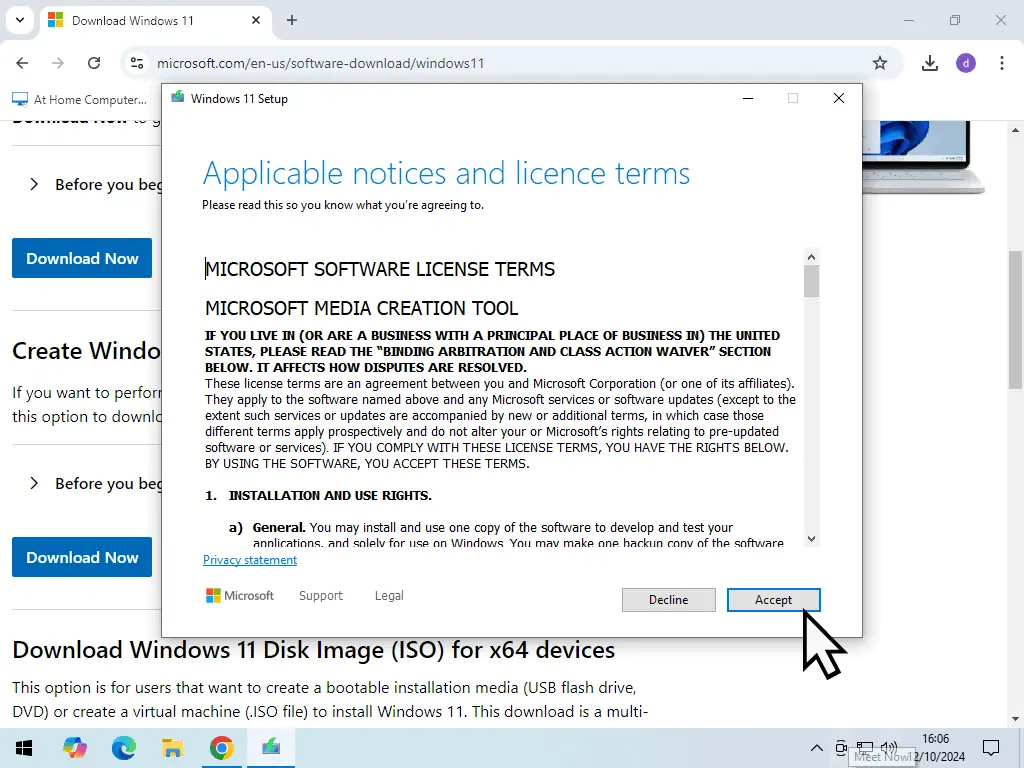
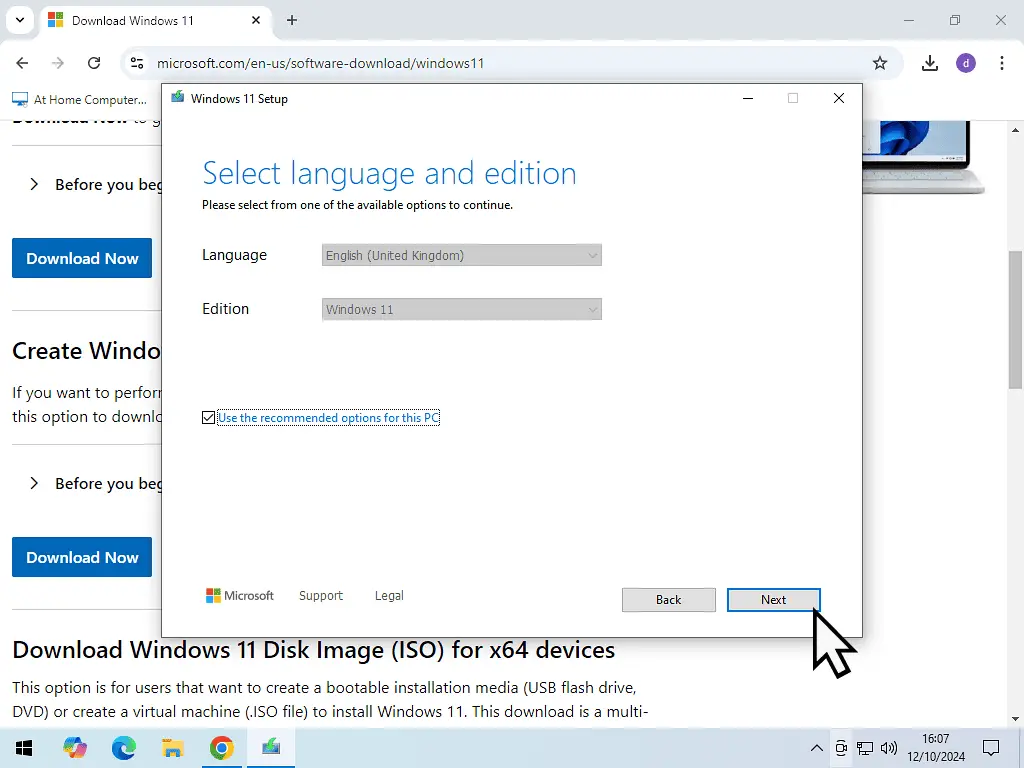
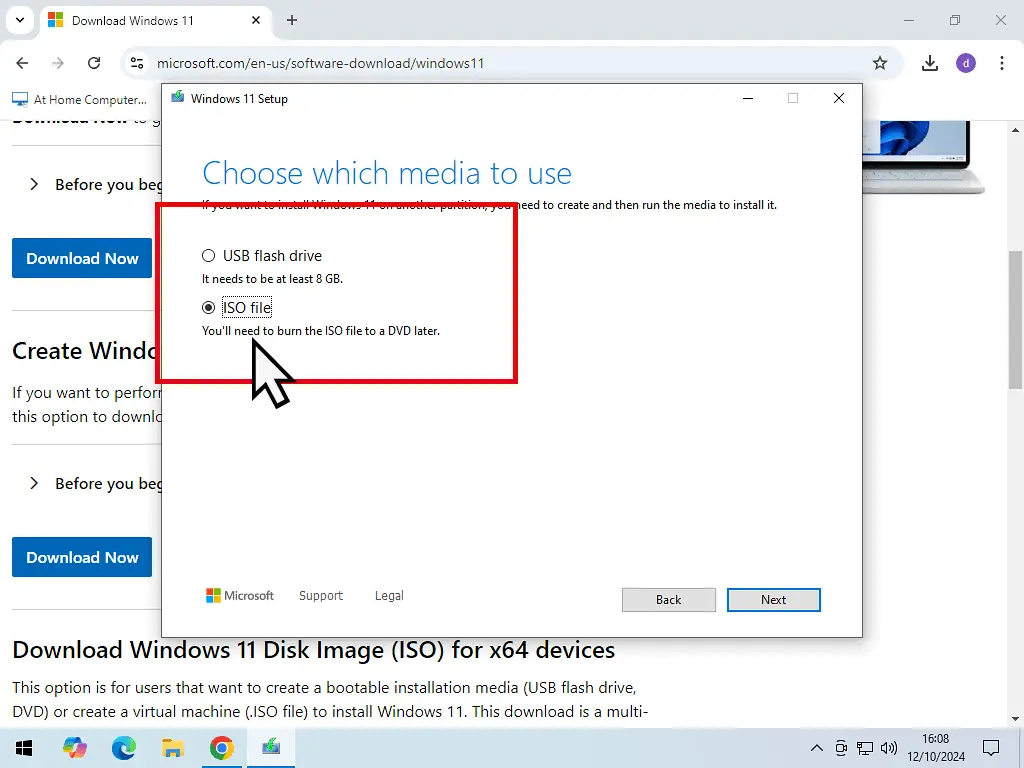
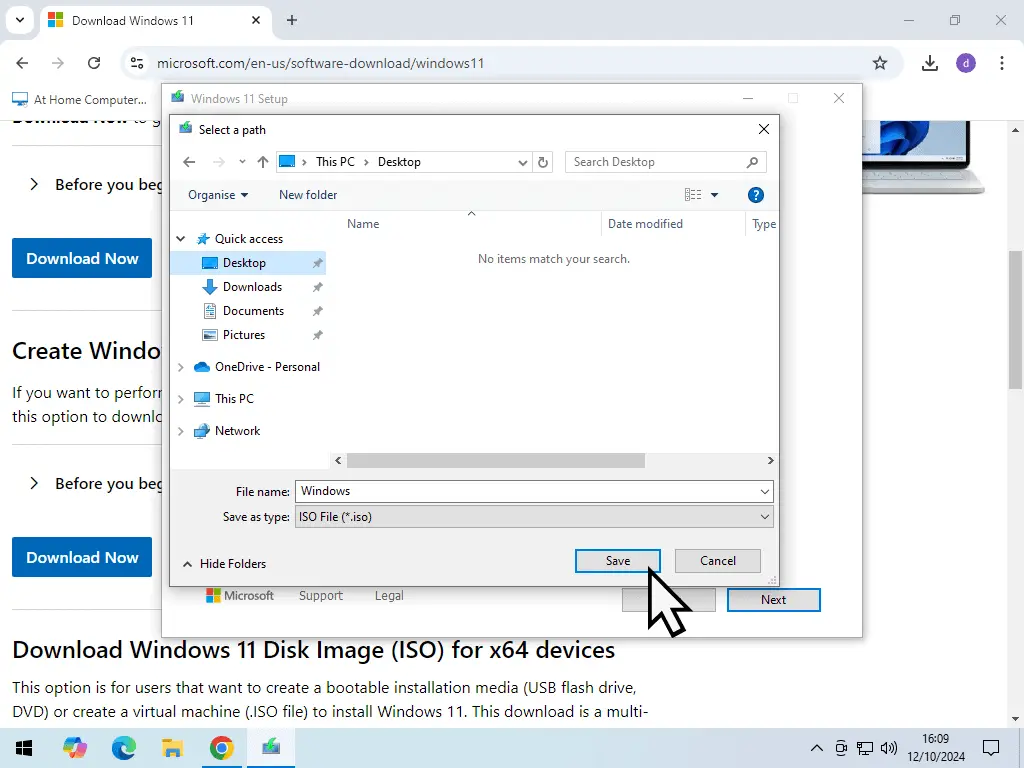
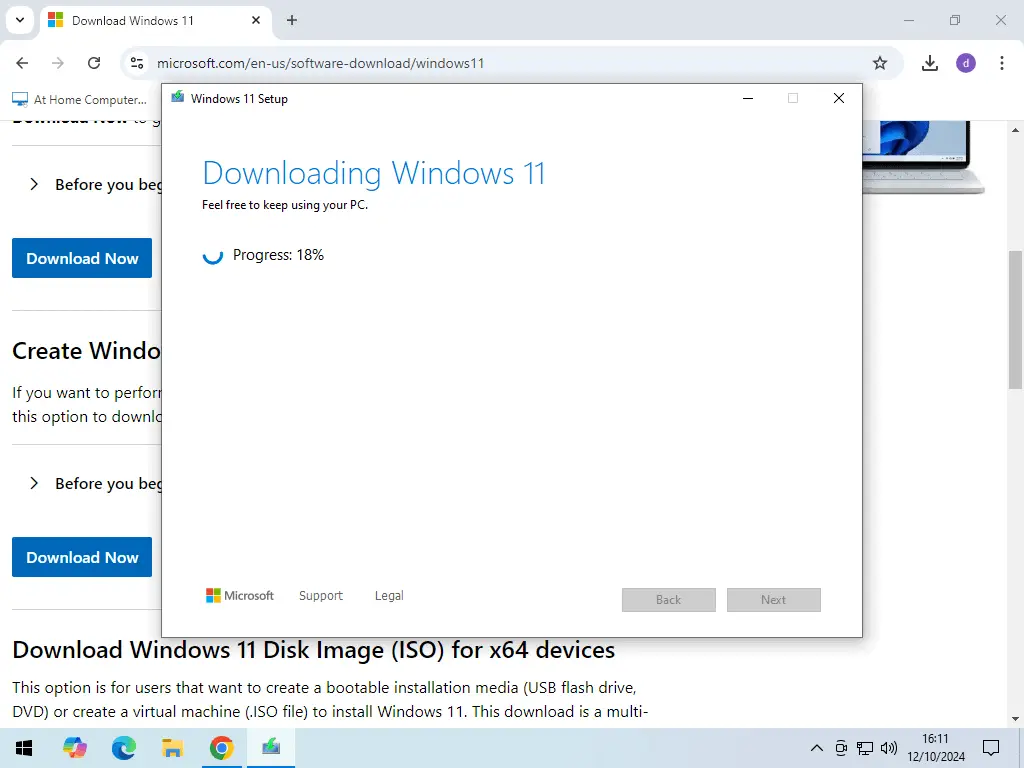
The Windows 11 ISO file will download to your computer. It’s quite a large file so you might have to wait a while.
- Allow the file to download.
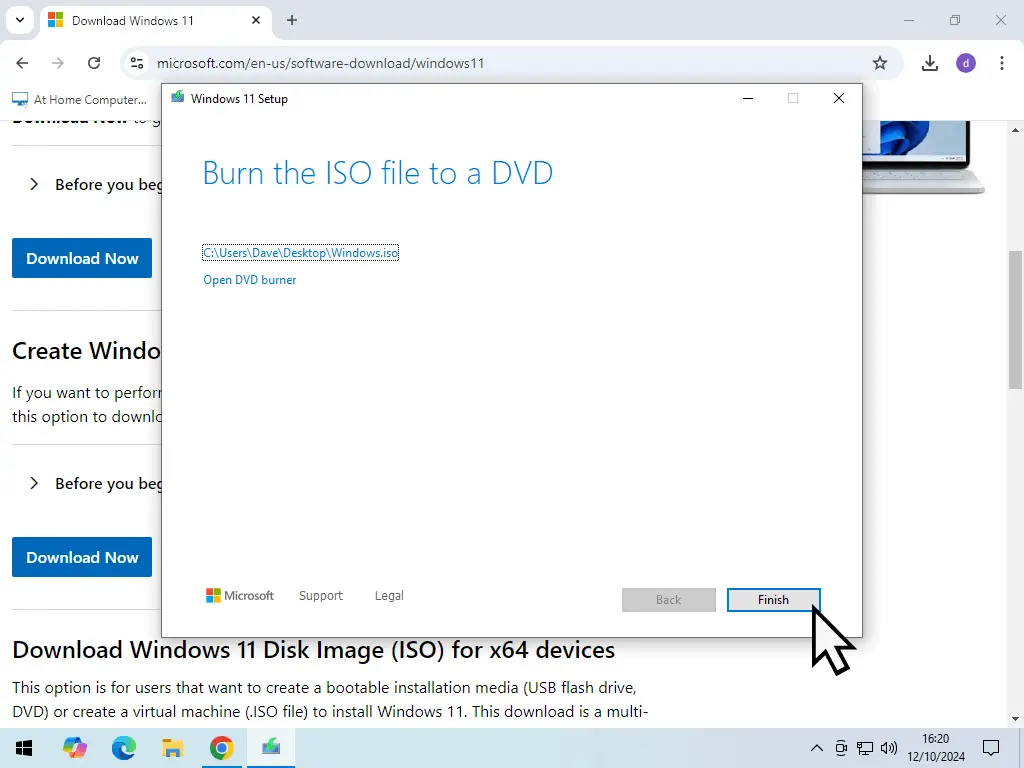
- When the Burn ISO file to DVD screen appears, the download is complete. Click the Finish button.
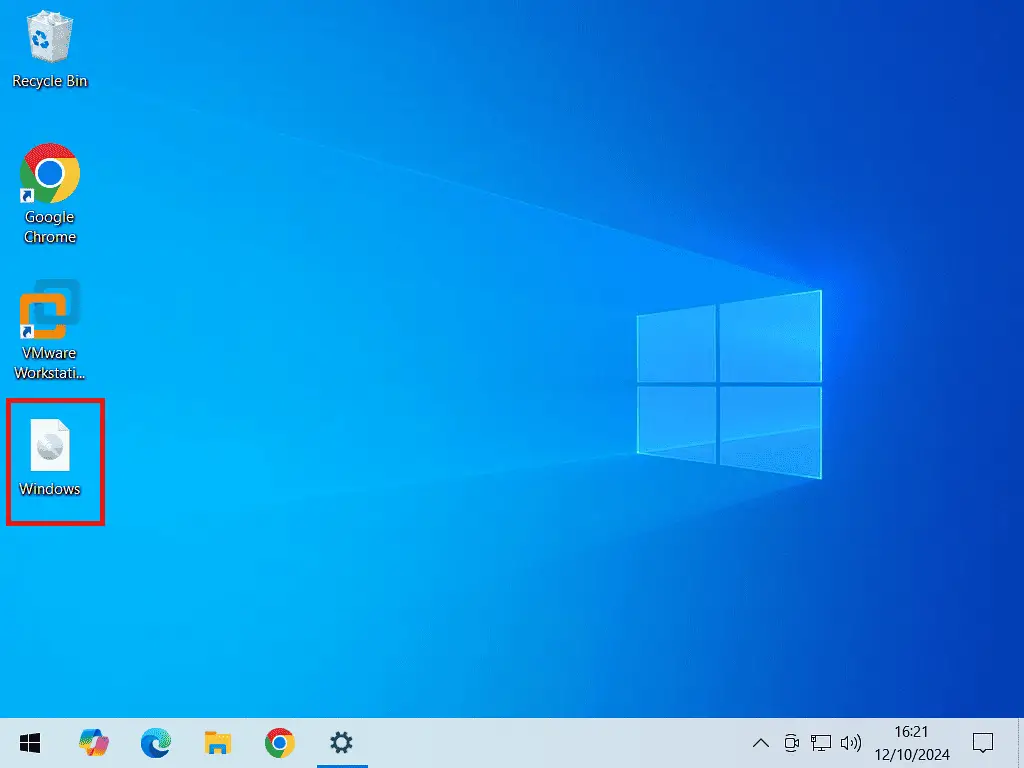
- You should see an ISO file in the location that you saved it to.
How To Create A Windows 11 Virtual Machine.
Creating any virtual machine is a two step process. Firstly you’ll create the virtual hardware for the VM (hard disk, RAM etc), and then install the guest operating system (in this case Windows 11).
Launch VMware Workstation Pro.
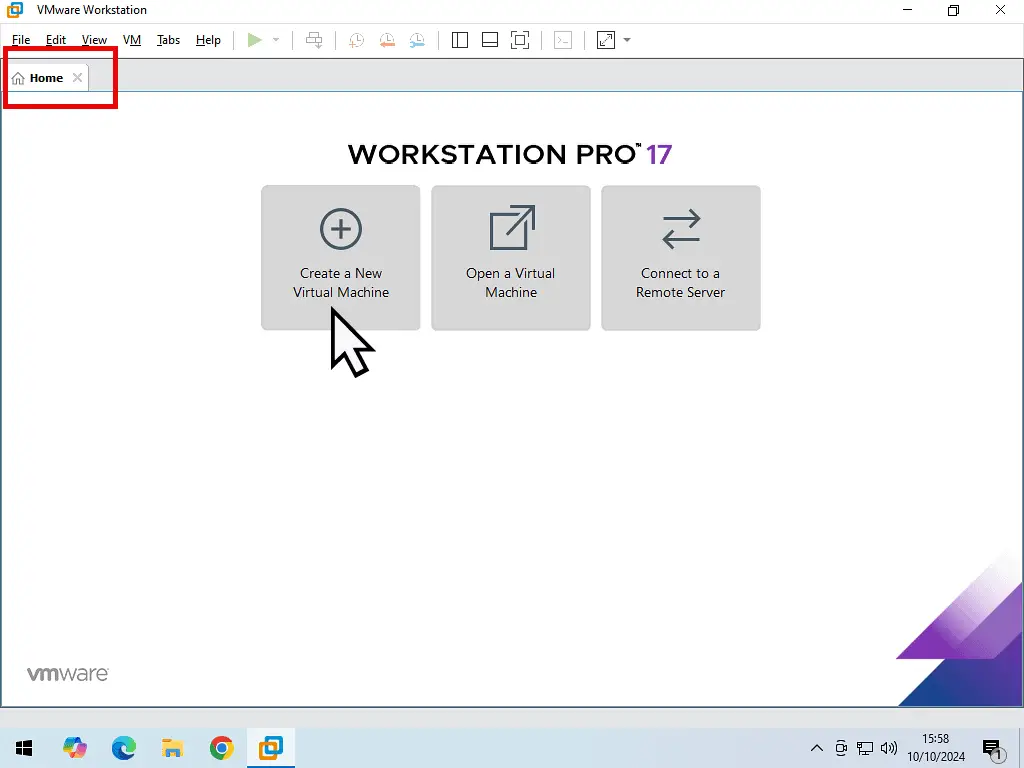
Then click Create a New Virtual Machine.
Workstation Pro Easy Install Wizard.
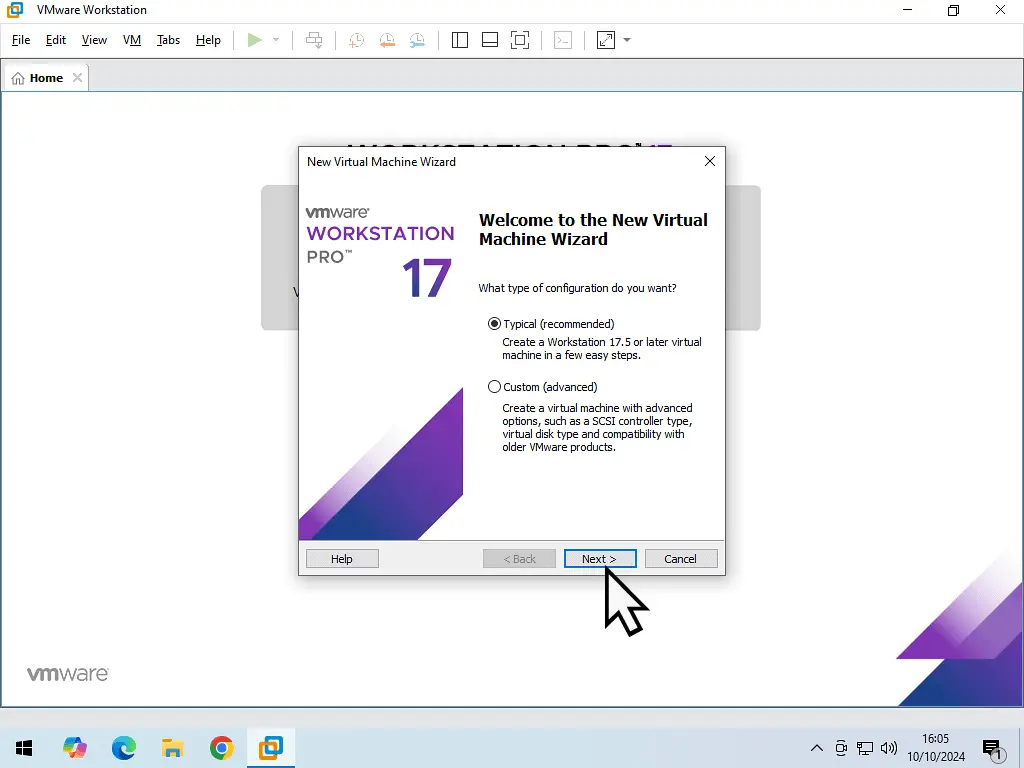
The Easy Install Wizard will guide you through setting your new Windows 11 VM.
- Click the Next button.
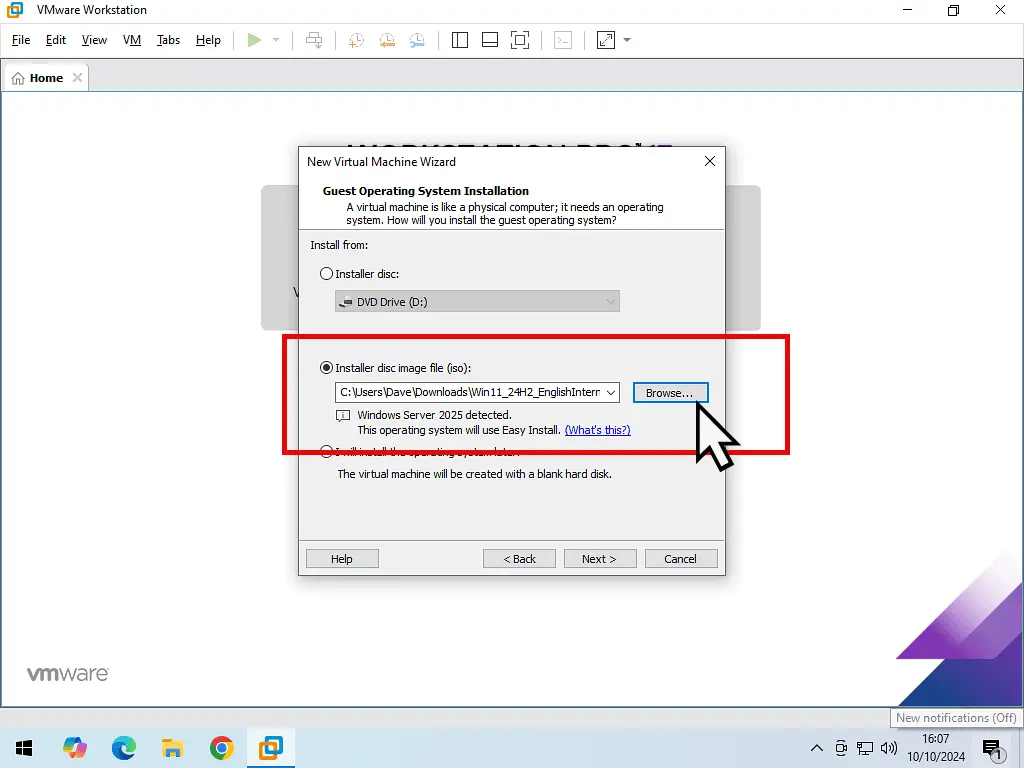
- Select Installer Disc Image file (iso). Then click the Browse button and locate and select the Windows 11 ISO file that you downloaded earlier. Click Next.
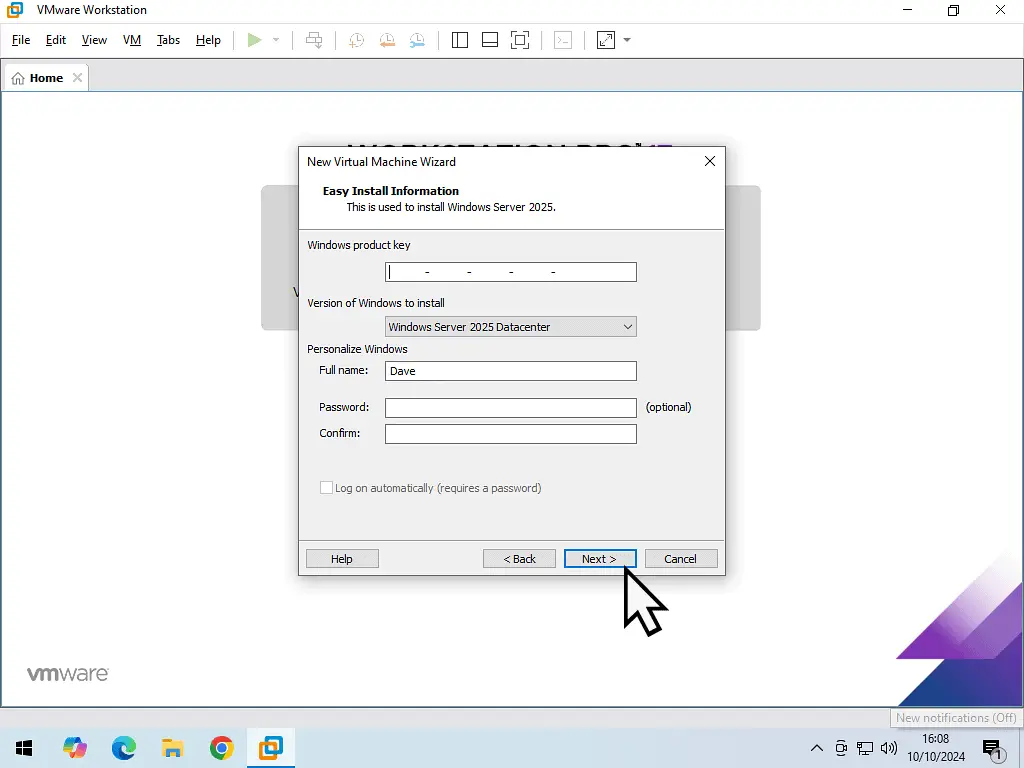
- You can enter a Windows product key if you have one. Personally I wouldn’t do that yet, just leave it blank. the same goes for the Password box. Click the Next button.
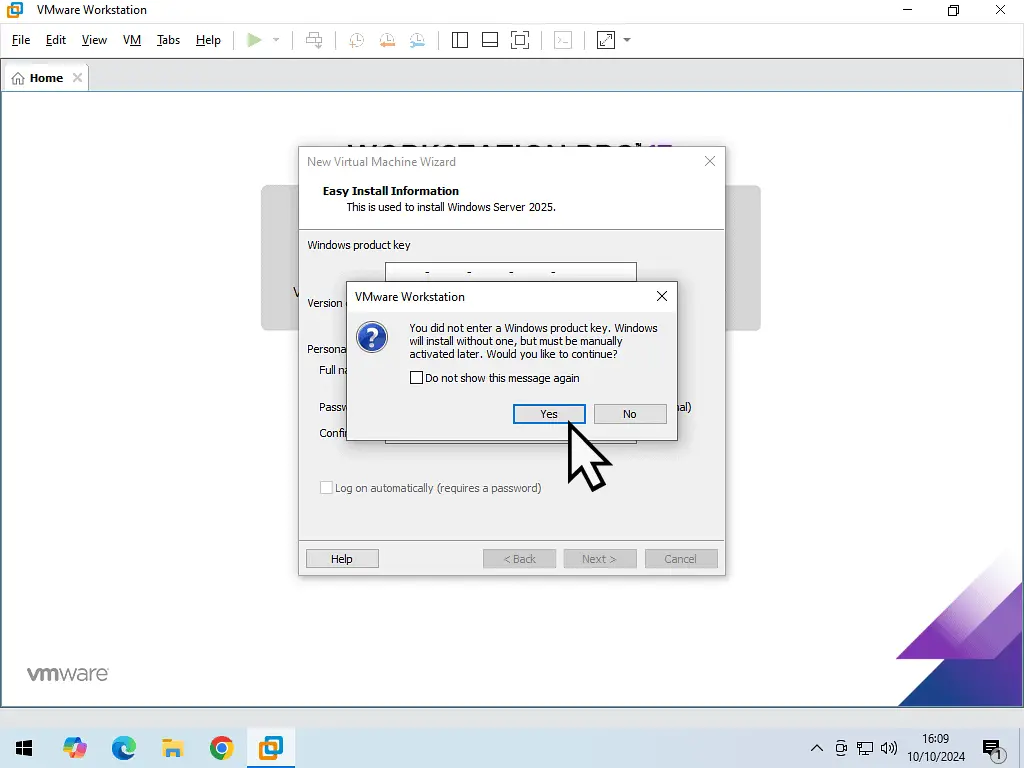
- Workstation Pro will warn you that you haven’t entered a product key, just click the Yes button to proceed.
Why Not Enter A Product Key?
If you enter your product key here, Windows 11 will be activated as soon as possible. That means that the product key is tied to this virtual computer.
If something then goes wrong during the installation, or subsequent setting up, and you have to delete the VM, you’ve lost your product key.
You can’t re-use it on another VM. I always advise that you get your computer up and running first. Regardless of whether it’s a real computer or a virtual computer. Make sure it works properly, then activate Windows 11.
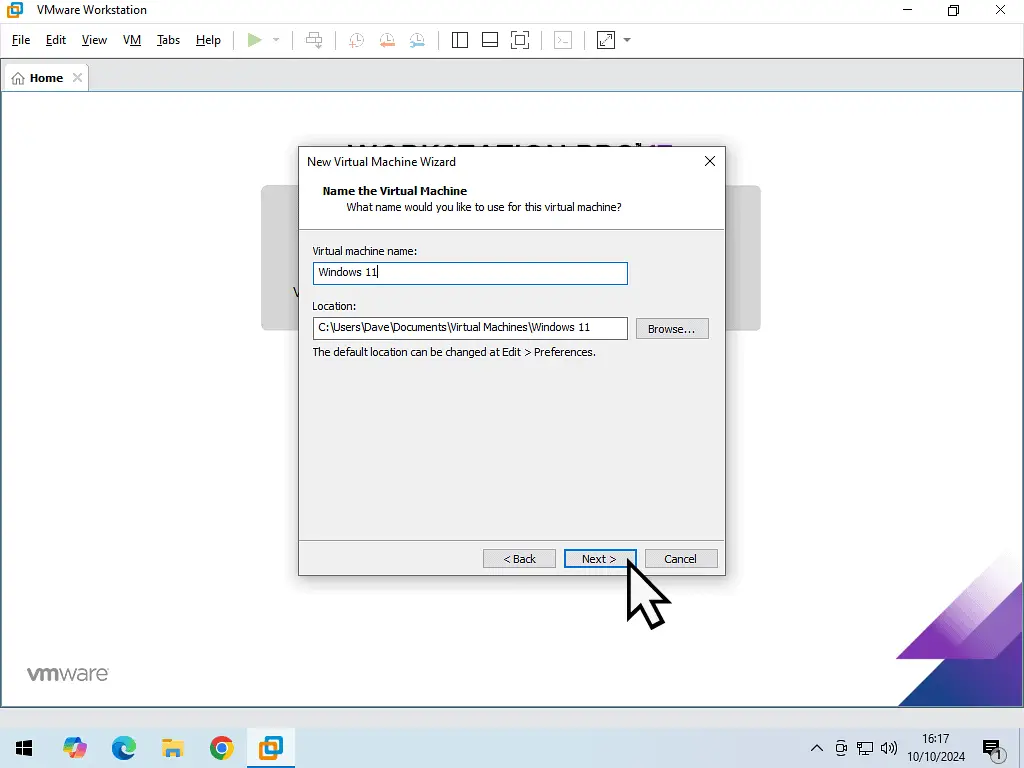
You can give your Windows 11 virtual machine a name if you want to. It’s a good idea if you’re planning on creating several VMs because it can get confusing otherwise. But if you’re only creating one, you can lever it as is.
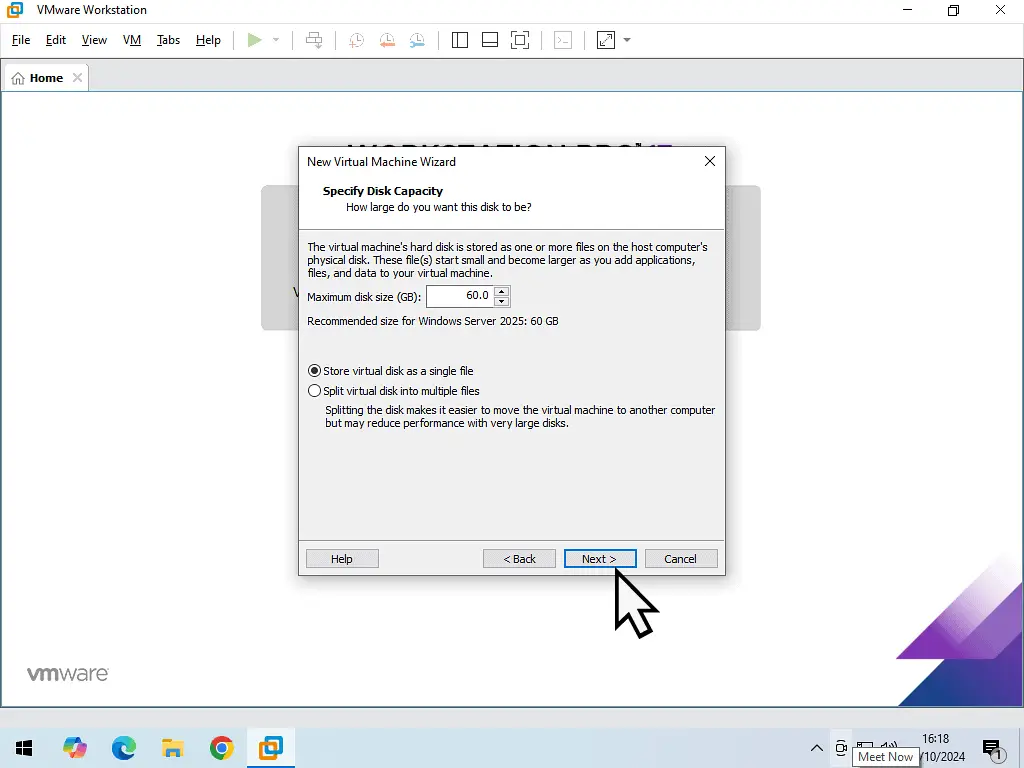
The virtual hard drive capacity needs to set. For Windows 11, Workstation Pro will allocate around 60 GB by default. You can change that if you need to.
You’ll also have the option of storing the virtual hard drive as a single file or multiple files. Personally I always go with a single file, but it doesn’t really make that much difference.
You’ll also have the option of storing the virtual hard drive as a single file or multiple files.
Personally I always go with a single file, but it doesn’t really make that much difference.
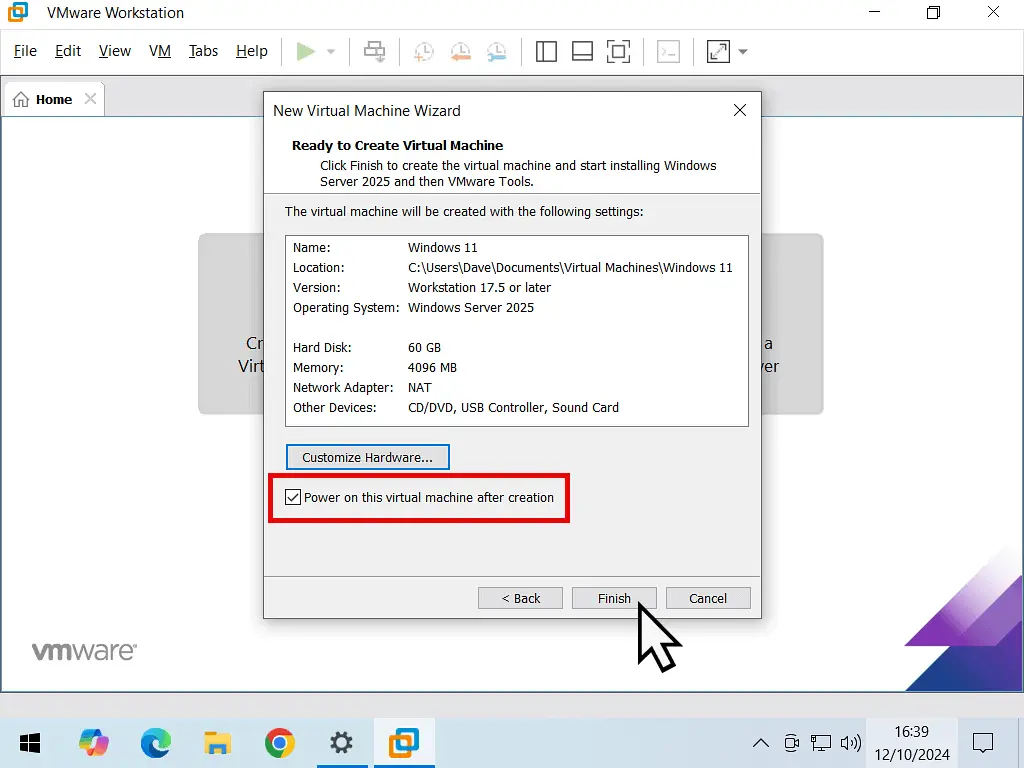
Make sure the “Power on this virtual machine after creation ” is selected and click the Finish button.
Keystrokes And Mouse Clicks.
Your real computer, the one you’re using right now, is called the host computer. The virtual machine, or virtual computer, that you’re creating is called the guest computer.
In effect you’ll have two computers, the host (real) and the guest (virtual).
But you only have one mouse and one keyboard. Both computers have to share your mouse and keyboard. So how do you manage that?
In VMware Workstation Pro you simply left click once inside the guest window. After that all keystrokes and mouse clicks will be captured by the guest system (the virtual computer).
To stop sending keystrokes and clicks to the guest and return them to the host, press the CTRL and Alt keys on your keyboard.
It can be a little difficult at first to get the hang of it, but with a little practice it becomes easy.
Installing Windows 11 In Workstation Pro.
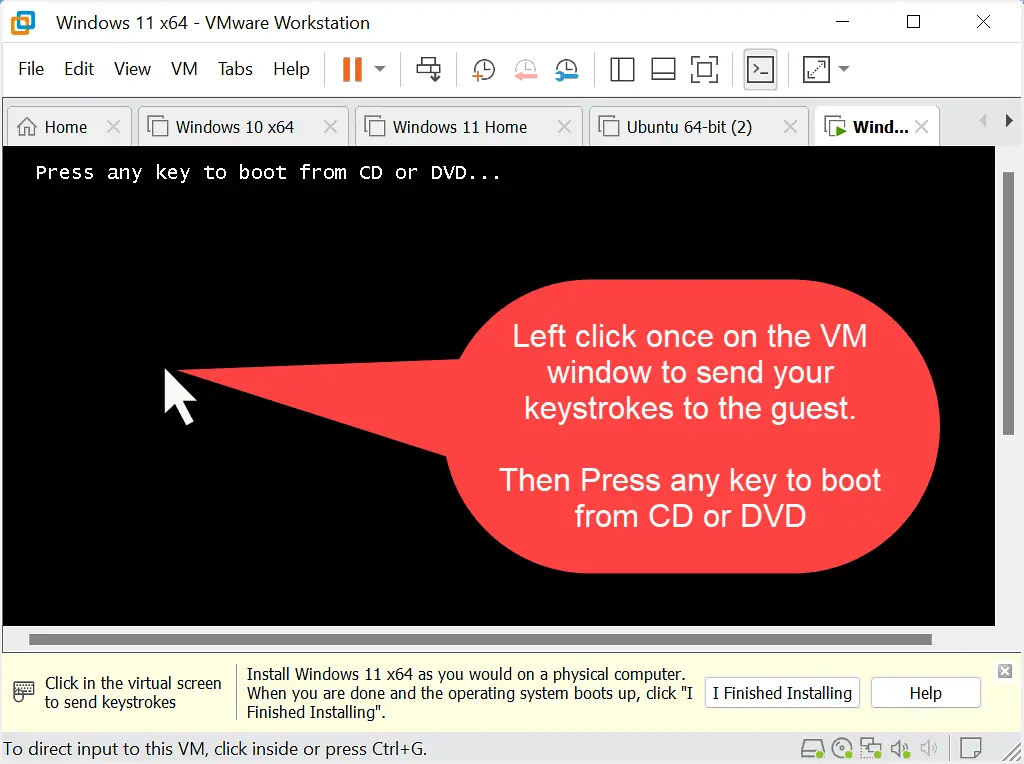
As Windows 11 starts, you’ll need to press a key on your keyboard.
So click inside the guest window and then hit the Enter key on your keyboard.
If Boot Manager Appears.
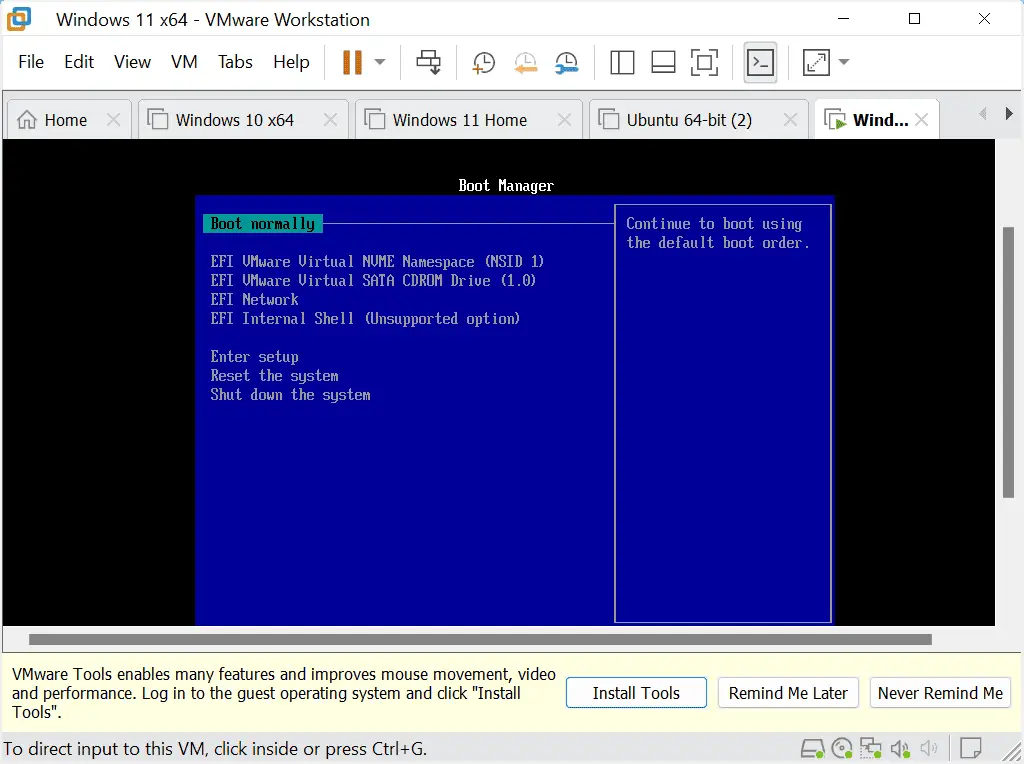
The “Press any key to boot from CD or DVD” screen doesn’t stay there very long. Something around 5 seconds or so.
If you miss it, you’ll see the Boot Manager screen appear. If that happens you’ll need to reboot the virtual machine.
Click the CTRL – Alt – Del button on the Workstation Pro toolbar. Note that you might have to press CTRL -Alt first to get your mouse pointer back
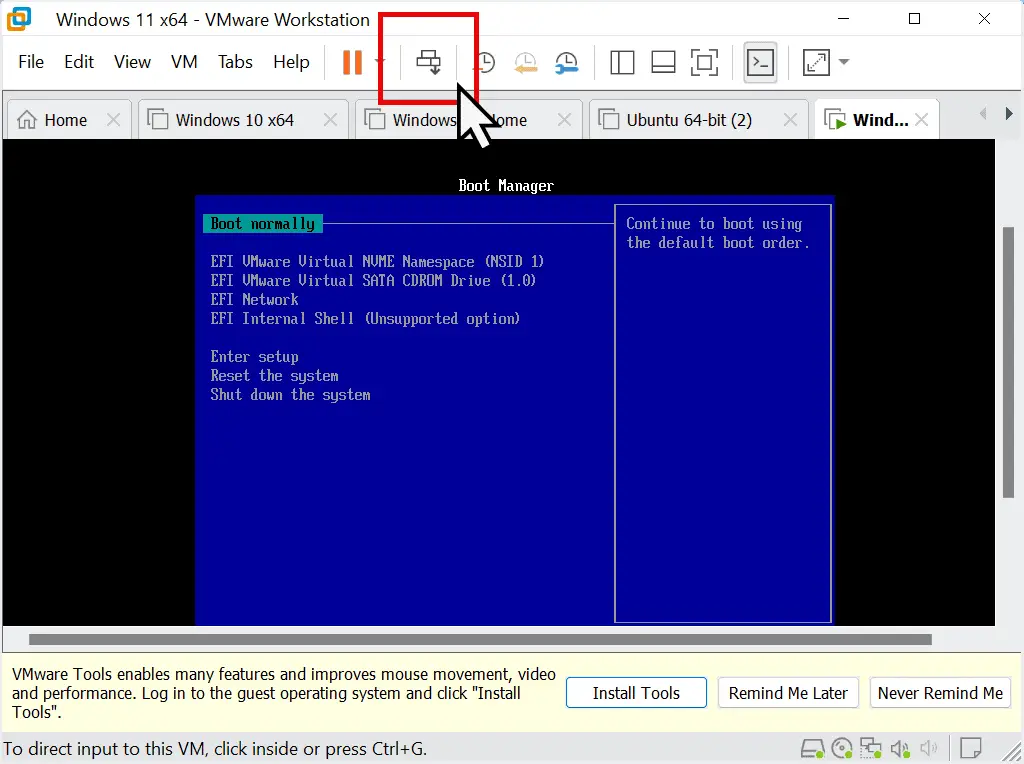
After sending the CTRL Alt Del command to the virtual machine it’ll reboot and the “Press and key etc” screen will re-appear.
Setting Up Windows 11 VM Installation.
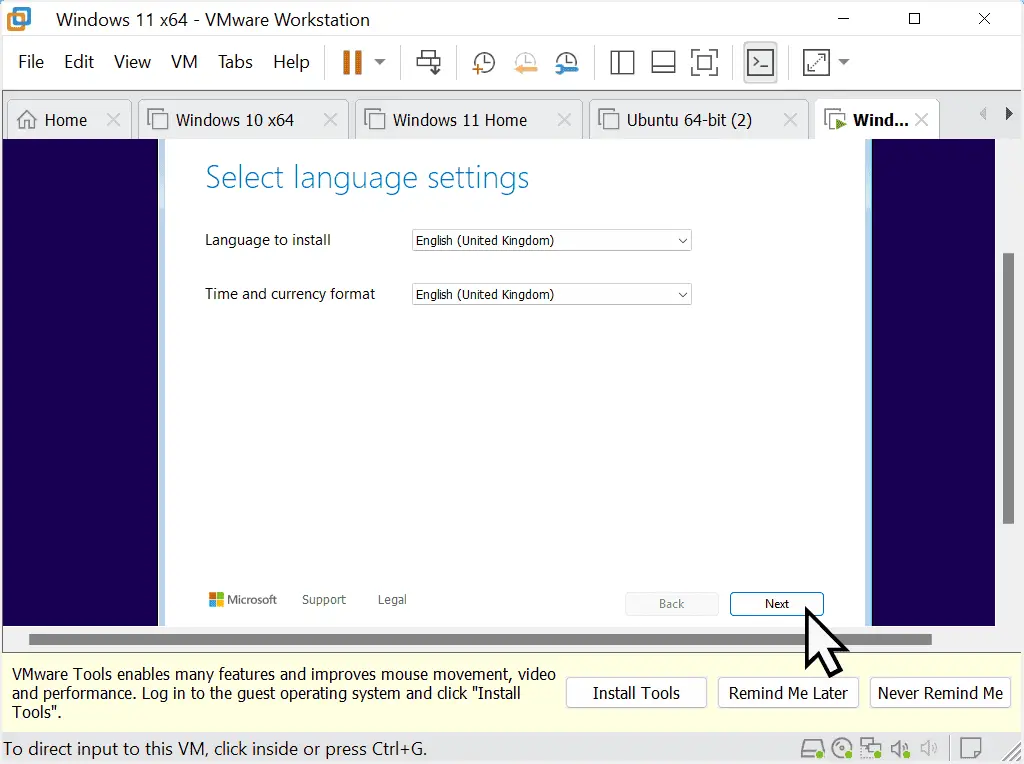
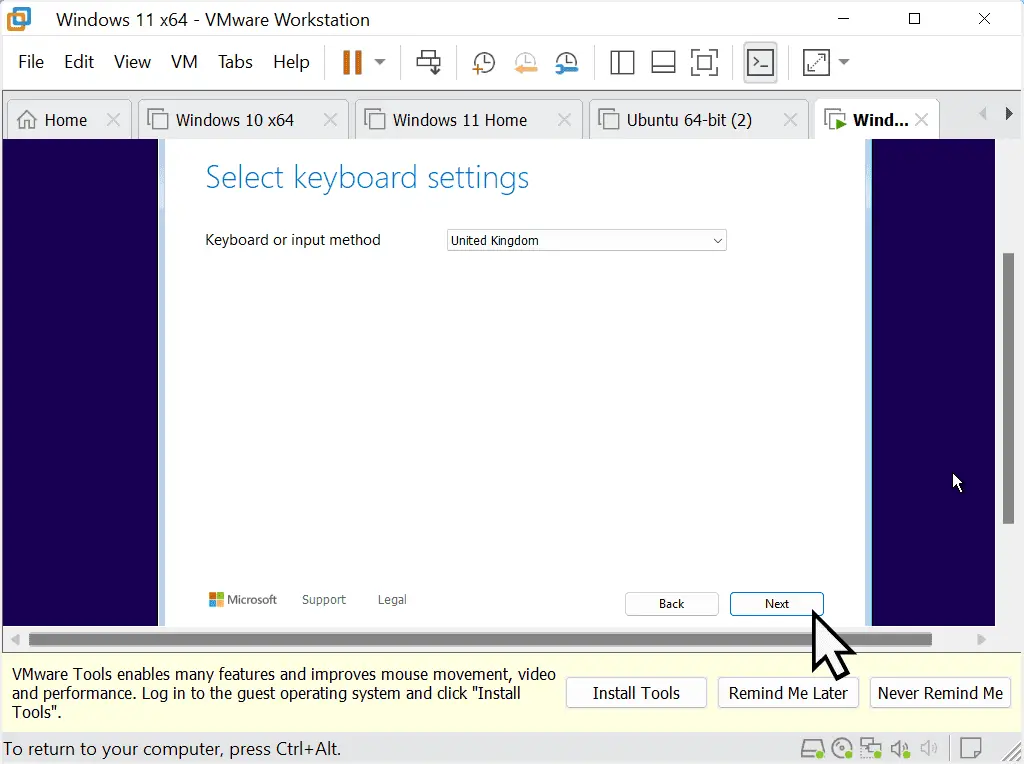
After booting from the CD or DVD Windows 11 setup will start. There’re several screens to go through. Most of them are self explanatory and you just need to click the Next button.
On the Select Language and Select Keyboard screens, Click the Next button.
The third screen is Select Setup Options. Make sure that Install Windows 11 is selected and then check the box “I agree everything will be deleted including files, apps, and settings”. Then click Next.
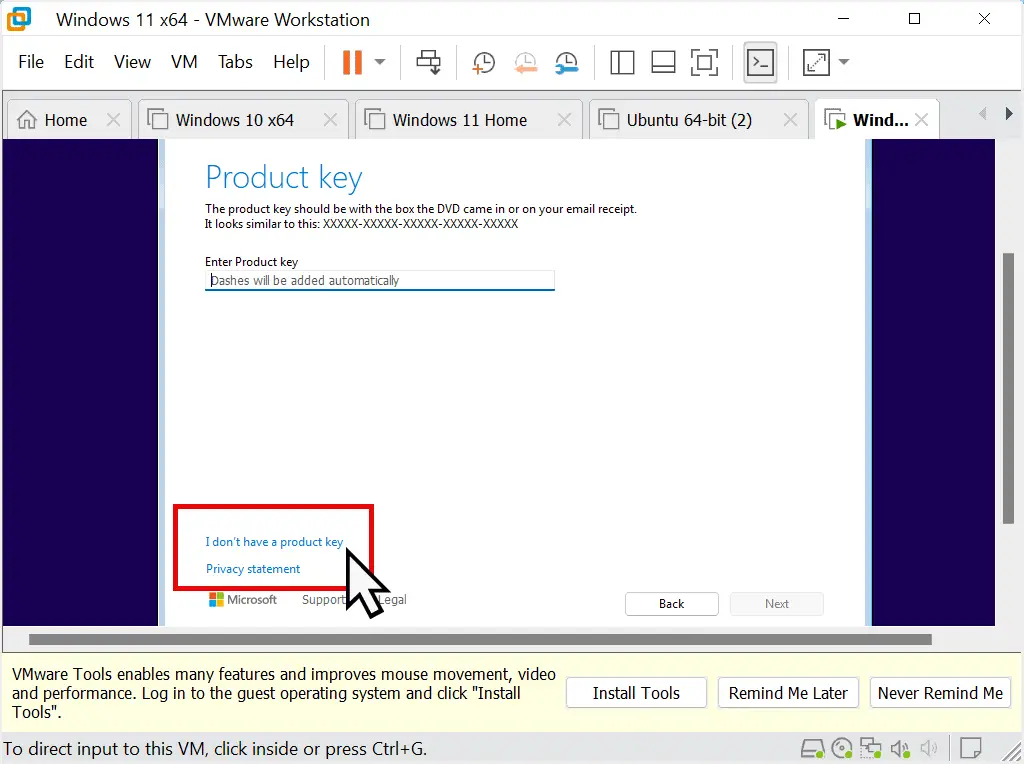
On the Product Key screen, you could enter your Windows 11 product key (if you have one), but I wouldn’t do that yet. Instead click “I don’t have a product key”.
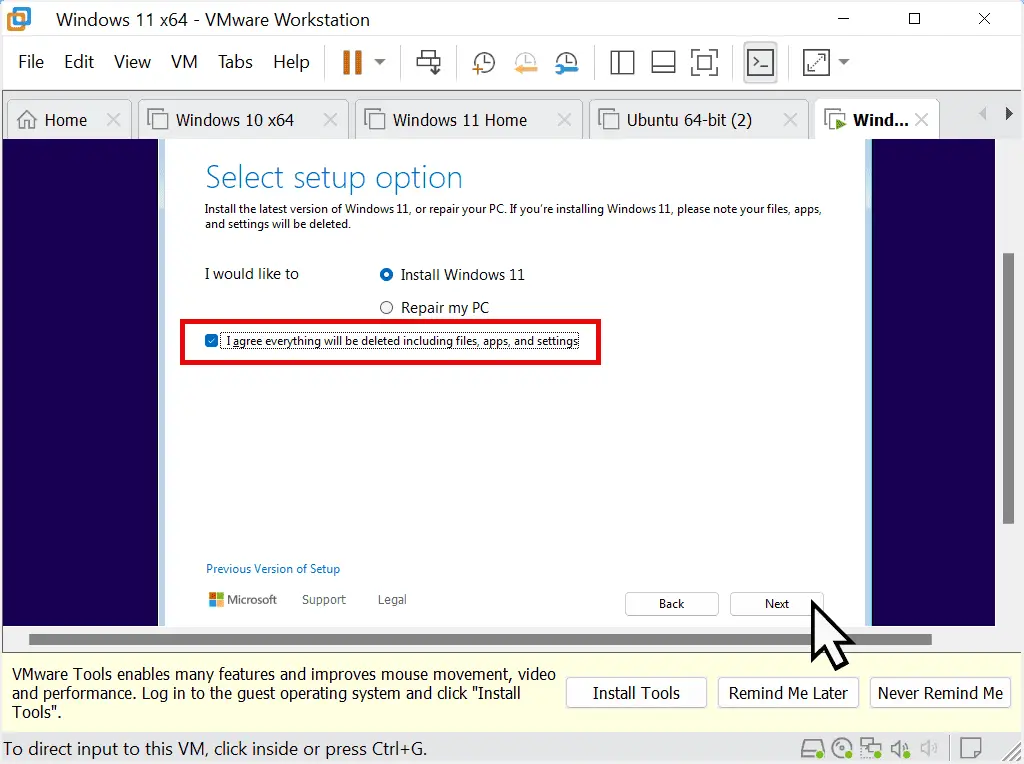
Everything Will Be Deleted?
That sounds scary, but nothing will be deleted from your host computer (your “real” computer). Remember that what you’re doing is installing Windows 11 onto a virtual machine. It’s the virtual machine that this notice refers to.
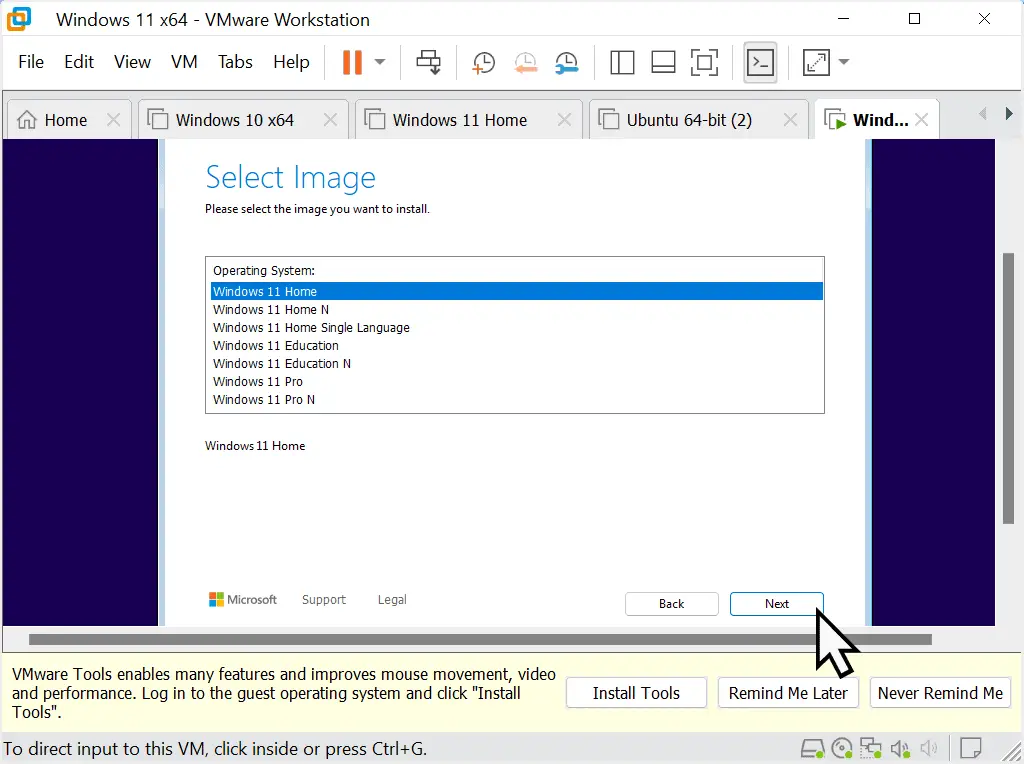
- Because you didn’t enter a product key earlier, you’ll need to select which version of Windows 11 to install on your virtual machine.
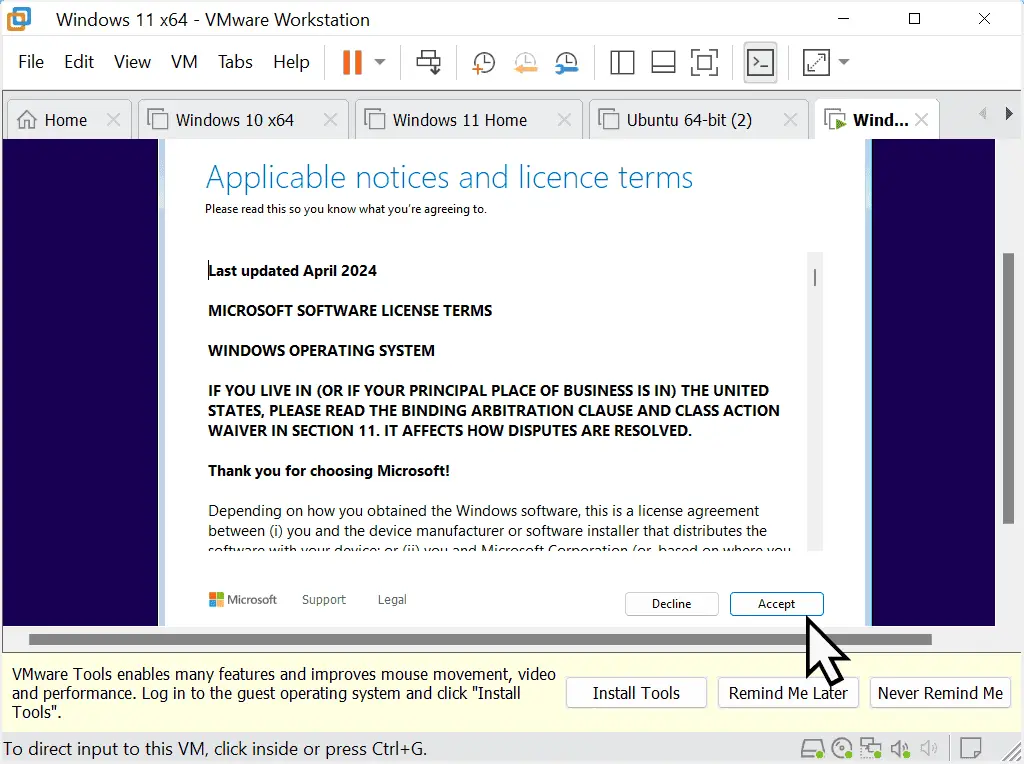
- Then Accept the applicable notices.
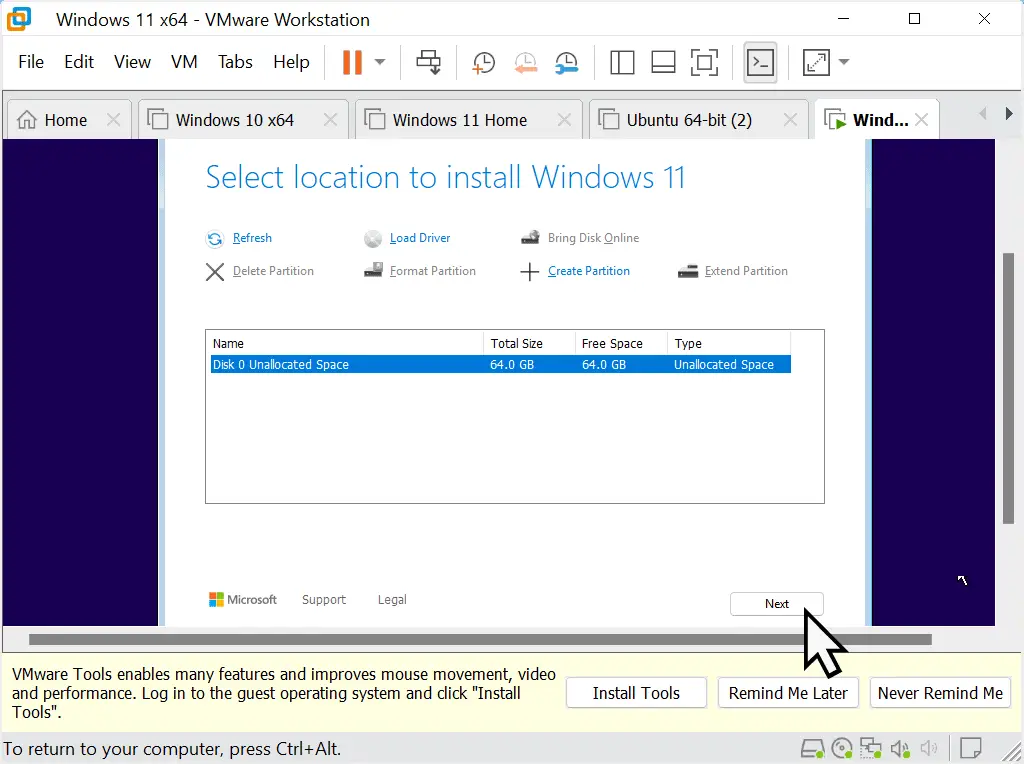
- Select Location refers the to hard drive that you want to install Windows 11 onto. Since this is going to be a virtual machine, it’ll install onto the virtual hard disk you created earlier in Workstation Pro. Click Next.
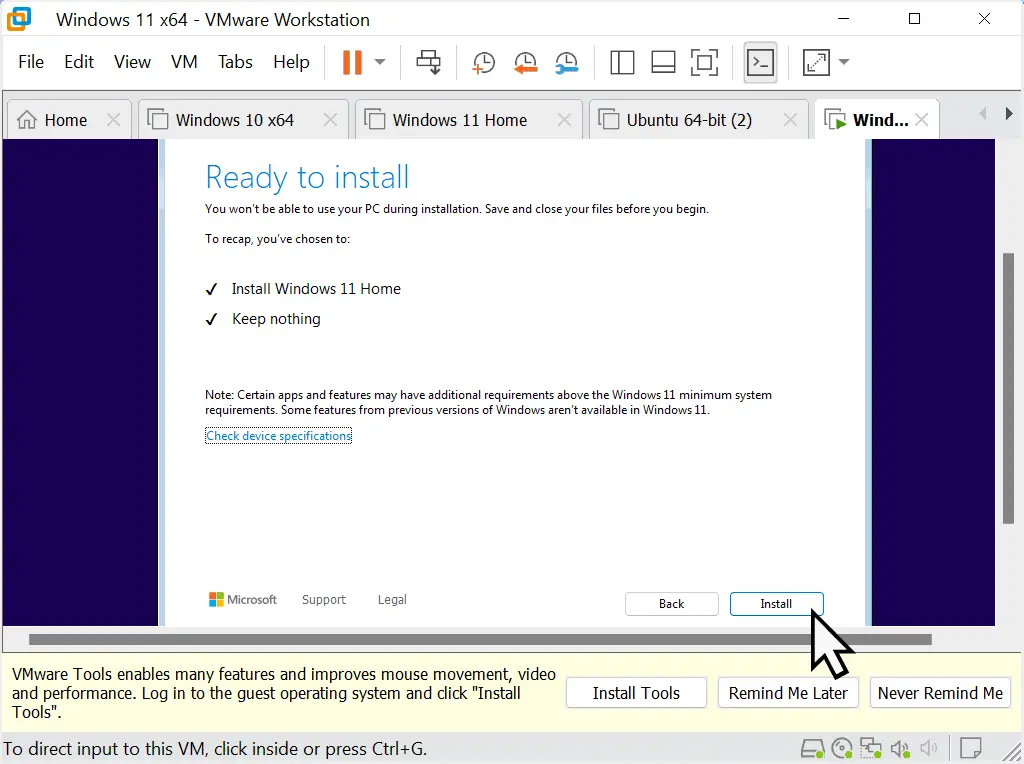
- Ready to install, click the Install button.
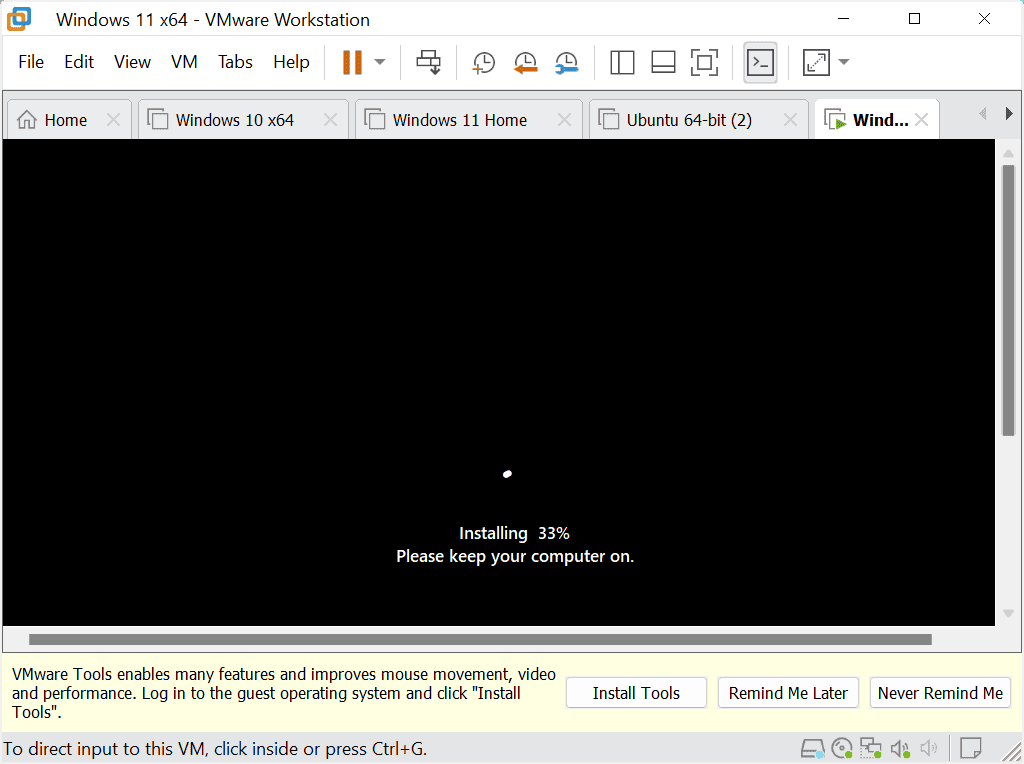
Windows 11 VM Installing On Workstation Pro.
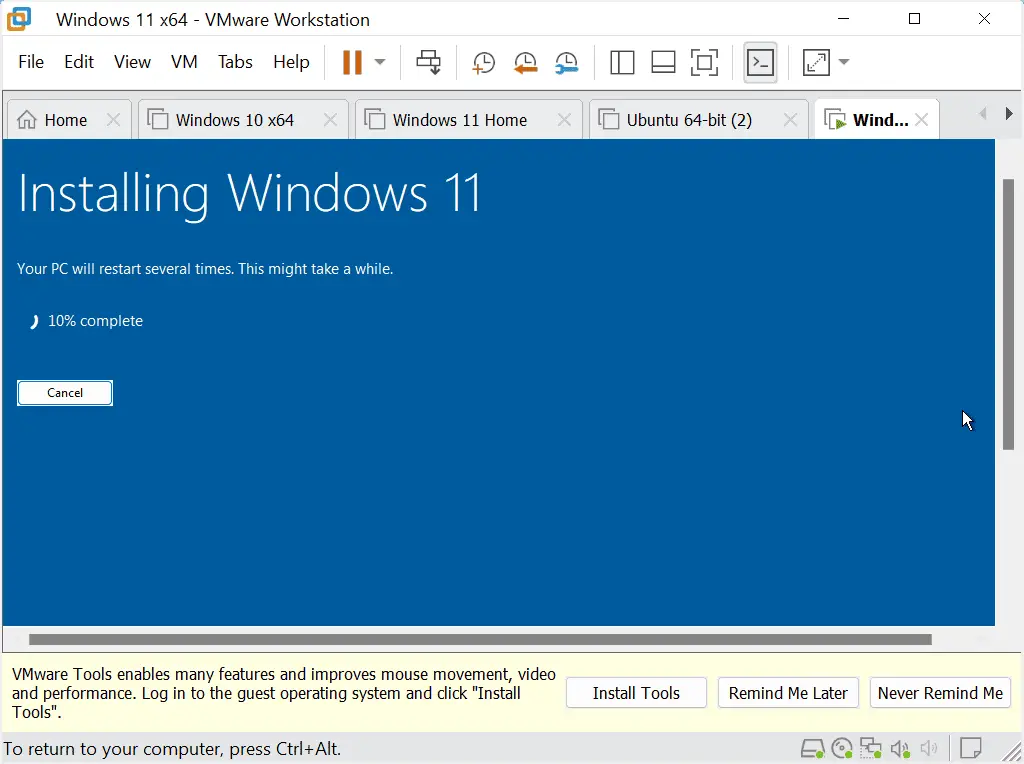
Installing Windows 11 as a virtual machine using VMware Workstation Pro is exactly the same as installing it onto a real computer.
The VM will restart several times and there’s nothing for you to do at this point. So sit back and let Windows do its thing.
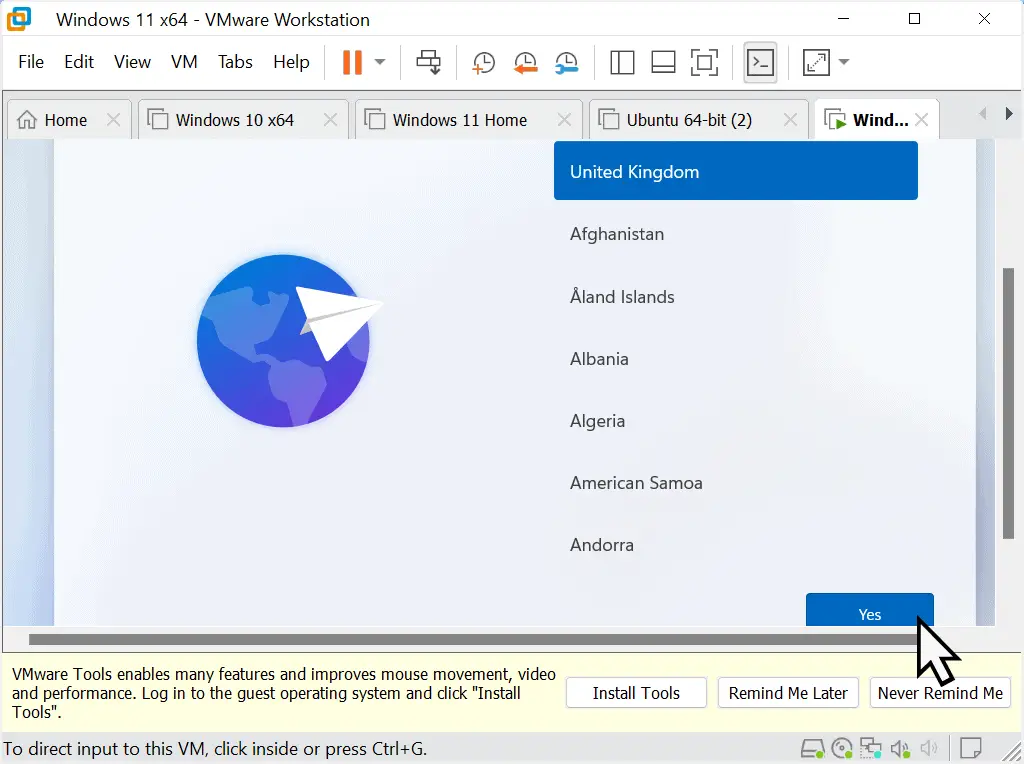
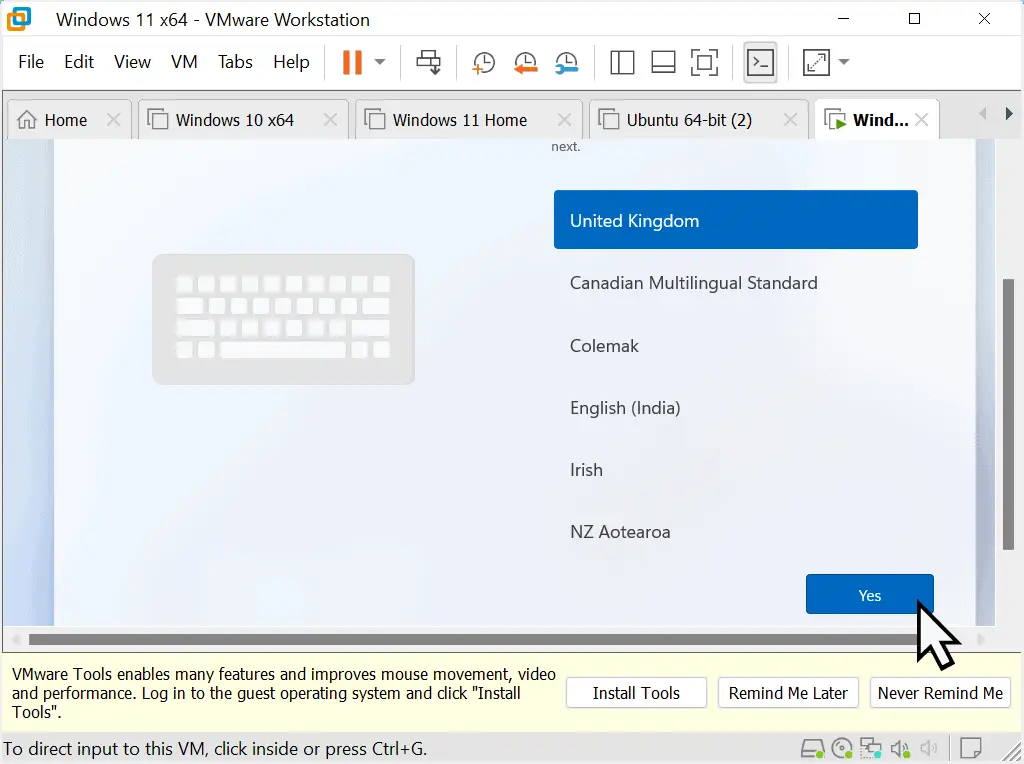
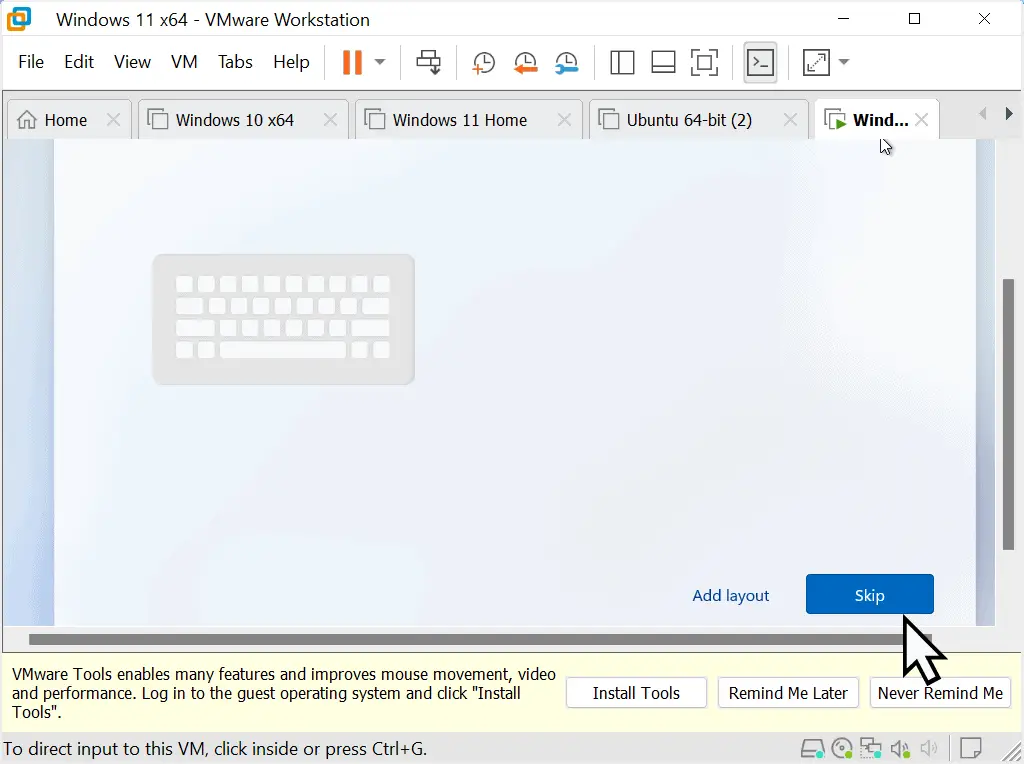
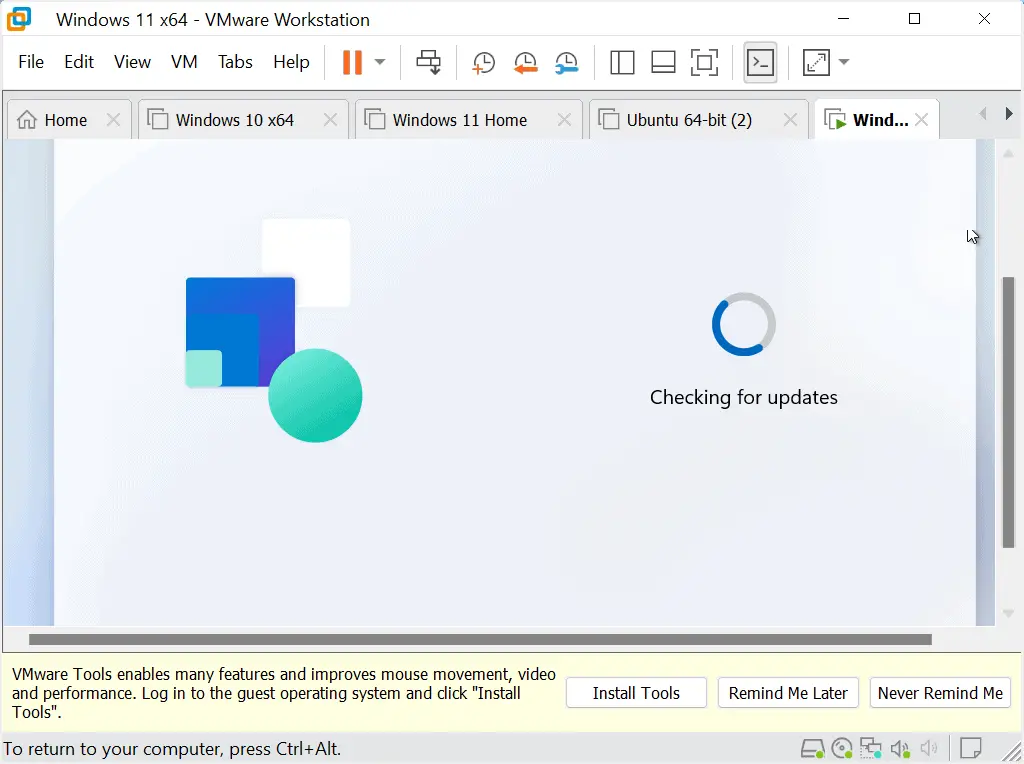
Select Country, Keyboard And Check For Updates.
After restarting a few times, Windows 11 setup will ask you to confirm your Country or Region and keyboard layout.
Name Your Device.
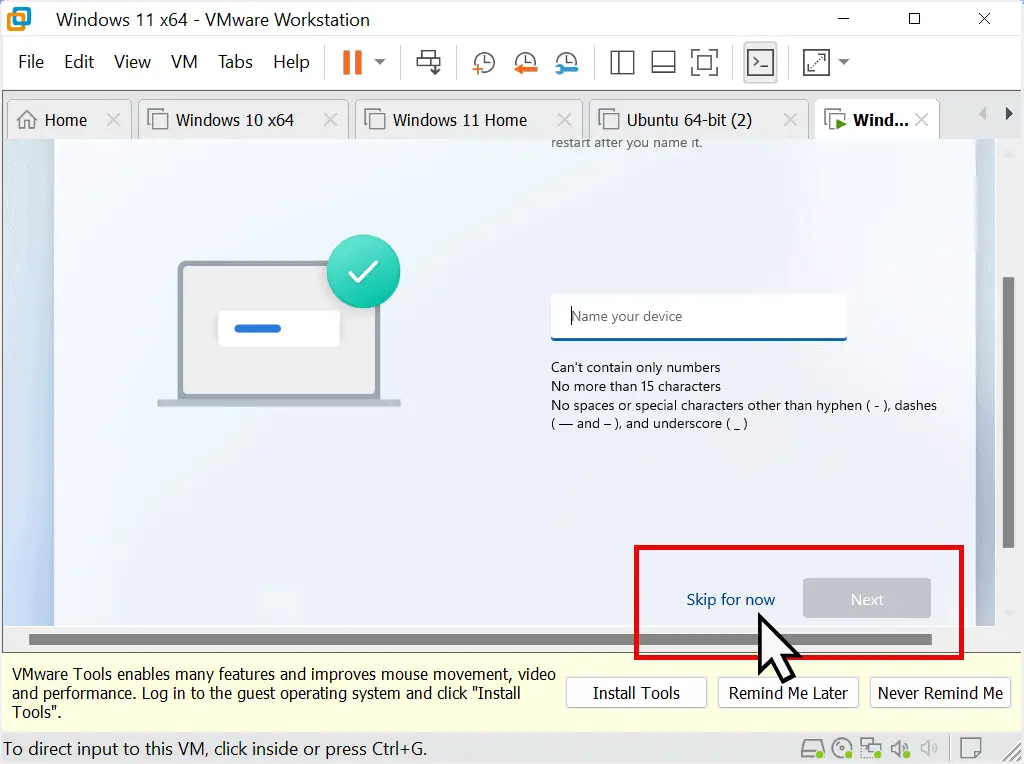
Windows 11 setup gives you the opportunity to name your device. It’s entirely optional. Naming a device like this simply helps you to find it on a network.
Type in a name and then click the Next button.
Or if you’re not intending to network your virtual machine, click the Skip For Now option.
Personally, I generally Skip for Now, you can always give your VM a name later if you decide you need to.
Related Posts.
If you are interested in setting up a home network with either your “real” computers or indeed a virtual PC, check out this guide.
Signing In With A Microsoft Account.
When installing Windows 11, you don’t have the option of using a local account. You have to sign in to a Microsoft account. That’s well known by now.
The same happens when you’re setting up Windows 11 as a virtual machine. So what should you do?
Since this is a virtual computer, I’d advise against using your regular MS account (assuming you have one) to sign in. It really all depends on what you intend to use the VM for. But as a general rule, I like to keep my virtual computers separated from my regular online accounts.
I keep several accounts with both Microsoft and Google that I can use for virtual computers.
Essentially you have 3 options –
- Sign in to your Microsoft account.
- Create a new Microsoft account
- Use a workaround to sign in to a local account.
It’s entirely up to you which you choose. For the remainder of this guide, I’ll use a local account.

Signing In With A Local Account.
There are various workarounds to avoid signing in to Windows 11 with a Microsoft account. I have a guide here that you can follow that always works. It’s quick and easy to do.
Windows 11 Privacy Settings.
After you’ve signed in to your virtual computer, whether that be with a Microsoft account or local account, the next few screens that you’ll see regard what data Microsoft can collect about you.
For me, I’d rather they didn’t collect any data at all. So it is up to you which choice you make. But I’d suggest you select the least invasive options.


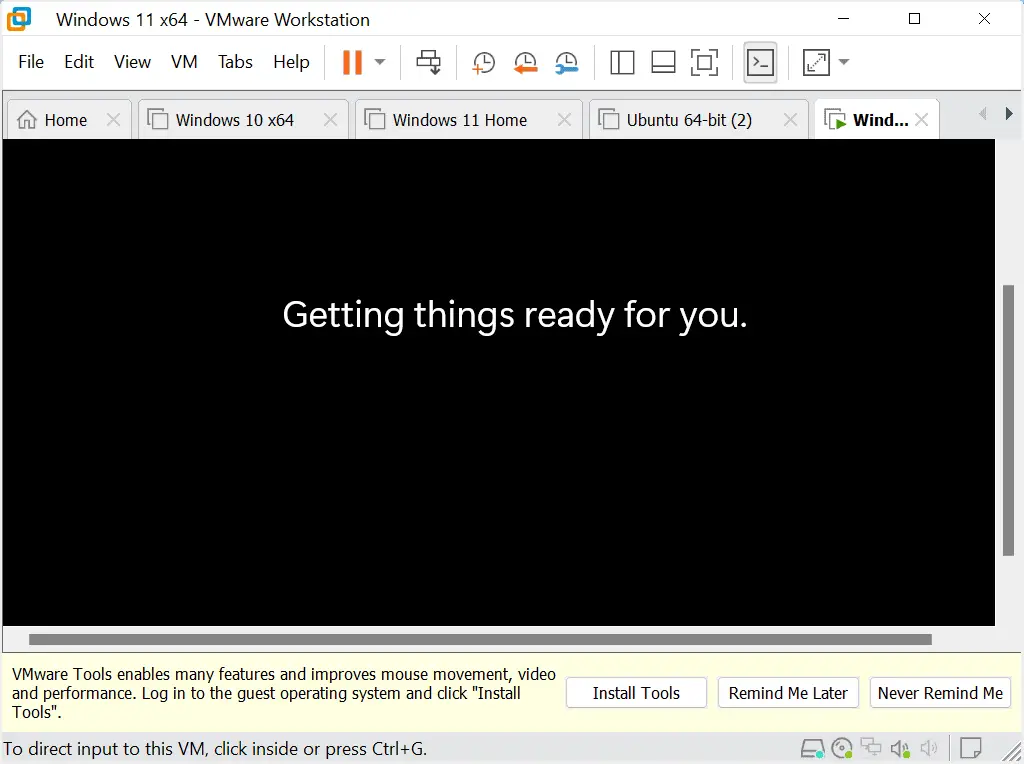
After a few restarts and a bit of behind the scenes setting up, Windows 11 will start up as a brand new virtual machine.
Brilliant.

Install VMware Tools.
Now that you’ve successfully setup Windows 11 as a virtual computer in Workstation Pro, there’s just a couple of jobs left to do.
The first is updating Windows. If you’ve connected your VM to the Internet, that’ll start automatically in the background. Just as it would for a real computer.
Because this is a virtual machine, you’ll need to install the virtual drivers for it. VMware calls these drivers VMware Tools.
Because this is a virtual machine, you’ll need to install the virtual drivers for it. VMware calls these drivers VMware Tools.
Click the Install Tools button.
When you do that, the Tools will be loaded into a virtual DVD drive.

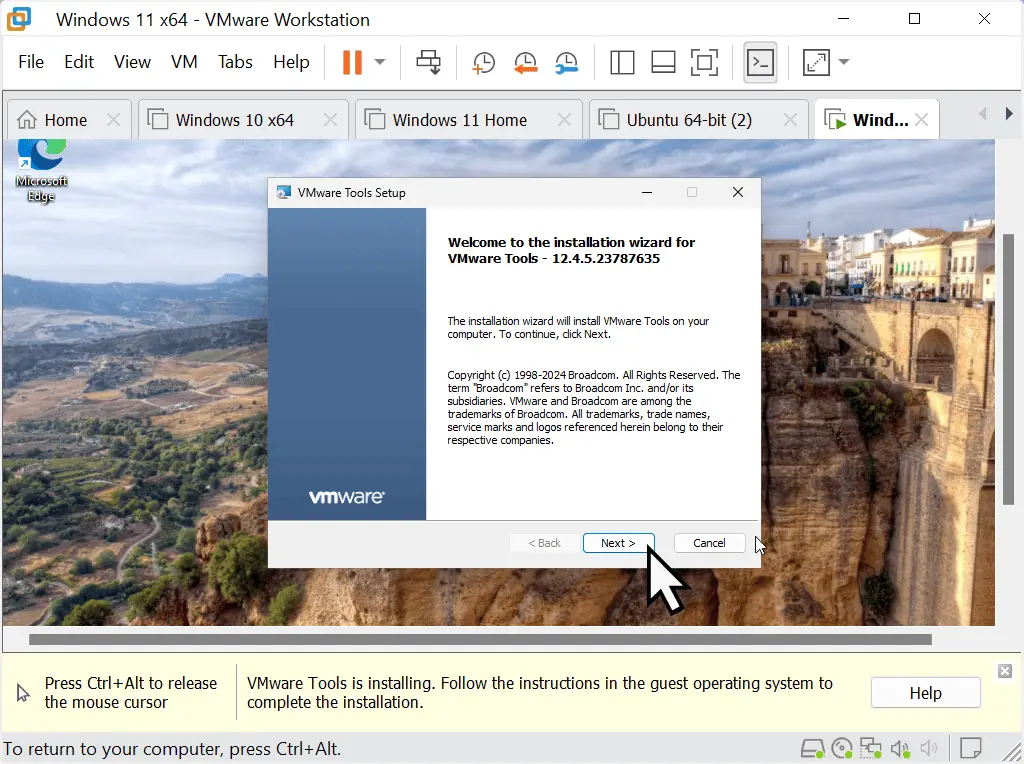
Click on the Autoplay notice in the bottom right hand corner and then click Run Setup.exe.


The VMware Tools installation wizard will open. You can accept all the default settings.
When the wizard finishes installing VMware Tools onto your Windows 11 virtual machine, restart it and you’re ready to go.


Summary.
After a final restart your new Windows 11 virtual machine will be all setup and raring to go.

