How to fix Install VMware Tools is greyed out and can’t be installed.
VMware Tools is a set of virtual drivers that need to be installed onto the guest operating system (virtual machine) when using VMware Workstation Pro as the hypervisor. They add extra functionality and communications between the host and guest systems.
Typically you’d install the Tools shortly after creating your virtual machine, but sometimes the Install VMware Tools is greyed out and disabled.
In this guide I’ll show you how fix the problem and get VMware Tools installed on to your virtual machine.
Install VMware Tools is Greyed Out
After creating a virtual machine using VMware Workstation (or the older VMware Player) you might notice that the option to install VMware Tools is greyed out. You can’t install the Tools. When you click the option nothing happens.
This issue seems to happen more often when installing older versions of Windows as the guest OS.
Windows 7, Vista and XP are typical, but you might run into this issue with other operating systems.

Windows 7 Not Updating
If you’ve installed Windows 7, either as a virtual machine or onto bare metal, you’ll almost certainly run into the problem of Windows Updates not working. Follow this guide to get all available updates How to Fix Windows 7 Updates Not Working 2026
How to Fix Install VMware Tools is Greyed Out
In order to fix Install VMware Tools is greyed out:
- Shutdown the guest operating system (virtual machine).
- Select the virtual machine in the left hand panel of Workstation Pro.
- Right click it to open the options menu.
- Left click on Settings.


Remove Virtual CD/DVD and Virtual Floppy Drives
In the Settings, make sure you’re on the Hardware tab, then select and remove each CD/DVD drive and floppy drive.
To fix VMware Tools greyed out you need to remove all the virtual CD/DVD drives and also any virtual floppy drives that are installed.

Add a New Virtual CD/DVD Drive
VMware Tools is downloaded as a CD image file (ISO), so after removing all the existing optical drives, you’ll need to add a new one so that you can mount the VM Tools image:
- On the Settings page, click the Add button.
- The Add Hardware Wizard will open.
- Select CD/DVD Drives and then click the Finish button.
- Close the Settings windows and re-start your virtual machine.


VMware Tools isn’t Greyed Out
After the virtual machine has fully loaded up try installing the Tools.
You’ll find that the Install VMware Tools option isn’t greyed out any longer and is now available.

Installing VMware Tools On Windows 7, Vista And XP VMs
If you’re virtual machine is either Windows 7, Windows Vista or Windows XP, you might find the the Tools will fail to install properly.
How To Fix Windows 7 Updates Not Working 2025
For Windows 7 VMs the most likely reason is that the OS is missing some updates.
How To Install VMware Tools On Windows XP And Vista VMs.
The latest version of VMware Tools no longer supports XP and Vista Virtual machines.
Summary
I run quite a few virtual machines on Workstation Pro, and I’ve never seen VMware Tools greyed out when setting up Windows 10 and Windows 11 VMs. Nor have I seen it happen for various Linux distros.
It only seems to be a problem with older versions of Windows. I’m not sure what’s happening but just deleting the virtual CD/DVD drive and then creating a new one always solves the issue.
Related Posts
Convert A Physical PC To A Virtual Machine On Workstation Pro
Convert a running physical computer into a VM to run on Workstation Pro.
Virtual Machine Snapshot In Workstation Pro
Create Snapshots of your virtual machines so that you can undo any major changes.
Backup Workstation Pro Virtual Machines.
After taking the time to setup a virtual machine in Workstation Pro, before you do anything else, back it up.
Windows 11 Virtual Computer
Create a Windows virtual machine. It’s free and not that difficult to do.
Virtual machines are great for experimenting with. You can try out new operating systems, you can browse the web safely and open suspicious emails. Download new software to try it out, all without risking your host (real) computer.
Setup a Windows 11 VM even if your current PC doesn’t currently support it.
You can find this and other related step by step guides in – At Home Computer VMware Guides
At Home Computer Step By Step Guides
![]() Easy to follow tutorials for users of Windows 10 and Windows 11 computers.
Easy to follow tutorials for users of Windows 10 and Windows 11 computers.

Gmail Storage Full? Here’s Why (and How to Fix it)
A Beginner’s Guide to File Formats and File Extensions

How to Protect Your Data When Sending Your PC in for Repair

Why I Use Virtual Machines and You Should Too
How to Install Windows XP as a Virtual Machine on VMware Workstation Pro
Is VMware Player Coming Back?

How to Setup OneDrive to Backup Your Files
OneDrive allows you to backup files to the cloud. It…

How to Share a Folder in OneDrive
One of the best features of OneDrive is the ease…
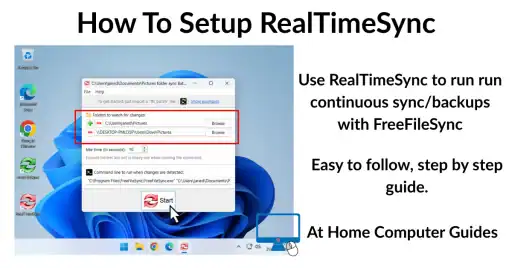
How to Setup RealTimeSync
RealTimeSync is a companion tool for the popular sync program…