How to download a Windows 7 ISO image file in 2025. Since Microsoft has removed all download links for Windows 7 from its servers. The question now is, how can you download a Windows 7 ISO file when you need one?
In this guide I’ll show you how to get a clean, untouched, original Windows 7 ISO file from Dell that still works in 2025.
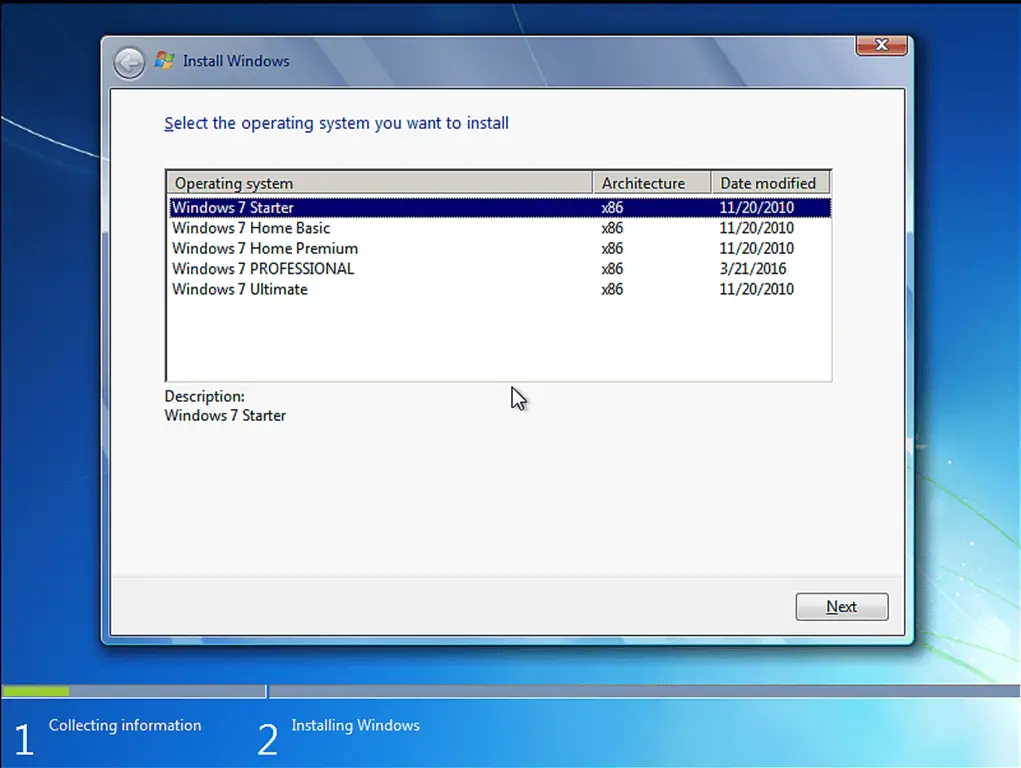
The image will be the Windows 7 Pro version, but you can easily change it into a multi edition ISO that contains Windows 7 Home Starter, Home Basic, Home Premium, Professional & Ultimate.
You’ll need a 16 GB USB flash drive, an Internet connection and a Windows 7 serial key for activation.
How To Download Windows 7 ISO File.
Although Microsoft has removed all its download links for Windows 7, Dell still has them available, even now in 2025.
Officially, they’re there to support Dell products, laptops and desktops, that were sold with Windows 7 installed. However, these versions of Windows 7 can be installed on any PC, regardless of the manufacturer.
You’ll need to use the Dell OS Recovery Tool to get the image file and although it’s convoluted, what you’ll get is a clean, original copy of Windows 7. So it’s worth the effort.
The Recovery Tool is an automated tool that’ll download the required ISO file (Windows 7) to your computer, extract it, copy the files to a USB drive and finally delete the ISO image from your PC.
What we need to do is to grab a copy of the ISO image file before the Recovery Tool deletes it.
I’ll show you how to do it below.
Install The Dell OS Recovery Tool.
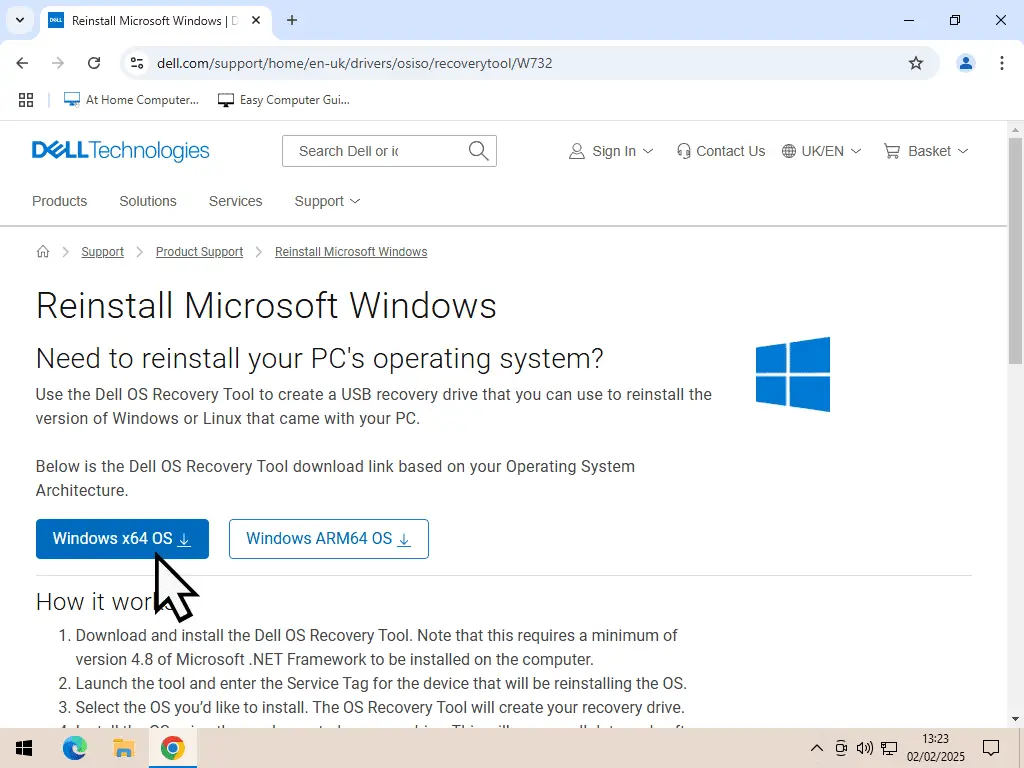
To download a Windows 7 ISO you’ll need to download and install the Dell OS Recovery Tool first. It’s the Recovery Tool that gives you access to the Windows 7 ISO files.
Plug in a USB flash drive (you’ll need that to make the Recovery Tool work properly) and then point your browser at the Dell support page here –
https://www.dell.com/support/home/en-uk/drivers/osiso/recoverytool/W732
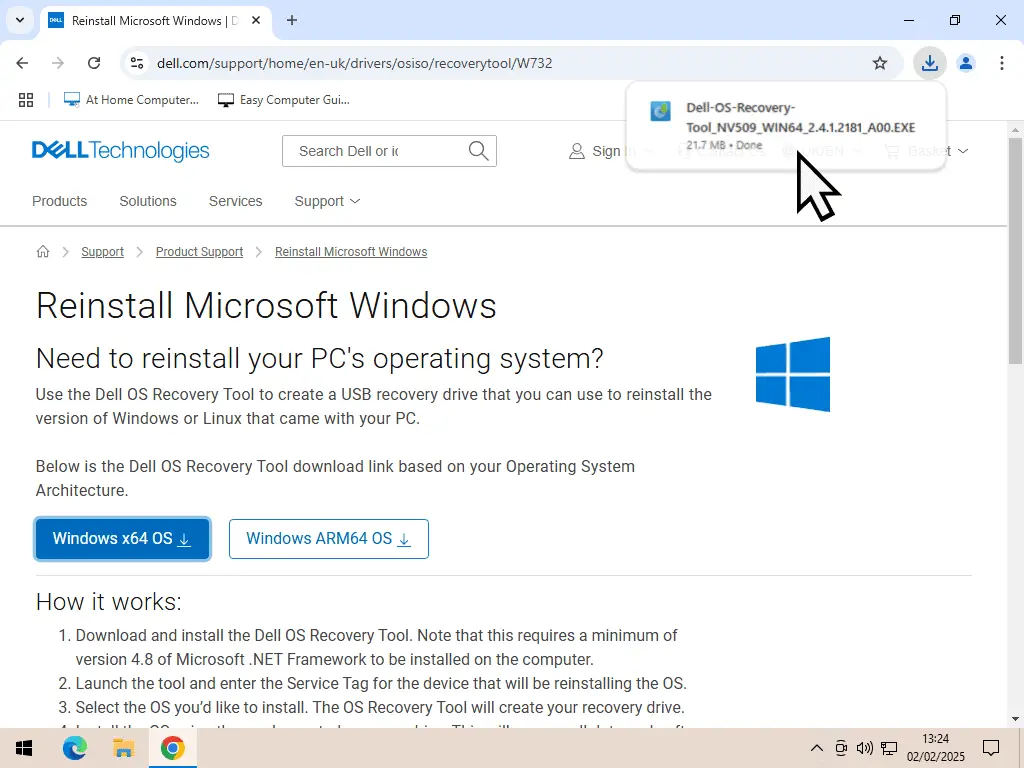
- On the Dell support page, click the Download button, Windows x64 OS.
- Then run the installer and install the Recovery Tool.
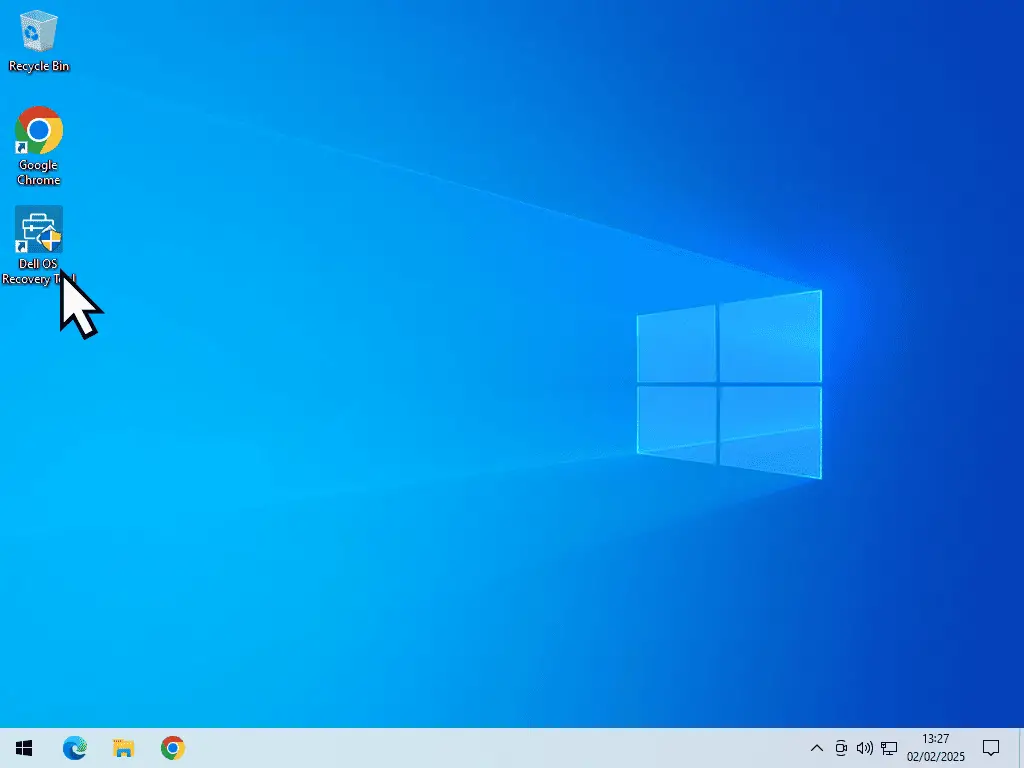
- After installation is complete, close your browser window and launch the Recovery tool from your desktop.
Getting Ready To Download Win 7 ISO Image.
As stated earlier, the Recovery Tool is an automated program that downloads the ISO file, then creates a bootable USB flash drive and finally it deletes the ISO file. All in one uninterruptable sequence.
So what you need to do is to grab a copy of the Windows 7 ISO before the Tool deletes it from your system.
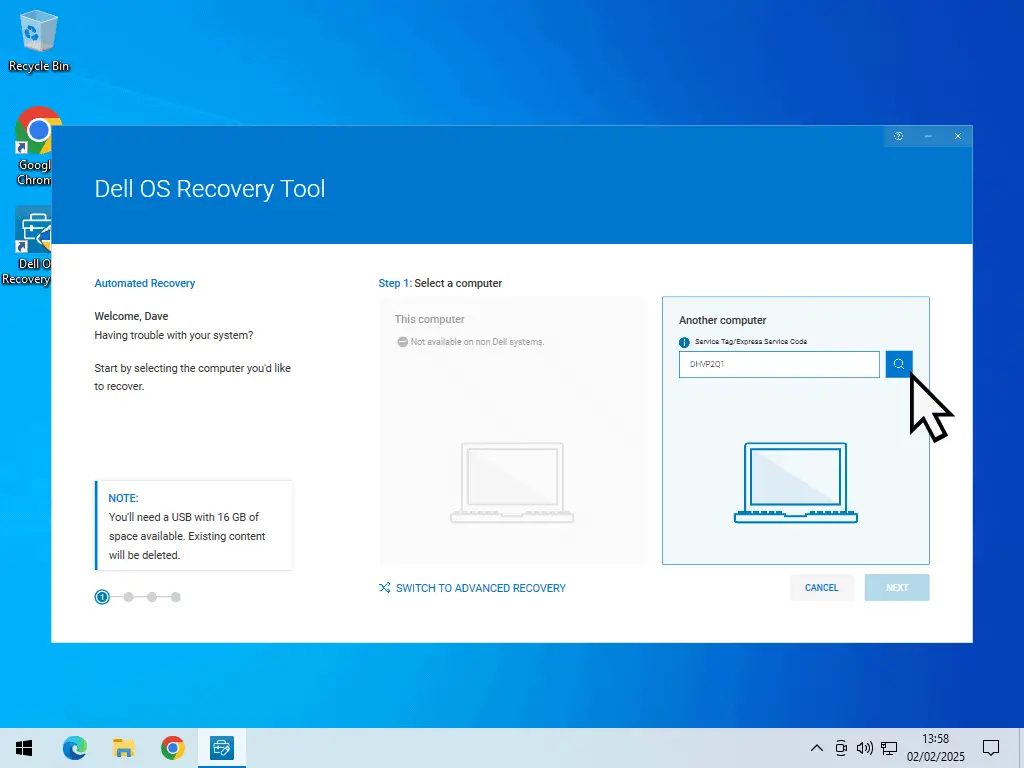
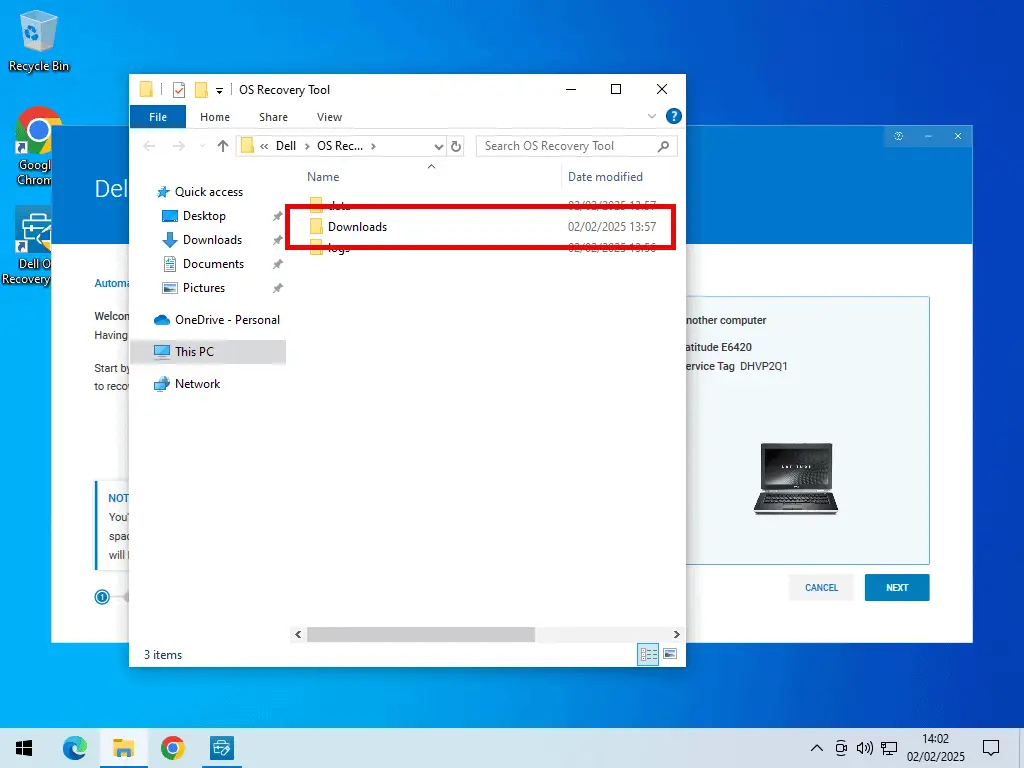
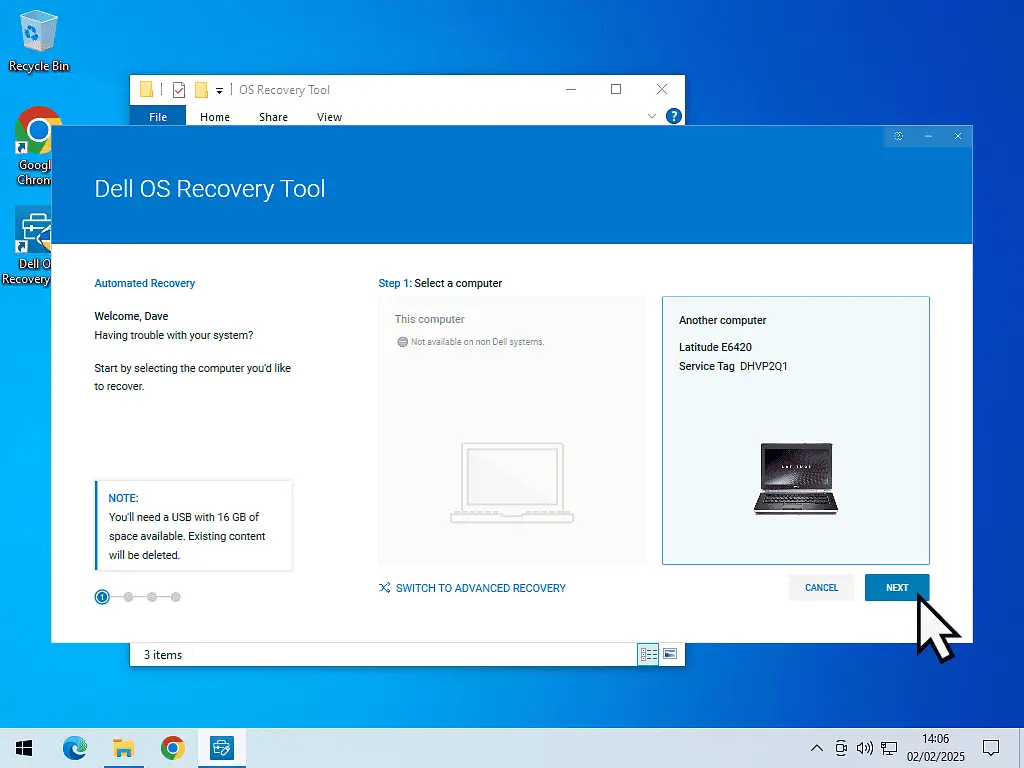
- When the OS Recovery Tool opens, select “Another Computer” and enter a Dell Service Tag number if you have one (if you don’t I have a couple below). Then click the Search icon. Do Not click the Next button yet.
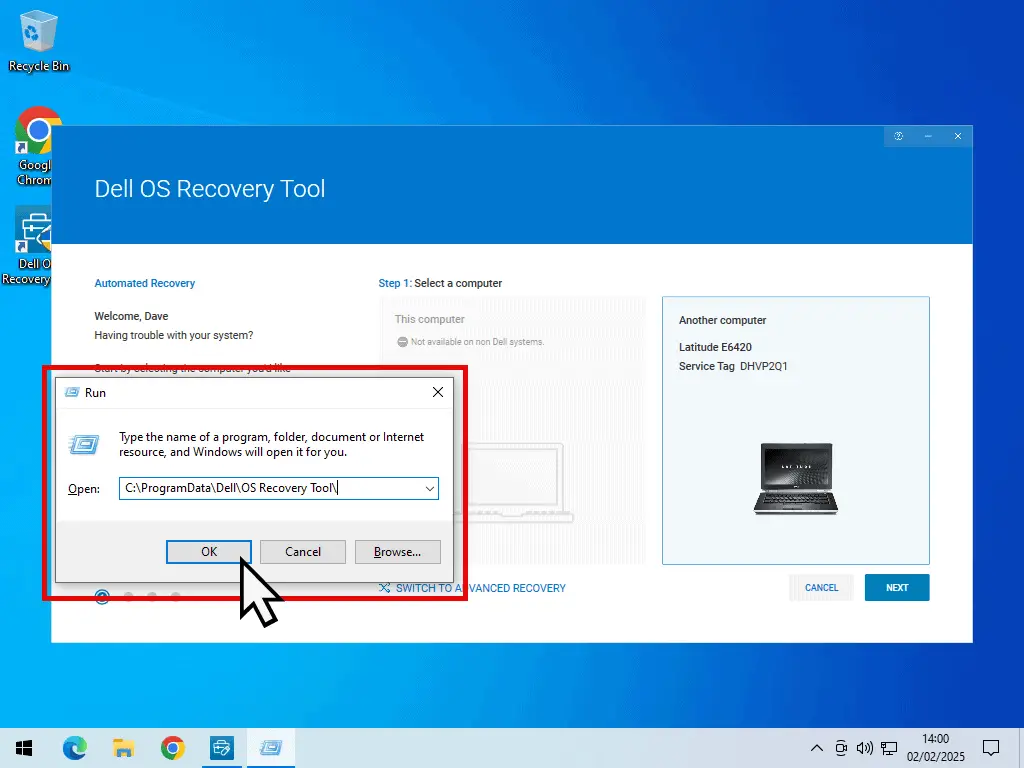
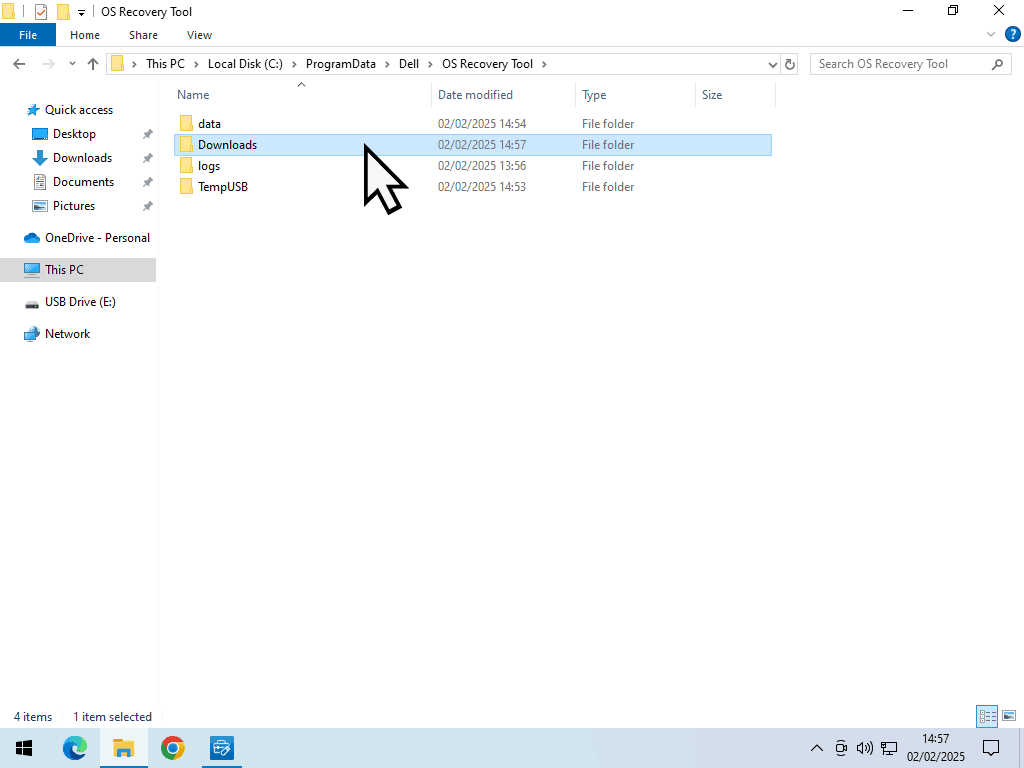
- Leave the Recovery Tool open and press the Windows key and the letter R on your keyboard to open the Run box. Copy and Paste C:\ProgramData\Dell\OS Recovery Tool\ into the Run box and then click the OK button.
- That’ll open an Explorer window. You’ll see a Downloads folder. This is where the Tool will download the Windows 7 ISO file to. There’s nothing in it yet, but you’ll need it in a few moments.
- Leaving the Explorer window open, go back to the OS Recovery Tool and click the Next button.
Service Tag Number.
Dell use a service tag to identify each and every PC that they make. What you need is a tag from a Dell windows 7 PC. If you have one, use that, if you don’t, you can use one of these.
Windows 7 32 bit ISO – DHVP2Q1 or 5Y9JKV1
Windows 7 64 bit ISO – DWK6PS1 or 5G5SNS1
Select A USB Drive To Download Windows 7.
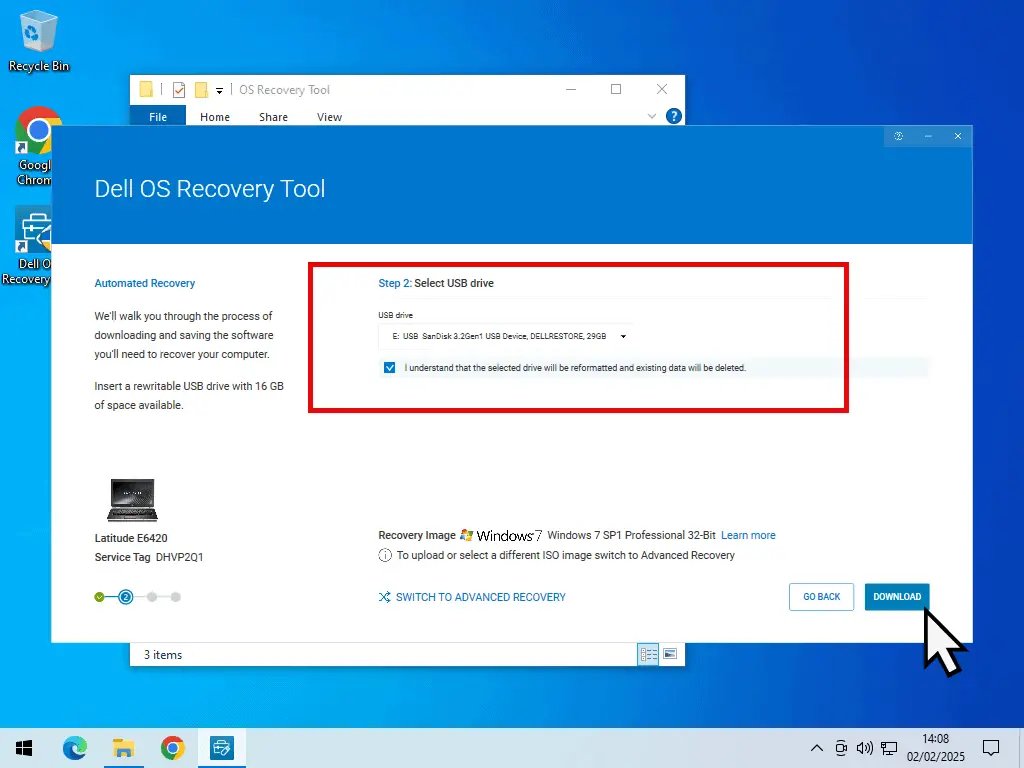
The OS Recovery Tool will select a USB flash drive to download Windows 7 onto. Make sure that it is the correct one that you want to use and change it if necessary by clicking the drop down arrowhead and selecting another one.
Check the box for “I understand that the selected drive will be reformatted and existing data will be deleted”. Then click the Download button.
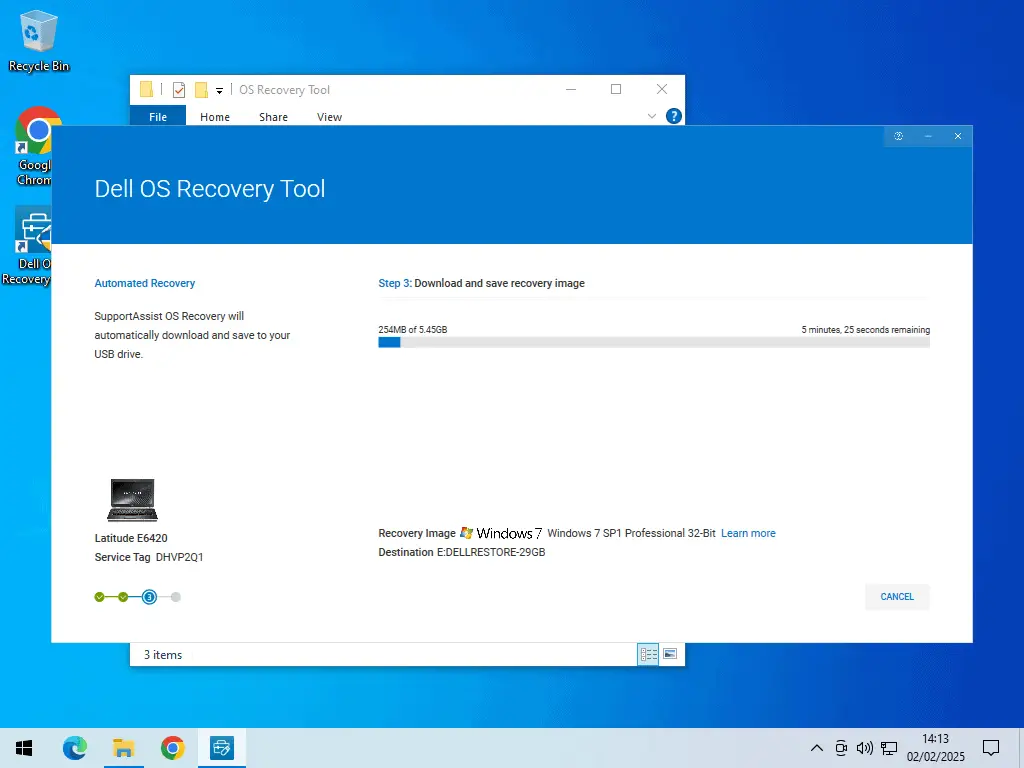
The Windows 7 ISO file will start downloading. Don’t walk away from your computer. You need to watch the download progress.
Copy The Windows 7 ISO Image.
- After the download is complete, the Recovery Tool will begin verifying the Windows 7 image file.
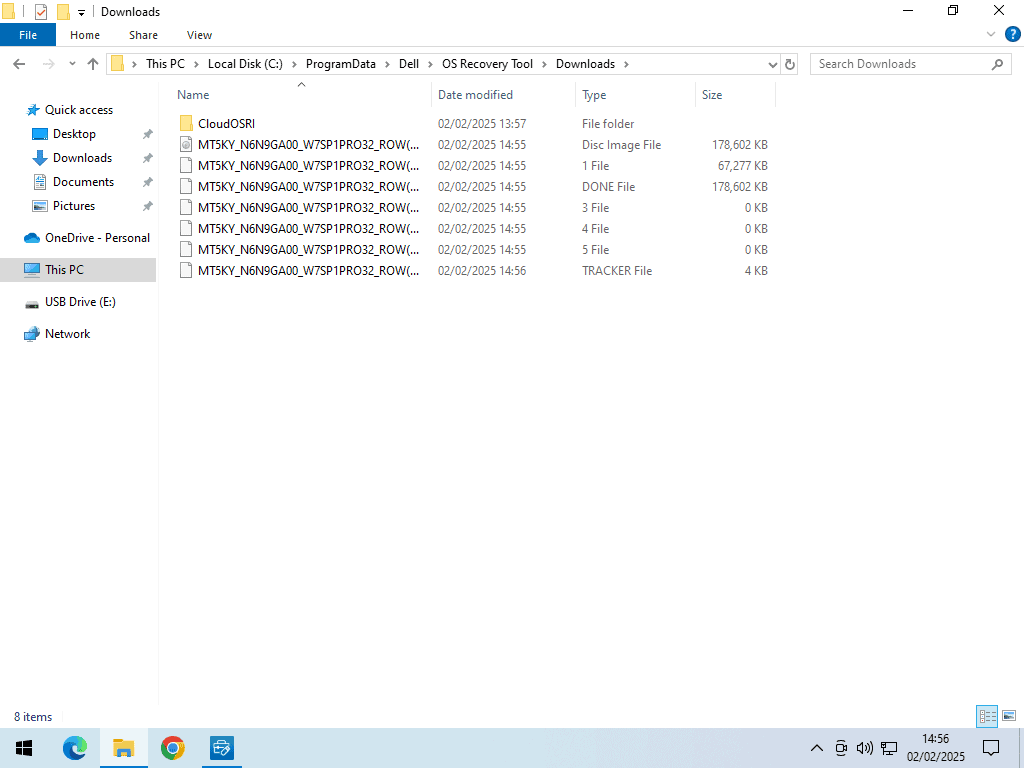
- As soon as that begins, go to the Explorer window you opened earlier (C:\ProgramData\Dell\OS Recovery Tool) and open the Downloads folder. Click the Continue button to grant yourself permission to open the folder.
- Inside the folder, you’ll see several ISO files. Wait a moment or two and all the files will be merged into just a single ISO file.
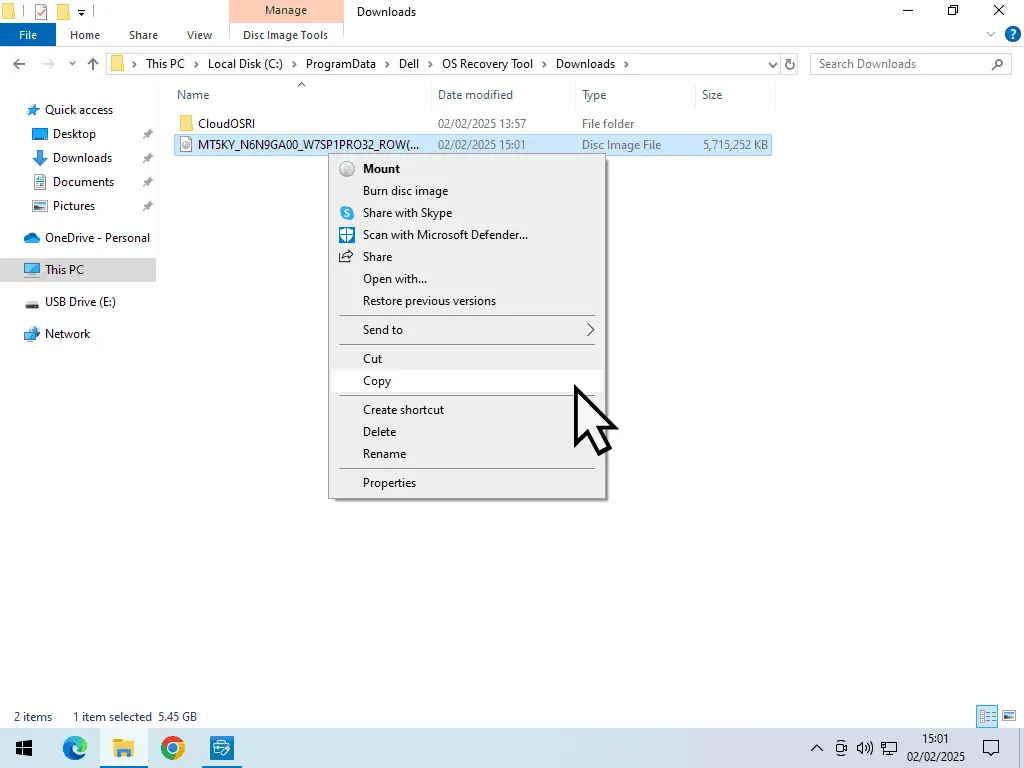
- When there is just a single Windows 7 ISO file, copy and paste it into a different folder on your PC, for example, on your desktop.
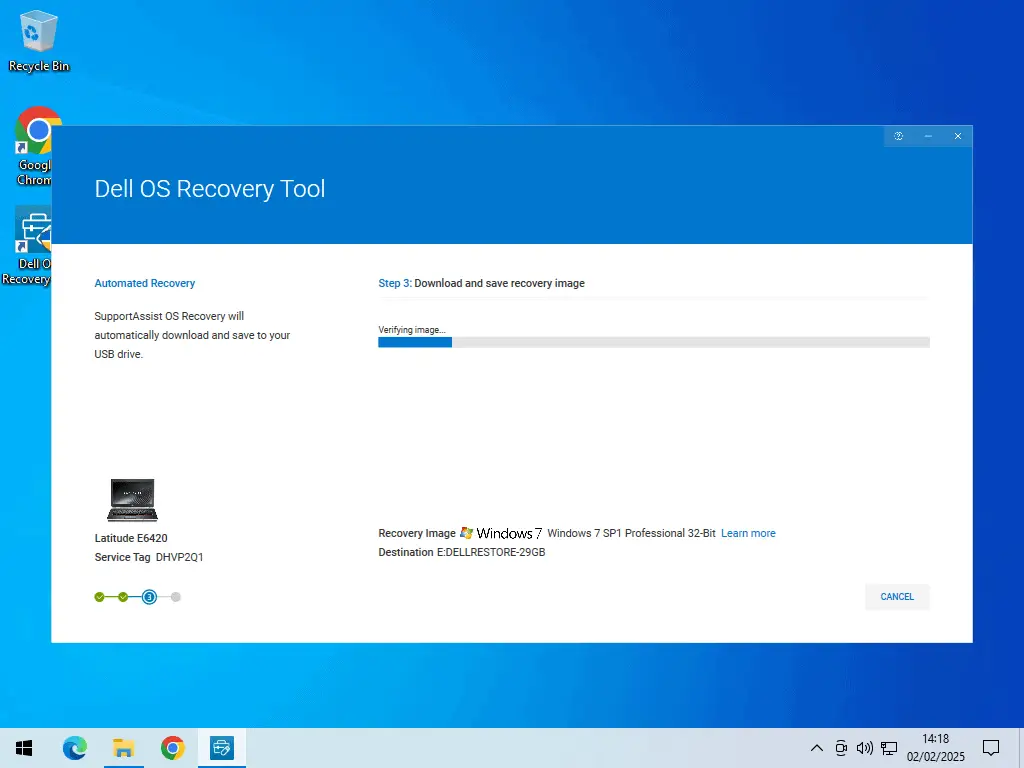
The OS Recovery Tool will continue working in the background.
There’s nothing that you can do other than let it finish.
After it has finished, it’ll delete the Windows 7 ISO file from the Downloads folder.
That’s why you need to be quick to grab a copy of it.
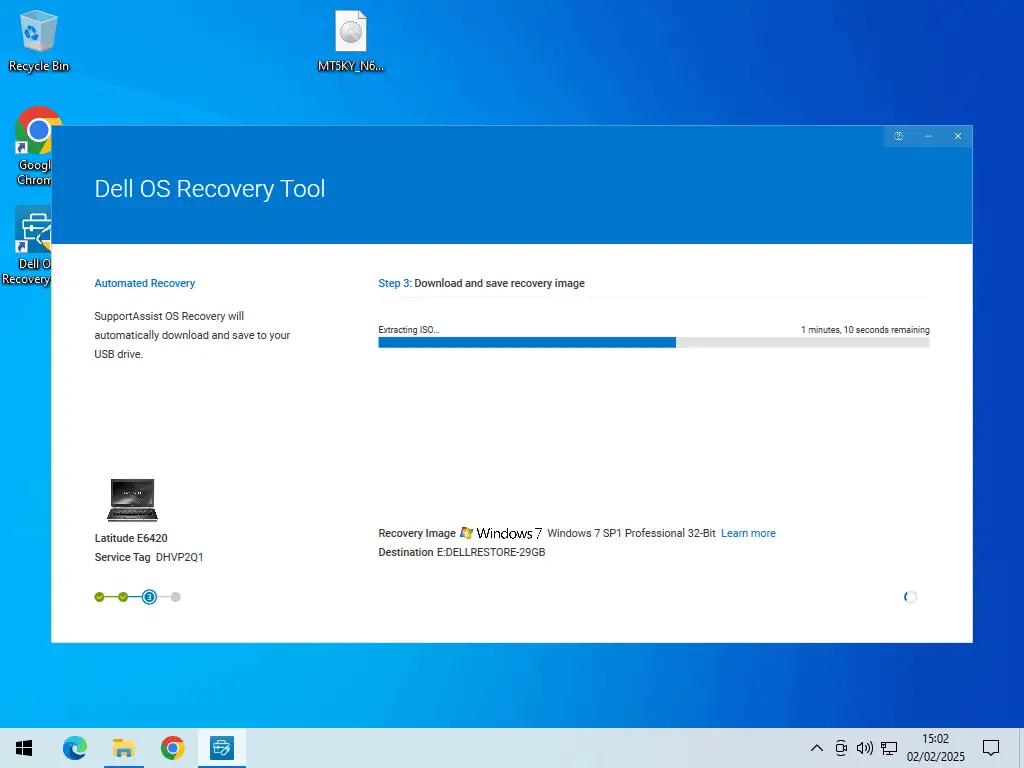
Windows 7 ISO File & Bootable USB Flash Drive.
Once the OS Recovery Tool has finished, you’ll have a Bootable USB flash drive which you can use to install Windows 7 Pro onto a bare metal computer.
And you’ll also have a Windows 7 Pro ISO file (the one you copied and pasted earlier) that you can use to create a virtual computer using VMWare Workstation Pro or VirtualBox.
Create A Multi Edition Windows 7 Flash Drive.
The bootable flash drive that the Recovery Tool creates will install Windows 7 Pro edition. However, the flash drive contains Windows 7 Home Basic, Home Premium and Ultimate editions.
To change the USB flash into a multi edition drive, all you need to do is to delete the ei.cfg file from the drive.
- Open File Explorer and then double click the USB flash drive that you used earlier for the Dell OS Recovery Tool.
- Then open the Sources folder.
- Delete the file named “ei.cfg“.
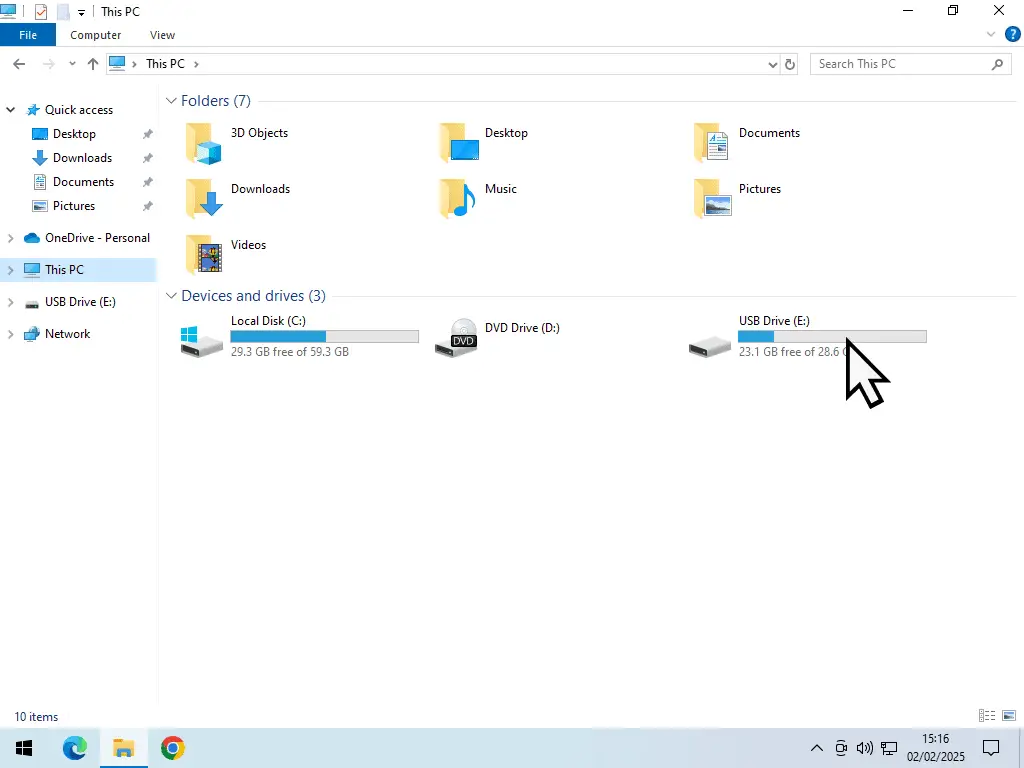
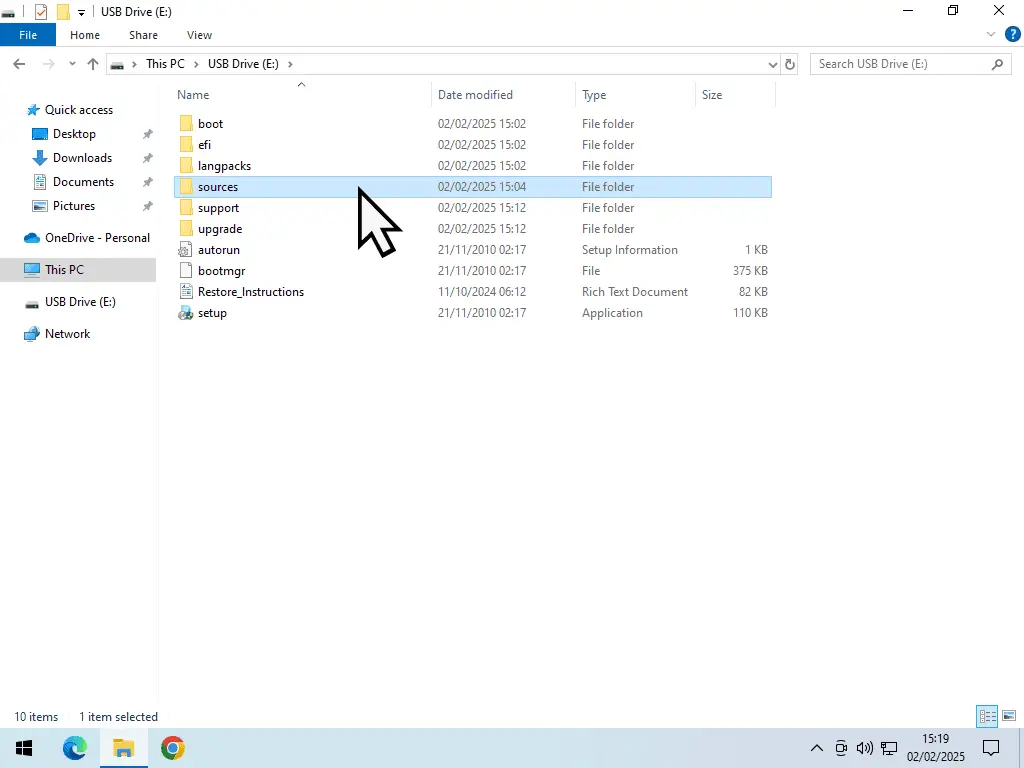
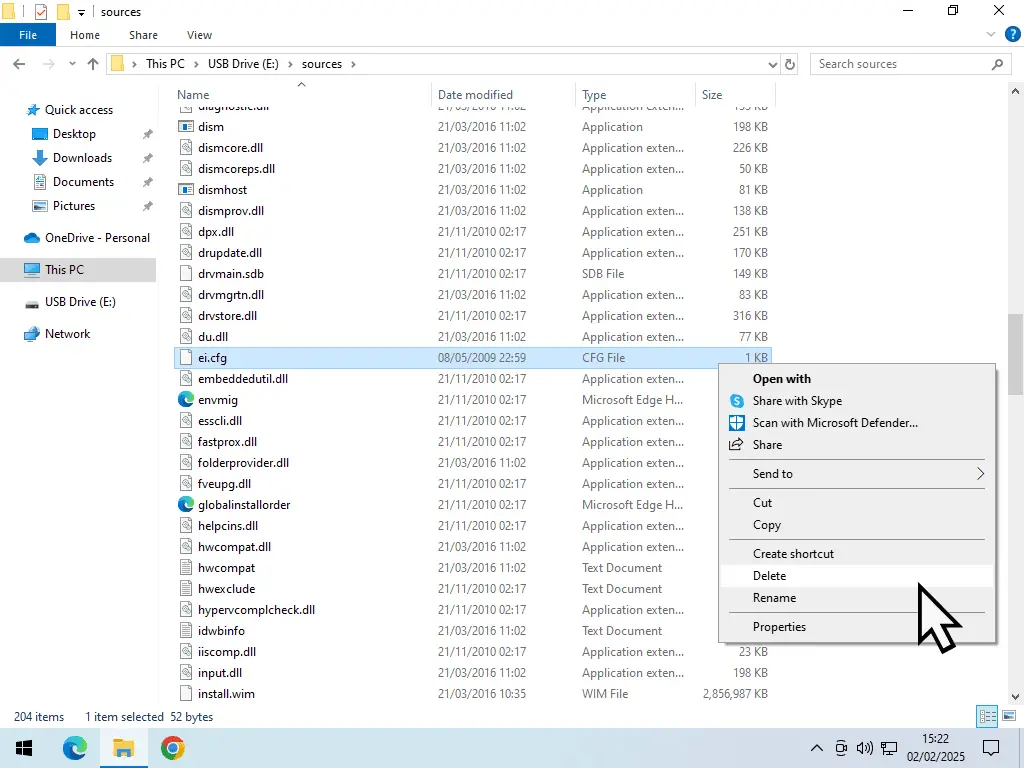
That’s it. You now have a bootable Windows 7 multi edition USB flash drive. Brilliant. Now for the ISO file. That’s a little more complicated, but not that much. I’ll show you how to do it below.
How To Create A Multi Edition Windows 7 ISO File.
The ISO image file that you copied and pasted earlier will also only install the Pro edition of Windows 7 until you remove (delete) the ei.cfg file.
However that becomes a little more tricky when you’re dealing with ISO files.
To do that, you’ll need to open the ISO file in a program that can edit ISOs. If you’ve already got something that can edit ISOs, you can use that. If not, then download and install the free edition of AnyBurn.
You can download AnyBurn from the link below. It’s free and will get this job done.
https://www.anyburn.com/download.php
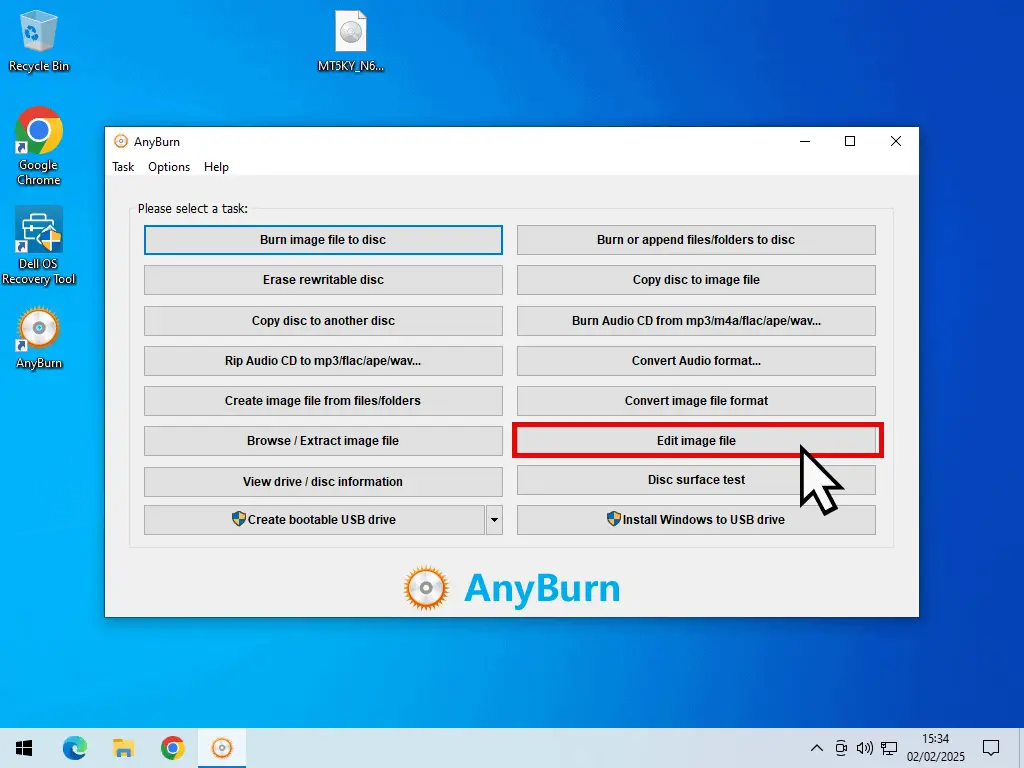
Once you’ve got AnyBurn installed, open it and then click Edit Image File.
Edit The Windows 7 ISO File.
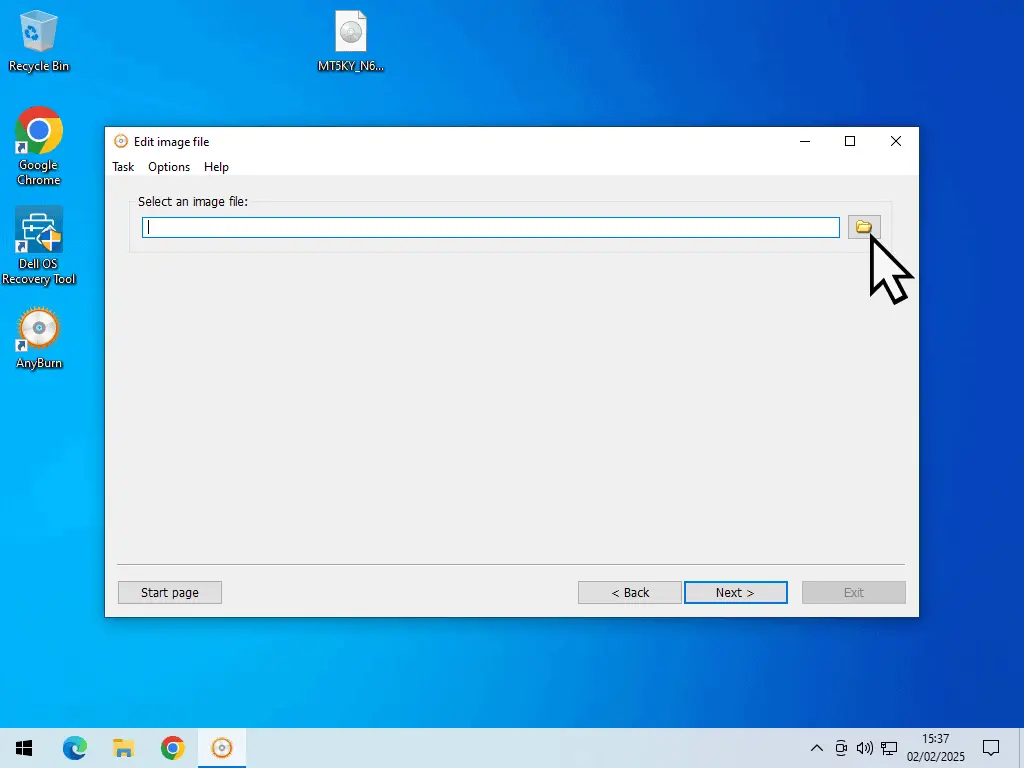
- Click the Browse button and then navigate to wherever you saved the Windows 7 ISO file that you copied and pasted earlier.
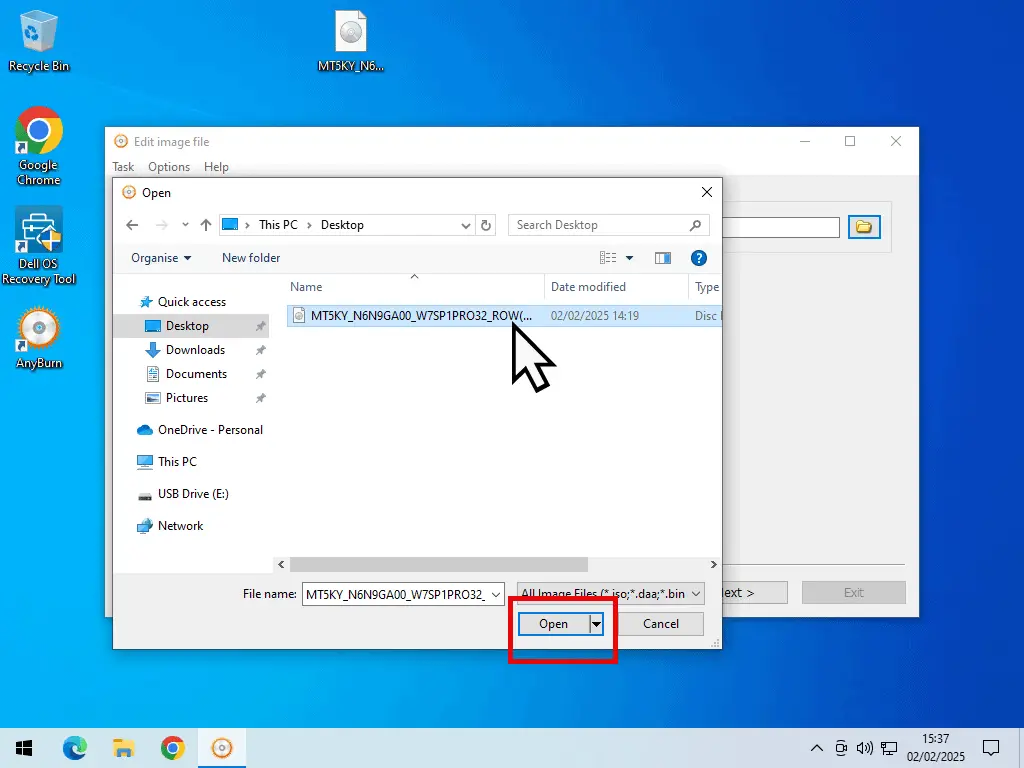
- Select the file and then click the Open button. Then click Next.
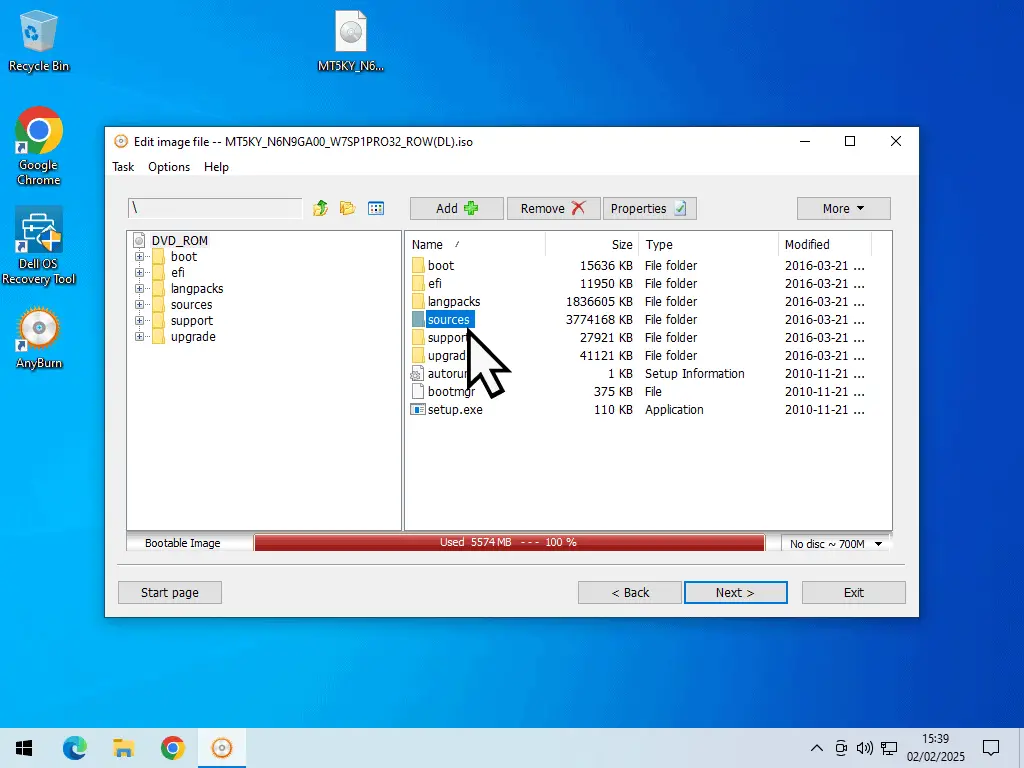
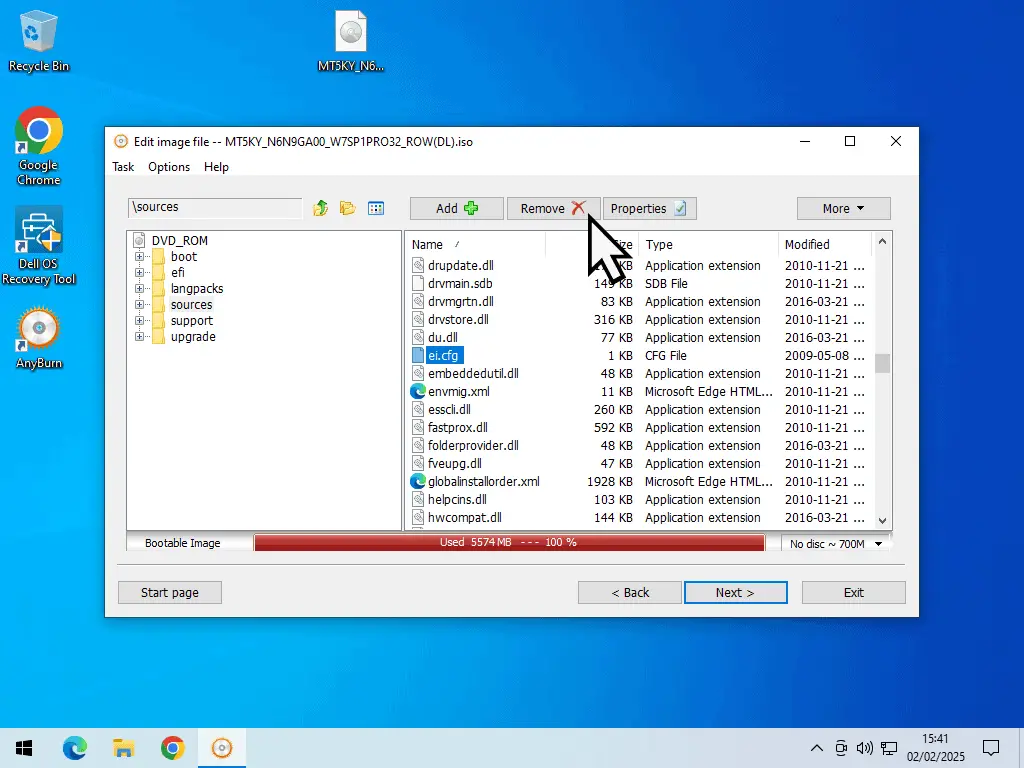
- In the right hand panel, open the Sources folder and scroll down the list of files until you find the “ei.cfg” file.
- Select ei.cfg and then click the Remove button. AnyBurn will ask if you’re sure, just click Yes.
Rebuild The ISO.
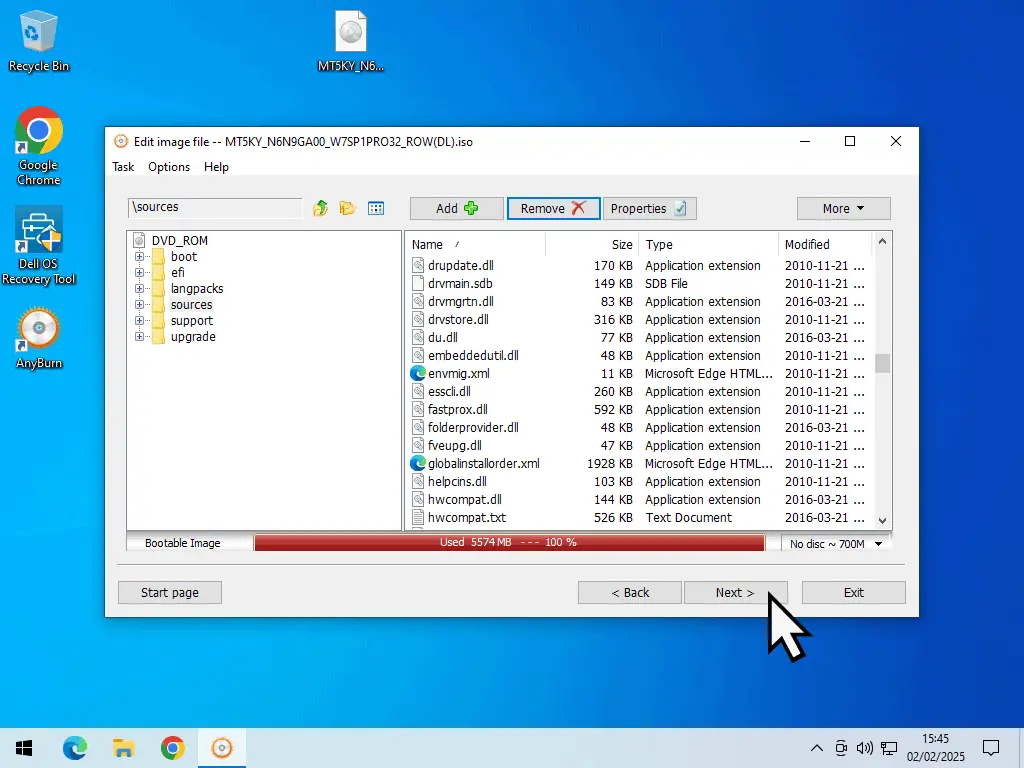
After deleting the file, you need to rebuild the ISO image file.
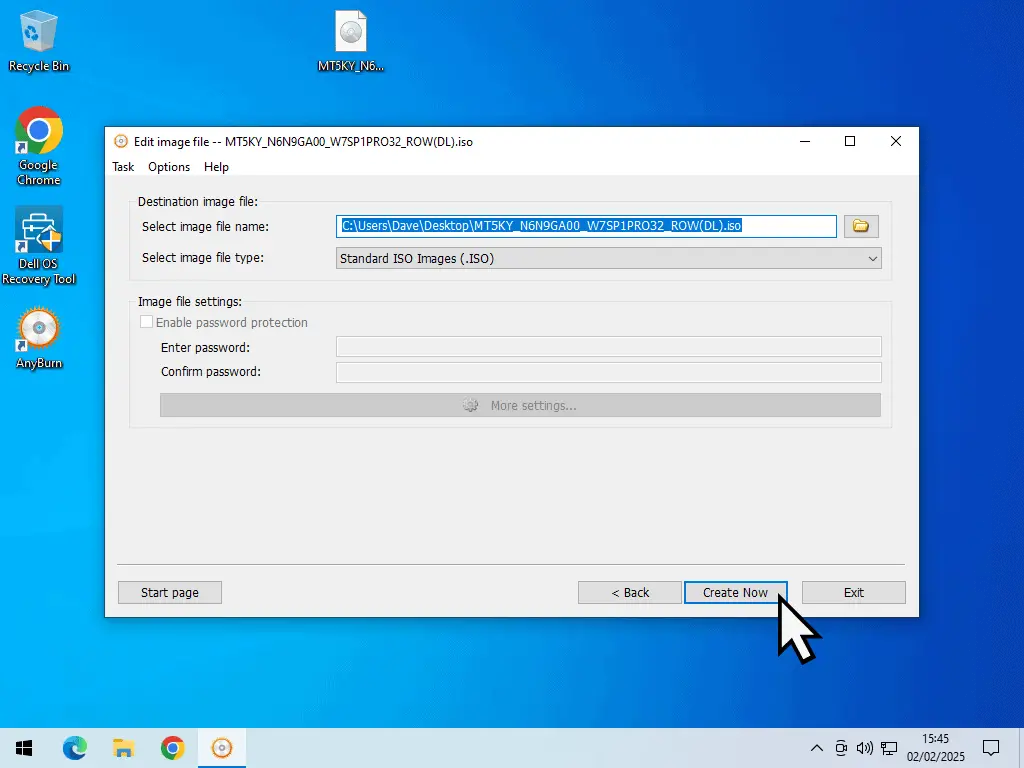
Click the Next button. On the next page, click the Create Now button. AnyBurn will ask if you want to overwrite the original image file, click the Yes button.
When the ISO file has been rebuilt, you’ll have a multi edition Windows 7 ISO file that’s perfect for a virtual machine.
Summary.
Obviously, if you have an original Windows 7 DVD, you could easily create your own ISO from that. And that would be my first choice.
But assuming that you don’t have a DVD to hand, then using this download from Dell is probably the safest way to get an original Windows 7 ISO file now that Microsoft have removed all links.
Stay Informed. Stay In Touch.
Now that you’ve found me, keep in touch. I publish new articles and update older ones constantly.
Let me send you a monthly email with all the latest guides for you to see if there’s anything you’re interested in.

