How to increase the size of a virtual disk in VMware and VirtualBox. When you’re setting up a new virtual machine in both VMware and VirtualBox you’re required to specify a size, or capacity, for the virtual hard disk. That means trying to guess how much storage space the VM will need.
Predicting future storage needs is always difficult, and this initial capacity often becomes insufficient.
Fortunately, both VirtualBox and VMware provide a straightforward process to expand the virtual disk when you require more storage space on your VMs.
How To Expand Virtual Disk In VirtualBox
To expand, or increase ,the virtual disk space for a virtual machine in VirtualBox, make sure that the VM is powered off, shutdown.
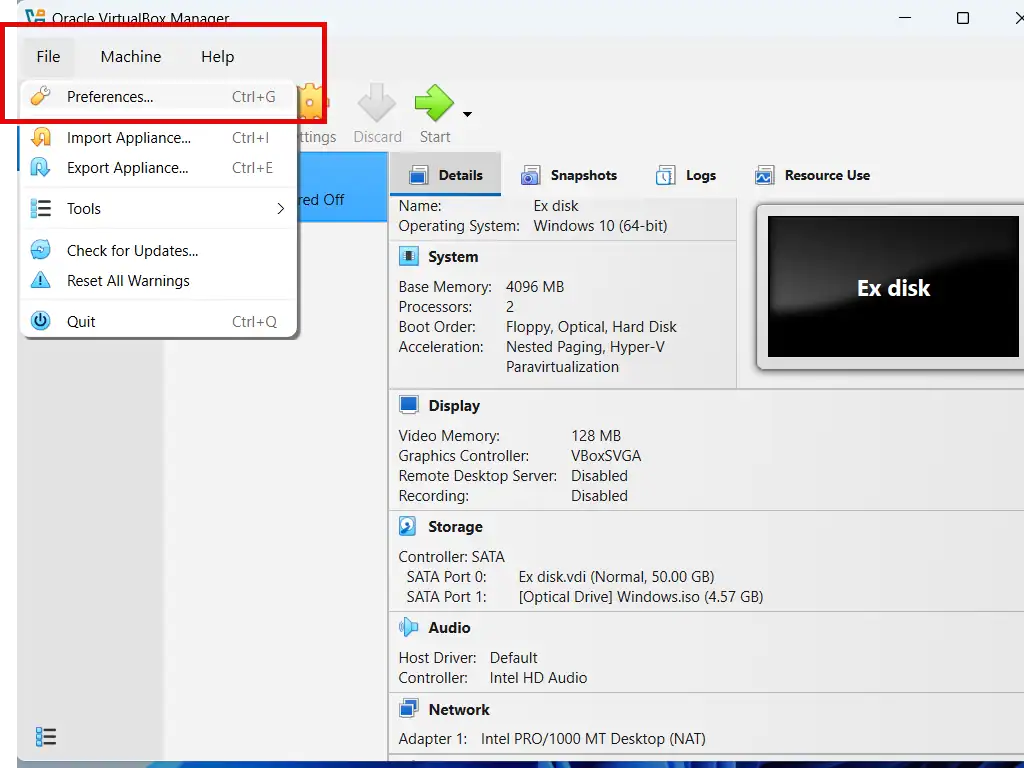
- Click File and then Preferences, or use the keyboard shortcut CTRL + G.
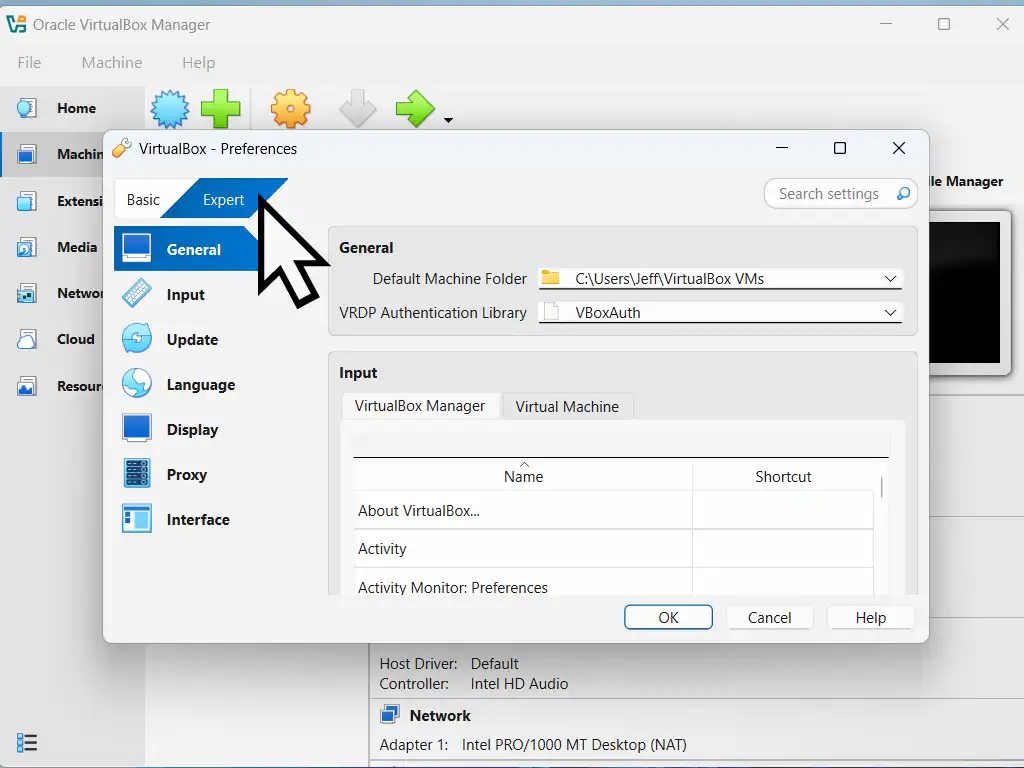
- Select Expert on the top tabs and then click the OK button.
- On the VirtualBox home screen, click Media in the left hand navigation pane.
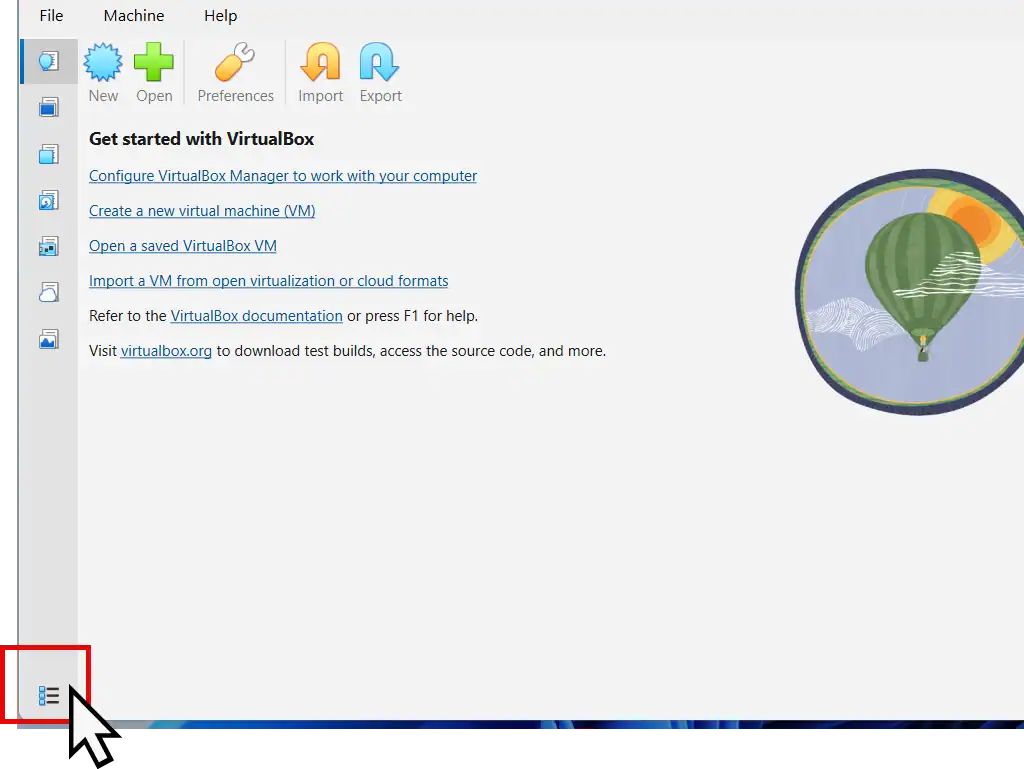
- If you can’t see the Media option, click the Show Text button at the bottom left corner of VirtualBox.

Increase Virtual Disk In VirtualBox
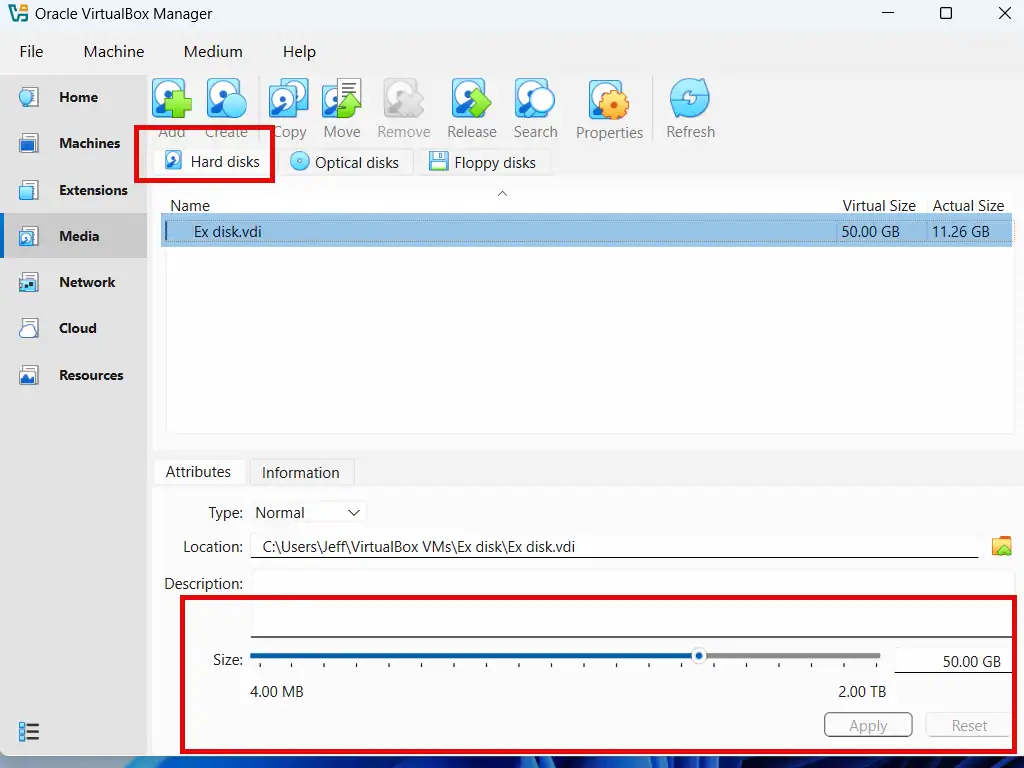
To increase disk space in VirtualBox, select the Hard Disks tab, then select the .vdi that you want to expand and use the sliding scale at the bottom of the window to set a new size. Then click the Apply button. Close the open windows and start your VM.
If you can’t see the disk slider at the bottom of the screen, click the Properties button on the VirtualBox toolbar.

How To Increase Virtual Disk Size In VMware
To expand the disk size for a VMware virtual machine, the VM must be shutdown.
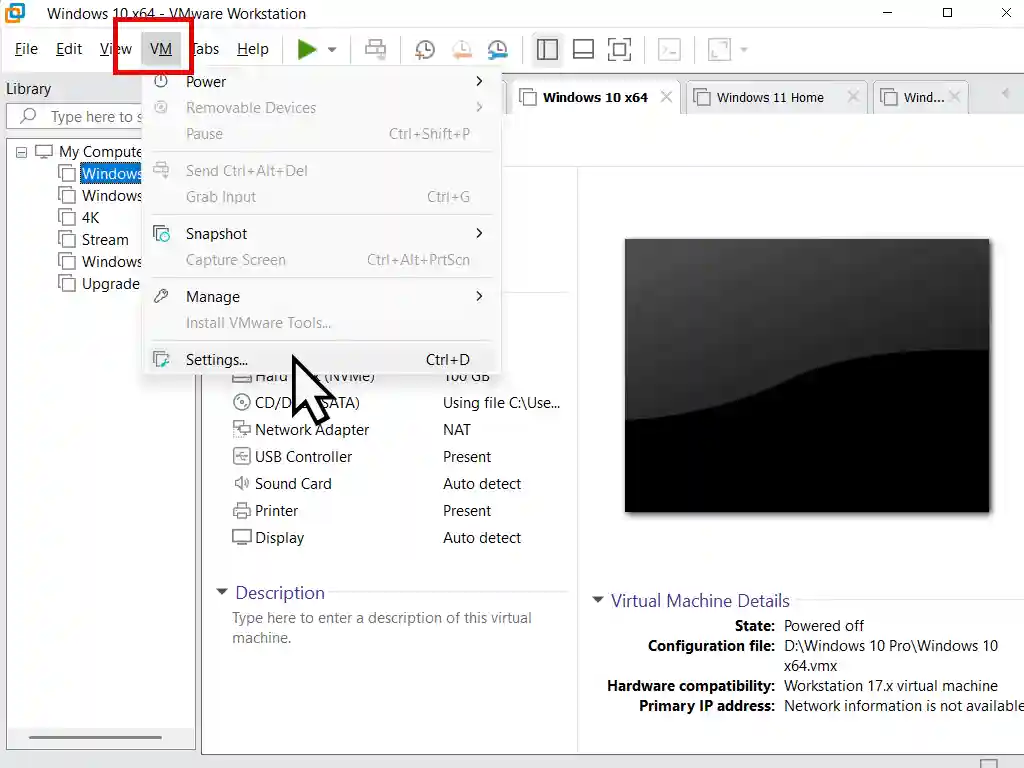
- Select the virtual machine in the left hand panel, then click the VM button on the toolbar. On the menu click Settings. Alternatively you can use the keyboard shortcut CTRL + D.
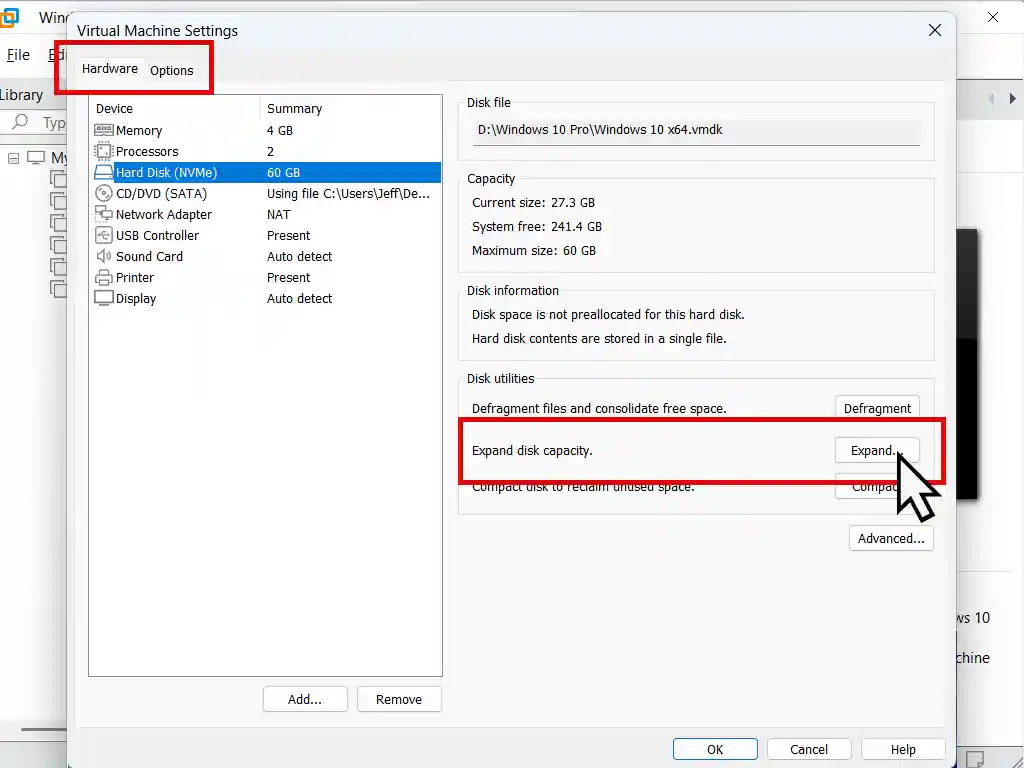
- On the Hardware tab select Hard Disk in the left hand panel then click the Expand button.
- A popup window will appear. Enter the new size (capacity) that you want in gigabytes and click the OK button.
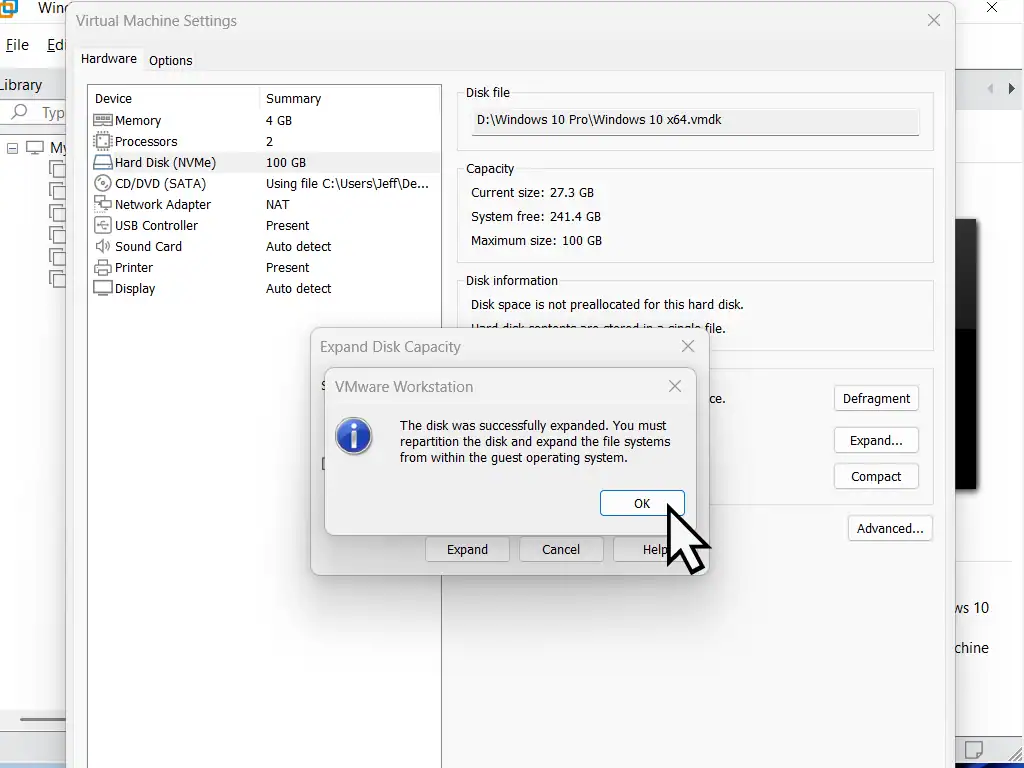
- VMware will then increase the disk size. It may take some time depending on your host machine but when it’s completed click the OK button.

Moving The Windows Recovery Partition
When increasing the disk size in a Windows VM, the extra capacity will be added as “Unallocated space” at the very end of the virtual hard disk.
That’ll leave the Windows Recovery Partition between the C: drive and the unallocated space. Which makes things a little awkward.
To get around the problem, you could simply format the unallocated space as a separate partition/drive. That would work. The expanded disk would become a storage drive.
But if you wanted to expand the C: drive then you’ll need to move the Recovery Partition.
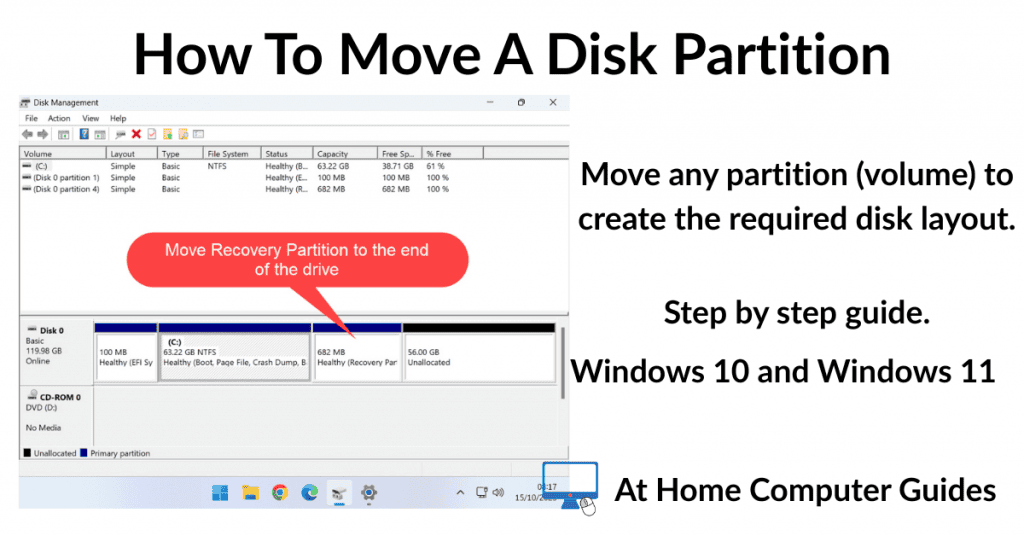
I’ve written a guide here – How To Move A Hard Disk Partition
Summary
Increasing the virtual disk capacity isn’t difficult but is a little more involved in VirtualBox as opposed to VMware. The main thing to remember is to enable the Expert mode, then all the options become available to you.
New Home Computer Guides
Latest step by step guides on At Home Computer.

