
How to make a window always stay on top of all your other program windows in both Windows 11 & Windows 10.
Every single program or app that you start up runs inside a window. Having a few programs open at the same time and those windows begin to stack on top of each other, like sheets of paper on a desk.
Most of the time, that’s fine, but sometimes it becomes a real nuisance. Suppose you were trying to copy some figures from a spreadsheet to an email, but the spreadsheet keeps disappearing behind the email. Or maybe you’re trying to follow some on screen instructions (like maybe this guide), a recipe, a Zoom call or YouTube and it vanishes every time you click away.
What you need is a quick, easy way to pin a window on top so it always stays visible, regardless of what other else you might click on.
Windows doesn’t have an always on top button that you could use, but Microsoft do give you one for free. It’s part of a free toolkit called Microsoft PowerToys, and once installed, it’ s easy to keep a window on top using a single keyboard shortcut.
How to keep a program window on top: Quick answer.
Install Microsoft PowerToys from the Microsoft Store, click on a the window you want to keep on top, then press Windows key + CTRL + T. A coloured border appears around the window and it’ll now stay on top of everything else. Press the same keys again to unpin it.
Keep reading and I’ll show you how to use Always on Top.
What “Always On Top Actually” Does
Pinning a window on top doesn’t change the program in any way. The windows still moves, resizes, minimises and closes exactly as it did before pinning it.
The only difference is that other windows can no longer cover it up. Whatever you click next will open behind your pinned window instead of over the top of it.
Use it to:
- Keep a calculator visible while fill in a spreadsheet.
- Watch a how to video while you’re following the steps in another program.
- Copying details from a website or PDF into a document.
- Keeping notes or shopping list on screen while you browse the internet.
- Watching a video or video call while you take notes.
Turn on the Always On Top Module
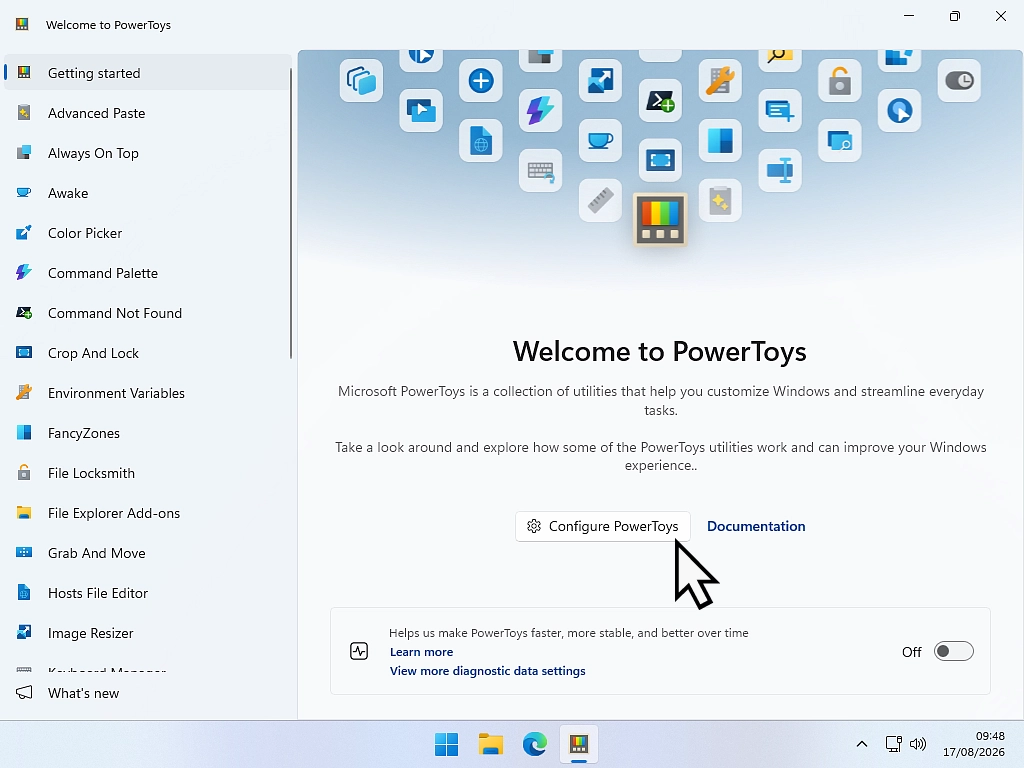
Once installed, open PowerToys from the Start menu and you’ll be greeted by the “Welcome to PowerToys” screen.
As I said earlier, PowerToys comes with lots of utilities (or modules), and many of them are already enabled (turned on). As a general first approach to PowerToys, it’s better to disable (turn off) everything that you’re not intending to use straight away. You can always turn them back on later.
Click the Configure PowerToys button.
Turn off Everything Except Always On Top
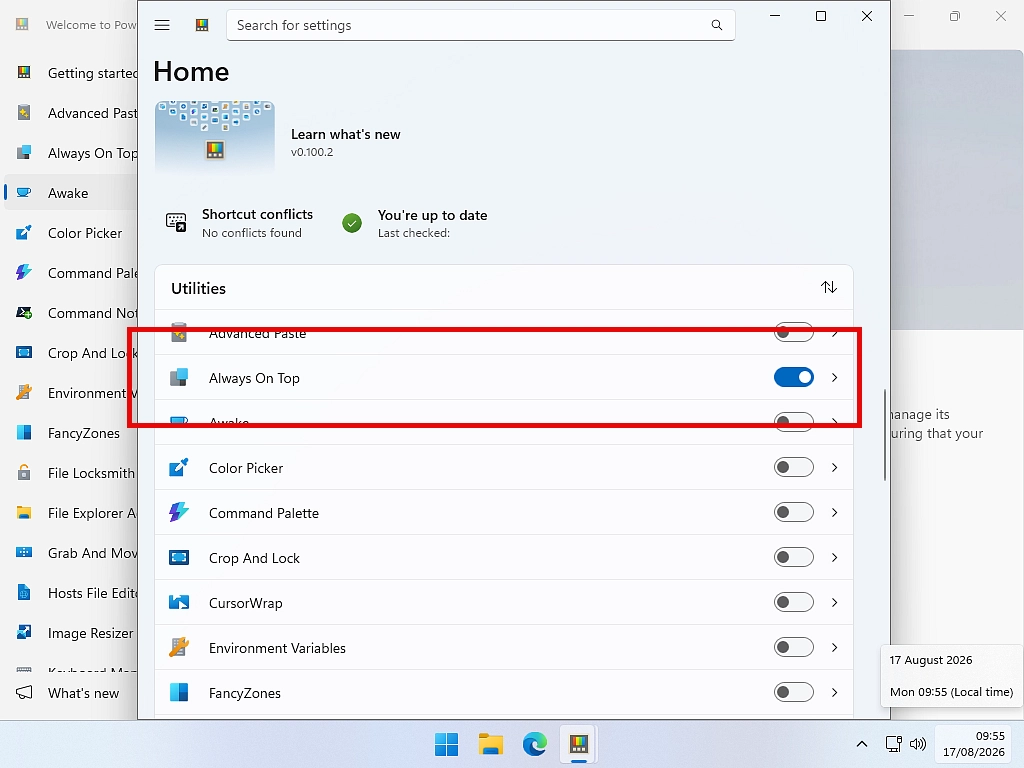
On the Home screen, scroll down past the Shortcuts section until you reach the Utilities section.
Quick Tip
Turn off everything except Always On Top. Scroll down and disable all the utilities.
The reason for turning them all off is that these utilities can make strange things happen when you’re not expecting it.
Start with Always On Top, then you can add others as you go.
How to Make a Window Stay on Top
To make a window stay on top, first select it by clicking inside it. That makes it the active window. Then press the Windows key, Ctrl key and the letter T together.
You’ll see a faint coloured border (a highlight) appear around your selected window and hear a sort sound (assuming you’ve got speakers).
That’s it. The bordered window will now stay on top of everything else, it’ll always be visible.
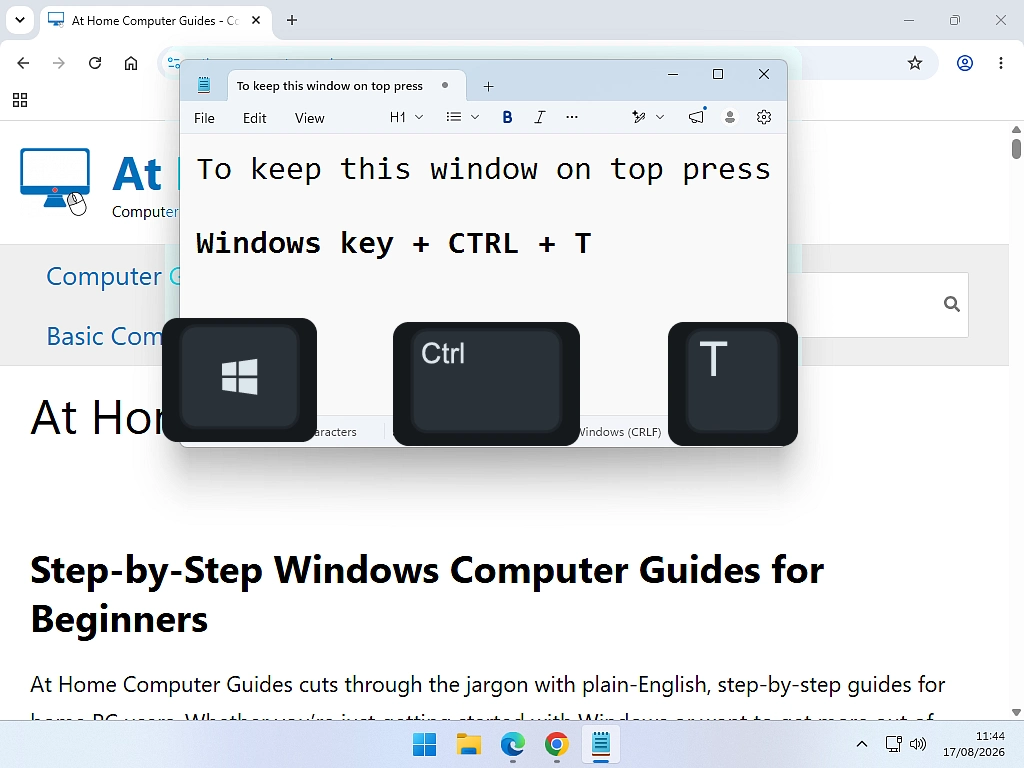
, then press Windows key + CTRL + T.
You can still move the pinned window around your screen and resize it however you like. It behaves completely normally except that you can’t cover it with another program window. It will always remain visible on screen.
How to Stop a Window Staying on Top
Just as important as pinning a window on top is how to unpin it. And that’s easy too. Just press the same keyboard shortcut that you used to pin it: Windows key + Ctrl + T. The border will disappear from around the program window and it starts behaving exactly the same as any other window.
Closing the window (closing the program) also unpins it. Nothing stays pinned on top forever.
Pin a Window Without the Keyboard
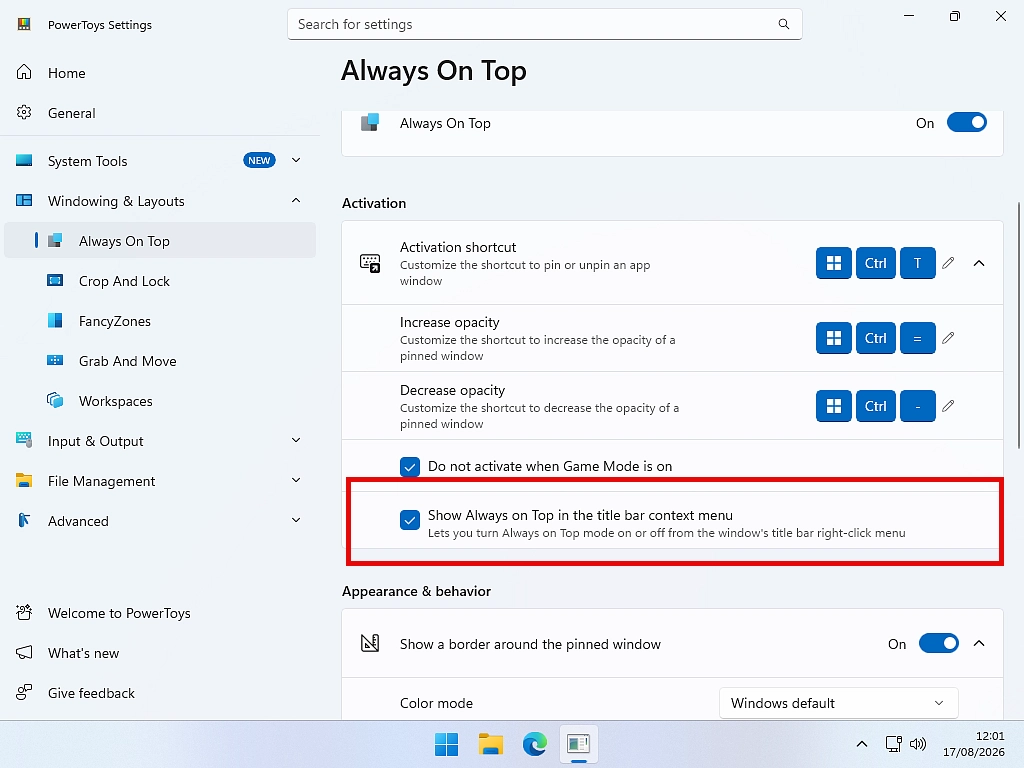
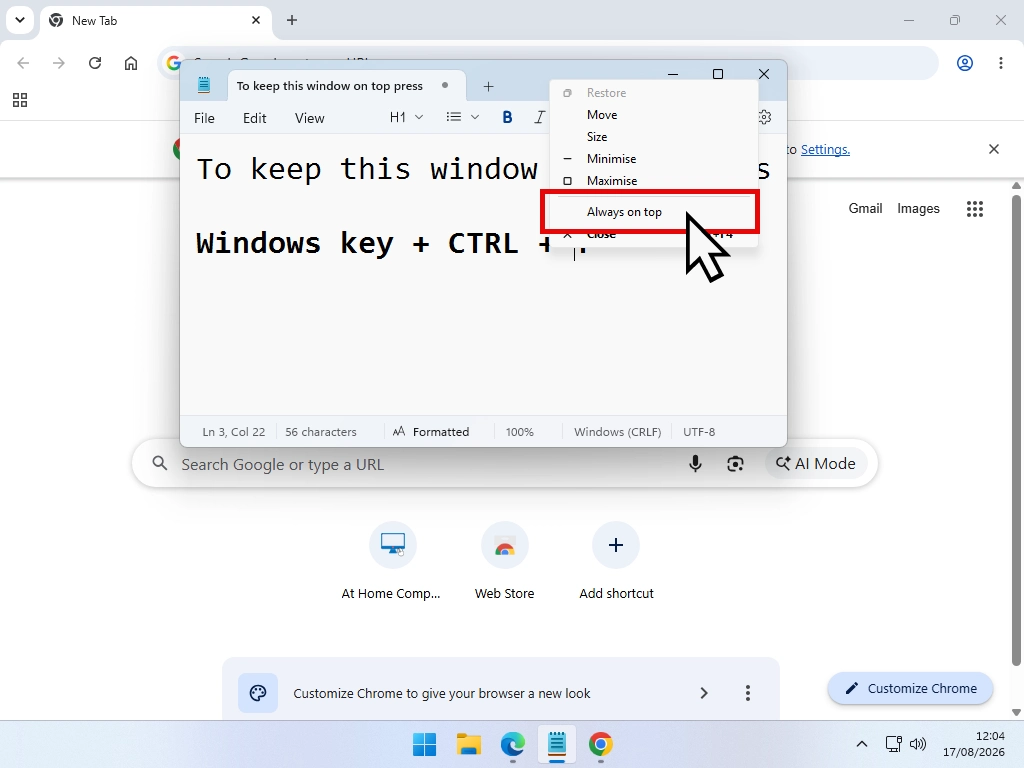
If you’d rather use the mouse instead of your keyboard, PowerToys can add an Always On Top option to the program window title bar menu, but you need to enable that inside the PowerToys options.
- Open PowerToys and go to Always On Top.
- Turn on Show “Always On Top” in the title bar context menu.
- Close PowerToys and from now on when you right click on the title bar of any program you’ll see an option to keep it Always On Top.
Always On Top Settings Worth Changing
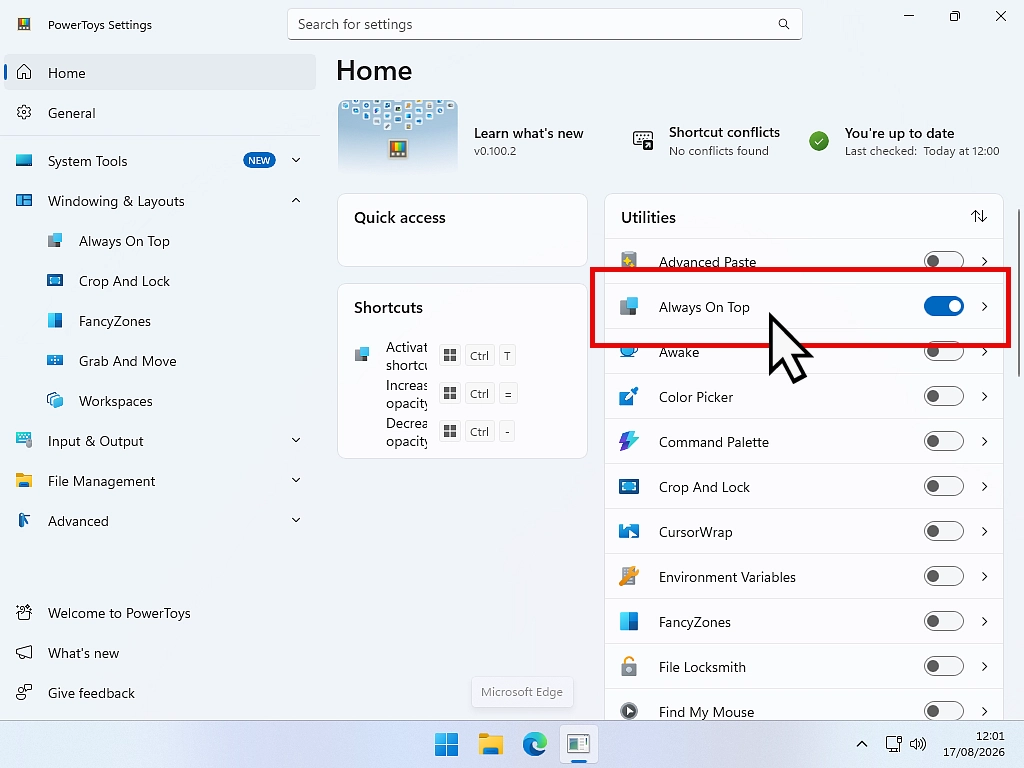
The default settings usually work just fine for most people, but there are a handful of settings that you could tweak. Open PowerToys and then open Always On Top.
Change the Keyboard Shortcut
You can use just about any key combination you want, provided it isn’t in use with another program.
Click the pencil icon next to Activation Shortcut and then press whichever combination of keys you prefer.
Change or Turn Off the Border
The coloured border around a pinned window is just a reminder that it is pinned. If you find it distracting you can switch off “Show a border around the pinned window”.
Or if you like it, you can customise the colours and thickness of the border in pixels.
Stop it Interfering with Games
There’s a setting called “Do not activate when Game Mode is on”. Leave it switched on and the shortcut won’t fire while you’re playing games. That way you won’t accidentally pin something over the top of your game.
Task Manager has its Own Setting
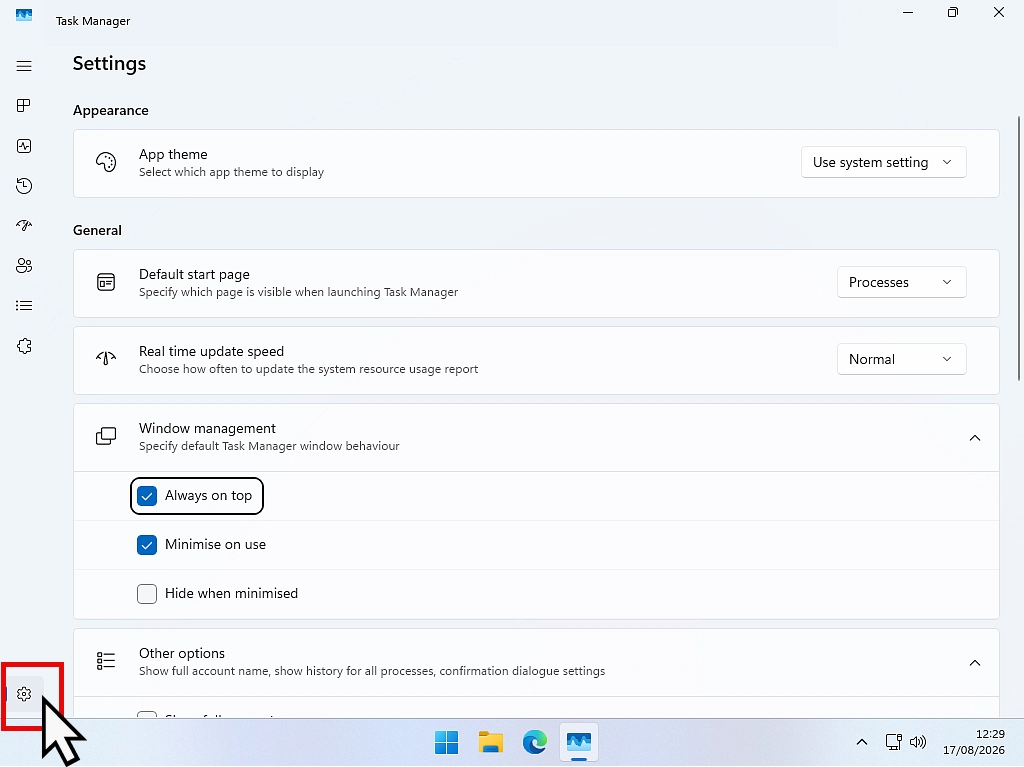
Sometimes when troubleshooting a computer you may want to have the Task Manager pinned on top. It’s really handy when trying to work out what’s racing your CPU or HDD etc.
Task Manager can actually pin itself on top without the need for any extra software. Simply open Task Manager, click the Settings gear (cog) in the bottom right hand corner and select Always on top.
Some Programs Already Have the Option
Plenty of other programs also have the always on top setting. tucked away in their own menus. For example VLC Media Player has one under Video > Always on top. It’s worth a quick check through a program’s View or Options menu.
Picture in Picture for Videos
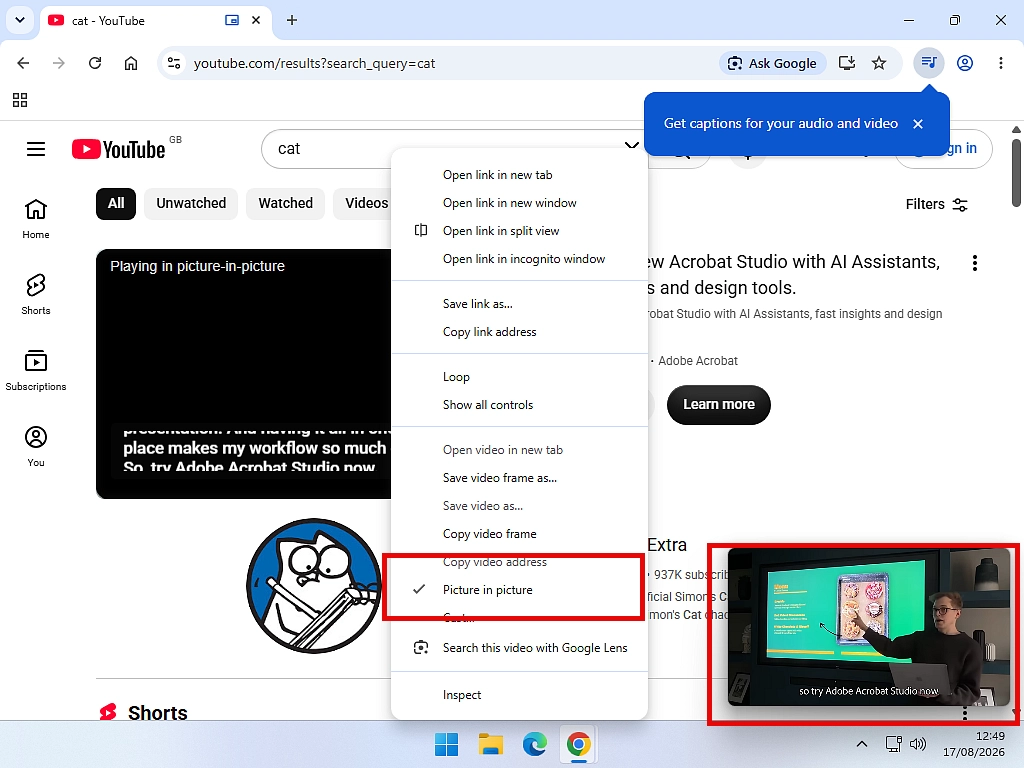
If all you want is to stream a video while you’re working, your browser can already do it. In Edge or Chrome, right click on the video then choose Picture in picture. The video pops out into a small floating window that stays on top of everything.
Troubleshooting
Nothing Happens When I Press the Keys
Nine times out of ten it’s because PowerToys isn’t running. The shortcut only works while PowerToys is going in the background.
Look for the PowerToys icon in the system tray. If you can’t see it, open PowerToys from the Start menu and leave it running.
It Won’t Pin One Particular Program
This often happens because the program is running as an administrator. In PowerToys, go to General and click Restart PowerToys as Administrator.
One other thing that you could check is that the program hasn’t been previously excluded.
The Window is Pinned But There’s No Border
The border is optional and can be switched off. Check that you haven’t previously disabled it.
I Pinned Two Windows and they Cover Each Other
This is a good one. You can pin as many windows as you like, but they’re all equally “on top”, so they still stack among themselves. They’ll all stay on top of unpinned windows though.
Summary
The Always On Top utility in Microsoft PowerToys is the simplest way to keep a window always visible in Windows 11 and Windows 10.
How to Use Windows Media Player Legacy
Still prefer the old Windows Media Player to Microsoft’s new app? You’re not alone.
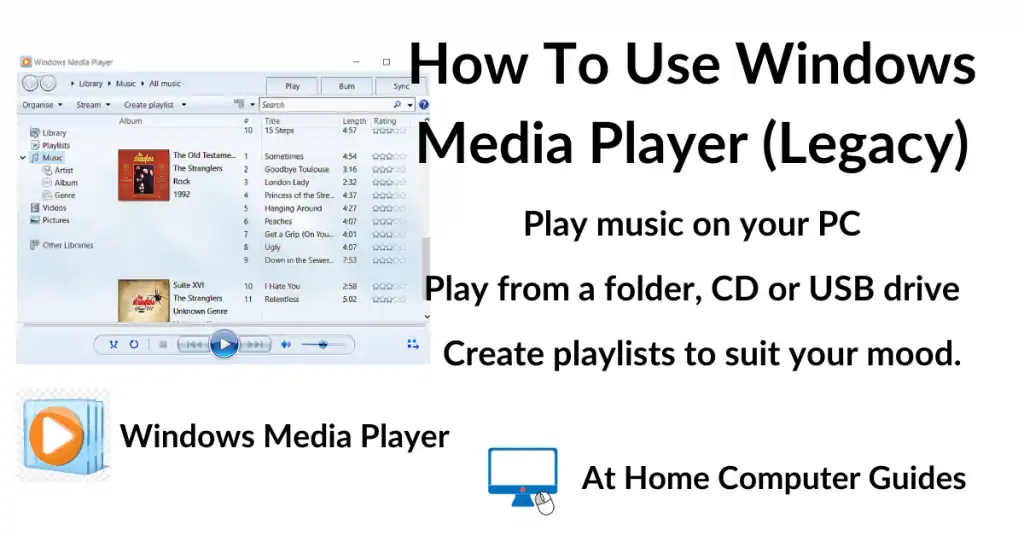
A beginner’s guide to the classic Windows Media Player in Windows 11 and 10: play music, rip CDs and build playlists.
You can find this and other related step by step guides in – At Home Computer Guides