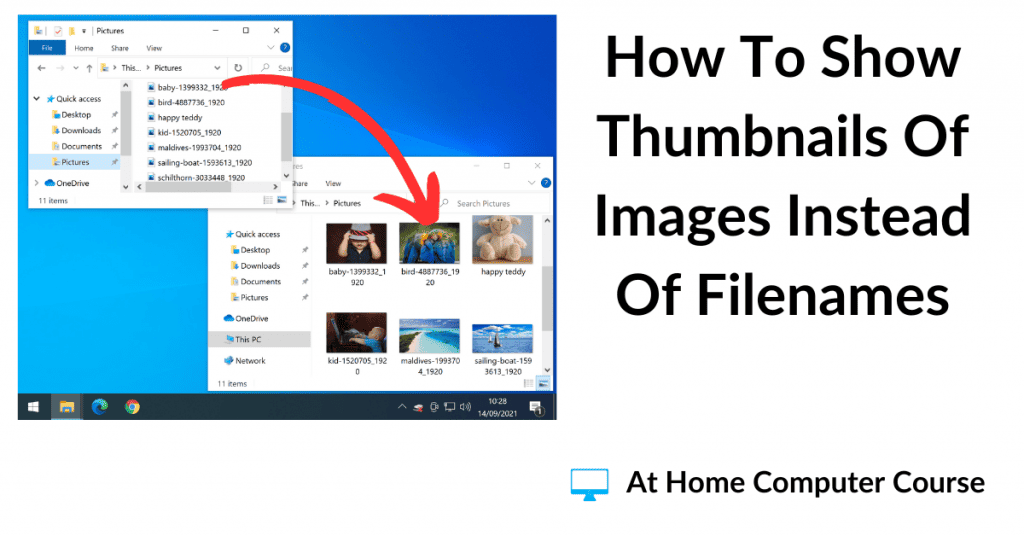
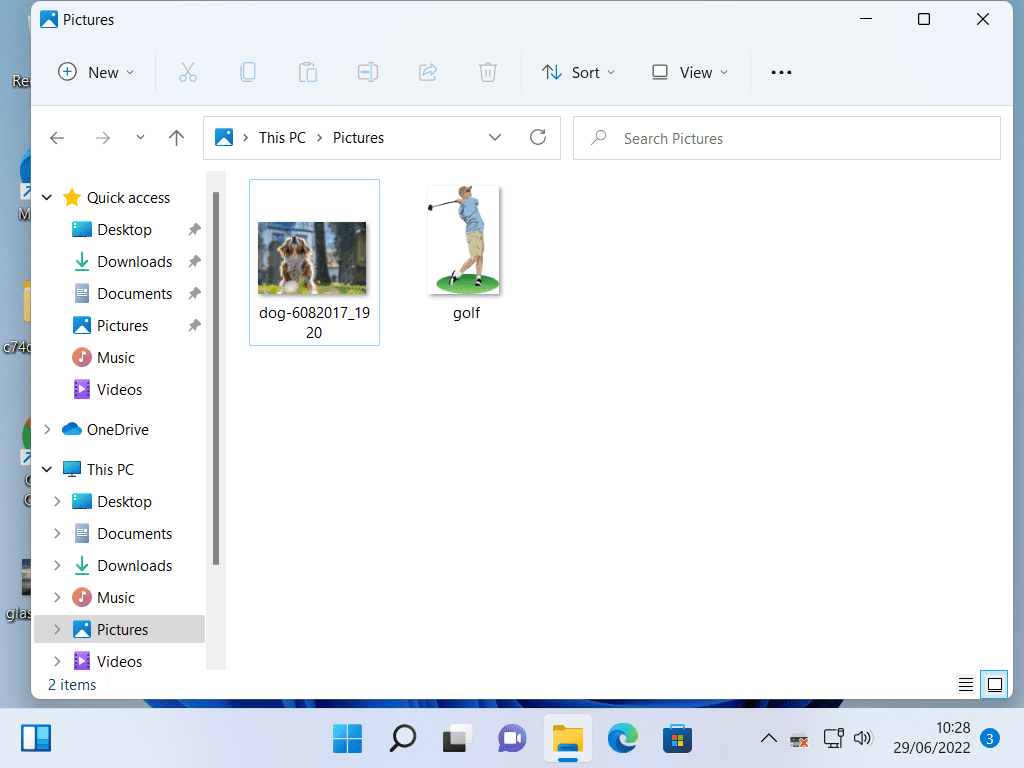
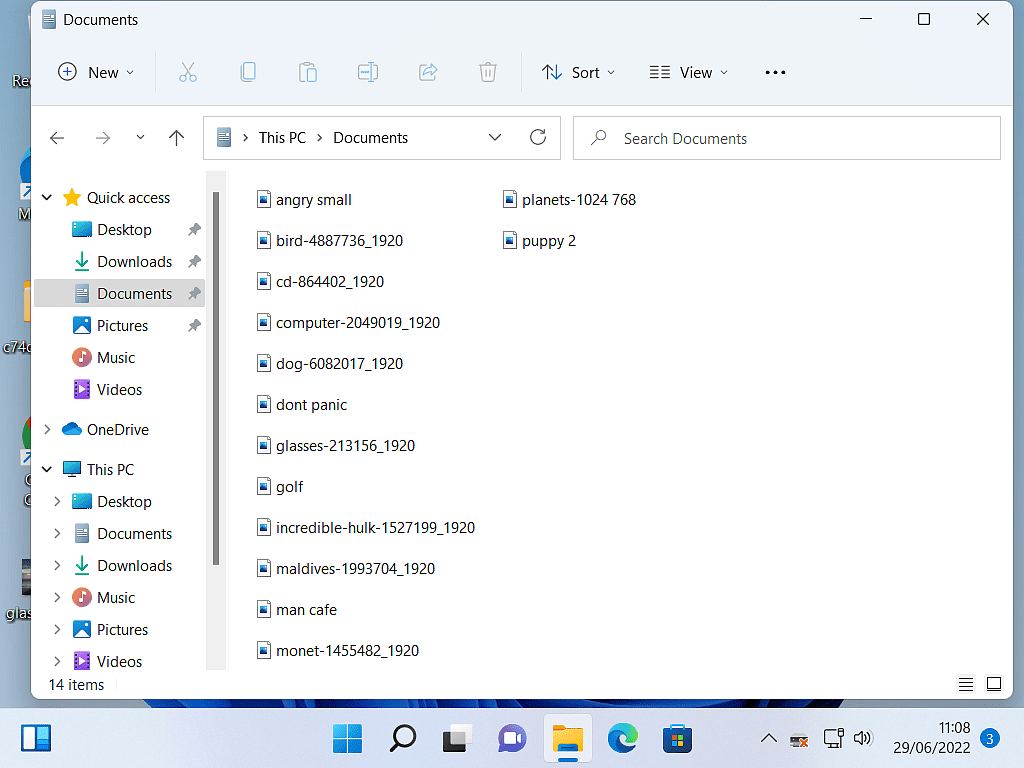
Often, when you open a folder that has got images (pictures) inside it, Windows will show you the files or file names, rather than thumbnails of the images.
That’s OK for the computer, but it’s not what we want. We need to be able to see the thumbnails, the pictures themselves.
So to make Windows show the thumbnails we’ll have to give it a little nudge in the right direction.
What Are Thumbnails?
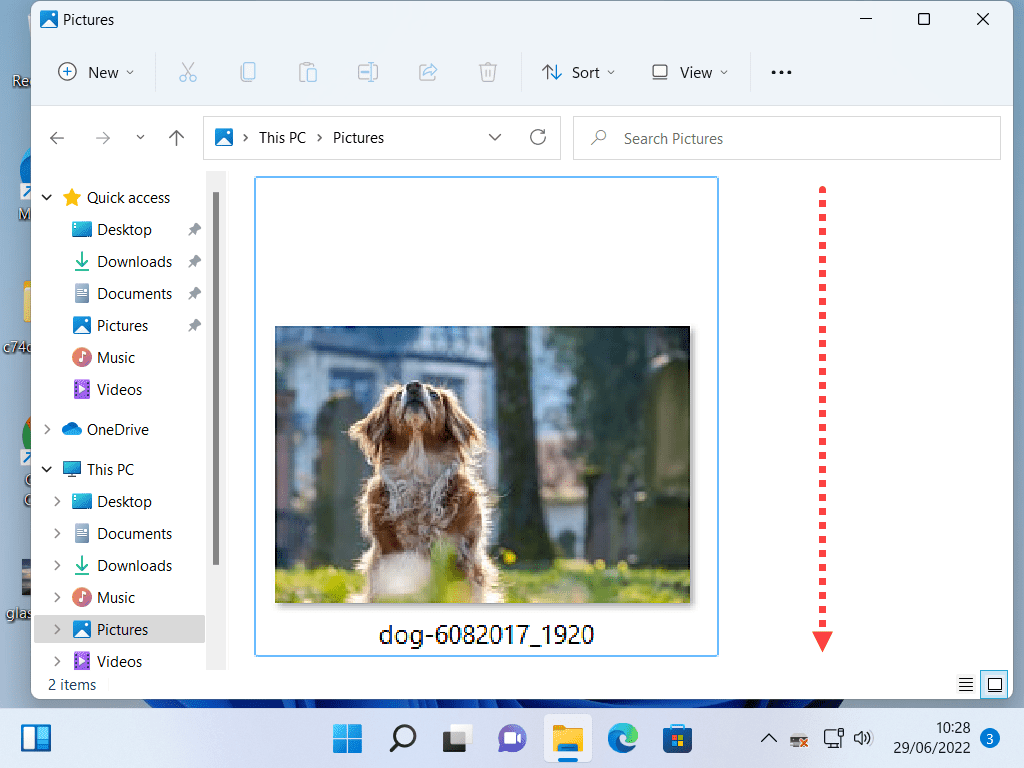
A thumbnail is a very small version of an image (or picture). They are used so that Windows can show you more than just a single image when you open a folder containing lots of images.
If the images were shown at full size, you’d only be able to see one image at a time, which would, in turn, mean you’d have to scroll down much more.
Why Does Windows Show Filenames Instead Of Thumbnails For Images?
Speed. When you open a folder, Windows has to fetch the contents of the folder from your computer’s hard drive. It’s much quicker for the hard drive to transfer text than it is to transfer images (even though those images are very small)
Screen space. Quite simply, file names take up much less screen space than images so many more items can be shown.
How To Show Thumbnails Of Images.
So displaying the contents of any particular folder as file names is much easier for the computer, but unfortunately, it’s often not of much use to us humans.
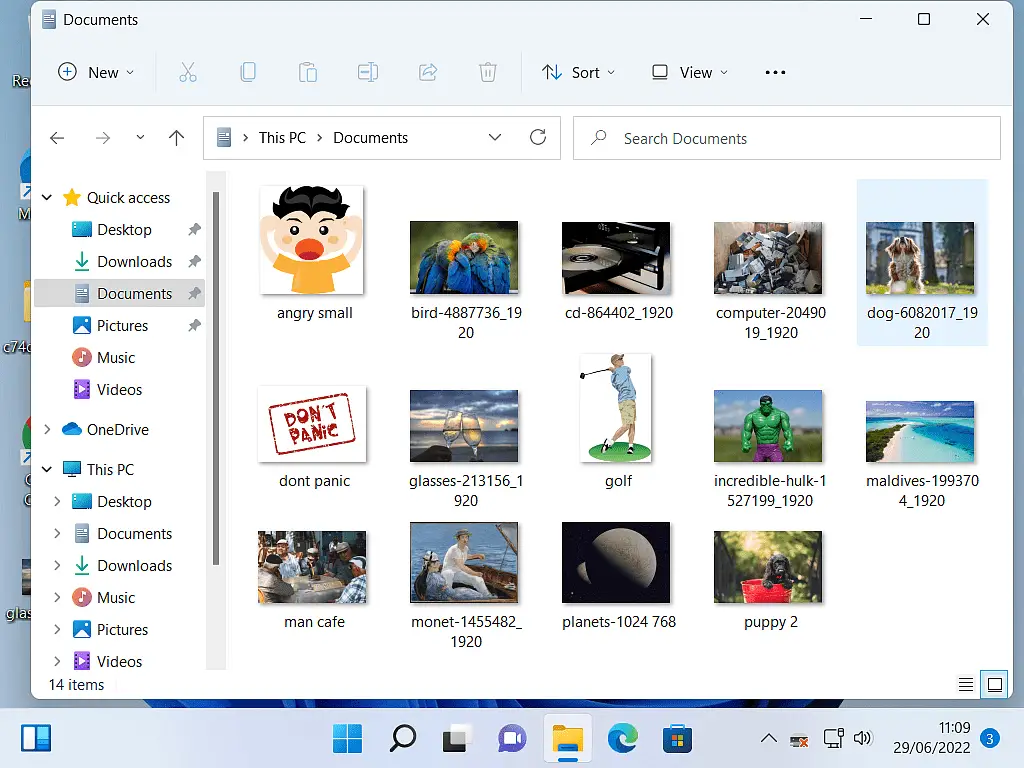
If you’re looking for a picture on your computer, you want to see the picture, not the file name. Filenames, when applied to images, aren’t of that much use to us.
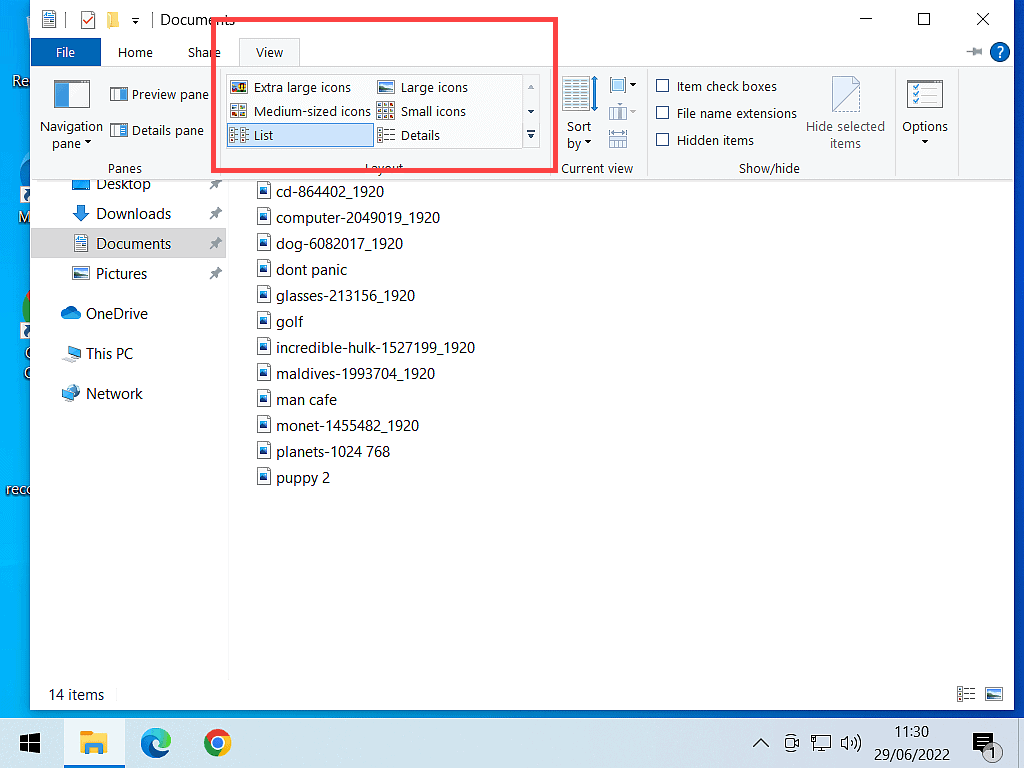
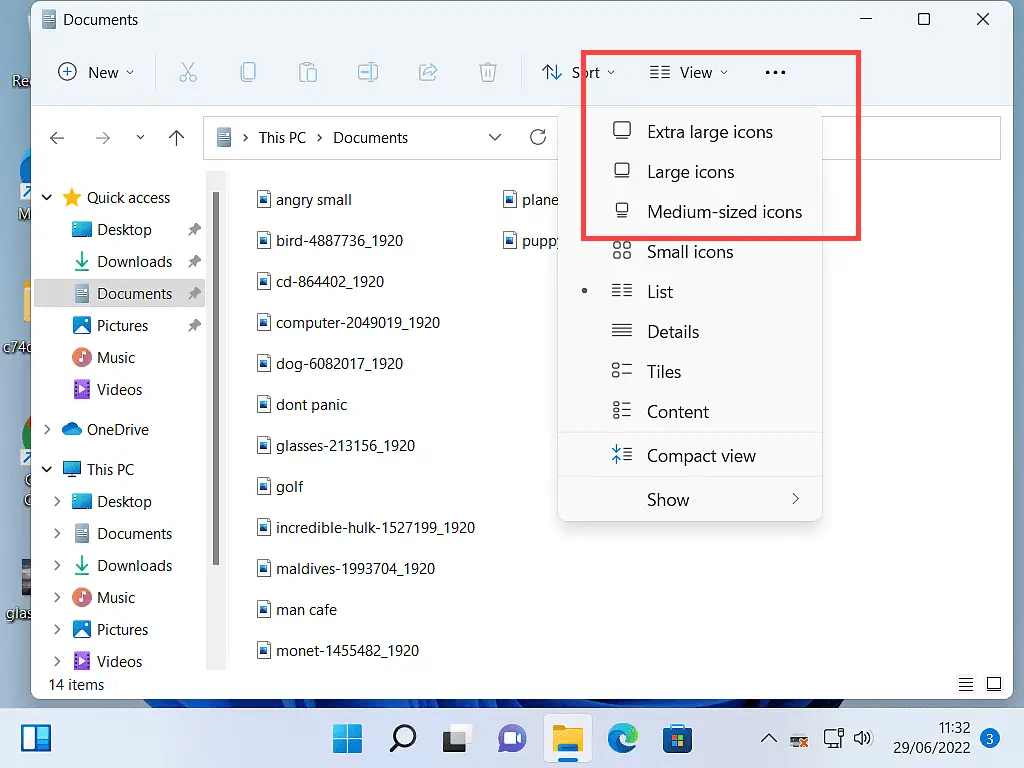
When you open a folder, to show thumbnails of your images, click VIEW at the top of the screen.
Then click either Extra Lage Icons, Large Icons or Medium Icons.
If Show Thumbnails Doesn’t Seem To Work.
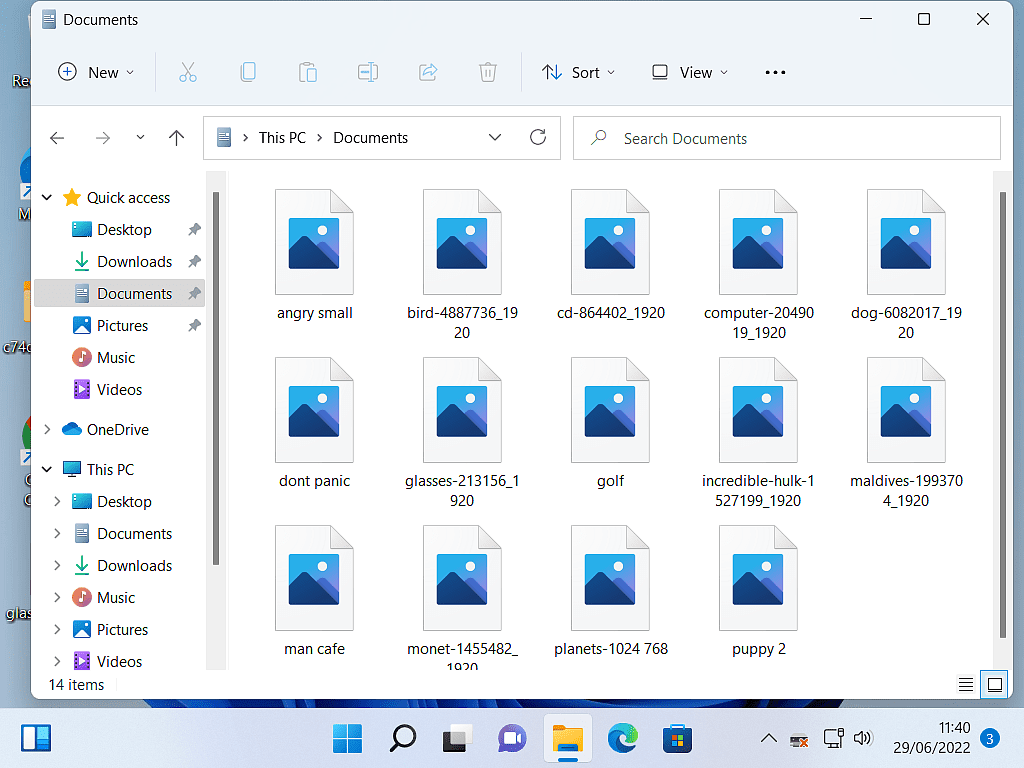
Sometimes you’ll find that the thumbnails still don’t show. Rather, what you’ll see are icons (or placeholders) for the images instead of the images themselves.
If this is happening on your computer, then it’s down to a little-used setting within Windows.
But we can change that setting. It’s quick, easy and safe to do.
Change Your Folder View Options To See Thumbnails.
To show thumbnails rather than icons –
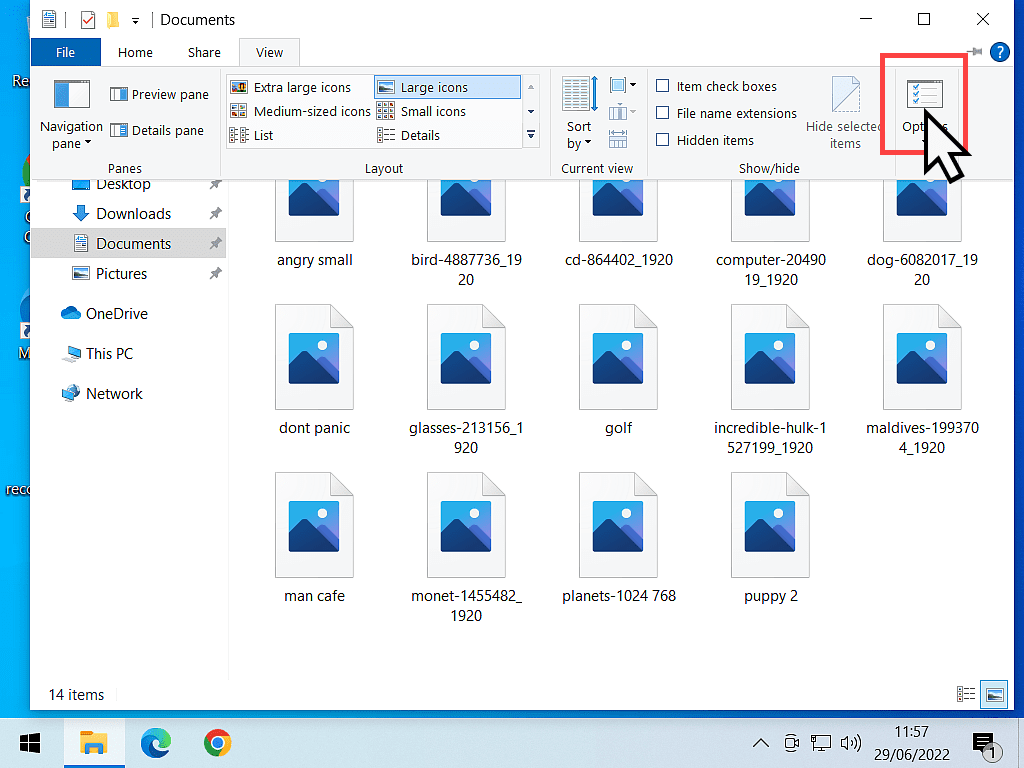
In Windows 10, click the OPTIONS button.
In Windows 11, click the 3 horizontal dots beside the View button. On the menu that opens, click OPTIONS.
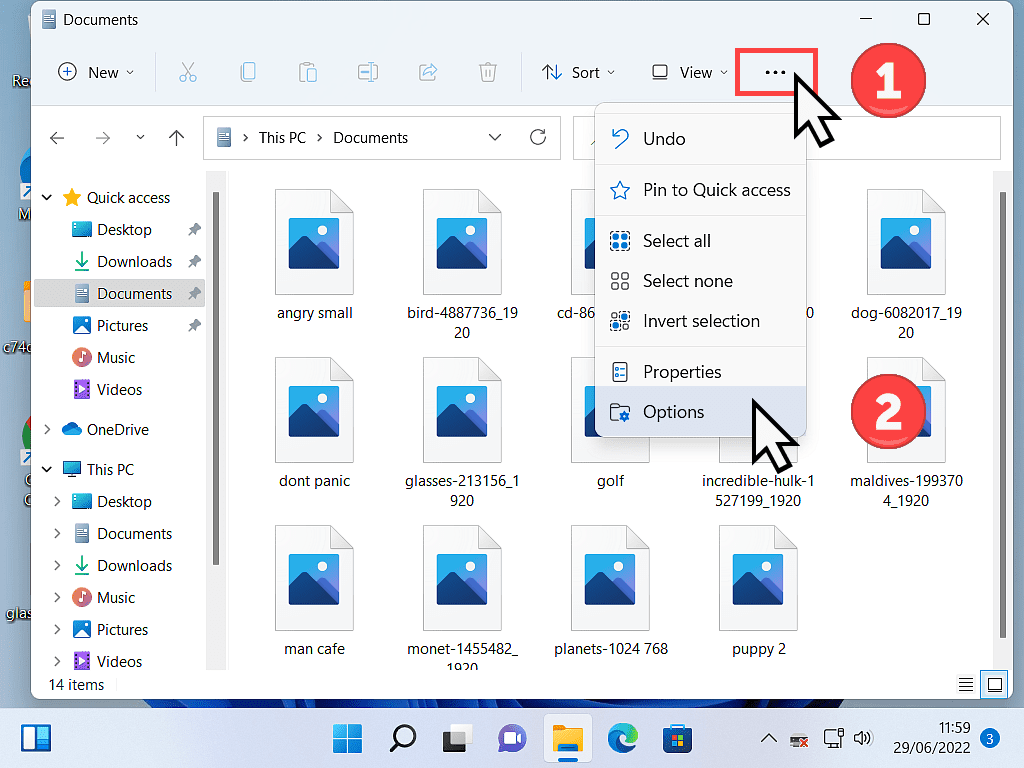
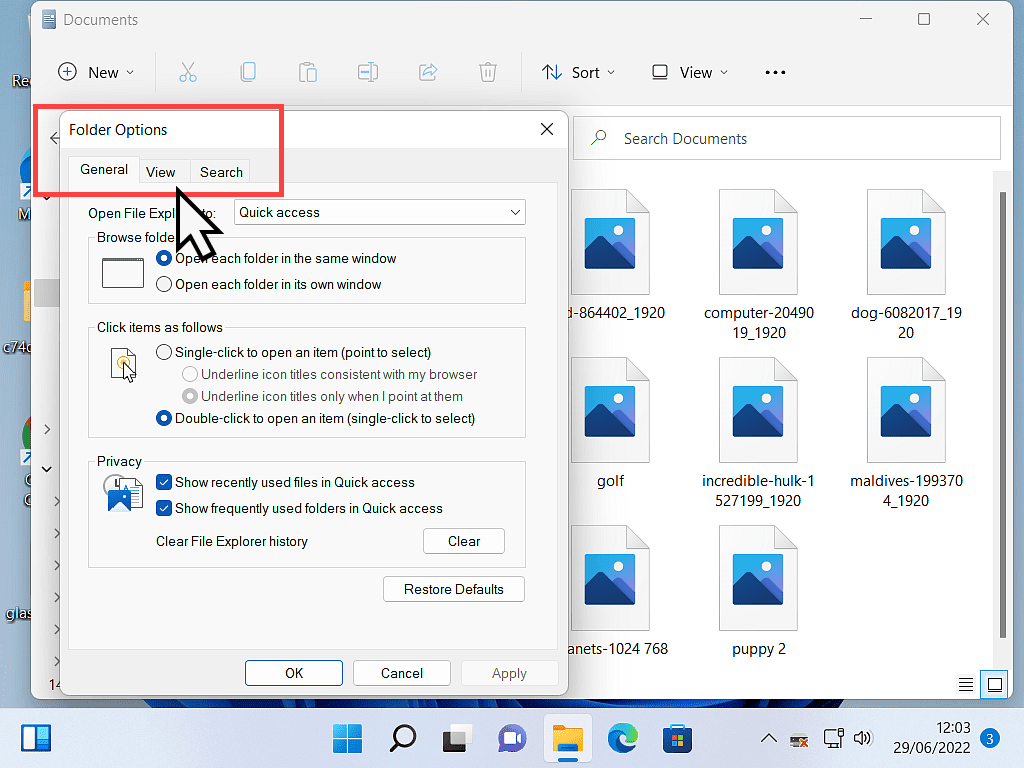
In both Windows 10 and 11, the Folder Options dialogue box will open.
Click on the VIEW tab.
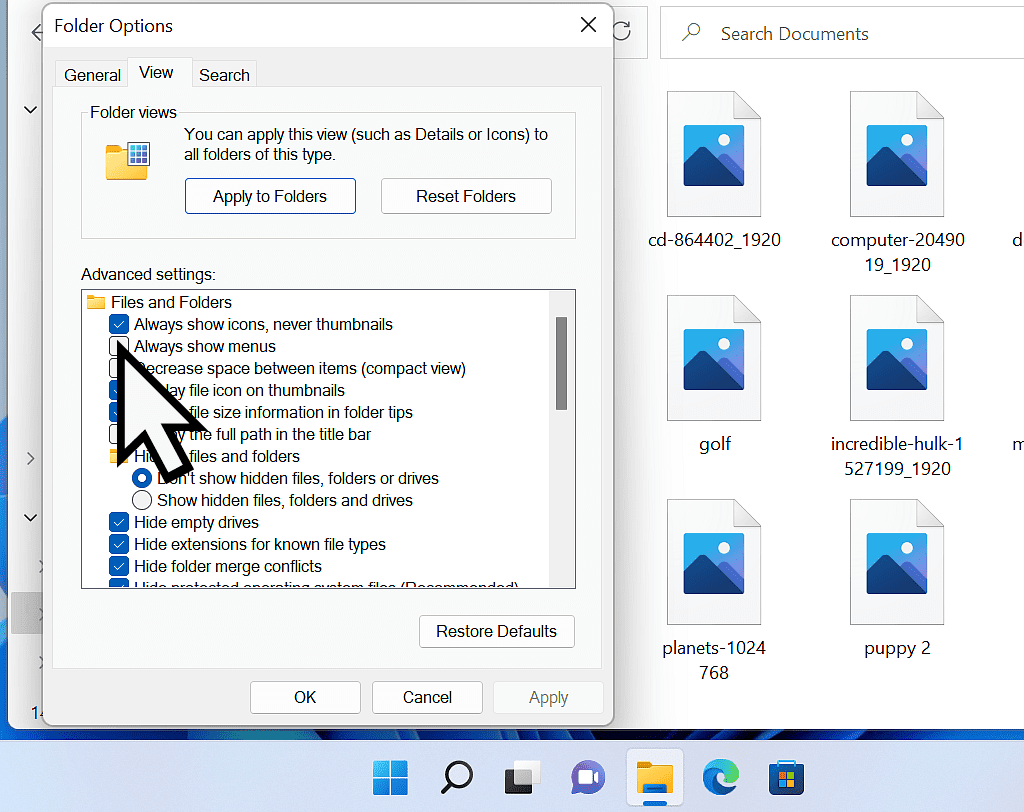
On the View tab, you’ll see that the very first option “Always show icons, never thumbnails” is selected.
This is the setting that’s stopping your computer from showing you thumbnails of your images.
You need to de-select this option.
Click in the box to take the tick out of it. Then click the OK button and your thumbnails should appear.
Show Thumbnails When Opening A File From Within A Program.
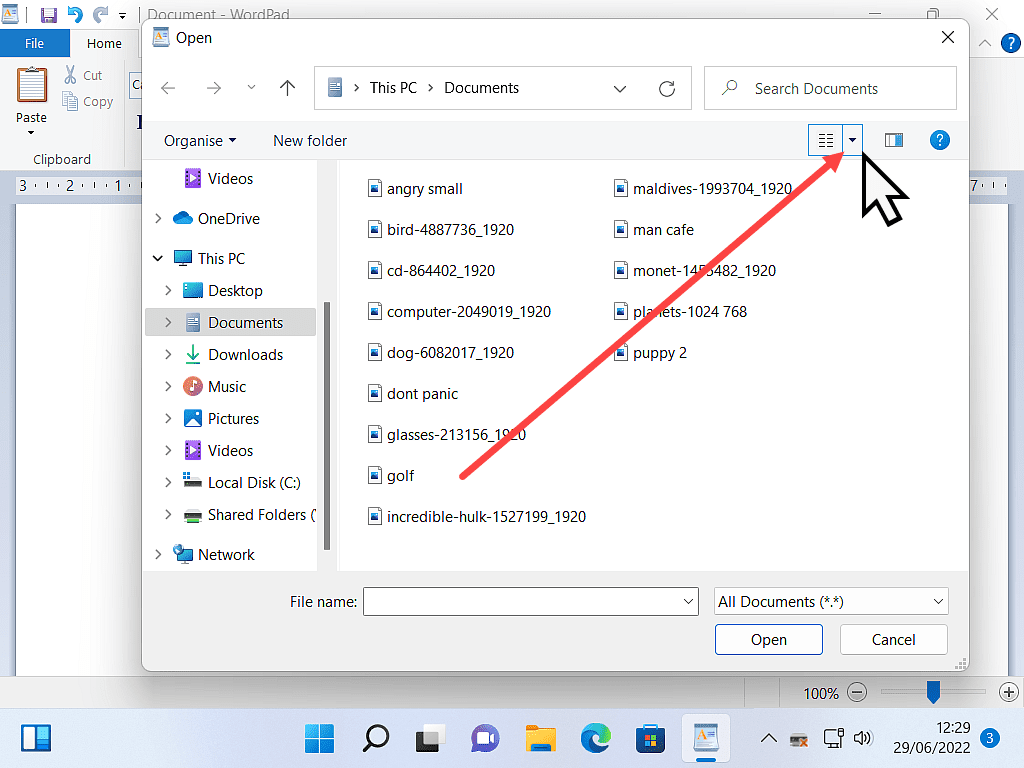
Before we go, there’s just one more quick thing for me to show you. When you’re trying to open an image file from within a program, you’ll often be presented with file names rather than thumbnails.
As an example, let’s say you wanted to insert a picture into a document.
You click FILE and then OPEN and navigate to the folder where your picture is located and what you see is simply file names.
We covered how to open files from within programs in more detail here How To Open Files On A PC
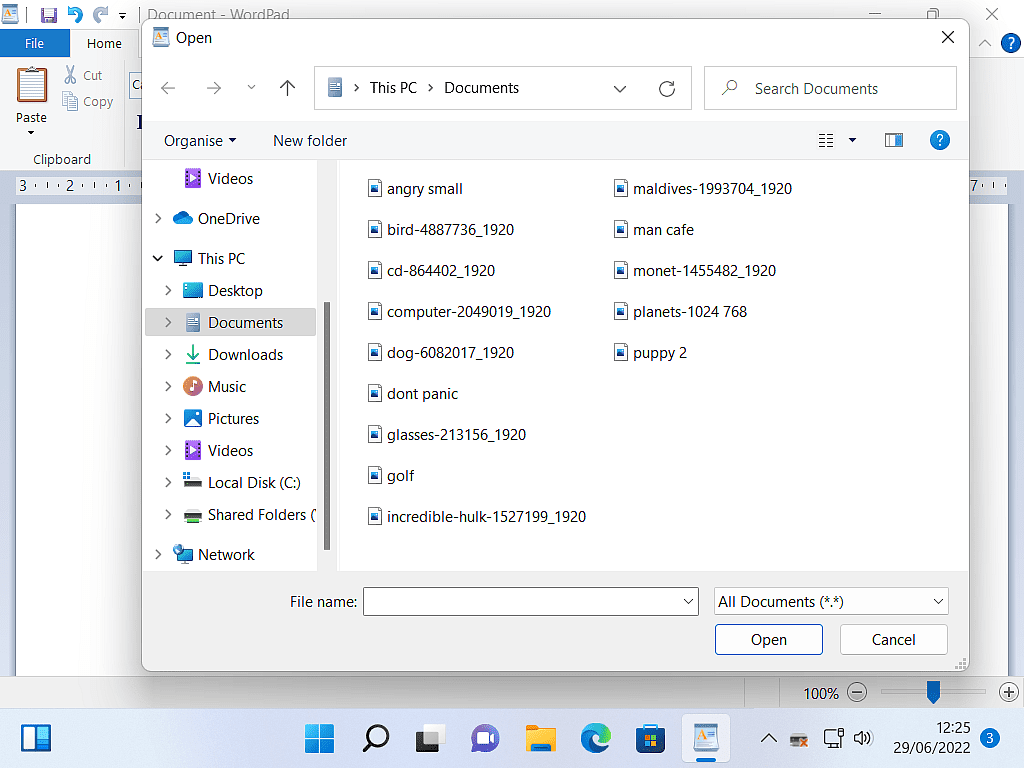
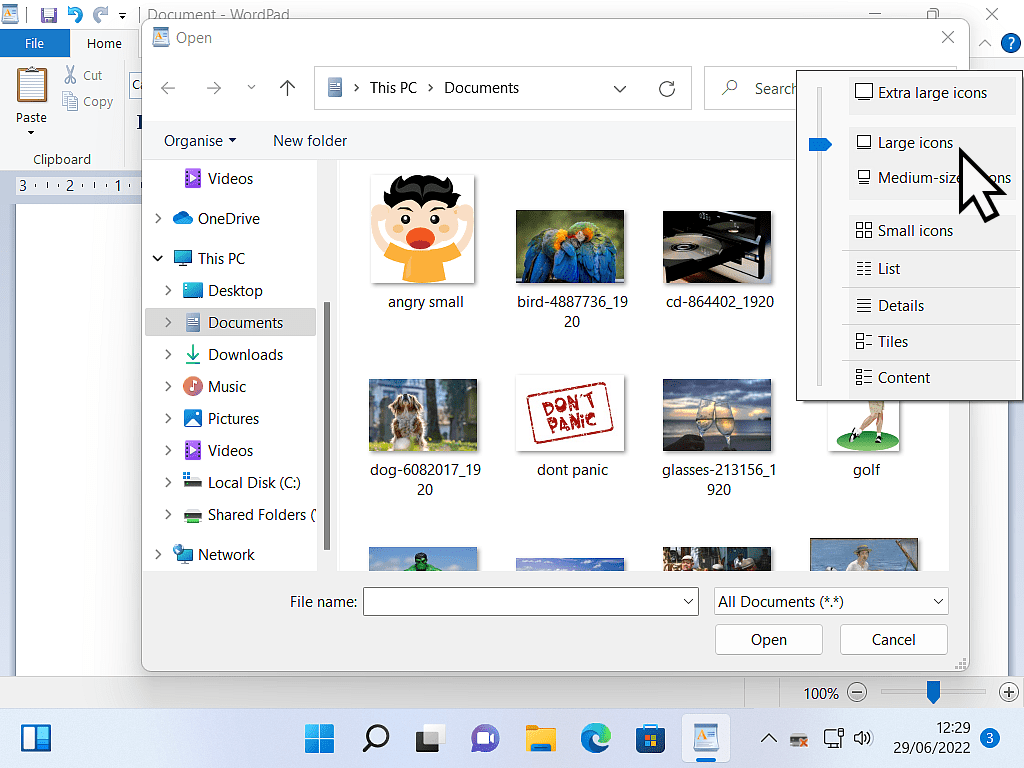
To show thumbnails of your images, click the drop-down arrow on the Change View button.
It’s very small and difficult to see, but it will be there.
On the menu that opens, click either Medium, Large or Extra Large Icons and your thumbnails will appear.
Keep Up With Home Computer Guides.
All the latest guides and articles published on At Home Computer delivered to your inbox.
No account needed, just add your email address.

