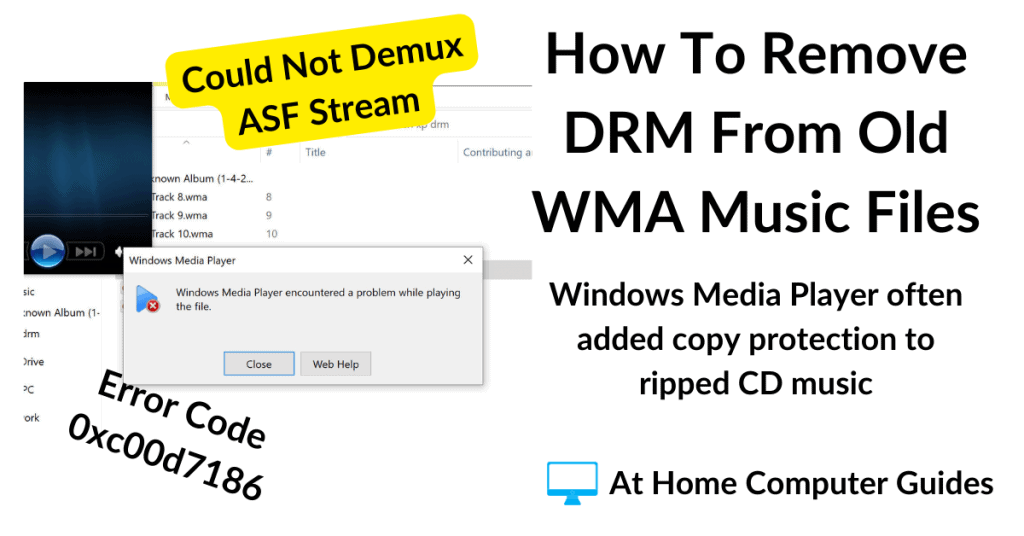
How to remove the DRM (Digital Rights Management) that Windows Media Player added to your WMA audio files when you ripped your music CDs.
Back in the day, when we were all busy ripping our audio CDs to our computers, we often used Windows Media Player to do the job. And why not? It was there, already installed on our machines, and it worked.
Little did we know back then, that WMP was adding a form of DRM copy protection to every single track that we ripped. The copy protection meant that we can’t then move those audio files to another device. Also, we couldn’t convert the files into any other audio format, such as MP3.
So, if you’re having problems playing, opening or converting old WMA (Windows Media Audio) files that you copied from a CD using Windows Media Player, it could be that when you ripped these files, you inadvertently added DRM copy protection.
However, help is at hand, Microsoft has released a fix that will remove the DRM that Media Player added, allowing you to enjoy your audio files once again.
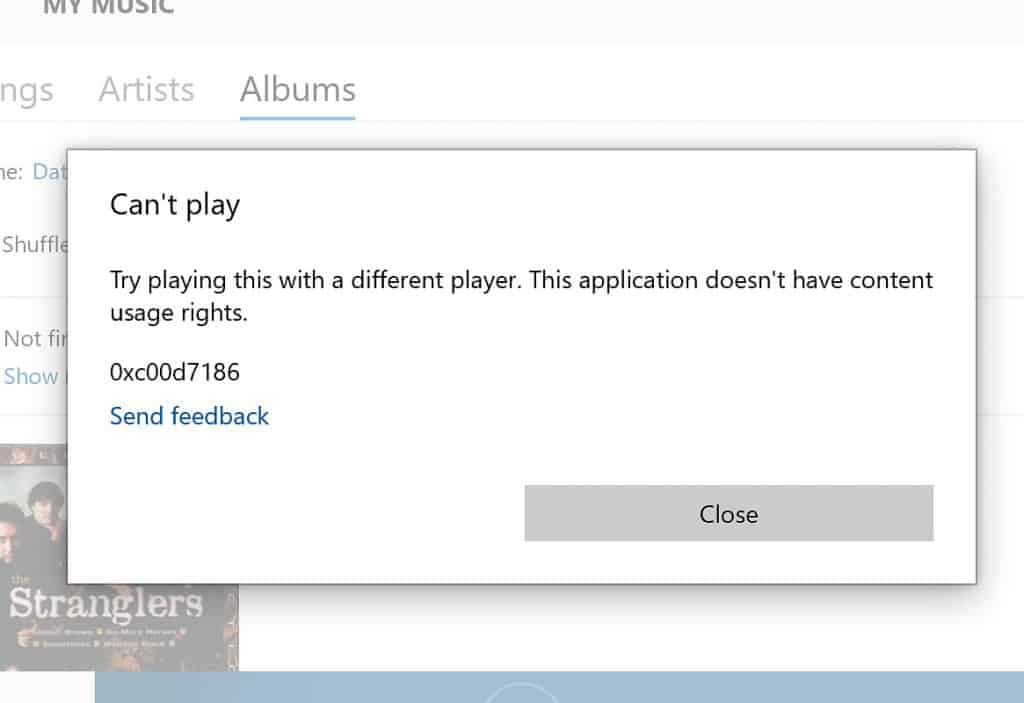
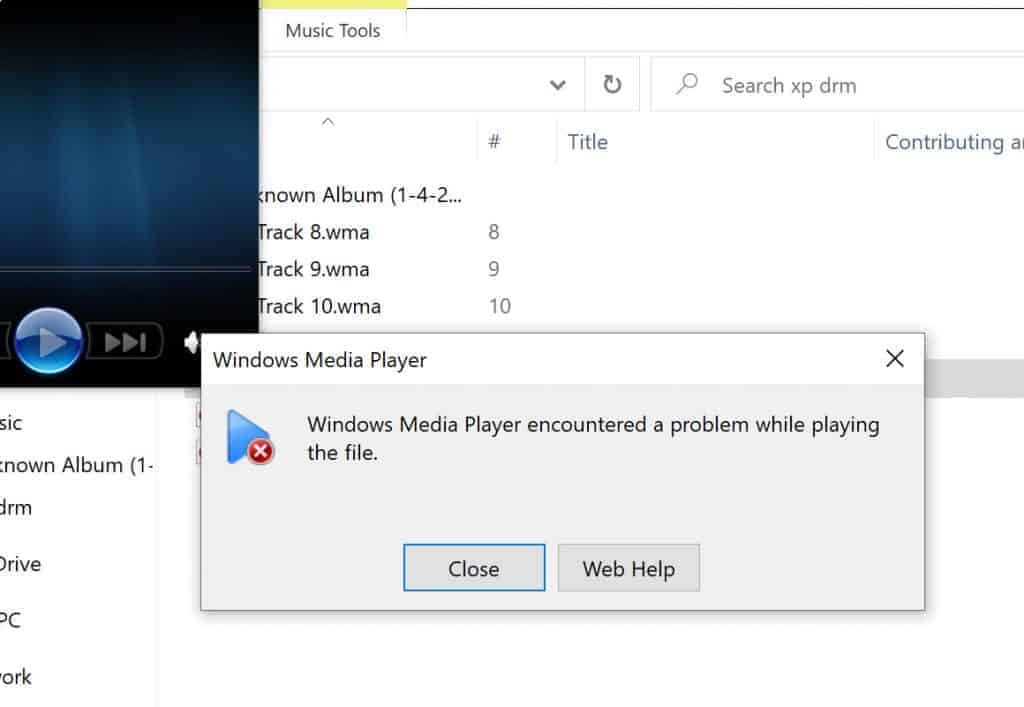
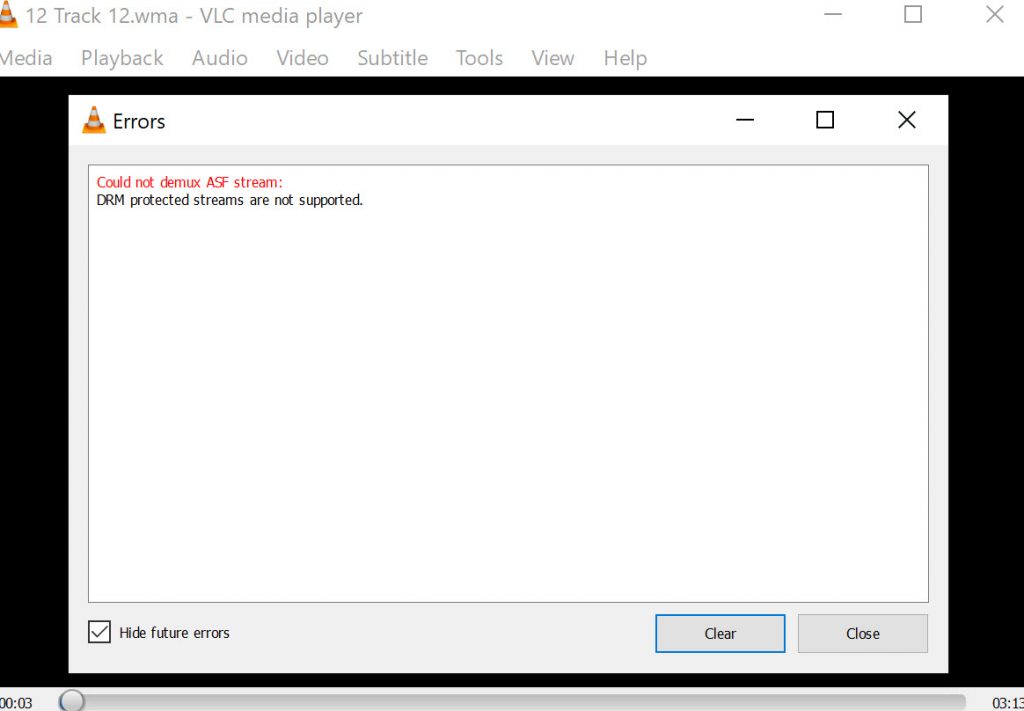
Common Error Messages Caused By DRM.
These are just a few of the error messages that you might receive from different programs when trying to play copy-protected WMA files.
And you’ll get the same or similar error messages if you try to convert the WMA files to MP3 or any other format.
Similarly, if you’re trying to burn the files to CD, or simply move them to another device.
You just won’t be able to do anything with the WMA files until you remove the DRM copy protection.
Download The Microsoft DRM Removal Tool.
The Digital Rights Update Tool removes the DRM copy protection that you added when ripping CDs using Windows Media Player.
After you’ve used this program, you’ll be able to play your music files on any computer or device without getting the dreaded “cannot play the file” message. You’ll also be able to convert and burn the files to CD.
The Digital Rights Update Tool is produced by Microsoft and is completely free and safe to use. You simply download it from the Microsoft Store.
To be clear, this tool only works on WMA audio files, and it won’t remove third-party DRM. It only removes the copy protection that Windows Media Player added when you originally ripped the CDs back in the day.
To get the Digital Rights Update Tool, either click the Windows Store icon on your Taskbar.
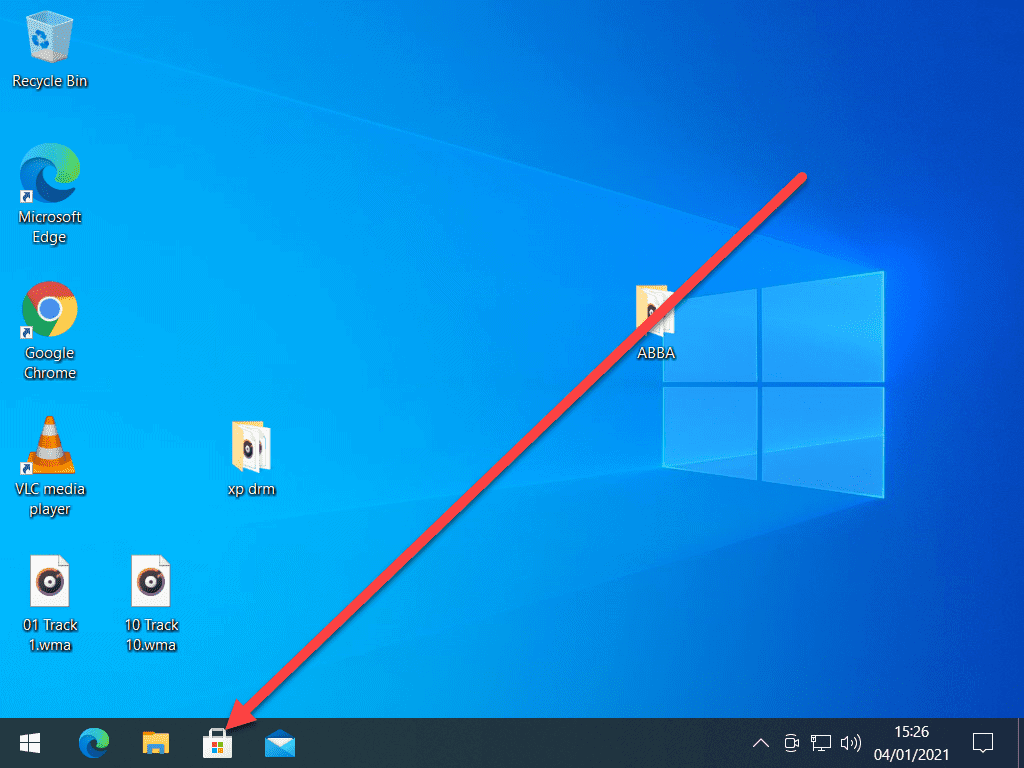
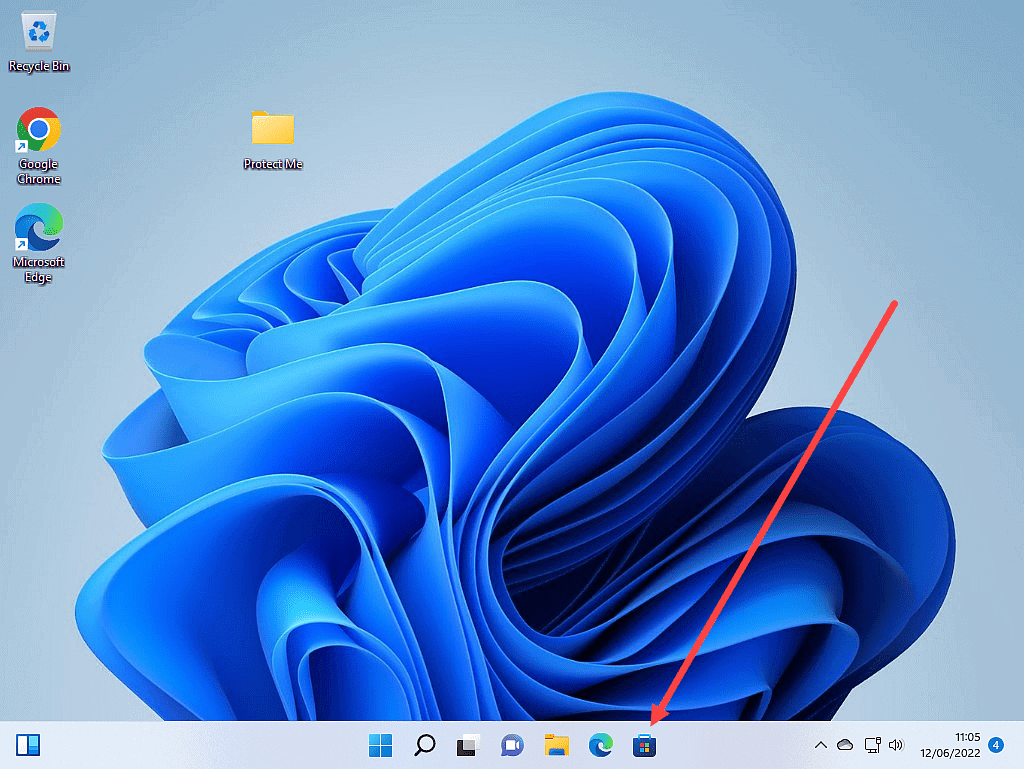
If you don’t see the Store icon on your taskbar you can search for it. Click the START button and then type “store” and then click on MICROSOFT STORE at the top of the list.
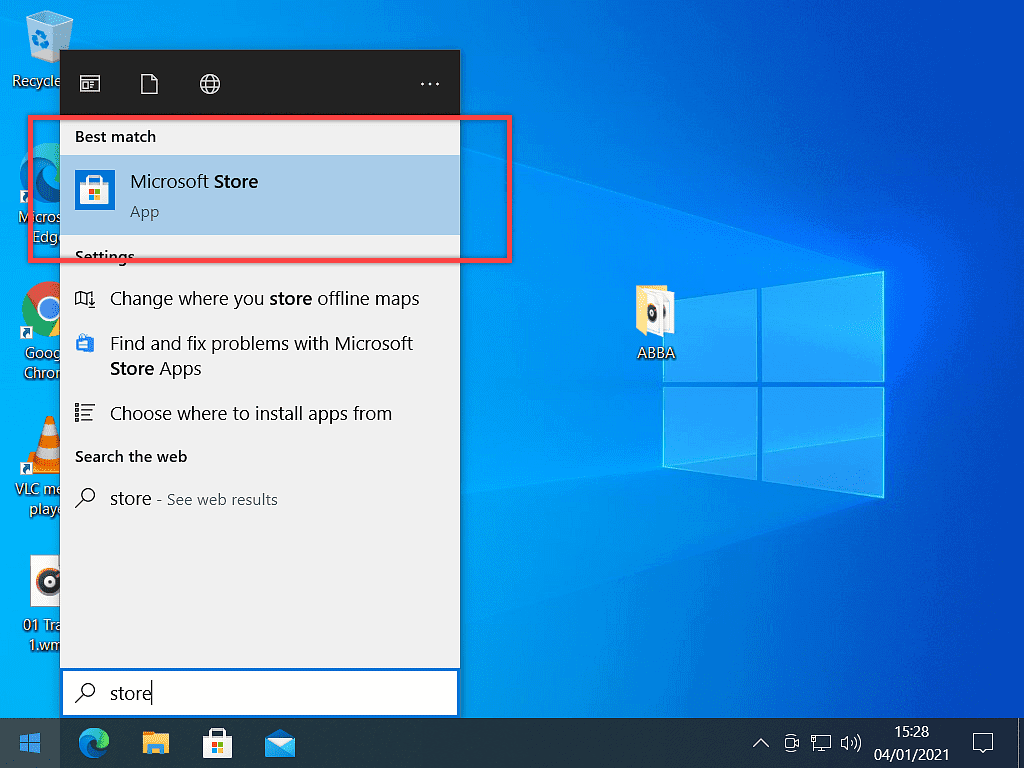
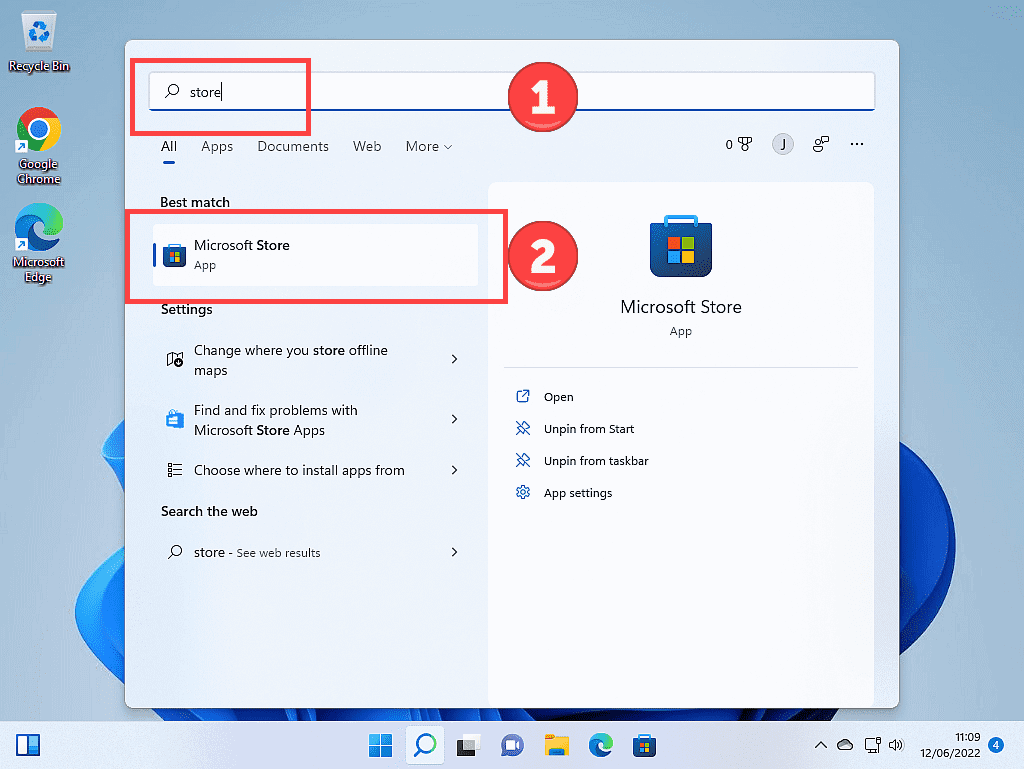
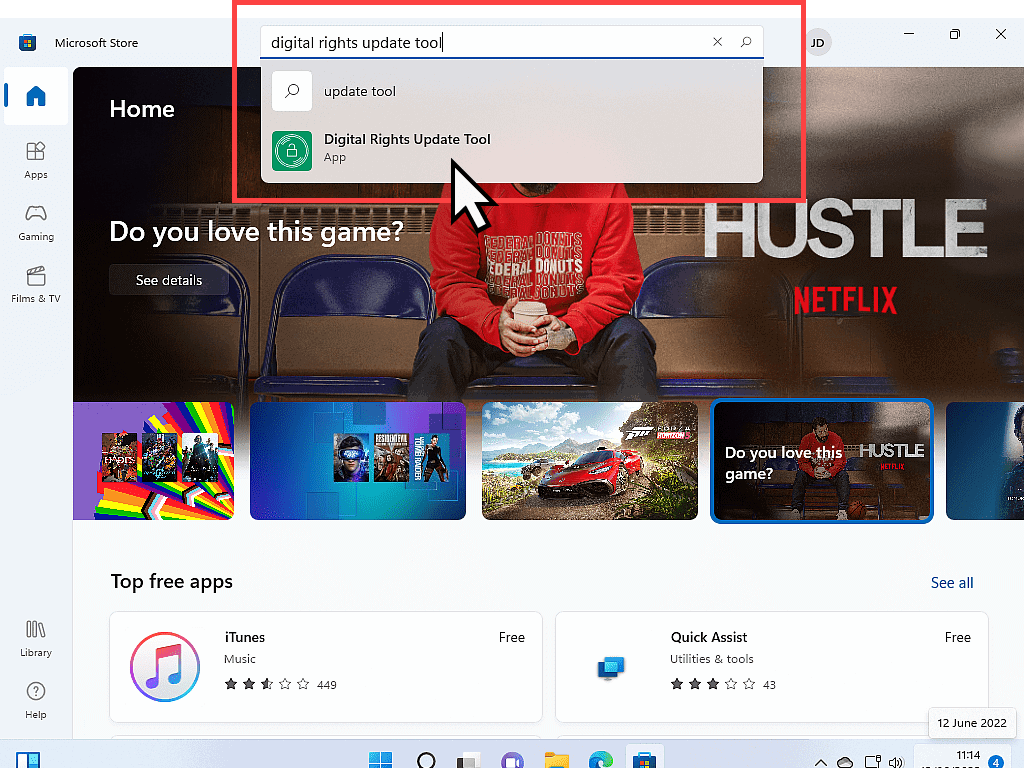
When the Store loads up, click the search box and type “digital rights update tool“. When the app appears, left-click on it.
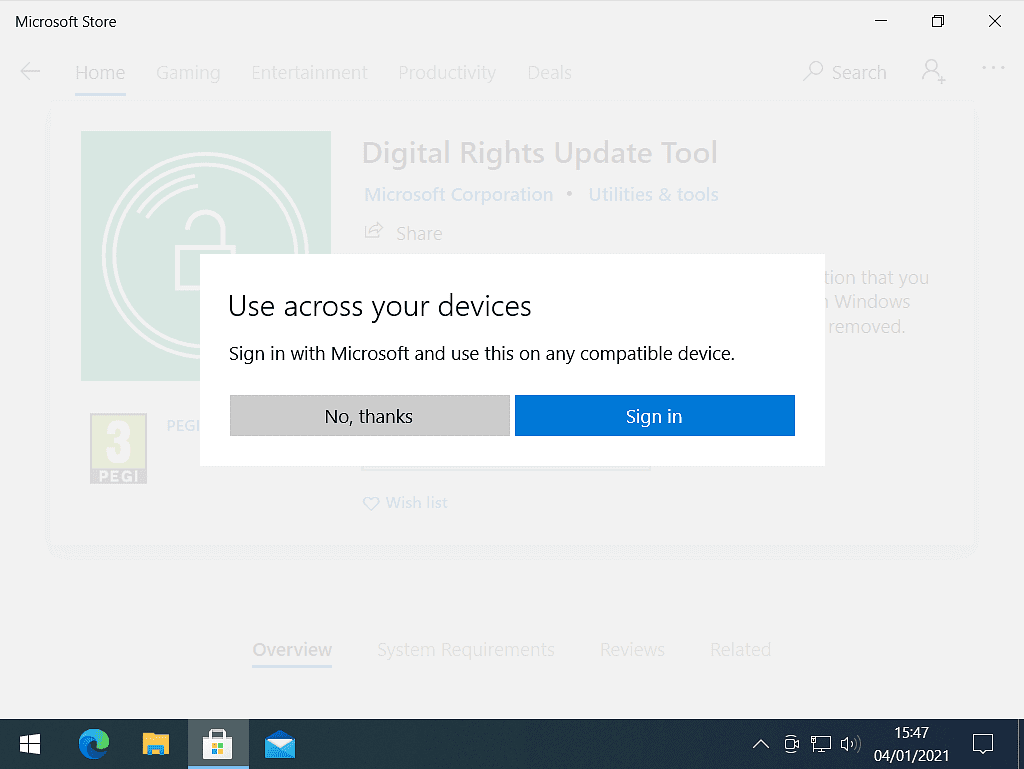
If you want to use this app across all your devices, you’ll need to sign into your Microsoft account. But you don’t have to. If you’d rather not, click No Thanks.
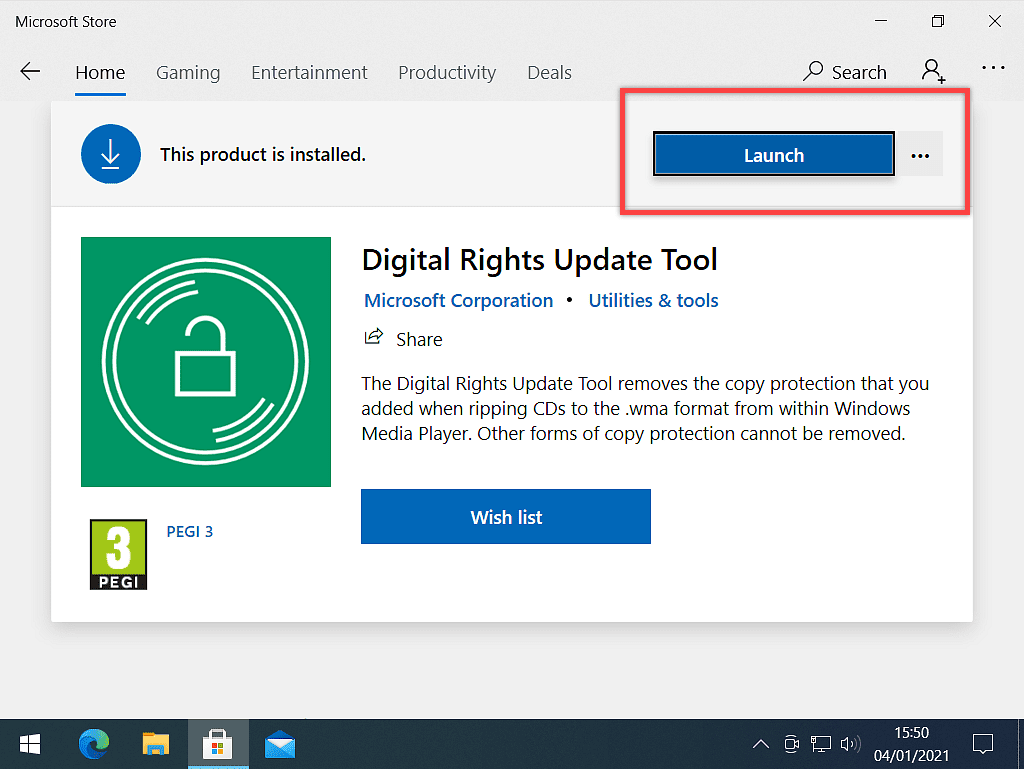
The Digital Rights Update Tool will download and install onto your computer.
Once it’s ready, click the LAUNCH button and we can begin removing the DRM from your WMA files.
How To Remove DRM From WMA Audio Files.
Now that you’ve got the tool installed it’s time to get to work removing the copy protection (DRM) from your audio files. The tool works on the folders that have got your music files inside. This way you don’t have to load files (tracks) individually.
When you ripped the CDs with Windows Media Player, it created folders for each album (CD). And most likely these folders will be in your Music Folder.
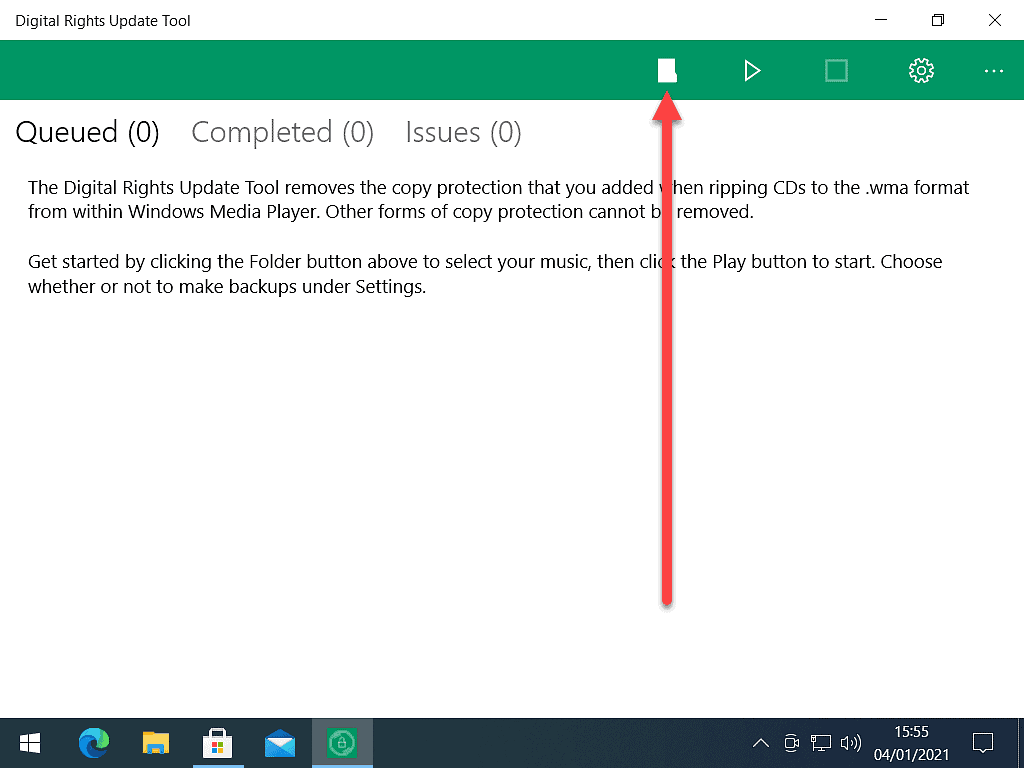
Left-click the folder icon (button) in the Digital Rights Update Tool. Then navigate to the folder where your copy-protected WMA files are stored.
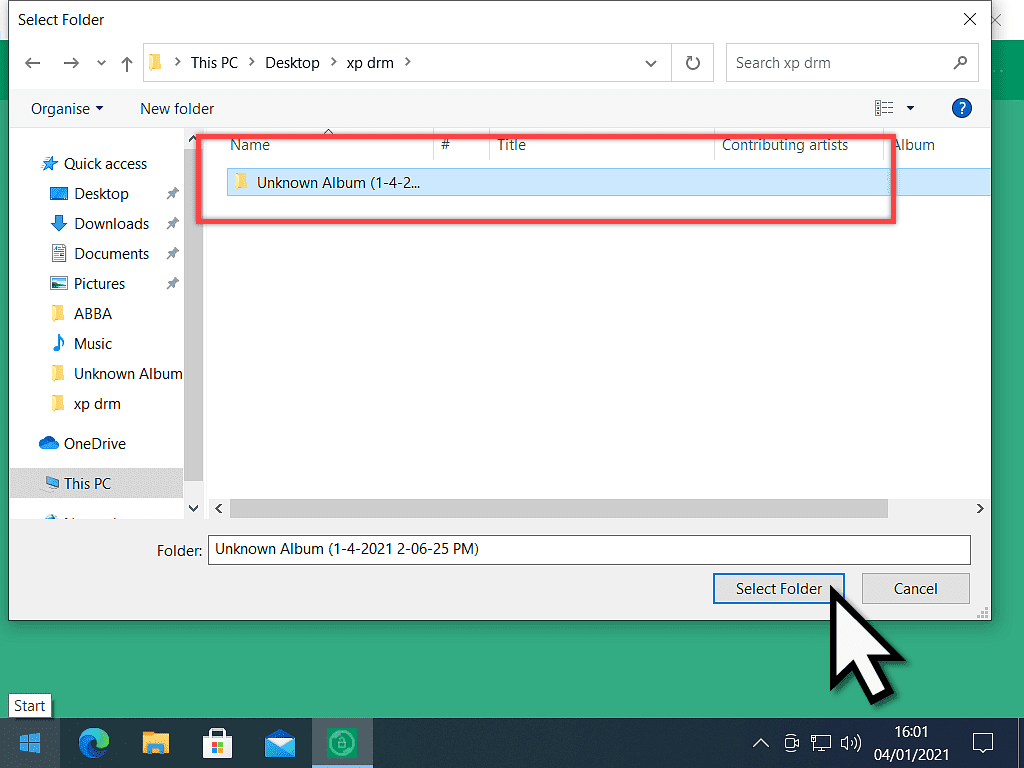
But don’t open the folder. Instead, left-click once on the folder to select it and then click the SELECT FOLDER button. The Digital Rights Update Tool works on the entire folder, not individual files inside it.
Start Removing DRM From WMA Files.
Once you’ve selected a folder, the app will search its contents looking for any WMA files that have DRM controls attached to them.
Any that do will be loaded into the app and those that don’t will simply be ignored.
To begin removing the DRM from your audio files, click the PLAY button.
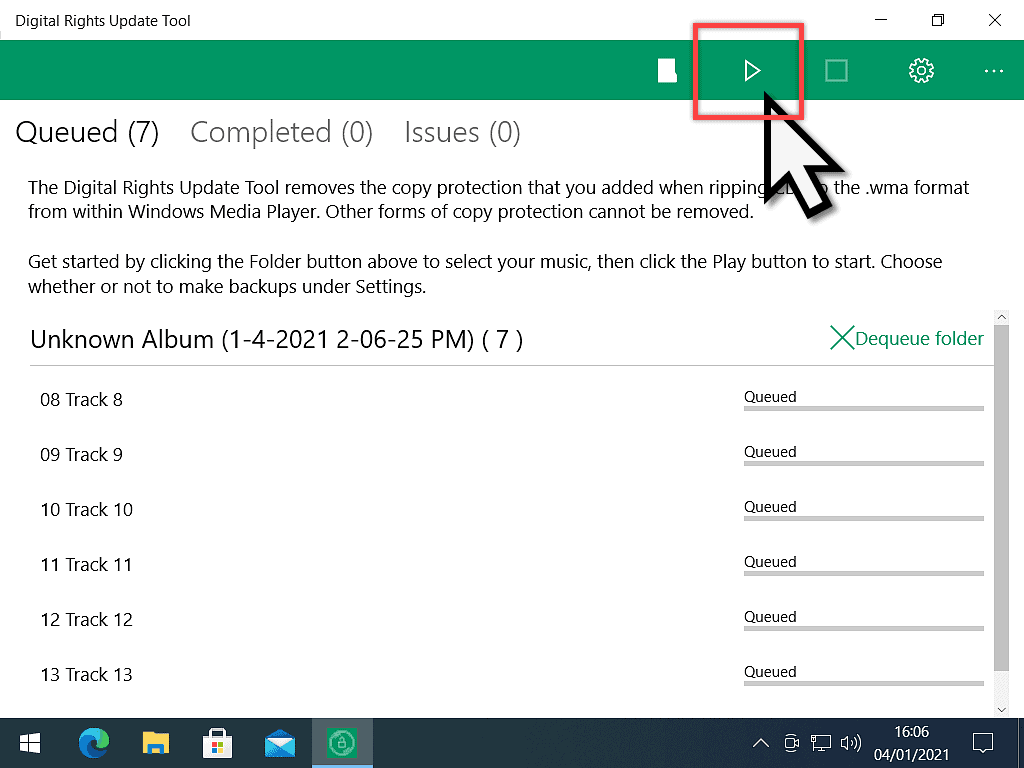
As each file is processed you can check its progress.
It may take some time depending on how many audio files you have and the speed of your computer.
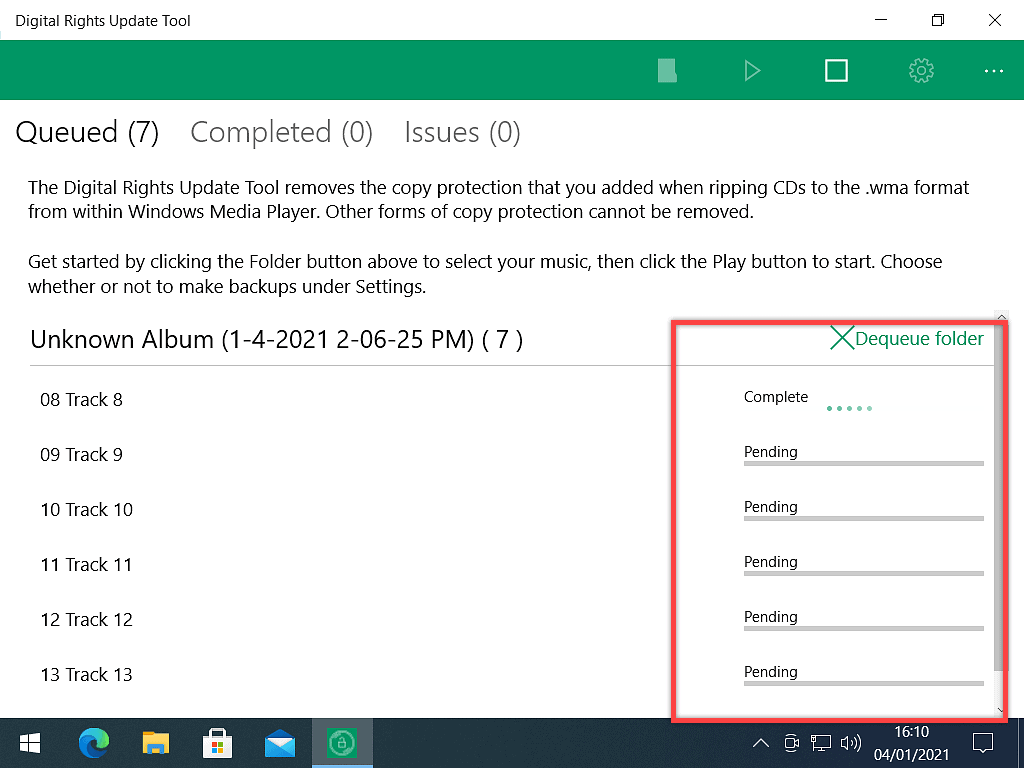
When it’s done, it’s done.
Either close the Digital Rights Update Tool or load another folder and continue removing DRM from your WMA audio files.
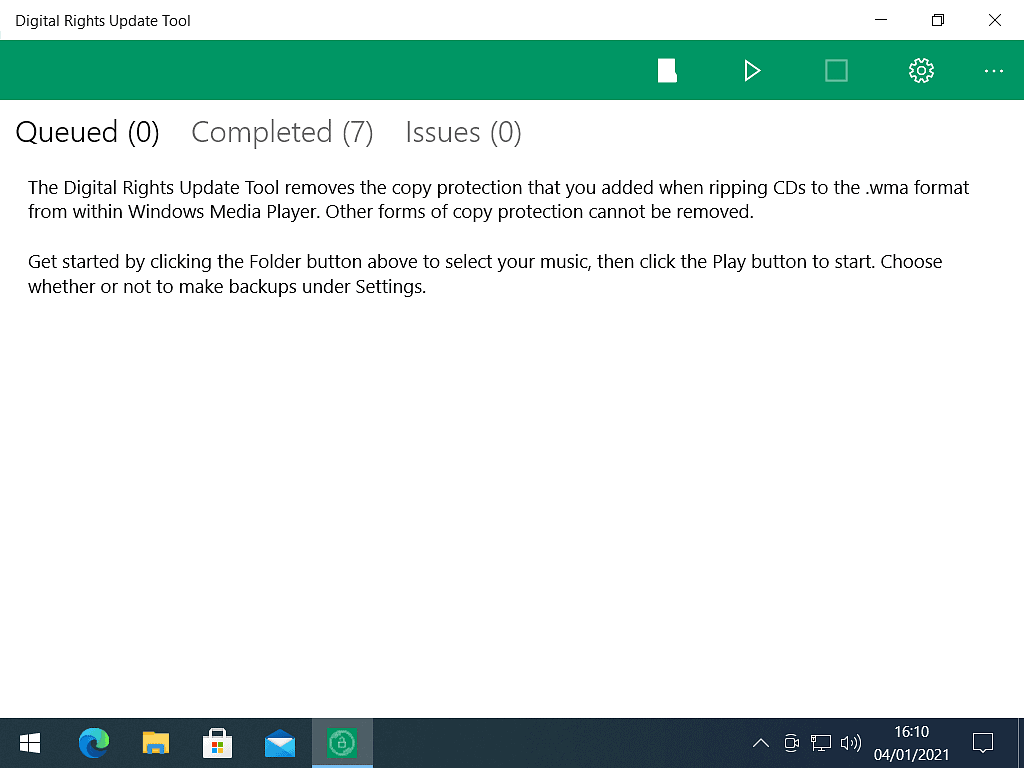
Load One Album (Folder) At A Time.
Generally, I’d say do one album (folder) at a time. That way it won’t take too long to complete the copy protection removal. Loading several folders (albums) at a time will tie up your computer for quite a while.
I know that if you’ve got a lot of albums to work through it will become tedious doing them one at a time, but better that than have something go wrong.
What To Do When DRM Removal Is Completed.
The Digital Rights Update Tool doesn’t remove the copy protection from your original WMA audio files, it leaves those intact and untouched.
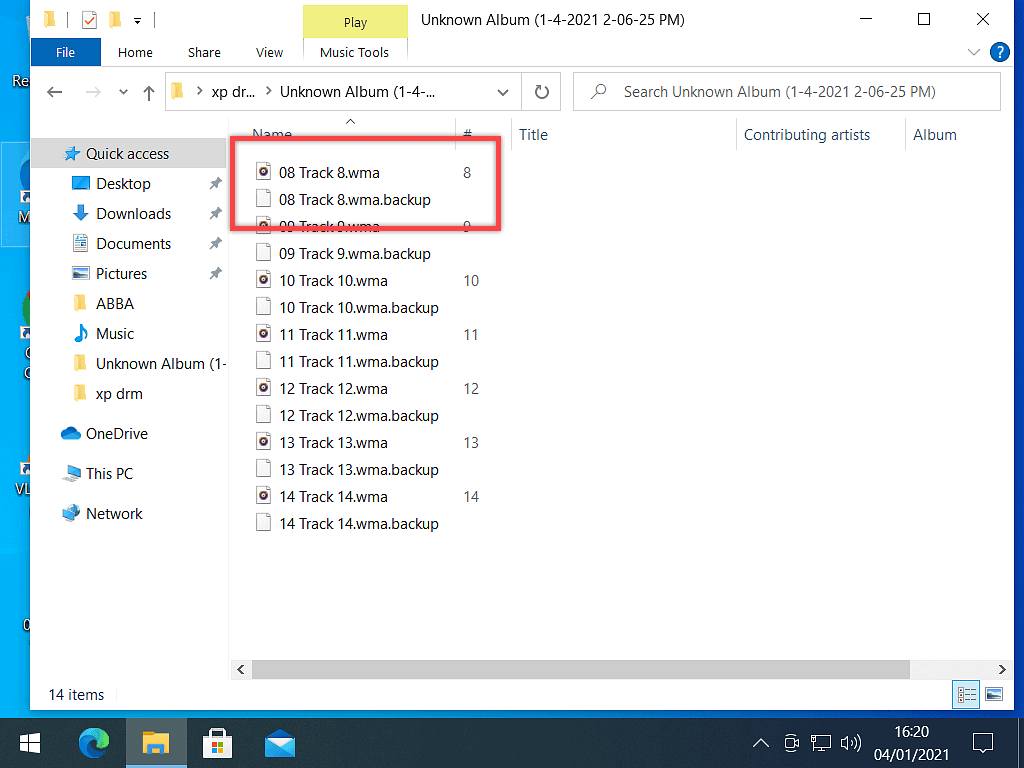
What it does is to create a copy of the original, the copy is the one with the DRM removed. Which means that you end up with two files for each audio file (song).
The original is then renamed as a backup file. If you want to, you can delete the backup files.
But make sure that you test all the audio files are working first.
If you’re only removing DRM from one album, then playing each track to see if it works isn’t much of a hardship.
If you’ve got several albums to get through, then you’re in for a long weekend.
How To Quickly Delete The Backup Files.
To delete the backup files quickly, type backup into the folder search box. Then click the search arrow. Windows will show you all the backup audio files.
Left-click once on one of them to select it, anyone will do it, it doesn’t matter which one. Then press CTRL and the letter A on your keyboard. All the backup files will be selected.
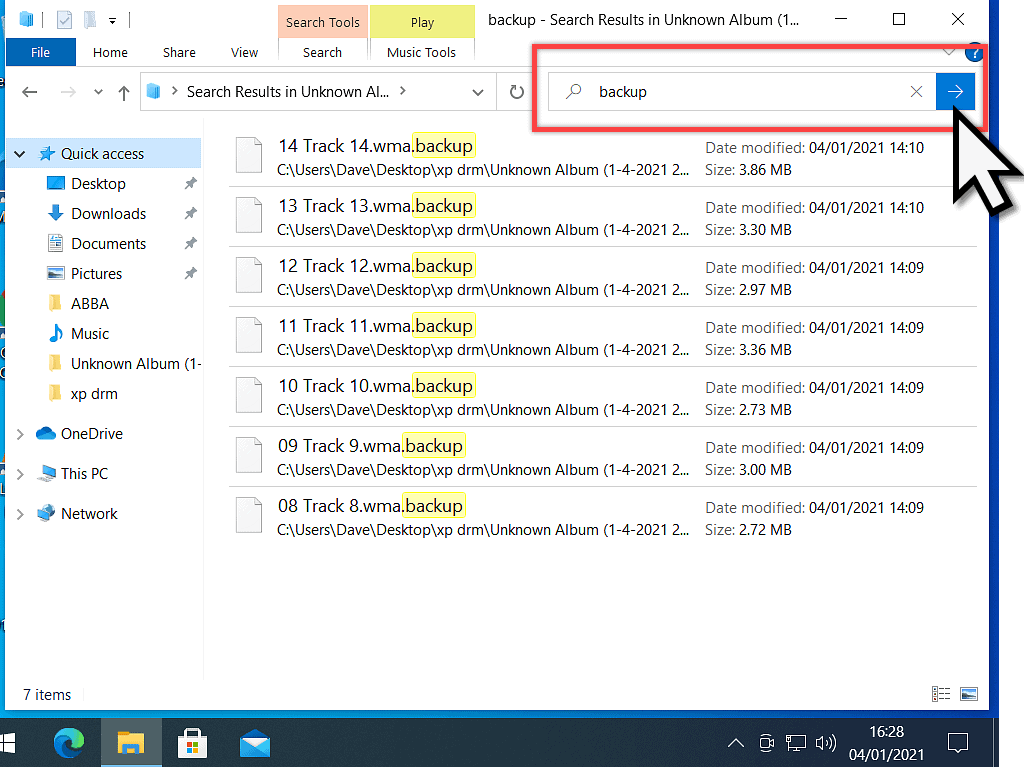
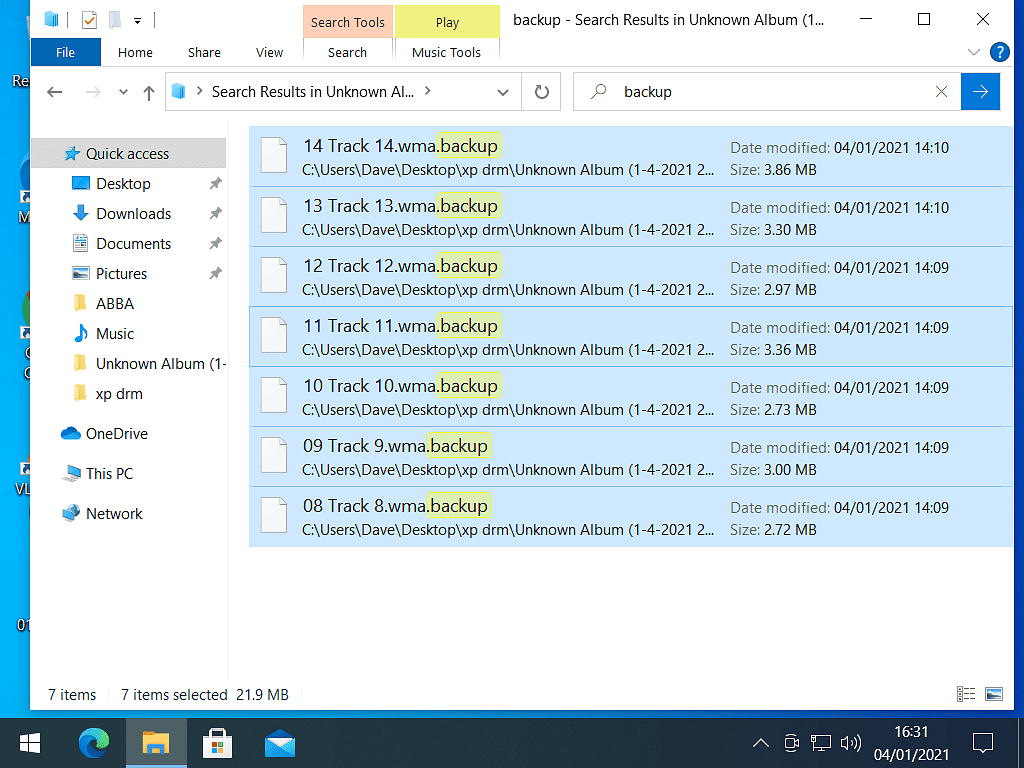
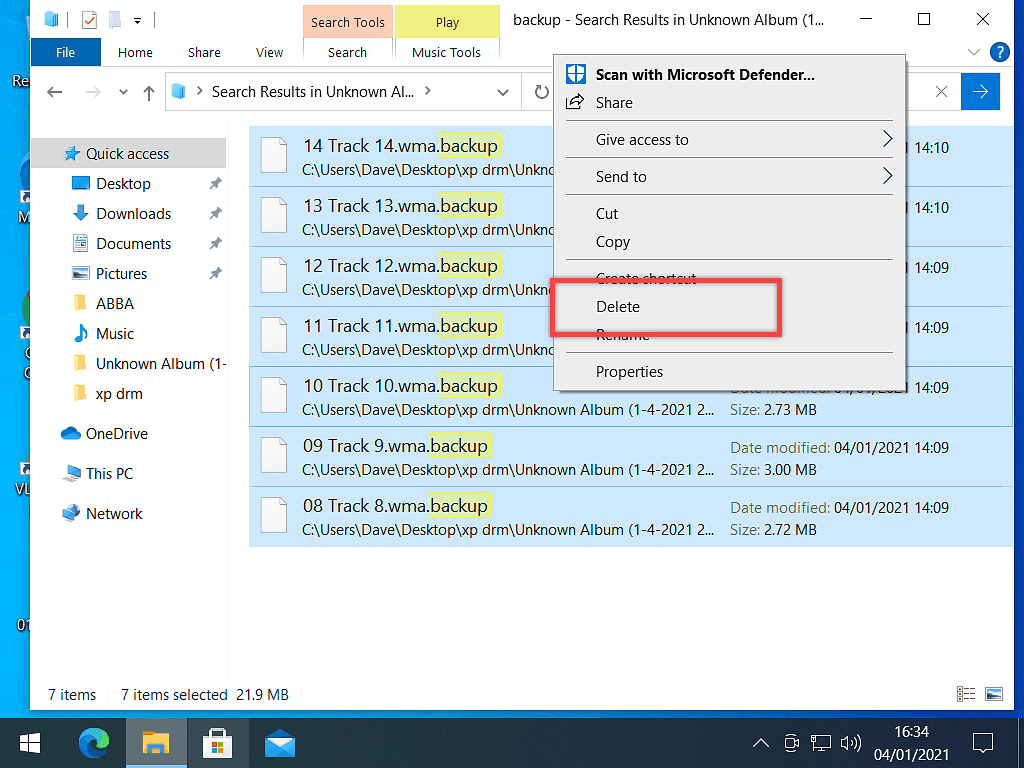
With all the backups selected, right-click on one of them, again it doesn’t matter which one.
On the menu that opens, left-click DELETE.
Job done.
You should now be able to play, copy and paste, transfer, burn, convert, or do whatever you want to do with your music files.
Removing DRM From WMA Audio – Summary.
Back in the day when we were all copying our CD collections to our computers, the program that was most often used was Windows Media Player. Unfortunately, when you used Media Player for the first time, you’d have to choose whether or not to add copy protection.
It seems obvious now that given the choice, you should choose no, but many of us just didn’t understand the implications of choosing yes. And secondly, the wording of the copy protection notice could have been clearer. As I remember it, the notice seemed to suggest that I was protecting my files from being damaged in some way. From becoming corrupted in some way or being deleted.
I’m sure a lot of people out there did exactly as I did for similar reasons.
Finally, with the Digital Rights Update Tool, Microsoft has given everyone the chance to regain control of their own audio files.
Keep Up With Home Computer Guides.
All the latest guides and articles published on At Home Computer delivered to your inbox.
No account needed, just add your email address.
