
How to burn a music CD in Windows 10 and Windows 11 in 2026. Burning audio CDs isn’t as popular as it once was, but there is still something to be said about making a music CD to play in the car or on your HiFi system.
To burn an audio CD in Windows 10 & 11, you can use the built in media player Windows Media Player (Legacy). You really don’t have to download or install anything else, WMP can handle it all.
You’ll need to have a few blank CDs and of course a CD/DVD burner. If your computer doesn’t have a built in burner, then you can use one of the external USB drives. They work just as well and have the advantage of being portable.
Most versions of Windows 10 & Windows 11 have Windows Media Player (legacy) pre-installed, but if you find that it’s missing from your computer click here How To Install Windows Media Player (Legacy) On Windows 10 And 11.
Opening Windows Media Player (Legacy)
To burn a music CD, load a blank disc into your CD/DVD drive. Ignore any pop-up windows and close File Explorer if it opens.
Ignore the Pop-Up Windows Offers You
When you put the blank disc in, Windows will very likely offer to burn it for you. One of the choices it gives you is called “With a CD/DVD player”, which sounds exactly like what you want.
It isn’t. Both of the choices in that pop-up make a data CD, not a music CD. A data CD won’t play in an older car stereo or HiFi, which is usually the whole point of burning one.
Close the pop-up and carry on with Windows Media Player. It’s the only thing built into Windows that makes a proper audio CD.
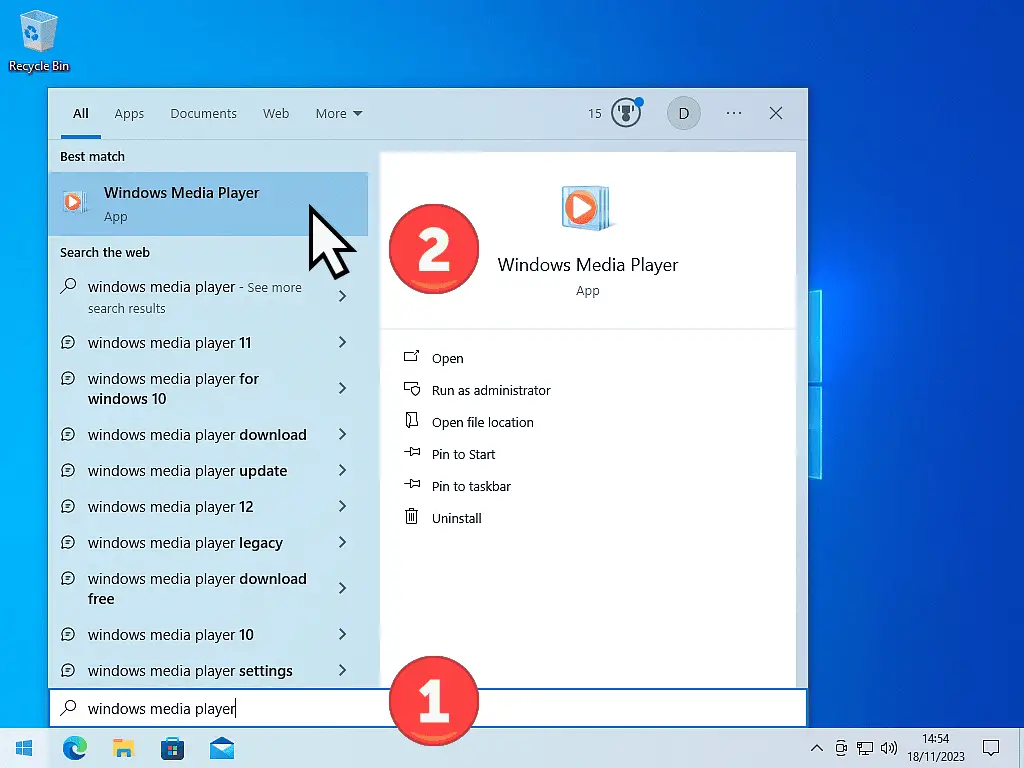
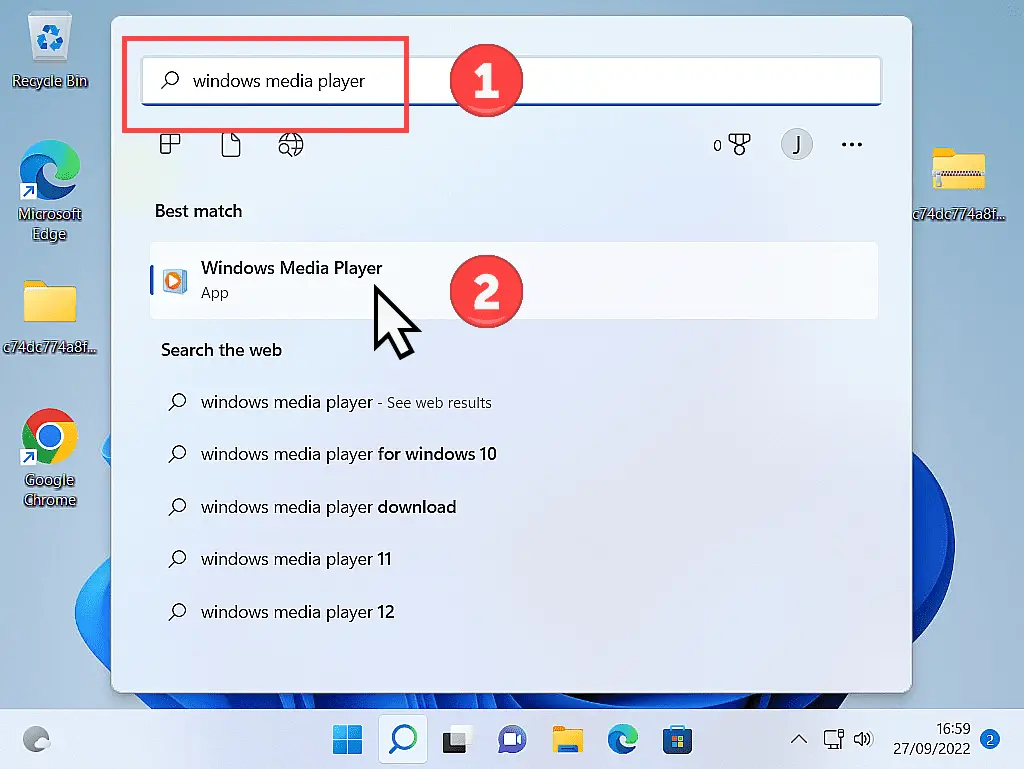
Click the Start button and then type “windows media player”.
For Windows 10 users, click Windows Media Player (App).
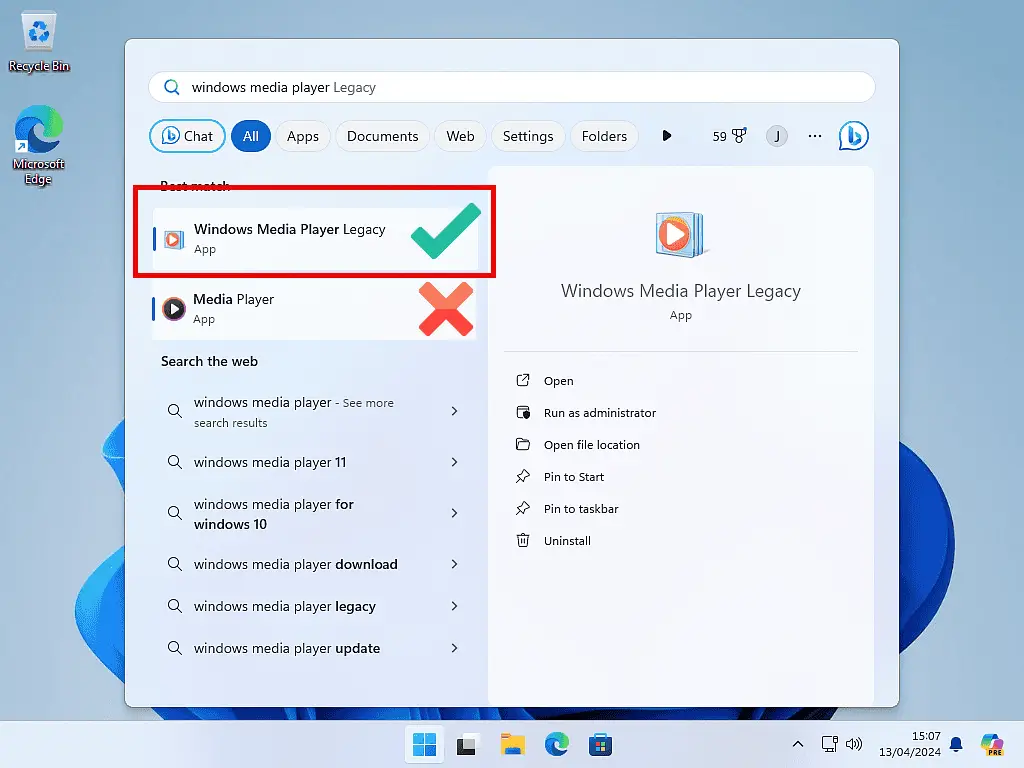
Windows 11 users should click Windows Media Player (legacy).
Windows Media Player (Legacy) Vs The New Media Player App
The new Media Player app that’s bundled with modern versions of Windows doesn’t burn CDs, it only plays your music. To burn a CD in Windows 10 & Windows 11 you’ll need the original Windows Media Player.
Windows ships with two media player programs installed and it’s very easy to get them confused because they have almost identical names.
There’s the original Windows Media Player, which is the one you want, and then there’s the “new” Media Player app.
Hats off to Microsoft for keeping things clear.
There’s one more thing worth knowing about the Legacy player. Microsoft now treats it as an optional feature. It’s installed by default on most computers, but it can be removed, and on some machines it simply isn’t there to begin with.
If yours is missing, you can put it back. Go to Settings, then Apps, then Optional features. Click View features, search for Windows Media Player and install it. Restart the computer and it’ll be back where it should be.
I’ll be honest with you, Microsoft has been quietly taking bits out of the Legacy player for years now. The Sync tab disappeared back in 2023, and the caption controls are being switched off in the Windows test builds as I write this.
Burning CDs still works perfectly well and there’s no sign of that changing any time soon. But it’s fair to say the Legacy player is on its way out, so it’s worth knowing where the off switch is.
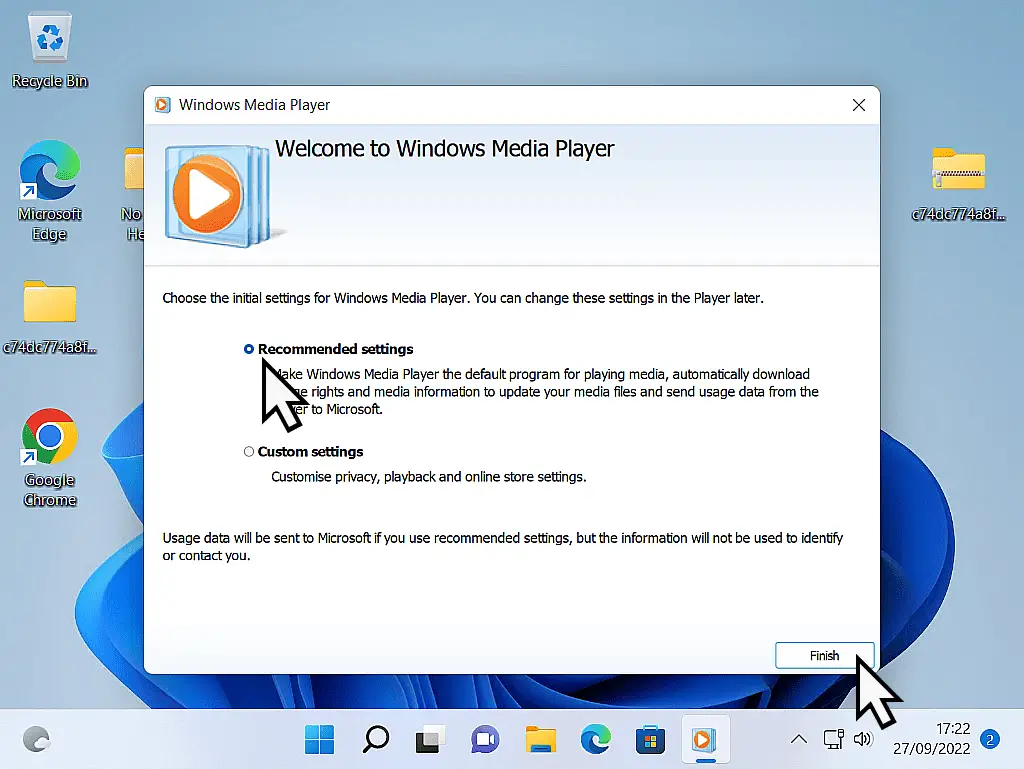
If this is the very first time that you’ve used Windows Media Player (WMP), then you’ll be greeted with the set-up screen.
Select the Recommended Settings and click the Next button.
Burn an Audio CD with Windows Media Player (legacy)
When WMP runs for the very first time, it’ll scan your Music folder looking for audio files. If you’ve got a large collection of music then it may take some time for Media Player to find and load all of it.
When Windows Media Player opens, it’ll usually display all your music (audio files).
If it doesn’t, click the Music tab in the left-hand panel.
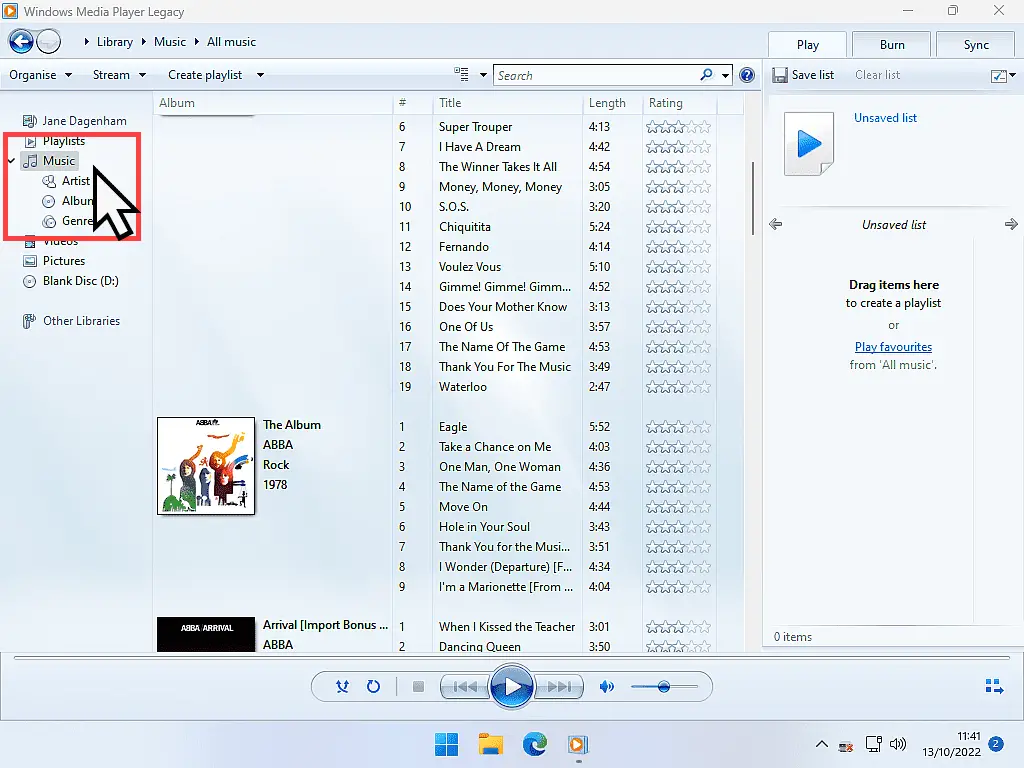
If Not All Your Music Is Being Shown.
Windows Media Player scans your Music folder for audio files. If you’ve got music tracks stored in a different folder (the Downloads folder for instance) then WMP probably won’t find it. If that’s the case, click here How To Use Windows Media Player
Check Windows Media Player Burn Settings
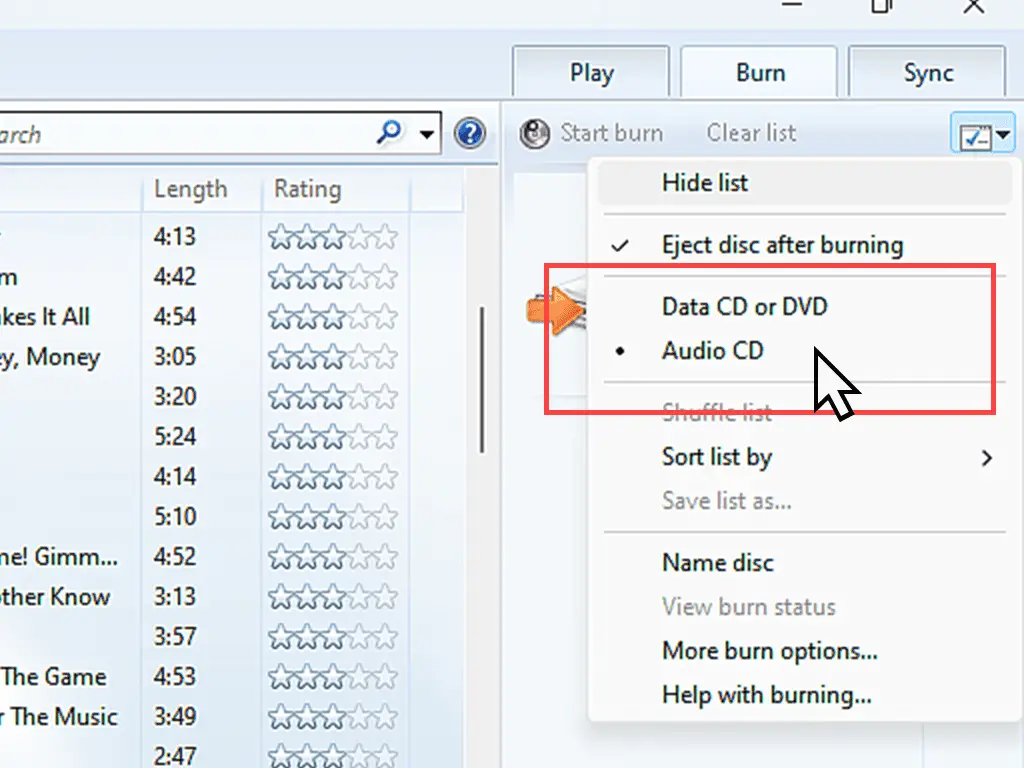
Windows Media Player can actually burn data CDs as well as burn music CDs, so you need to check what settings it’s using.
All standalone CD players, such as in your car or HiFi system, will be able to play music CDs burned as CDDA (Compact Disc Digital Audio).
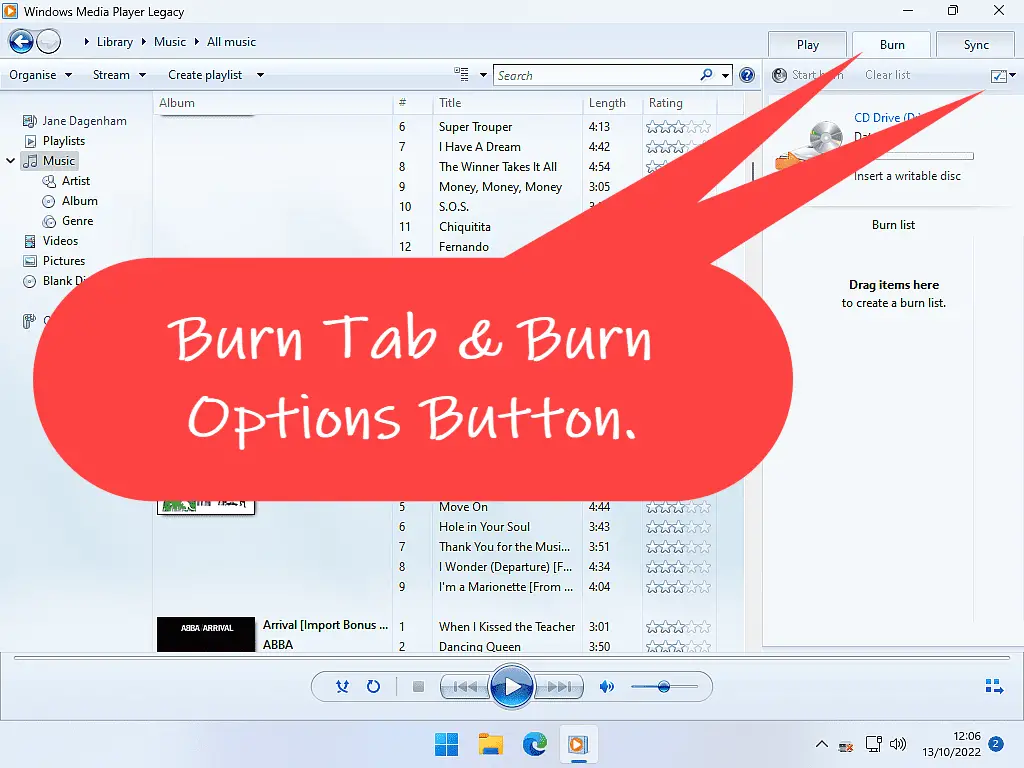
To ensure that you’re going to make a music CD, left click the Burn tab on the right-hand side of the window. Then click the Burn Options button. The Burn Options button is tiny, but it is there.
On the Burn Options menu, make sure Audio CD is selected. If it isn’t, left-click on it.
Audio Files In MP3 Format.
In case you’re wondering, it doesn’t matter if your music is currently in the MP3 format (which is probably the most common format). WMP will convert it to CDDA during the burn process.
The same is true for the WMA, WAV, and FLAC formats. A Beginner’s Guide to File Formats and File Extensions
Adding Music to your Burn List
To burn your music to a CD, you’ll need to create what’s known as a “Burn List”. The burn list is simply a list of the songs that you want added to the audio CD you’re creating.
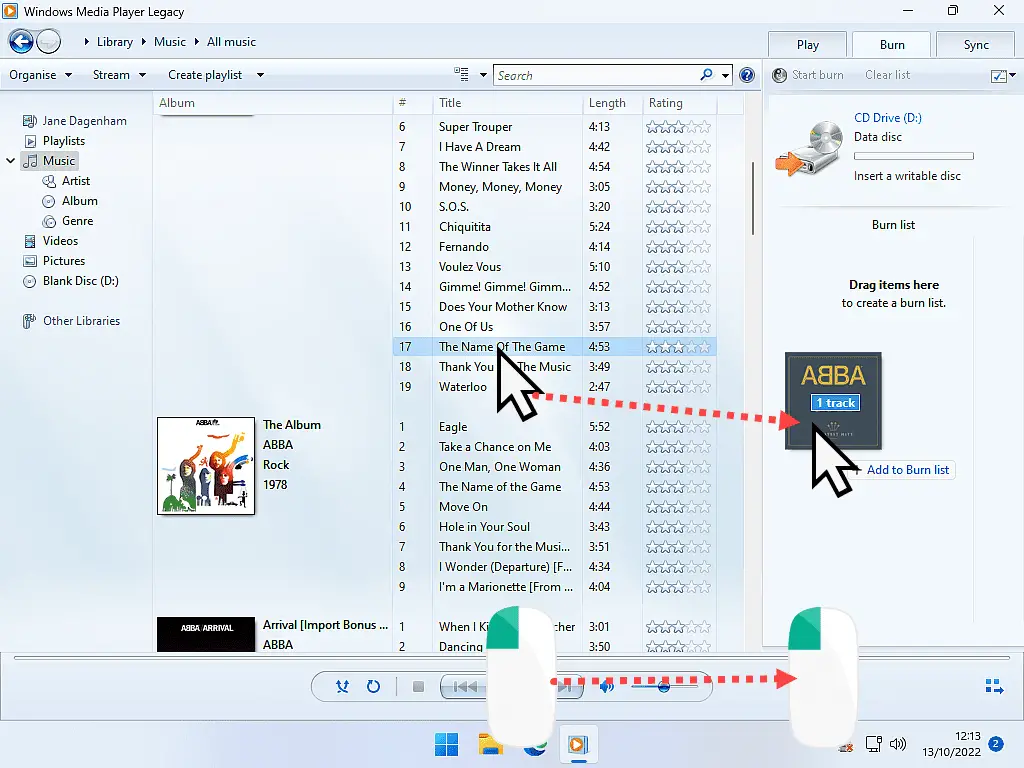
Drag and drop each track in turn onto the Burn List.
To drag and drop, put your pointer onto a track, hold down the left mouse button, and then move your pointer onto the burn list.
You’ll see that the music track will move with your pointer. Release the mouse button to drop the track onto the list.
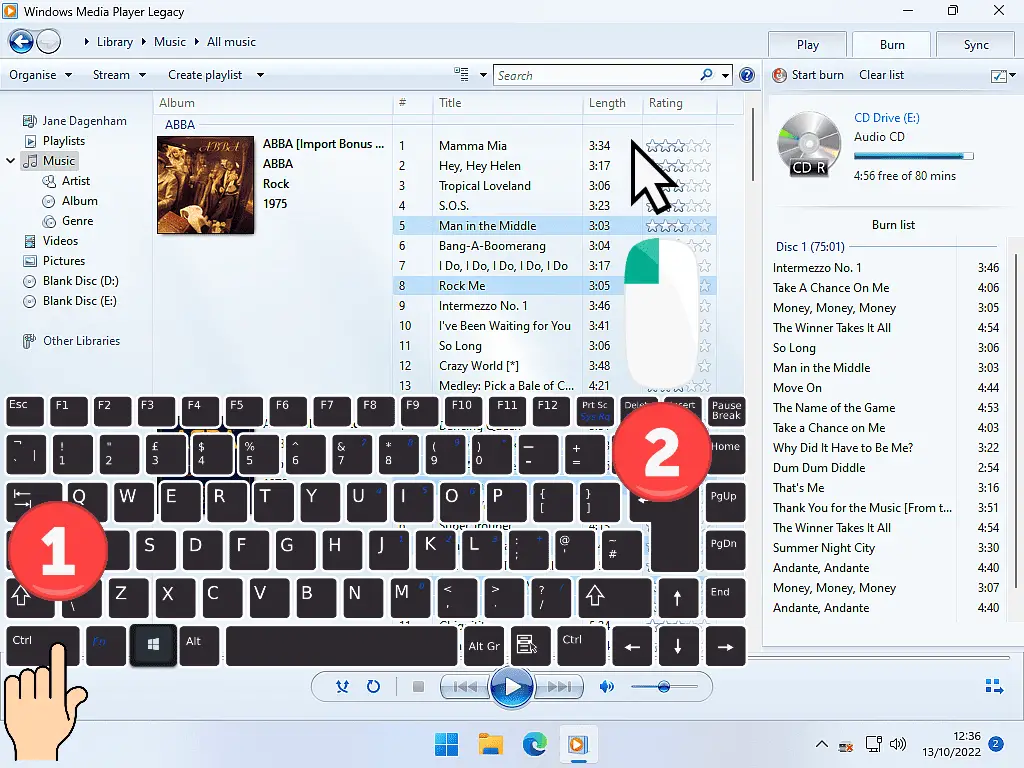
You can speed things along by selecting multiple tracks at the same time.
Hold down the CTRL (Control) key on your keyboard, then single left-click on the different tracks that you want to add to your CD.
You’ll see that they will all become selected.
Once you’ve finished selecting, simply drag any one of them to the burn list and you’ll see all of them will follow.
Selecting Multiple Files At The Same Time.
If you’re unfamiliar with selecting lots of files at the same time click here How To Select Multiple Files In Windows
Blank CD Music Capacity
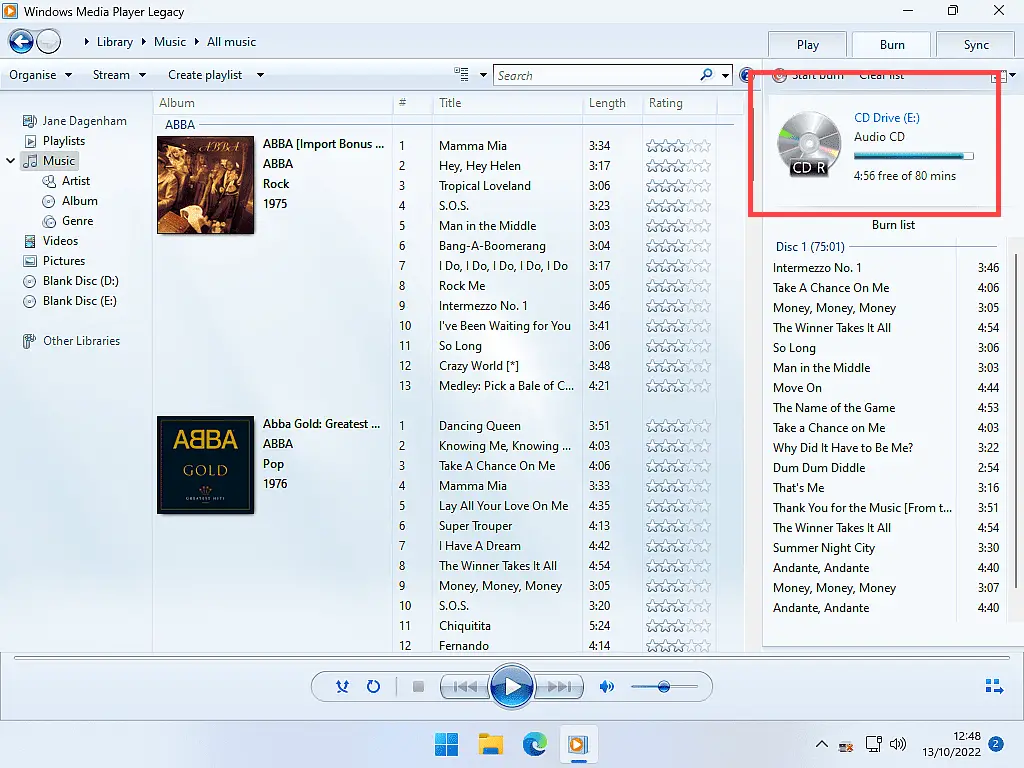
As you add more songs to be burned to the CD, keep an eye on how much space is left on the CD. Blank CDs have a capacity of around 700 MB. That’s just about 80 minutes worth of music formatted as CDDA.
Windows Media Player will show you the remaining CD-R capacity just above the burn list.
It’s displayed in minutes rather than megabytes.
Although you could fill the disc entirely, generally I’d recommend leaving a few minutes spare.
Something between 2 to 5 minutes. You’ll get better, more reliable results by leaving a little empty space on the disc.
Very Long Playing Music CDs.
With a standard audio CD you’re limited to around 80 minutes of playback time. That’s simply because of the amount of space that CDDA files take up.
However you can use WMP to make an MP3 music CD. They won’t play in every standalone CD player, but you might be surprised at how many will play MP3s. How To Make An MP3 CD
Ready to Burn your Audio CD
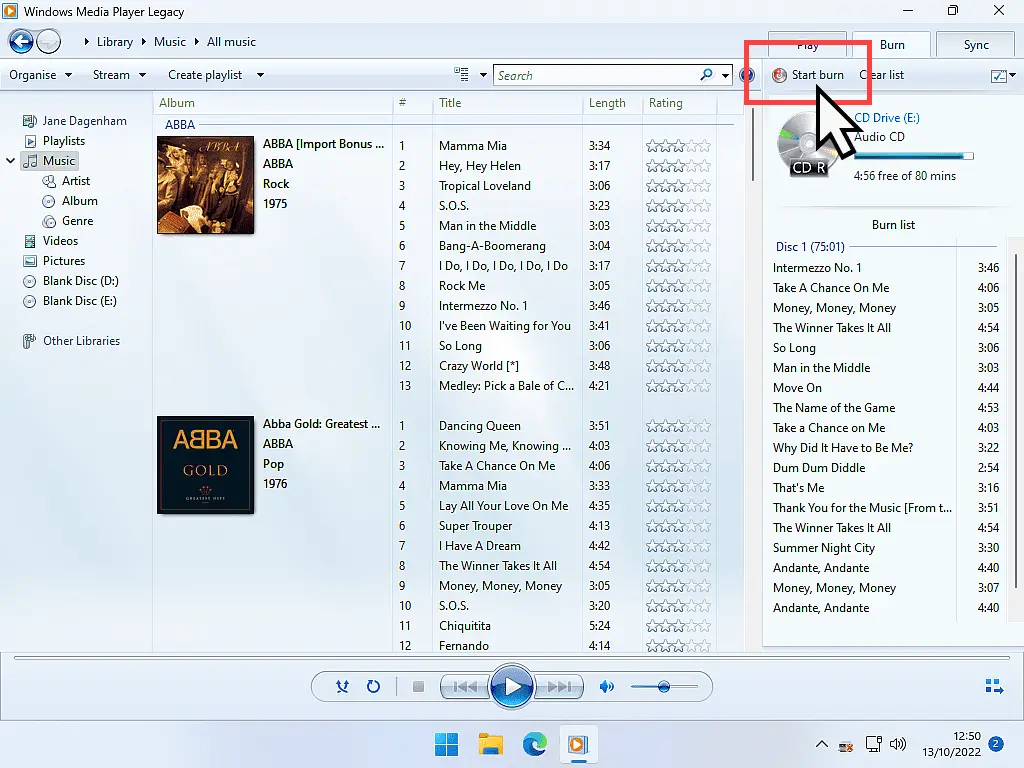
When you’ve added all the music that you want on the CD, you’re ready to begin burning your audio CD. Click the Start Burn button (which is just above the burn list).
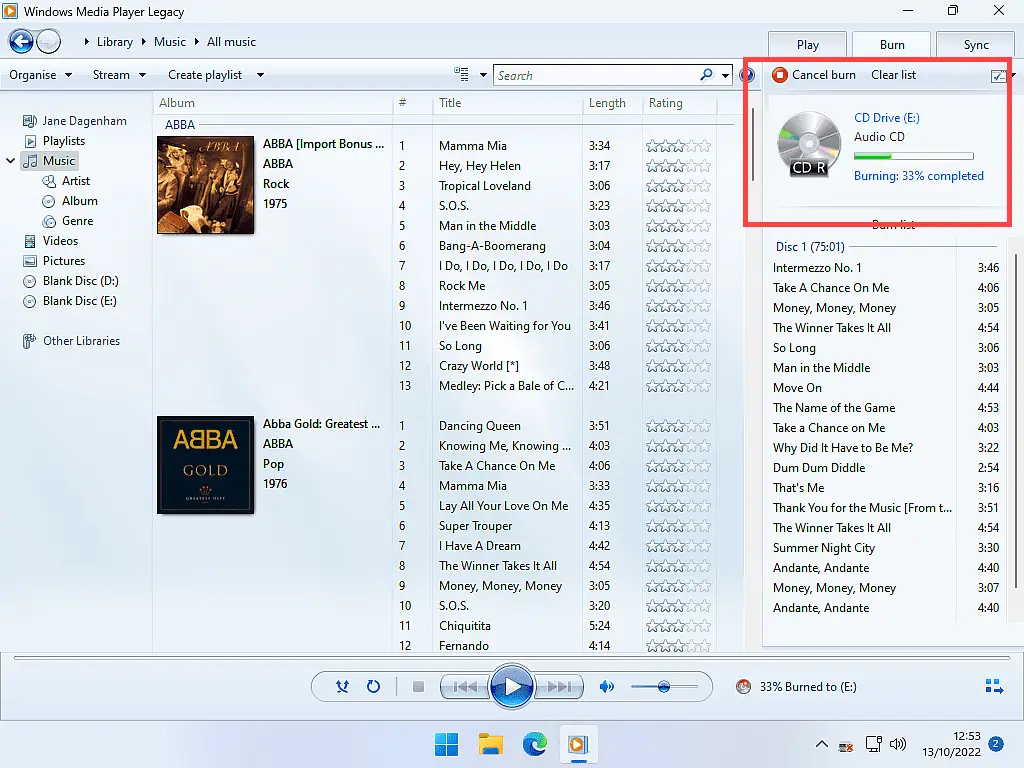
As Windows burns your music to the CD, you’ll see a progress indicator appear.
Summary
If you’ve got a CD/DVD burner on your computer and a few blank CDs lying around, creating your own music CDs is great fun. They can be played in most HiFi CD players or in the car.
And, unlike a lot of other things that we do on our home computers, you finish with something that you can actually hold in your hand. Something tangible. Love it.
Related Posts
How to Convert WAV Files to MP3
WAV files are huge and not widely supported outside of computers.
How To Fix Missing MP3 Tags
MP3 tags are the album name, track listing, artist name etc. Sometimes they’re not there.
Copy text directly from a picture
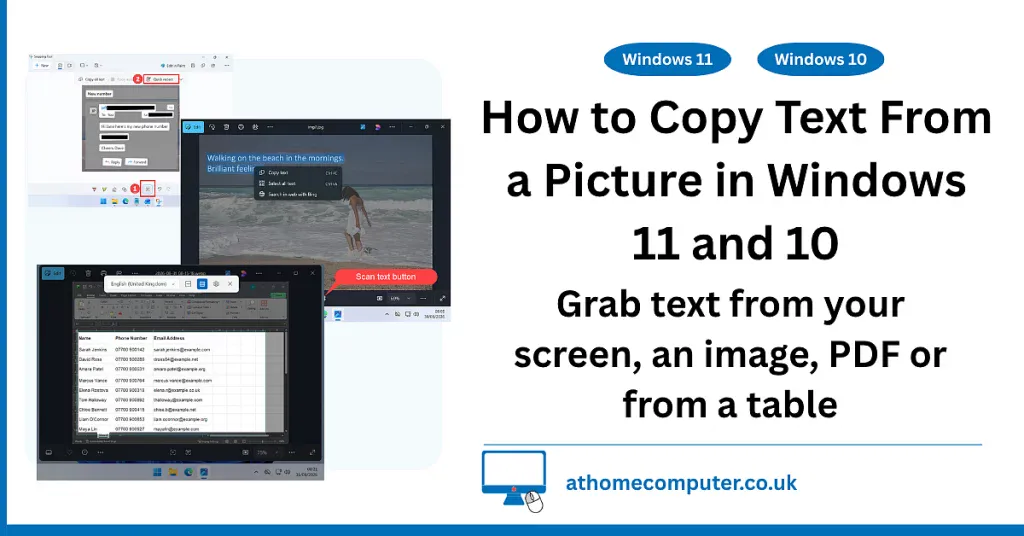
Windows can read the words in a picture and put them on your clipboard, ready to paste. It’s free, it’s already on your PC, and once you’ve seen it work you’ll use it constantly.
You can find this and other related step by step guides in – At Home Computer Guides