The version of VMware Tools that ships with the latest versions of Workstation Pro no longer supports Windows XP and Windows Vista virtual machines. They’re now legacy operating systems.
The good news is that you can still download and install a legacy version of VMware Tools that does install on XP and Vista and it’s easy to do.
So if you’re trying to setup an XP or Vista VM, then read on and I’ll show you how to do it.
VMware Tools For Legacy Operating Systems.
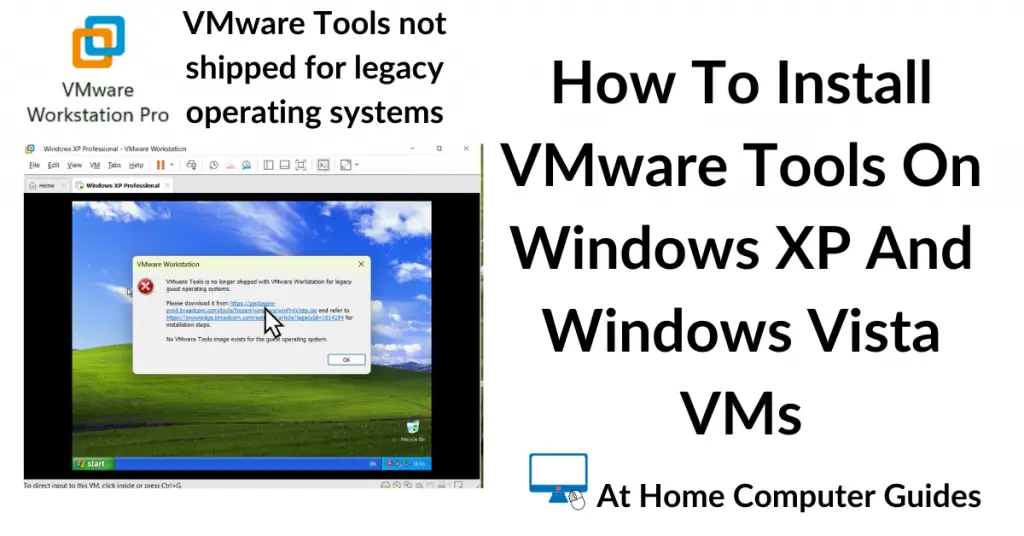
When trying to install VMware Tools on to a Windows XP or Windows Vista virtual machine, you’ll see this message popup.
“VMware Tools is no longer shipped with VMware Workstation for legacy guest operating systems”.
What you need to do is to click the link in the message popup to download the “Pre Vista” legacy Tools.
Download the VMware Tools ISO to your computer.
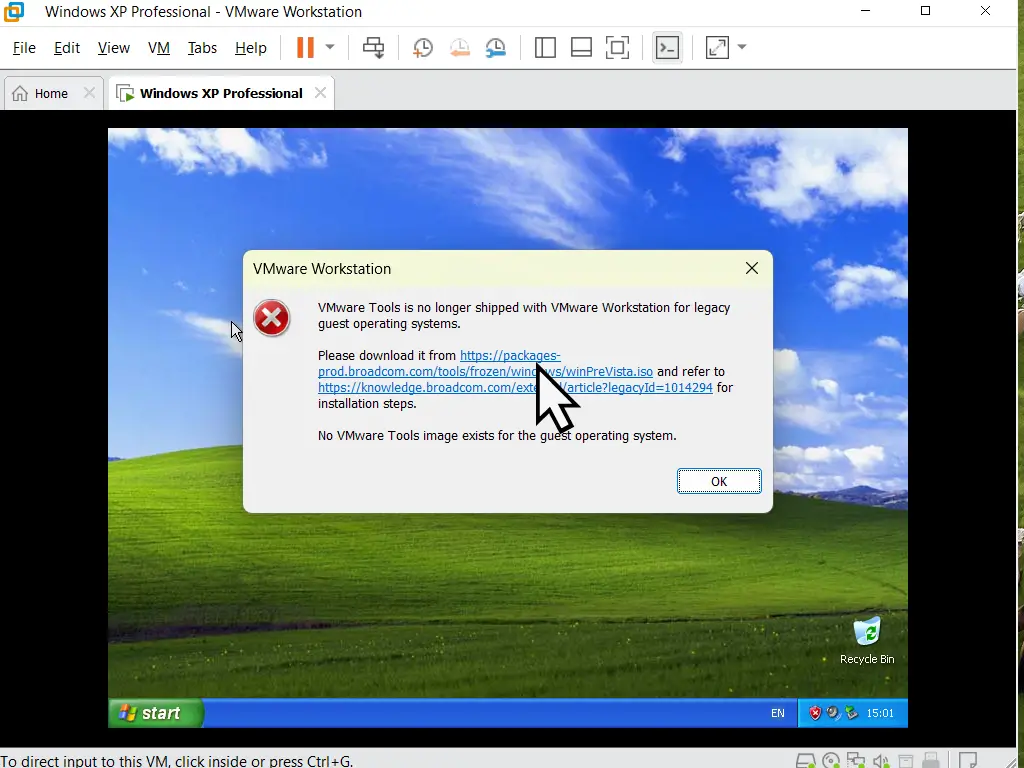
There Are Two Links In The Popup.
There are two links present in the popup. They’re very close together, so be careful to click the top link to start the download.
Mount The ISO File.
Once the legacy Tools has finished downloading, you’ll find that it’s in the ISO format. That makes it easy to simply mount the file in a virtual CD/DVD drive.
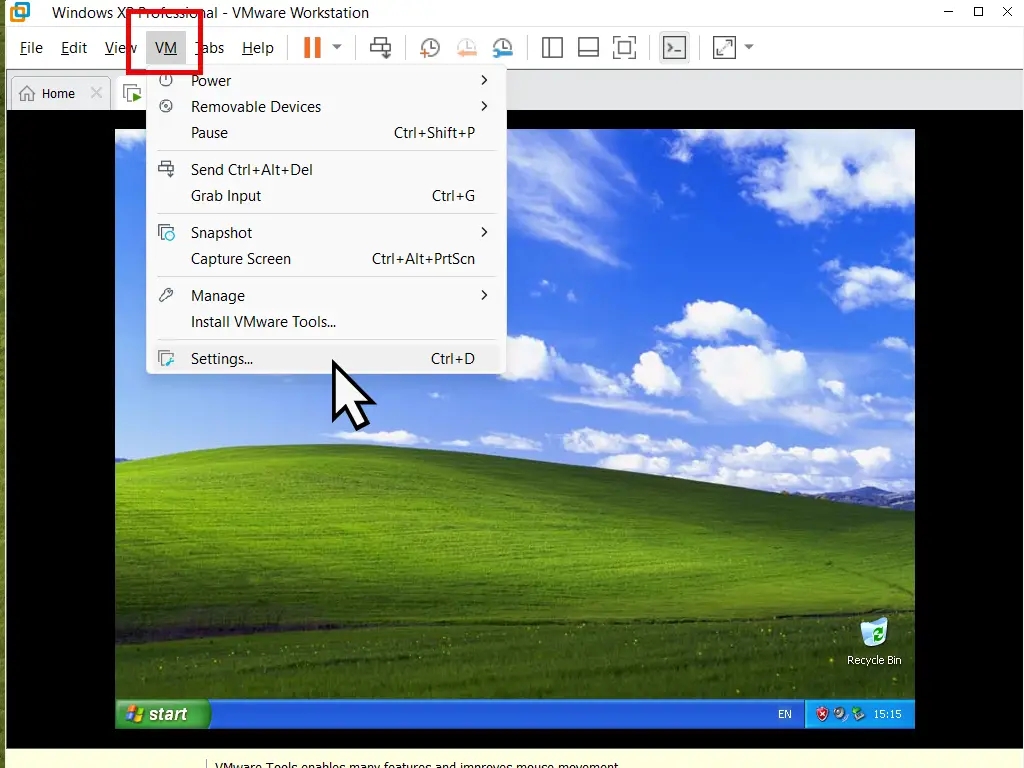
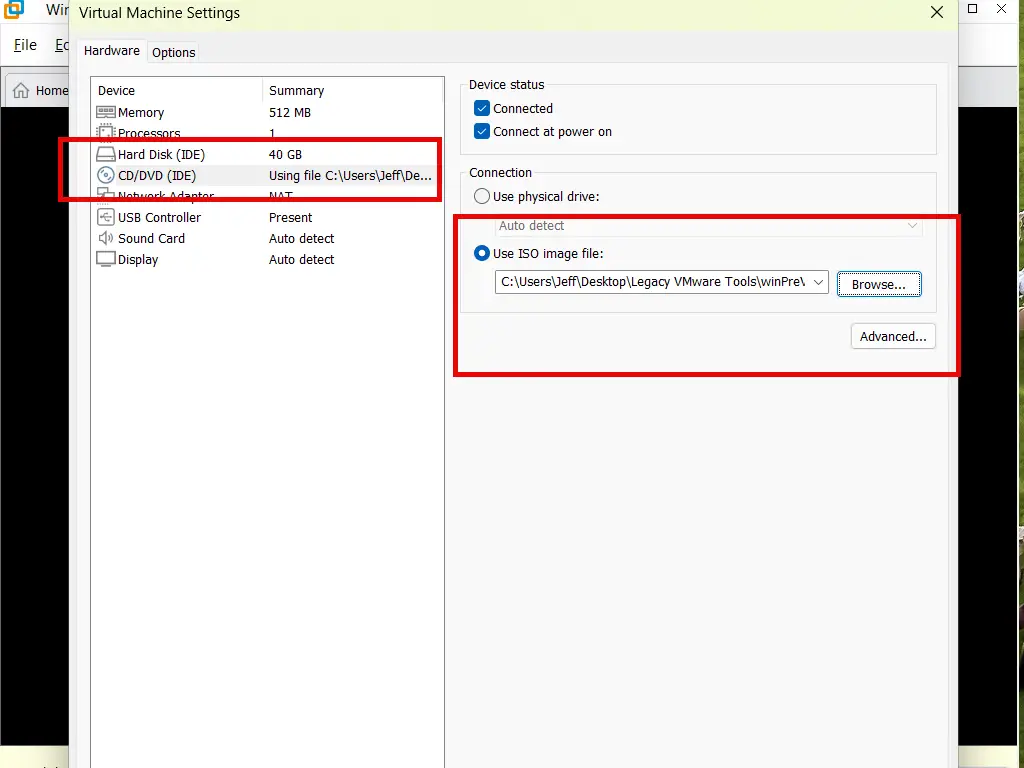
To install the Tools, boot up the virtual machine (XP or Vista). When it’s ready, click the VM button on the Workstation Pro toolbar. On the menu, click Settings.
On the Settings page, select CD/DVD (IDE) in the left hand pane. Then on the right hand pane, use the browse button to navigate to and select the legacy VMware Tools that you just downloaded.
When that’s done, click the OK button at the bottom of the page.
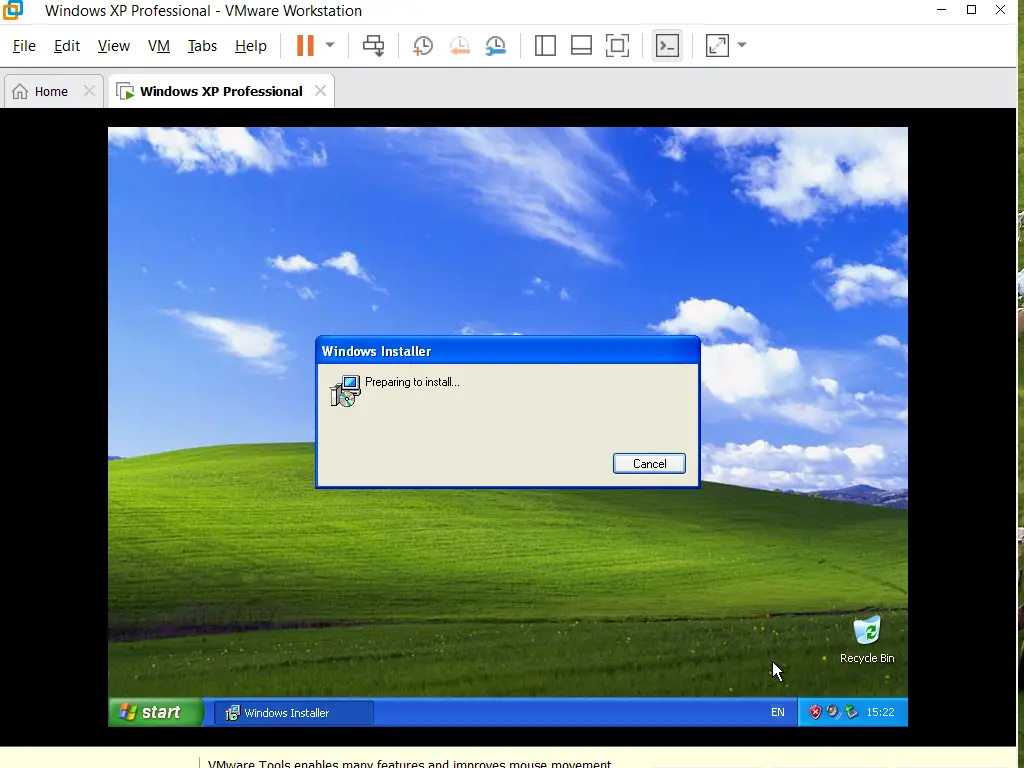
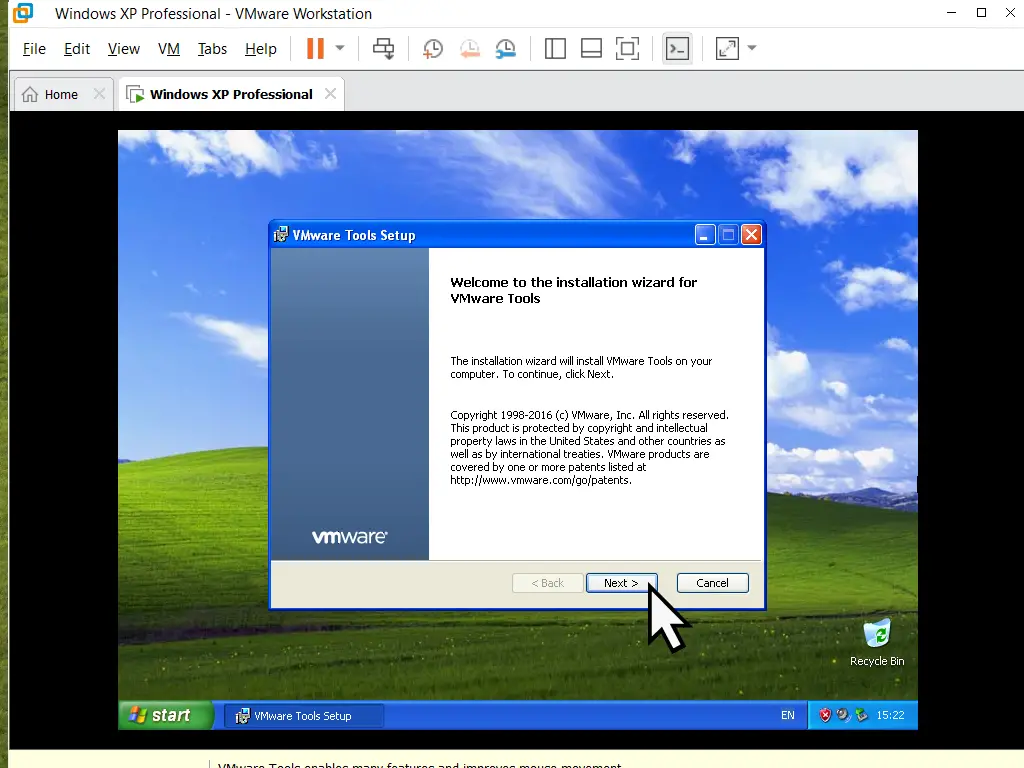
After a slight pause, you should see the Windows Installer start up, followed by the VMware Tools welcome screen.
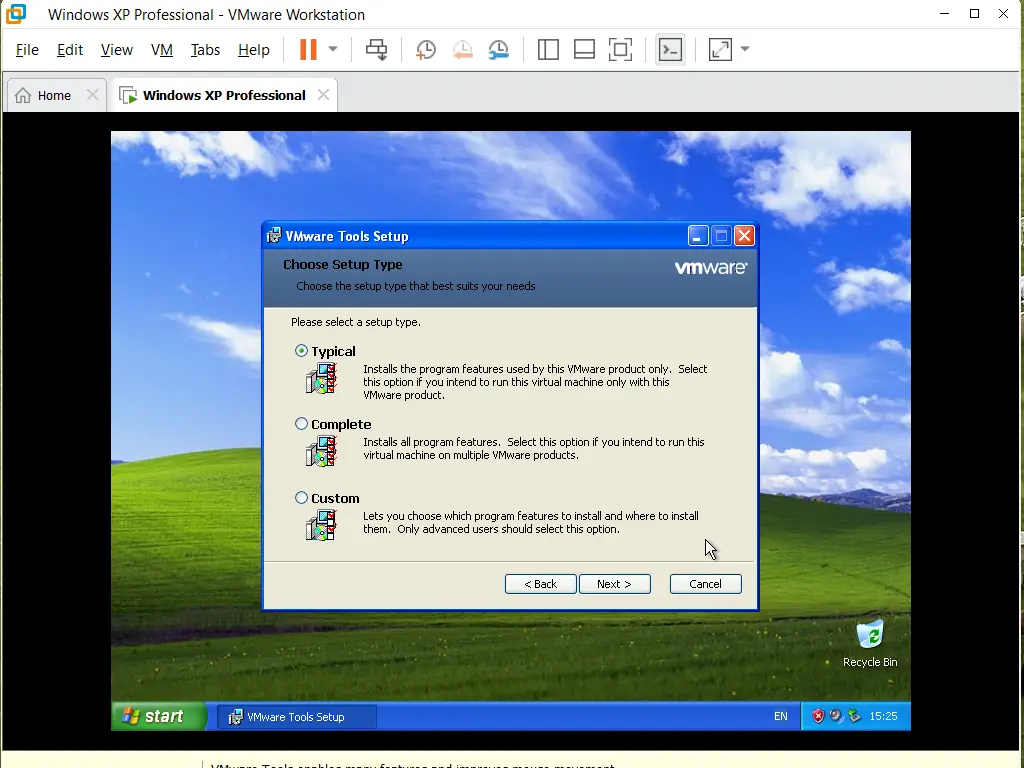
Click the Next button to continue. Select Typical and click Next. Finally click the Install button.
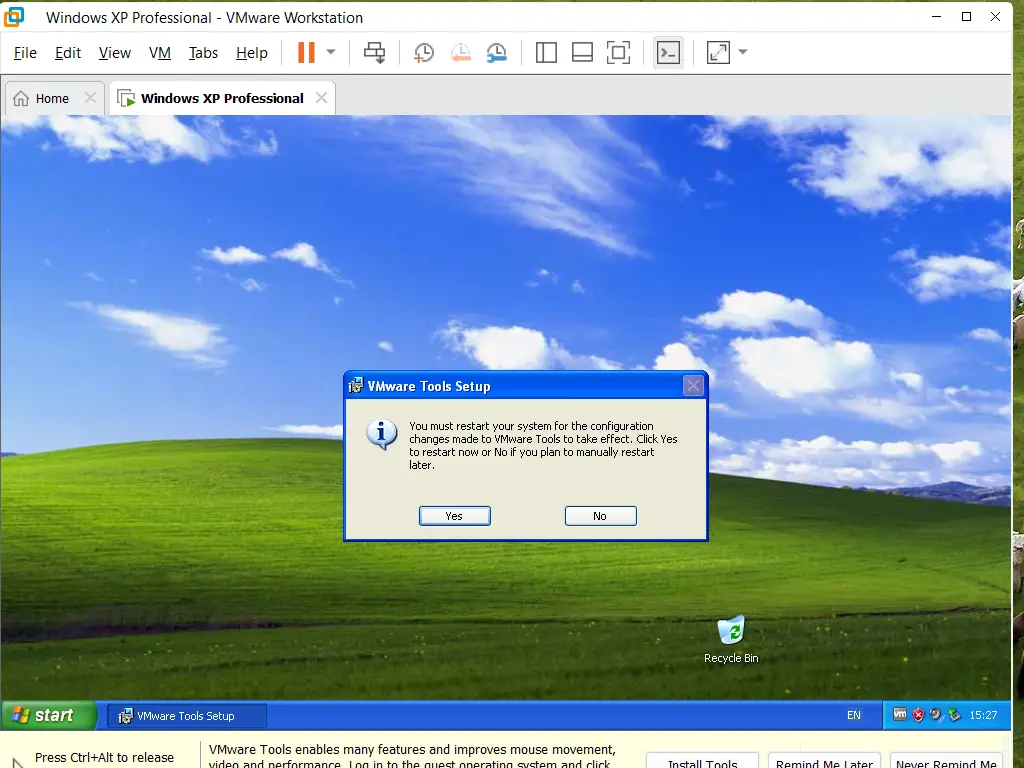
When the Tools have finished installing, you’ll probably be required to reboot your virtual machine.
Summary.
It’s understandable that Broadcom has removed the legacy Tools from the standard Workstation Pro setup. It adds extra weight to the download and not that many people still use XP or Vista even as virtual machines.
But if you’re one of those people, then it’s still available for download. And installing it is much easier than perhaps you thought it would be.
Related Posts
Add A USB Device To VMware Workstation Pro
Attach external drives to your virtual machine.
How To Create A Windows 7 Virtual Machine.
Windows 7 can also be used as a virtual machine.
Backup Workstation Pro Virtual Machines.
Create a complete backup of your VM. No need to re-install an OS, just copy and paste the virtual machine folder.
Virtual Machine Snapshot In Workstation Pro
A snapshot is a quick backup of the virtual machine state.
Step By Step Computer Guides
Easy to follow step by step computer guides.

