The Windows Start menu is the central command centre for your PC. It’s changed significantly over the years, but still has a major roll to play.
The only issue is that both Windows 10 & Windows 11 stuff the Start menu with junk programs and apps that, quite frankly, become overwhelming. There’s too much and none of it is there for your benefit.
In this guide I’ll show you what it is, how to use it, and how to customise it so that it works better for you.
Where Is The Start Button?
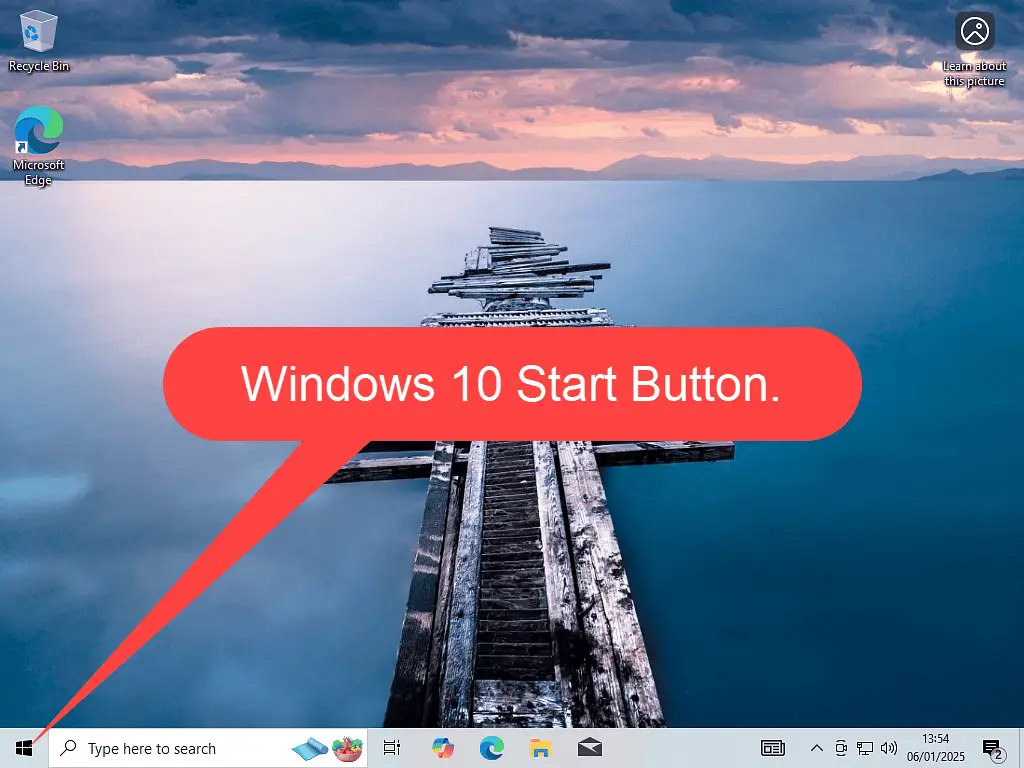
You can open the Windows Start menu by left clicking once on the Windows Start button.
In Windows 10, the Start button is usually at the bottom of the screen in the far left hand corner.
For Windows 11, it’s generally the left most button of the taskbar icons.

Start Menu Keyboard Shortcut.
You can also open the Windows Start menu by using what’s known as a keyboard shortcut.
On your keyboard, press the Windows key and the Start menu will open.
You can also use the CTRL (Control) key and the Esc (Escape) key combination.

What’s On The Start Menu?
The Start menu gives you quick access to a variety of different options on your computer.
- Programs and apps list – you can find and open any of your installed programs and apps from an alphabetically arranged list.
- Settings – most of the computer’s main settings/
- Power button – allows you to shutdown your computer.
- Search – probably the best feature of the Start menu is ability to search your computer for just about anything.
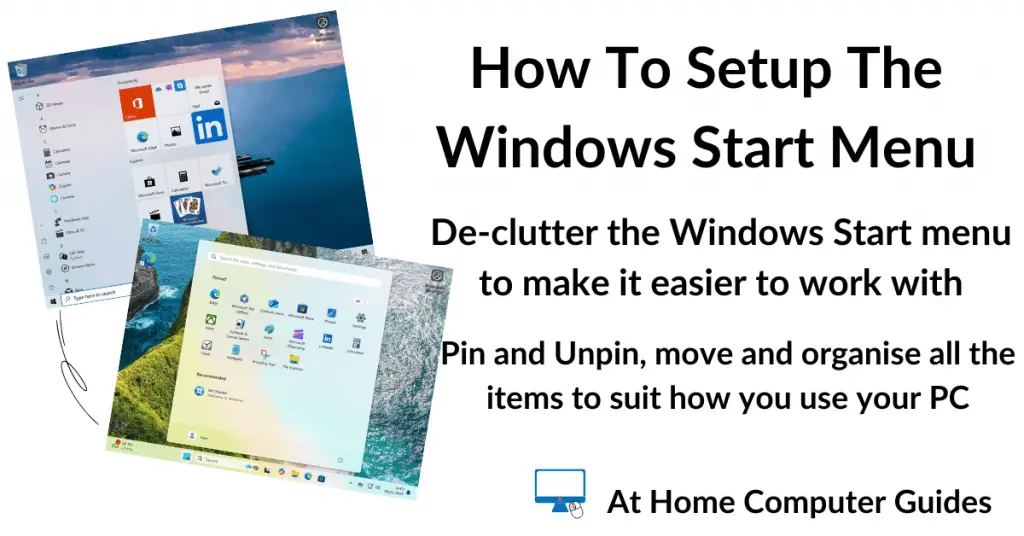
Windows 10 Start Menu.
On the right hand panel of the Windows 10 Start menu is the Live Tiles area. The Live Tiles are just links to apps that have been pre-installed on your computer by Microsoft.
The centre panel is where you’ll find a list of all the programs and apps currently installed on your computer. The list is in alphabetical order and you simply scroll down to find the program that you’re looking for.
The left hand panel is where you’ll find the power button to shut down your computer and also the Settings button (it’s the gear wheel).


Windows 11 Start Menu.
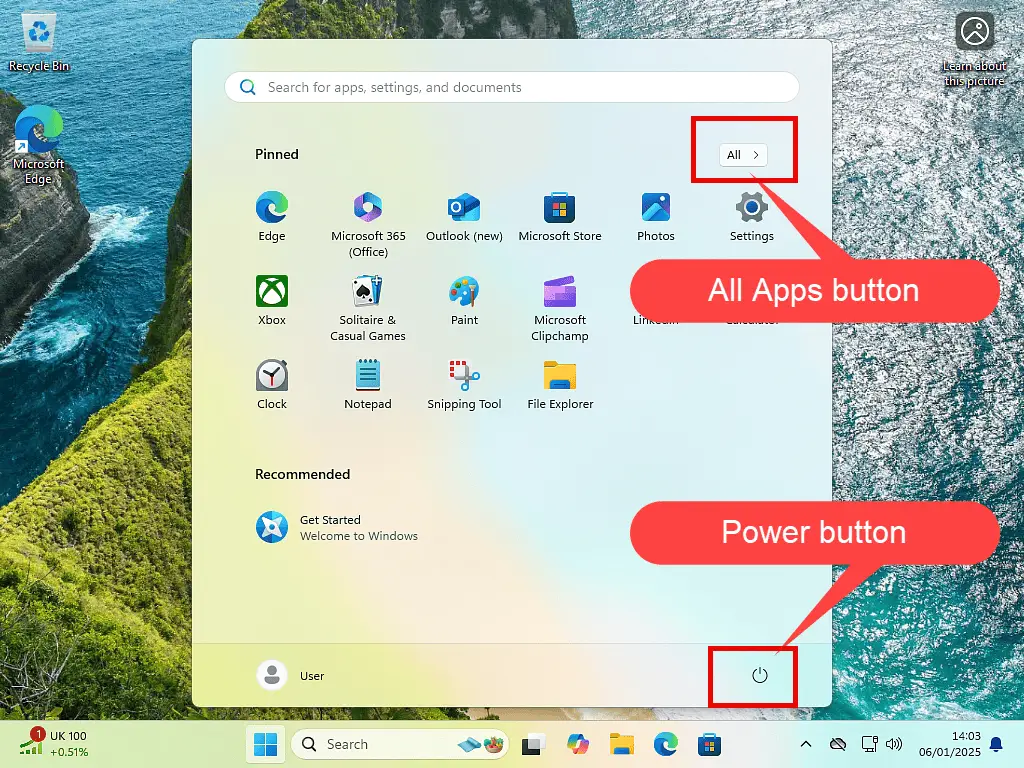
The Windows 11 Start menu has been redesigned but still performs the same functions as it did in Windows 10.
At the top is the pinned apps section. Similar to the Live tiles, pinned apps are mainly links to programs or apps installed on your computer by Microsoft.
Below the pinned apps is the Recommended section. This section will self populate depending on the programs/apps that you use, together with recently accessed files and folders.
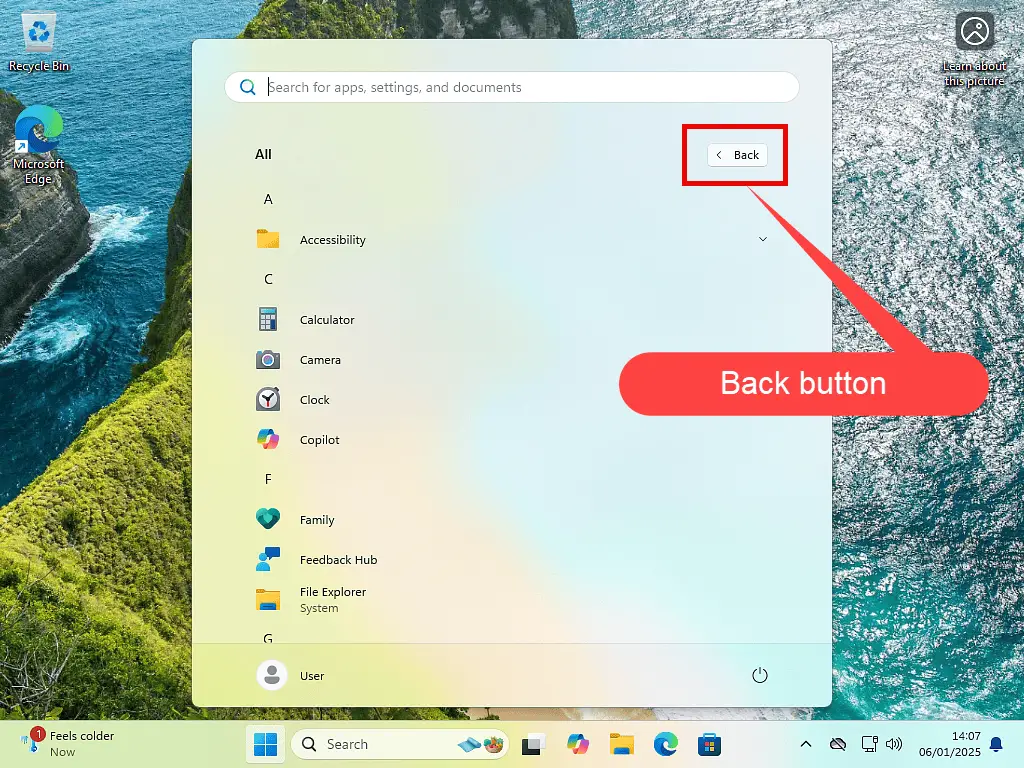
To see the programs list in Windows 11, you have to click the All Apps button.
Clicking the All Apps button will open an A-Z list of the programs and apps currently installed on your PC.
Finally, in the lower right corner is the Power button (icon).

How To Organise The Windows Start Menu.
By default the Windows Start area will be overly populated with programs and apps that aren’t much more than advertising. Both Microsoft and your PC manufacturer make money by placing these items on to your computer.
Organise your Start menu by removing all the clutter first. Start with a clean slate, then add in whatever items you want quick access to.
Setting up your start menu like this makes it much cleaner and easier to use. With less useless clutter you can quickly find the items that you’re looking for.
How To Unpin Items From Windows Start Menu.
To remove any item from the Windows Start menu
Removing items from the Windows Start menu is called unpinning. Each app on the Start is currently pinned, so to remove it, you have to unpin it.
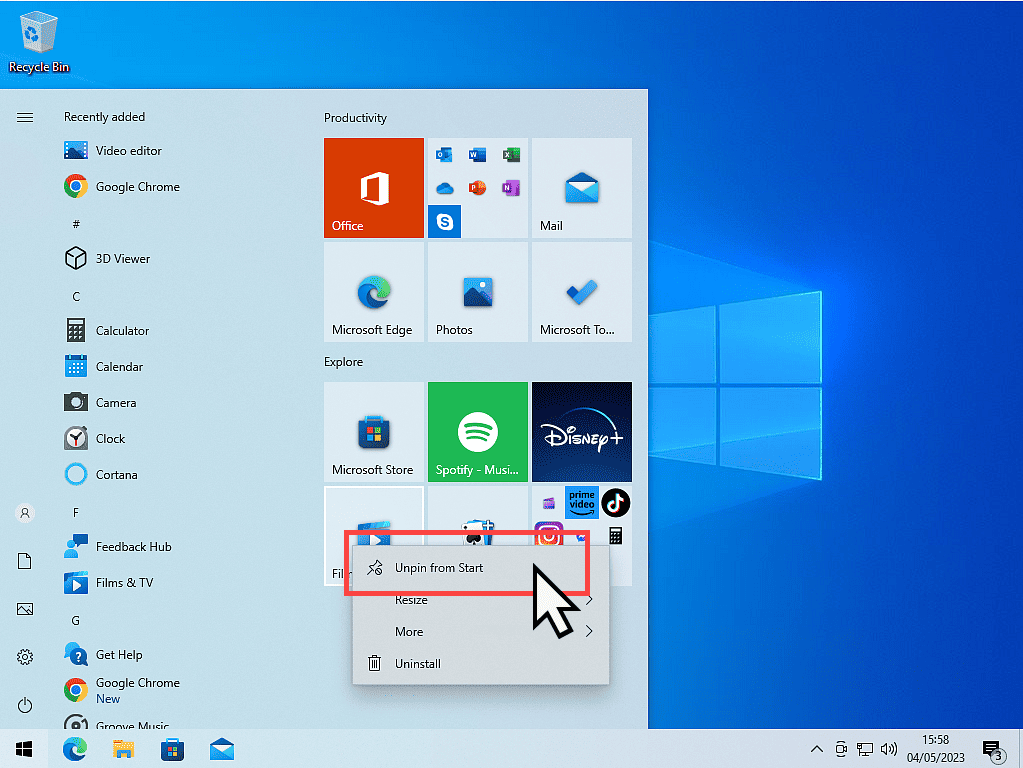
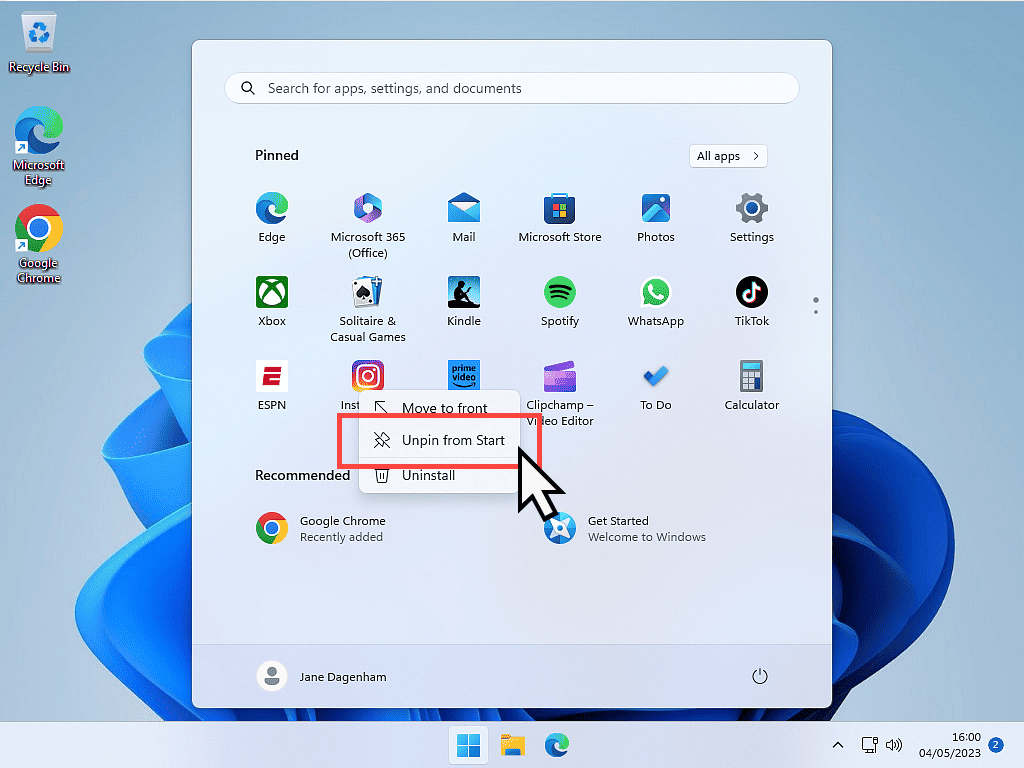
To unpin an item from the Start menu, right click on it. On the menu that appears, left click Unpin from Start.
What Should Be Unpinned From Start?
Windows 10 users – Unpin everything. Right click on each Live Tile and unpin it.
Windows 11 users – Unpin everything except the Settings app (the gear wheel icon). The Windows 11 Settings app is the only useful pinned item on the Start menu.


A Note About Unpinning Items From Windows Start Menu.
Removing Live Tiles or Pinned Apps from the Start menu like this is called unpinning. It is not the same as uninstalling the programs/apps.
Programs and apps that have been unpinned are still installed and available on your computer.
So if you should change your mind later, and you want to begin using a program, you can always pin it back again.
How To Pin To Start.
Ok, so now you’ve unpinned more or less everything from the Windows Start menu you can begin adding the items that you want.
Adding something to the Start menu is called pinning, you Pin to Start.
Since this is a beginners course, you may not actually know what you want pinned to the Start menu right now. We’ll get to that later, right now I want to show you how to pin an item.
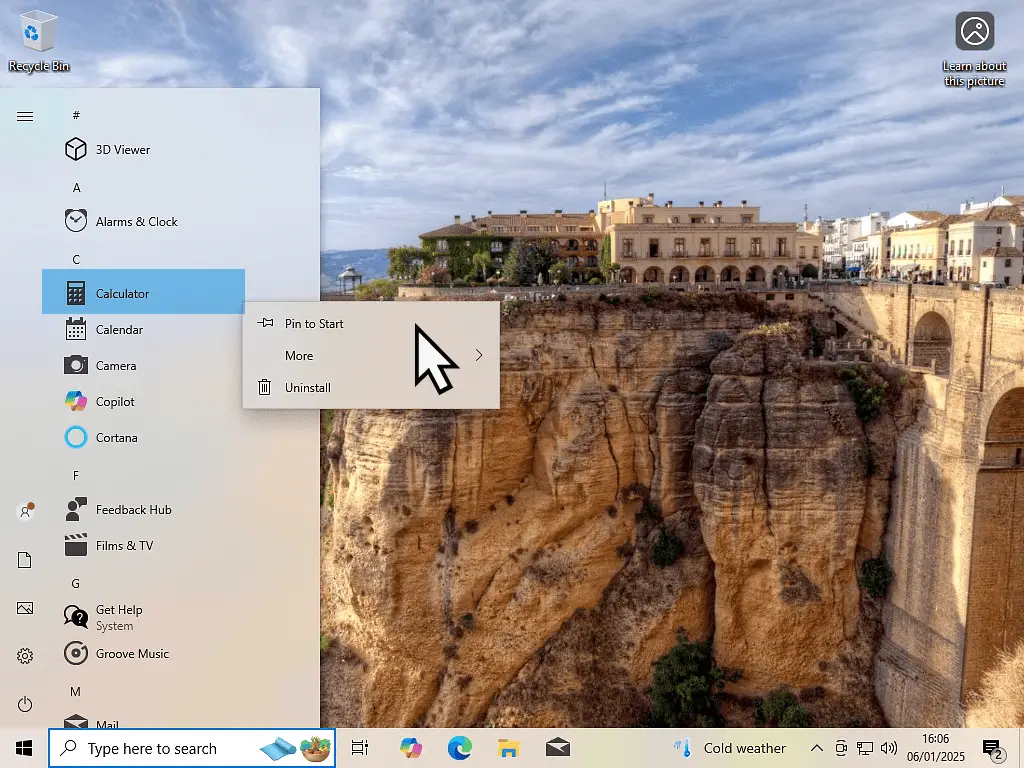
For example, let’s say you wanted to pin a program to Start. Open the Start menu by clicking on the Start button (or pressing the Windows key on your keyboard), and scroll through the list of installed programs and apps.
When you find the one that you want pinned, right click on it and then left click Pin to Start.

How To Pin Shortcuts And Folders To Start.
It’s exactly the same procedure to pin an item from your Windows Desktop. Right click on the item to open the options menu and then left click Pin To Start.
And also for folders, just right click on it to open the options menu. If the item can be pinned to Start, you’ll see the option Pin to Start.
You can pin programs, apps, folders, shortcuts, pretty much most things can be pinned.


How To Arrange The Start Menu.
Once you’ve pinned several items to the Windows Start menu, you move them around to arrange them in to groups.
To move an item on the Start menu, hover the mouse pointer over it and then hold down the left hand mouse button.
With the left hand mouse button held down, drag the item by moving the mouse to where you want it to be.
Release the mouse button when it’s in position.


What Should You Have Pinned To The Start Menu?
Organising your Start menu will be different for everyone. We all use different programs/apps and different folders.
There’s isn’t a “one size fits all” option. The main thing to keep in mind is that the Start menu isn’t a set once and that’s it forever. Instead it’s fluid, you’ll pin items as they’re being used, and then unpin them when you don’t need them anymore.
If you’re using Windows 11, then I’d recommend that you have the Settings app pinned. You don’t need to in Windows 10 because it has it’s own icon in the left hand panel.
Also I like to have Notepad (which is a simple text editor) and the Calculator pinned. If you use any office software (Word, Excel etc), ten they should be the Start menu too.
After that you’re looking at programs and apps specific to you, to what you’re using your computer for. It’s anything that you want quick access to.
Summary.
Use the Windows Start menu to save programs/apps and folders that you’re using. Items that you want to be able to open quickly and easily.
Move items around on the Start menu, group them together, it makes it much easier to find them again later. And don’t be afraid to unpin stuff that you don’t actually use. If you haven’t clicked on it for a while then it doesn’t need to be on the Start menu.
