
The Windows taskbar is the horizontal bar that sits along the bottom of your screen. It’s one of the most useful parts of Windows — once you know how to set it up properly.
This step-by-step guide will show you how to customise your Windows taskbar (both Windows 10 and Windows 11) so it works exactly the way you want.
You’ll learn how to remove items you don’t need, pin your favourite apps for one-click access, use the taskbar search bar, and tidy up the system tray (the notification area on the right-hand side).
What Does the Windows Taskbar Do?
The taskbar serves two main purposes:
- Quick launch icons — App shortcuts that open with a single click, so you don’t have to search for them every time.
- Running apps display — It shows every program currently open on your PC, letting you switch between them instantly.
On the far left (or centre in Windows 11) is the Start button, which opens the Start Menu.
On the far right is the system tray (also called the notification area), which shows the clock, Wi-Fi icon, volume control, and other background app icons.
Open Taskbar Settings
Before making any changes, you need to get into Taskbar Settings:
- Right-click on an empty part of the taskbar and select Taskbar settings.
- Alternatively: press Windows key + I to open Settings, then go to Personalisation > Taskbar.
Remove Items You Don’t Need
By default, Windows loads the taskbar with icons you may never use and don’t need. Clearing these out makes your taskbar cleaner and easier to use. When you only have a few items on the taskbar it’s much easier to find what you want.
Windows 11 and Windows 10 taskbars are slightly different (although they perform the exact same function).
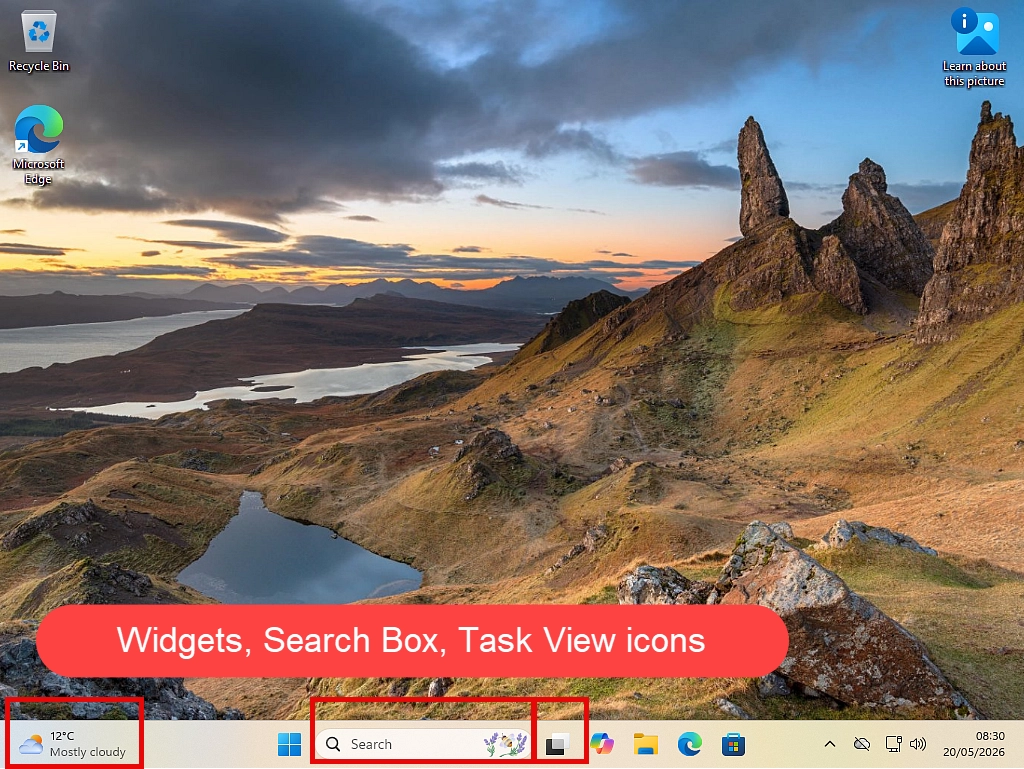
Windows 11 — Items You Can Hide
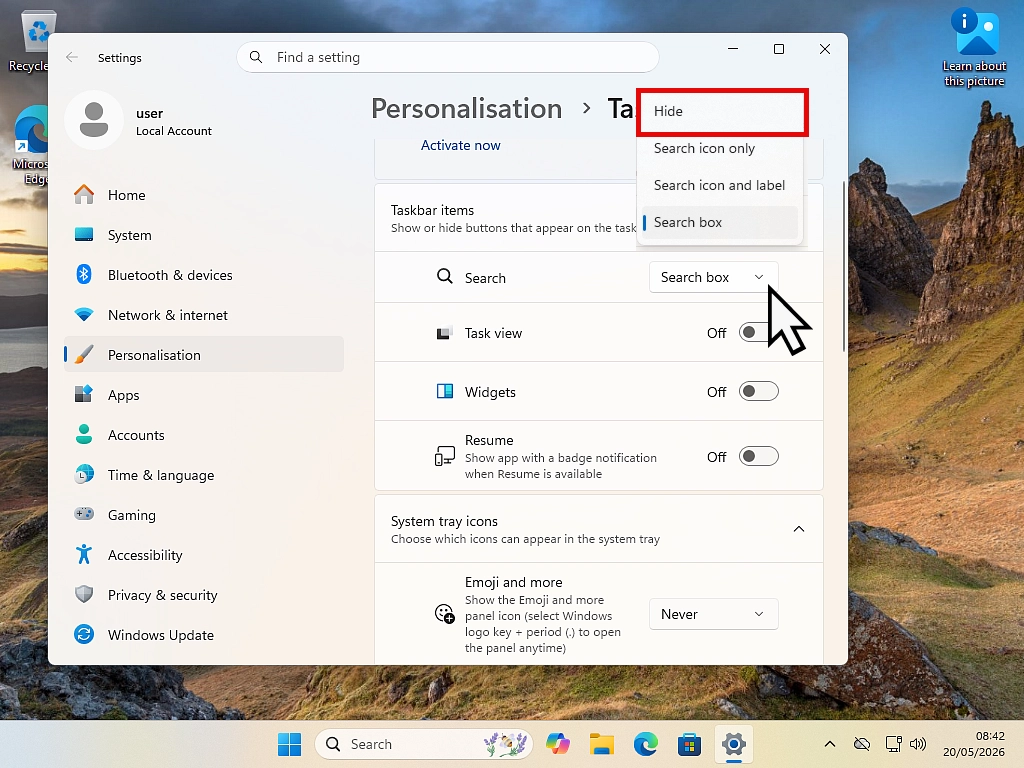
In Taskbar settings, under Taskbar items, you’ll find toggles for:
- Search — A large search box or magnifying glass icon. Click the drop down arrowhead and set it to Hide to save space.
- Task View — Shows thumbnails of all open windows. Useful for multitasking, but easy to ignore if you don’t use virtual desktops. Turn it off by clicking the toggle switch.
- Widgets — A news and weather panel. Many people find this distracting. Toggle it off if you don’t use it.
- Chat (Microsoft Teams) — Can be turned off if you don’t use Teams.
- Resume — Links to connected phones and other devices. For most users just turn it off.
You might find that the options available on your PC differ slightly, it all depends on which version of Windows 11 you’re using.
If you use any of these then obviously leave them enabled, but my guess is that you’ve never used any of them. Turn them off. They’re a waste of the limited space available on your taskbar.
Windows 10 — Items You Can Remove
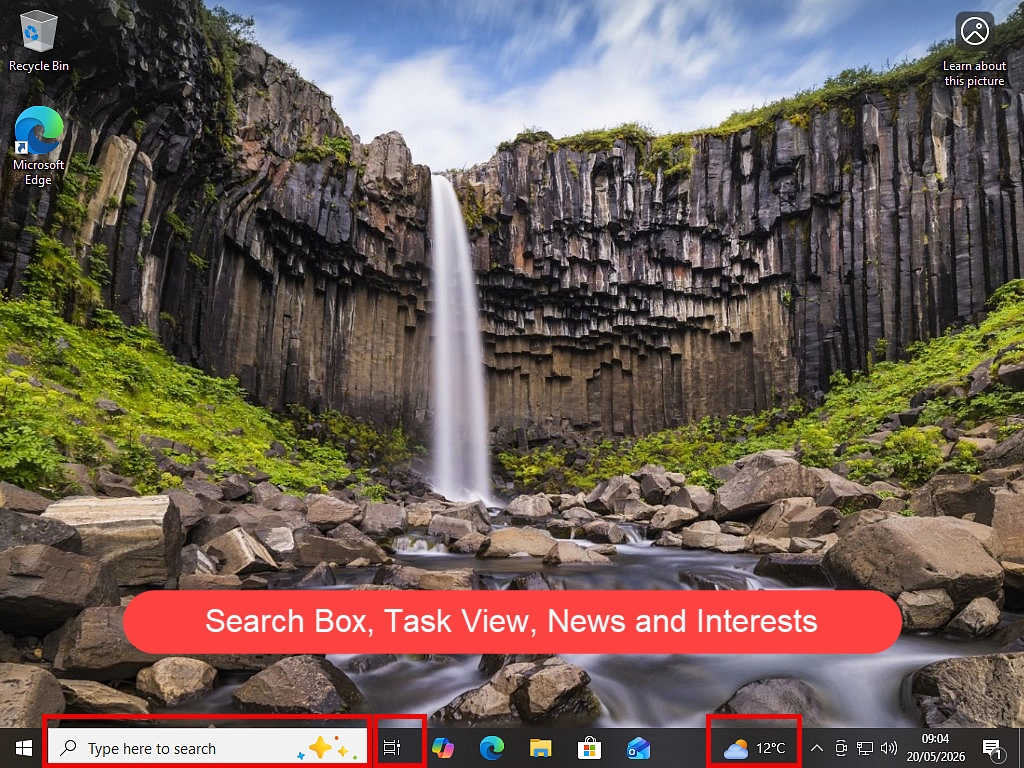
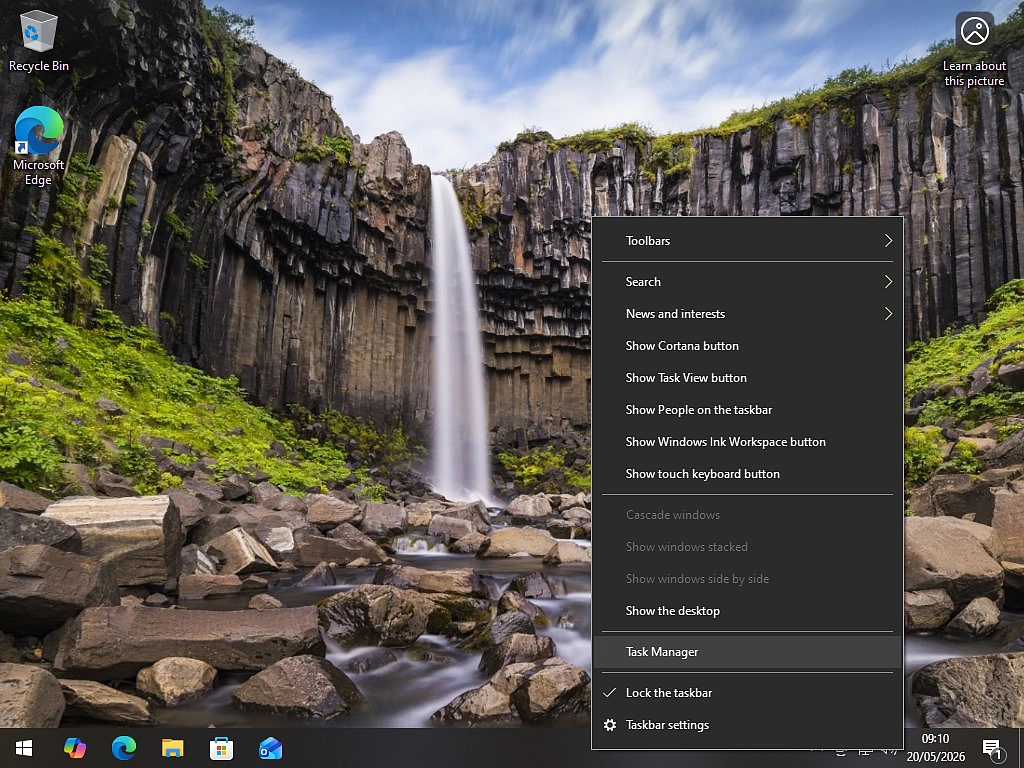
Right-click on the taskbar to open the taskbar menu. You’ll see options for hiding:
- Search — Hover your mouse pointer over Search, on the sub menu click Hidden.
- Show Cortana button — Deselect it.
- Show Task View button — Uncheck this.
- News and Interests — Hover over News and interests, on the sub-menu click Turn off.
- People — Deselect it.
Note that your specific taskbar menu may be slightly different from the one shown depending on which version of Windows 10 you’re running.
But the principle is the same, deselect, uncheck or turn of everything you’ve never used.
For most people they’re just wasting space and distracting.
How to Unpin Items from the Taskbar
Not everything can be removed from your Windows taskbar using the settings. Many items are “Pinned”.
Pinned items are one click shortcuts to programs and apps installed on your PC. A kind of quick launch button.
Most of them really don’t need to be on your taskbar. Keep your taskbar for items (programs and apps) that you use daily. Remove anything that you don’t use.
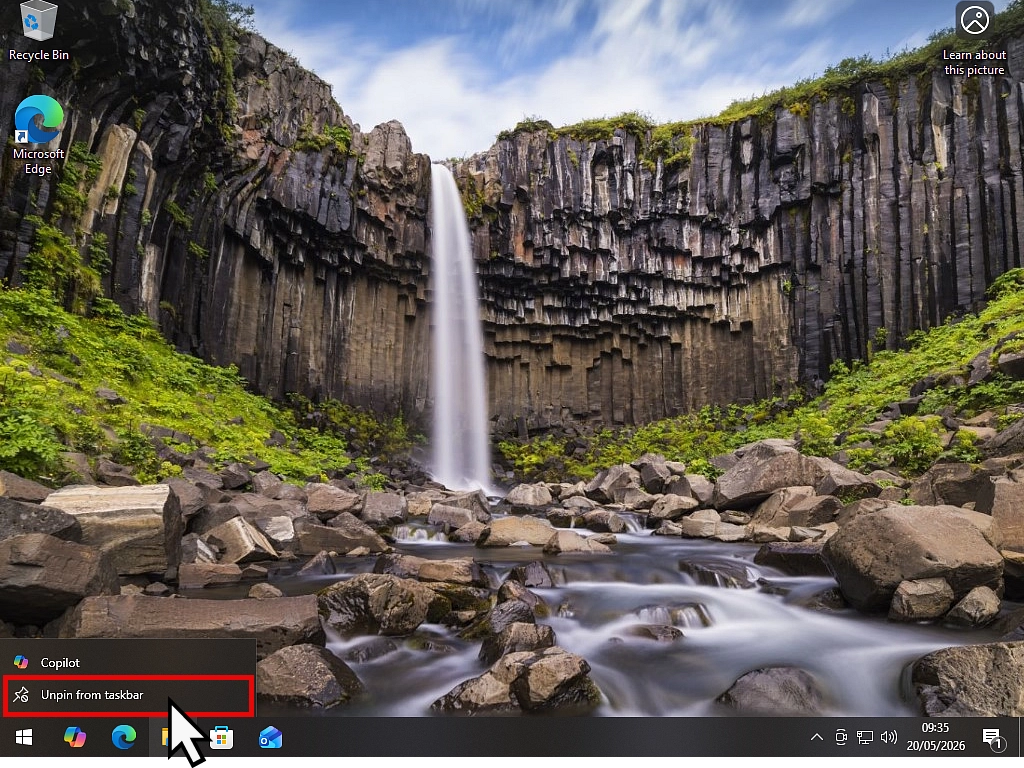
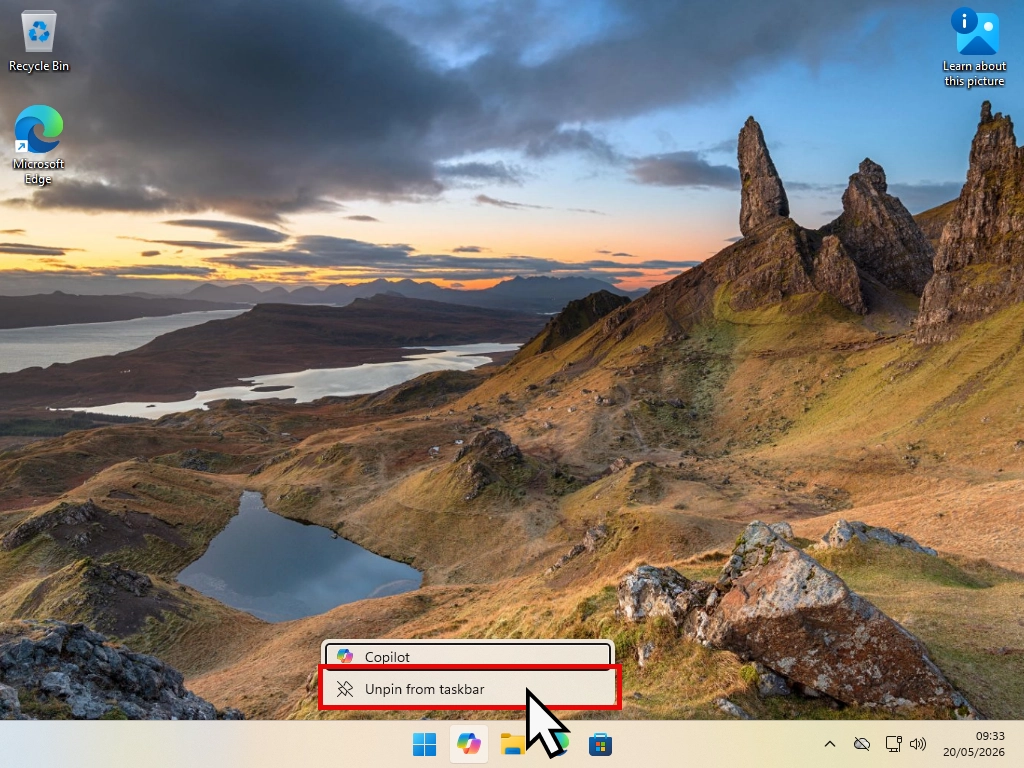
To unpin an item, right click directly on it, then left click “Unpin from Taskbar“
What to Remove and What to Keep on your Taskbar
Both Windows 11 and Windows 10 taskbars will be pre-loaded with apps and services that you neither want, use or need.
When trying to decide what to remove, ask yourself this question “Did you click on that item today or yesterday?” If you didn’t, remove it. Even if you’re not sure what you want on the taskbar yet, remove whatever you know you don’t use. You can always add things back later.
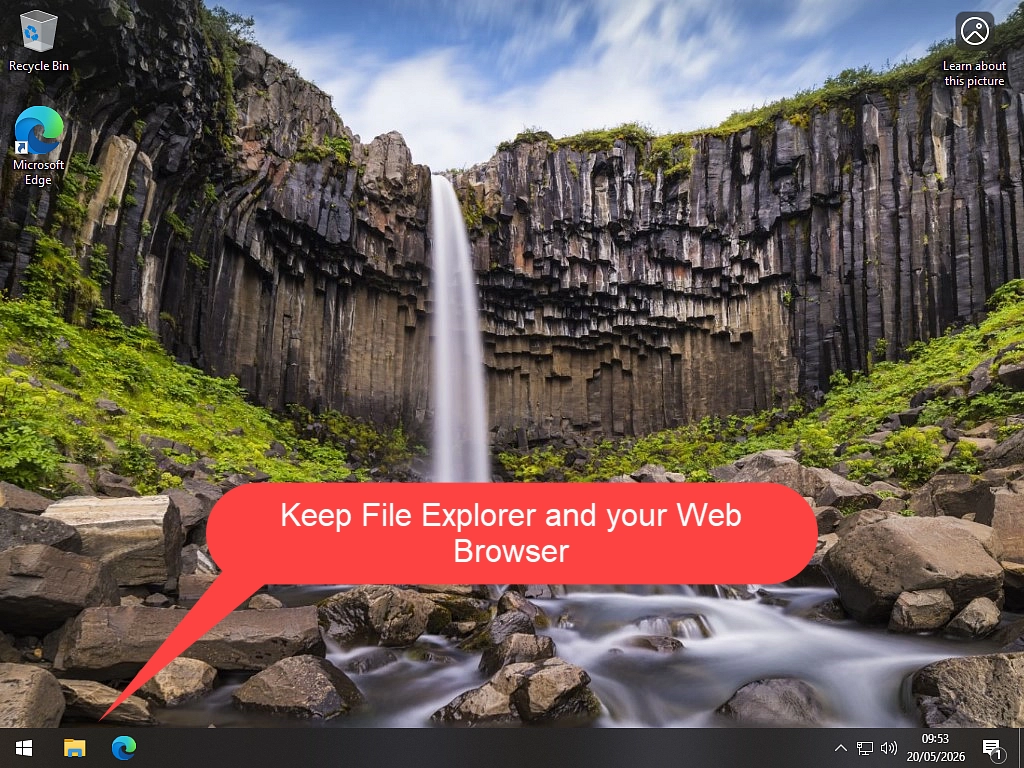
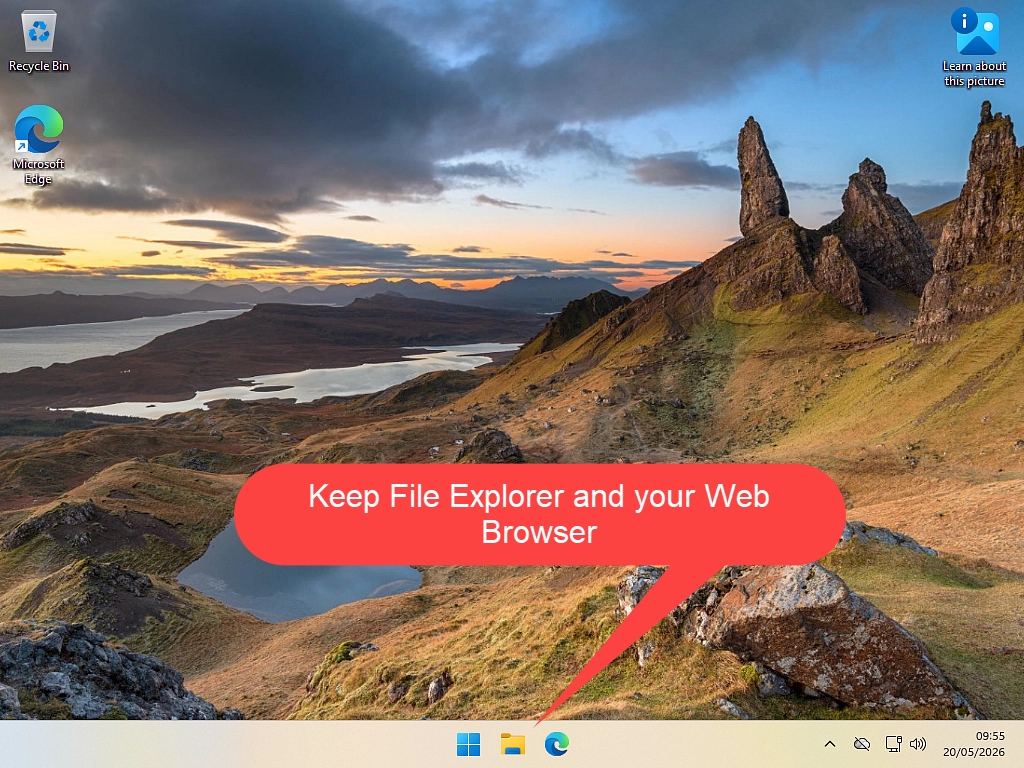
Keep File Explorer (the yellow folder) and your default web browser. Everything else needs to earn its place.
Using The Windows Taskbar
The taskbar isn’t a “set it and forget it” option. Instead, just like the Start Menu, it should be a work in progress. Pin programs and apps that you’re using everyday. It makes them quick and easy to get at. Then unpin them as they fall into disuse.
For example, if you have a bunch of pictures to edit which is going to take several weeks, pin your photo editing app to the taskbar. When you’re done, unpin it out of the way.
Pin Your Favourite Apps to the Taskbar
Pinning apps to the taskbar means you can open them with a single click, without searching through the Start Menu every time.
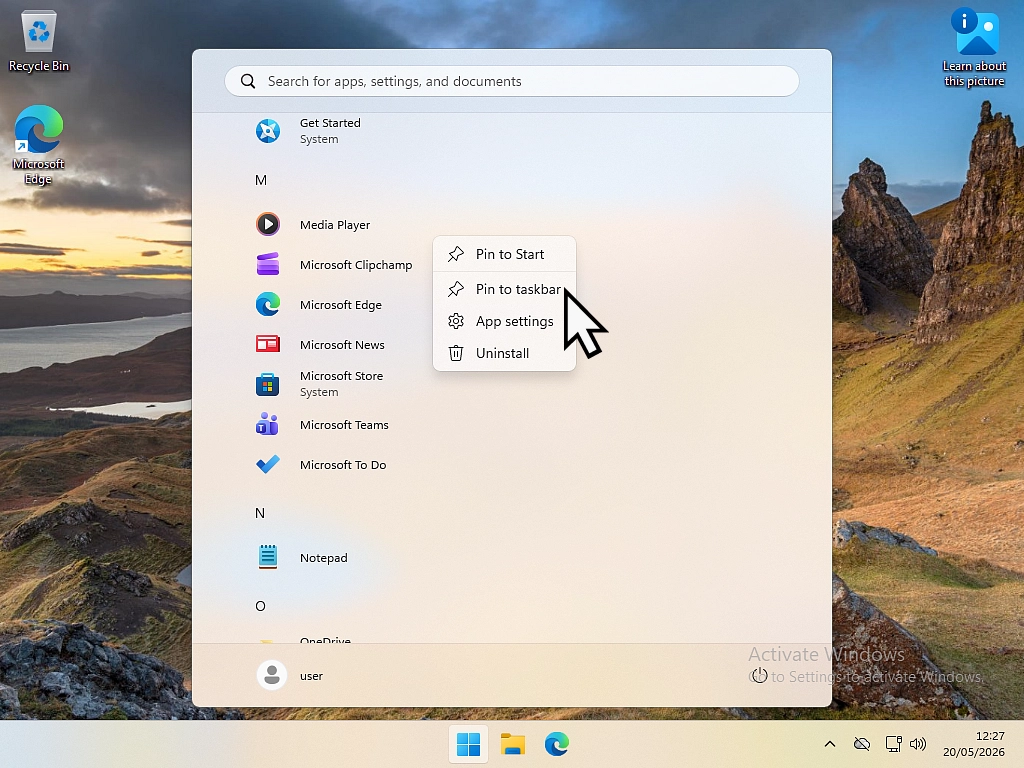
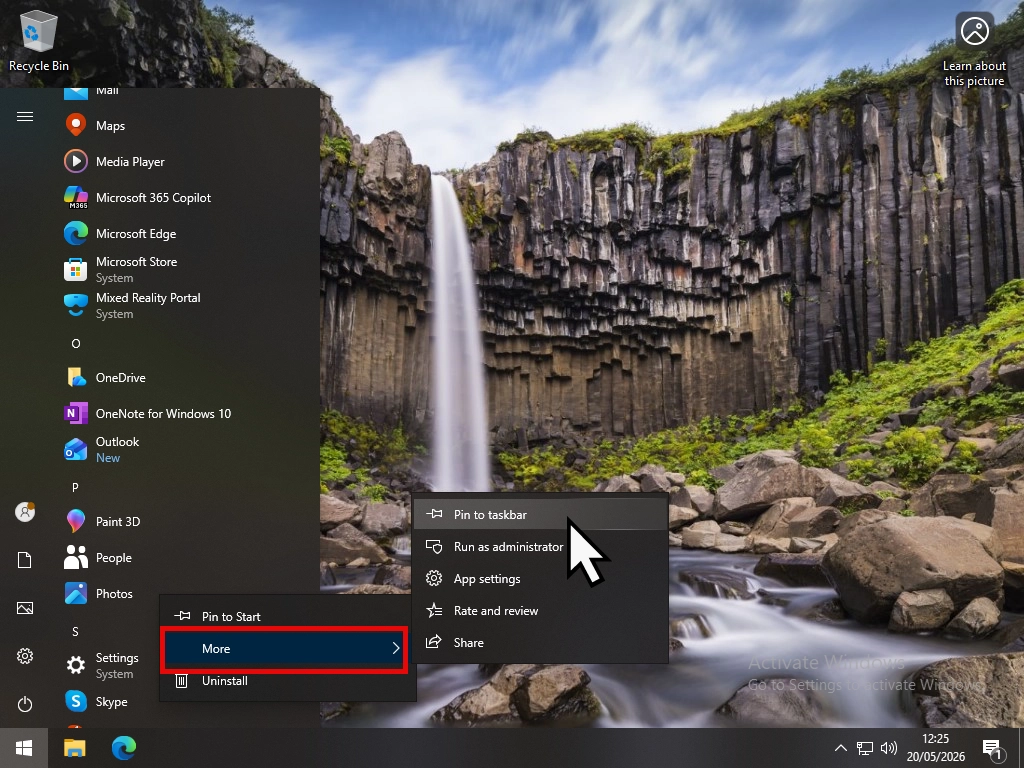
- From the Start Menu: Click the Start button and find the app that you want to pin to the taskbar. Right click on it and then left click “Pin to taskbar” on the menu.
- From the desktop: You can pin to taskbar from most places on your PC including the desktop. Simply right click an item and then left click “Pin to taskbar” from the menu. Note that if you don’t see the pin to taskbar option then the item can’t be pinned.
Pin to taskbar in Windows 11:
- From the Start menu – Find the app you want to pin, right click on it, then left click Pin to Taskbar.
- From everywhere else – Just right click an item and if it can be pinned you’ll see the option to Pin to Taskbar.
Pin to taskbar in Windows 10:
- From the Start menu – Find the program you want to pin, right click on it, hover over More, then left click Pin to Taskbar
- From everywhere else – Just right click an item and if it can be pinned you’ll see the option to Pin to Taskbar.
How to Rearrange Taskbar Icons
Pinning and unpinning items on the taskbar will cause them to move around. However you can easily arrange them in any order to suit yourself.
To move an icon, hover your pointer over it, hold down the left mouse button and drag it either left or right. When it’s in the correct position, release the mouse button. This is known as drag and drop.
Auto-Hide the Taskbar (Optional)
If you want more screen space, you can set the taskbar to automatically hide when you’re not using it. It will reappear when you move your mouse to the bottom of the screen.
To enable auto-hide:
- Open Taskbar settings (right click on taskbar, then left click Taskbar Settings)
- Under Taskbar behaviours (Windows 11) or Taskbar settings (Windows 10)
- Check the box next to Automatically hide the taskbar
Taskbar Keyboard Shortcuts Worth Knowing
| Keyboard shortcut | What it does |
|---|---|
| Windows key | Opens / closes Start Menu |
| Windows + S | Opens the Search bar |
| Windows + D | Shows the desktop (minimises all windows) |
| Windows + T | Cycles through apps on the taskbar |
| Windows + [number] | Opens the pinned app in that position (e.g. Win+1 opens the first pinned app) |
| Windows + A | Opens the Action Centre / Quick Settings |
| Windows + N | Opens the Notification panel |
| Alt + Tab | Switches between open apps |
Summary
A well-organised taskbar makes your Windows PC much easier to use day to day. Keep the pinned items to a minimum, only your day to day apps. Programs that you might use once or twice a week go on the Start menu. It just makes life so much easier.
Next Lesson
Windows Desktop Icons
Organise everything on your desktop, find what you’re looking for fast.
Course Progress – 3 of 37 done.
Part of the At Home Beginner Computer Course.
Previous Lesson
Setup the Start Menu
Get the Start Menu working for you by removing the apps you don’t use and adding the ones you do.