There are many reasons to hide a file (or even an entire folder) away from prying eyes. And it’s especially true on a shared home computer. In this guide, I’ll show you how to hide your secret file inside any jpg image.
Once the file is hidden, anyone looking at your computer screen will only see the picture, the secret file will be completely invisible. Only you will know that it’s there.
We’ll be using the Command Prompt to hide the file inside the image, but it’s surprisingly easy to do.
Getting Started With Hiding A File Inside A Picture.
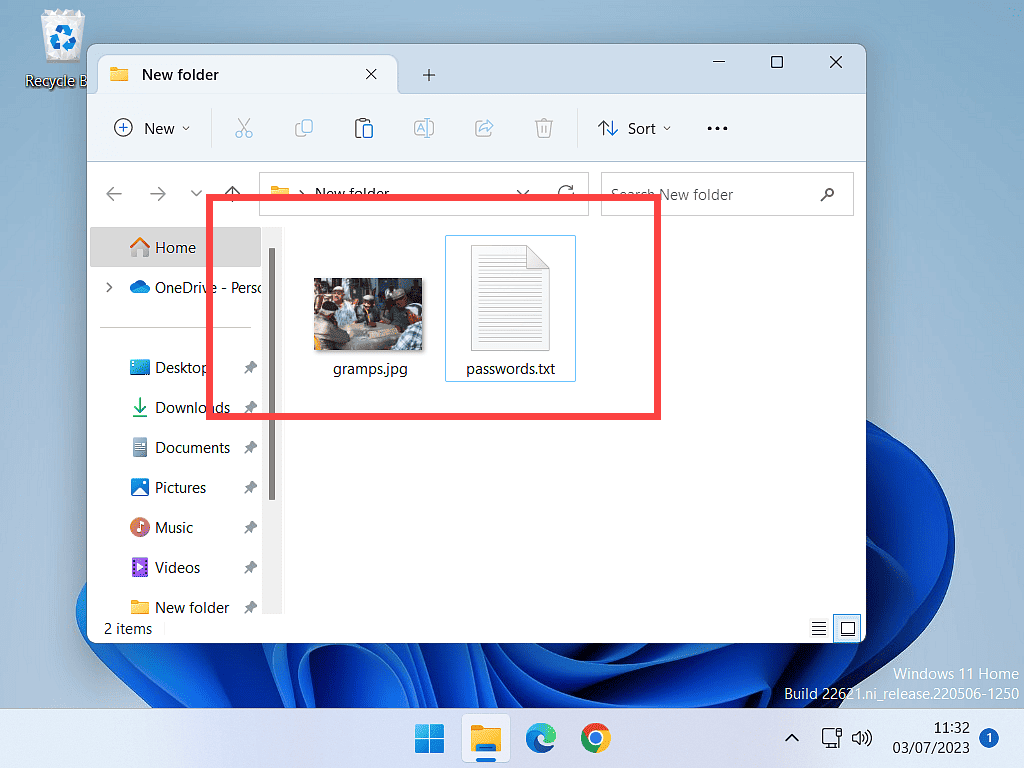
Hiding a file inside an image is easier to do if you’ve got them both saved into the same parent folder. Another help is to give both the image and the file a single word name. Remember that we’ll be using Command Prompt here and it’s a rather unforgiving tool.
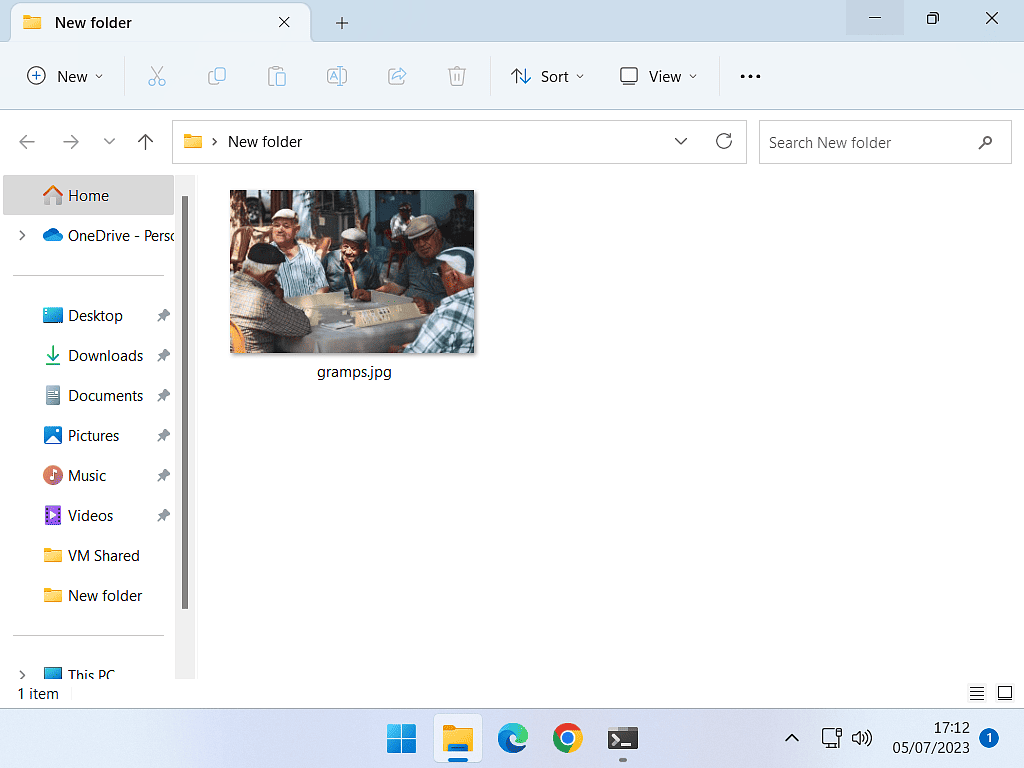
In this example, I’ll hide my passwords list inside a picture file named “gramps”.
For this to work the image must be a .jpg file.
I’m not sure if you can do this with other image formats, but you can definitely hide a file inside a jpg (jpeg).
Practice With Random Files First.
Before attempting ti hide your “real” file, I’d recommend that you try it out with a couple of dummy files first. Things can go wrong and you wouldn’t want to lose something important.
Hide A File Inside An Image.
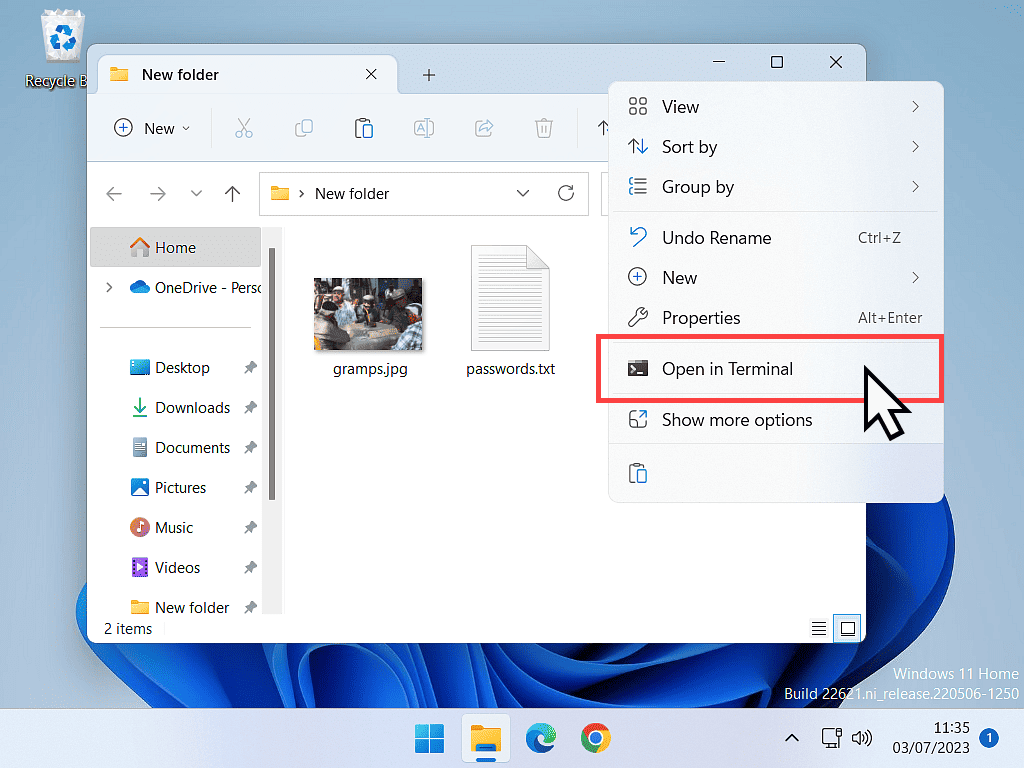
Right click inside your folder to open the context menu. Not on the image of the file you’re trying to hide.
Then left click on the “Open in Terminal” option.
If you’re using Windows 11, you might have to click “Show more Options” first.
Command Prompt Terminal.
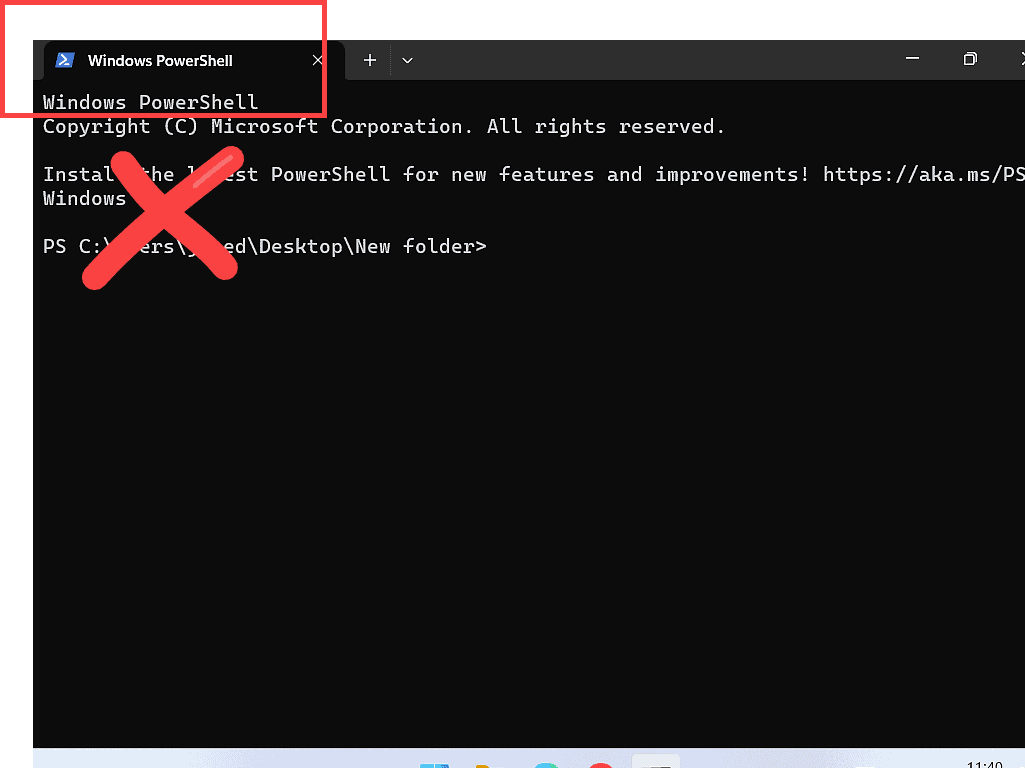
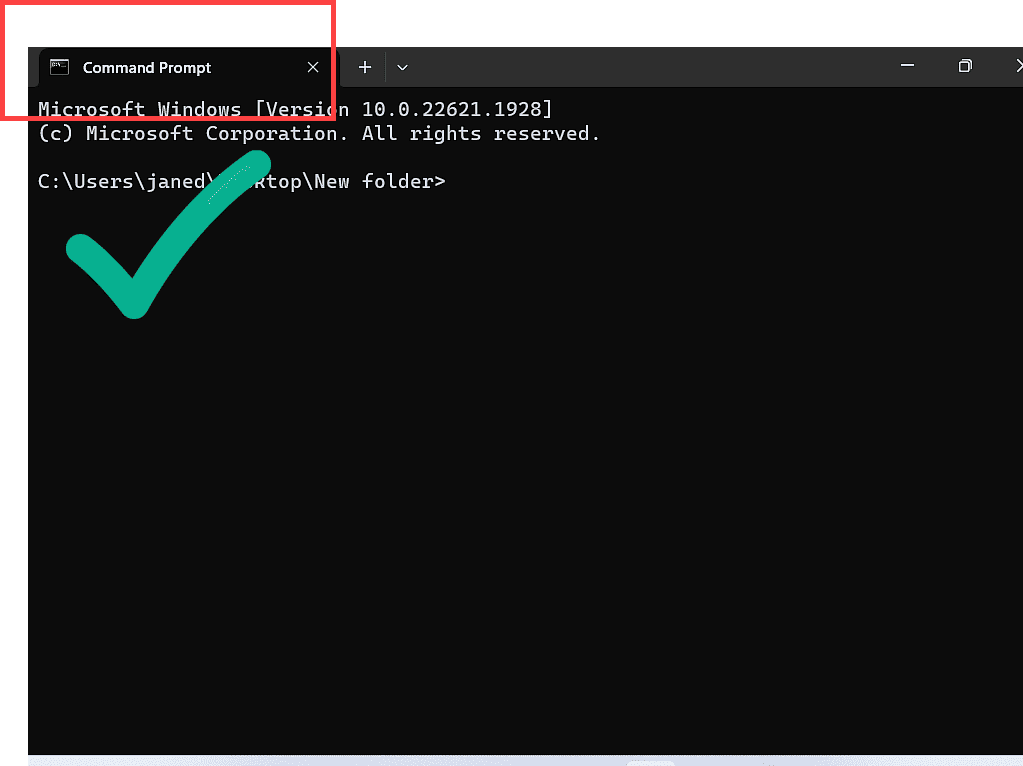
When the Terminal window opens, check the you’re actually using Command Prompt (CMD) and not PowerShell. In order to hide a file inside an image, you need to be in Command Prompt.
Most home computers will probably have PowerShell set as the default for a terminal window. Both windows will look very similar. Check in the top left corner of the window to make sure you’re using Command Prompt.
If, on your computer, the terminal opens in PowerShell, follow the next steps to change it to Command Prompt.
But if you’re already in Command Prompt, you’re good to go and can skip to the following section – “Hiding a file inside an image”.
To Change The Default Terminal To Command Prompt.
The commands that you’ll need to enter to hide a file will only work in Command Prompt. So if your terminal window is set to open in PowerShell, you’ll need to change it to Command Prompt.
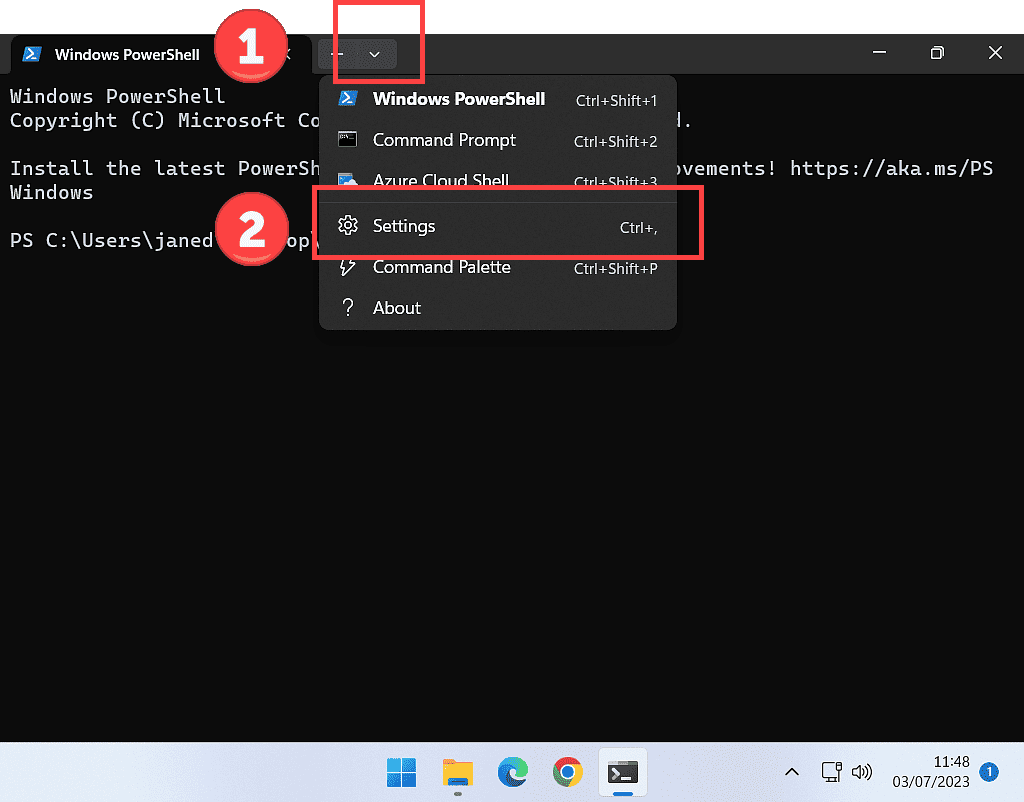
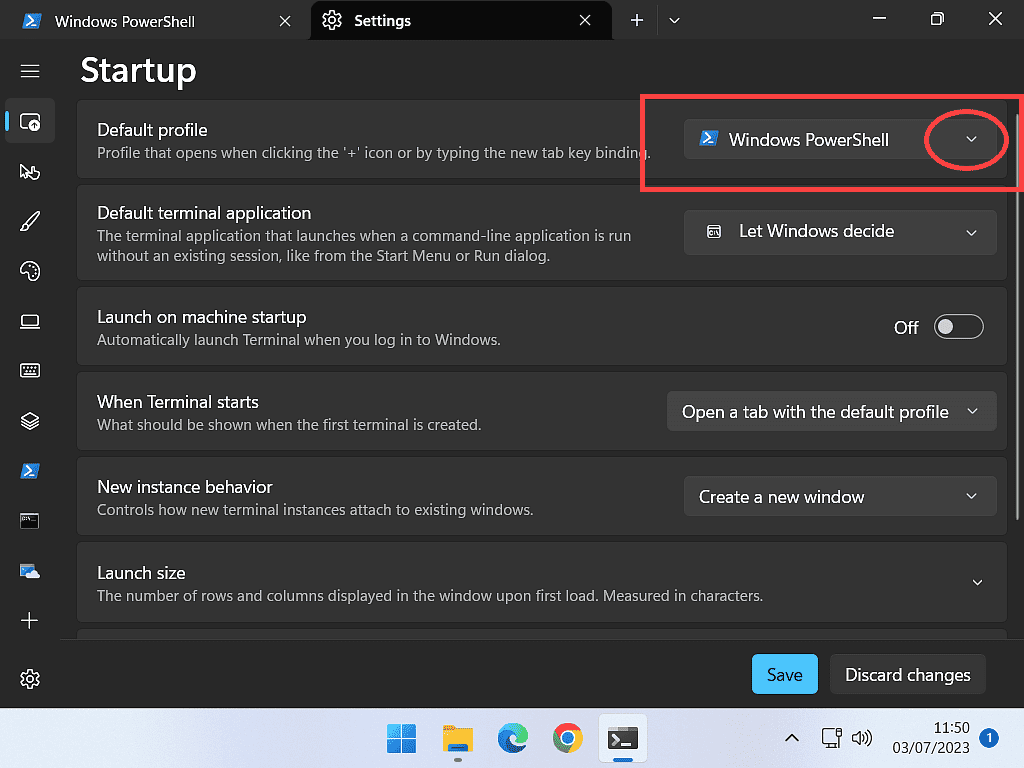
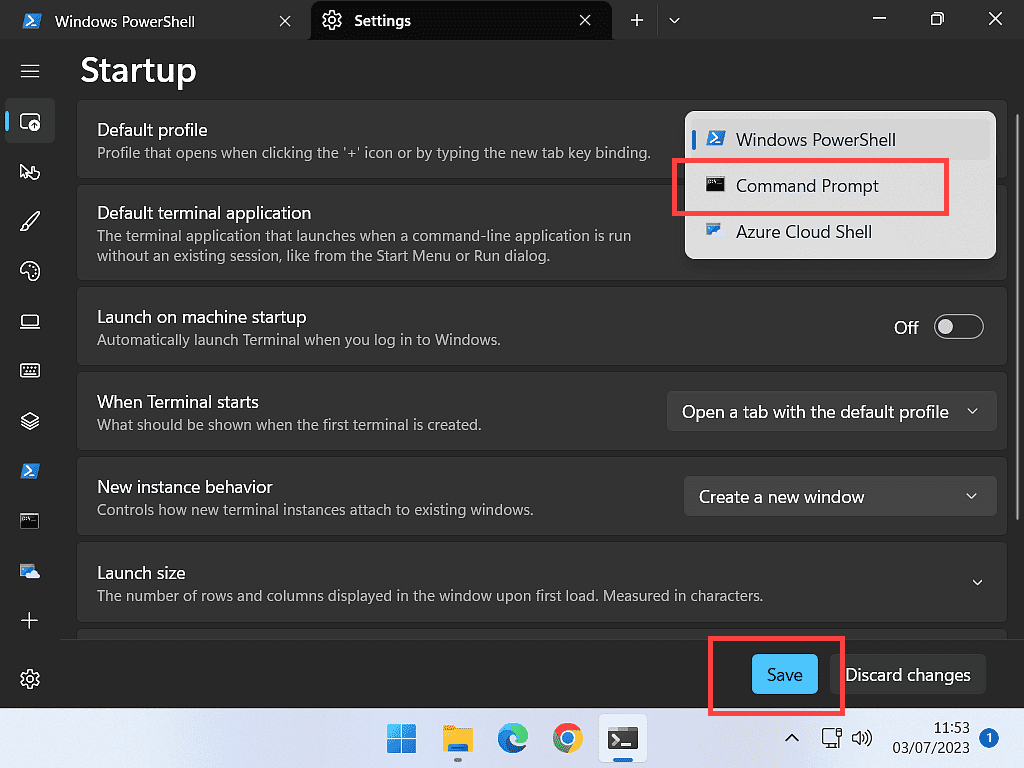
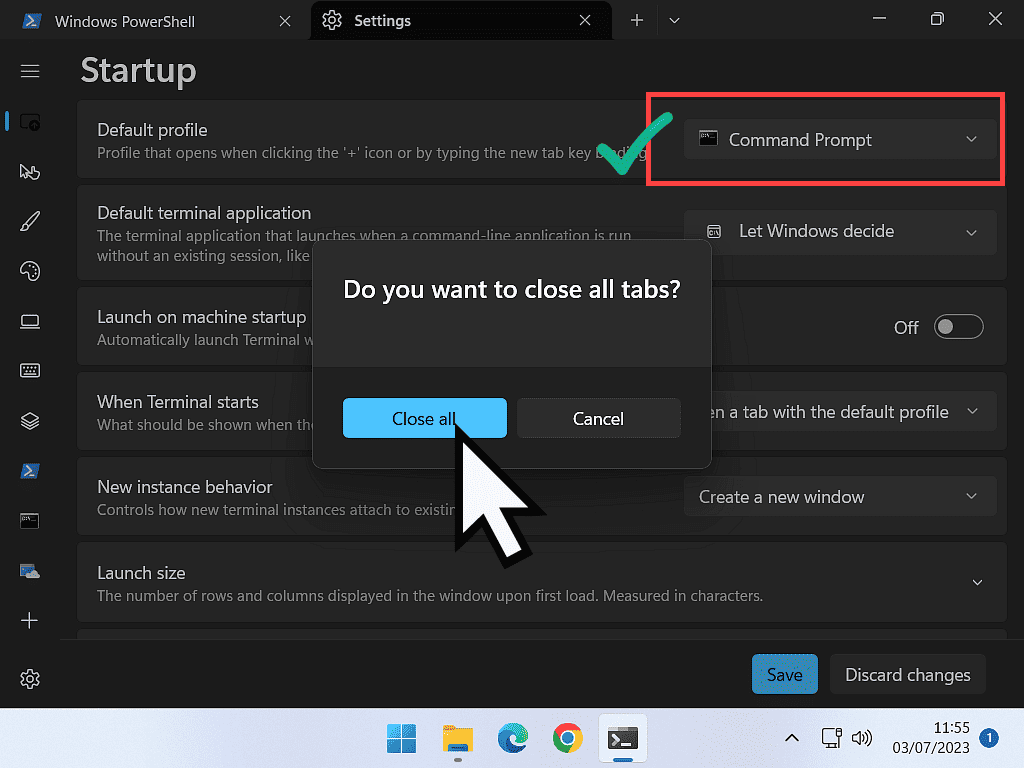
After clicking the Close All button, you’re terminal windows will close and you’ll be back to your folder.
Simply right click inside your folder again, select Open in Terminal and this time the Command Prompt window will open. Great.
How To Hide A File Inside An Image.
Note that in this example, the file I’m hiding is called “passwords.txt” and the image is named “gramps.jpg“.
You’ll obviously need to change both the file and image names to be whatever your files are named.
In Command Prompt, you have to type in a command to hide the file inside the image and then press the Enter key on your keyboard.
type passwords.txt > gramps.jpg:passwords
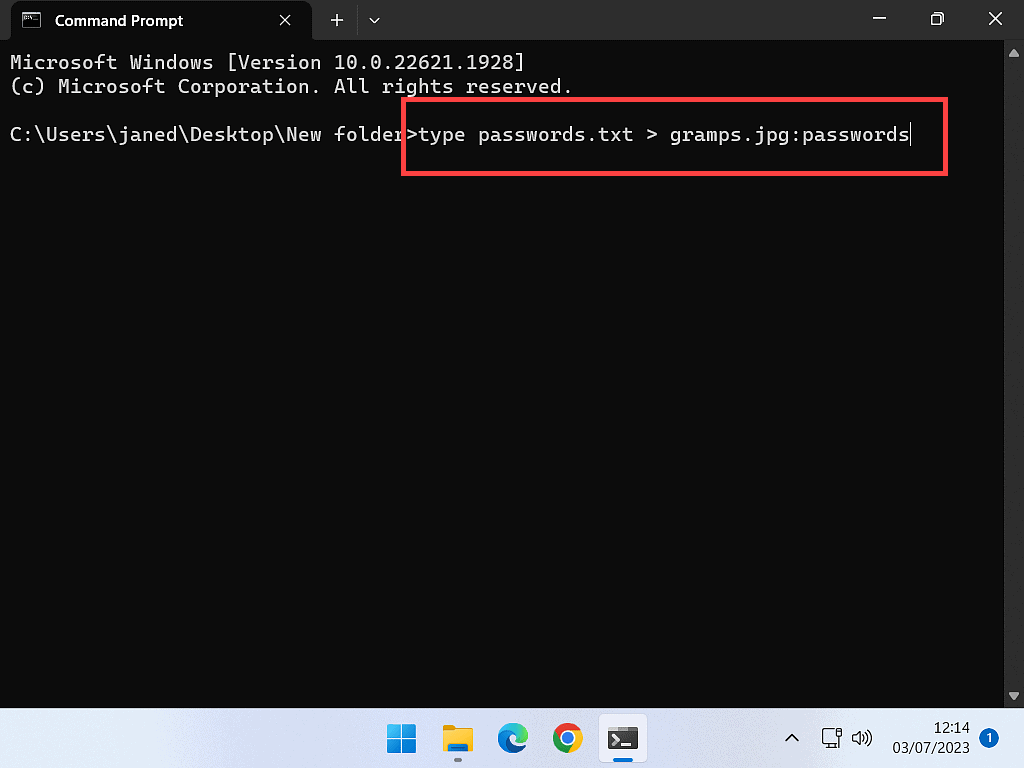
After pressing the Enter key you should see something like this in Command Prompt.
If you see anything else, then you’ve probably made a typo.
Try it again, being especially careful to type in the command exactly as laid out above.
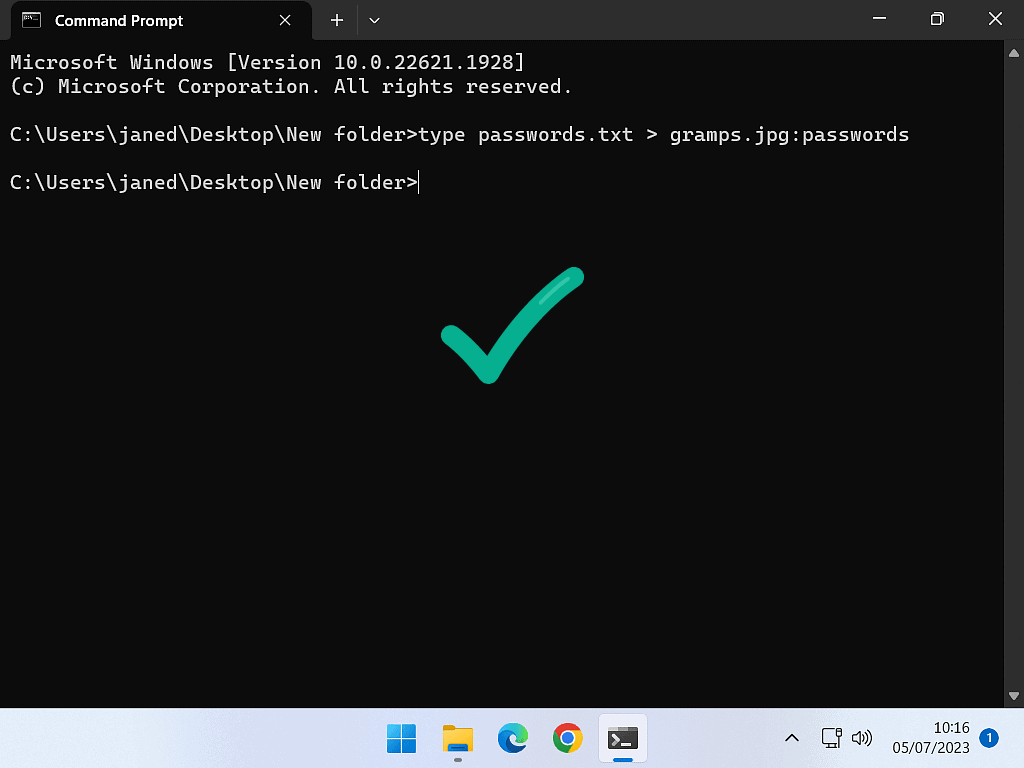
The File Is Still There.
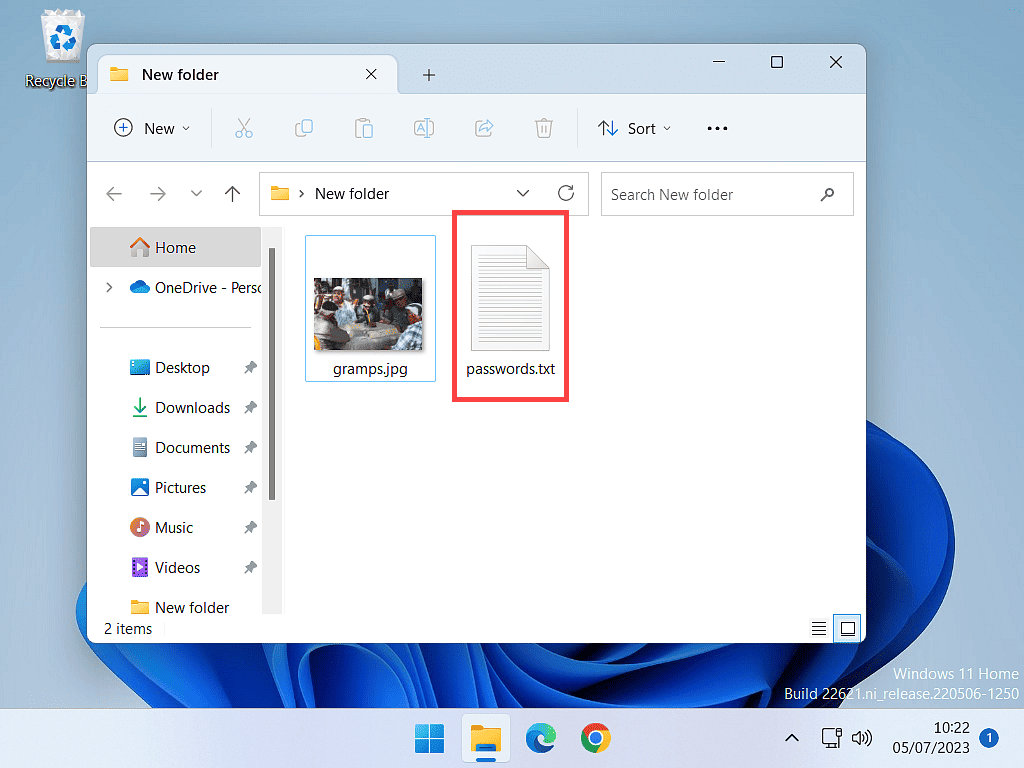
When you return to your folder, you’ll see that you still have both the image and the file that you were trying to hide.
That’s because you haven’t moved the file, but rather you’ve copied it, and it’s the copy that has been placed inside the image. The original stays where it is.
To complete the operation, you’d just delete the original file.
But before you do that, it’s best to check that it has really worked.
How To Retrieve A Hidden File From An Image.
There’s not much point hiding a file inside an image if you can’t retrieve that file whenever you want it. To get the file back, you’ll need to go use Command Prompt again.
Right click inside the folder that contains your image and hidden file. Then click Open In Terminal.
At the Command Prompt you need to specify which program should open the file. Followed by the image name and then the file name to open.
In my example, I’m just using a simple text file, so I’ll type notepad. If your file is a Word document, you’d type word, an Excel spreadsheet, type excel etc.
Type the command like this, substituting your file names for those in the example.
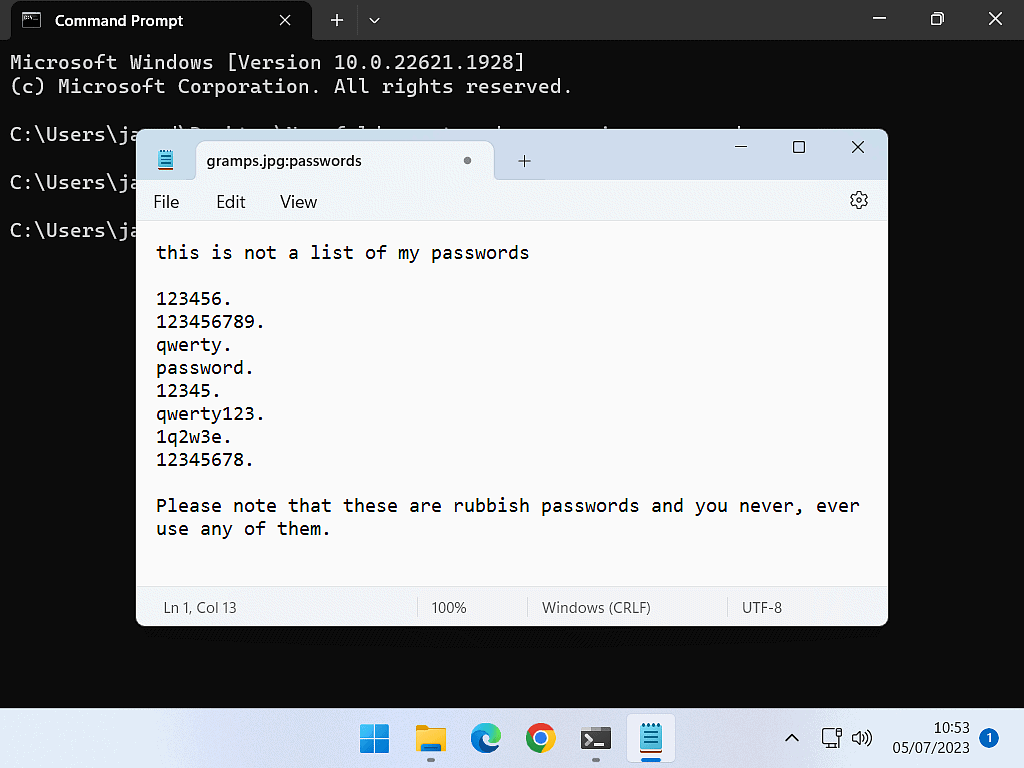
notepad gramps.jpg:passwords
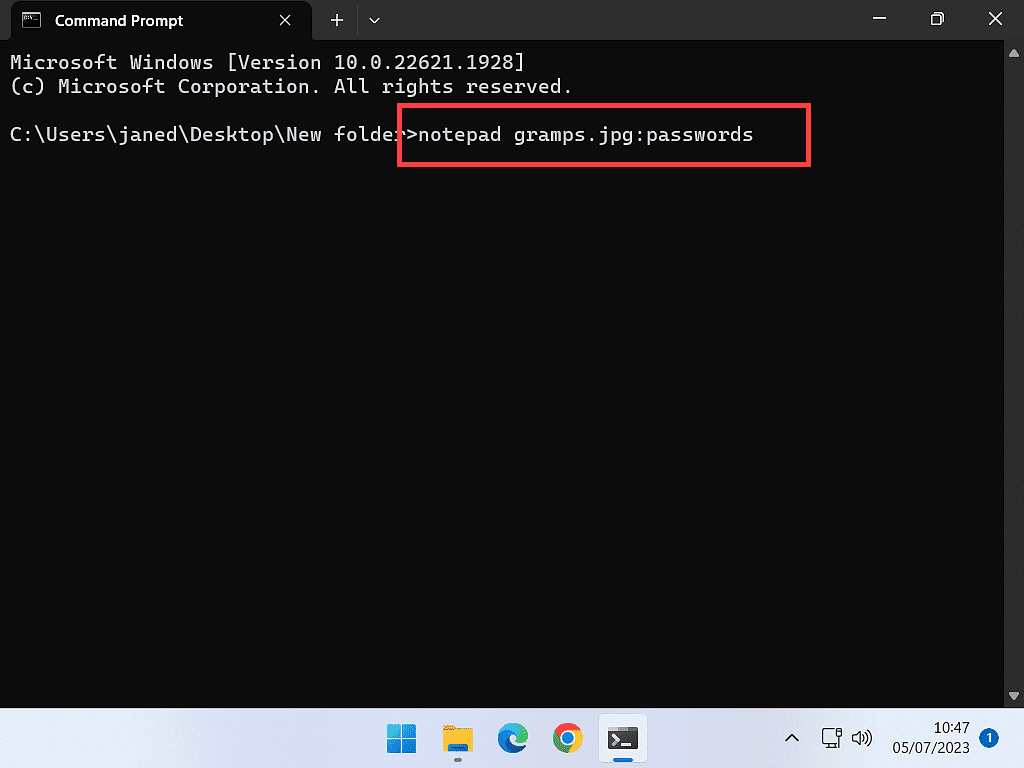
After pressing the Enter key, the hidden file will open in whichever program you chose.
You can now edit the file as you wish. When you close the program, it’ll ask if you want to save the changes, just as it normally would.
How To Hide A Folder Inside An Image.
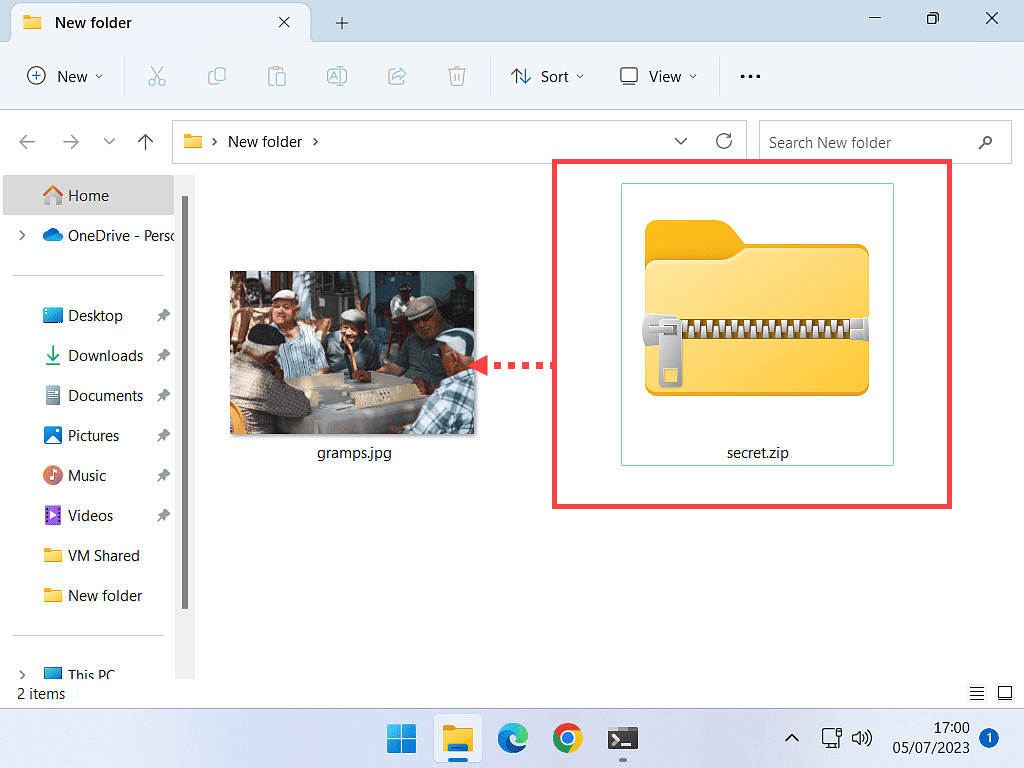
You can also hide a folder and its entire contents inside an image. There is just one caveat though, the folder must be zipped (compressed) first. Other than that, hiding the folder is exactly the same as hiding a file.
For example, here I’ve got a folder called “secret.zip” that I’ll hide within the image “gramps.jpg”. You’d change the file and folder names to be whatever yours are called.
Open the Command Prompt by right clicking in the folder and then selecting “Open in Terminal”.
Why Does It Need To Be A Zipped Folder?
The folder to be hidden needs to be zipped first because to the operating system a zipped folder appears as a single file. How To Zip And Unzip Files On A Windows PC.
Hiding A Folder In An Image.
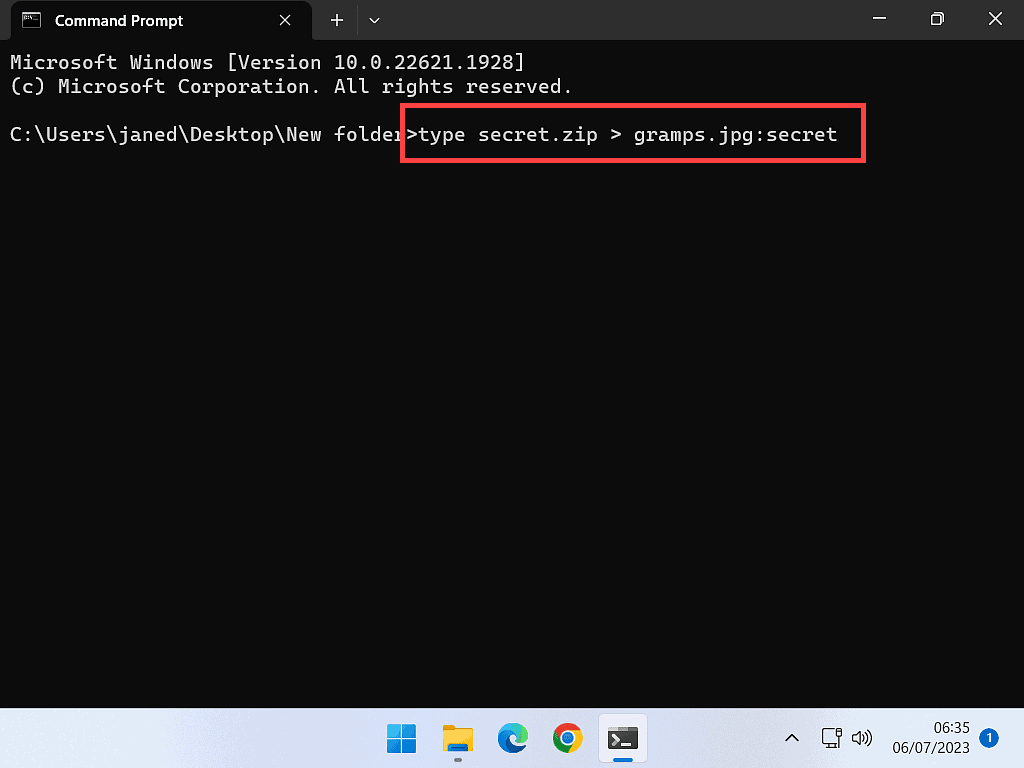
At the Command Prompt type
type secret.zip > gramps.jpg:secret
Hit the Enter key on your keyboard. Note that it might take a while to complete if you’re using a large folder.
The folder will be copied inside the image file.
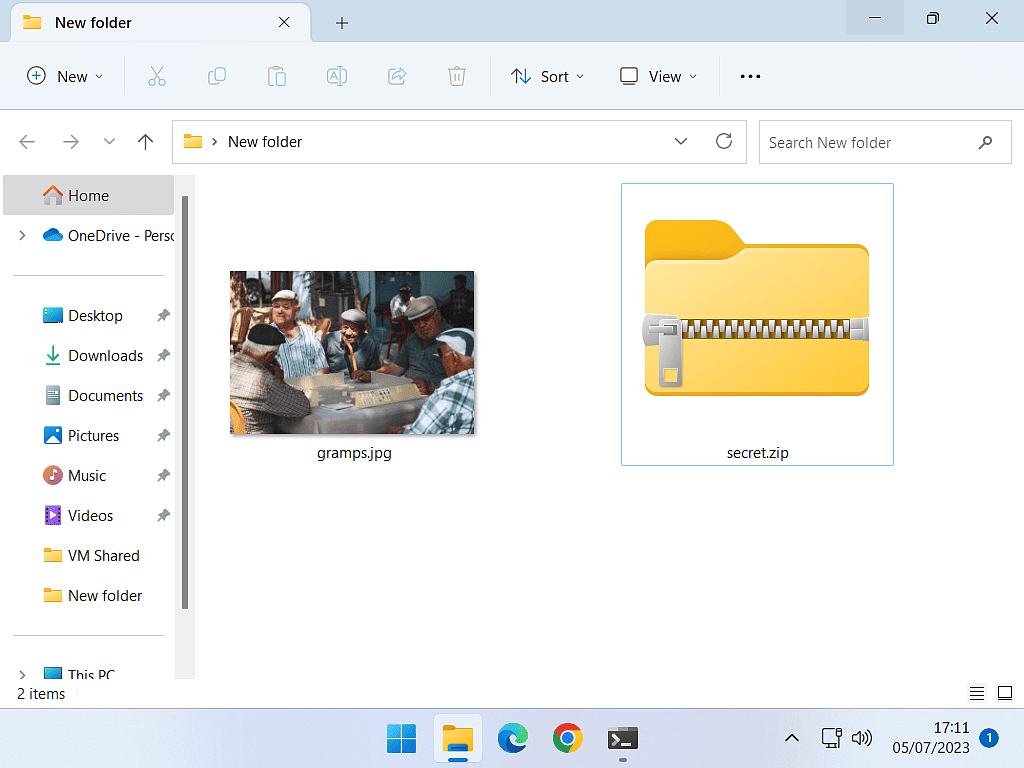
Don’t forget that the original folder will still be visible. The command creates a copy and it’s the copy that is hidden in the image.
The original folder needs to be deleted. But again, I’d test it first, just to be sure it’s worked properly.
How To Retrieve A Hidden Folder From An Image.
Retrieving the hidden folder from the image is a little different from retrieving a single document.
Whereas with a single file you can simply open it from within the image and then edit it, when you’re working with a folder, because it’s zipped, you have to extract the folder first.
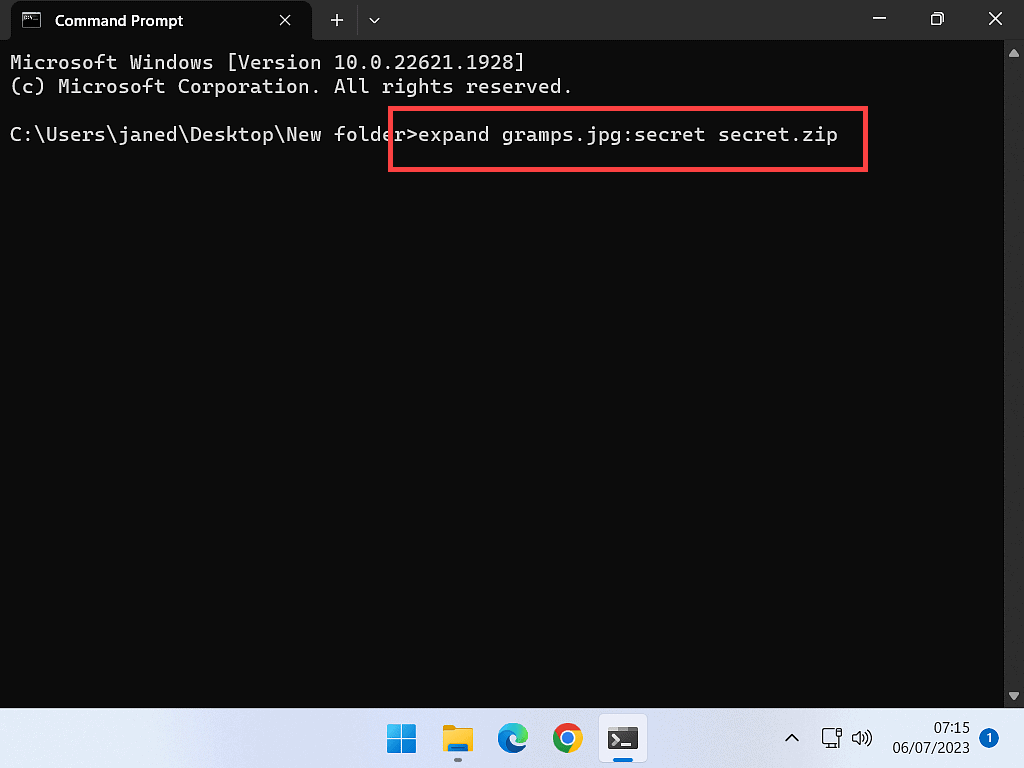
In this example to retrieve the hidden folder I’d type
expand gramps.jpg:secret secret.zip
You’d change the file and folder names to reflect your own files and folders.
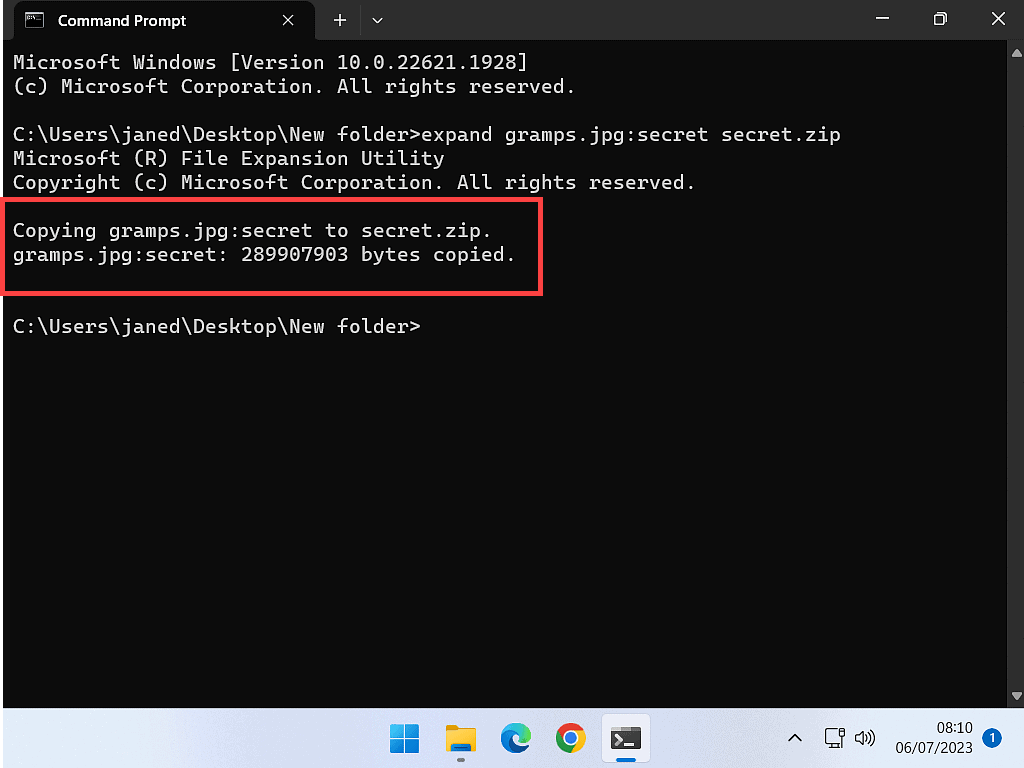
After you hit the Enter key, the hidden folder will be copied from within the image and the copy will be placed in your folder.
Note that the folder is COPIED. You’re not retrieving the original folder.
That’s important because if you then make any changes, or edits, to the copied folder, it won’t be reflected, or saved into the original (hidden) folder.
Important To Note The Differences Between Hiding A File Or Folder In An Image.
When you open a single hidden file you are viewing and/or editing the file directly. Which means that any changes you make will be saved in the hidden file.
But when you’re working on a hidden folder, you’re not. You’re working on a copy of the hidden folder. That’s important because any changes that you’ve made won’t be saved in the hidden folder, you’ll need to re-hide the entire folder.
For that reason, if the files you’re hiding will need to be updated, edited or changed in any way, it’s much better and easier to hide them as single files. If the files will never need to be added to, changed or edited in any way, then it’s fine to group them together inside a folder and hide that.
Summary.
Hiding individual files works well because you can easily open and edit them. Hiding folders is a bit more problematic.
It’s fine for static folders that aren’t going to change, but for “live” folders, I don’t think it really works well and there are better ways to do it.
Keep Up With Home Computer Guides.
All the latest guides and articles published on At Home Computer delivered to your inbox.
No account needed, just add your email address.


