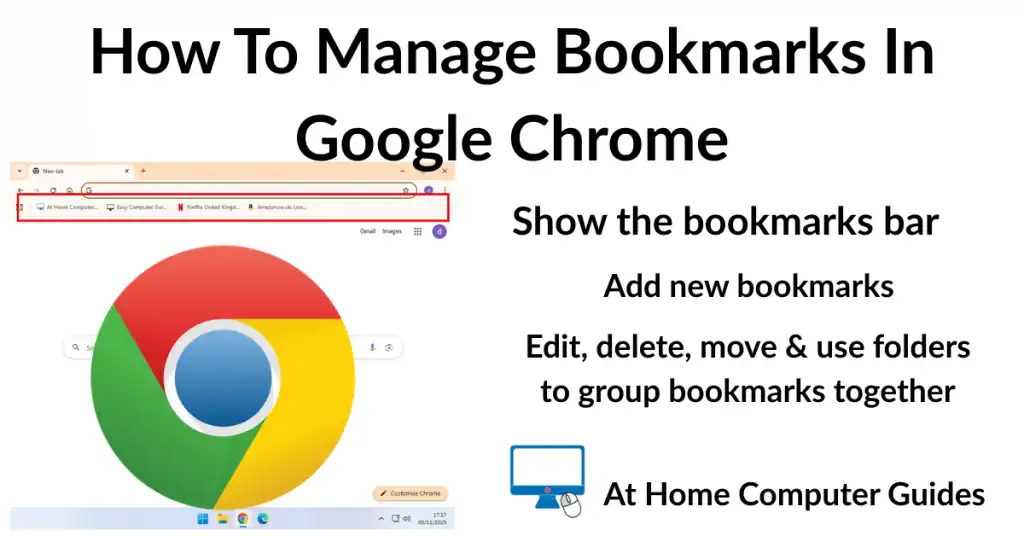
How to manage your bookmarks in Google Chrome. A bookmark is essentially a shortcut, or quick access to a web page or website. Pages that you visit often can be bookmarked so that you can get back there with just a single click.
In this step by step guide I’ll show you how to organise your bookmarks. Everything from how to create a bookmark, edit, move, delete and group them in to folders.
How To Create A Bookmark In Chrome
Bookmark websites and web pages that you want to return to. They could be be pages that you visit often or just occasionally. You can even bookmark a page temporarily, e.g. you’re doing a little research, and then delete that page later when you’ve finished.
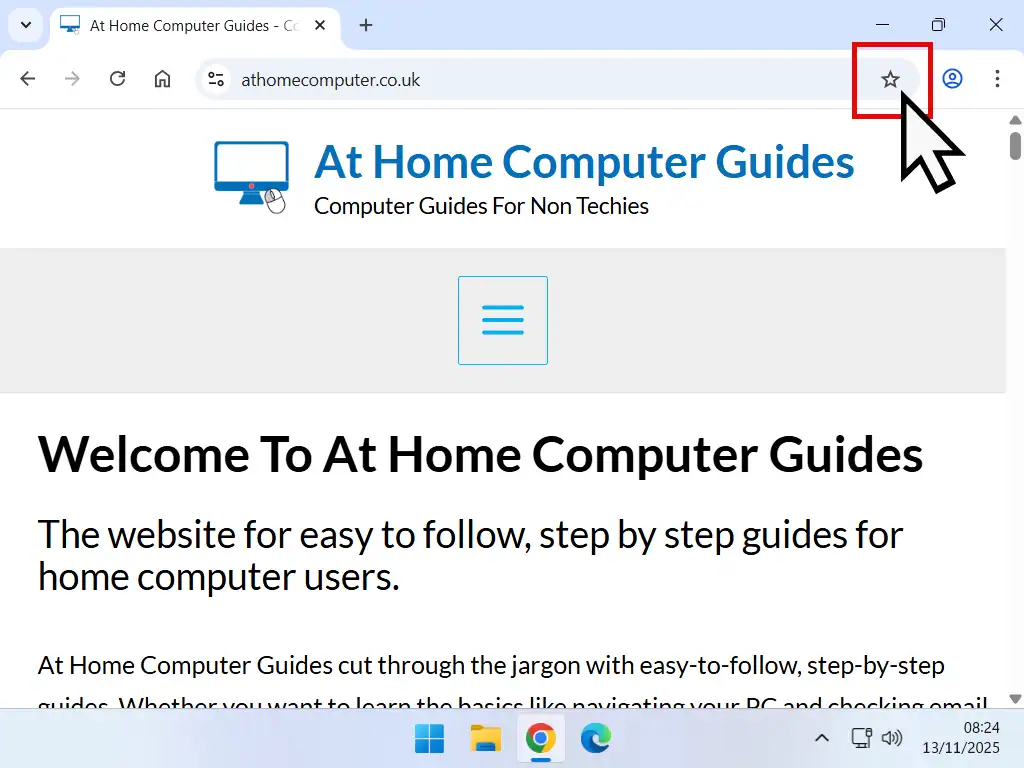
In Chrome there are two ways to bookmark a page –
- Click the Star icon in the the address bar
- Or press CTRL and the letter D on your keyboard
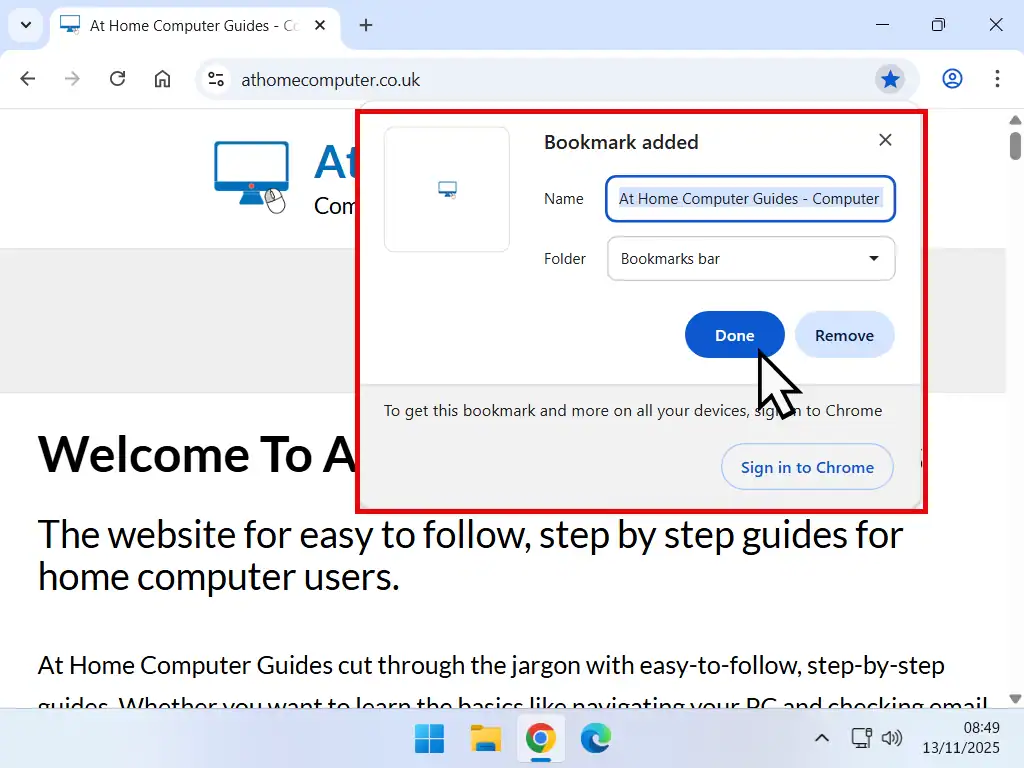
Bookmark Added
Whichever you choose to create the bookmark, a popup window will appear. The Bookmark Added popup gives you two pieces of information. Firstly the name of the bookmark, which is going to be the web page name. And secondly the folder in which Chrome will save the bookmark.
By default, Chrome will save your new bookmark into the last folder that you used. That’s important to know because it explains why sometimes bookmarks go missing, or at least you can’t find them later. But we’ll get to that later. For now I’ll assume that the bookmark is going to saved to the bookmarks bar.
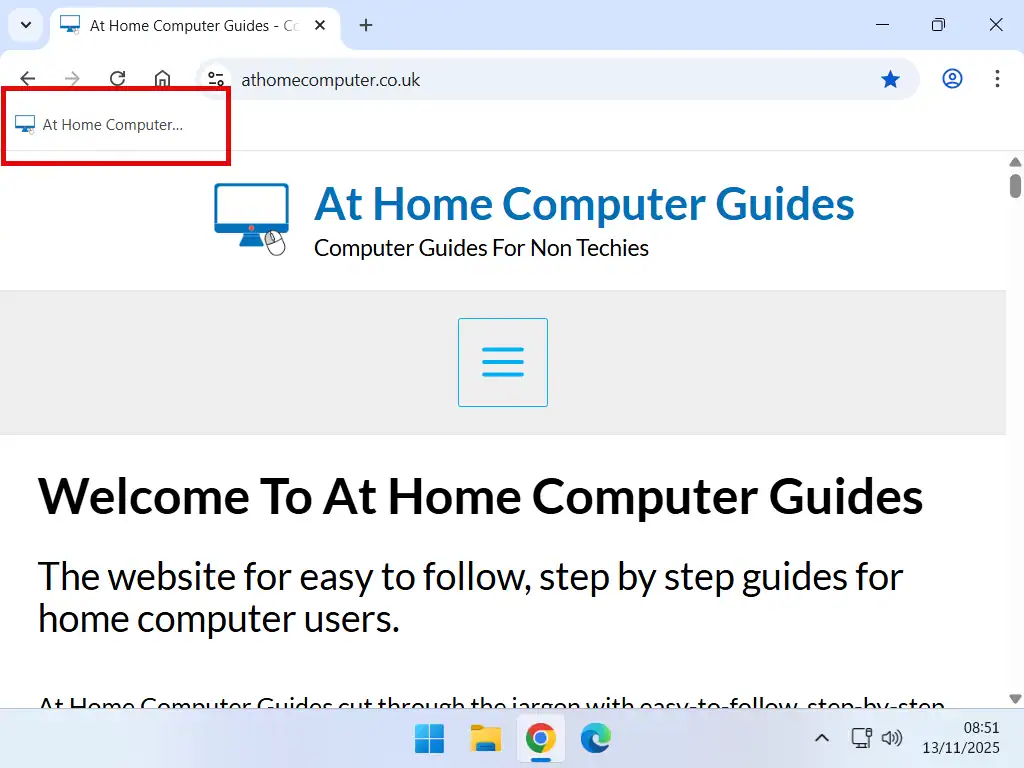
Click the Done button and the web page should appear on the bar.
Show The Bookmarks Bar In Chrome
It’s very possible that you can’t see the Bookmarks Bar on your computer. That’s because Chrome usually doesn’t show it by default. You have to change a quick setting to get Chrome to show the Bookmark Bar.
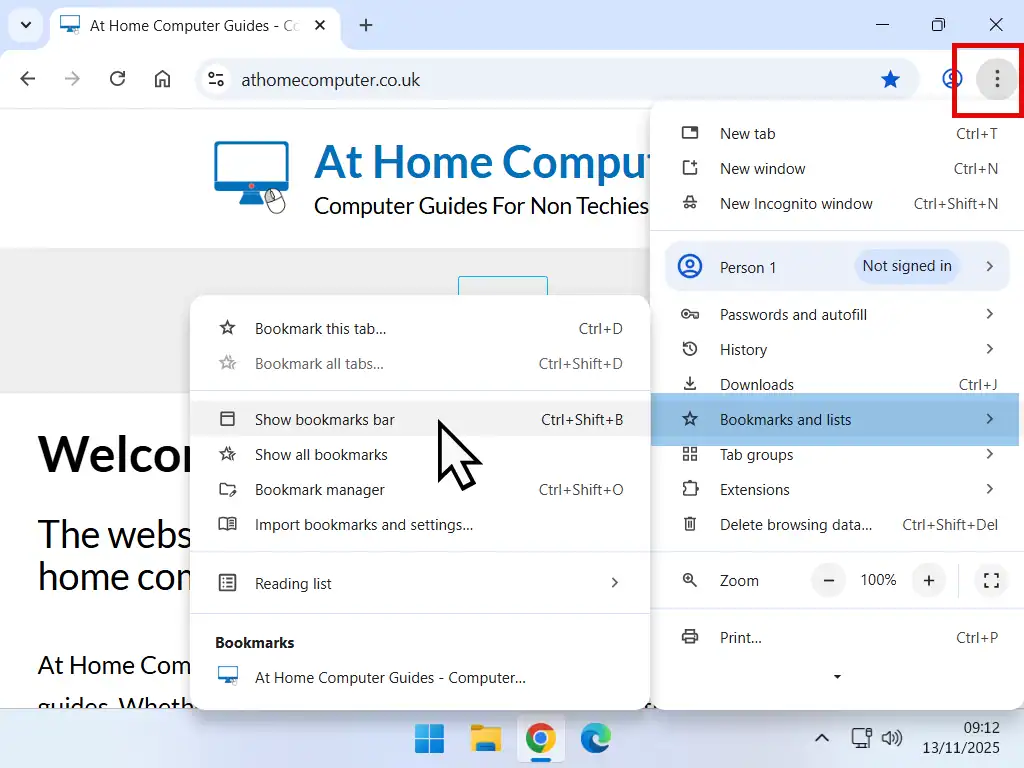
To show the Bookmarks Bar in Chrome you can use the keyboard shortcut CTRL + Shift + B.
Or if you prefer to use the mouse, click the settings icon (3 vertical dots) in the top right hand corner. On the menu, hover over Bookmarks and Lists, then click Show Bookmarks Bar.
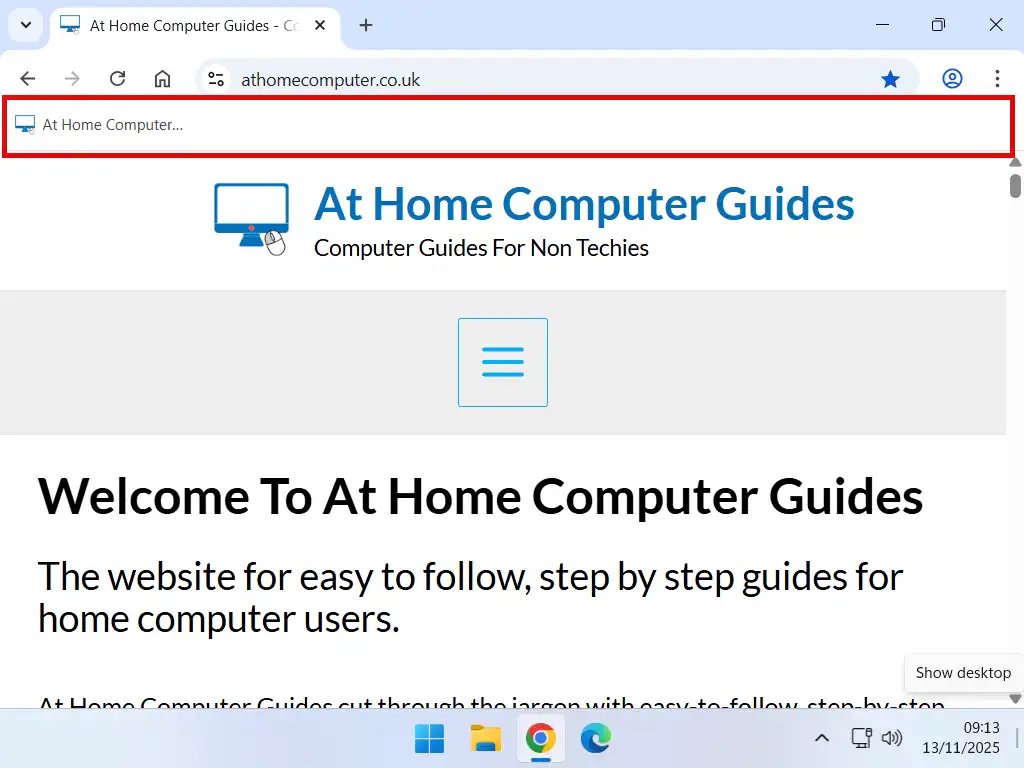
The bar will appear at the top of the page, just below the Address Box.
Hidden Bookmarks In Chrome
The bookmarks bar is limited for space since it can only extend the width of your computer screen. Once the bar is full, it might seem that no more bookmarks are being saved. But they are, there’s a kind of “overflow” for bookmarks that won’t fit on the bar.
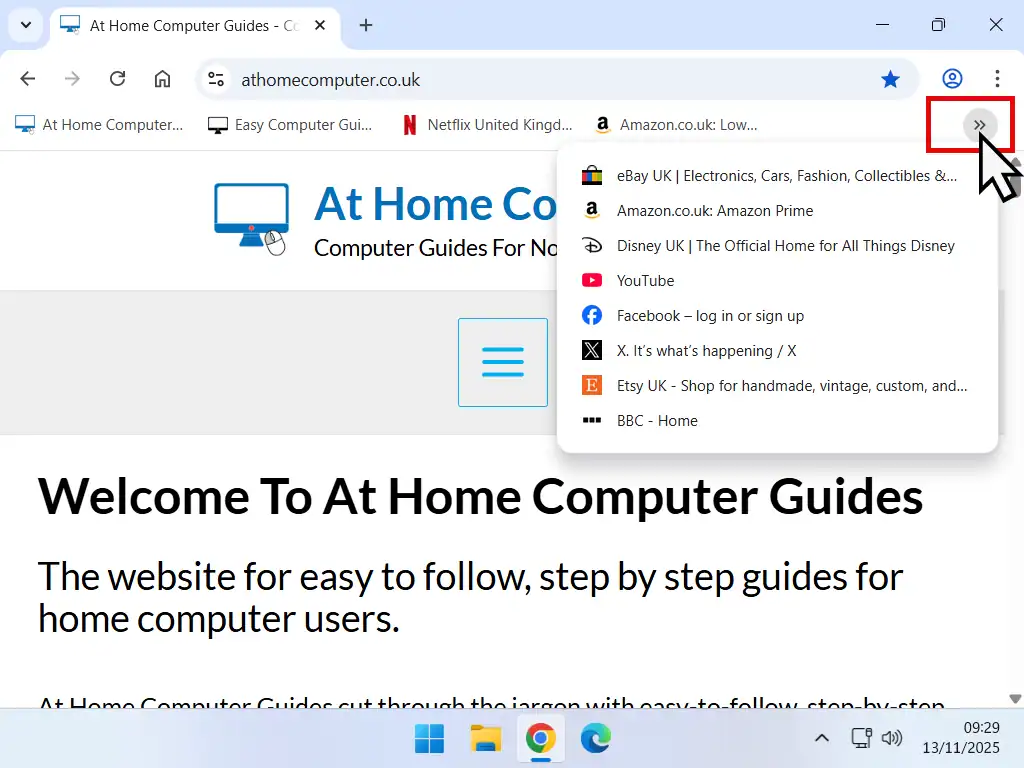
It’s called Hidden Bookmarks and is represented by two chevrons at the end of the Bookmarks Bar.
Click on the chevrons and you’ll see a list of all the saved bookmarks that just can’t fit on the bar.
Note that new bookmarks are added to the bottom of the list, not the top.
How To Delete A Bookmark
Over time you’ll find that some bookmarks aren’t really needed any longer. In that case you can easily delete them out of the way.
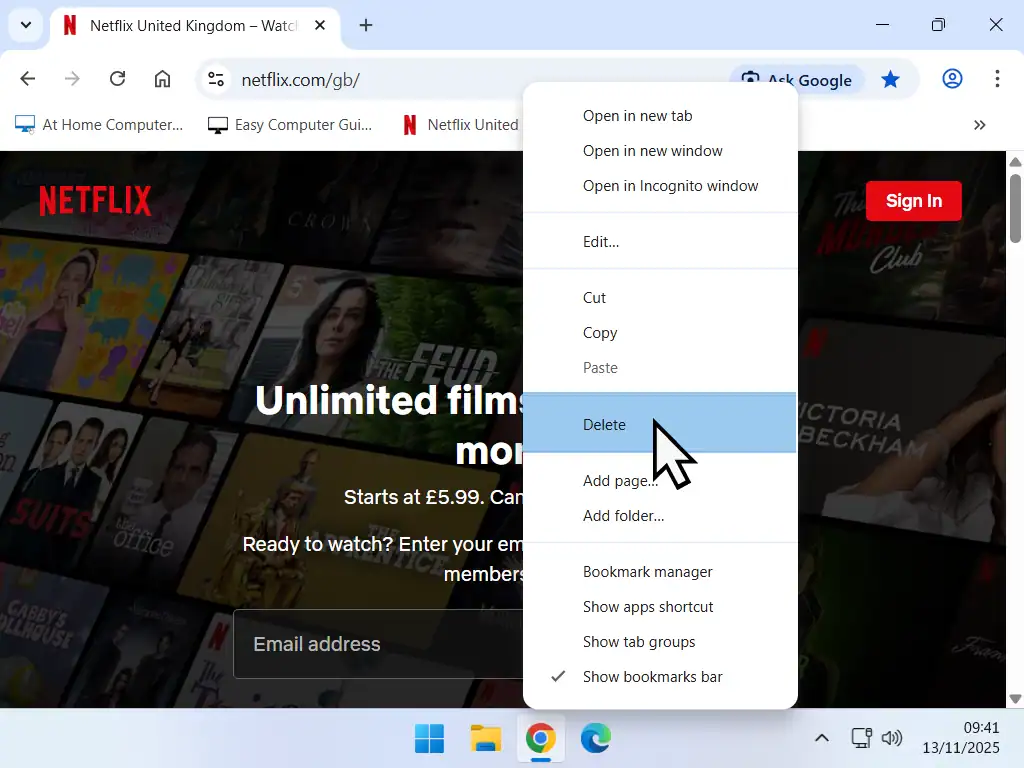
To delete a bookmark, right click on it and then left Delete from the options menu.
You can delete bookmarks that are shown on the bar and that are in the hidden bookmarks list.
How To Manage Bookmarks In Chrome
Now that we’ve covered the basics such as creating, deleting and showing the bookmarks bar, I’ll show you how you can manage your Chrome bookmarks. How to organise them in to some sort of order so that you can use them more easily.
How To Move Bookmarks
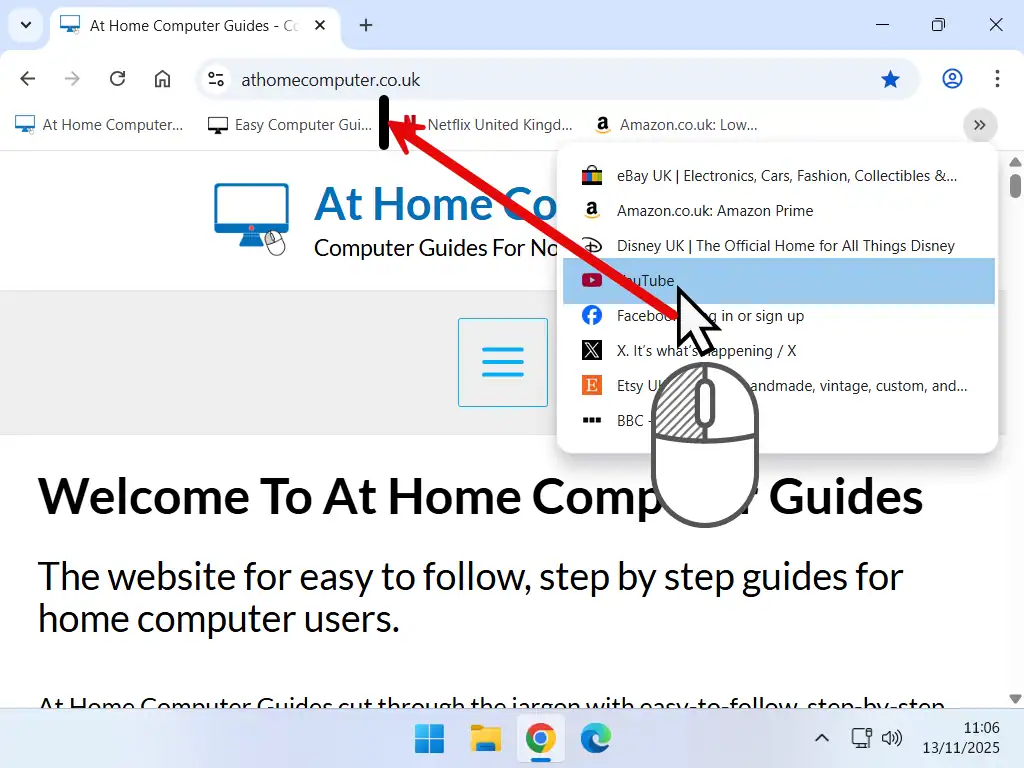
The Bookmarks Bar is the place to have your most-used bookmarks because they’re easy and quick to get to. To move any bookmark in Chrome you can simply drag and drop it to where you want it to appear on the bar.
To help position the bookmark properly, as you move it, you’ll see a straight black line appear on the Bar.
The line is where the bookmark will will be positioned when you drop it. All the other bookmarks will be moved along to the right to make way for it.
If your bar is full, then whatever bookmark is at the end will drop off into the hidden bookmarks list.
Use Folders For Similar Websites
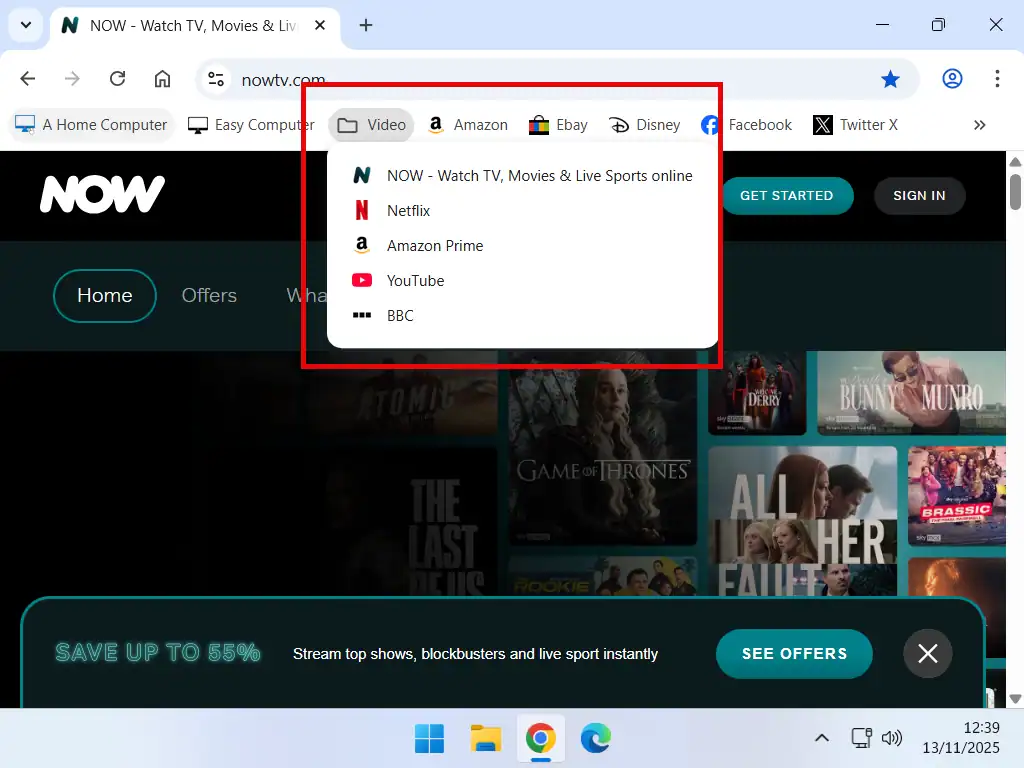
If, like me, you have a lot of saved websites that are similar, or related in some way, then you can make use of folders to manage your bookmarks.
Group related bookmarks together in a folder, similar to how you’d store related files in a folder on your PC.
For example, if you have a few video streaming websites bookmarked, you could group them together in a folder
You can obviously do the same for online shopping sites, online banking, social media, email accounts, etc.
How To Create A Folder In Chrome
To create a bookmark folder in Chrome –
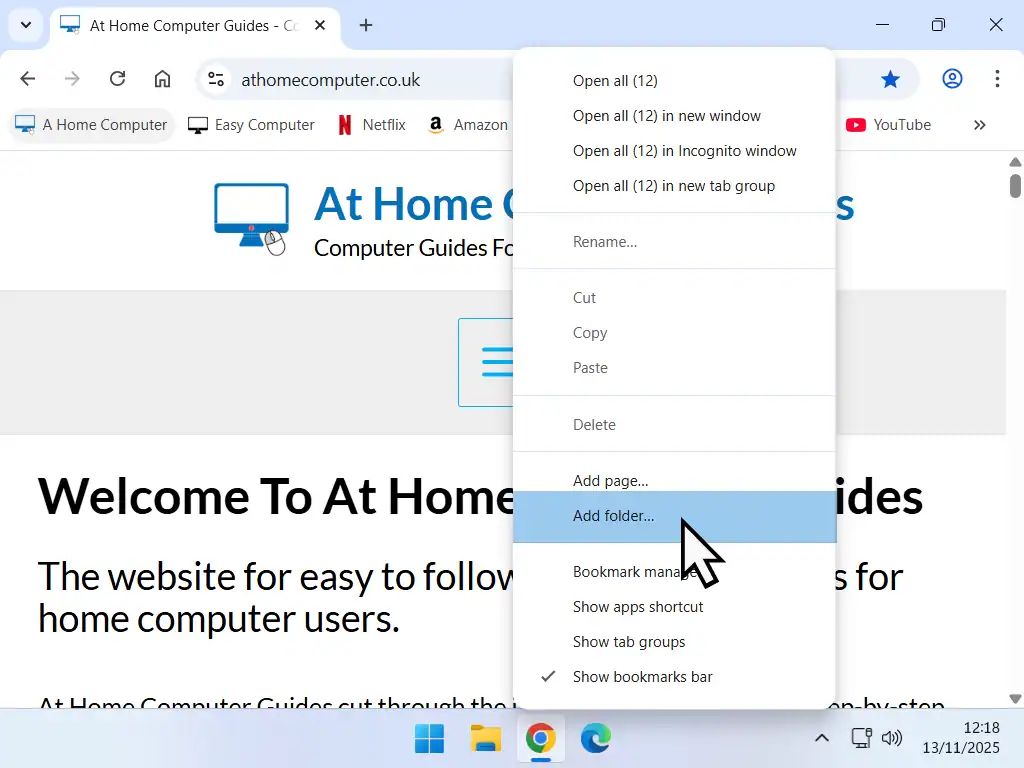
- Right click on the Bookmarks Bar. Be careful to not click an actual bookmark. You have to click between the bookmarks, on the Bar itself. On the options menu, left click Add Folder.
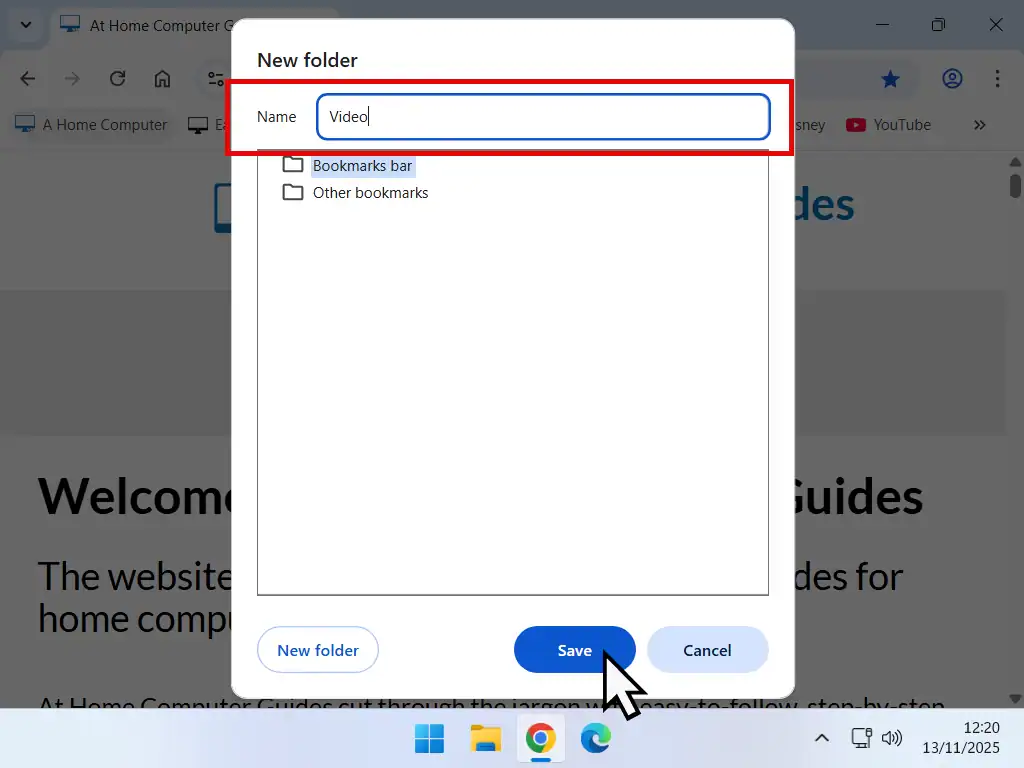
- In the New Folder window, type in a name for your bookmarks folder. Try to keep it short but descriptive
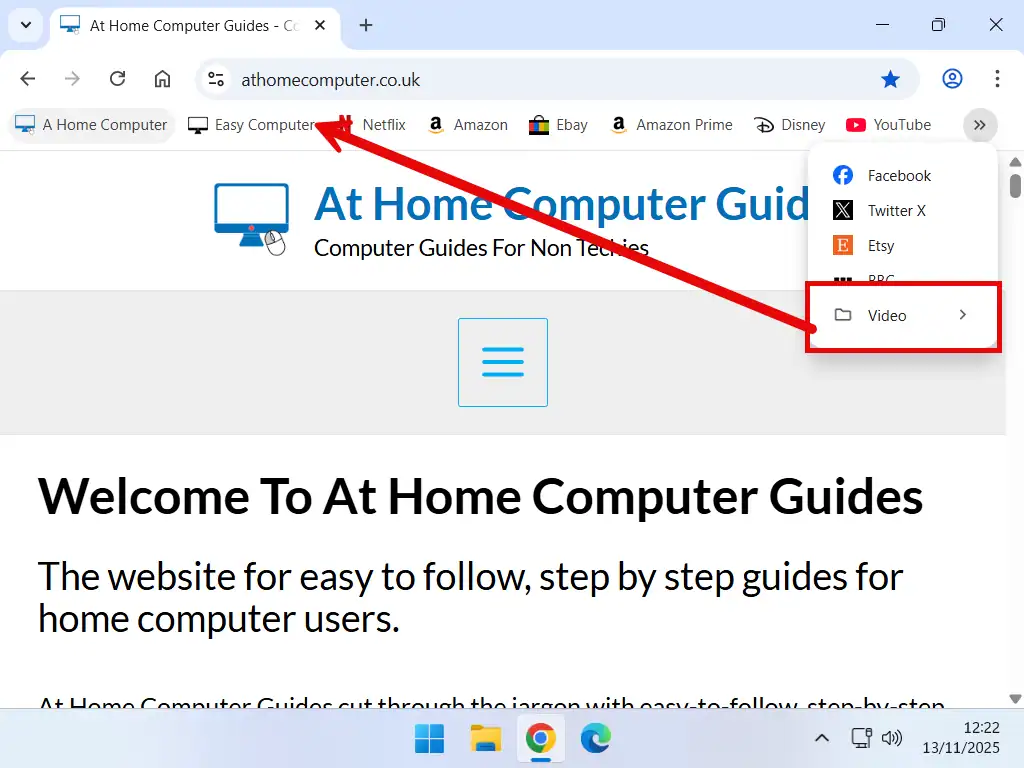
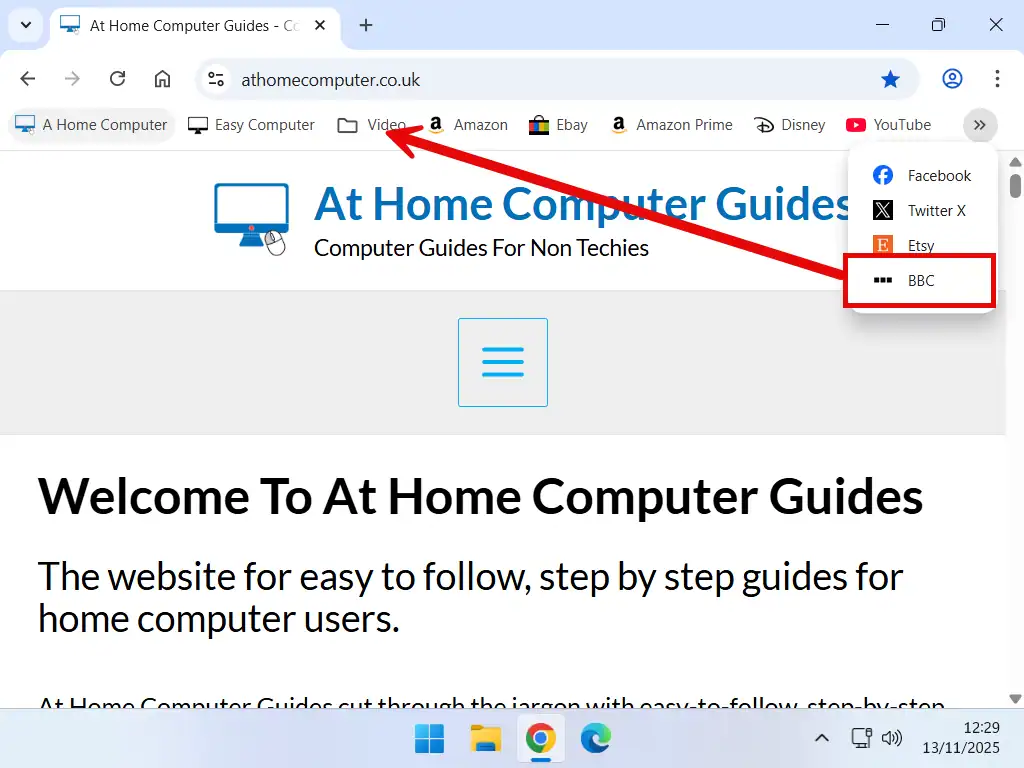
- If you have space on the Bookmarks Bar, then the folder will appear there. If not it’ll go to the Hidden Bookmarks list. Drag and drop the folder to the Bookmarks Bar just as would any other bookmark.
- Next drag drop related bookmarks in to the folder.
You’ll find that by keeping saved websites together in folders makes it much easier to handle large numbers of bookmarks.
Sub Folders
Folders in Chrome can also have subfolders, again just like on your PC. Simply drag and drop a new folder into an existing folder and there you have it.
Saving Bookmarks Into Folders
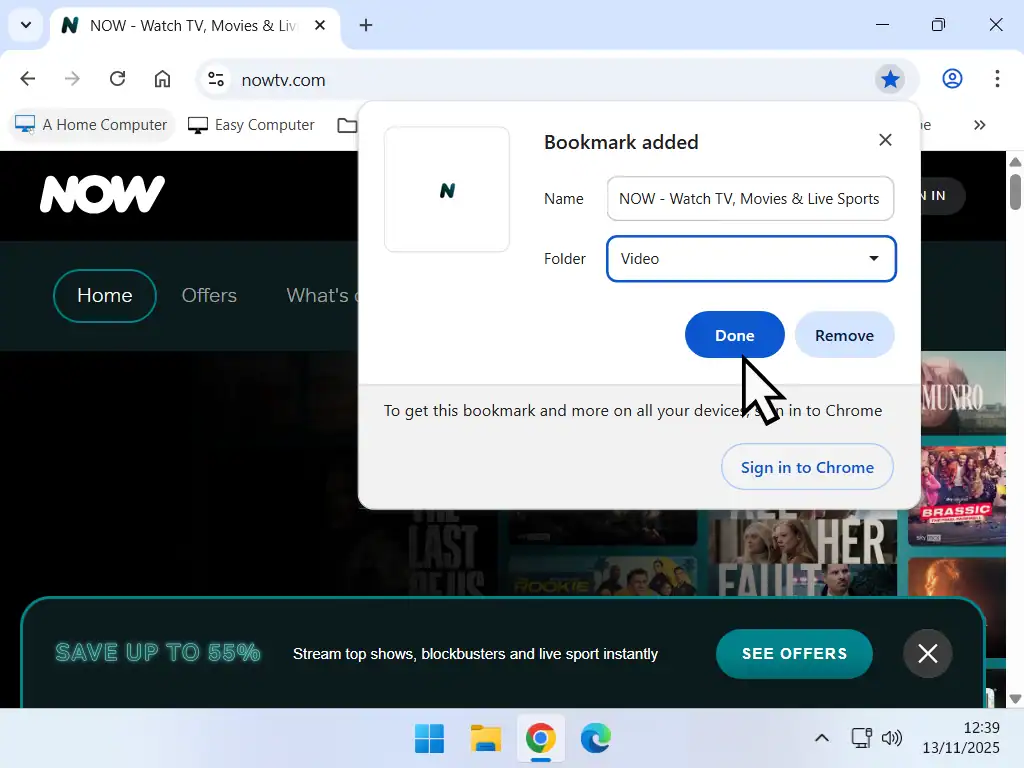
When you create a new bookmark, you can save it directly in to a folder rather than on the Bookmarks Bar.
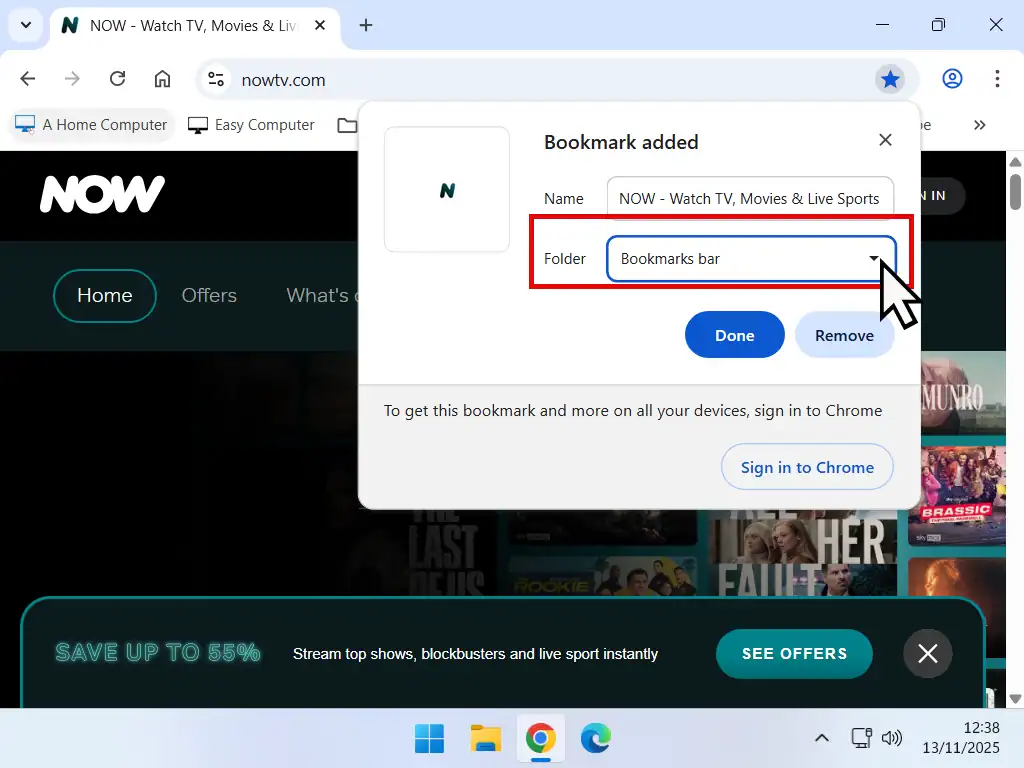
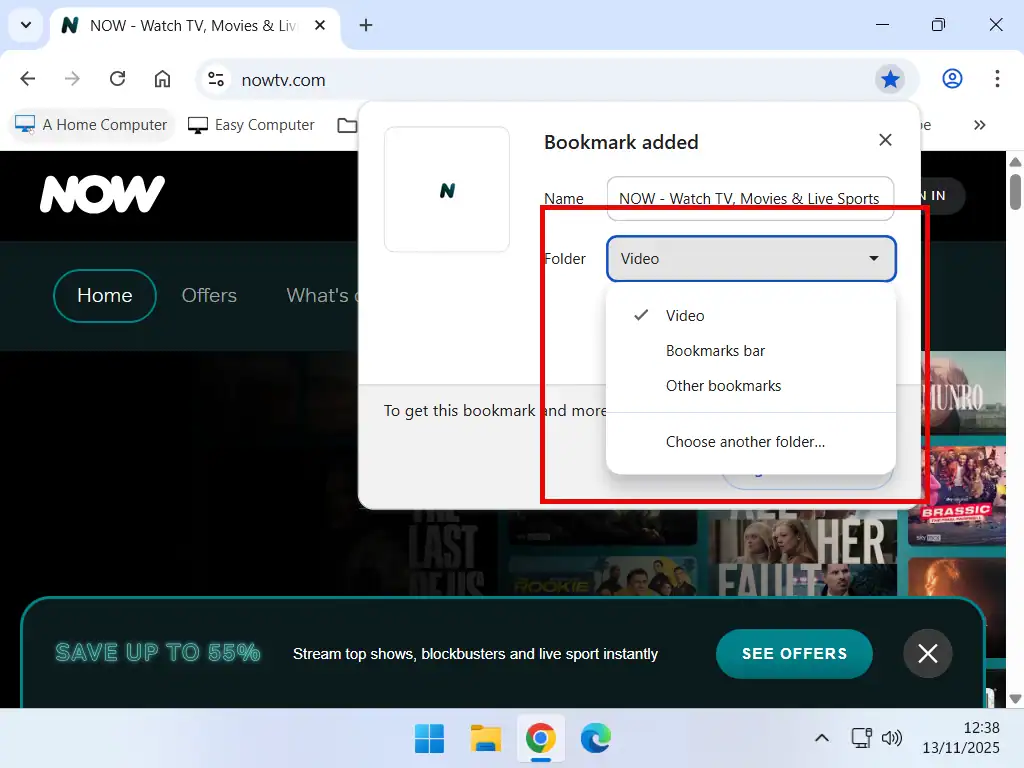
- Click the bookmark icon (or press CTRL + D on your keyboard). Then click the drop down arrowhead in the Folder box.
- Select the folder that you want to use to save the bookmark in to.
- Click the Done button.
- And the bookmarked website will appear in the folder that you selected.

Missing Bookmarks
Whenever you create a new bookmark in Chrome, it’ll be saved in to the last folder that was used. This behaviour can sometimes lead to bookmarks going “missing”.
So if you find that you seem to be missing some saved websites, check your folders, they’re most likely in there.
How To Create More Space On The Bookmarks Bar
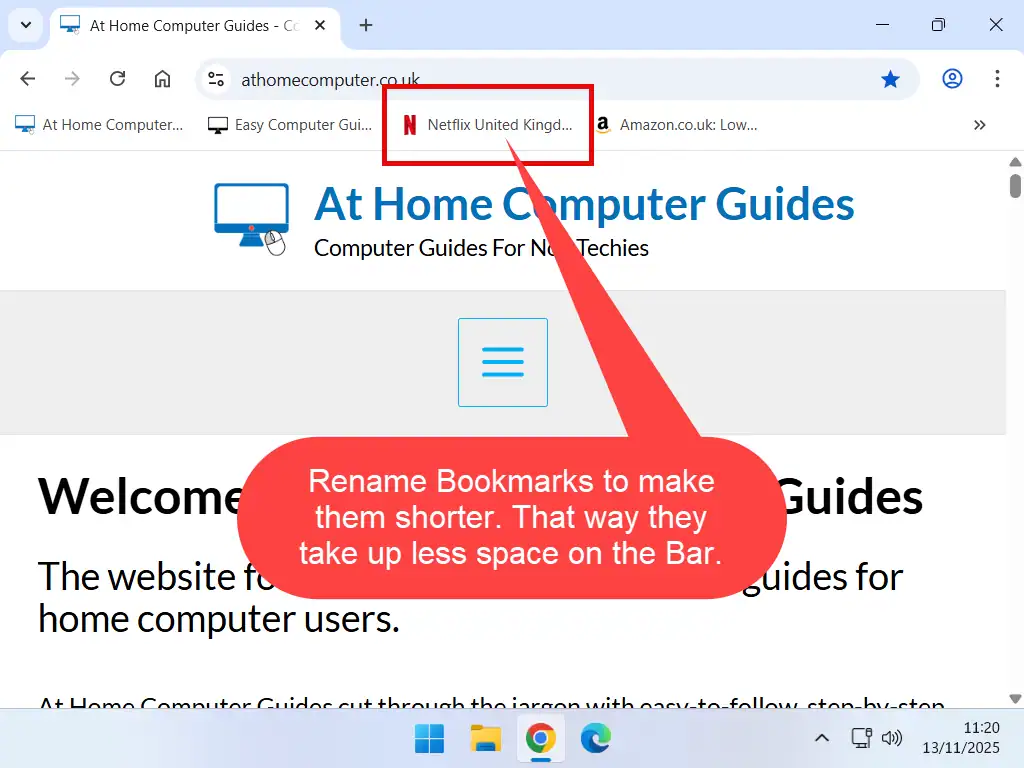
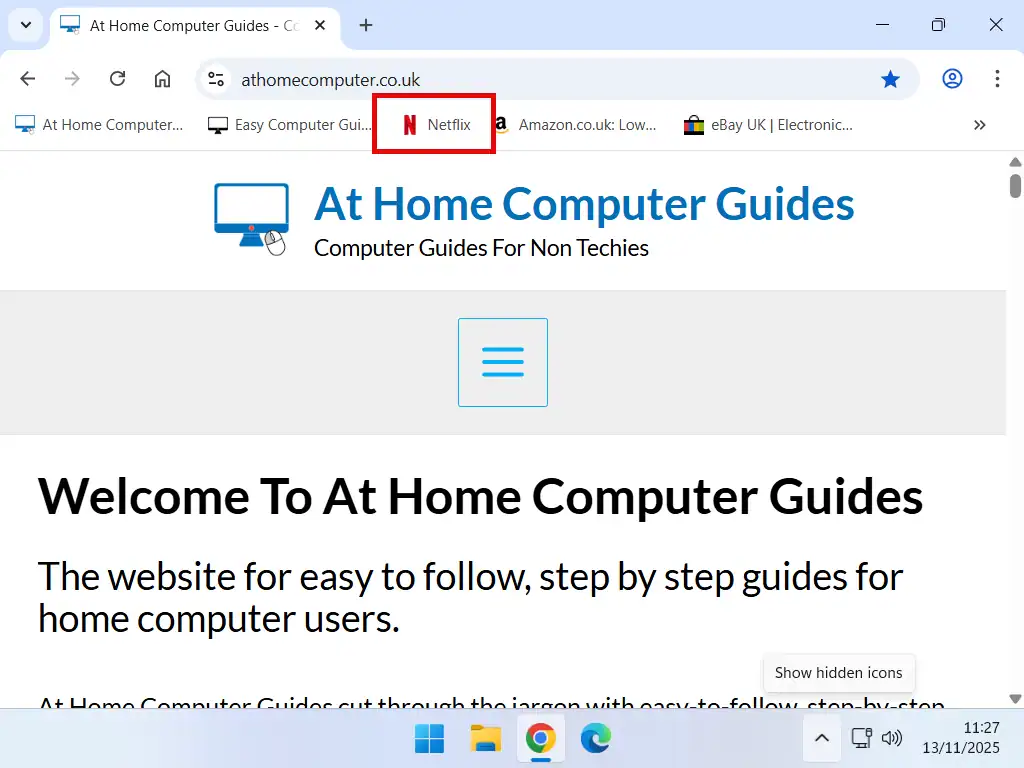
There’s never enough room for every saved website on the Bookmarks Bar, but there is simple trick that you can use to create more space, just rename them.
Bookmarks are saved using the website name, or sometimes the page name. Those names can be unnecessarily long, which uses up the available space. Give your bookmarks a shorter name and they’ll occupy less space on the bar.
- For example, Netflix United Kingdom could be shortened to just Netflix.
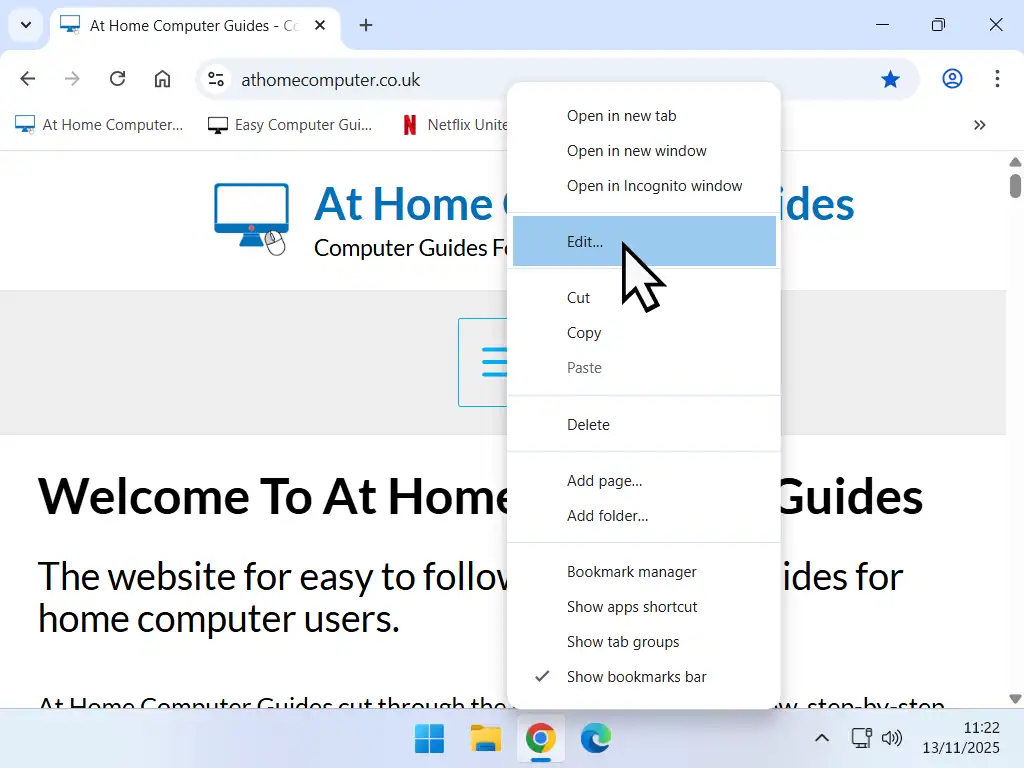
- To rename a bookmark in Chrome, right click on it. On the menu that opens, left click Edit
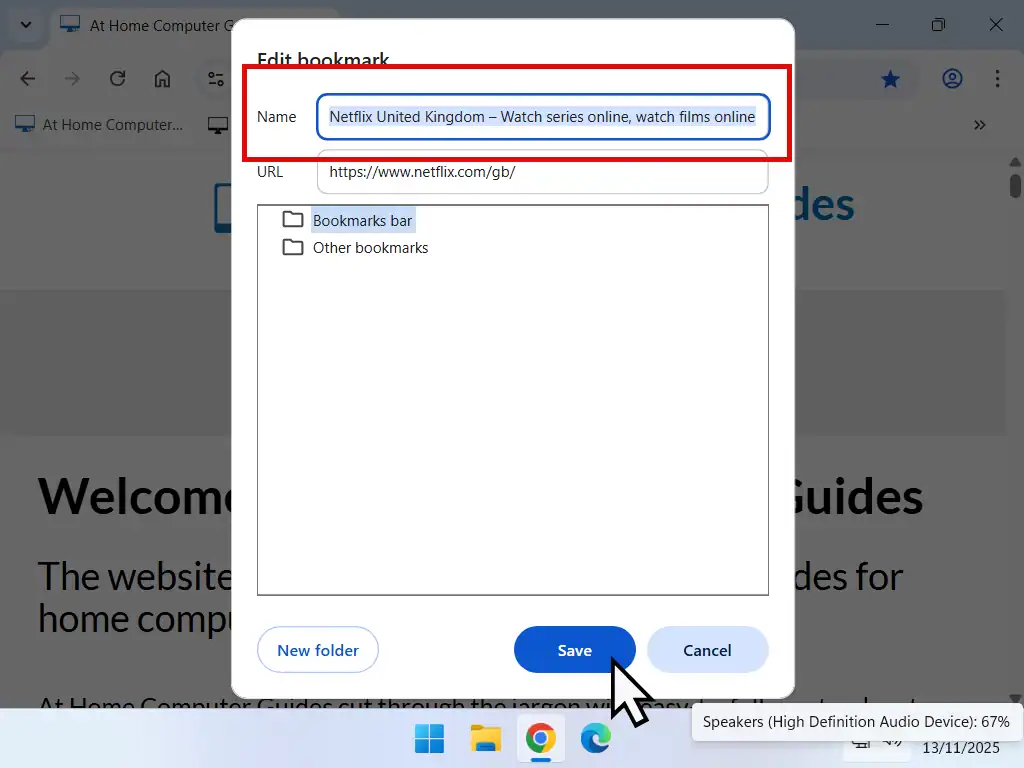
- In the Name box, type in the new name that you want to give to the bookmark. Since you’re trying to save space the shorter the name the better. Then click the Save button.
- The bookmark will appear with the new, shortened name, thus creating more space on the bar.
Create Even More Space On The Bar
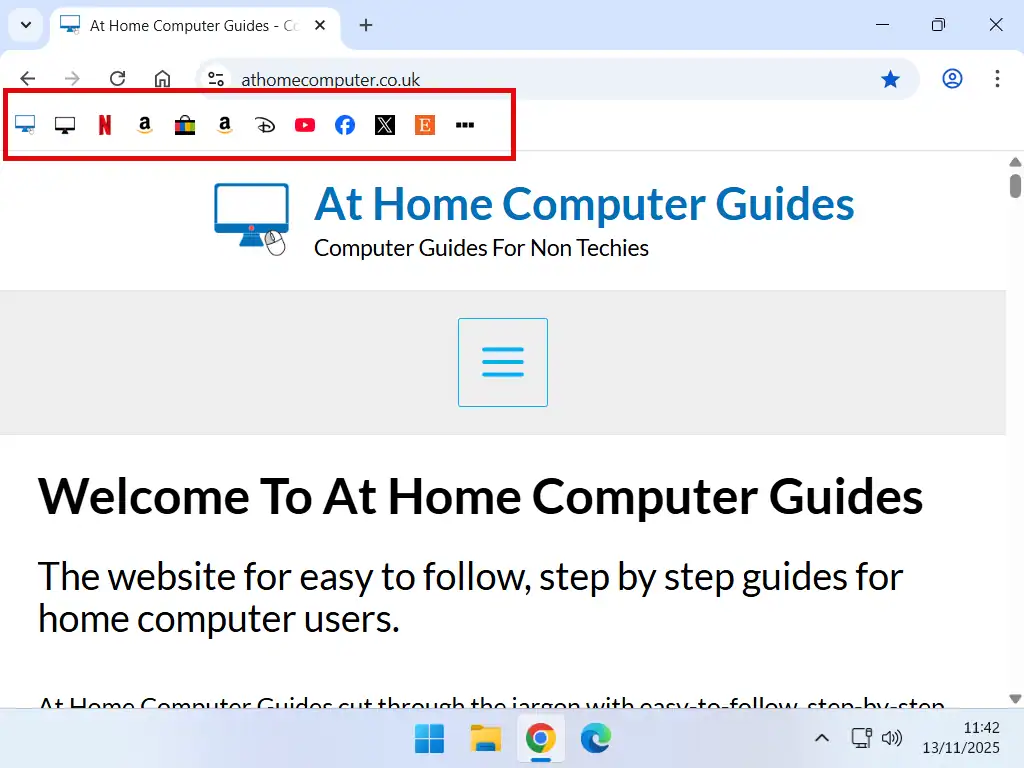
Most websites use an icon, commonly called a favicon, to represent the site. Many of these favicons are instantly recognisable without the need for any text description at all. And the icons (favicons) take up hardly any space at all.
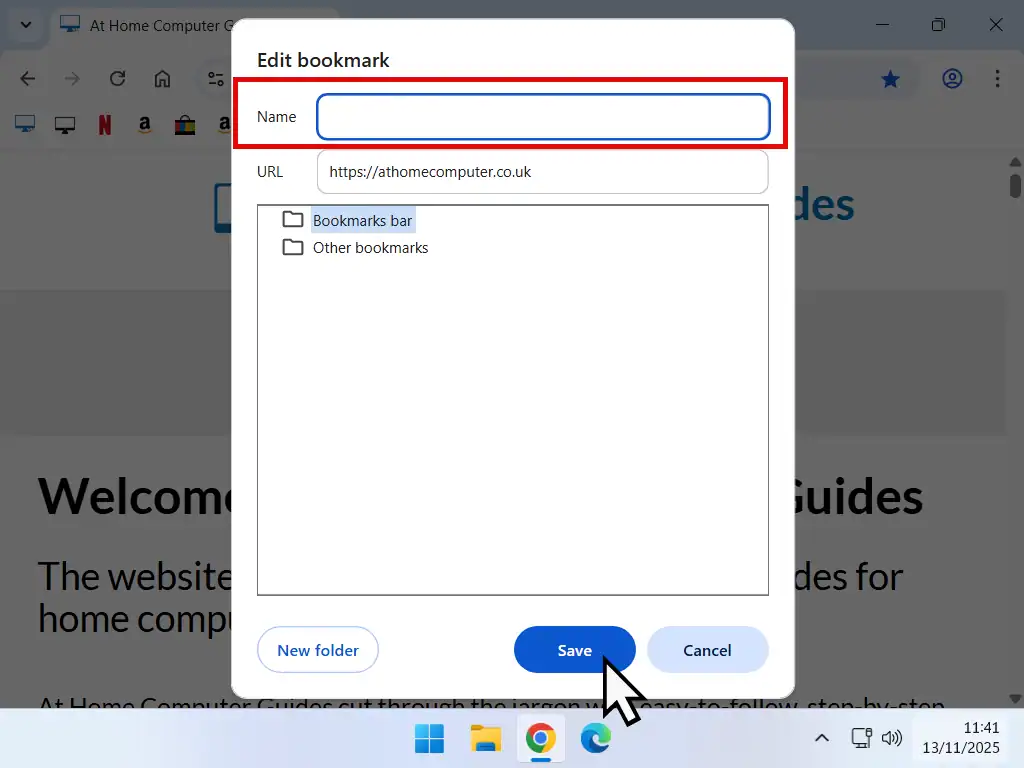
To create even more space on the bar, right click on a bookmark that you can easily recognise the by its icon. On the menu left click Edit.
This time, instead of typing a new name, just delete whatever name is already there, then click the Save button.
The saved website will appear as just an icon. It’s amazing how many sites you can then add to the Bookmarks Bar.
Quick Note
Deleting the website name is worth trying out if have a lot of bookmarks and can easily recognise them by the favicon. And the best part is that you can always rename any that you’re struggling to recognise.
Summary
Over time you’ll most likely build up a long list of bookmarks. Manage them effectively by saving them in to folders, using shorter names and deleting out any that aren’t used anymore.
Extra Internet Guides
How To Setup Open DNS On Your Computer.
DNS is how your computer finds websites. If the DNS server you’re using is slow, your internet will be slow.
How To Switch To Google Public DNS Servers.
Google provides a DNS service too.
Popular At Home Computer Guides
The most popular step by step guides for your home computer.
