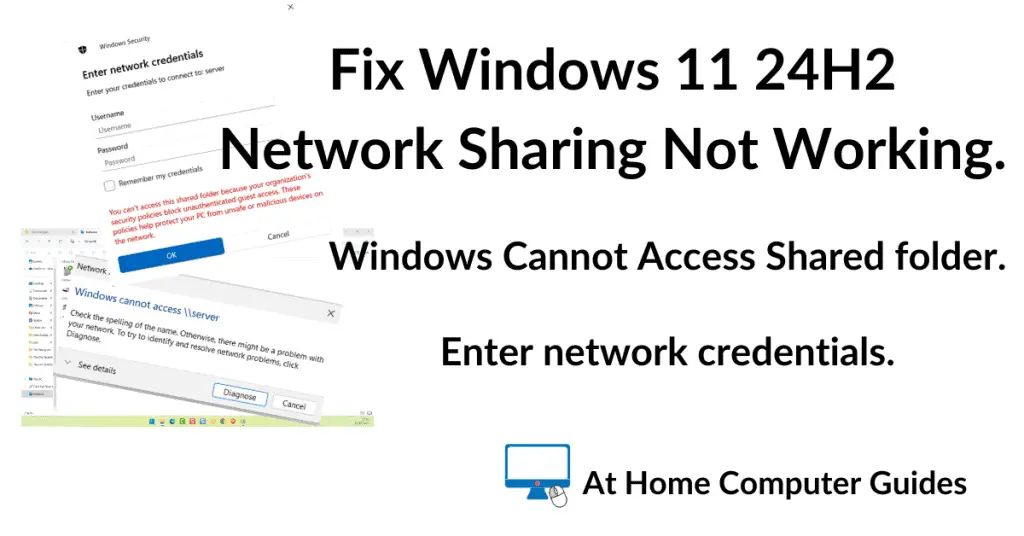
Windows 11 24H2 network sharing has stopped working. Whenever you try to connect to a shared folder over your network, you get an error message saying “Windows 11 cannot access network share”, or possibly you’ll be asked to “Enter network credentials”.
It affects both Windows 11 Home and Pro versions. But only after updating to 24H2. Earlier versions of Windows 11 work just fine.
If you haven’t yet setup a network, then click here
Windows 11 Cannot Access Network Share
After installing the 24H2 update you may well find that Windows 11 can’t access network shares. It may not even be able to find them on your local network.
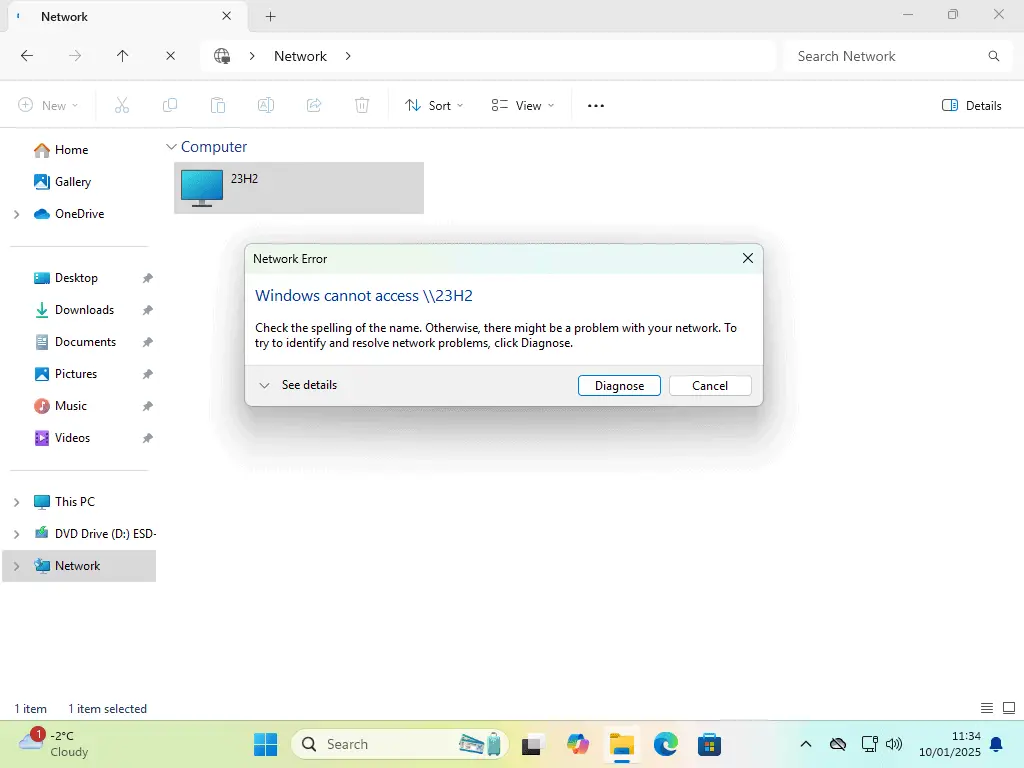
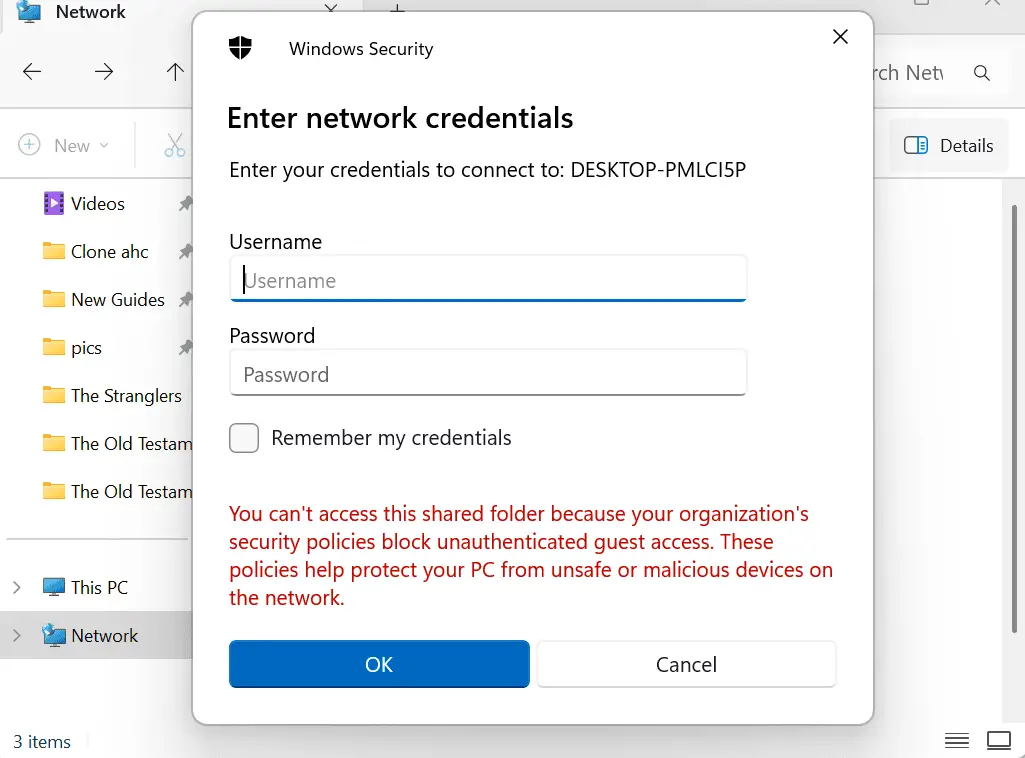
Whenever you do try to open a shared folder on your network you’ll see either a Network Error message “Windows cannot access – Check the spelling of the name. Otherwise there might be a problem with your network“. Or maybe you get a Windows Security popup requiring you to Enter Network Credentials.
Either way, the result will be the same, no access to shared folders. Even though they were accessible prior to the 24H2 update.
How To Fix Network Issues With Windows 11
Ok, so if the problem you’re having with Windows 11 24H2 is as described above, then I have an easy fix for you.
You have to add passwords to the accounts that your trying to access. It’s as simple as that.
Currently, the only way to get Windows 11 24H2 to access network shares is by adding a password to the accounts on those other computers.
Then you need to turn on Password Protected Sharing.
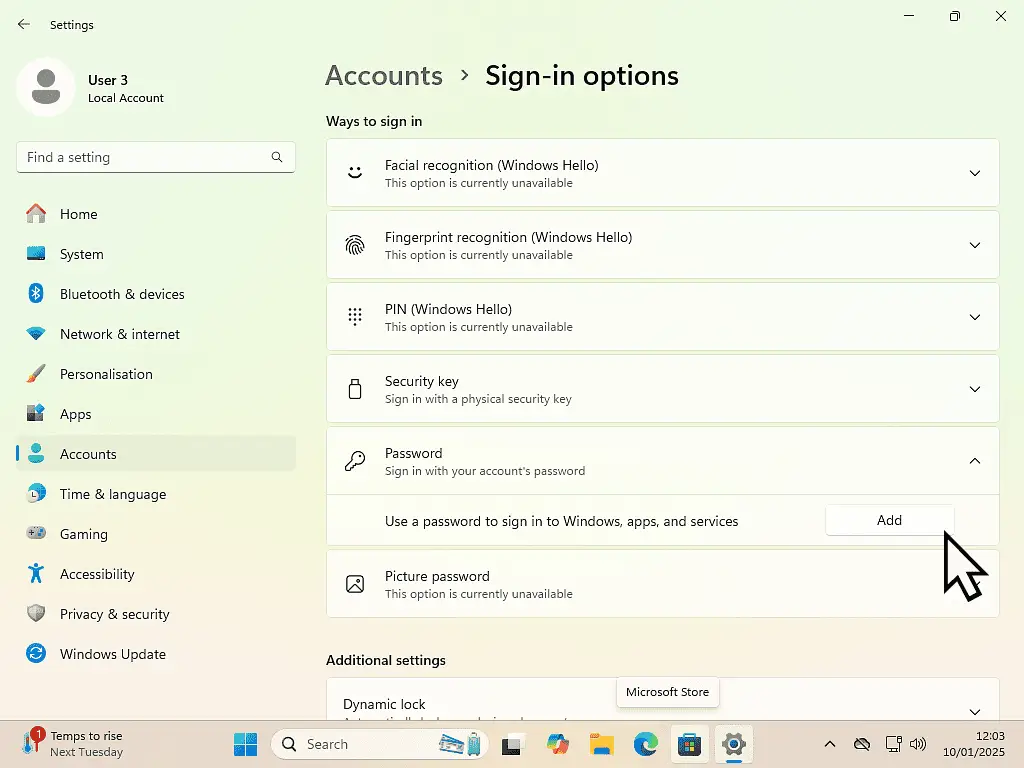
Accounts Without Passwords
On all your computers, if you’re using a Microsoft account then you’ll have to have a password for that account. You might actually sign in to that PC with a PIN, but there will be a password for the account.
However if the account on the networked computer is a local account, then you may not have set a password for it. That is the issue. Windows 11 will not access a shared folder on another PC that isn’t using Password Protected Sharing. Explaining The Different Windows User Accounts.
Turn On Password Protected Sharing
After adding a password to your account, the next thing to do is to turn on Password Protected Sharing.
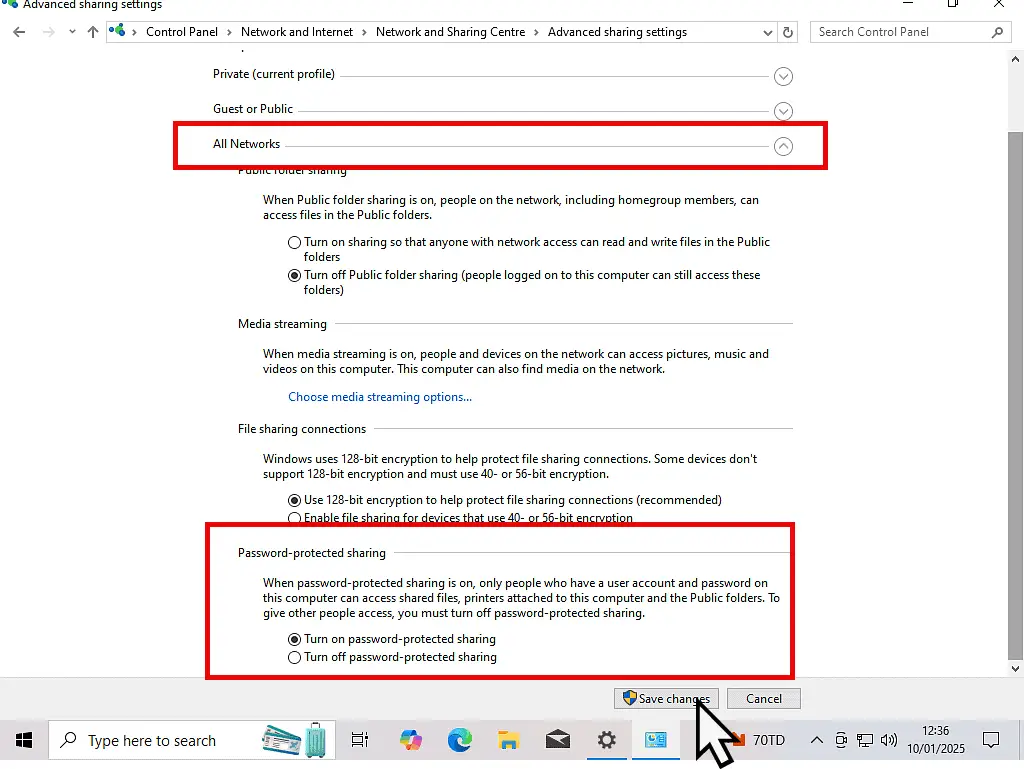
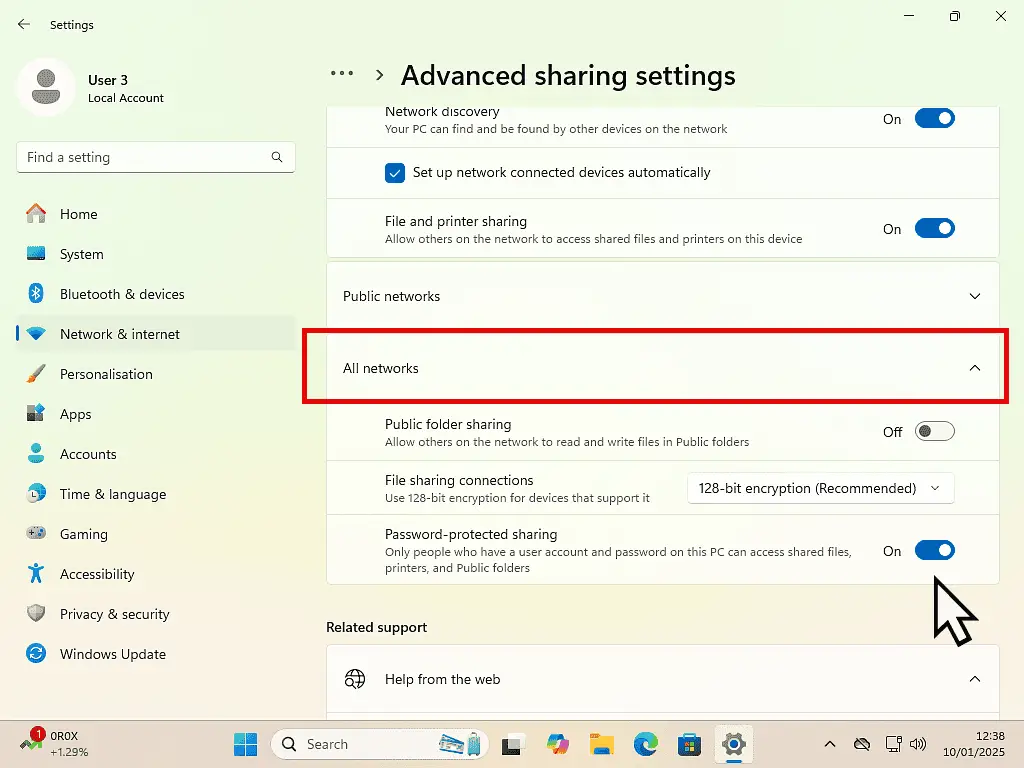
Click the Start button and then type “advanced sharing settings“. Click on Manage Advanced Sharing Settings.
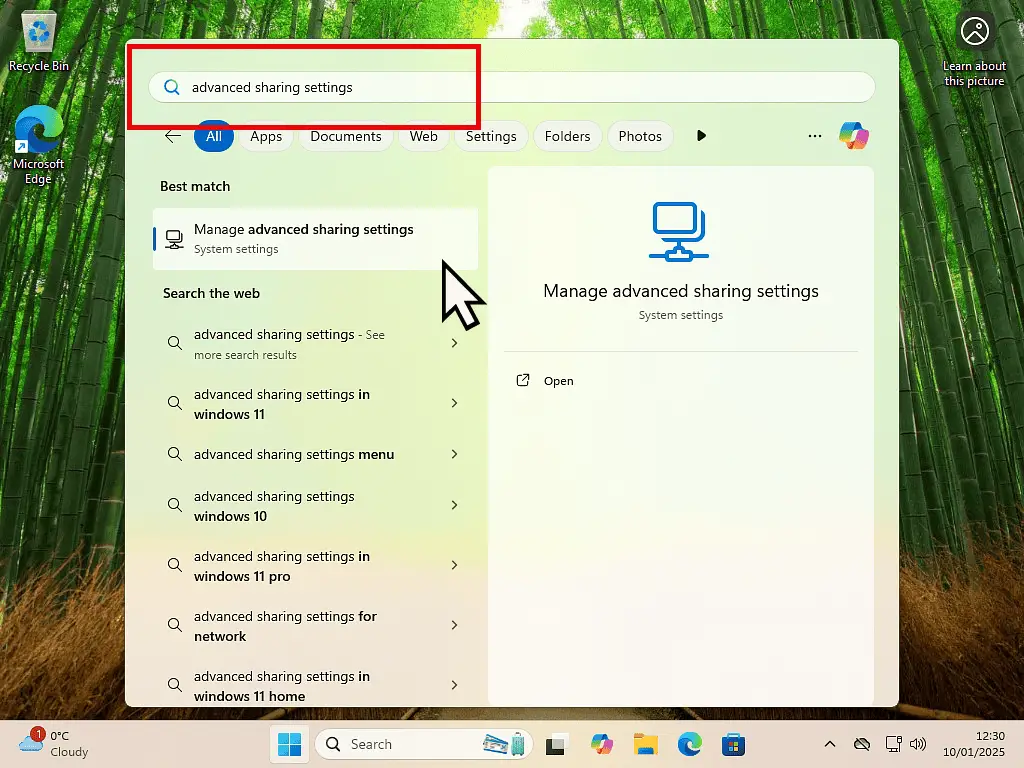
In the Advanced Sharing Settings, expand the All Networks section and select “Turn on password protected sharing”.
If you’re doing this on a Windows 10 computer, don’t forget to click the Save Changes button.
Restart all your computers.
Enter Network Credentials.
After adding passwords and turning on Password Protected Sharing on all your computers, Windows 11 24H2 should be able to access your network shares.
Open File Explorer and click Network in the navigation pane.
Your shared computers will appear.
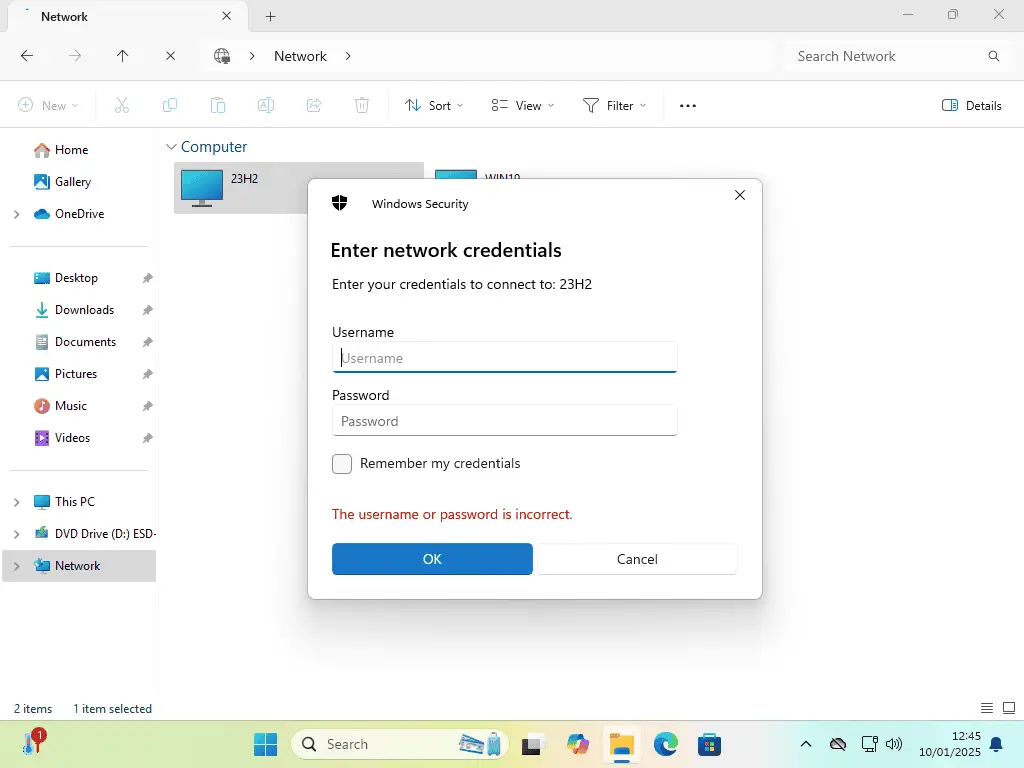
When you click on a shared resource (such as a PC), you’ll see the Windows Security popup window asking you to Enter Network Credentials.
Local Account Or Microsoft Account
The Network credentials that you need to enter are the user name and password for an account on the computer that you’re trying to connect to. Not the credentials for the PC that you’re sat at, but the other machine.
If the other computer has a local account set up, then enter the username and password for that account. That’s easy and straightforward.
But if the account on the other machine has a Microsoft account, then you’ll need to enter the email address and the password that you used to set up the account.
Not the PIN. Many of us that use MS accounts actually sign in with a PIN rather than the full password. The PIN won’t work. You have to use the complete password.
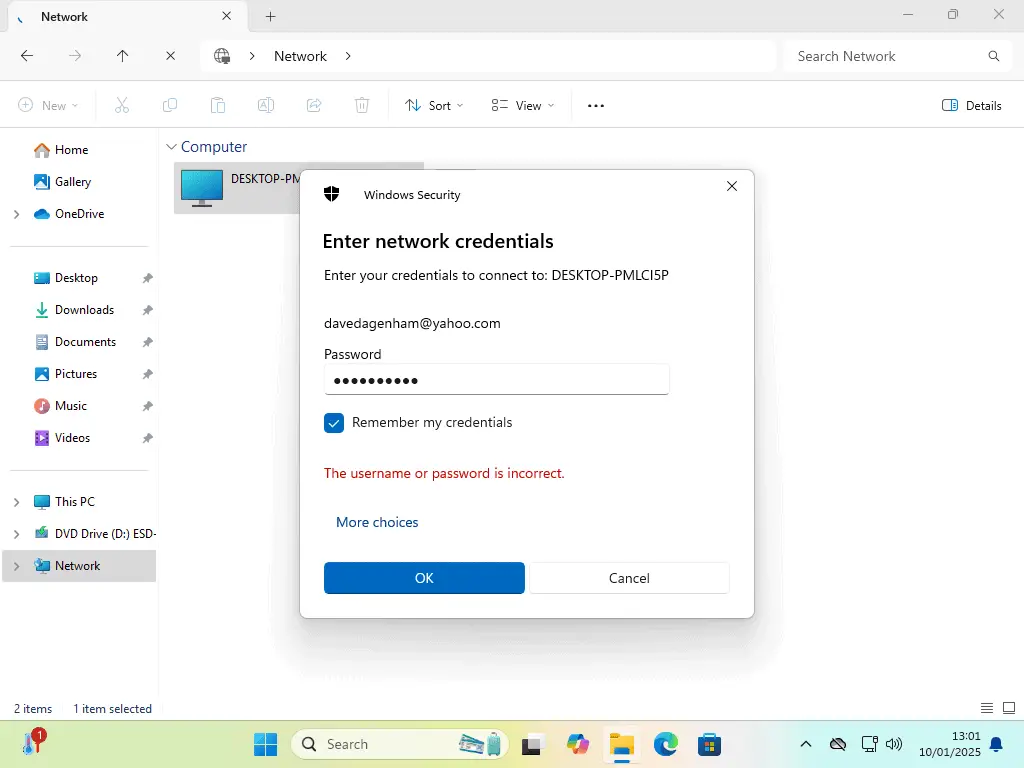
Remember My Credentials
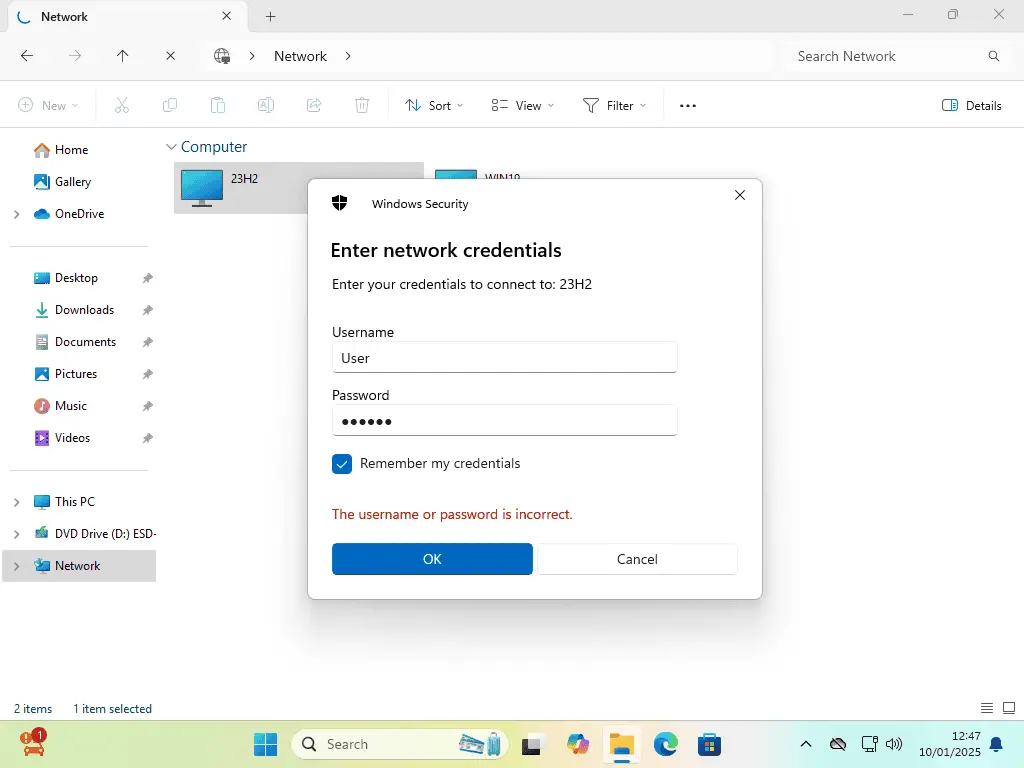
To save time in the future you can check the Remember My Credentials box and you won’t have to authenticate again.
Summary
So there you have it. With Windows 11 24H2 you have to have passwords on all your PC accounts and password protected sharing setup on every PC on your network.
I’m not sure if that’s a deliberate ploy by Microsoft or just a bug in the 24H2 update, but at the moment, nothing else seems to work.
That then raises the question of will it be fixed? If it is a bug then you’d assume Microsoft will eventually fix it with an update. But if it’s deliberate, then we’re going to be stuck with it.
Related Posts
Stop Your Computer From Entering Sleep Mode Too Quickly.
How many times have you tried to access a networked PC only find it’s gone into sleep or hibernation mode.
How To Use The Windows Send To Menu.
The old Send To option still exists and works, even in Windows 11.
Windows 10 System Image Backup.
Backup your entire Windows 10 PC. Everything including files/folders and partitions.
New Home Computer Guides
Latest step by step guides on At Home Computer.

