The “Send To” menu is a feature of Windows that has been around for a very long time. It provides a quick way of copying virtually any file or folder to another location on your computer.
Both Windows 10 and Windows 11 still support the “send to” menu, but by default, it only includes a few options and some of those are practically redundant these days.
The good news is that you can easily add and remove destinations to the menu.
How To Use The Send To Menu In Windows.
The “Send to” menu in Windows has been a useful feature for generations. You can use it to quickly send files to a specific location (destination).
Such as copying photos (or other files) to a new folder, partition or even a new device.
Send To works pretty much the same in both Windows 10 & Windows 11, with the caveat of the Windows 11 right click options menu. Let me show you how to use it.
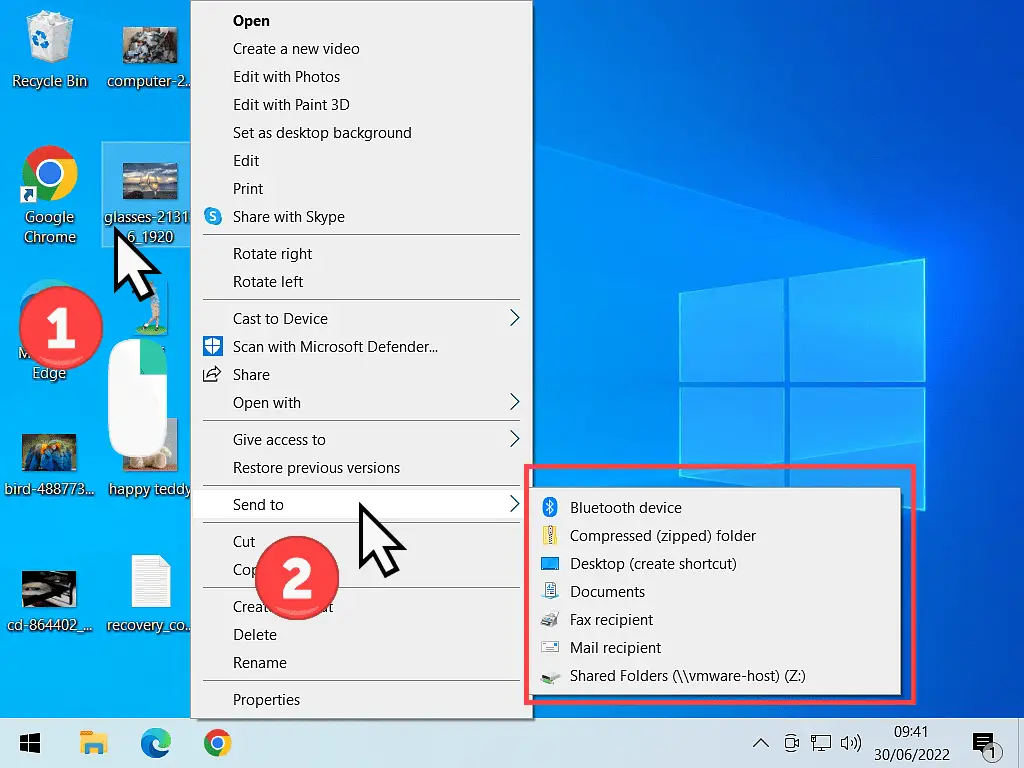
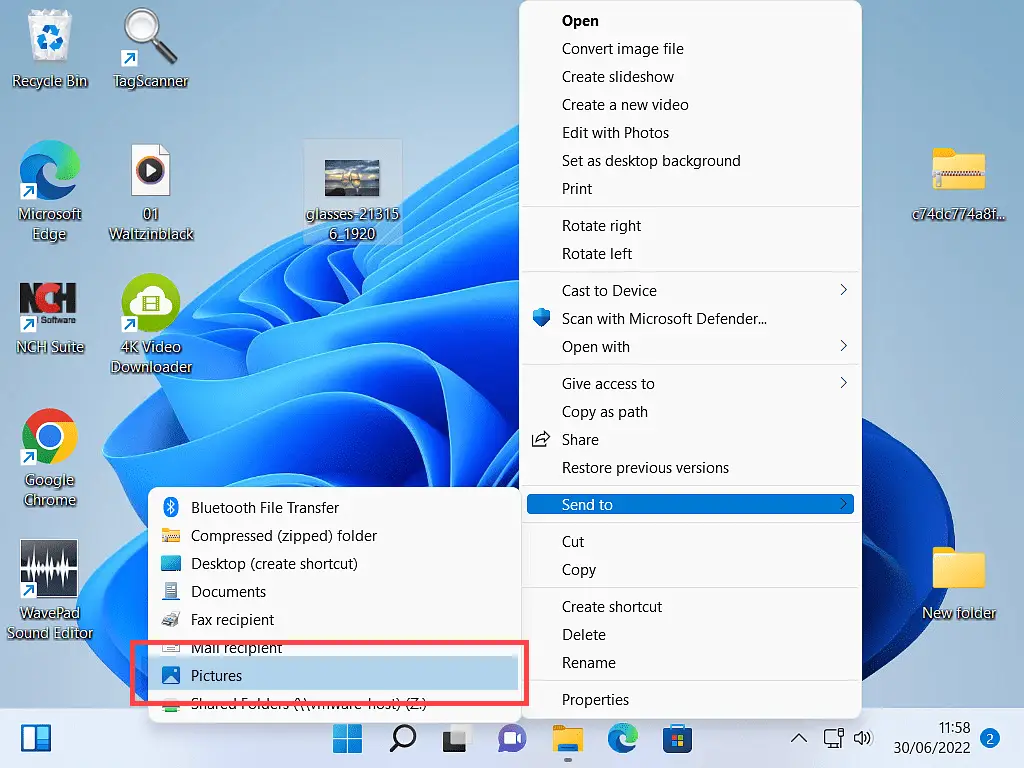
Right-click on an item (a file or folder). Hover your mouse pointer over Send To.
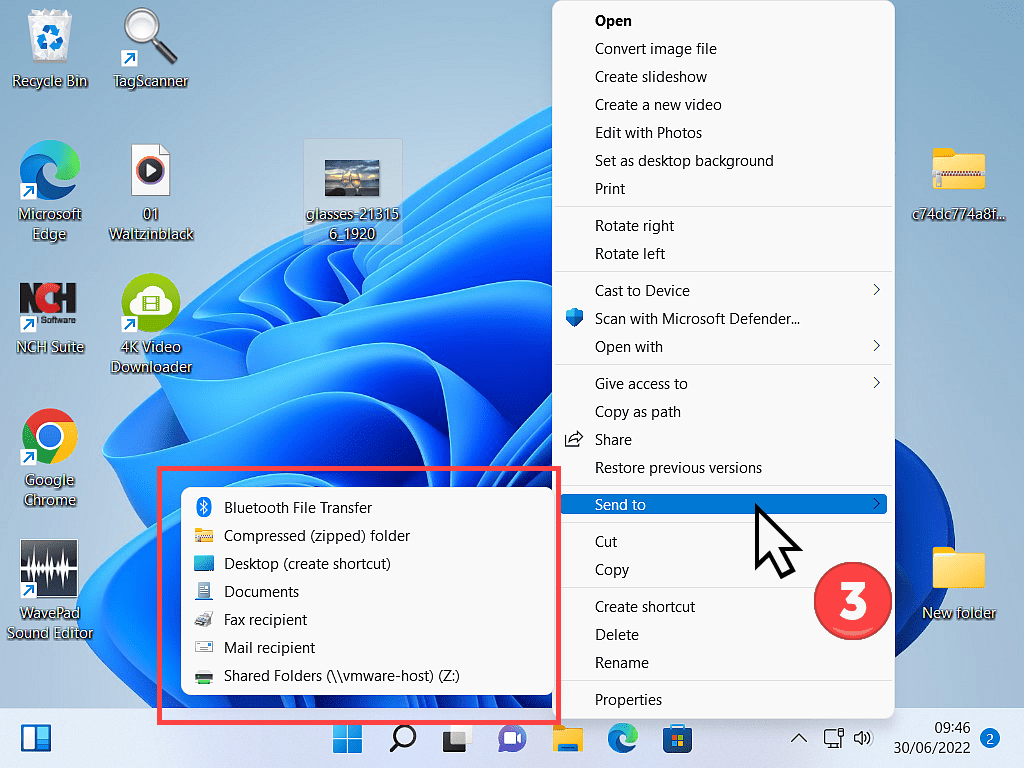
On the sub menu that opens, you can see all the destinations currently available for the Send to command.
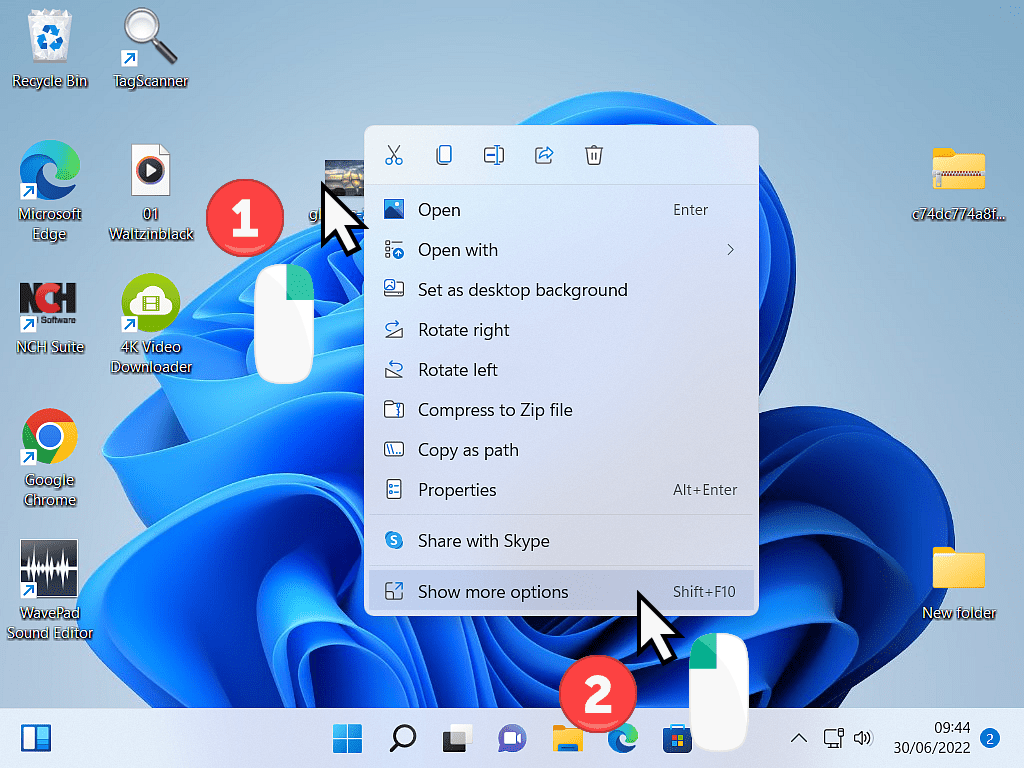
In Windows 11, the Options menu has been changed or streamlined. When you right-click an item, You’ll see a much-reduced Options menu. Left-click SHOW MORE OPTIONS and that’ll open the exact same options menu as in Windows 10.
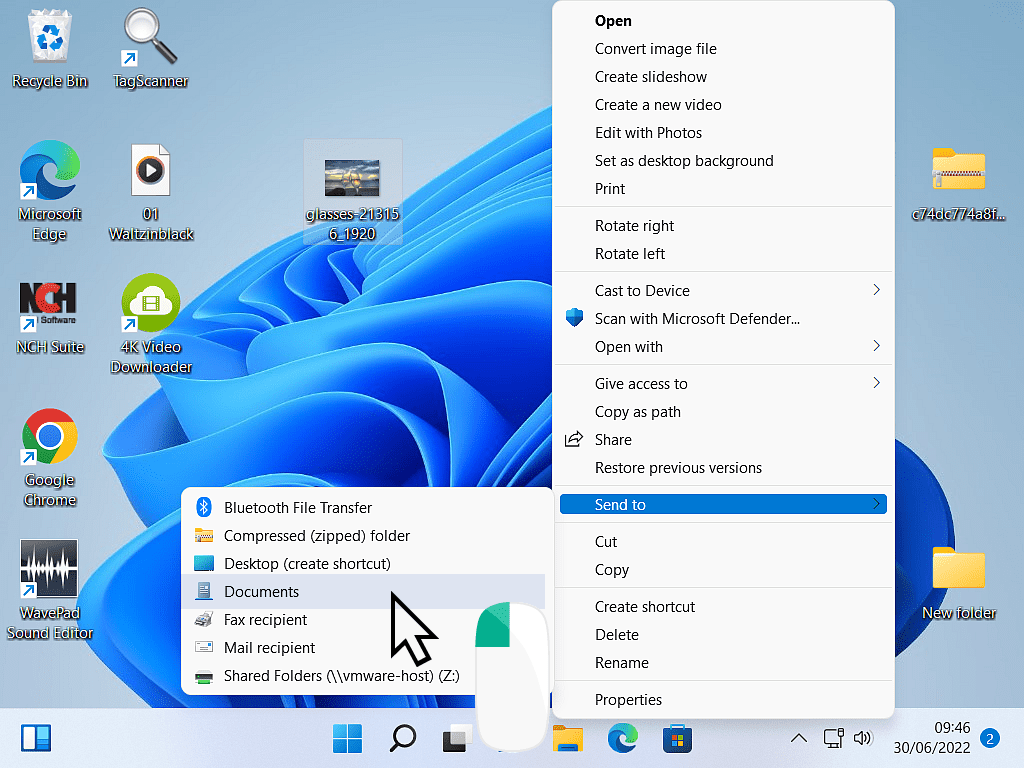
Then you simply left-click on one of the destination options in the menu.
For example, if you wanted to send a file to your Documents folder, you’d simply click Documents on the Send To menu.
Using Windows Send To is much quicker that using copy and paste, but you have to setup your destinations first.
In short, you need to add them to the menu before you can start sending files and folders to them.
The Windows Send To Folder.
The entries that appear on the Send To menu are just shortcuts to the locations. They’re all stored within a special folder, the Send To folder.
You can add extra entries (destinations) to the Send To folder to make it more relevant to you.
How To Add Items To The Windows Send To Menu.
To add locations (destinations) to the Send To menu, you’ll need to create shortcuts inside the Send To folder.
The Send To folder is located at C:/Users/YourAccountName/AppData/Roaming/Microsoft/Windows/SendTo
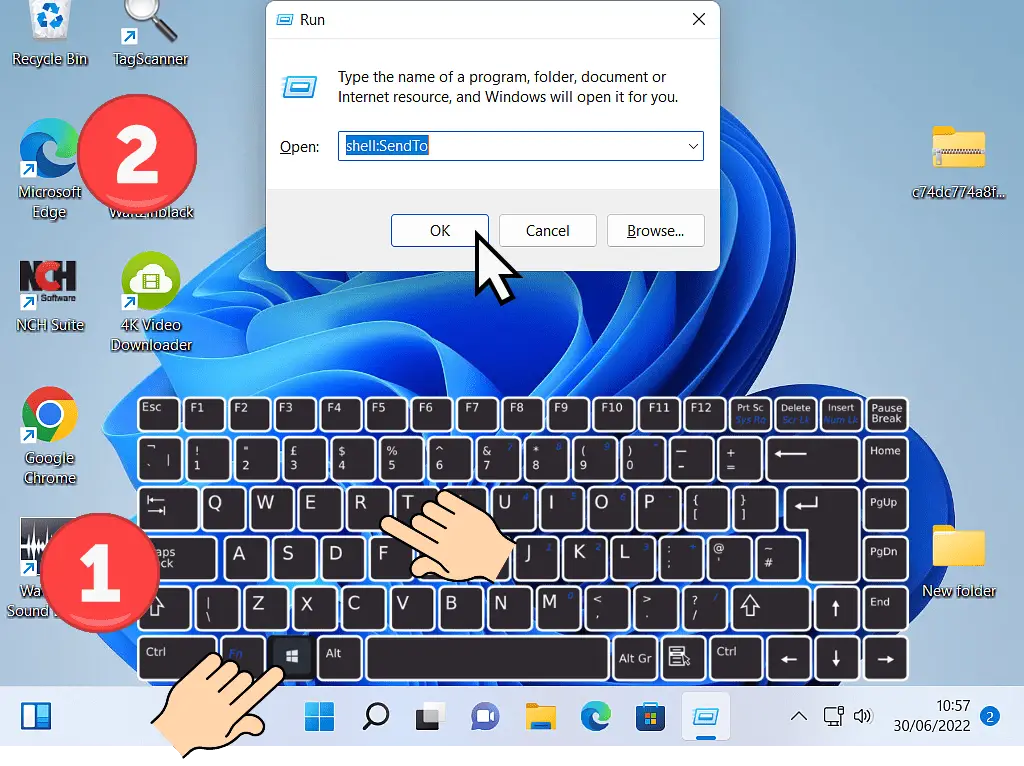
The quickest and easiest way to open the Send To folder is to press the Windows key and the letter R on your keyboard at the same time.
That will open the RUN box. Type –
shell:SendTo
Into the box and then click the OK button.
Instead of typing it you could also Copy and Paste it from here.
Adding Entries To Send To Folder.
When you’re adding locations to the Send To folder, what you’re actually doing is adding a shortcut. A shortcut to the folder or drive that you want to appear on the Send To menu.
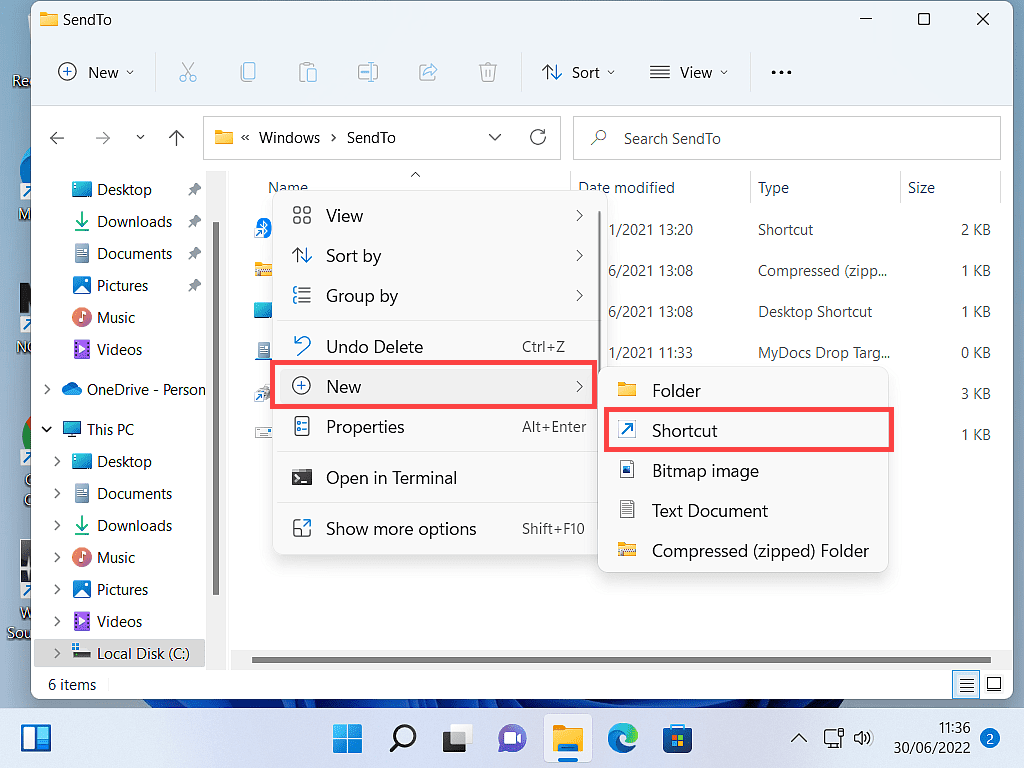
To add a new shortcut, right-click within the folder.
On the options menu, move your pointer onto the word NEW. Then on the second menu, left-click SHORTCUT.
Select a Send To Destination.
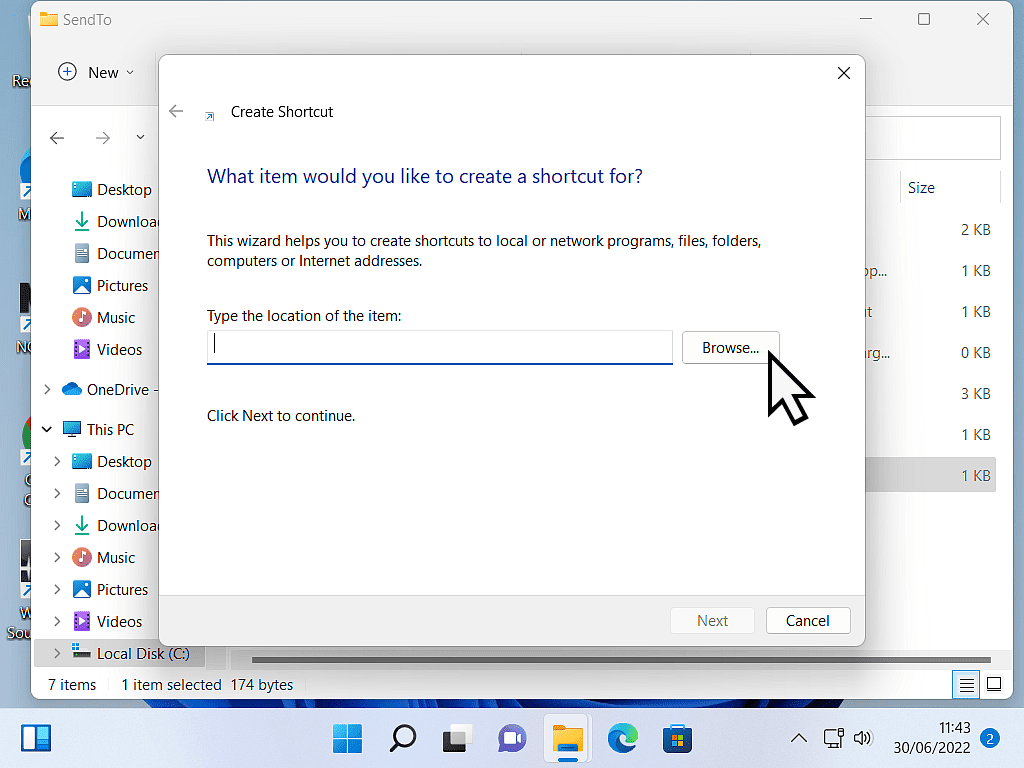
The Create Shortcut window will open. Click the BROWSE button to bring up the folder selection window.
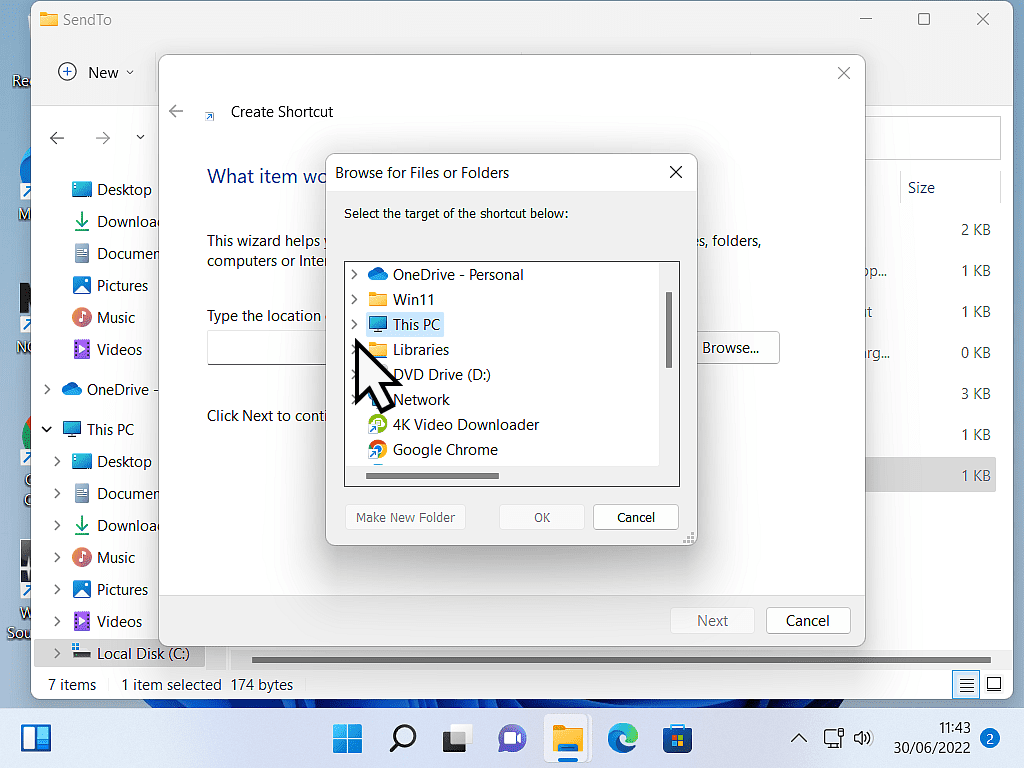
Use the folder selection window to navigate to the folder you want to add, select it and then click the OK button.
In the example below, I’m going to add the Pictures folder.
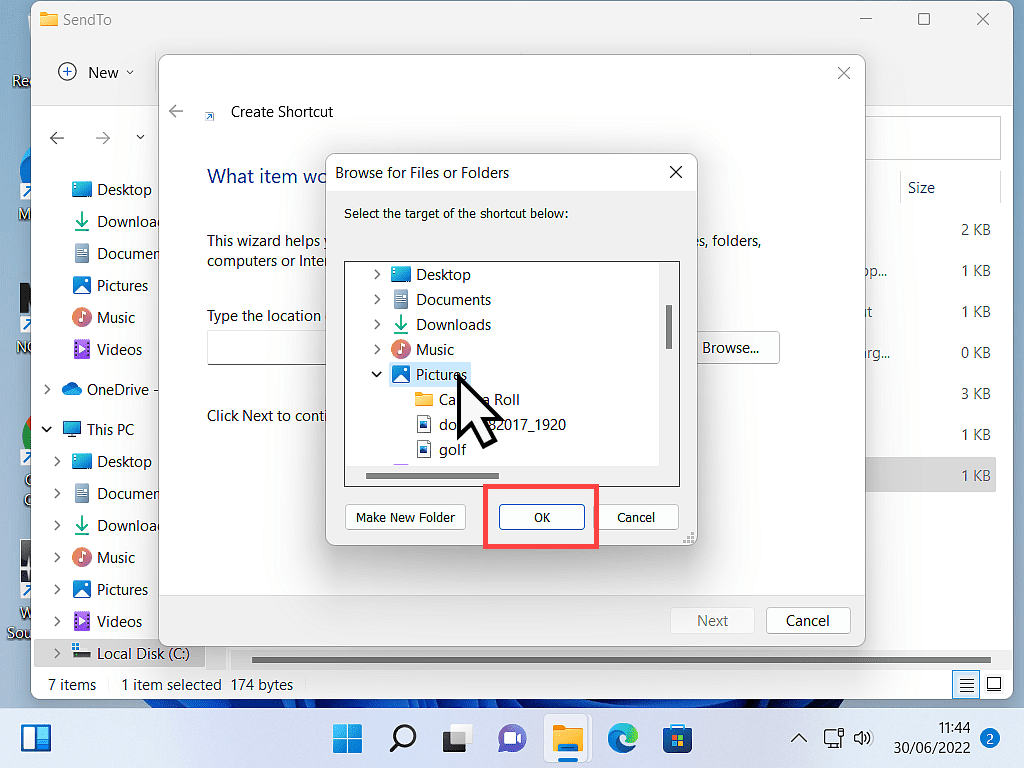
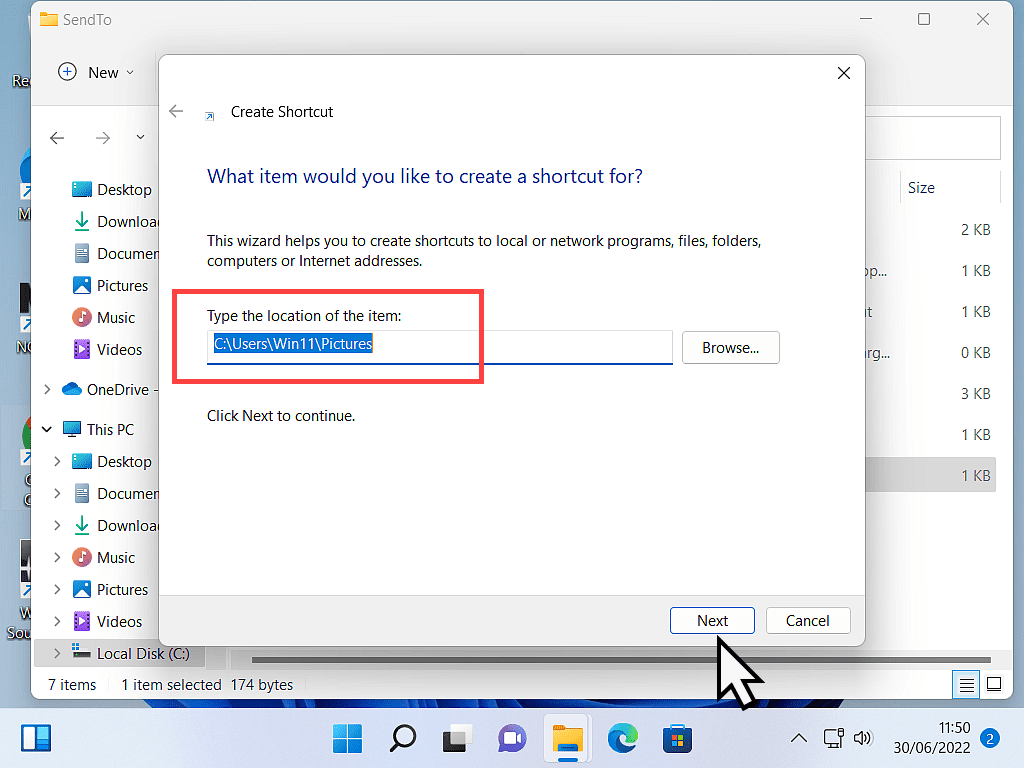
After clicking the OK button, you’ll be returned to the Create Shortcut window.
The location of your chosen folder will be automatically entered into the Location box.
Click the NEXT button.
Name That Shortcut.
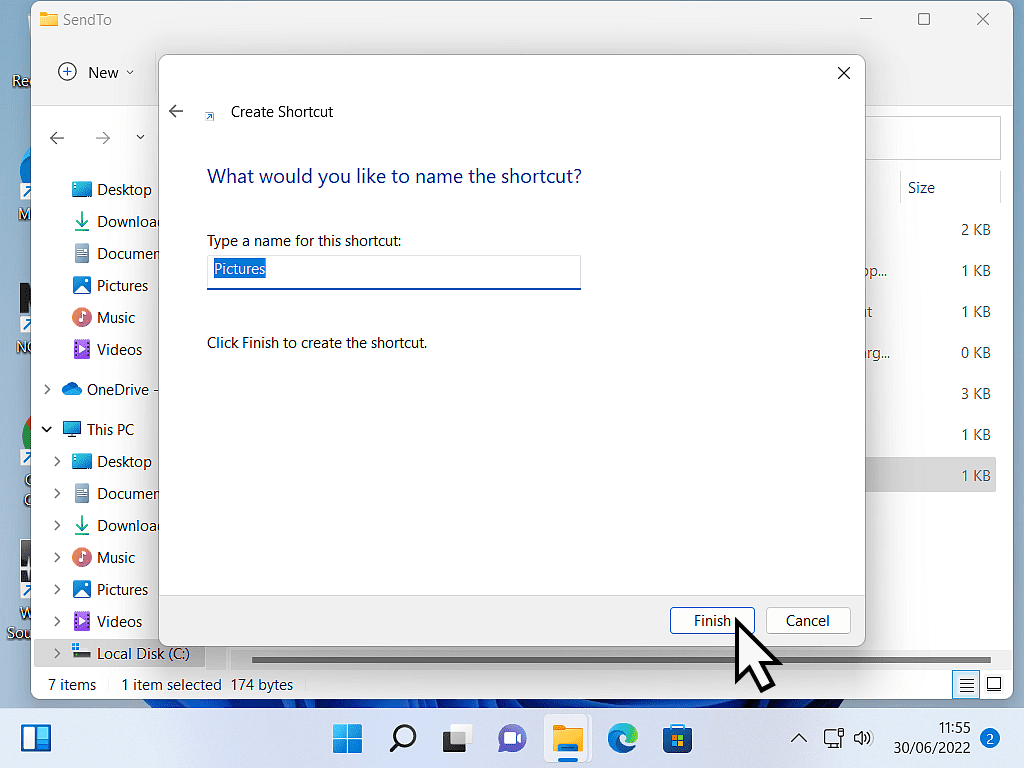
You can give your new shortcut any name you would like. Anything that makes sense to you.
It’s this name that’ll appear on the Send To menu.
Simply type whatever you want into the Name box or just leave it as is to accept the default name.
Click Finish when you’re ready.
Your New Location Is Added To Send To Menu.
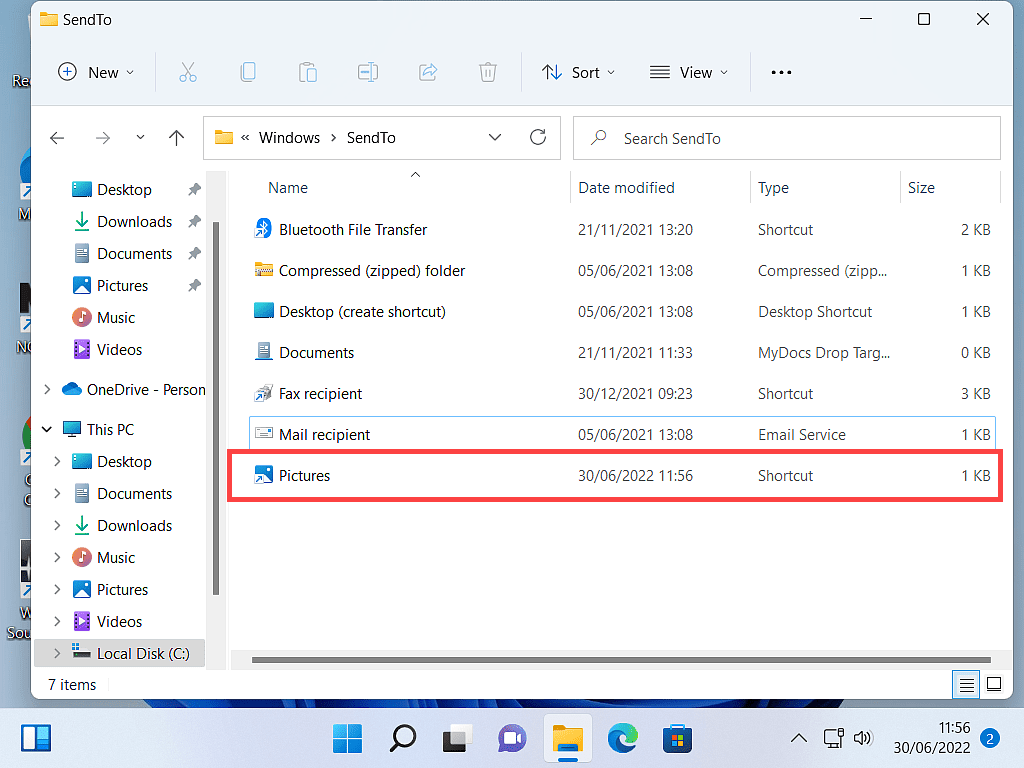
After clicking the Finish button, you’ll see your new shortcut appear within the SendTo folder. Now all you need to do is to test it out.
Right-click on a file or folder, move to the Send To option and check that the new location is showing up.
How To Remove Entries From The Send To Menu.
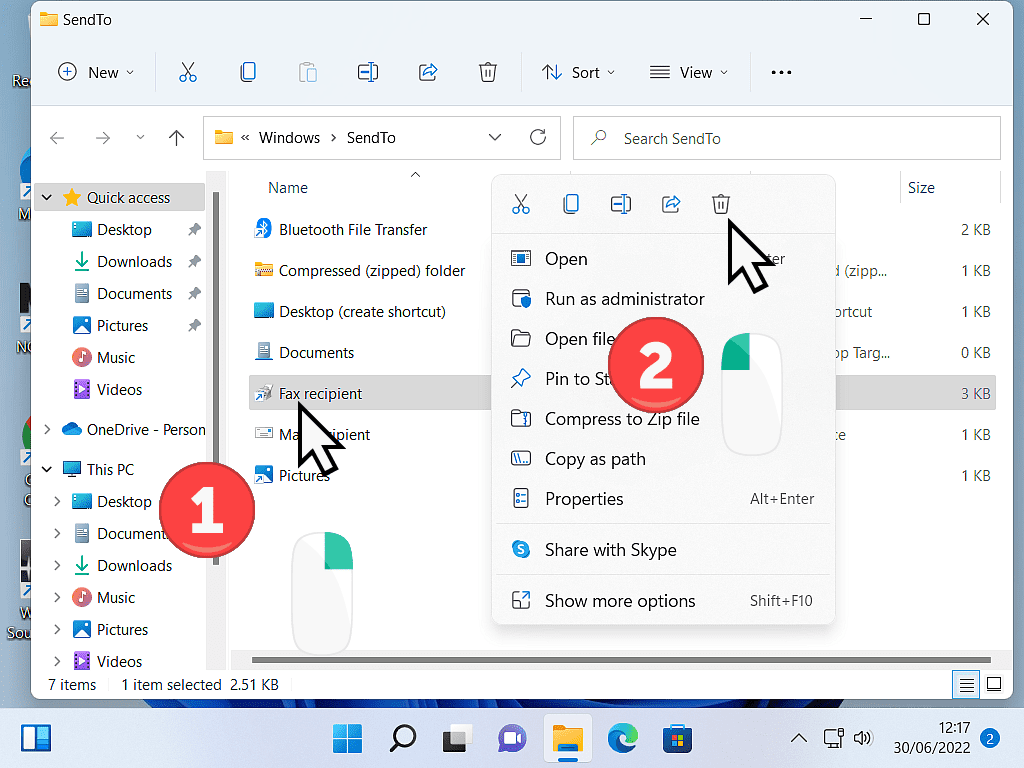
To make the Send To menu easier to use, it’s a good idea to remove any items that you’re not likely to need.
You can remove any or all of the default options as you see fit.
Inside the Send To folder, delete any items that you don’t want to appear on the Send To menu.
Note that you’re not deleting anything from your computer, these are only shortcuts and are safe to delete.
Summary.
The “send to” option on the right-click context menu is a great time saver. It’s worth taking a few minutes to get it set up with the folders and drives that you want to use.
Just bear in mind that when you send something to a location on the menu, you are copying and pasting it. So you will have duplicate files and folders.
Stay Informed. Stay In Touch.
Now that you’ve found me, keep in touch. I publish new articles and update older ones constantly.
Let me send you a monthly email with all the latest guides for you to see if there’s anything you’re interested in.

