
How to create an ISO image file from a folder. Creating an ISO file from a folder offers several key advantages, primarily centred around portability, organization, and preservation.
An ISO file, also known as an ISO image, is a single file that acts as a perfect digital replica of the data and file structure of an optical disk, such as a CD, DVD, or Blu-ray.
When you create an ISO from a folder, you are essentially packaging all the files and their original directory structure into a single, cohesive file.
This file can then by “mounted” as a virtual CD/DVD.
How to Create an ISO Image File from a Folder
First thing you’ll need is some software that’s capable of creating ISO files from folders. There’re lots of programs that can do it, so if you already have something, use that.
If not, then you can use program called ImgBurn. It’s free, lightweight and fairly easy to use.
Download it from here https://www.imgburn.com/index.php?act=download
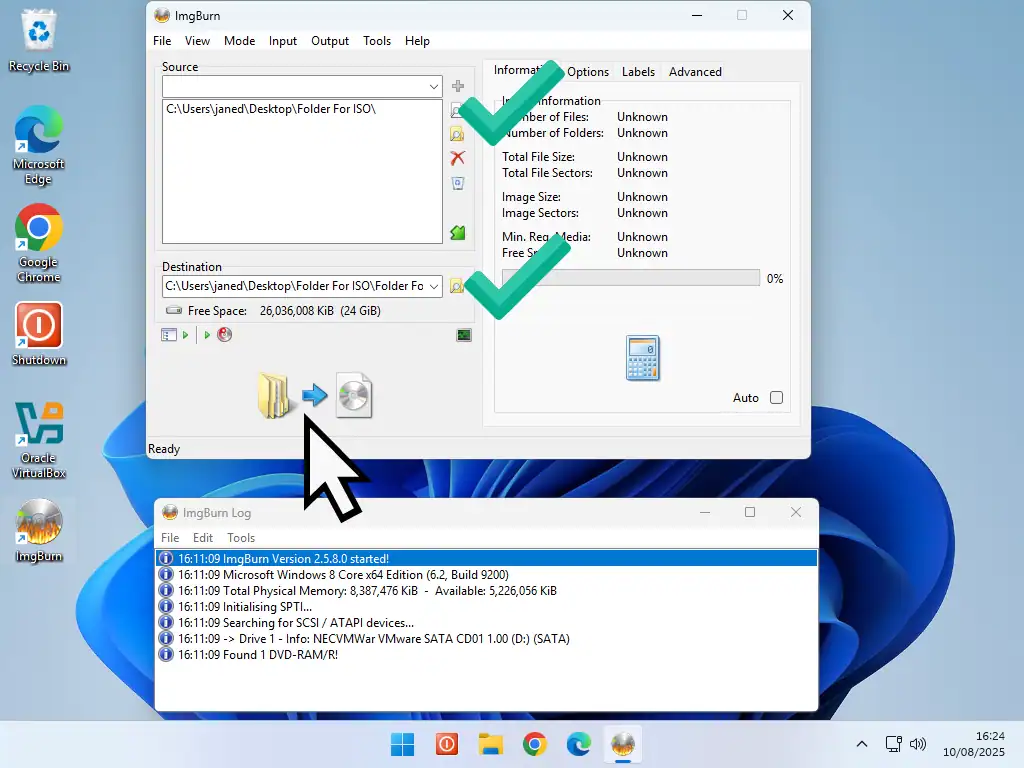
Once ImgBurn is installed, open it and then click the Create Image File From Files/Folders option.

Source Folder
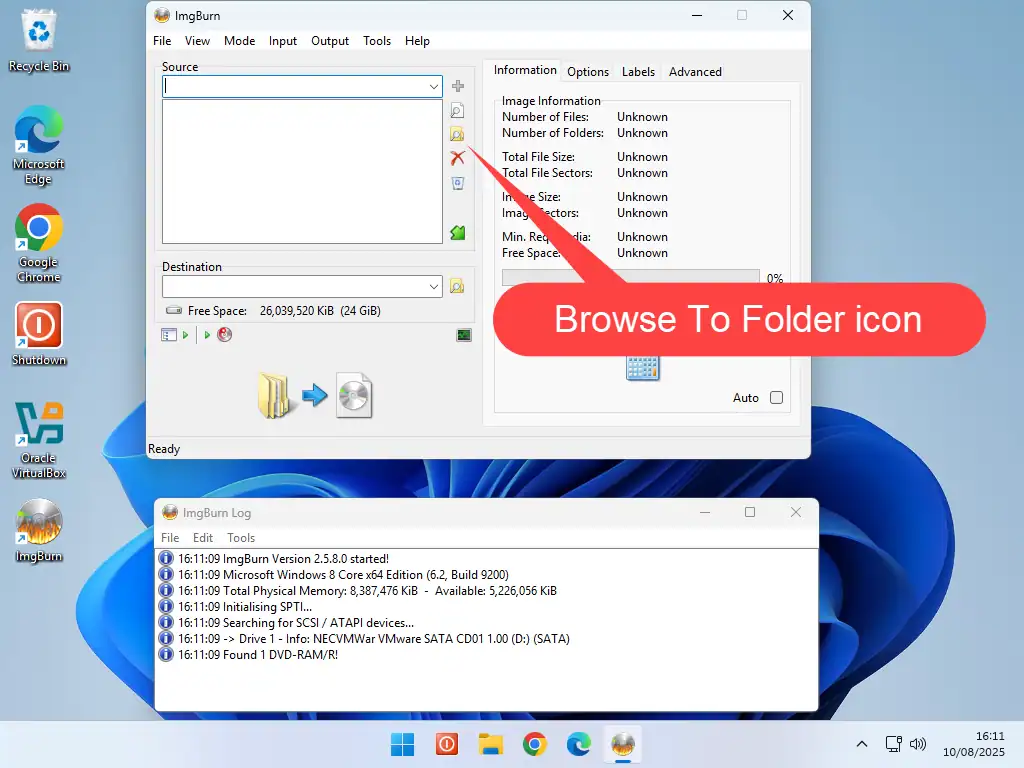
Now you’ll need to supply ImgBurn with the source folder that you want it to create an ISO file from.
Click the Browse To Folder icon. That’ll open an Explorer window allowing you to navigate to and select whichever folder you want to use.
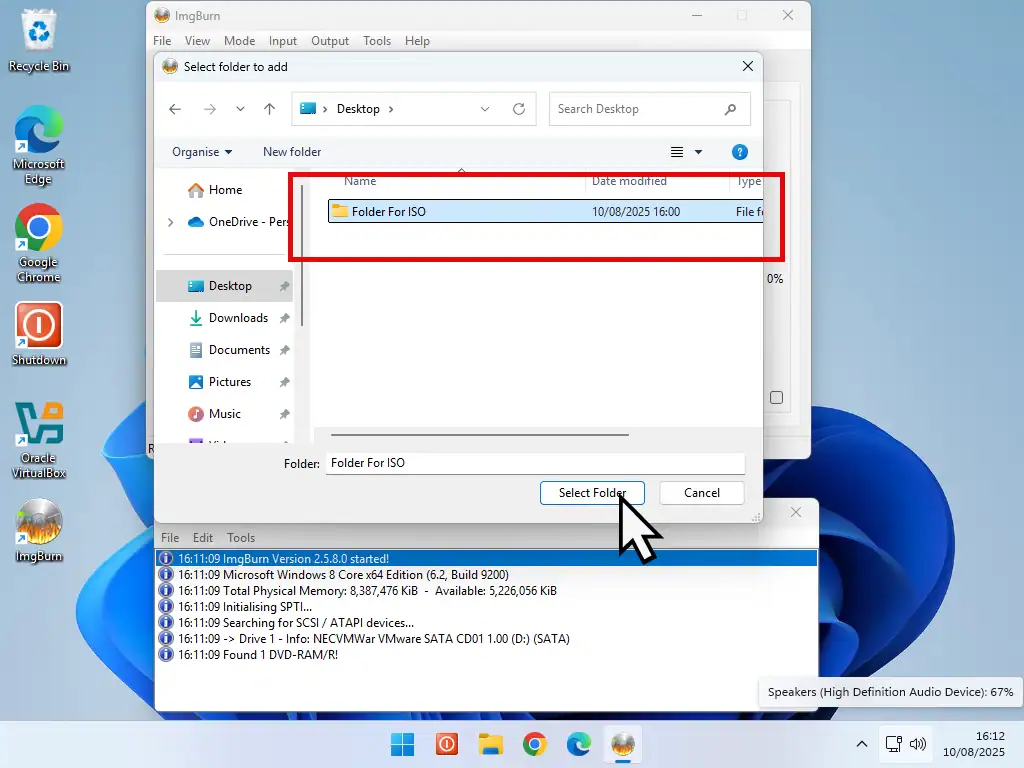
Left click the folder once and then click the Select Folder button.
If you wanted to add more folders to the ISO you can by clicking the Browse To Folder icon again and selecting the other folders. But ideally you’d have already copied them all into just the one folder.
Note.
When choosing a source folder, note that everything inside that folder will be included in the subsequent ISO image file. That includes all sub folders and files.
Destination of ISO File
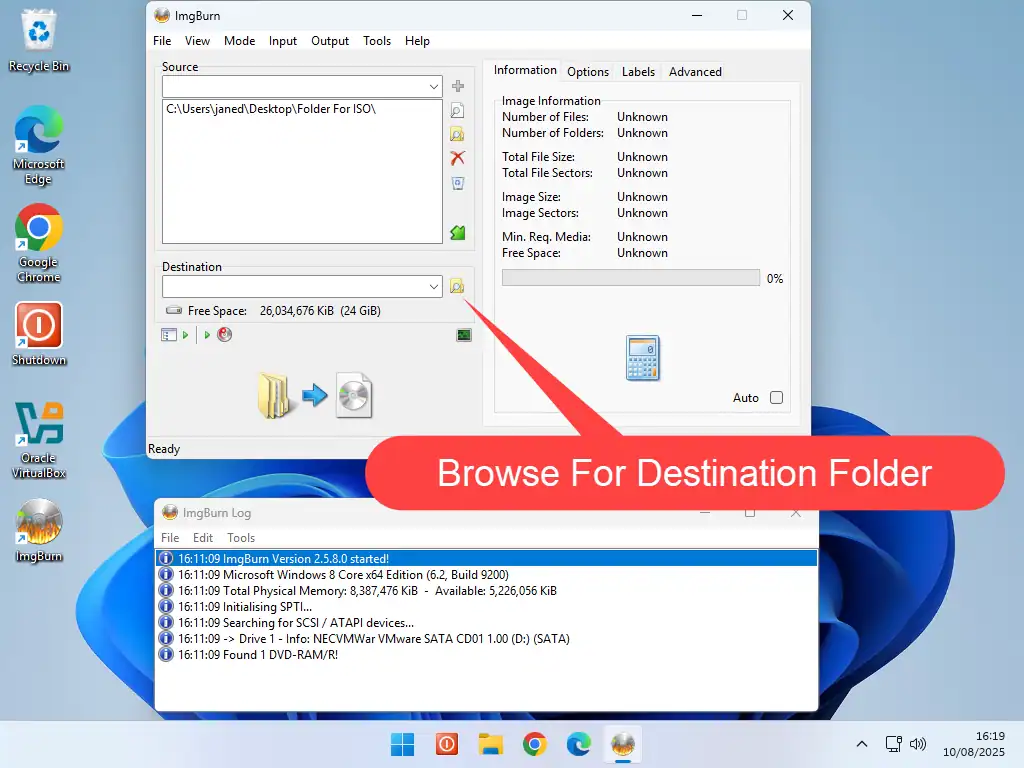
Next you’ll have to choose where the newly created ISO image file should be saved to. That could be into a different location or inside the source folder. It really doesn’t matter which.
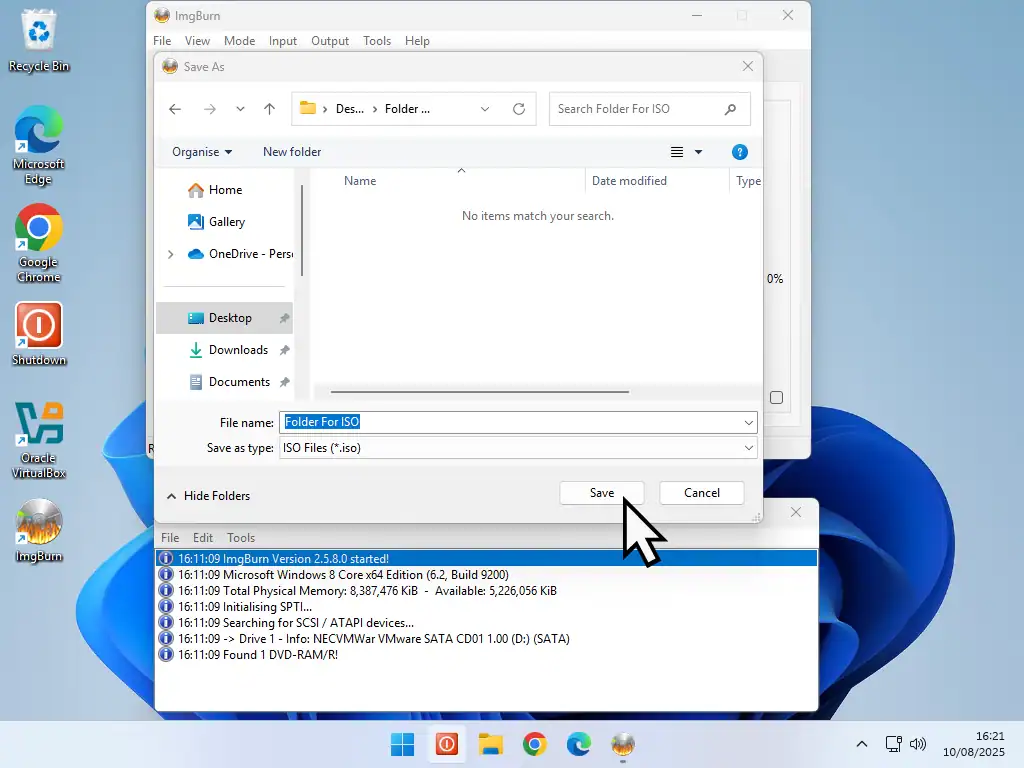
For this example, I’ll be saving the ISO back into the source folder.
Click the Browse button beside the Destination window. Navigate to the folder that you want to save the ISO image into and click the Save button.
Build ISO File from Folder
With both the source and destination folders set, click the Build button.
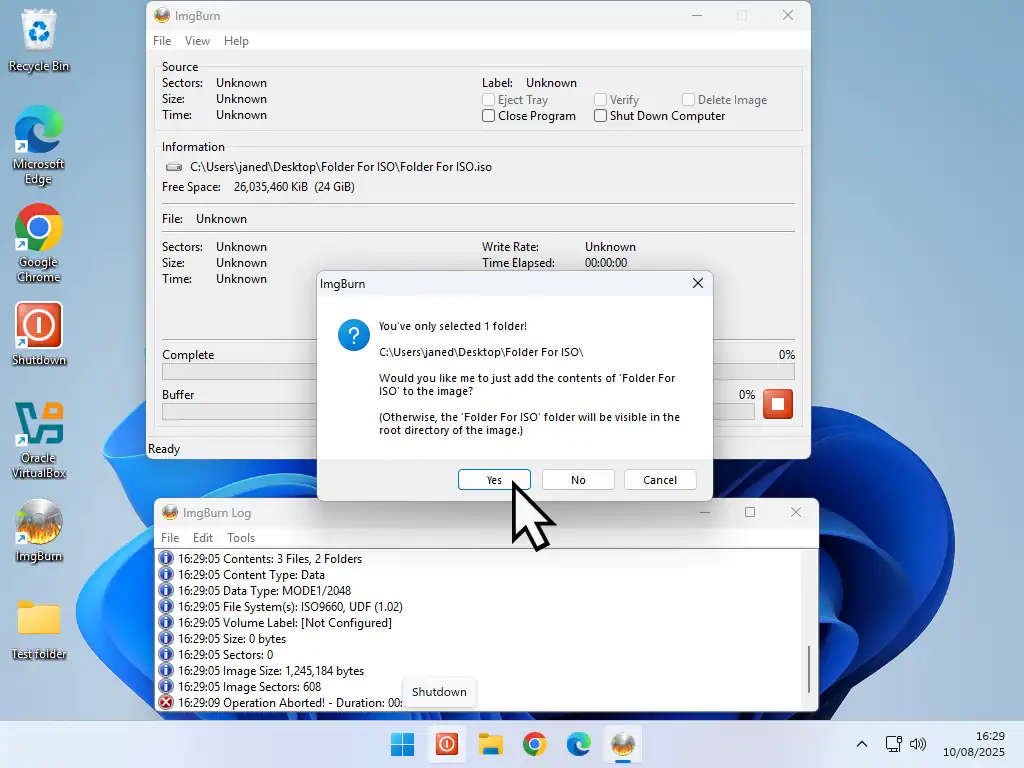
- You might see a notice informing you that “You’ve only selected 1 folder”. Just click the Yes button to proceed.
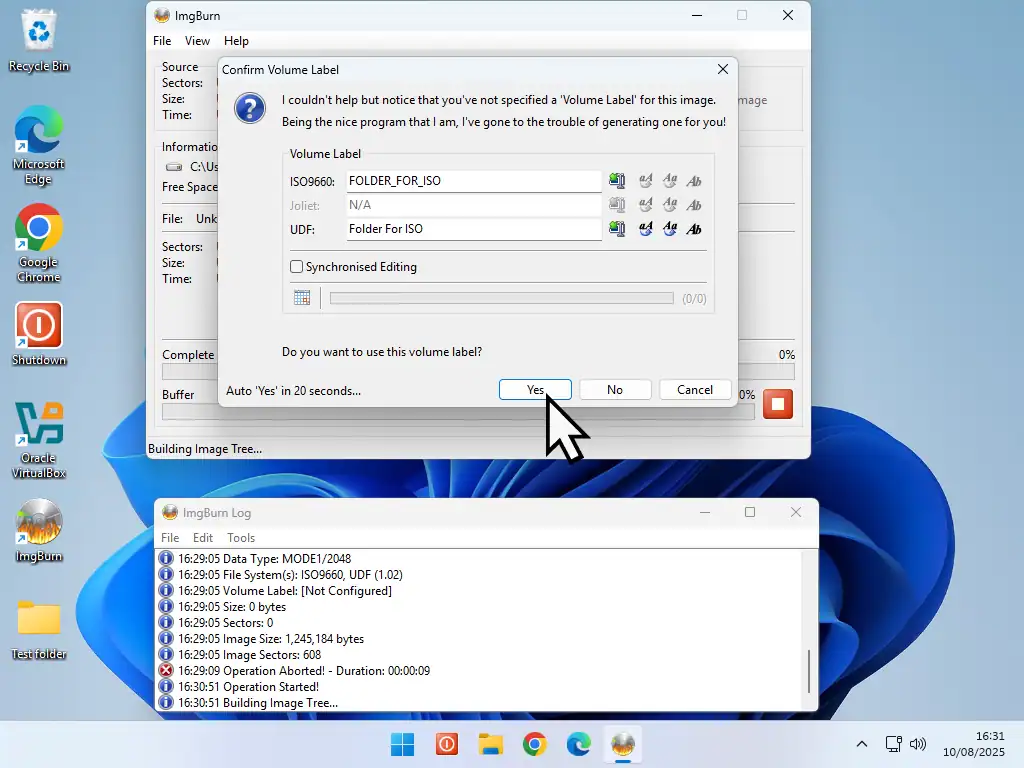
- Then you’ll see a confirmation of the volume label that the ISO image will have. Remember that this is going to be an image of a CD/DVD, which has to have a volume label. Click the Yes button to continue.
- Finally you’ll see a confirmation popup. Click the OK button.
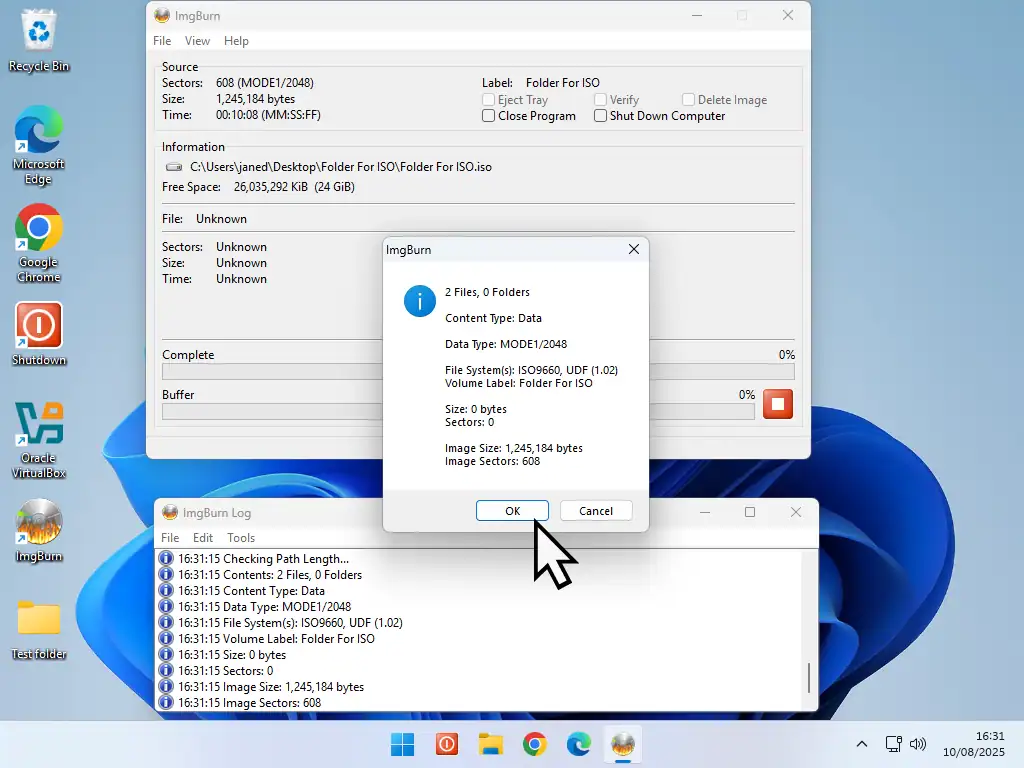
ImgBurn will create the ISO file and save it into the destination folder that you set earlier. How long it takes depends on the size of the file being created and the speed of your PC, but it shouldn’t take long.
Once it’s done you can close ImgBurn.
How to Mount an ISO Image in Windows
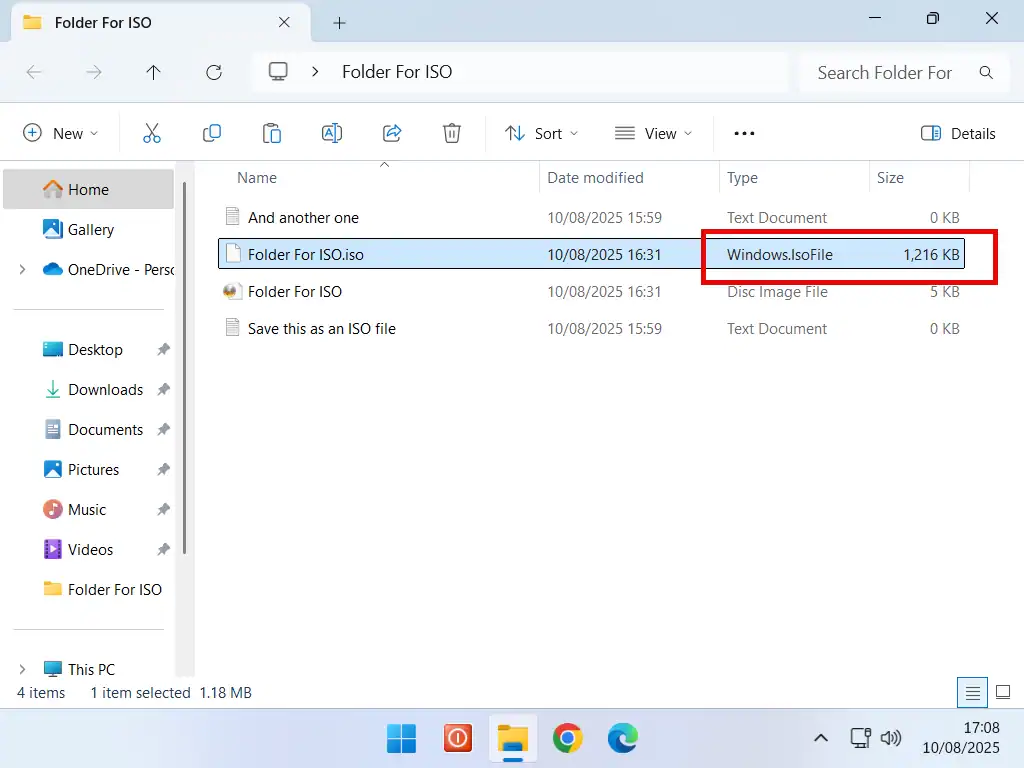
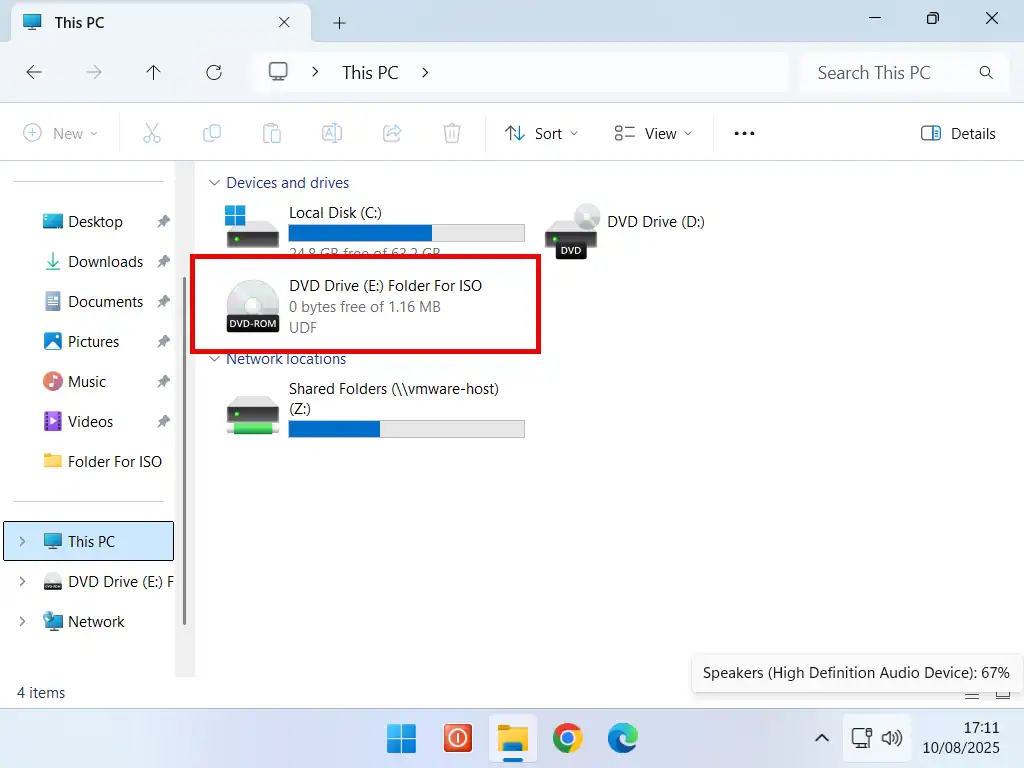
Now that you’ve created an ISO file from a folder, you can use it as you wish, but if you wanted to mount it as a virtual CD/DVD you can.
- Open the folder where you saved the ISO file in to.
- Right click on the file and on the options menu, hover over Open With. On the second menu, left click Windows Explorer.
- The ISO file will open and you’ll have access to its contents and if you open an Explorer window and click This PC, you’ll also see that a virtual CD/DVD drive has been added.

Summary
While Windows doesn’t support the creation of ISO images, for that you’ll need third party software, it does support there use.
Mounting ISOs as virtual drives is easy, efficient and effective.
Related Posts
How To Create An ISO File From A Disc.
Protect your CDs and DVDs by saving them as ISO files.
Data Storage Units Explained: Kilobytes, Megabytes, Gigabytes, and Terabytes
Get to grips with megabytes and gigabytes.
How To Make Text and Icons Bigger in Windows 10 and 11
Stop squinting at your computer monitor.
Differential vs Incremental Backups
What they are, how they differ, and which one to use on your home PC?
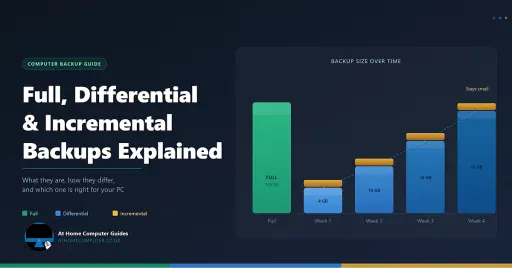
This guide explains all three backup types in plain English, so you can make the right choice for your home PC.
You can find this and other related step by step guides in – At Home PC Tech Guides
At Home Computer Step By Step Guides
 Easy to follow tutorials for users of Windows 10 and Windows 11 computers.

Gmail is Switching Off Gmailify and Check Email From Other Accounts
Do your BT, Yahoo, Hotmail or other emails turn up…

How to Make Your Own Photo Calendar (Free 2027 Template)
A calendar with a family photo on every month makes…

Free Editable and Printable 2027 Family Calendar (UK)
If you’ve ever gone looking for a free editable, printable…

How to Add, Edit and Save Contacts in Gmail
Gmail has its own address book, which Google calls your…

How to Block Emails in Gmail and Stop Spam
Whether it’s a company that won’t stop sending you offers,…

How to Change Your Name in Yahoo Mail
When you send an email from Yahoo Mail, the person…
How to Save a Web Page as a PDF in Chrome, Edge or Firefox
Sometimes you want to keep a copy of a web…
How to Download a Windows 7 ISO File in 2026
Microsoft has taken the Windows 7 downloads off its servers,…

Keep Track of Your Golf Scores on Your PC
Ask most golfers whether they are improving and they will…