To access websites over the Internet, your computer will connect with what’s called a DNS (Domain Name System) server. How Does DNS Work?
Typically on your home computer you’ll be using the DNS server setup by your ISP (Internet Service Provider). But you don’t have to. You can switch DNS servers. Google Public DNS is a free service that anyone can use.
Switching to Google DNS servers you could see faster loading times for websites compared to your ISP’s DNS servers, especially if they’re congested. That’s not guaranteed but worth a try if your experiencing slower that expected connections.
How To Change To Google DNS.
To change your DNS server to Google Public DNS you need to enter Google’s DNS server IP addresses, which are 8.8.8.8 and 8.8.4.4
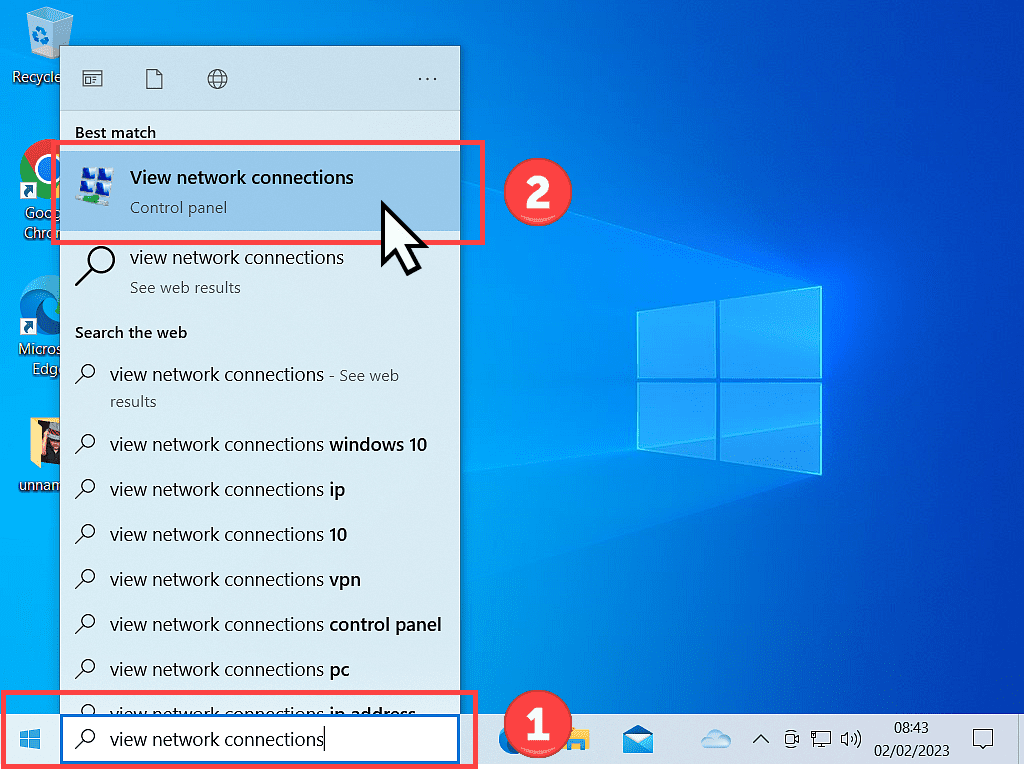
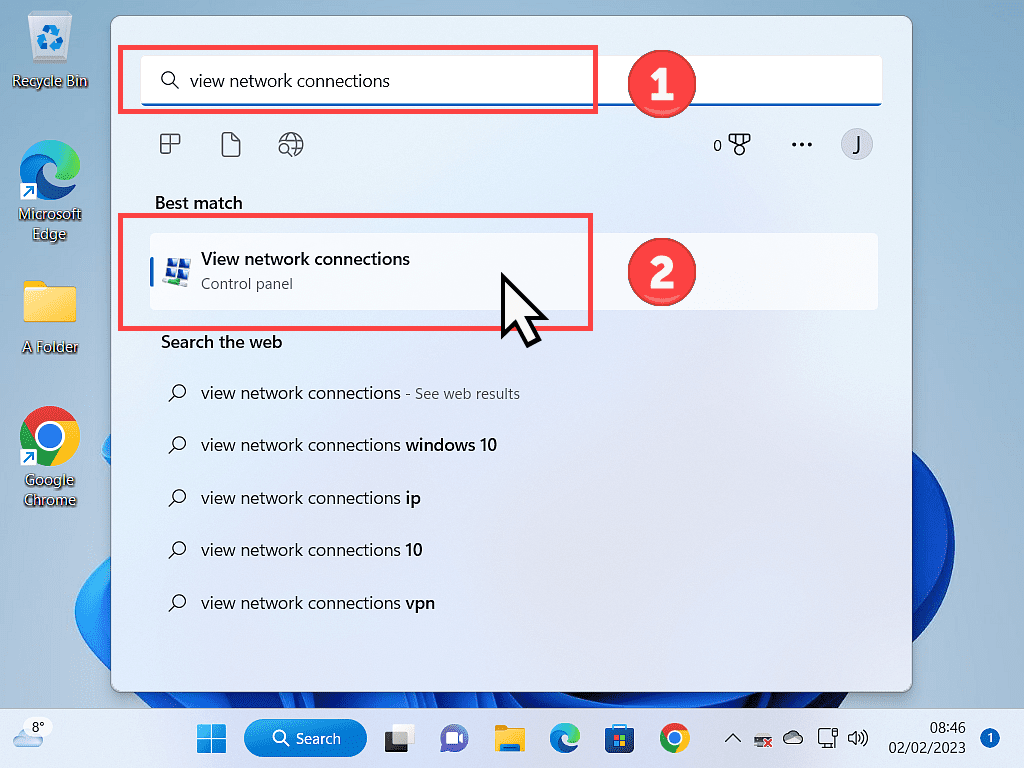
Click the Start button, then type “view network connections“
Click View Network Connections (Control Panel).
To change your DNS server to Google’s, you need to alter the DNS settings for the network adapter that you’re using.
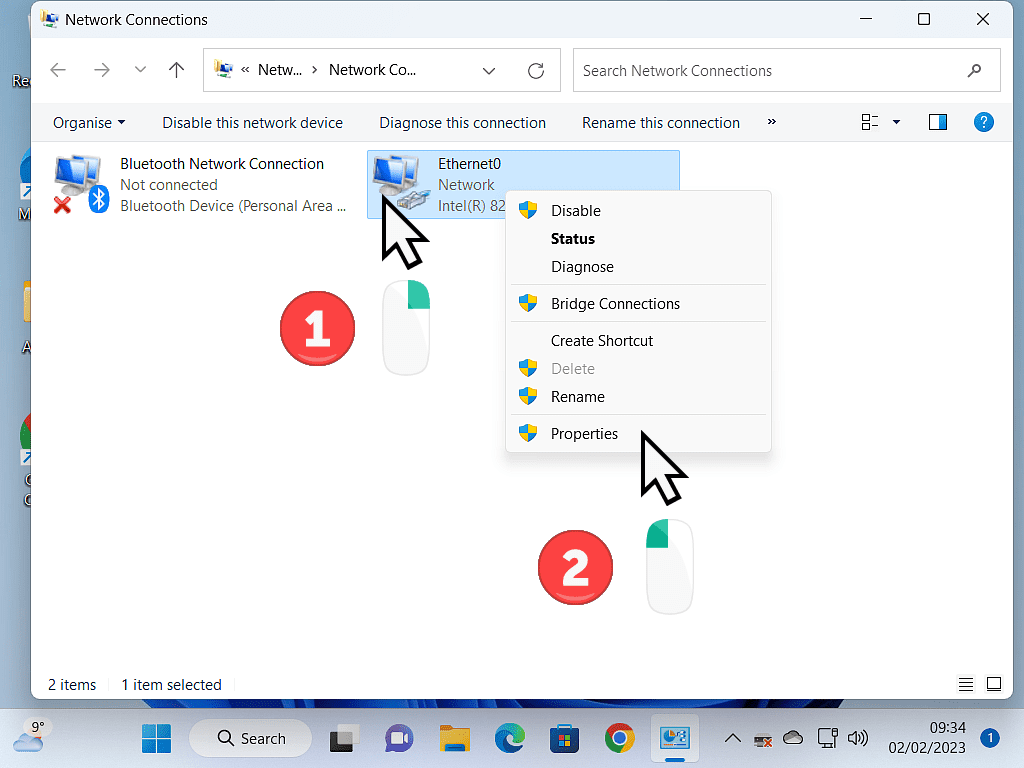
You should see all the network adapters connected to your computer on the Network Connections page.
Right-click on the adapter and then, on the menu, left-click Properties.
Wired Or Wireless?
If you’re using a wired connection, it’ll be an Ethernet adapter. And if you’re using wireless, it’ll be a WIFI adapter..
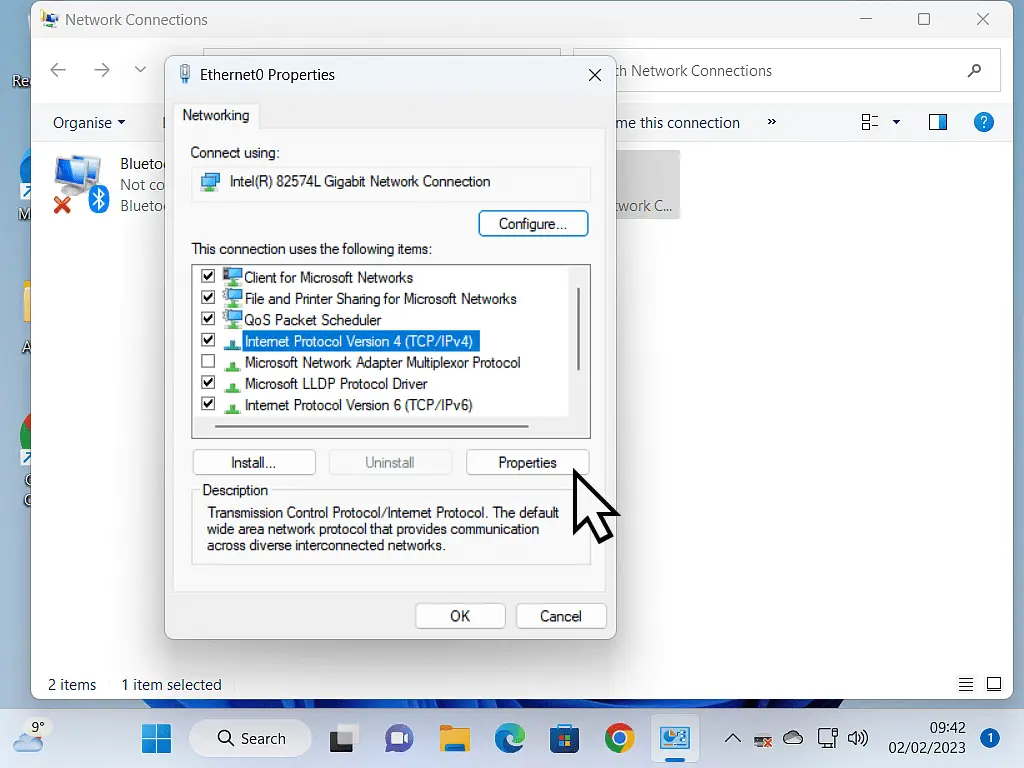
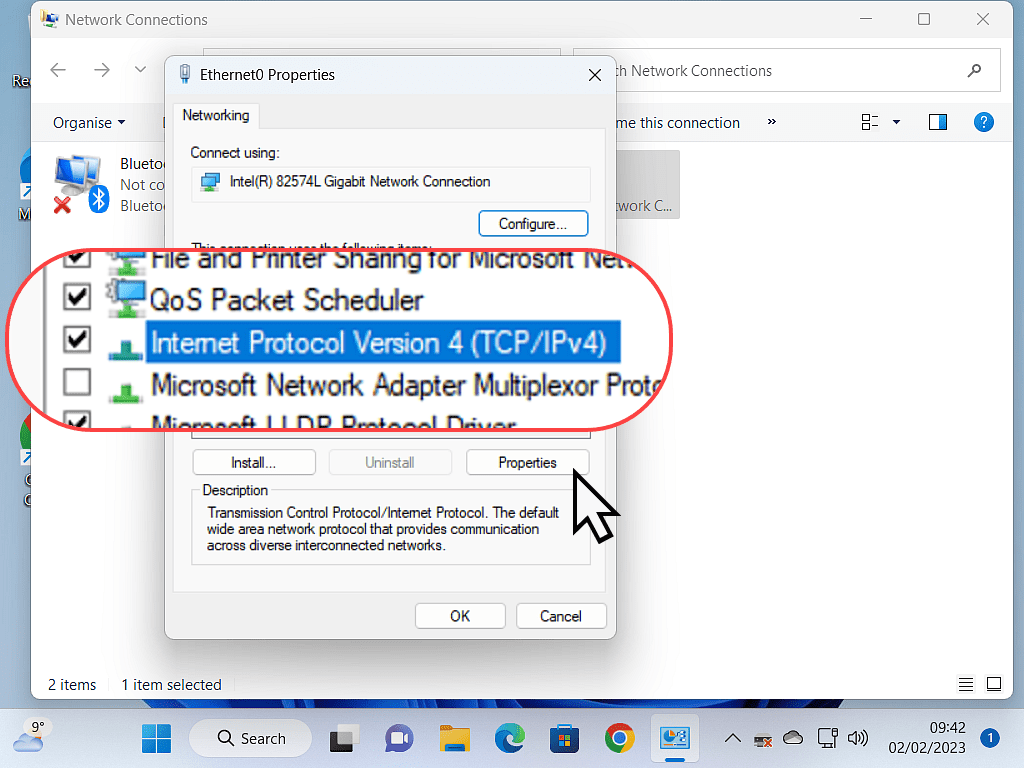
On the network adapter properties dialogue box, select Internet Protocol Version 4 (TCP/IPv4) by left clicking on it once.
Then click the Properties button.
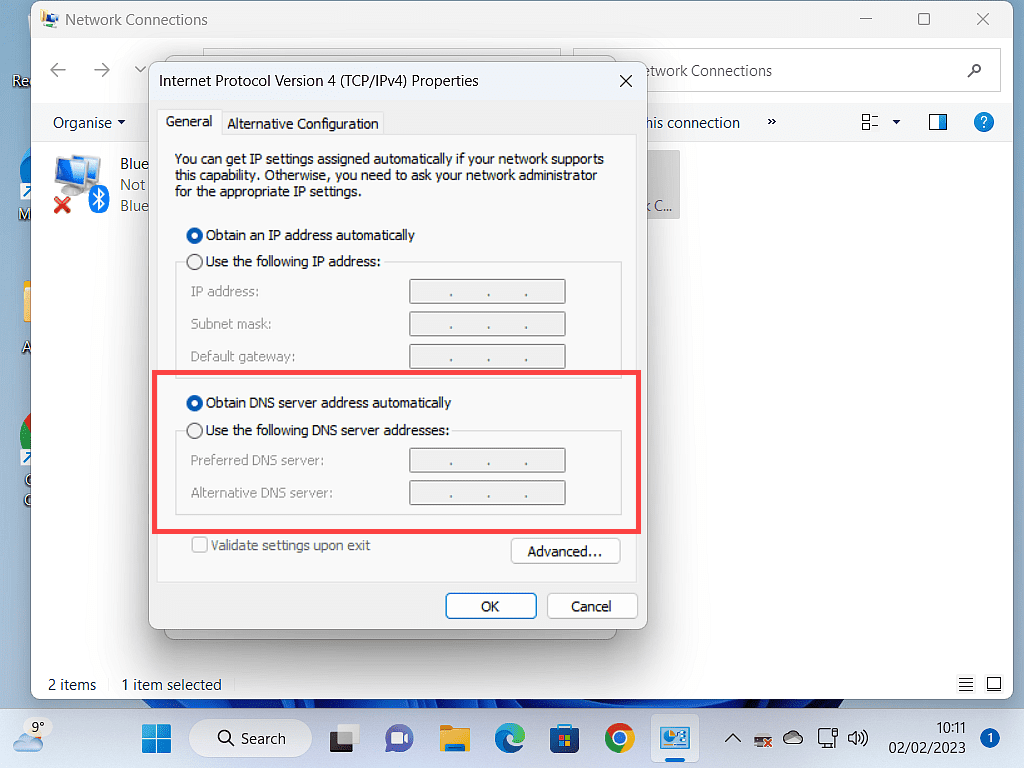
The Internet Protocol Version 4 (TCP/IPv4) Properties Box.
The Internet Protocol Version 4 (TCP/IPv4) box is split into 2 sections. The top section refers to your computer’s IP address and default gateway (router). Leave this section as it is.
The lower section details the IP address of the DNS server that your computer should be using. Generally, it’ll be set to “Obtain DNS server address automatically” and both the boxes will be empty (blank).
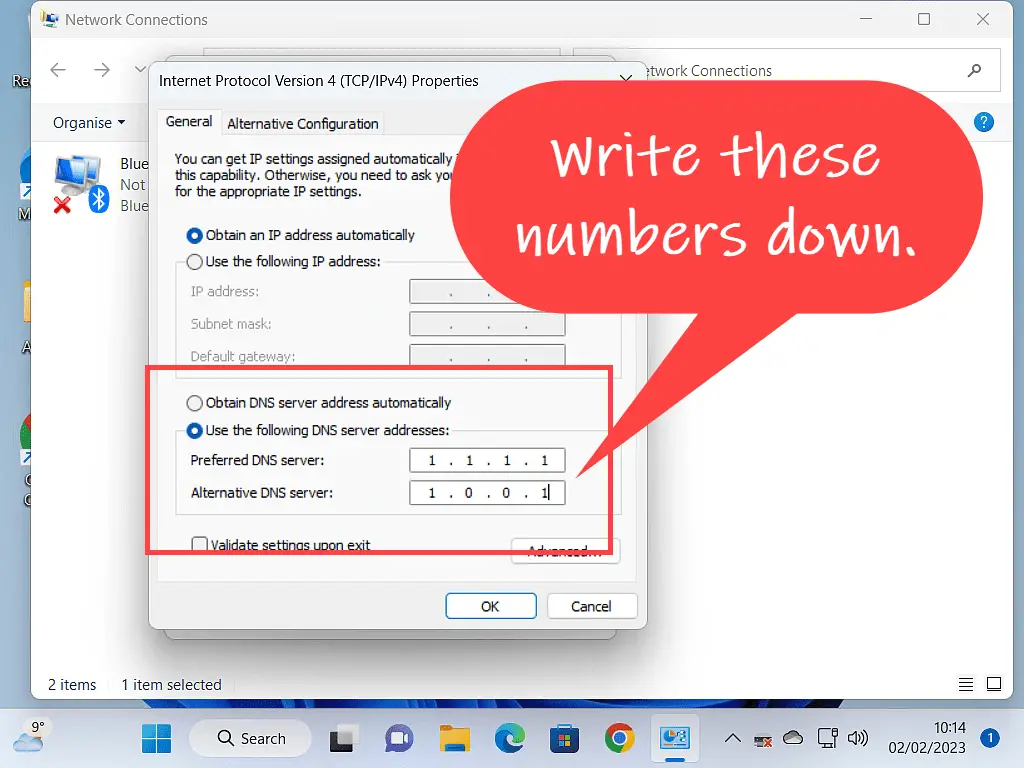
On your computer, if the “Use the following DNS server address” option is selected and you can see IP addresses in the boxes, then make a quick note of those address numbers, or screenshot the window How To Screenshot A Computer Screen.
You Might Want To Go Back.
Switching away from your ISP-provided DNS server to Google’s DNS servers isn’t a guarantee of better Internet performance. In fact, things could get worse. It all depends on what you’ve got right now.
By keeping a note of the current DNS server IP addresses, you can always change back if things don’t work out for the better.
Enter The Google DNS Server IP Addresses.
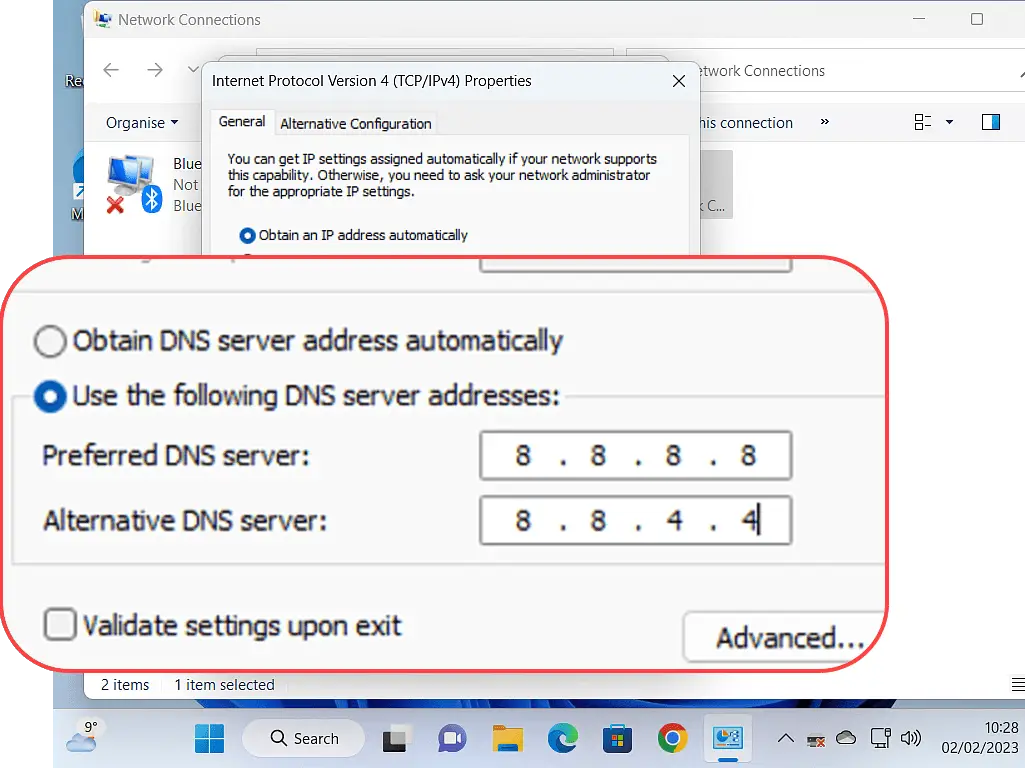
To switch to using Google’s Public DNS servers select “Use the following DNS server addresses”, if it’s not already selected, and then enter these IP addresses into the relevant boxes.
Preferred DNS server 8.8.8.8
Alternative DNS server 8.8.4.4
Click the OK button and close all the open windows.
Summary.
Restart your computer and then test that everything is working properly. Start by trying to access a few of the bigger websites such as Facebook, Ebay, Amazon etc. These websites are almost always up and working.
After that try a few random searches. If everything is working OK you’re good to go. If you experience any problems you can always switch back to whichever DNS server you were using previously.
Stay Informed. Stay In Touch.
Now that you’ve found me, keep in touch. I publish new articles and update older ones constantly.
Let me send you a monthly email with all the latest guides for you to see if there’s anything you’re interested in.
