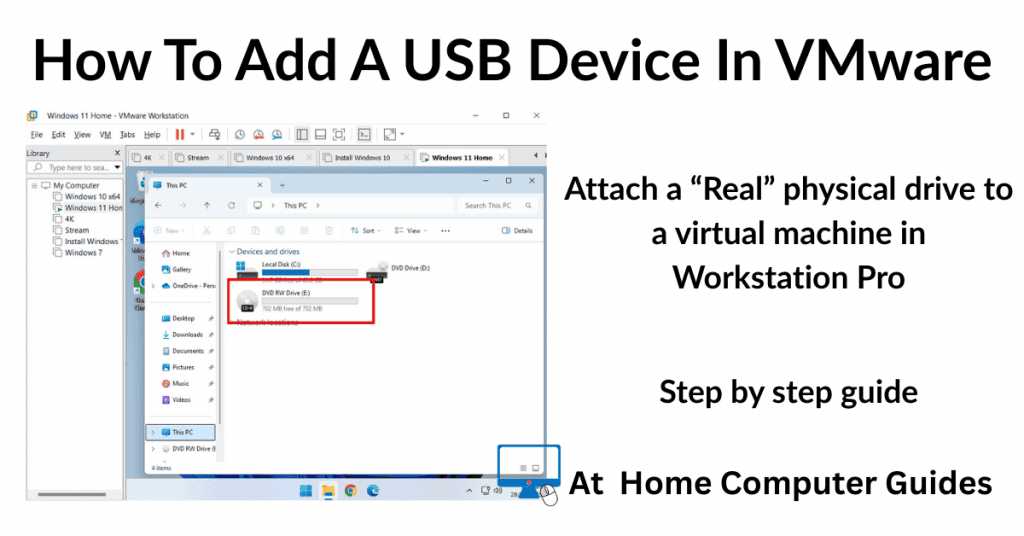
How to add a USB device to a virtual machine in VMware Workstation Pro. You can easily connect an external drive such as CD/DVD drives, USB flash drives and hard drives to your virtual machine.
Attaching removable drives allows you to easily transfer files and folders between the host machine and the guest.
In this step by step home computer guide, I’ll show you how to add a USB device and what you can do if it fails.
How To Add A USB Device To Workstation Pro
Removable devices such as USB drives can be connected to either the host system or the guest but not to both. Workstation Pro doesn’t have a mechanism that allows removable devices to shared between the two at the same time.
VMware New USB Device Detected
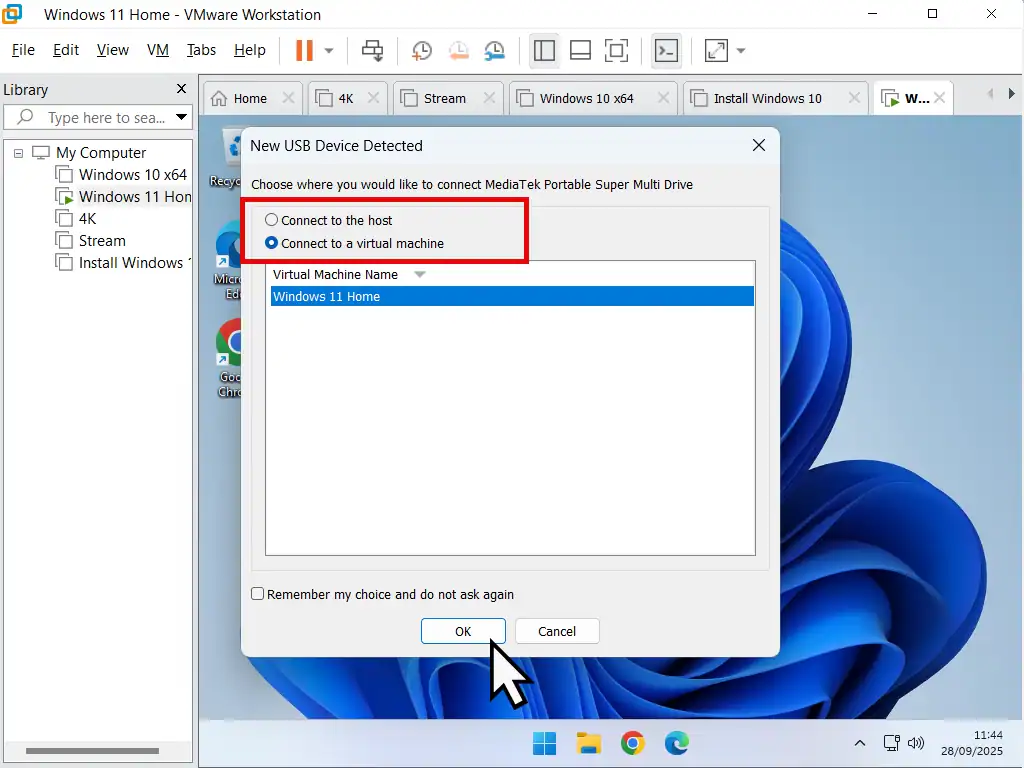
If you’re virtual machine is running and you plug in a removable device you’ll see the New USB Device Detected popup.
To attach the device to your virtual machine –
- Select “Connect to a virtual machine” by clicking the radio button.
- Then select the VM you want the device attached to
- Finally click the OK button.
Remember My Choice Option
Near the bottom of the popup window you’ll see an an option to “Remember my choice and don’t ask again”.
If you check this box then whenever you plug in your USB drive it’ll automatically be connected to the virtual machine. Personally I think that’s too restrictive. My advice is to not select the option.
VMware Attach Removable Devices
You can also add a USB device to VMware when it’s already plugged in to your host machine. Using this method you switch the device between the host and the guest. Handy when you’re trying to pass files between the two.
To attach or detach a removable device in VMware –
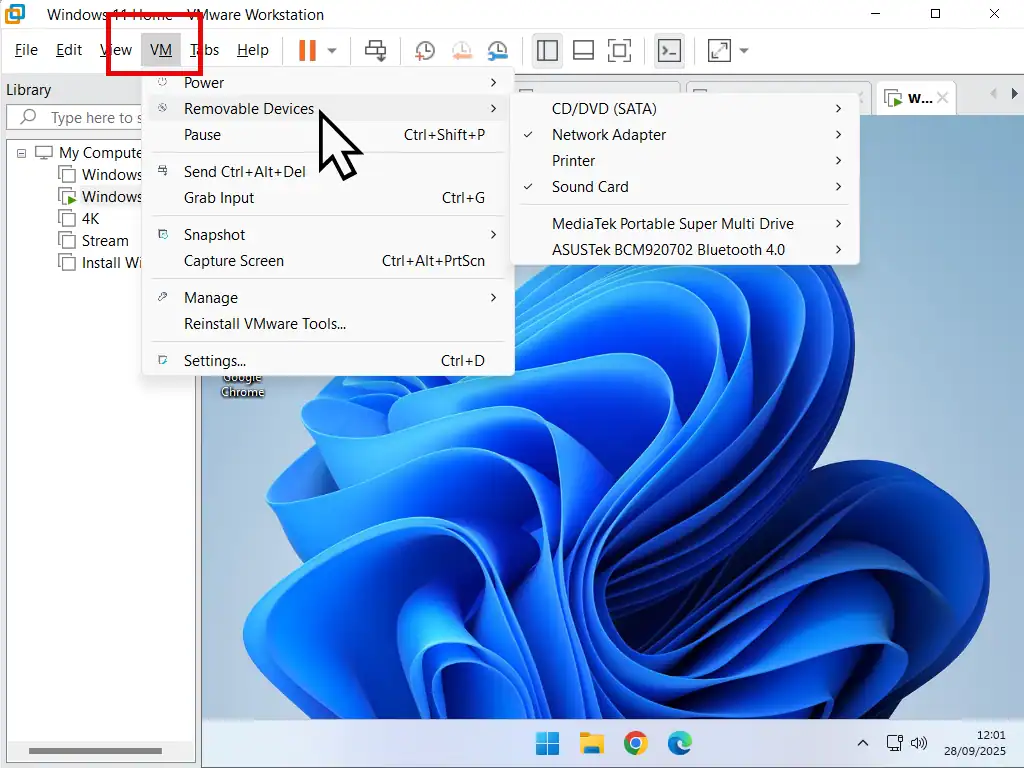
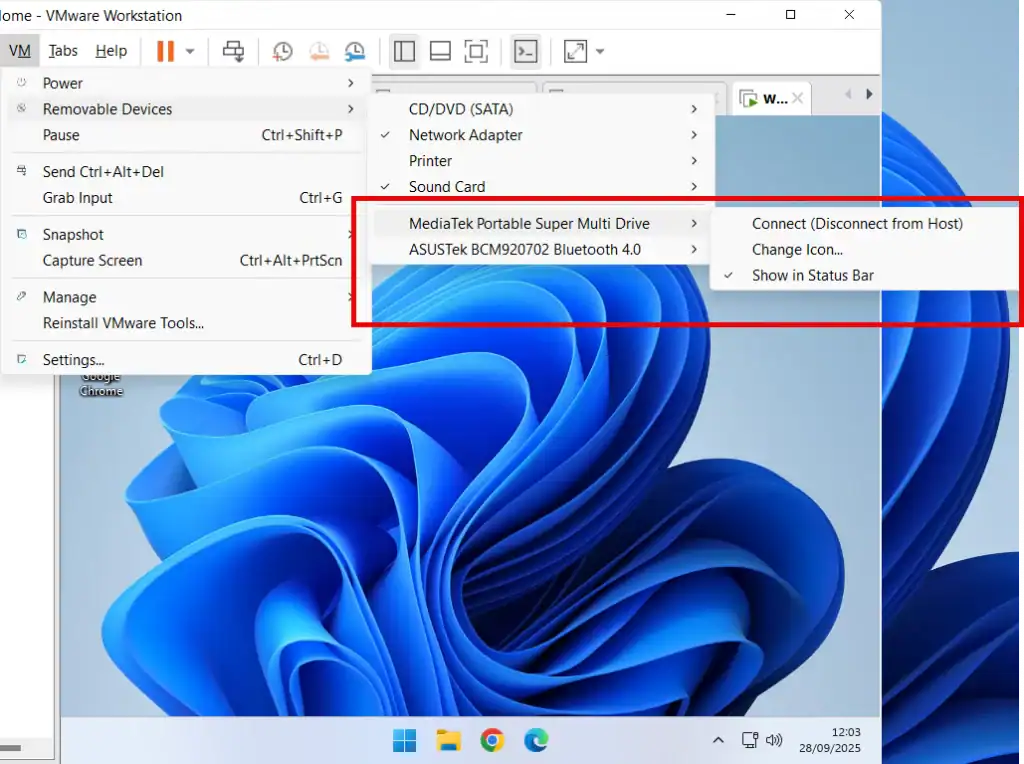
- Click the VM button on the Workstation Pro toolbar. On the menu that opens, hover over Removable Devices. That’ll open a second menu with all the devices VMware has detected.
- Hover your mouse pointer over the USB drive to want to add and click Connect (Disconnect from host).
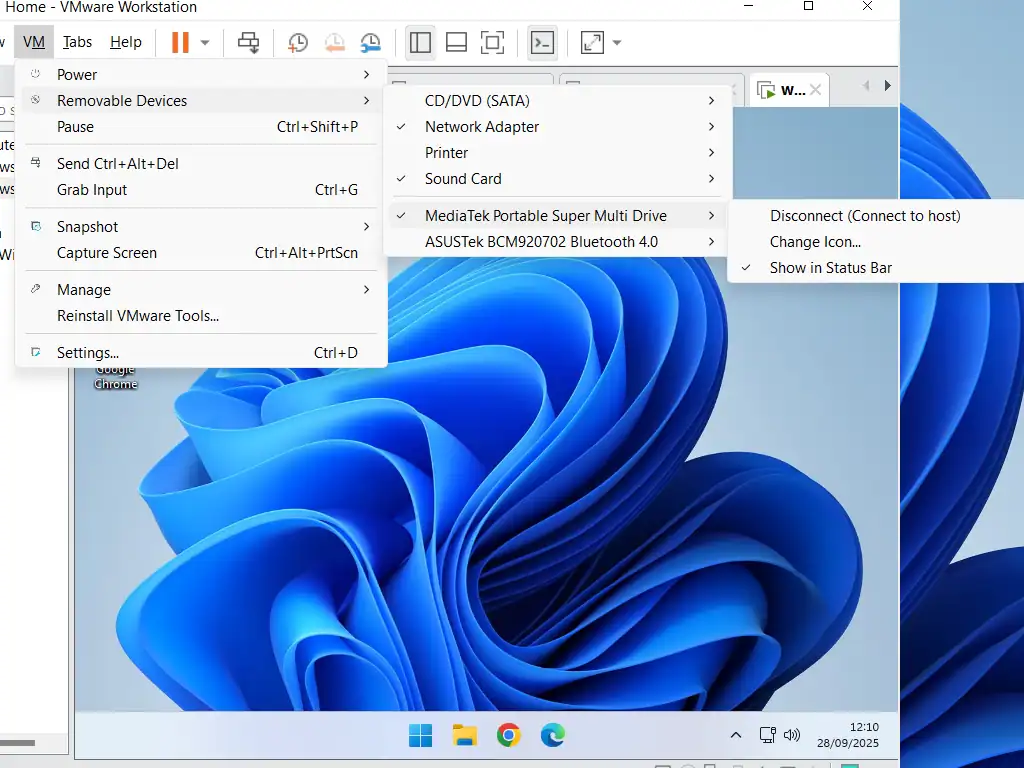
- To disconnect a drive from the guest, click the VM button, hover over Removable Devices, the device that you want to remove and click Disconnect (Connect to host).
USB Device Not Recognised In VMware
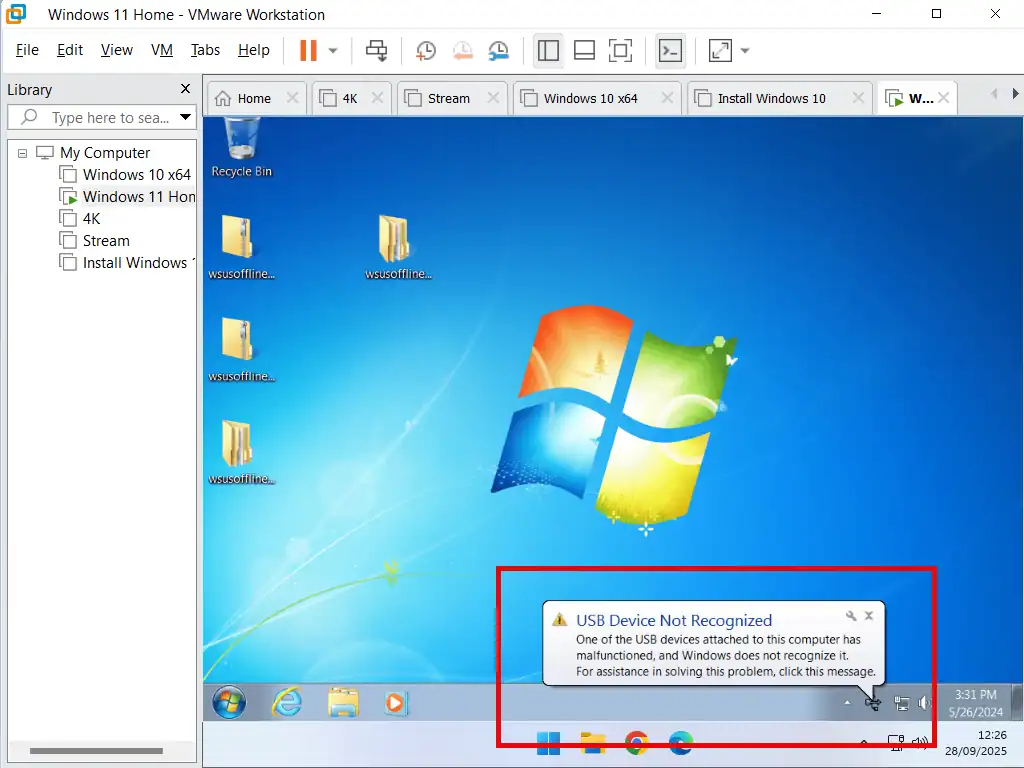
When you’re trying to add a USB device in VMware, you might see the dreaded “USB Device Not Recognised” message. If that happens, then the device won’t be available in the guest system because it’s failed to load the necessary drivers.
Generally this’ll happen when the guest is an older operating system such as Windows 7 and Windows XP etc.
The issue is usually related to USB 3 and upwards.
Try to use both USB 2 ports and USB 2 devices to avoid the problem.
How To Get Around USB Device Not Recognised
It may be that you really can’t get around the USB device not being recognised by the guest system in VMware. So what can you do?
That really all depends on what it is that you’re trying to do.
Passing Files Between Host and Guest
If all you want to do is to pass files between the host and guest and vice versa, then the easiest way around a USB drive not being recognised is to use a Shared Folder. In VMware shared folders are accessible by both the host and guest at the same time. VMware Shared Folders
Install A Program Onto Guest
If you wanted to instal a program or app onto the guest, then the best way is to create an ISO file and then mount that as a virtual CD/DVD drive in VMware. You’ll find that the virtual drive will be accessible by the guest system.
If the program is on a CD/DVD then follow this guide to save it as an ISO How To Create An ISO File From A Disc.
Or maybe you downloaded the setup files from the internet, that case follow this guide How To Create An ISO File From A Folder
How To Add A Virtual Disc In VMware
Once you’ve created the ISO file, you’ll need to add/mount it as a virtual disc in VMware.
- Click the VM button on the toolbar and then click Settings.
- Select all the virtual CD/DVD drives in turn and remove them by clicking the Remove button.
- Click the Add button.
- Select CD/DVD Drive and click Finish.
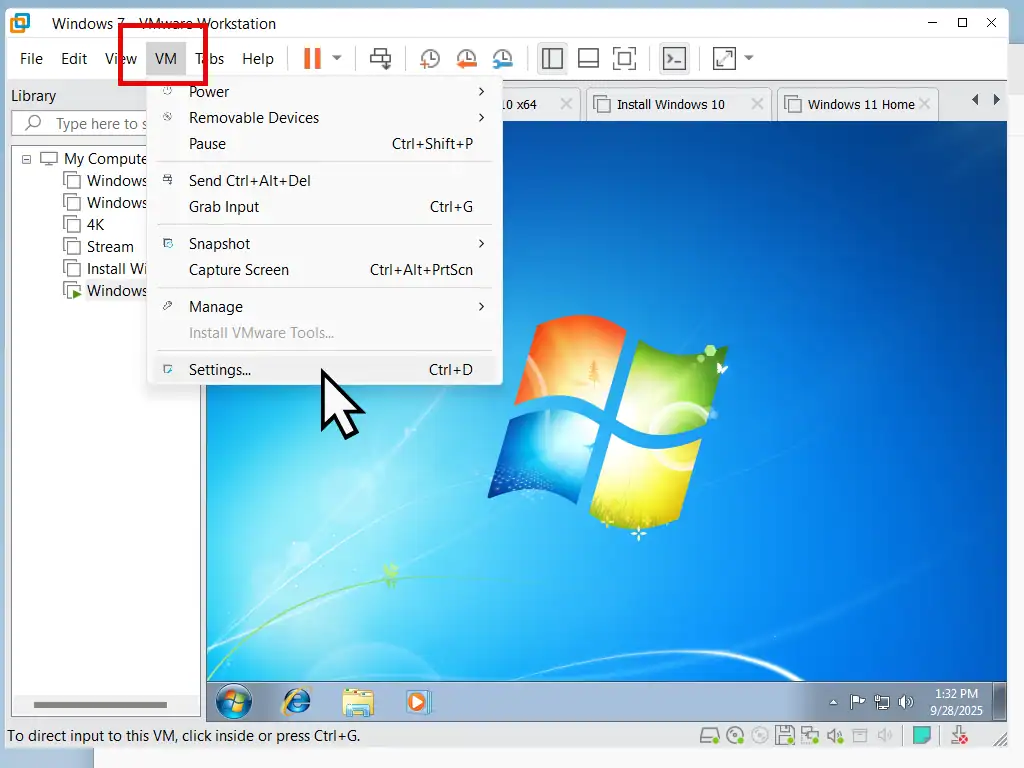
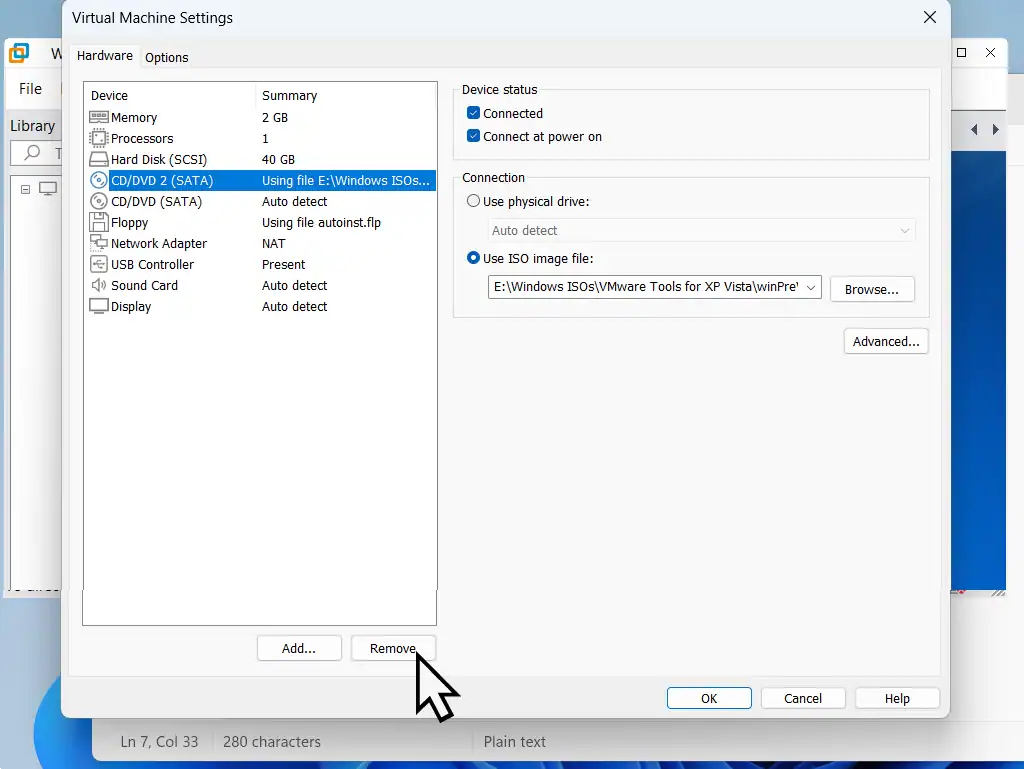
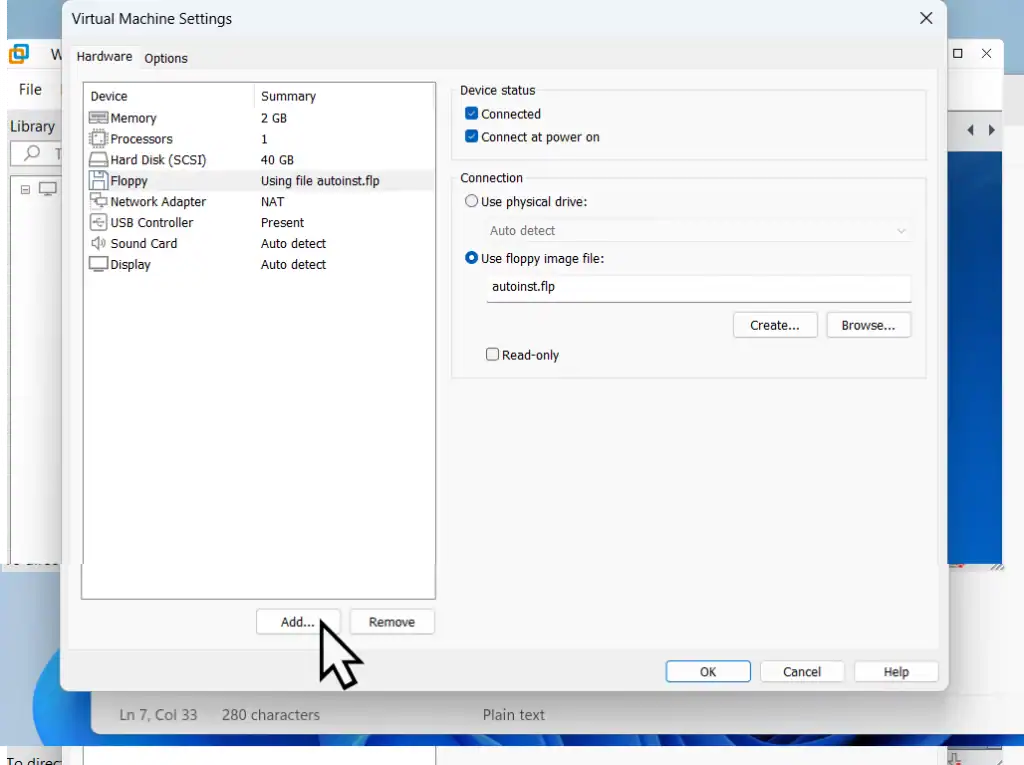
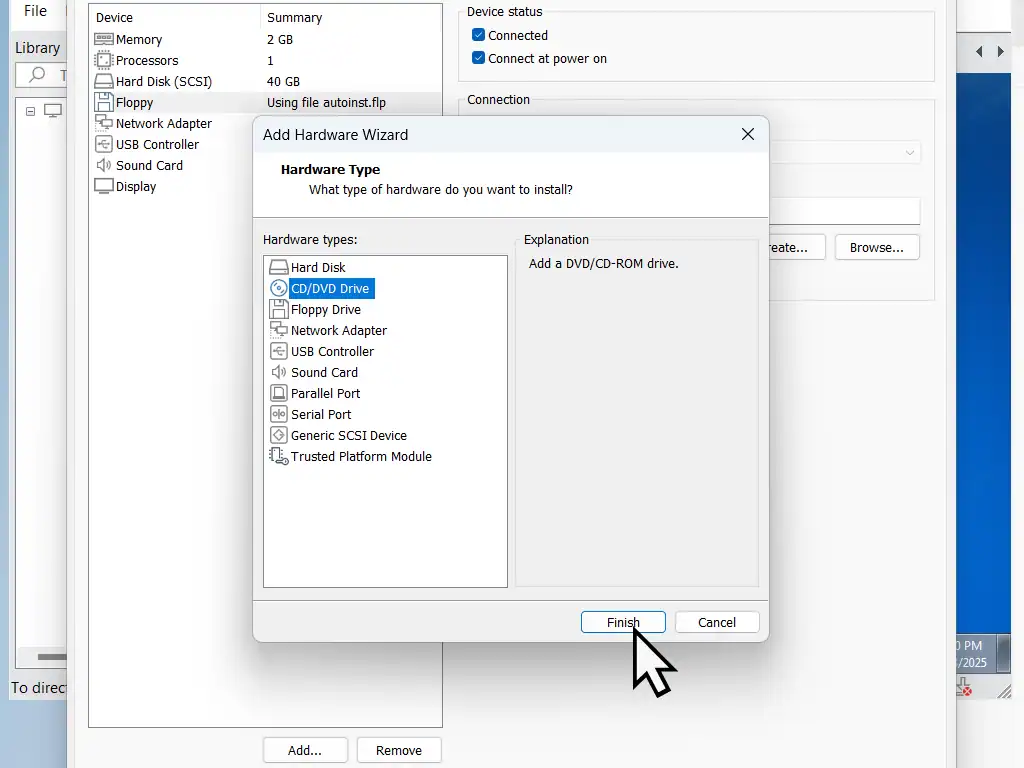
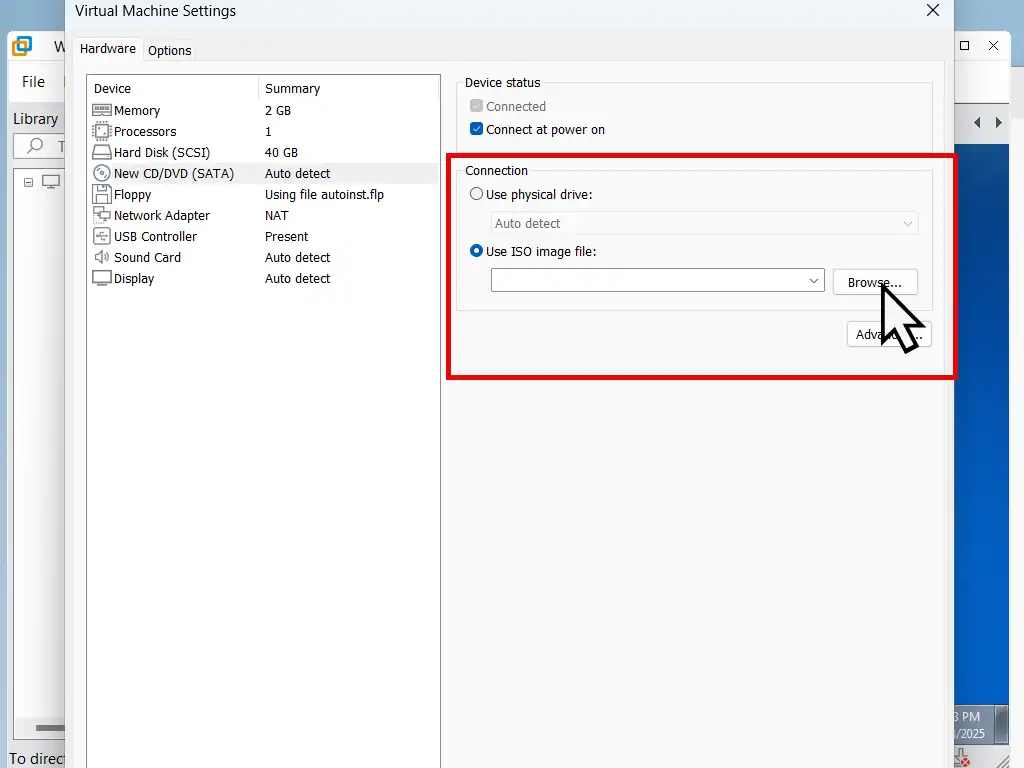
In the right hand panel select Use ISO Image File. Then click the Browse button and navigate to the ISO file you created earlier.
Select the ISO, click OK and then return to your VM. You’ll find that the virtual CD/DVD is now available.
Summary
Attaching removable devices in VMware Workstation Pro is generally easy. The device will appear in the guest operating system but disappear from the host.
The only real problems that I’ve experienced is when using an older OS on the guest. But there are workarounds.
Related Posts
How To Install Windows 11 As A Virtual Machine In Workstation Pro.
You can setup a Windows 11 VM even if your host PC doesn’t currently meet the requirements. VMware does all the heavy lifting for you.
How To Install Windows 10 Virtual Machine In Workstation Pro.
A Windows 10 VM to play around with. Brilliant.
Backup Workstation Pro Virtual Machines.
It’s surprisingly easy to create a complete backup of a virtual machine. Saves a lot of time recreating your VMs.
Save Your Old PC
As Windows 10 nears the end of its life cycle, many people will be considering buying a new PC. What will you do with you’re old PC. What about all the program and apps installed on it.
You could save your old machine together with all its data and apps and use it as a virtual computer on your new PC.
