
Every program, app and folder you open on a Windows computer lives inside a window — it’s actually where Windows gets its name. Most windows open at a fixed size by default, but that’s not always going to be the size you actually want.
Learning how to resize and move a window properly is one of the most useful beginner skills on a computer, because it lets you work with two or more windows on screen at the same time — no more constantly flicking back and forth between programs.
Here are two everyday examples of why this matters:
- Comparing files in two different folders side by side, instead of jumping between them.
- Shopping online with two browser windows open next to each other, so you can compare prices, specs and delivery between different shops.
In this lesson from our free Basic Computer Course, I’ll show you exactly how to minimise, maximise, resize, move and snap windows in both Windows 10 and Windows 11 — using your mouse and your keyboard — plus how to fix the two problems people run into most: a window that’s vanished off-screen, and a window that refuses to resize.
Table of contents
What Do the Minimise, Maximise and Restore Down Buttons Do?
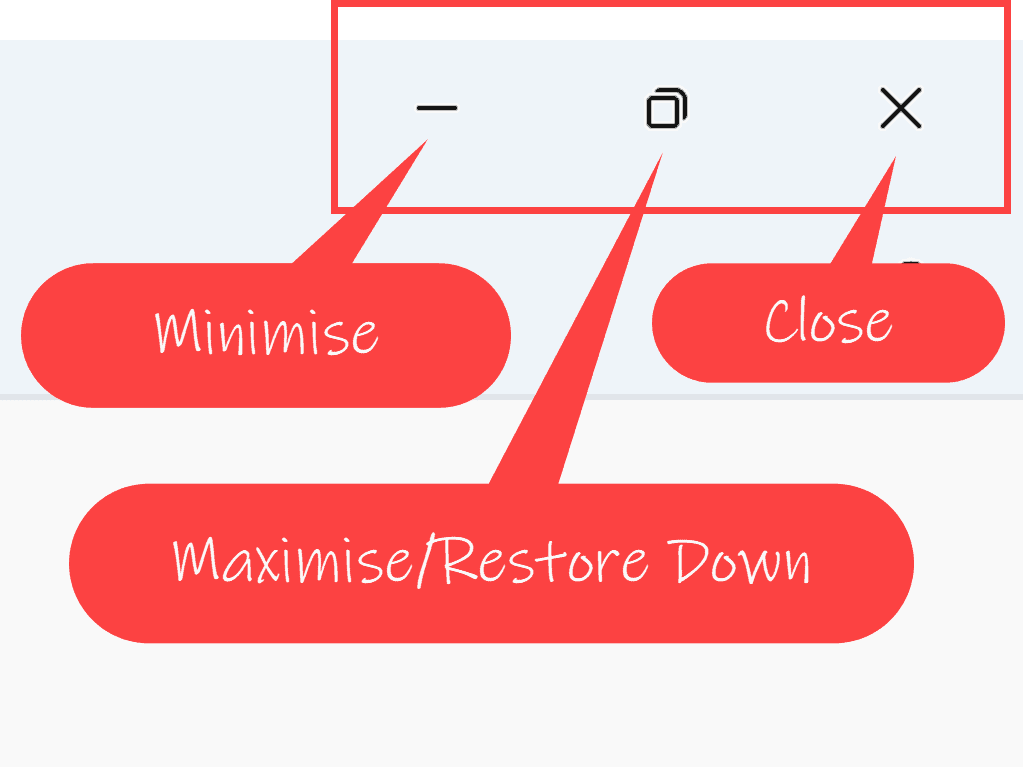
Every open window has three buttons in the very top right-hand corner. Understanding what each one does is the key to controlling any window on your screen.
Furthest to the right is the Close button (the X) — most people already know that one closes the program.
Just to its left sit the Minimise and Maximise/Restore Down buttons.
The Minimise Button
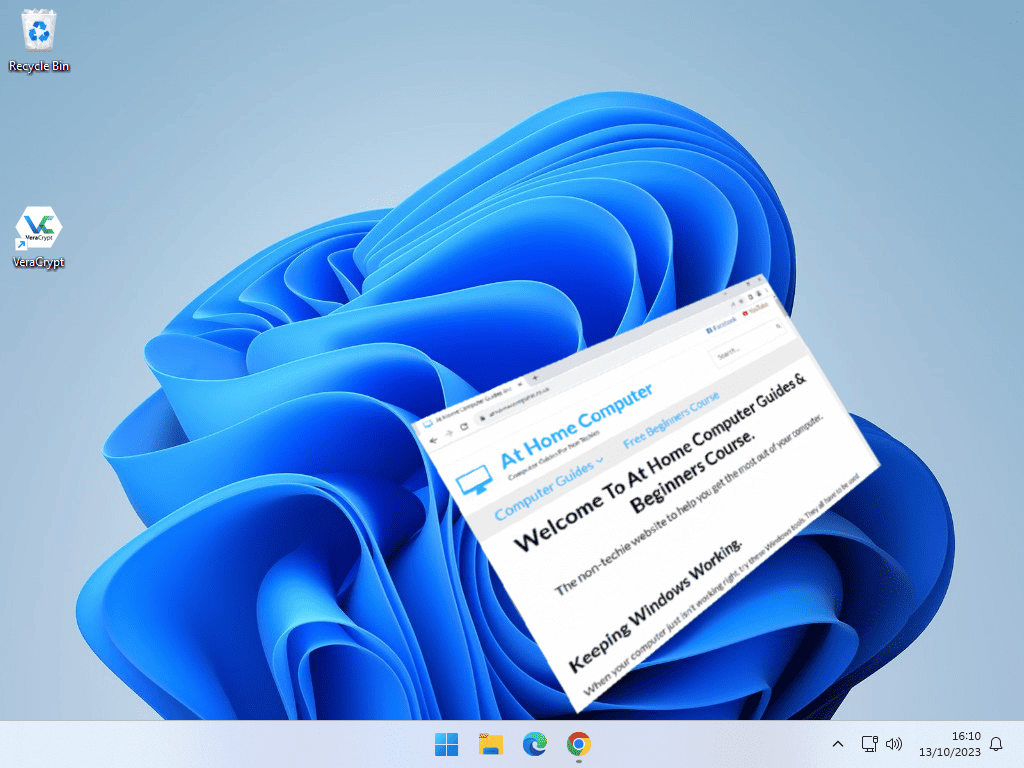
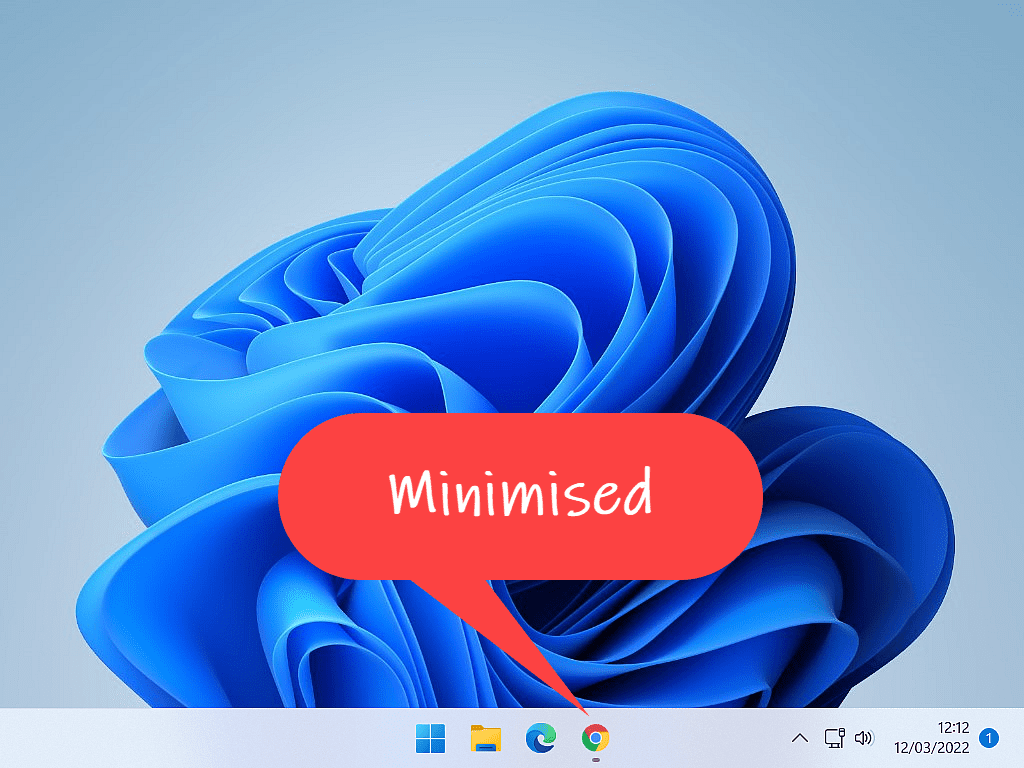
The Minimise button has one job only: it sends the open window down to the taskbar, out of your way.
Clicking Minimise does not close the program and doesn’t stop whatever it’s doing — it simply tucks the window out of sight.
You’ll know a program is minimised because a small line appears underneath its icon on the taskbar. Hover your mouse pointer over that icon and you’ll see a live preview of the window pop up — click the preview (or the icon itself) to bring the window back to full size.
The Maximise and Restore Down Button
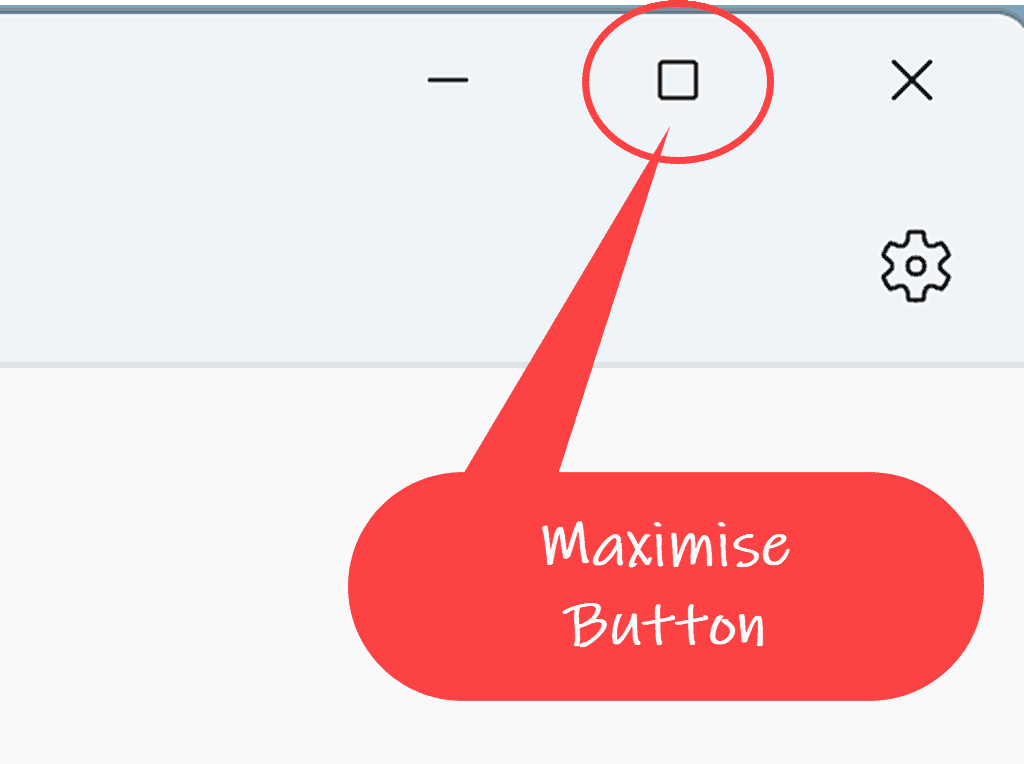
This button actually does two different jobs, depending on the window’s current state:
| Button shows | Name | What clicking it does |
|---|---|---|
| A single square | Maximise | Resizes the window to fill the entire screen |
| Two overlapping squares | Restore Down | Shrinks the window back to its previous size and position |
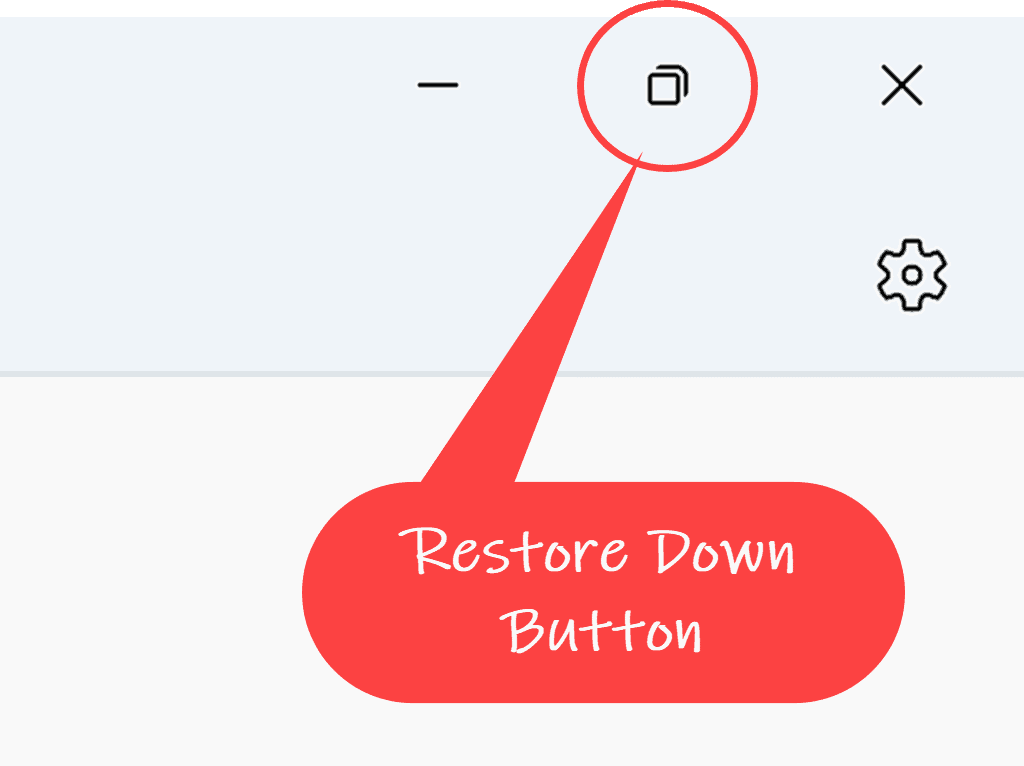
The Restore Down Button: Windows 10 vs Windows 11
The Restore Down button (sometimes called the Resize button) works slightly differently depending on which version of Windows you’re using.
When you click Restore Down, the window doesn’t jump to a random size — it returns to the exact size, shape and screen position it was in the last time it was resized.
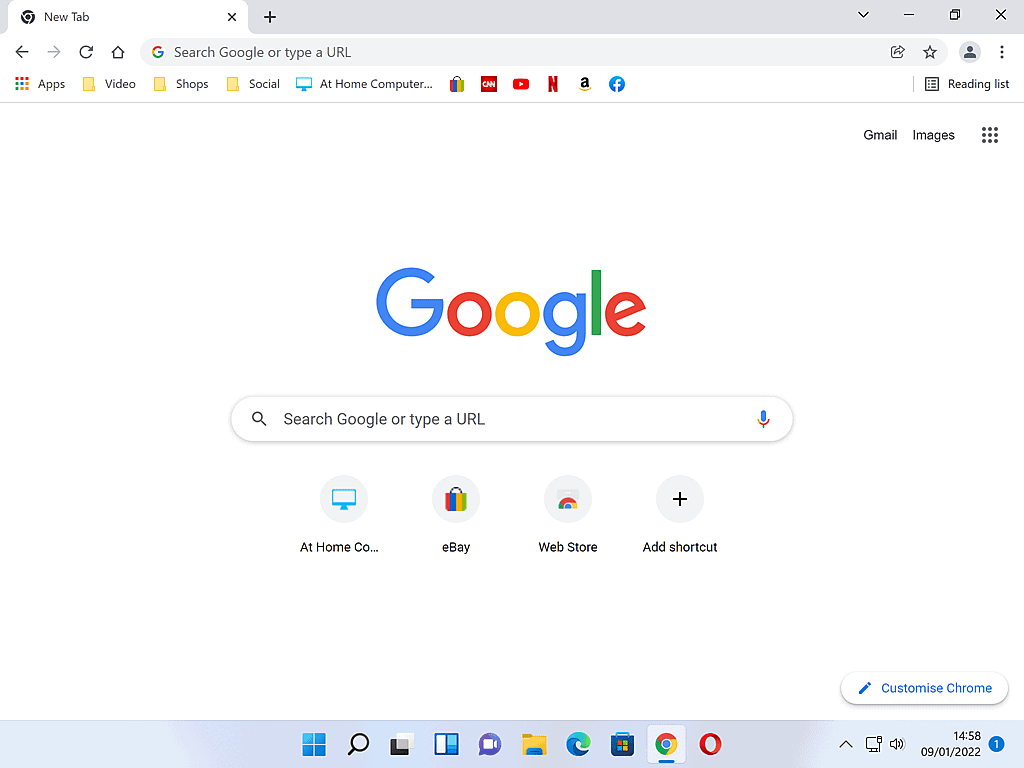
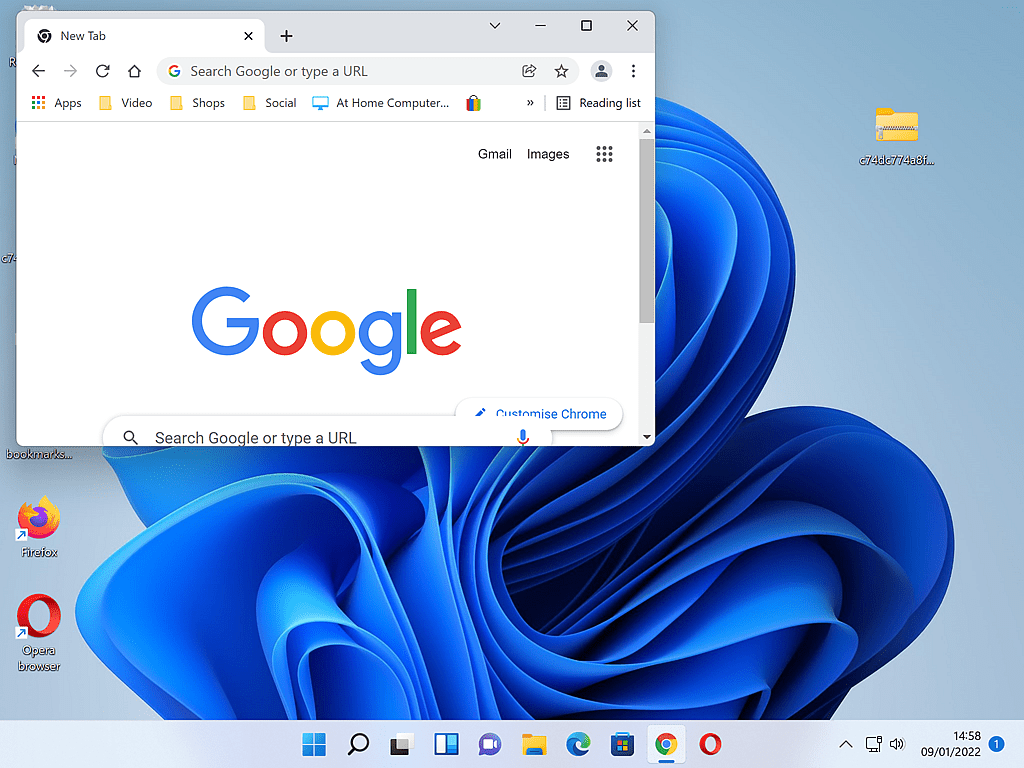
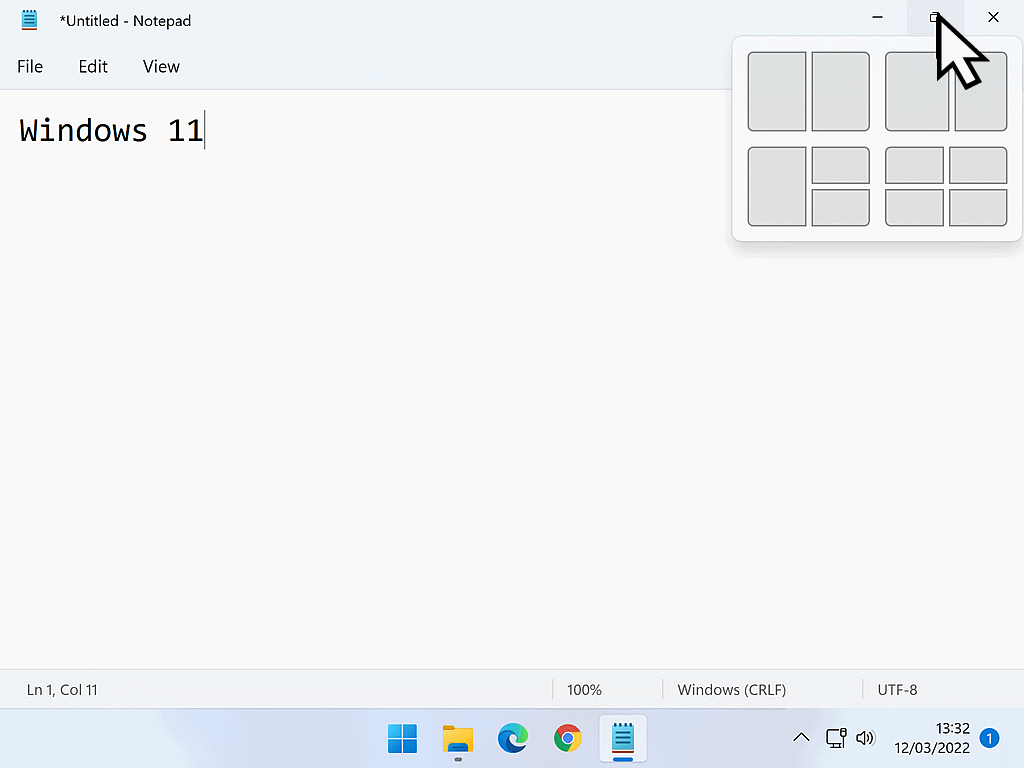
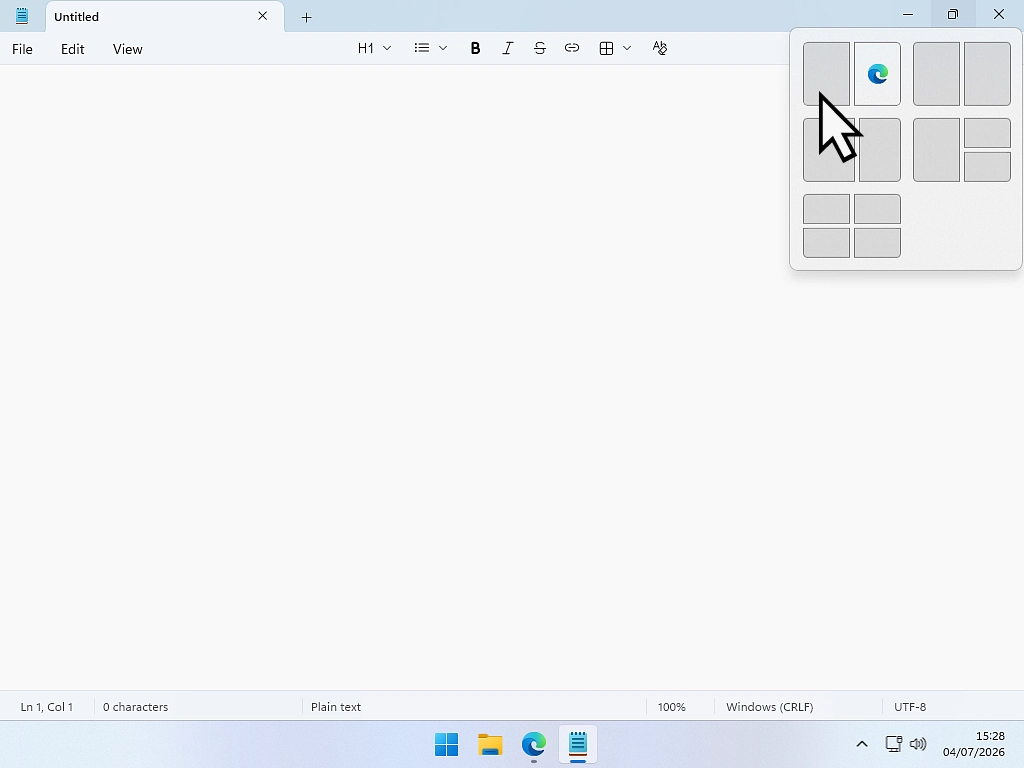
In Windows 11, hovering your mouse pointer over the Restore Down button (without clicking) opens a small flyout menu of layout shapes. This feature is called Snap Layouts, and clicking any shape instantly resizes and positions the window to match it — a genuinely fast way to arrange several windows on screen at once.
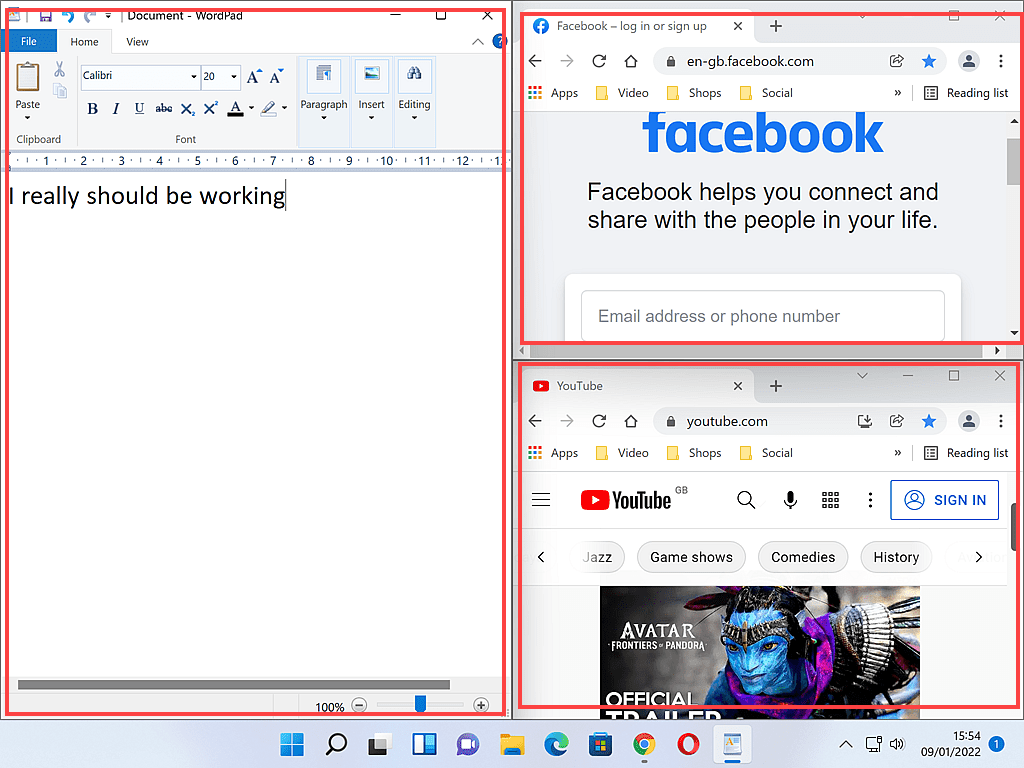
In Windows 10, you won’t see this Snap Layouts flyout — it arrived with Windows 11. But Windows 10 has its own version, called Snap Assist, which works differently (more on that below), and you can always get the same result by moving and resizing windows yourself, which is exactly what the rest of this guide covers.
How to Move a Program Window
In both Windows 10 and Windows 11, you can only move a window around the screen when it’s in the Restore Down position — not maximised, and not minimised.
To move a window:
- Point your mouse at the title bar along the very top of the window.
- Press and hold the left mouse button.
- Drag the mouse — the window follows your pointer.
- Release the mouse button to drop the window in its new spot.
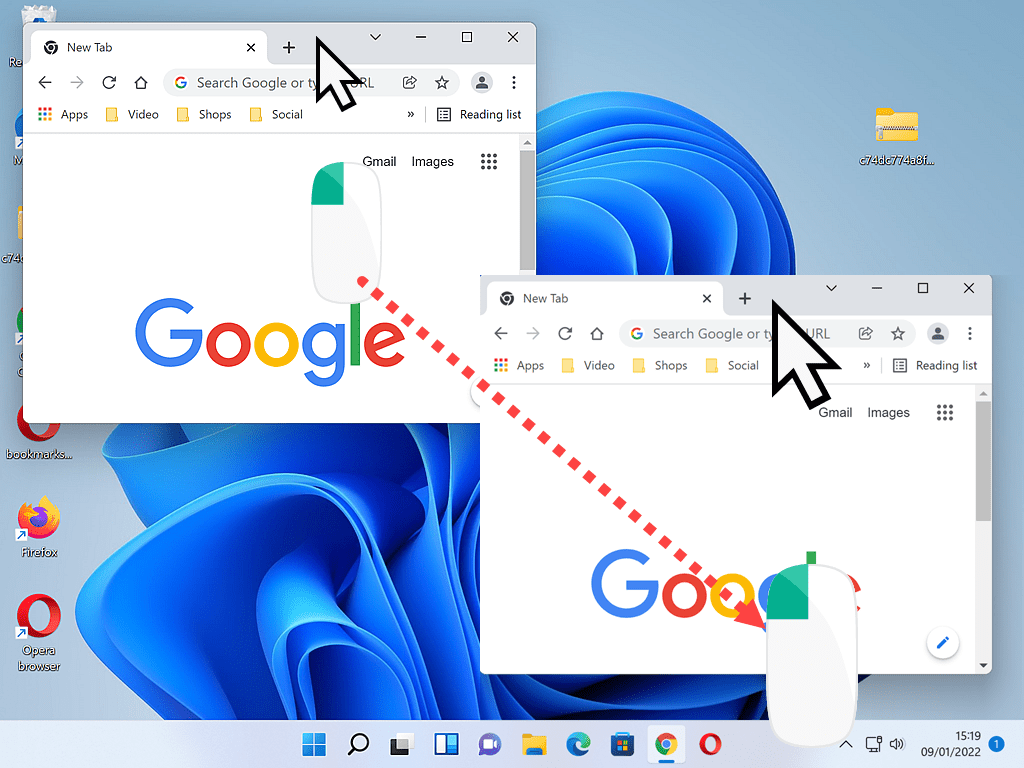
This is called dragging and dropping, and it works exactly the same way for folder windows as it does for program windows.
How to Resize a Program Window
Once a window is in the Restore Down position, you can also change its size and shape.
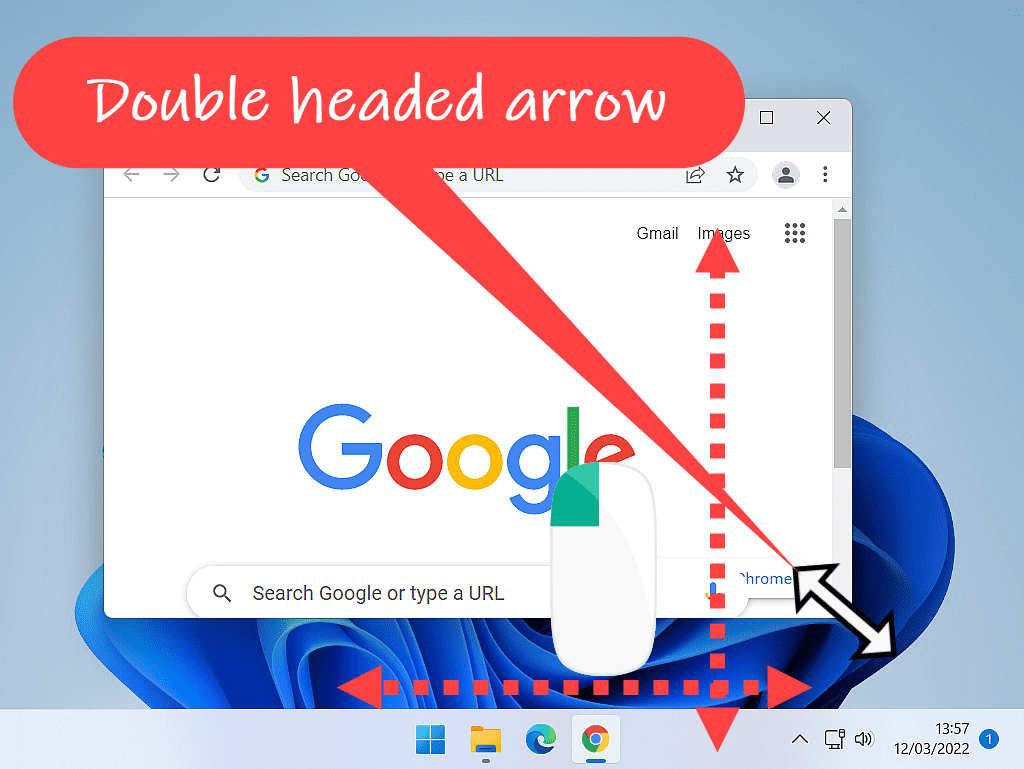
- Move your mouse pointer to the very edge of the window until the pointer changes into a double-headed arrow.
- Press and hold the left mouse button.
- Drag the mouse — the window resizes as you move it.
- Release the mouse button once the window is the size you want.
- Drag a side edge to resize the window horizontally
- Drag the top or bottom edge to change its height
- Drag a corner to resize width and height at the same time
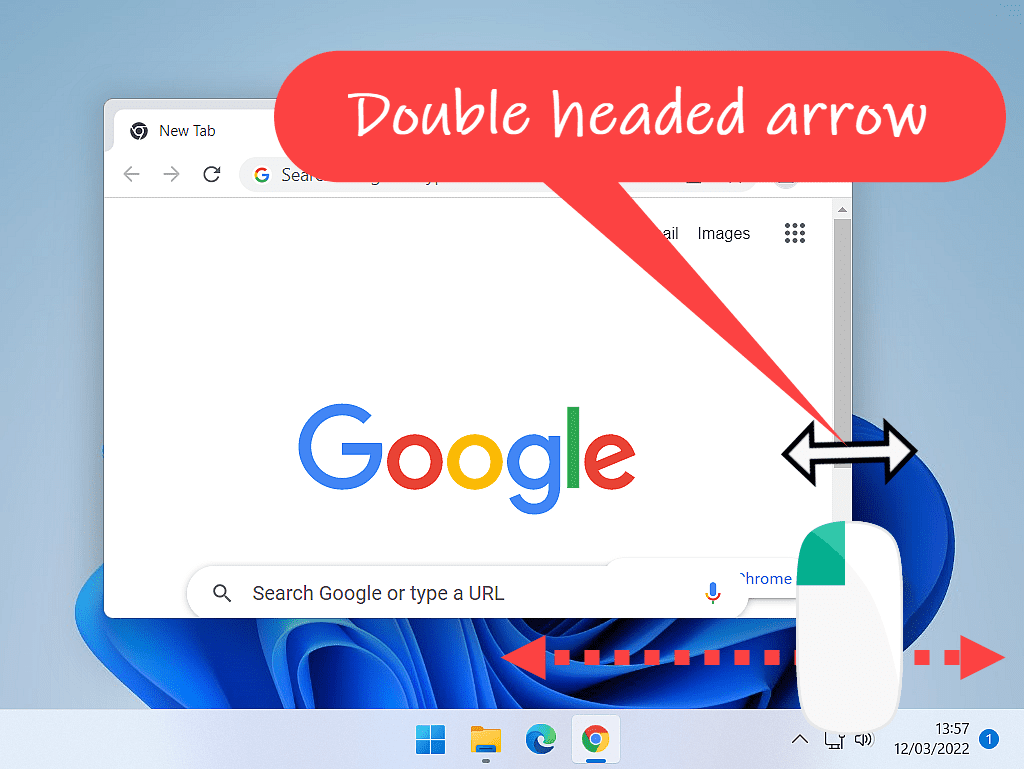
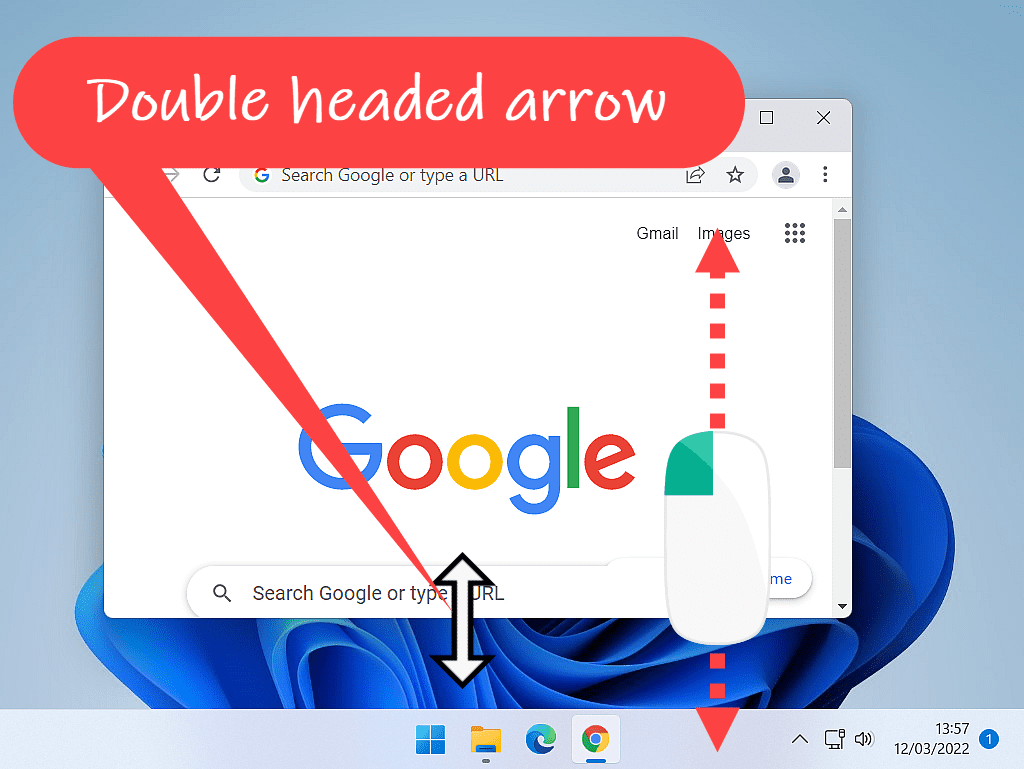
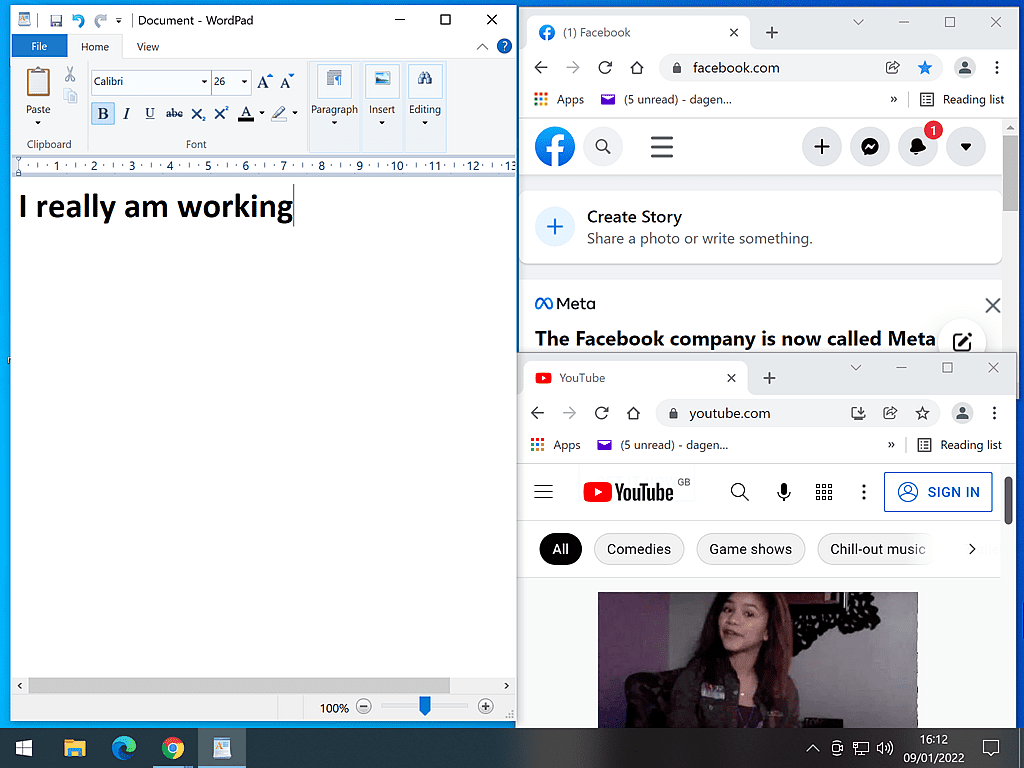
Windows 10 doesn’t have the automatic Snap Layouts flyout that Windows 11 has, but you get exactly the same result by resizing and moving windows manually, as shown above.
How to Resize or Move a Window Using Just the Keyboard
If your mouse stops working, or you simply prefer the keyboard, every action above has a keyboard equivalent. This works for most desktop programs and File Explorer windows.
To move or resize a window with the keyboard:
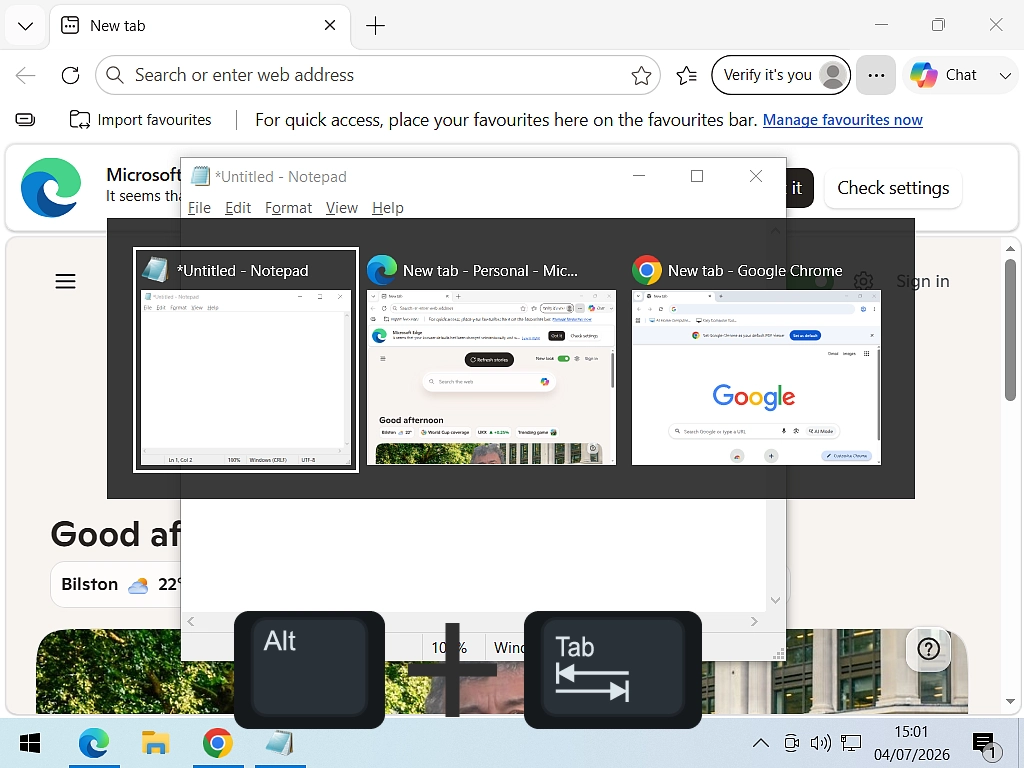
- Click the window once to make sure it’s the active window. If your mouse isn’t working you can use Alt + Tab to select the window.
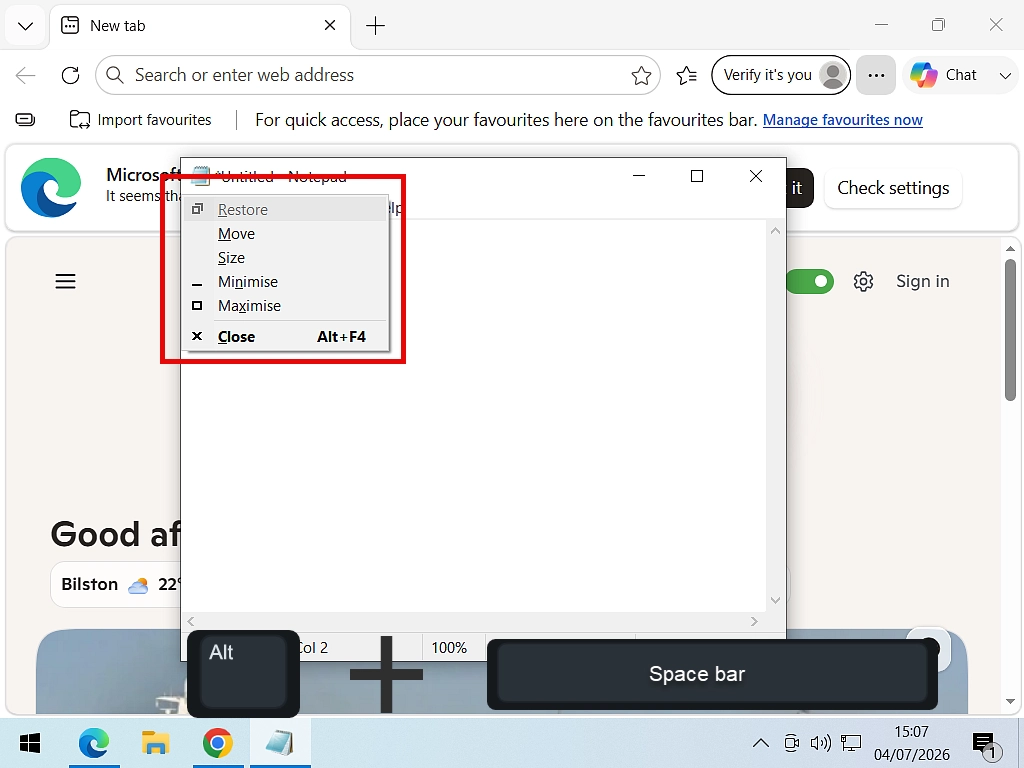
- Press Alt + Space to open the window’s hidden system menu.
- Press M to move the window, or S to resize it.
- Use the arrow keys to move or resize the window.
- Press Enter to lock it in place.
To snap a window with the keyboard:
| Keyboard shortcut | What it does |
|---|---|
| Windows key + Left arrow | Snaps the window to the left half of the screen |
| Windows key + Right arrow | Snaps the window to the right half of the screen |
| Windows key + Up arrow | Maximises the window |
| Windows key + Down arrow | Restores the window down (press again to minimise) |
| Windows key + Z | Opens the Snap Layouts flyout without touching the mouse |
How to Snap Two (or More) Windows Side by Side
Snapping is the quickest way to get two or more windows arranged neatly on screen without manually resizing each one.
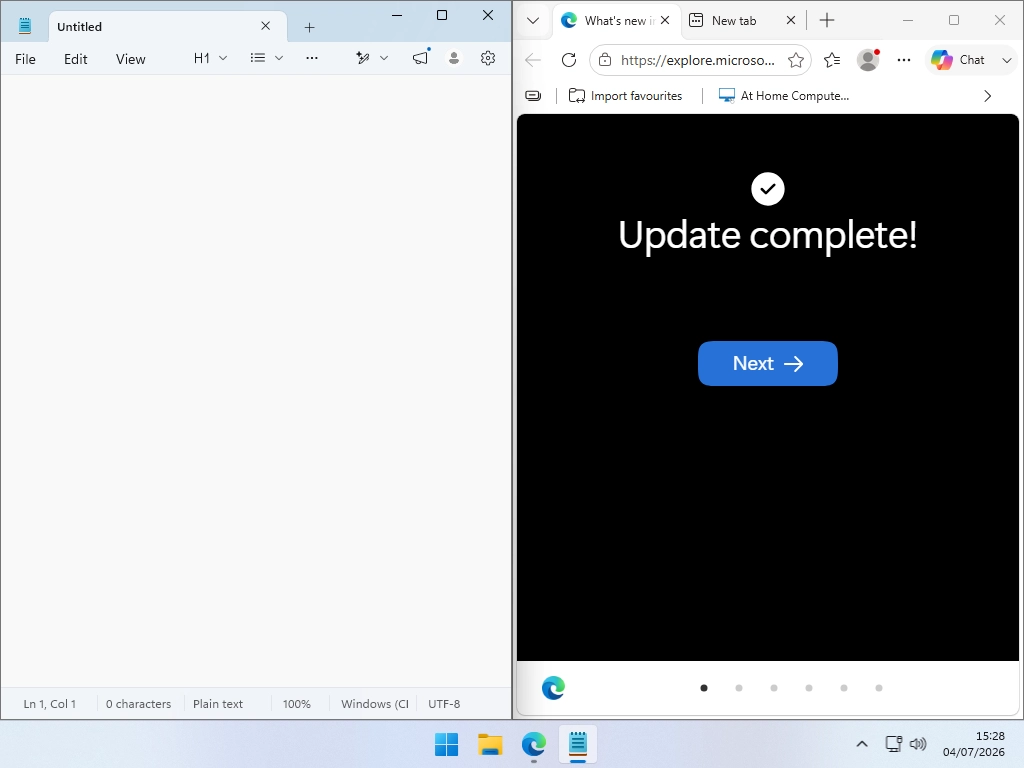
In Windows 11 (Snap Layouts): Hover over a window’s Maximise/Restore Down button — don’t click — and choose one of the layout shapes that appears. Windows resizes the window to fit that section of the screen, then shows thumbnails of your other open windows so you can fill the remaining space with a single click.
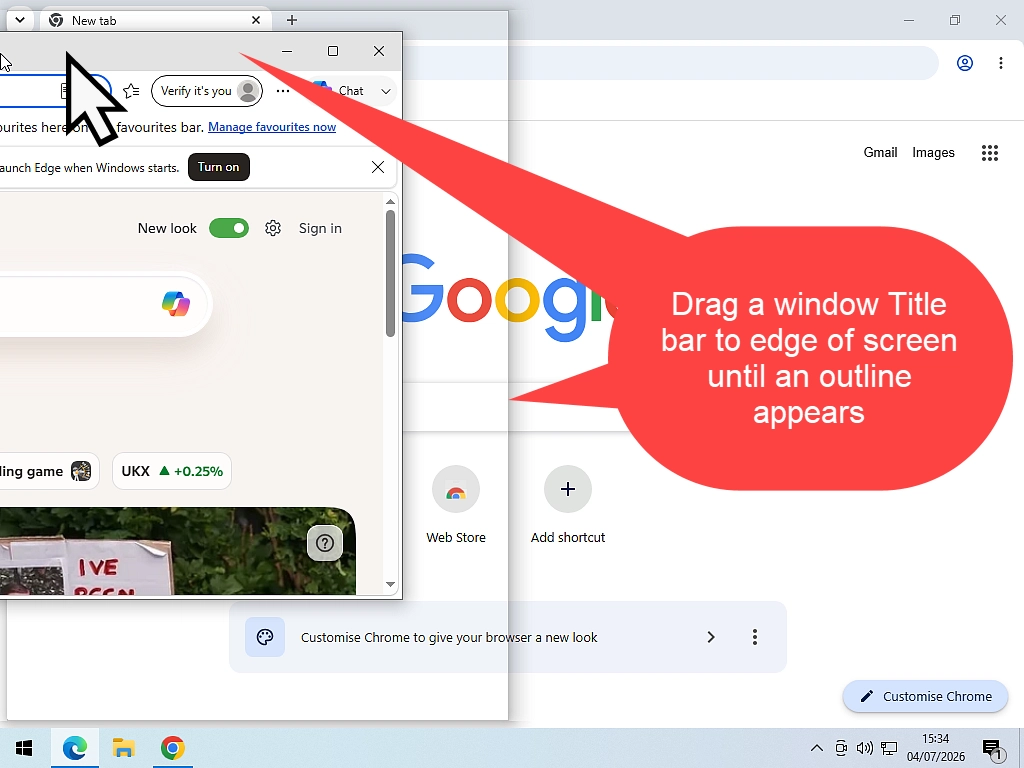
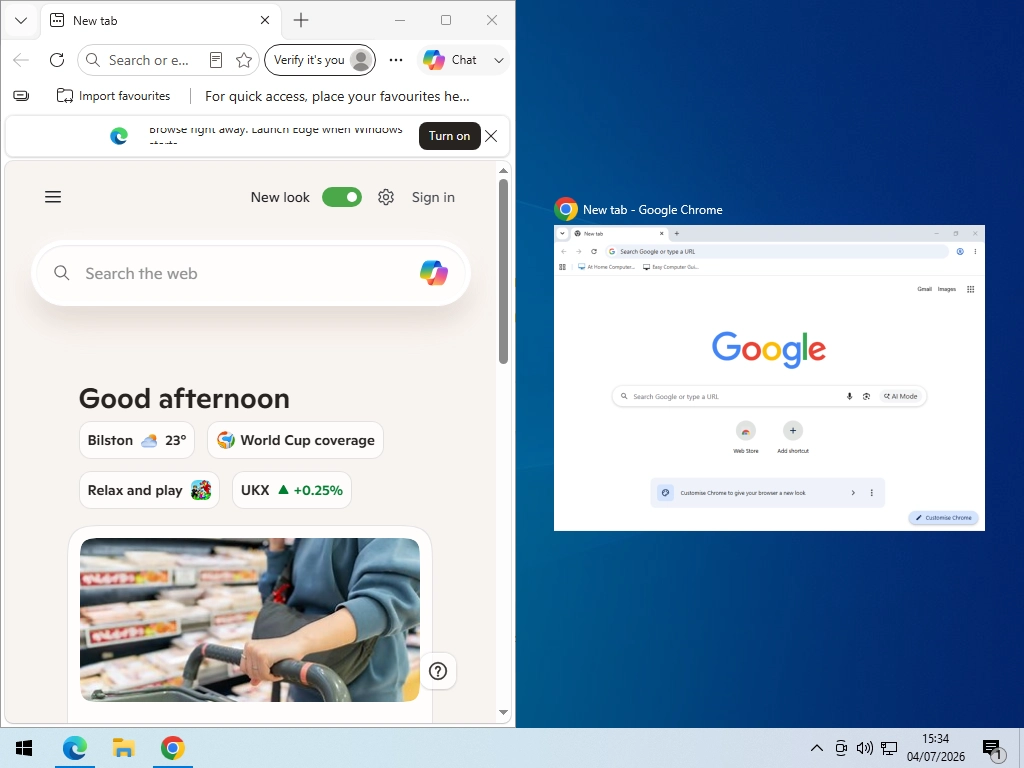
In Windows 10 (Snap Assist): Drag a window’s title bar to the left or right edge of the screen until an outline appears, then let go. The window snaps to fill that half of the screen, and Windows shows thumbnails of your other open windows so you can choose one to fill the other half.
| Windows 10 (Snap Assist) | Windows 11 (Snap Layouts) | |
|---|---|---|
| How you trigger it | Drag the window to a screen edge | Hover over the Maximise/Restore Down button |
| Layout options | Halves and quarters | Halves, thirds and quarters (varies by screen size) |
| Keyboard shortcut | Windows key + Arrow keys | Windows key + Arrow keys, or Windows key + Z |
| Fills remaining space for you | Yes, via thumbnails | Yes, via thumbnails |
Once two windows are snapped side by side, you can resize them together: hover your pointer over the dividing line between them until it highlights, then drag it left or right. Both windows resize at the same time.
Troubleshooting: When a Window Won’t Behave
Most of the time, resizing and moving windows just works. But two problems come up often enough to be worth their own section.
A Window Has Disappeared or Moved Off-Screen
This usually happens after unplugging a second monitor, or after changing your screen resolution — Windows can “lose track” of where a window is supposed to sit.
To bring it back:
- Click the program’s icon on the taskbar, or press Alt + Tab, to make sure it’s the active window.
- Press Alt + Space, then M to select Move.
- Press any arrow key once — this switches on the move cursor.
- Move your mouse, and the window should jump back into view. Click to drop it in place.
If that doesn’t bring it back, try right-clicking an empty part of the taskbar (Windows 10 only) and choosing Cascade windows, which pulls every open window back onto the main screen.
On Windows 11, pressing Windows key + P and choosing PC screen only often fixes windows left stranded on a disconnected second monitor.
A Window Won’t Resize
If dragging the edge of a window does nothing, work through these in order:
- Check it’s not maximised. A maximised window can’t be resized — click Restore Down first.
- Check it’s not a fixed-size window. Some older programs and dialog boxes are deliberately fixed and simply can’t be resized, no matter what you try.
- Try the keyboard method. Press Alt + Space, then S, then use the arrow keys. This sometimes works even when dragging with the mouse doesn’t.
- Check your display scaling. Go to Settings > System > Display and make sure Scale is set to 100% or 125%. Unusual scaling settings occasionally stop older apps from resizing correctly.
Frequently Asked Questions
Press Alt + Space to open the window menu, then press S for Size, then use the arrow keys to resize, and Enter to confirm.
Select the window with Alt + Tab, press Alt + Space then M for Move, tap an arrow key once, then move your mouse to bring the window back into view.
Two overlapping squares means the window is already maximised. Clicking the button will Restore Down (shrink) the window to its previous size.
Yes. Select the window and press Windows key + Left arrow or Windows key + Right arrow to snap it to either half of the screen.
The Snap Layouts flyout menu (which appears when you hover over the Maximise button) is a Windows 11 feature. Windows 10 has a similar feature called Snap Assist, which works by dragging a window to the edge of the screen instead.
Summary
Once you understand how the Minimise, Maximise and Restore Down buttons work, moving and resizing windows — with a mouse or a keyboard — becomes second nature. And with Snap Layouts in Windows 11, or Snap Assist in Windows 10, you can have several windows arranged neatly on screen in just a couple of clicks.
Next Lesson
How to use Windows File Explorer
File Explorer is the way in which you navigate around your computer. Find files, save them, delete them, it’s all done through File Explorer
Course Progress – 6 of 37
Part of the At Home Beginner Computer Course.
Previous Lesson
Make Text and Icons Bigger
Hi-Def computer screens make everything appear small. Change the size of icons and text to easily.