Core Isolation Memory Integrity is a security feature of Windows 10 and Windows 11 that can help to prevent cyber attacks on your computer.
One of the main features of Core Isolation is Memory Integrity which prevents malware and other malicious code from hijacking high-security processes.
It works by using virtualization to isolate critical system processes from the rest of your operating system. This makes it more difficult for malware to tamper with these processes and gain control of your system.
That’s the good news, the bad news is that Core Isolation Memory Integrity does have an impact on your system’s performance. For that reason, in this guide I’ll show you how to both enable and also how to disable it.
Core Isolation Memory Integrity.
Core Isolation Memory Integrity security feature built into Windows 10 & 11. It should be enabled by default.
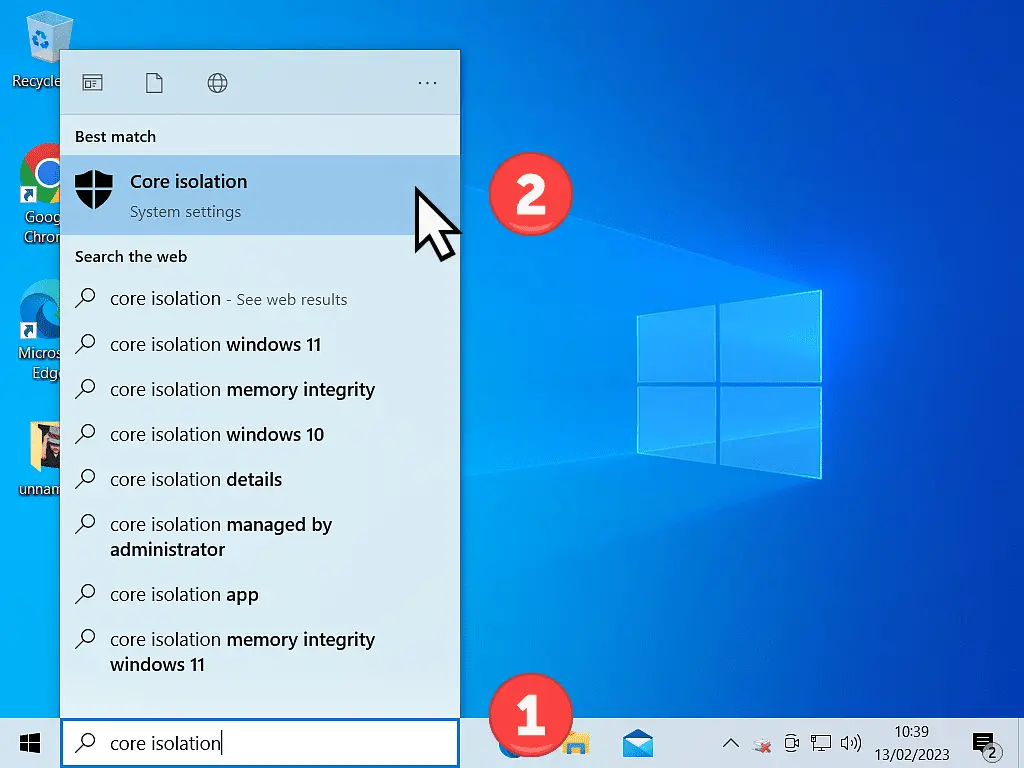
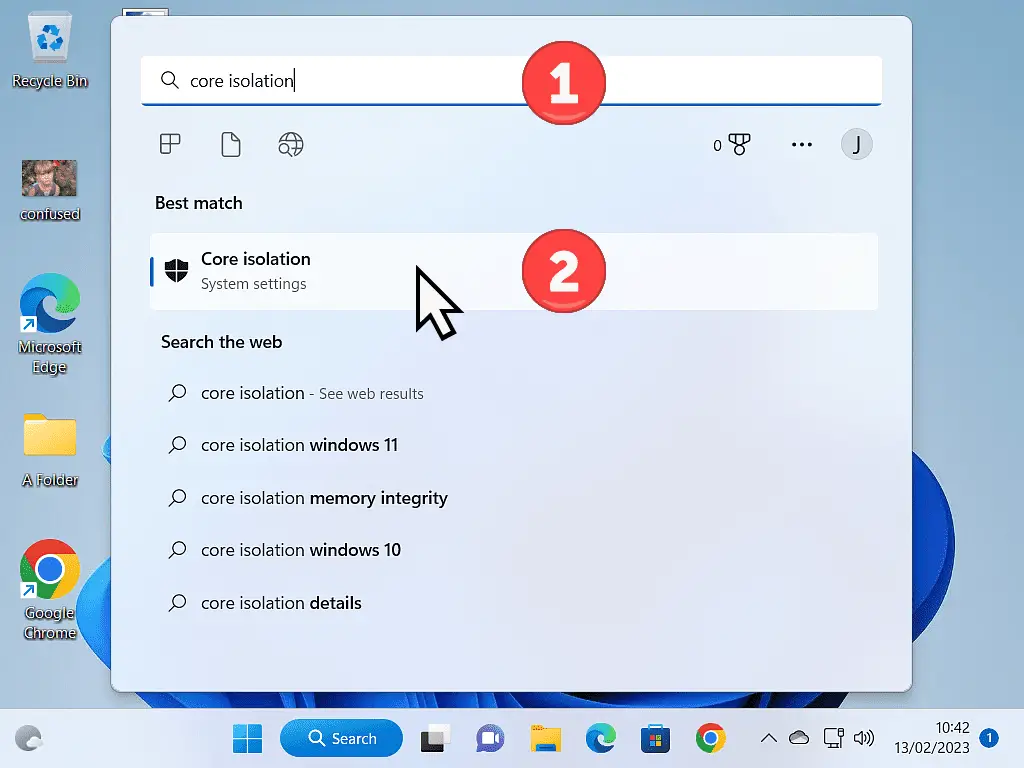
To check whether it is actually enabled and working on your computer click the Start button and type “core isolation“
Left-click on “Core Isolation (System Settings), which appears at the top of the search results.
How To Enable Or Disable Core Isolation Memory Integrity In Windows.
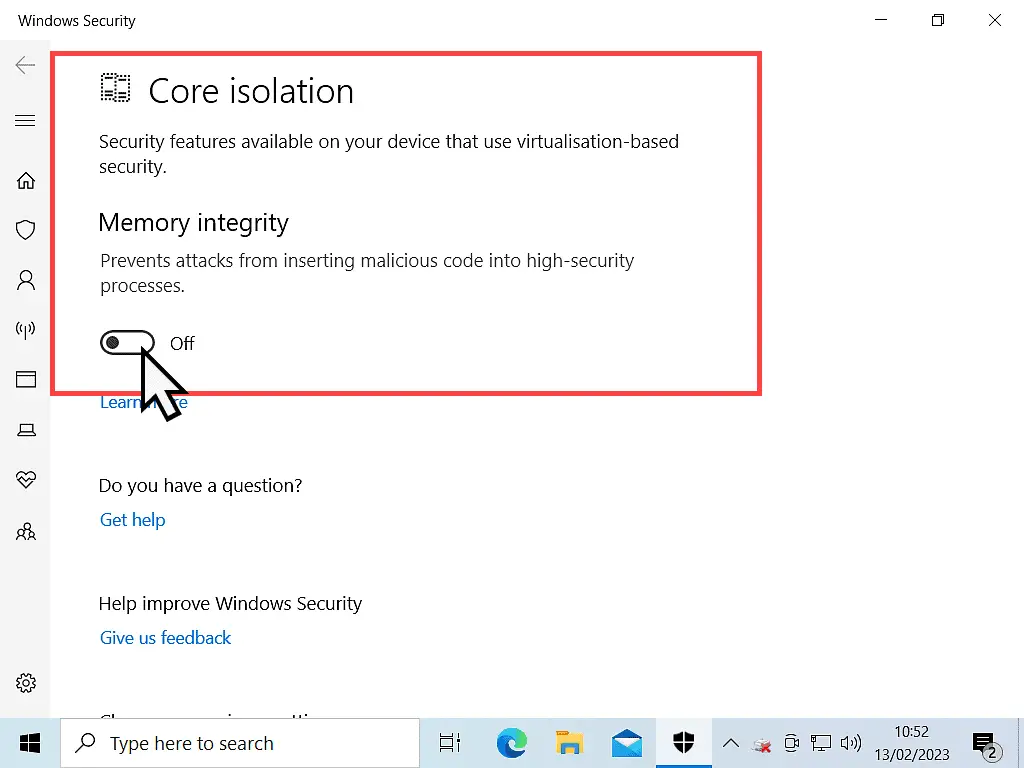
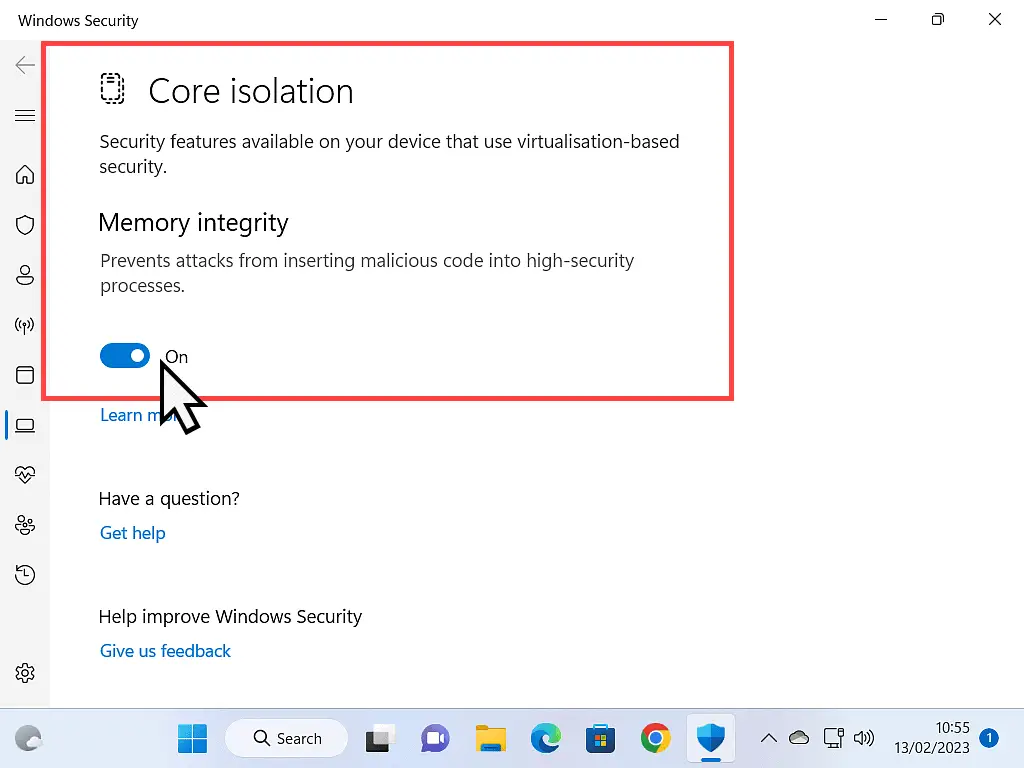
Windows Security will open on the settings screen for Core Isolation.
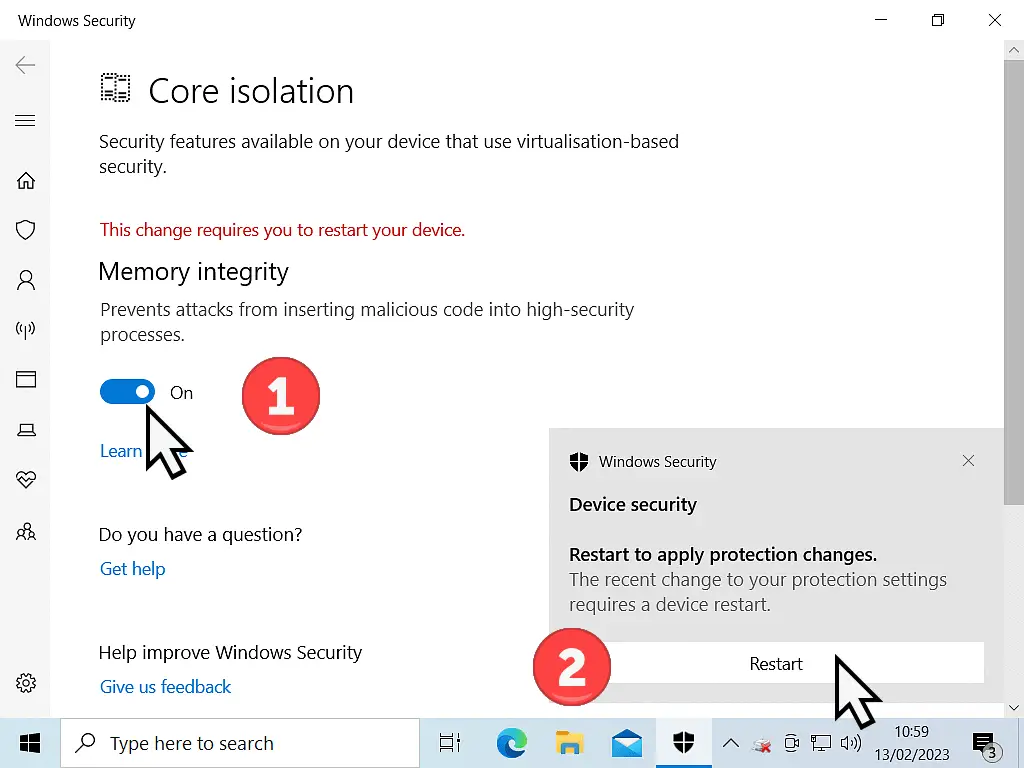
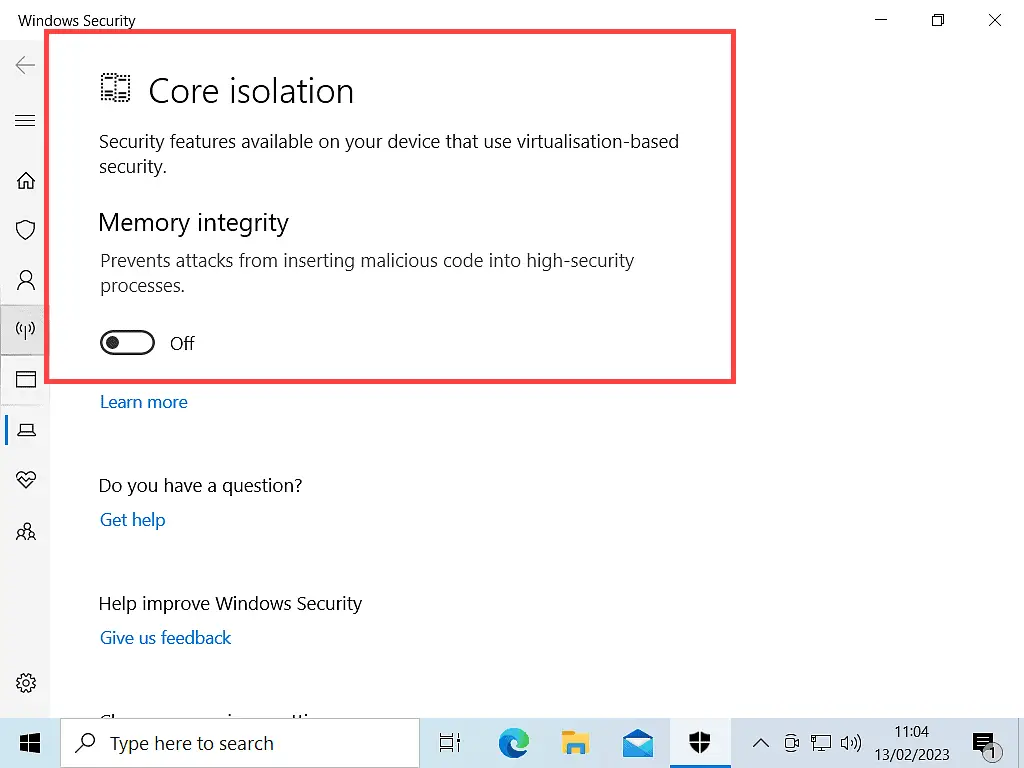
You can either enable or disable Core Isolation by clicking the Memory Integrity toggle switch to on or off.
Core Isolation Memory Integrity Might Not Be Available On Your PC.
You may find that core isolation memory integrity doesn’t enable on your computer. In order to take advantage of the security benefits of Core Isolation, you need to have virtualization enabled on your computer motherboard. Without virtualisation, it just won’t work. How To Enable Virtualisation On A PC.
On Windows 11 core isolation should be enabled by default and you can disable it whenever you need to simply by clicking on the toggle switch.
But on Windows 10 computers, virtualisation isn’t always enable and so core isolation just won’t work. Even if you enable it, after restarting your computer you might find that it’s disabled again.
Performance Issues.
Enabling Core Isolation on your computer will adversely affect your computer’s performance. Your computer will boot up (start) a little slower than it did before and some applications will take a few moments longer to load.
Exactly how much the performance of your particular computer will be affected will vary considerably. It all really depends on your machine and how you use it. I’ve seen estimates quoting a performance hit of between 2% and 7%.
However the real test is whether or not you, on your home computer, you can actually notice the hit. Does it affect what your doing, how your working or playing? And can you live it?
Should You Enable Or Disable Core Isolation.
The underlying technology behind Core Isolation will improve over time. Hardware will catch up and negate the performance issues that having it enabled currently produces.
But that’s for the future, what about right now? Well the only person who can answer that question is you.
If you’ve bought a Windows 11 computer recently, then Core Isolation will almost certainly be turned on by default. If you’re reasonably happy with your computer, then personally, I’d leave it enabled. The security benefits it brings are becoming ever more important.
However if you want, or need, to get a little more from your machine, then try disabling it. You might be pleasantly surpried at the extra little boost your computer receives. Bear in mind that you’re turning off an important security feature, so test thoroughly to make sure you really are gaining on performance.
For everyone else, then Core Isolation (Memory Integrity) probably won’t be enabled by default. If you turn it on, you may or may not notice the difference. And if you do notice it, then by how much? Can you live with it? Is it workable? Or is it slowing down an already slow machine?
Stay Informed. Stay In Touch.
Now that you’ve found me, keep in touch. I publish new articles and update older ones constantly.
Let me send you a monthly email with all the latest guides for you to see if there’s anything you’re interested in.
