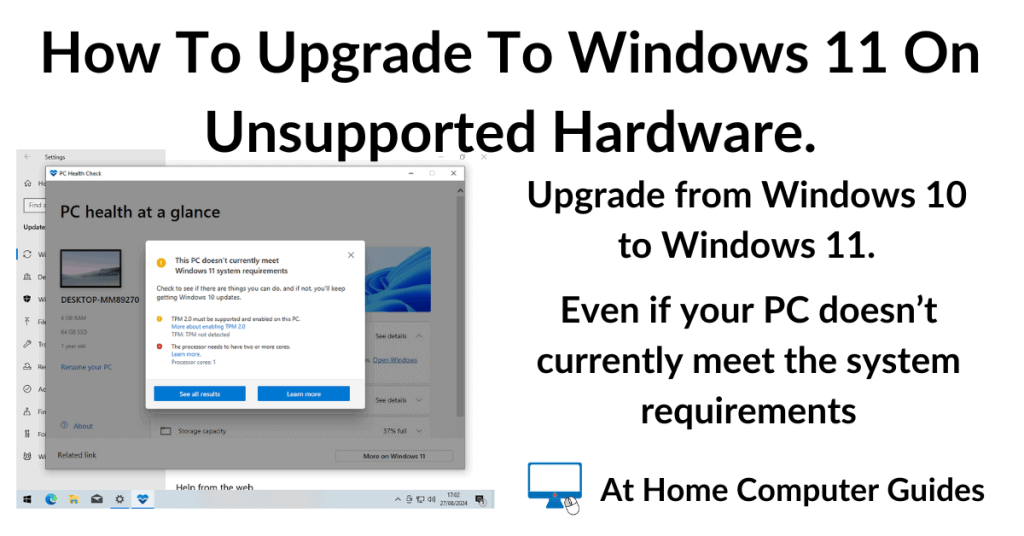
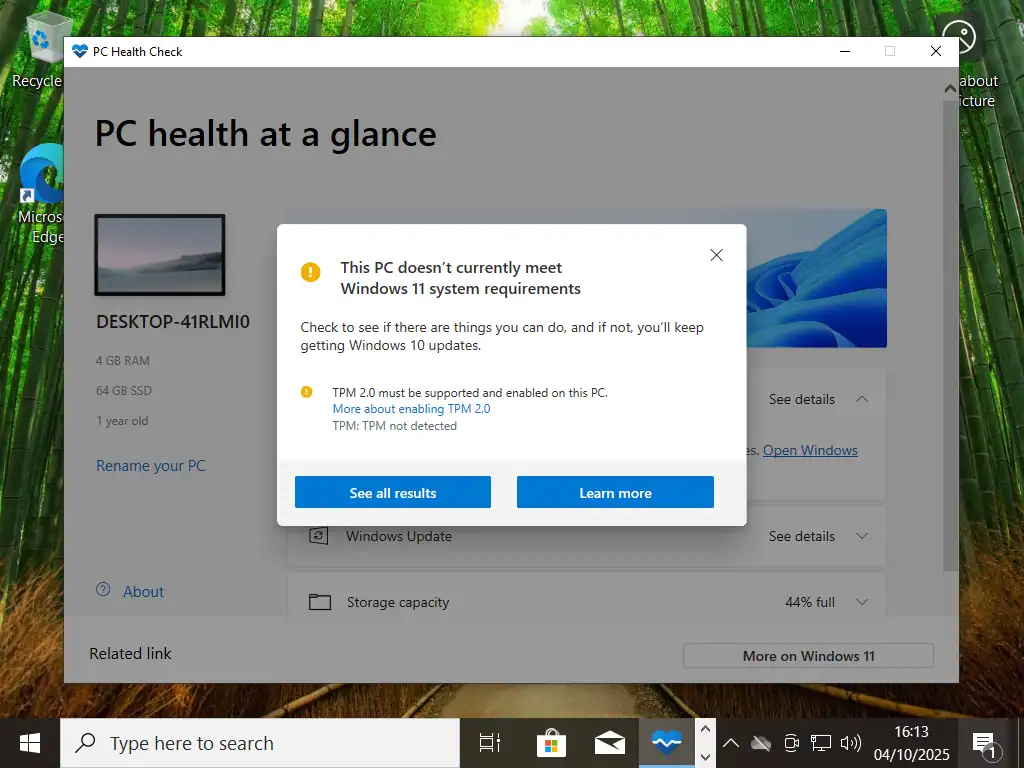
How to upgrade to Windows 11 on unsupported hardware. I’ll show you step by step how to get around the “This PC doesn’t currently meet the Windows 11 system requirements” notification.
In order to upgrade to Windows 11 on unsupported hardware you’ll need to download the Windows 11 ISO file and then remove the system requirements from it. Once that’s done, Windows 11 will install on to your unsupported PC.
This PC Doesn’t Currently Meet The Windows 11 System Requirements
Many Windows 10 computers, while they work perfectly well, will fail to meet the system requirements for Windows 11. Windows 11 requires a computer to support TPM 2 (Trusted Platform Module), Secure Boot enabled and also have a supported CPU (Central Processing Unit).
Should your current PC fail any of these requirements, then you won’t be able to upgrade it to Windows 11. At least not officially. But as I’ve said, I’ll show you how to do it.
Preparing To Upgrade To Windows 11 On Unsupported Hardware
To upgrade to Windows 11 on unsupported hardware download the latest official Windows 11 ISO file from Microsoft. You can get it from here –
https://www.microsoft.com/en-us/software-download/windows11
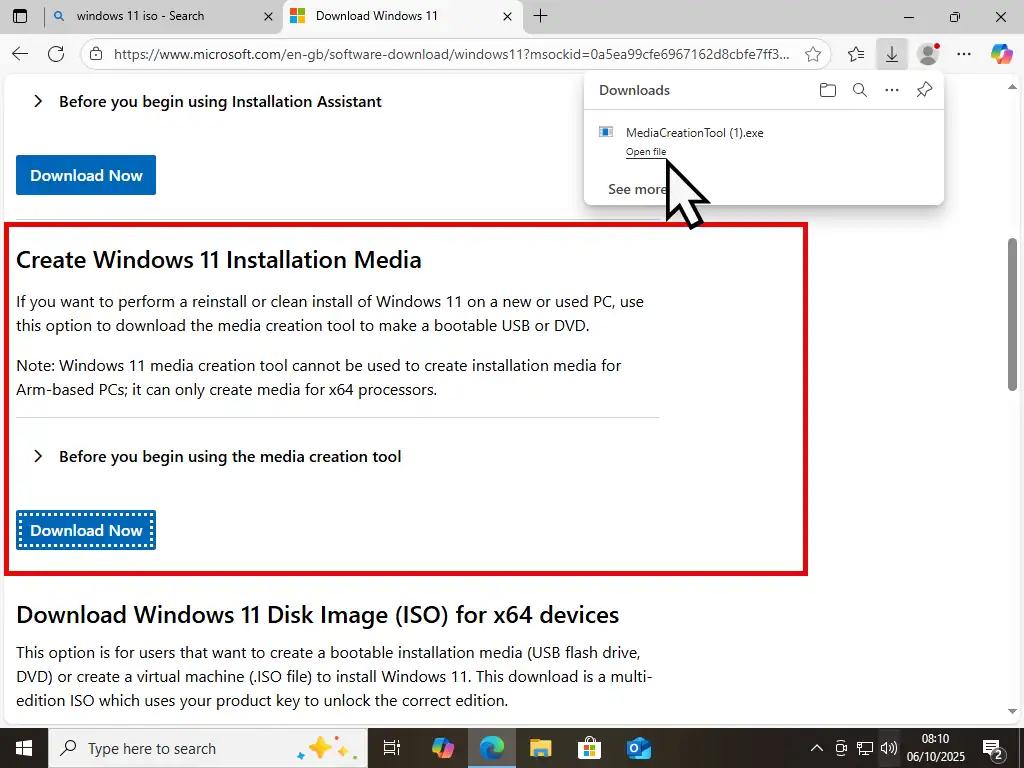
Scroll down the page a little to the “create Windows 11 Installation Media” section. Click the Download Now button to download the Media Creation Tool. It only takes a few seconds. Once it’s downloaded run the Tool either from within your browser or from wherever you saved it to.
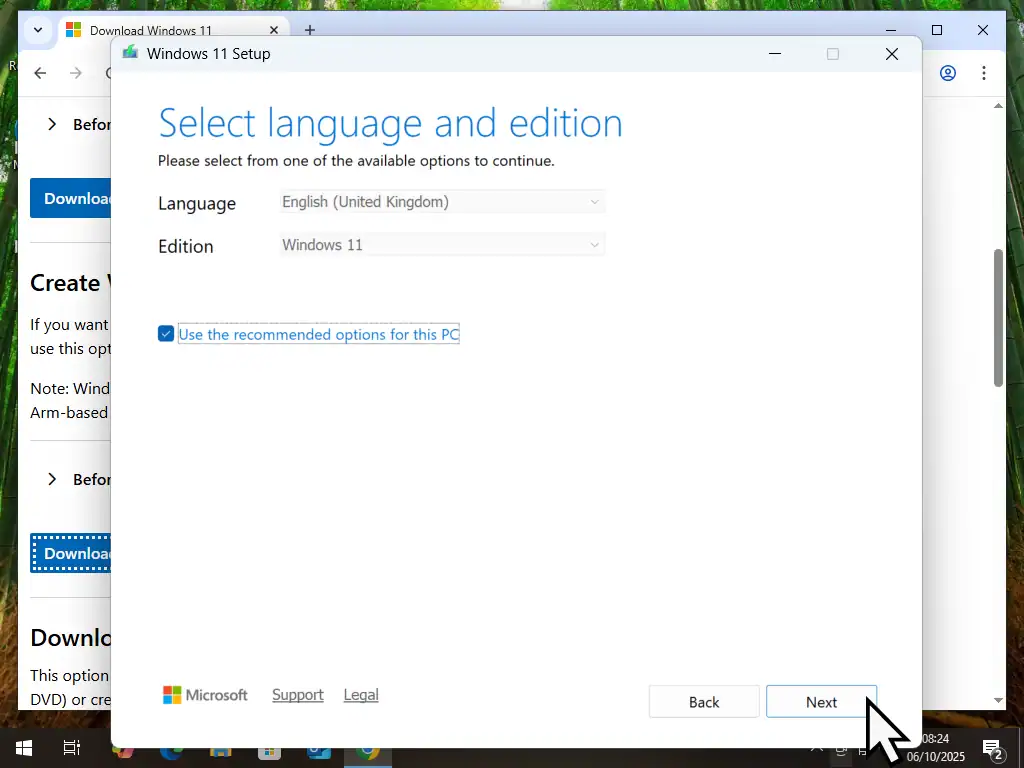
The first screen you’ll see will be a terms and conditions notice. Click Accept to proceed. On the Language and Edition screen, click Next.
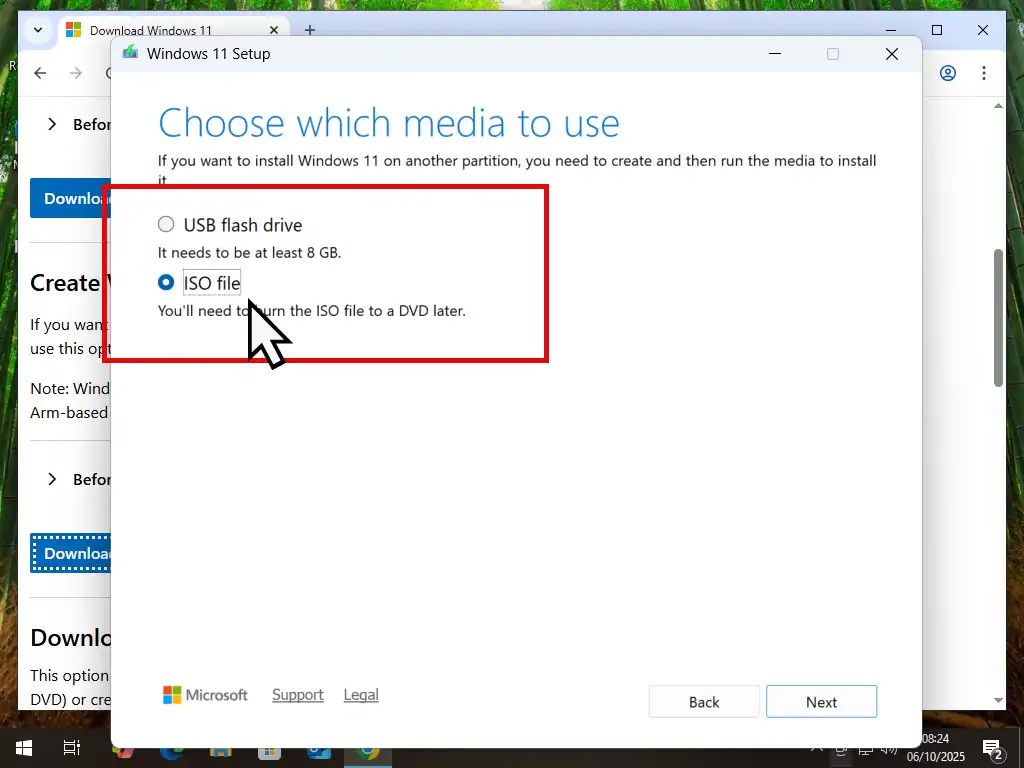
Choose which media to use – This is the important part. Make sure that you select ISO file. Click the Next button and save the file to your computer.
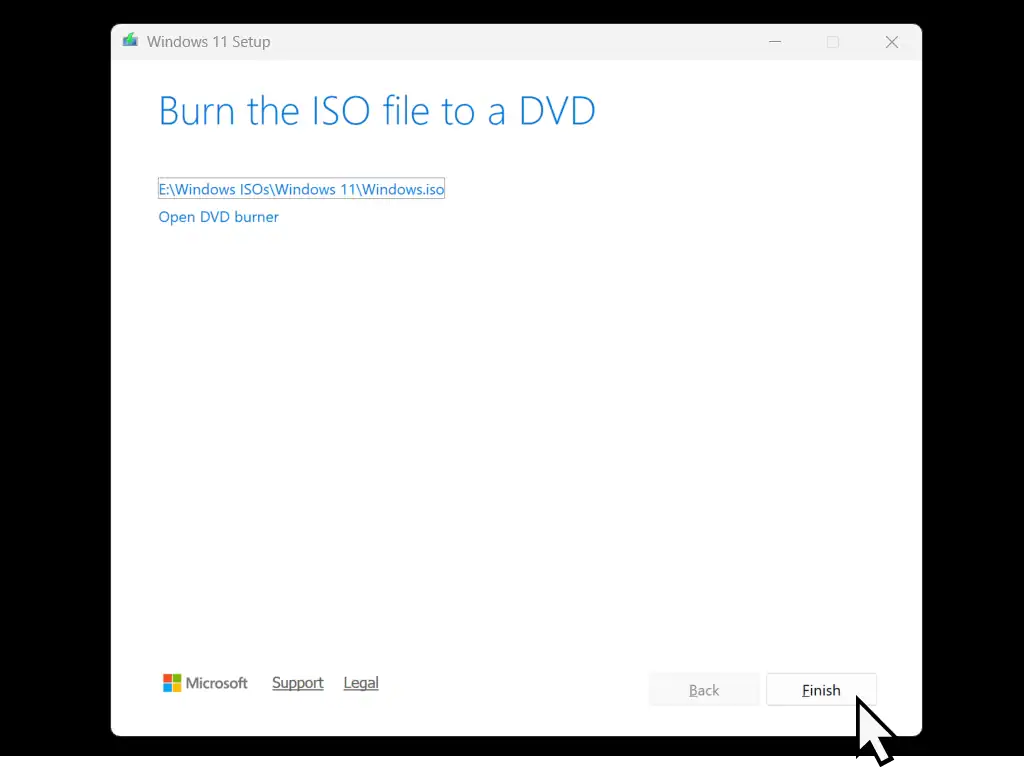
When it’s finished downloading, click the Finish button.
Plug In A USB Flash Drive
If you haven’t already, plug in the USB flash drive that you’re going to use. The Windows 11 installation files will be written to this drive.
Be sure that there isn’t anything on the drive that you need because it’ll be formatted and everything will be erased.
A quick tip here is to unplug any other drives. When you’ve only got one flash drive connected you can’t accidentally select the wrong one.
Check Which Partition Scheme You’re Using
This step is vitally important. You’re hard drive could be formatted in either the MBR (Master Boot Record) or the newer GPT (GUID Partition Table) style. How To Convert MBR And GPT Disks
Since you’re upgrading to Windows 11 on unsupported hardware, then you’re hard drive may well be formatted as MBR.
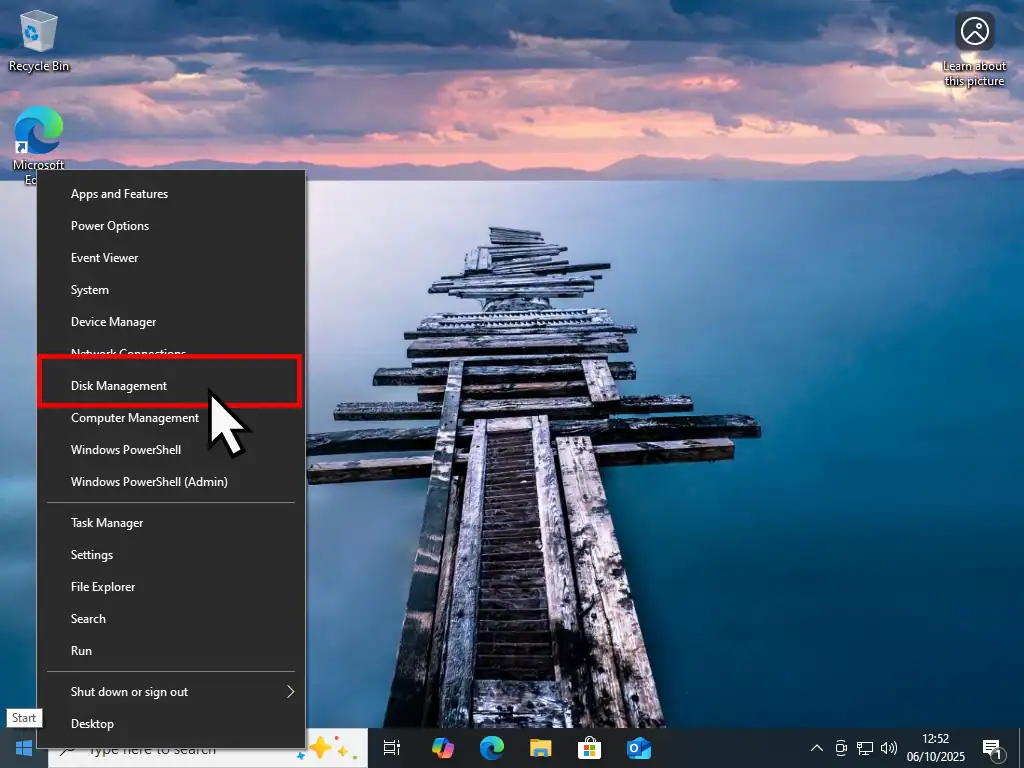
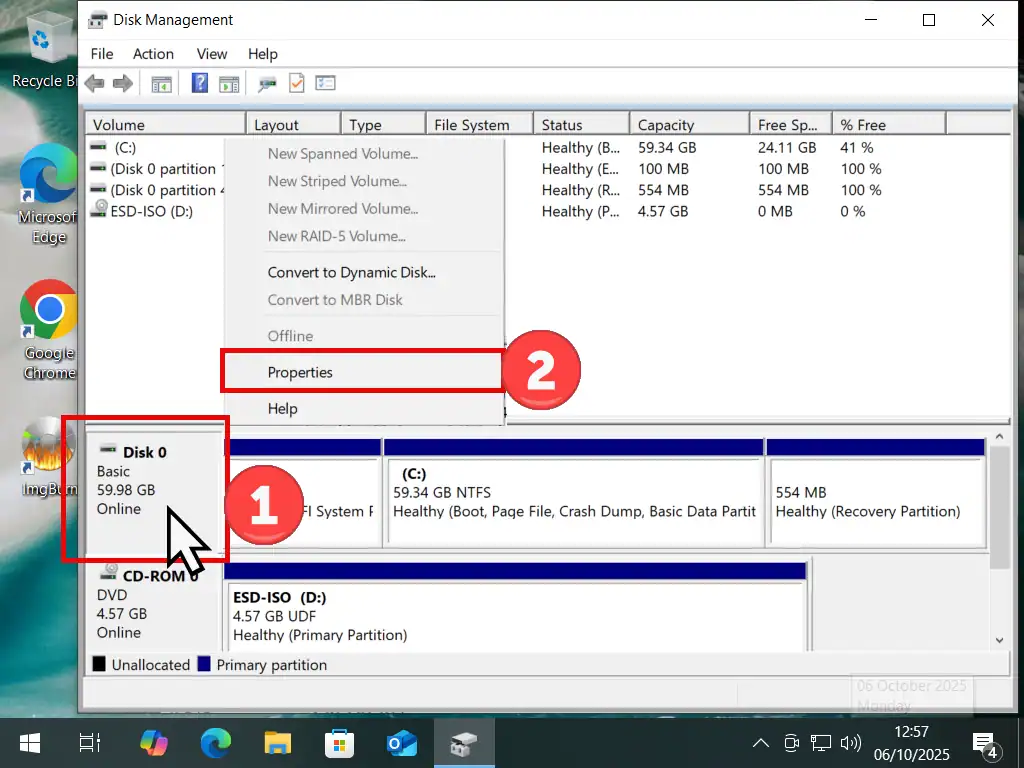
To check which partition style your PC is using, right click the Start button and then left click Disk Management on the menu.
In Disk Management right click the far left hand side of the system disk (usually it’ll be Disk 0). On the menu that opens, left click Properties.
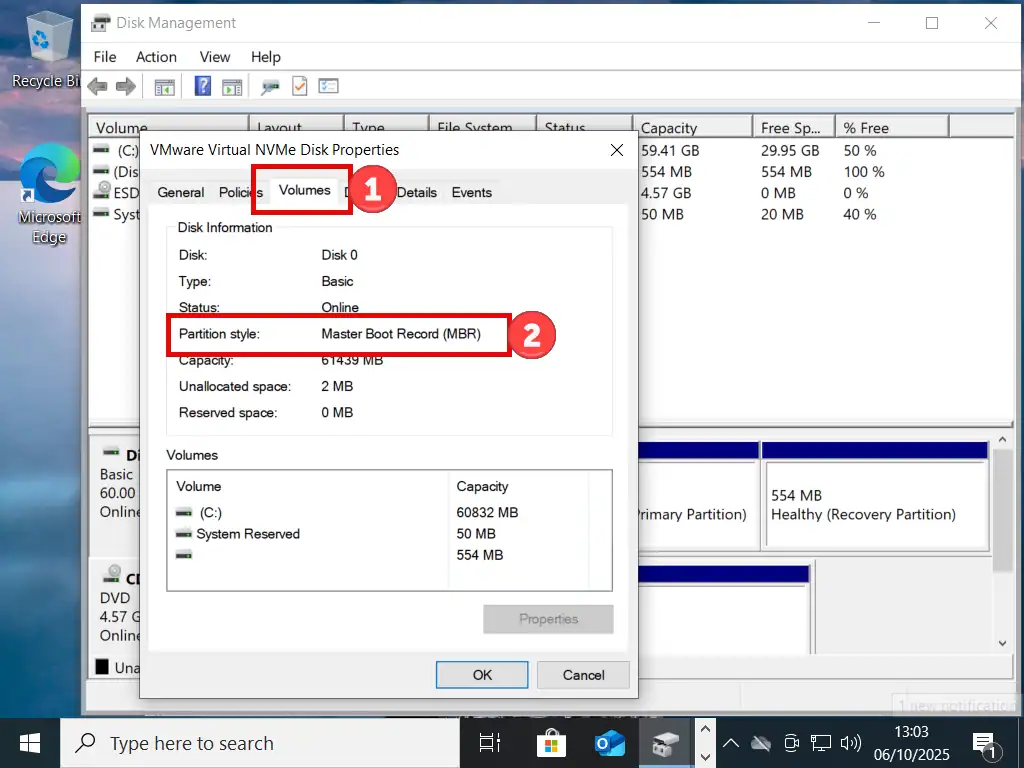
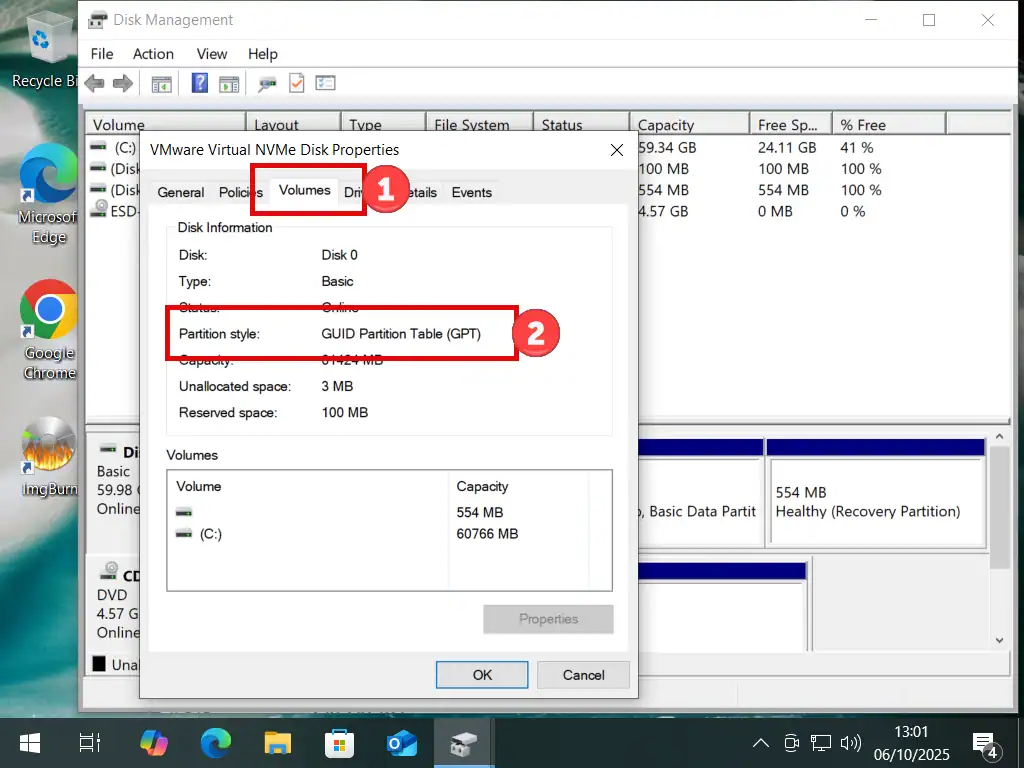
When the Properties window opens, left click the Volumes tab. Check under the Partition Style section which style you’re using, either MBR or GPT.
Once you know which one your hard disk using using you can close Disk Management. Just remember it because you’ll need to know it later.
Download Rufus
Rufus is a free tool that’ll remove the system requirements for Windows 11. Then it’ll rebuild the ISO and create a bootable USB drive that you can use to install Windows 11 on to an unsupported PC.
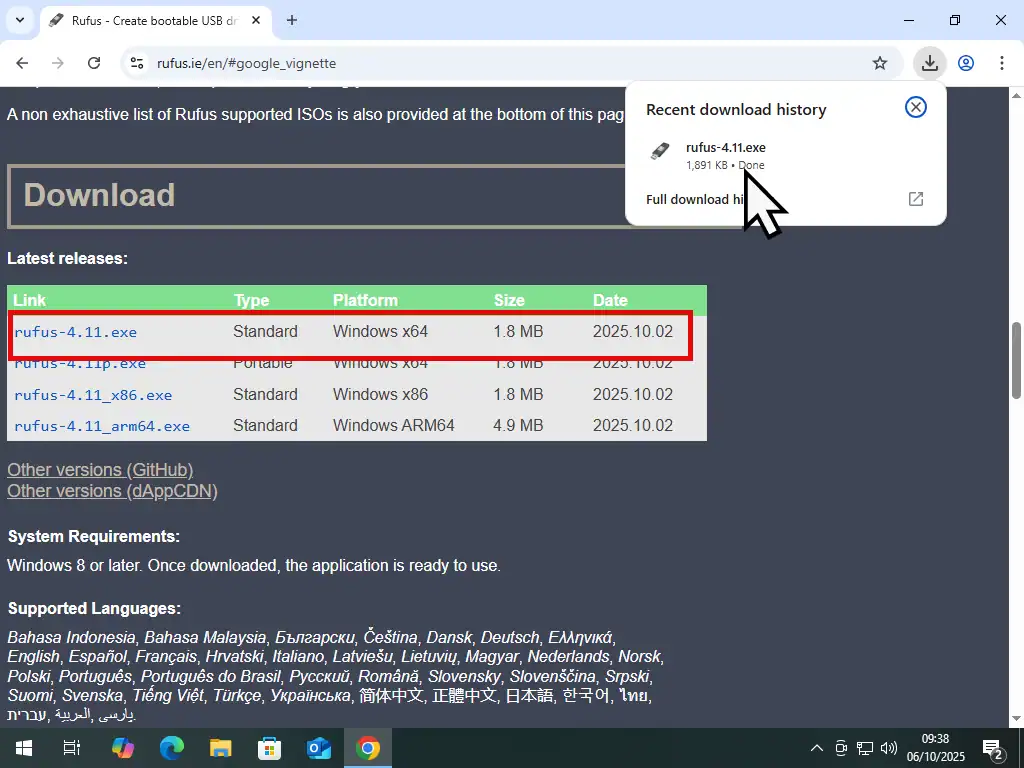
Download Rufus from here –
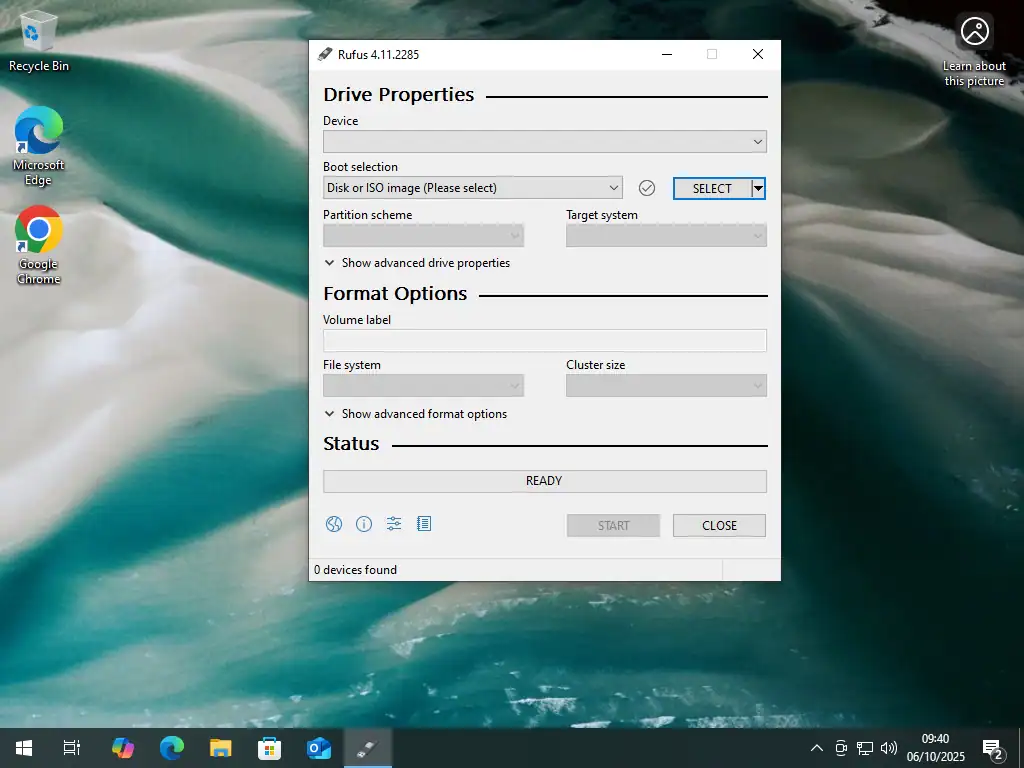
Scroll down the page to the Downloads section and click standard edition for Windows X64. Once it’s downloaded, run it from your browser or the download location.
Upgrading To Windows 11 On Unsupported Hardware
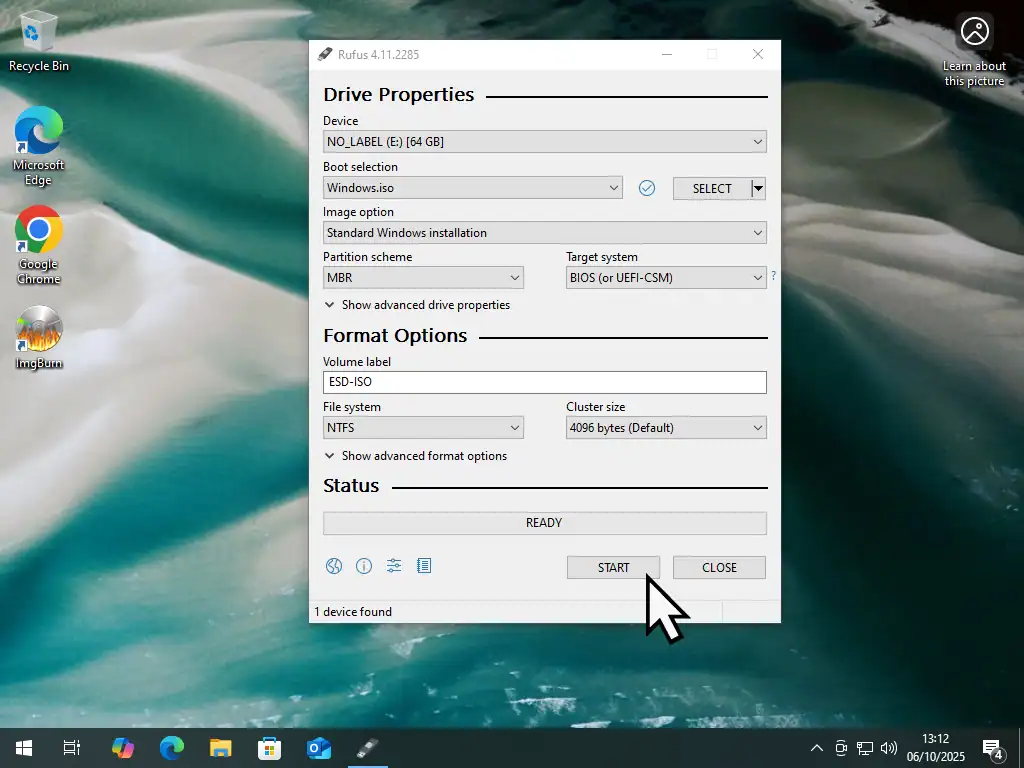
Now everything’s in place it’s time to create a bootable USB drive that’ll install Windows 11 on a computer that’s not supported.
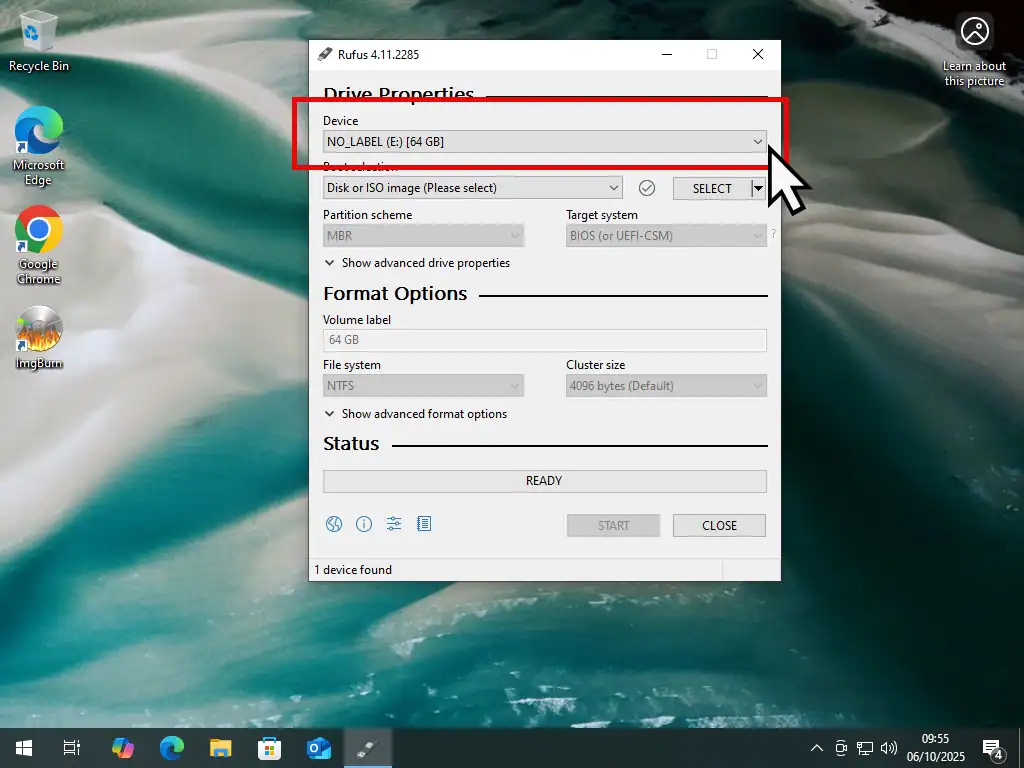
Rufus should have already selected your USB flash drive. If it’s selected the wrong one, click the drop down arrow head and select the right one.
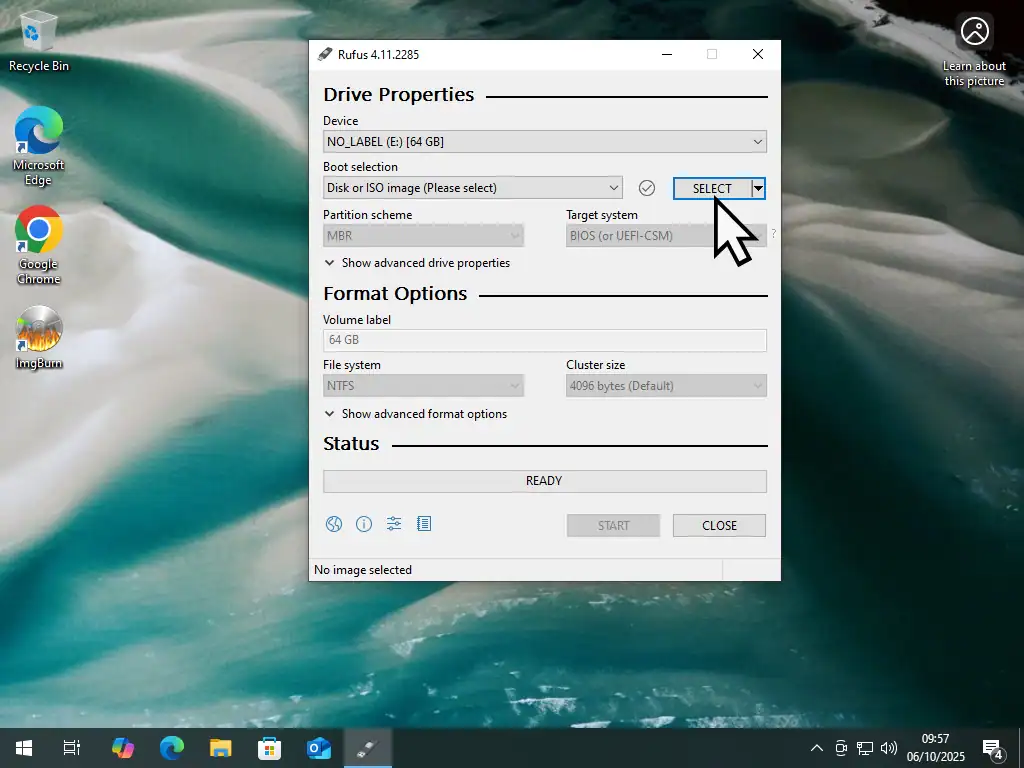
Click the Select button and then find and select the Windows 11 ISO that you downloaded earlier (probably in your Downloads folder).
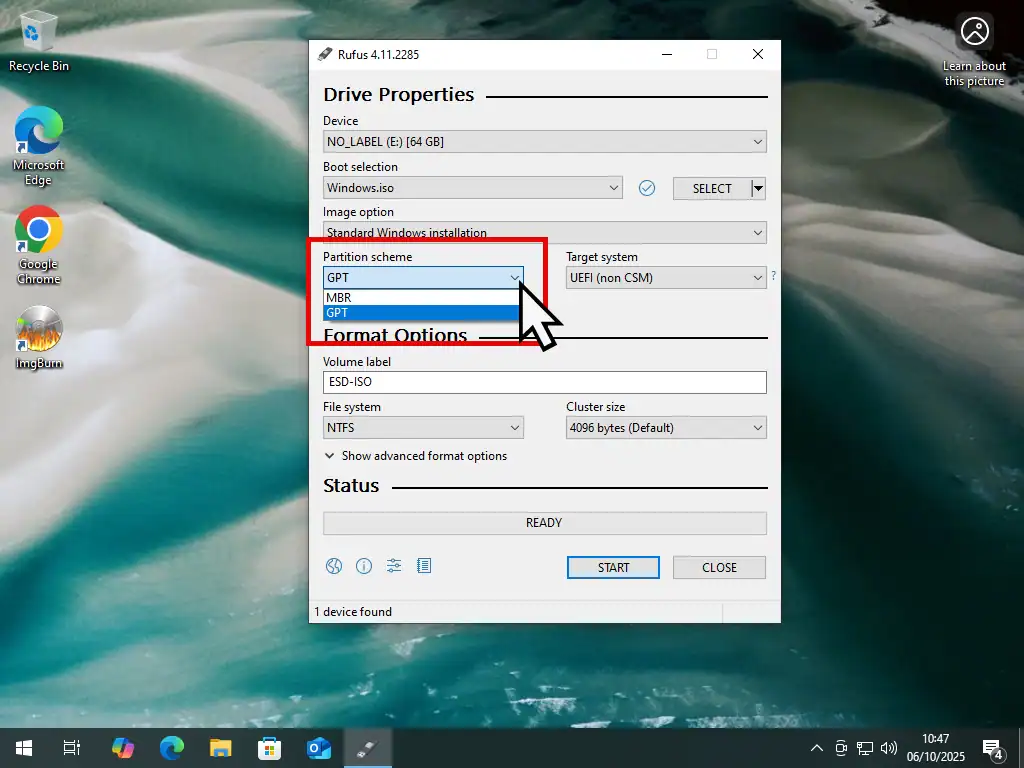
Select the correct Partition Scheme for your device. Click the drop down menu and select either MBR or GPT.
Removing The Windows 11 System Requirements
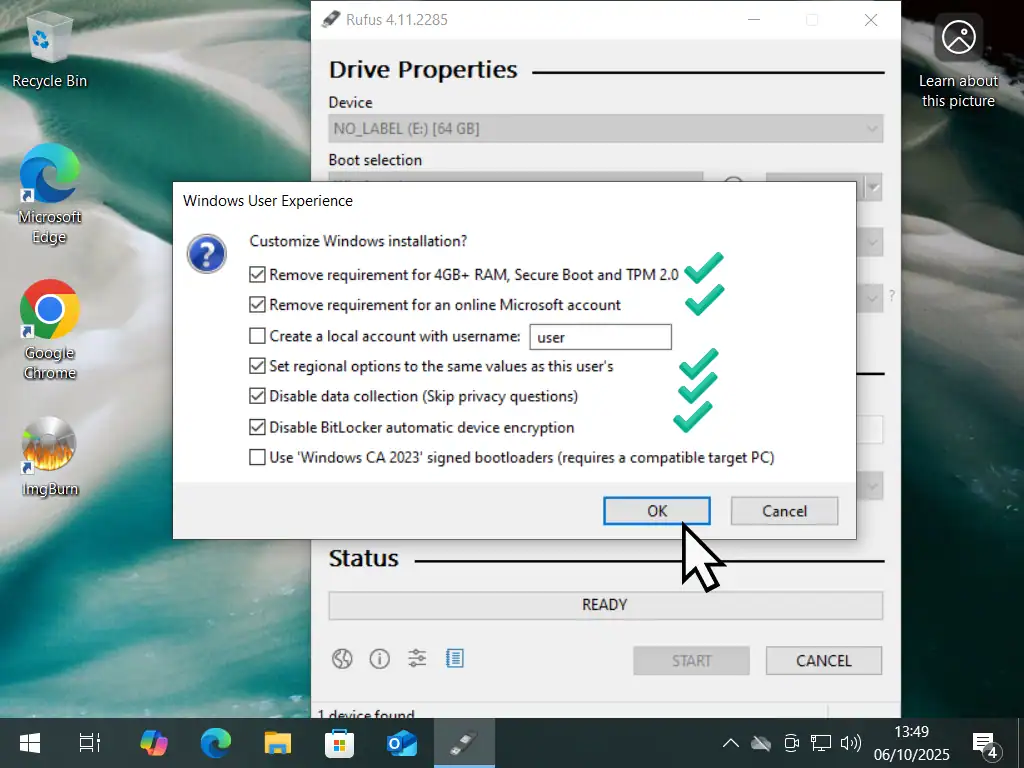
The Windows User Experience window will open. By default Rufus will automatically select “Remove requirements for 4GB + of Ram, Secure Boot and TPM2.0” and also “Require an online Microsoft account”.
It’s these two settings that allows you upgrade to Windows 11 on a PC that’s not supported. So keep these selected.
Since this is an upgrade you can leave the “Create a local account” option unchecked since you already have an account setup.
Check the boxes for “Set regional options etc”, “Disable data collection” and also “Disable BitLocker automatic device encryption”.
When that’s done, click the OK button.
You’ll see a warning that all the data on the USB flash drive will be destroyed. Click OK.
About The BitLocker Option
You’re upgrading to Windows 11 on an unsupported computer that probably doesn’t have a TPM 2.0 module. BitLocker saves the key to unlock your drive in the TPM. So you need to disable it from attempting encrypt your drive automatically.
If you want to use BitLocker, then take a look at these two guides after you’ve finished upgrading How To Use Microsoft BitLocker. and How To Enable BitLocker Without A TPM.
Start Windows 11 Setup
When Rufus has finished creating the installation USB drive you’re all set to upgrade your PC to Windows 11.
Disconnect from the internet. During the upgrade Windows 11 will check for updates, disconnecting from the internet ensures that a future update doesn’t override the installation files that you’ve just create using Rufus.
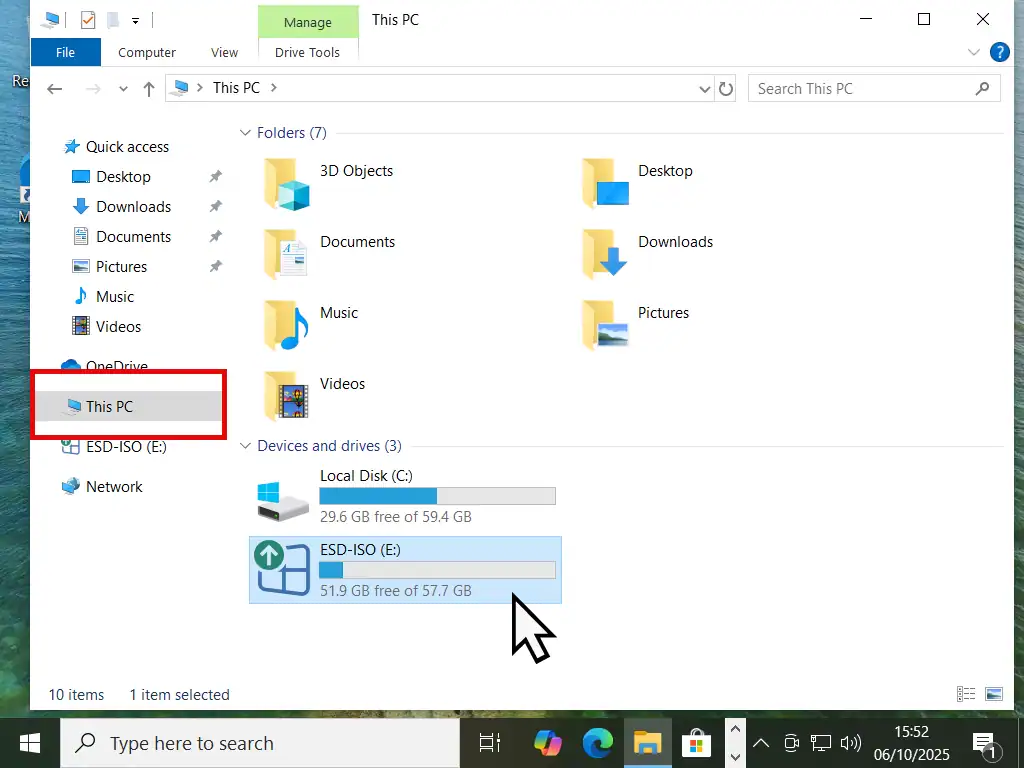
Open File Explorer (Windows key + E) and then click This PC. Double left click on the USB flash drive that you’ve just created earlier to open it.
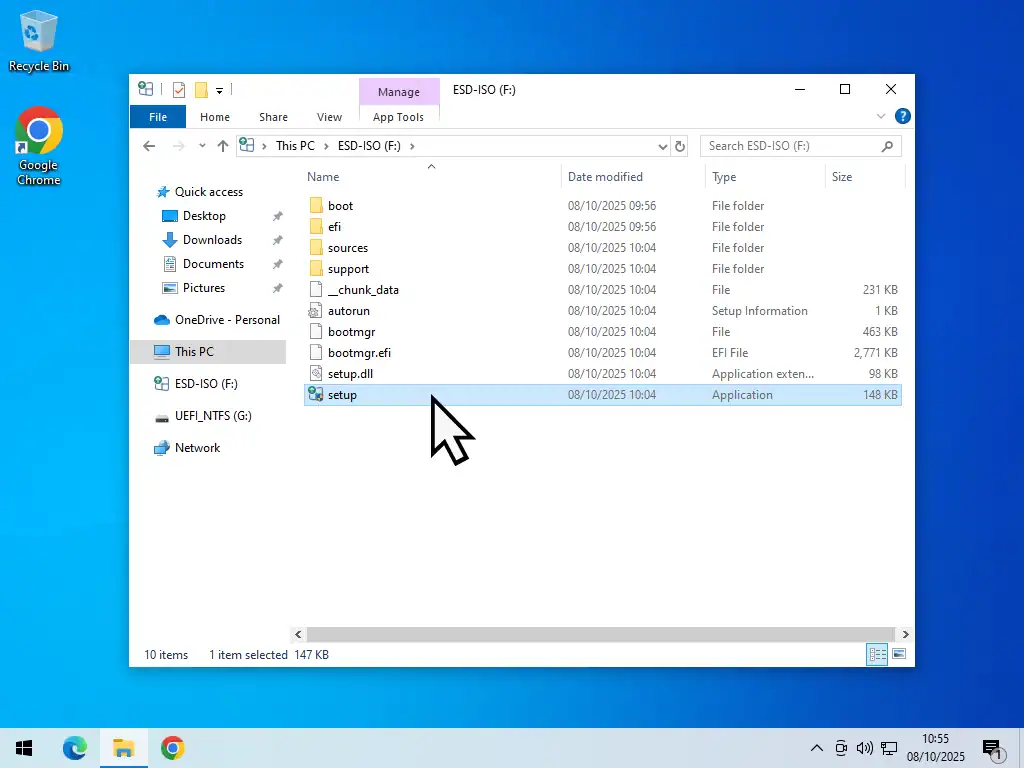
Double click on Setup. You’ll need to allow it to run on the User Account Control popup.
Then the Windows 11 installer will check for updates and after a few minutes you’ll see a Terms and Conditions screen. Click Accept to proceed.
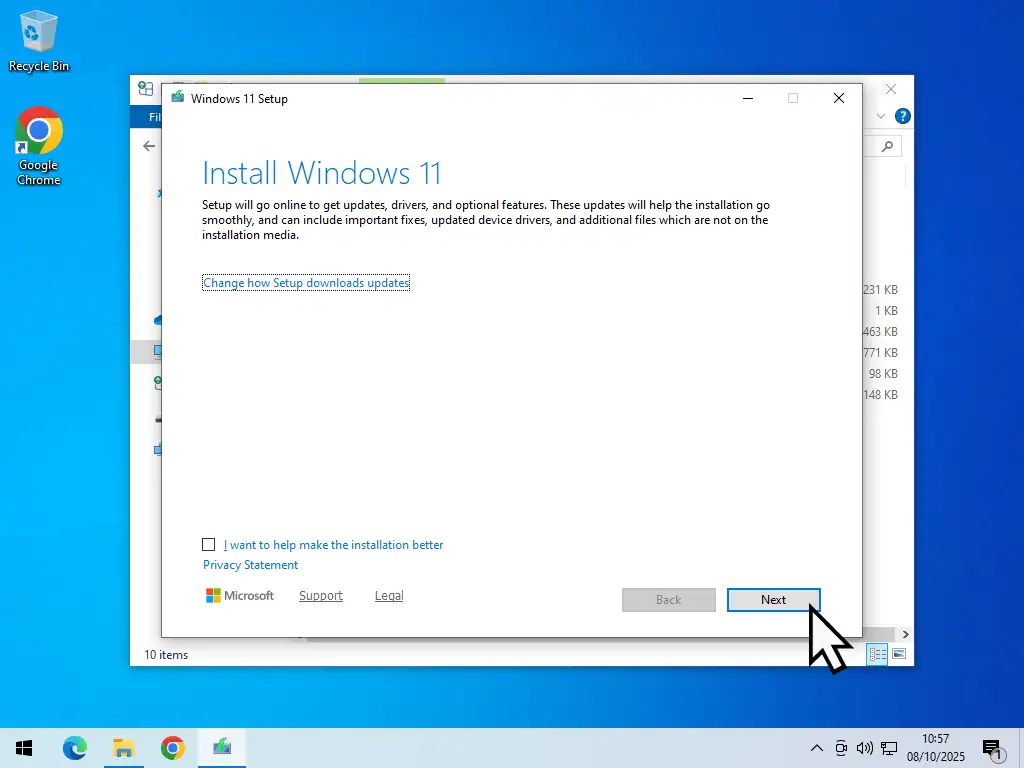
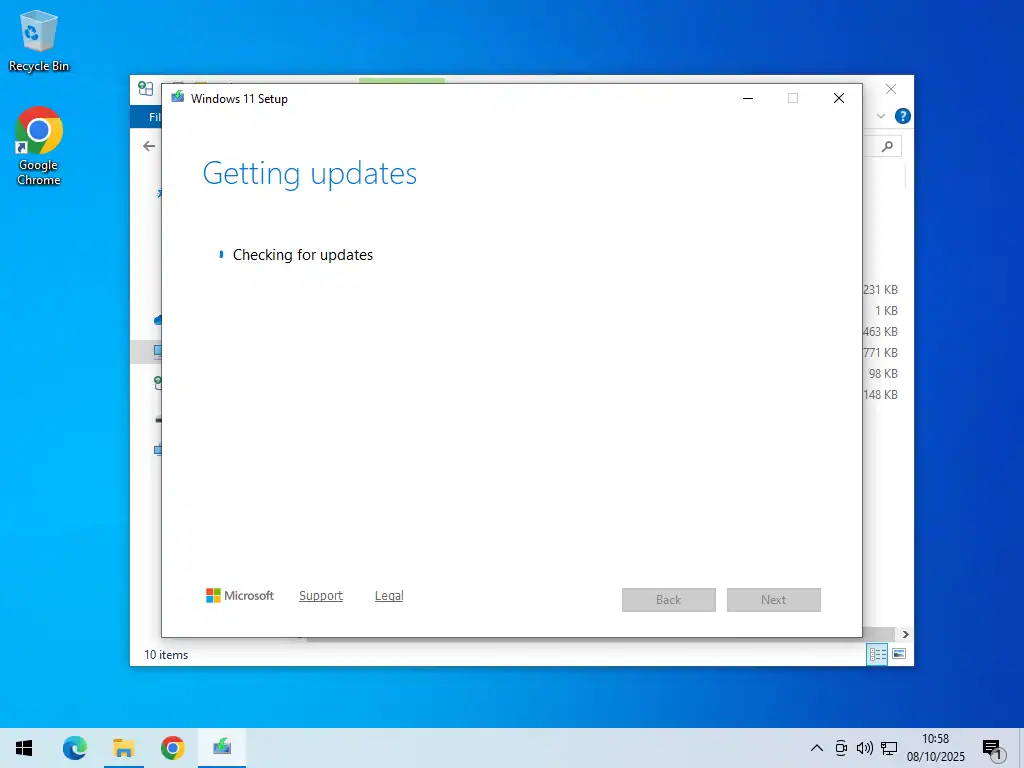
Upgrade To Windows 11 On Unsupported PC
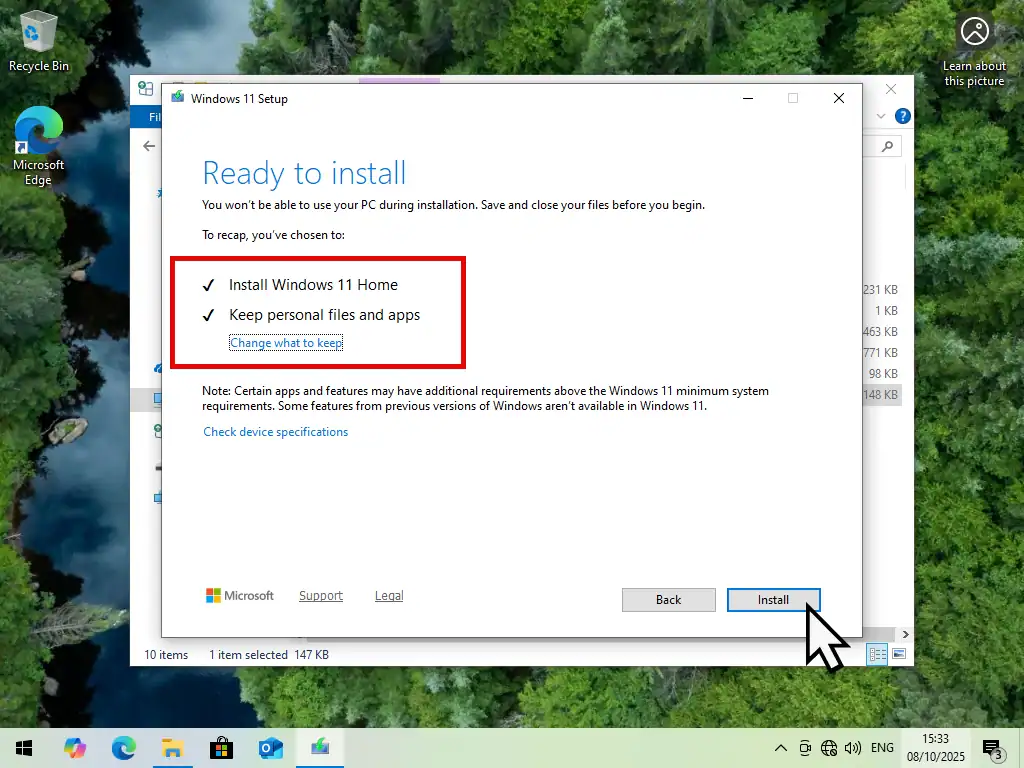
Setup will scan your PC and load files from the USB flash drive. Although the next screen will say “Ready to install”, this isn’t a clean installation, it’s an upgrade. You can keep your files and apps. Click the Install button.
The installation (upgrade) will start, there’s nothing for you to do right now other than to keep your computer on. This is especially important if your upgrading an unsupported laptop, make sure that you’re plugged into the power supply.
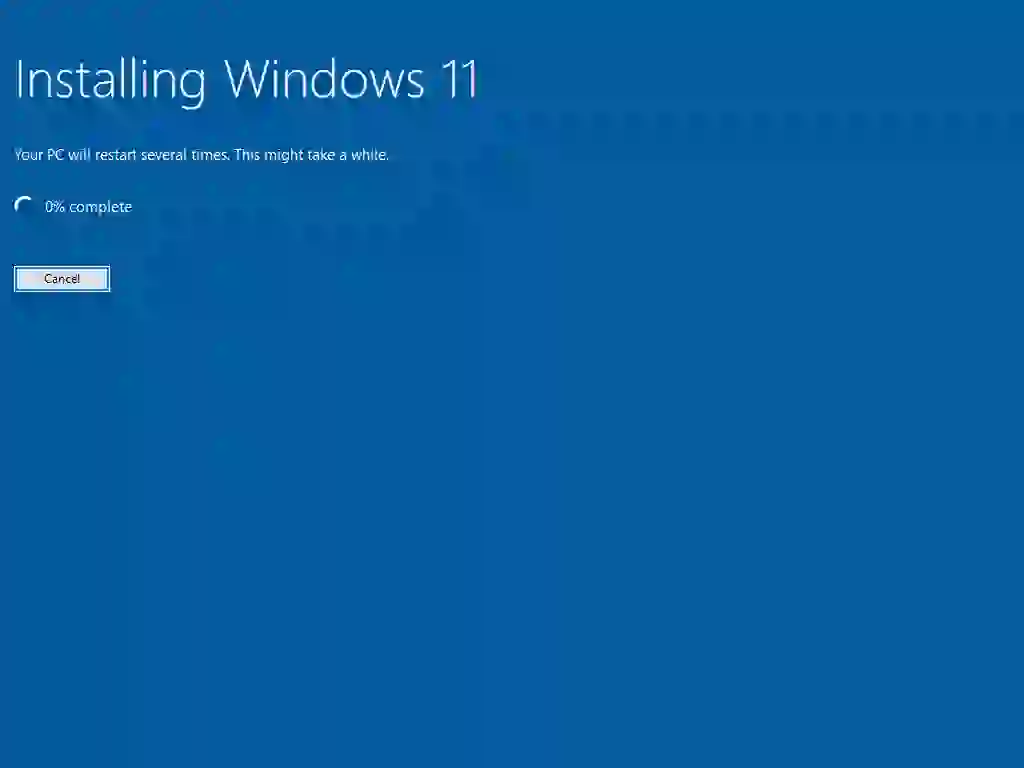
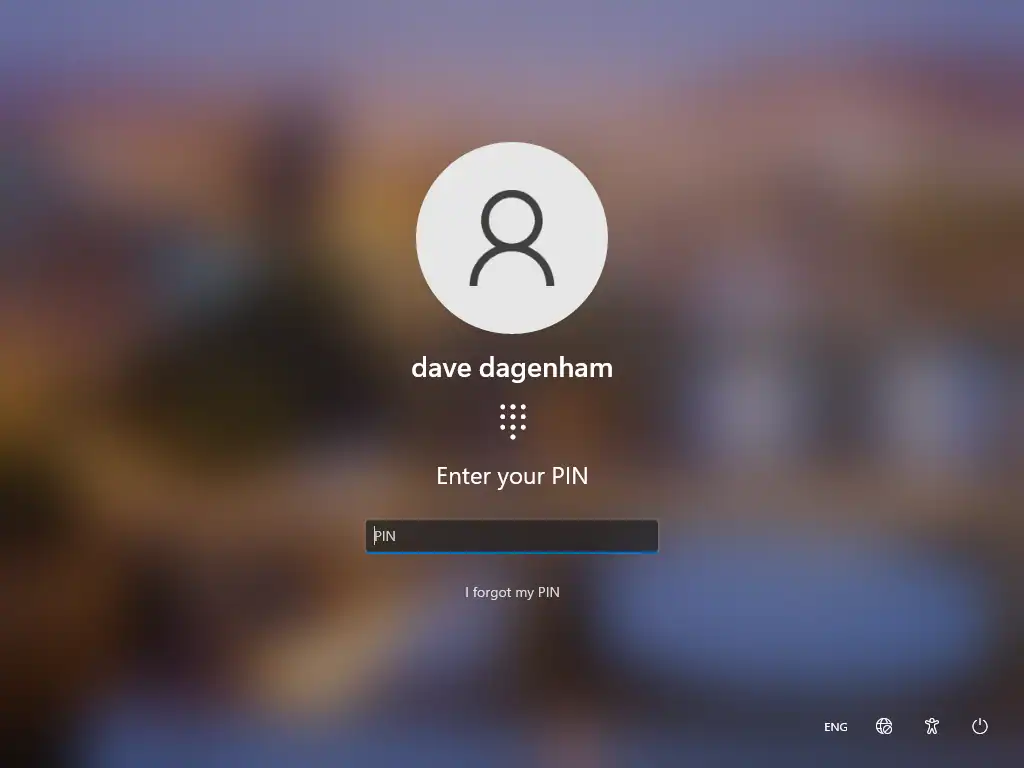
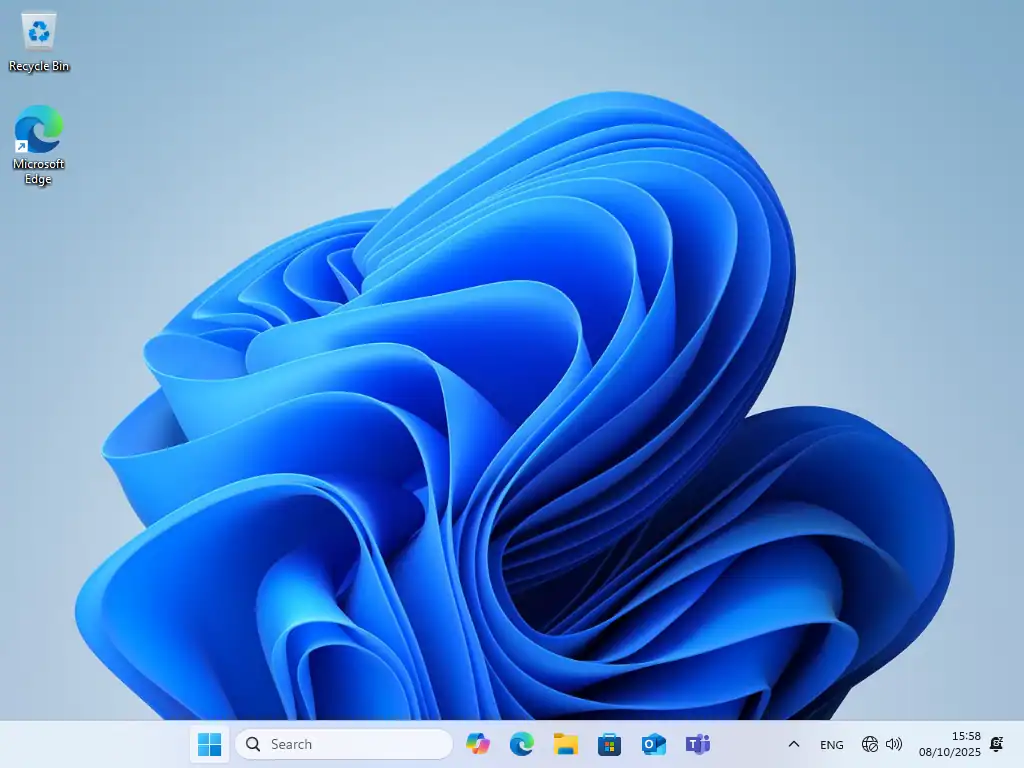
After several restarts Windows 11 will be installed on to your unsupported computer. Enter the PIN or password for your account. You’ll see Windows “Getting things ready for you” and finally you’ll arrive at the new desktop. Done.
Now all you need to do is to reconnect to the internet and run Windows updates.

Sensible Precautions Before Attempting To Upgrade
These precautions will apply on any sort of Windows upgrade. There’s just so much that can go wrong you’d be well advised to follow them before attempting to upgrade on unsupported hardware.
Here’s a quick checklist of the things you should beforehand –
- Run Check Disk – Make sure that both your hard drive and Windows file system are working fine. No lost or corrupted files.
- System File Checker – SFC will repair any damaged Windows files. You want the upgrade to go as smoothly as possible so ensure that everything is in good order before you start.
- Remove Your Antivirus – Antivirus programs are necessarily powerful. As such they can interfere with any Windows update or upgrade. So if you can, temporarily uninstall it (not necessary if you’re using Windows Security/Defender).
- Backup – At the very least backup your important files. Copy them to an external drive. If you’ve got enough external storage (USB hard Drive etc), then make a full system backup. You can use free tools such as EaseUS Todo Backup or maybe Windows System Image Backup.
Summary
Windows 11 can be installed on to a PC that doesn’t meet the current system requirements, but does that mean that you should. I really don’t know the answer to that question.
It all really depends on you and how you use your computer. But if you make regular backups and keep a system image of your old Windows 10 installation, then you should be fine. Good luck.
Related Posts
How To Install Windows 10 Virtual Machine In VirtualBox.
Not sure if upgrading to Windows 11 on unsupported hardware will work? Want to try it out first? Create a Windows 10 VM and upgrade that.
Convert An Old PC To A Virtual Machine
As Windows 10 nears the end of its life cycle, many people will be considering buying a new PC. But what then happens to your old computer. It still has all your data and applications on it.
You could save your old machine together with all its data and apps and use it as a virtual computer on your new PC.
Or you could pass it on. In that case, make sure you remove all traces of your activities.
