How to install Windows 11 onto your computer from a USB flash drive.
Starting a fresh Windows 11 installation can seem like a daunting task, but by following this guide you’ll find it’s a straightforward process.
Windows 11 brings a modern interface, enhanced performance, and a host of new features designed to improve your productivity and creativity. From its centred Start menu and redesigned taskbar to improved multitasking capabilities, you’re in for a significantly enhanced computing experience.
Let’s get started!
Create A Windows 11 Installation Media Flash Drive
To start the installation of Windows 11 you’ll need to download the installer files from Microsoft and save them to a USB flash drive. They’re completely free to download and use.
Plug in the USB drive that you intend to use. Make sure that there’s nothing on the drive that you want to keep because it’ll all be deleted.
Click here https://www.microsoft.com/en-gb/software-download/windows11
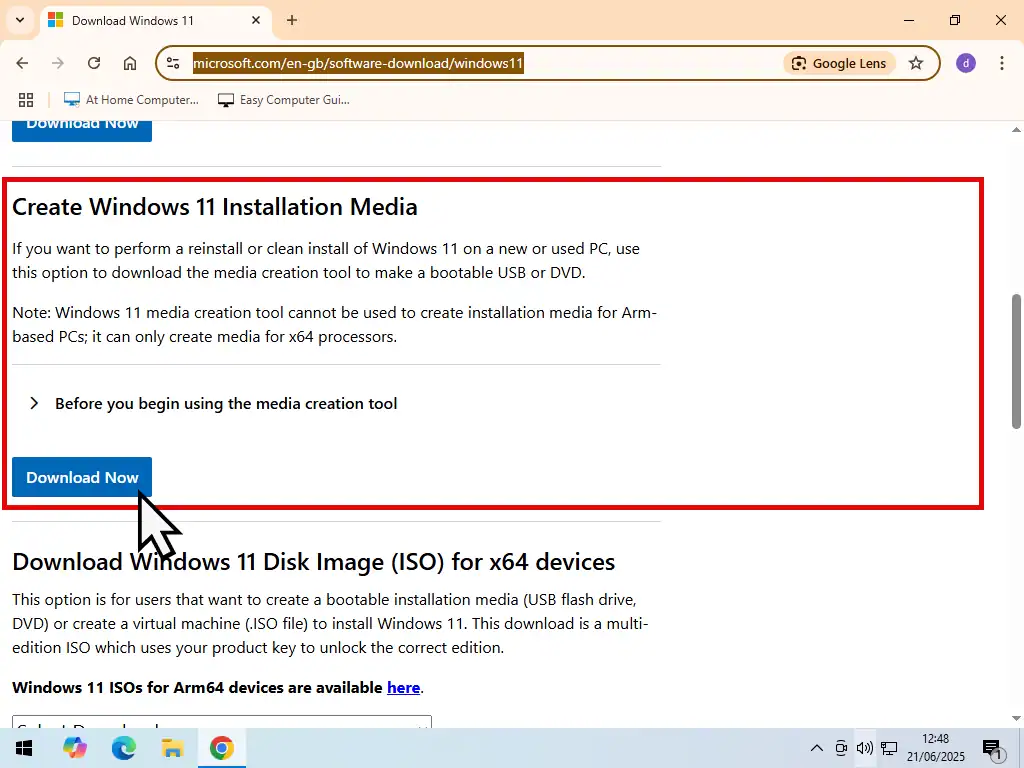
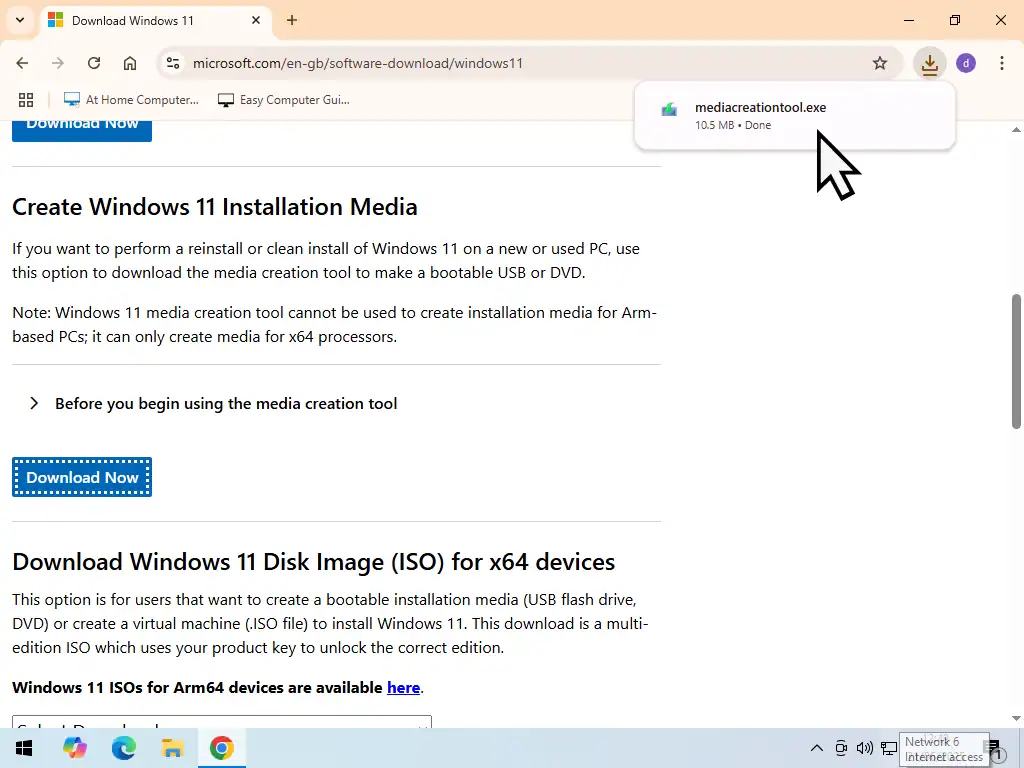
Once you’re on the Windows 11 download page, scroll down to the Create Windows 11 Installation Media section and click the Download Now button. It only takes a few seconds to download.
Run the Media Creation Tool from where you saved it to or from your browser window.
You’ll see a “Getting a few things ready” screen and then an “Applicable notices and licence terms” screen. Click the Accept button.
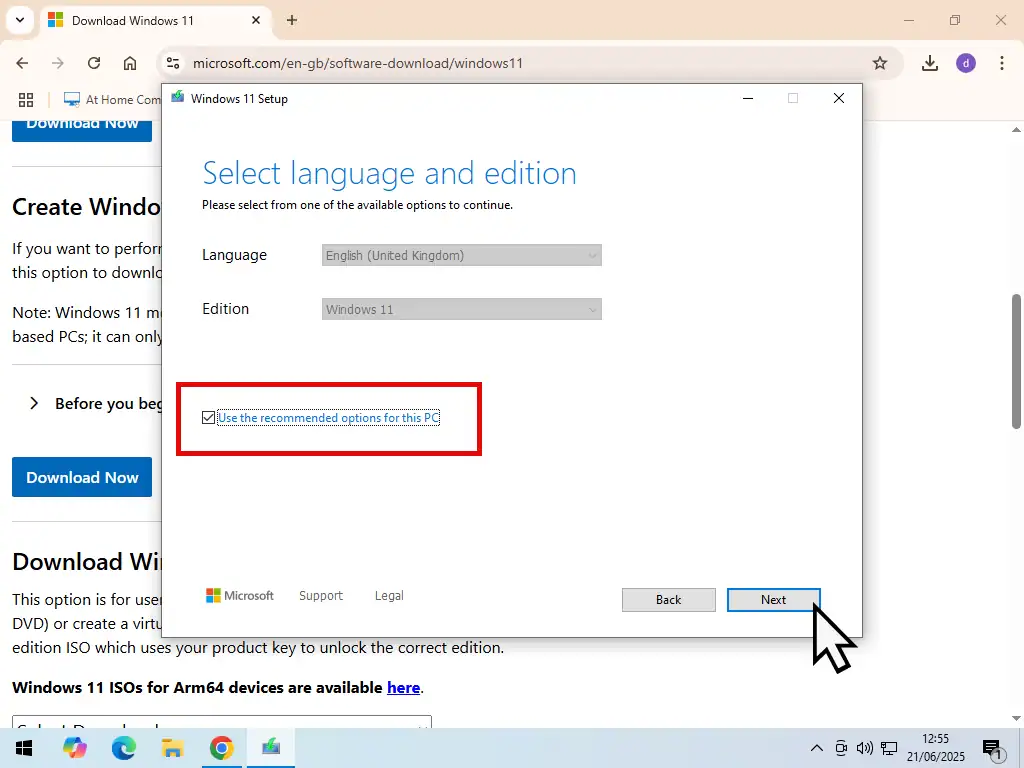
On the “Select language and edition” screen you can usually leave it set at the default setting, just click the Next button. But if you wanted to change the language, uncheck the box “Use the recommended options for this PC”, then use the drop down menu to select another language.
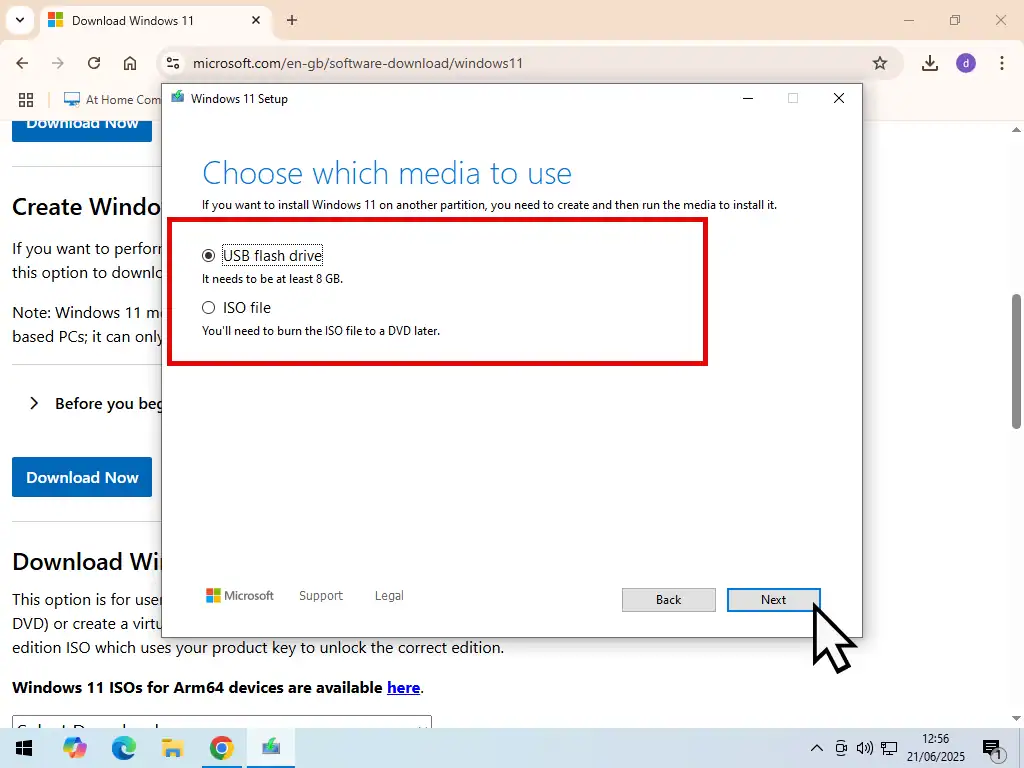
On “Choose which media to use” select USB Flash Drive. It’s usually preselected by default, but worth checking.
Note
If you’re installing Windows 11 because your current computer won’t start (boot up), then you can use a different PC to download and create the installation media. The resulting USB flash drive will be exactly the same.
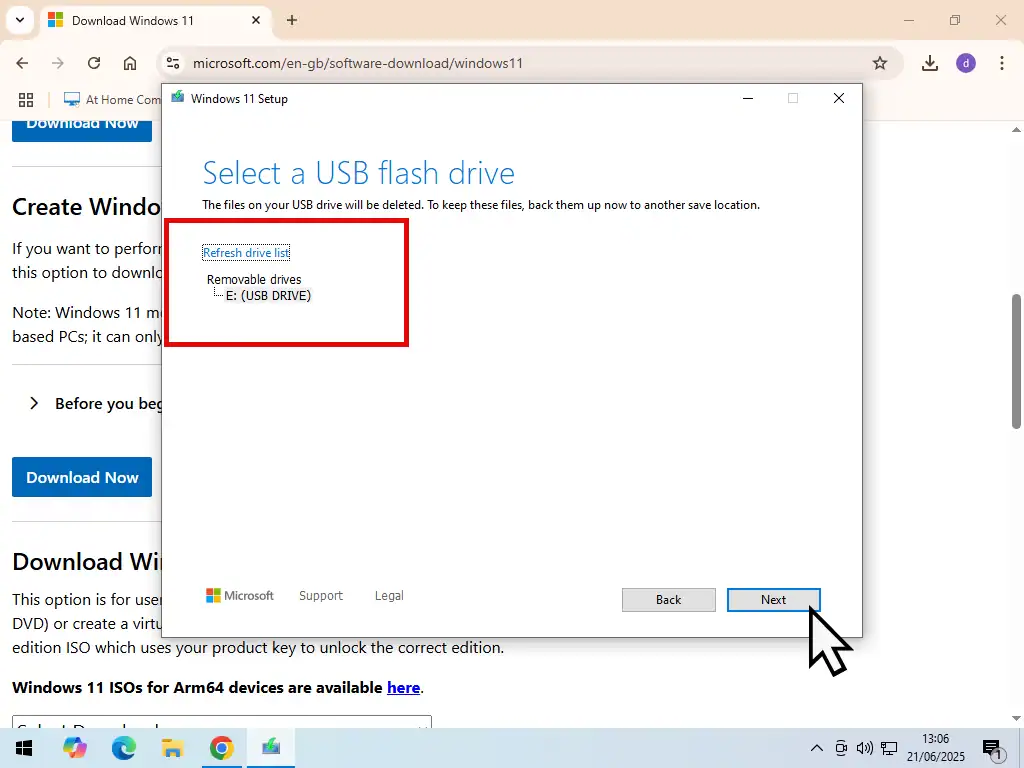
Select the USB flash drive that you want to use for the Windows 11 installation media. If you’ve got more than USB device plugged into your computer, be sure to select the right one. Click the Next button.
The Windows 11 installation files will be downloaded and then installed onto the USB flash drive. It’s all automatic at this point, nothing for you to do until it’s finished.
It might take a while to complete, it all depends on your internet connection speeds and the speed of your USB flash drive.
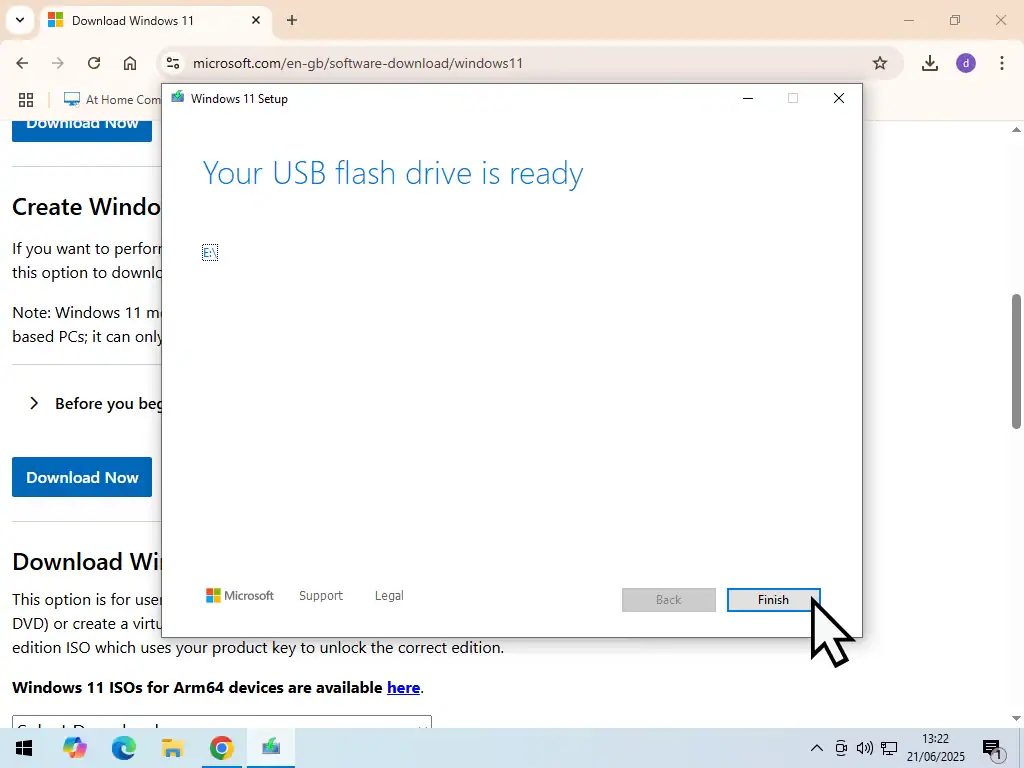
When it’s done, click the Finish button.
Check Which Windows 11 Edition You Have
If you’re re-installing Windows 11 onto a computer that’s already got Windows 11 installed and activated on it, then you should check which edition you have. Most likely it’ll be either a Home edition or Pro edition.
Install the same edition (Home or Pro) to have it activate properly after you’ve finished installing.
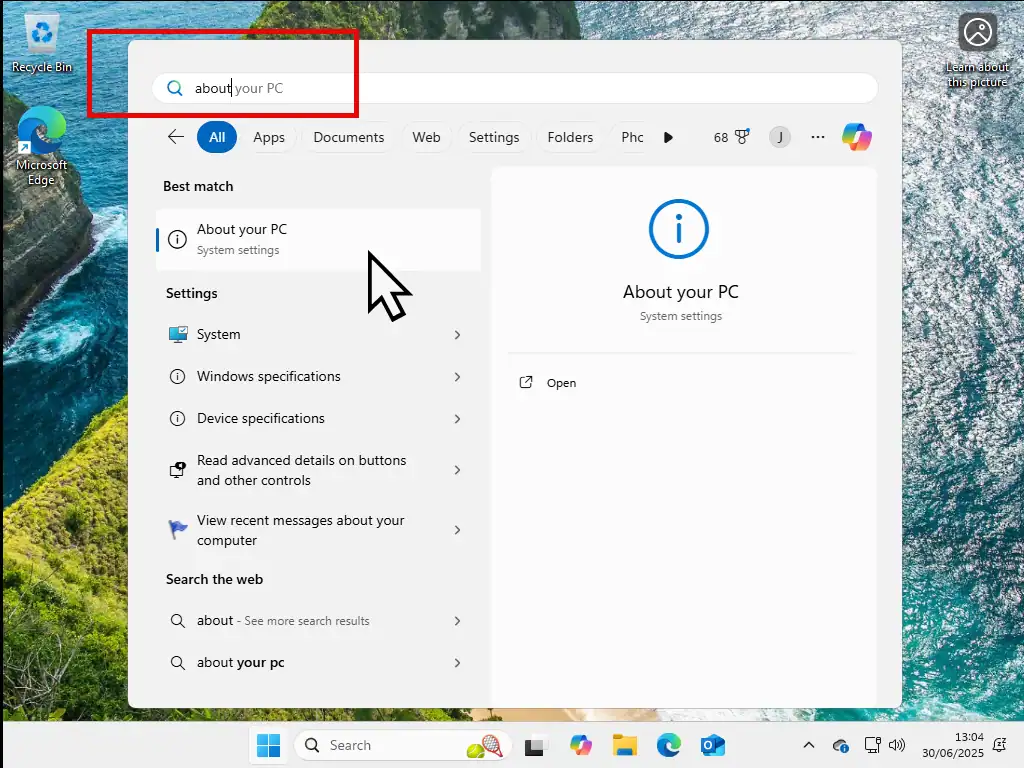
To check which edition you have, click the Start button and the type “about”. Click About Your PC (system settings).
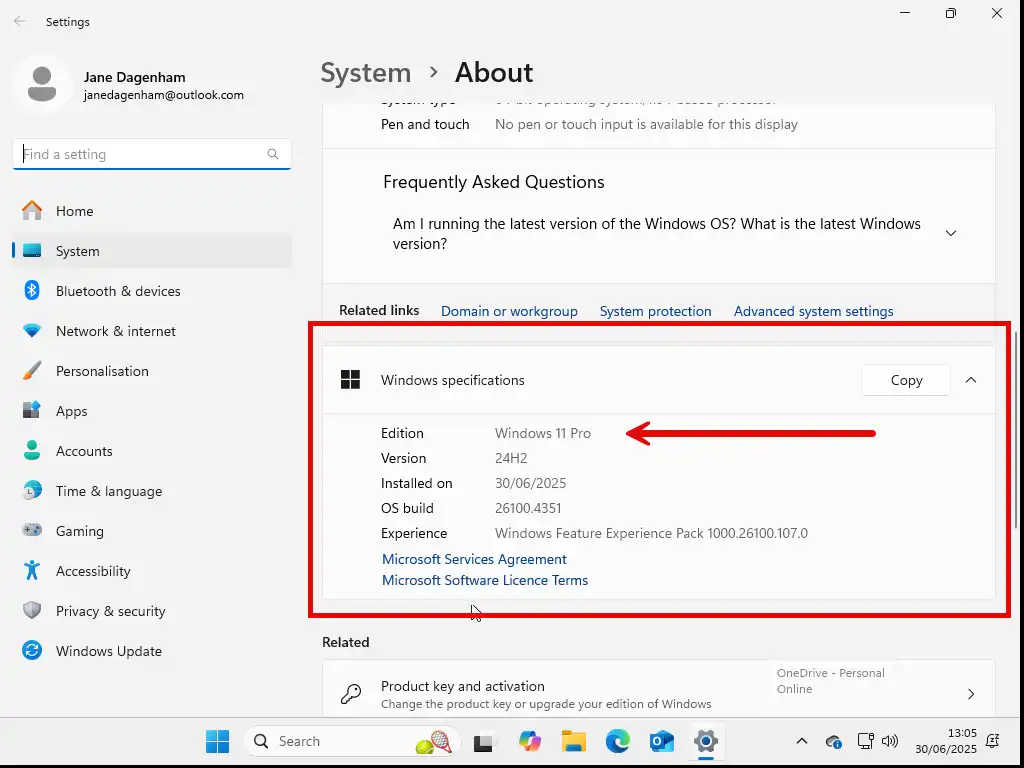
In the Windows Specifications section you’ll be able to see which edition of Windows 11 you have.
How To Install Windows 11
To install Windows 11 you’ll need to boot your computer to the USB drive that you just created.
Normally when you turn on your PC it boots from the hard drive which contains the current version of Windows. You need to interrupt that process and have the PC boot (start) from the USB drive that contains the installation files instead.
There’re various ways to do this, but no “standard” way. It’ll very much depend on your computer, but a commonly used method is the “one time boot menu” which can usually be accessed using either the Esc key, F8, F10, F11 or F12 key on your keyboard. If you’re using a laptop, you might also have to hold down the Fn key.
To boot from the Windows 11 USB installation drive, turn off your computer.
Then turn it on but keep tapping the whichever key will bring up the one time boot menu on your PC.
If you don’t know which key that is, then you’ll have to try each key in turn or search Google for it.
Booting To A USB Drive
It’s not always easy to get a computer to boot to a USB drive. Here are some more ways to do it How To Boot From A USB Drive For Windows.
Install Windows 11
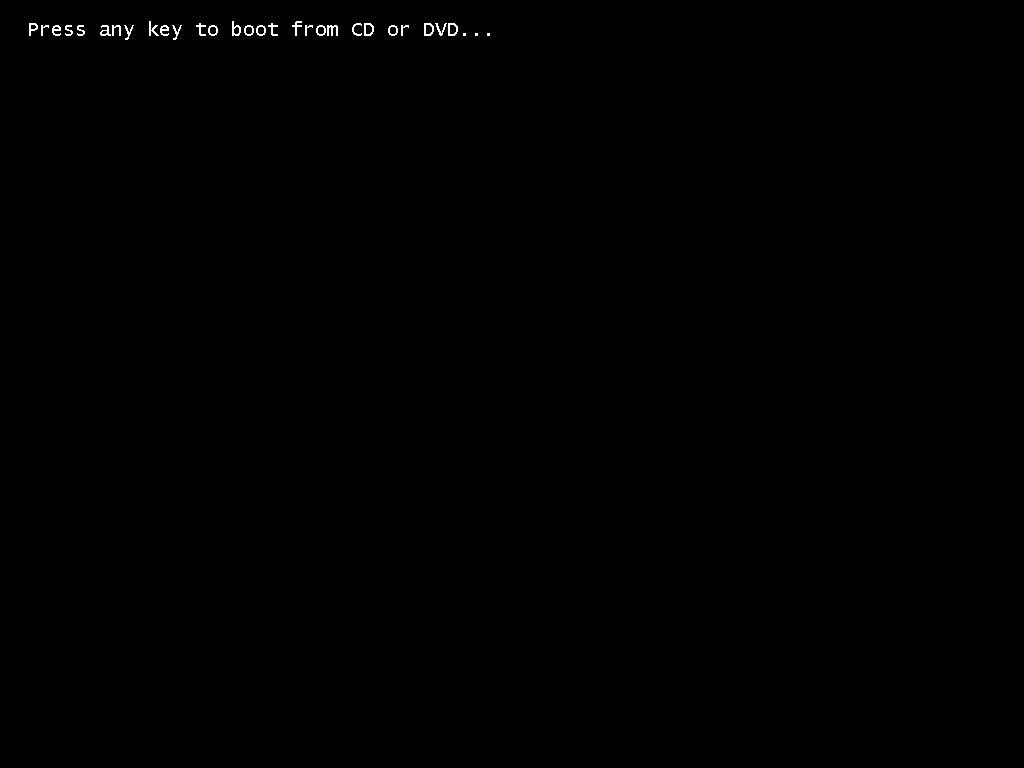
The first screen you’ll see will be your computer asking if it should boot from the USB drive. You’ll see the message “Press any key to boot from CD/DVD”. Although the message specifically mentions CDs & DVDs, it also means USB drives. So press a key on your keyboard.
Booting the computer from a USB drive will take a little longer than booting from your hard drive. It might appear that nothing is happening but the Windows 11 setup files are being loaded.
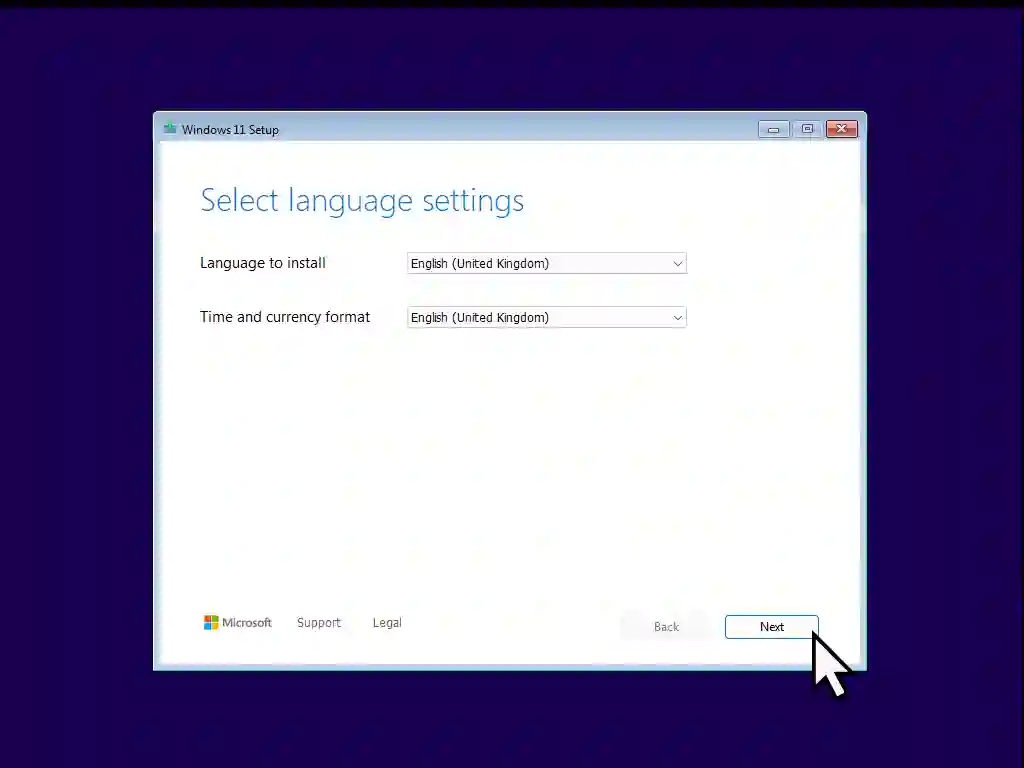
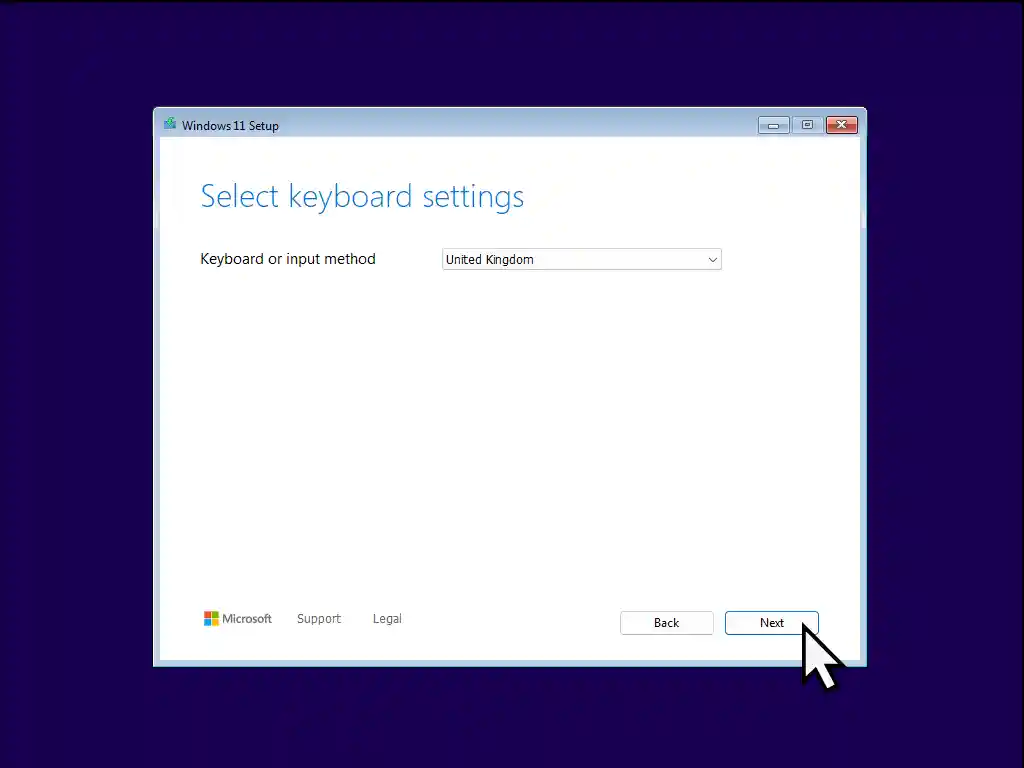
Once the setup files are loaded you’ll see some Windows 11 setup screens. The language and keyboard settings should be set correctly. If they’re not you can change them using the drop down menus.
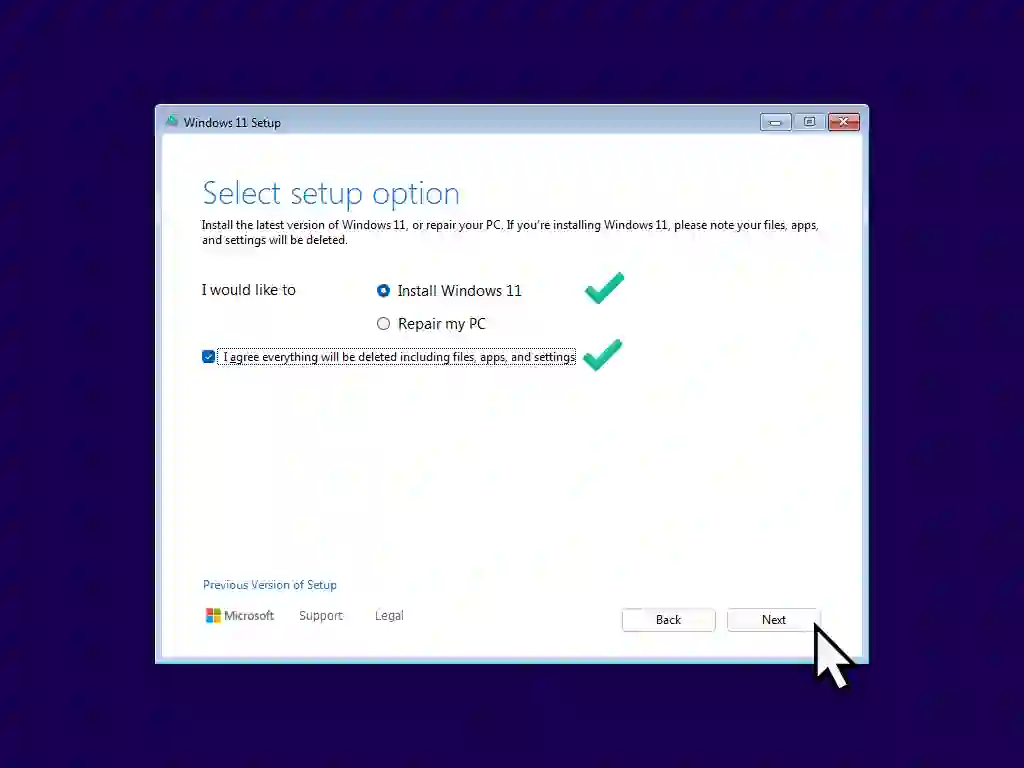
Then you’ll see the setup options screen. Select Install Windows 11 and then put a tick in the box “I agree everything will be deleted included files, apps and settings”.
Enter The Product key
The Windows 11 product key not only activates Windows but also determines which edition of Windows (Home, Pro, Enterprise etc) should be installed.
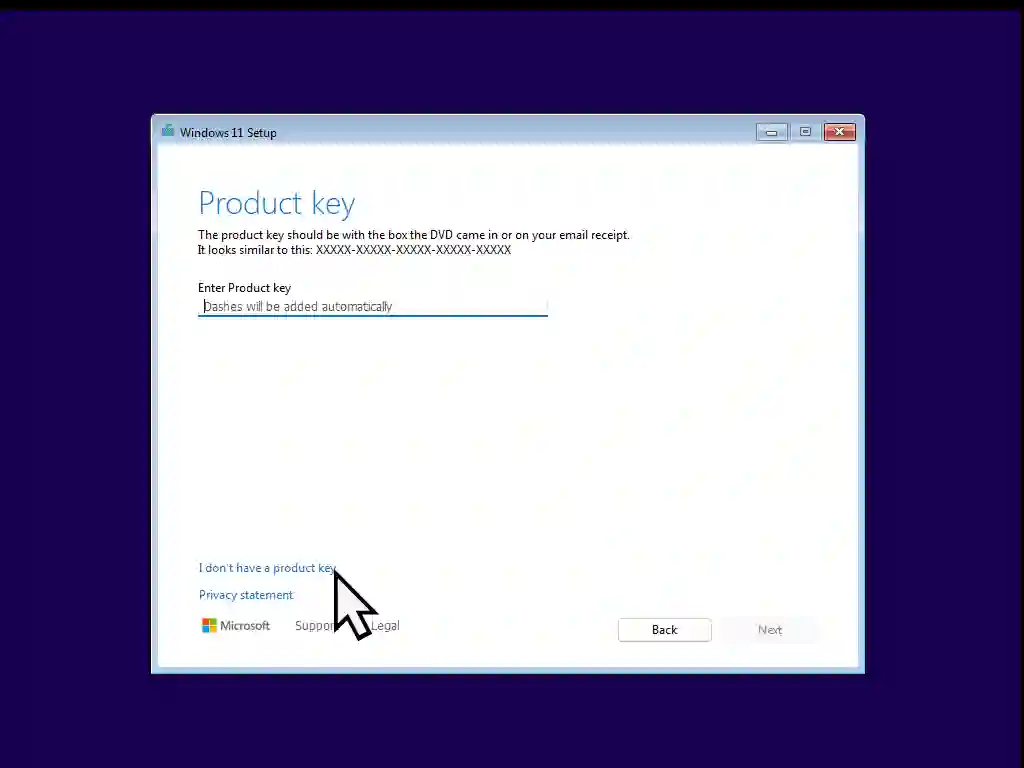
You might not actually have a product key, at least not a key written down. If you’re PC is a branded machine (Acer, Dell, HP etc), then the key will be stored within the machine itself and will be automatically applied. In that case you won’t see these next two screens.
If you do see them, on the Product Key page, click “I don’t have a product key” which is in the lower left corner.
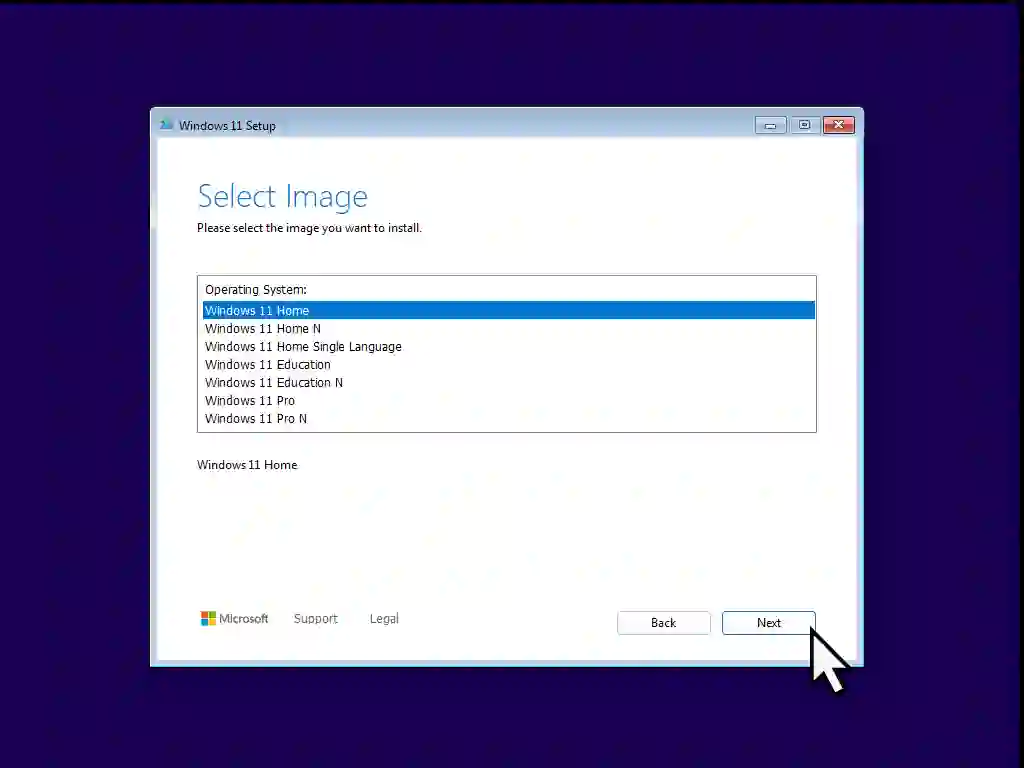
On the next screen, select which edition of Windows 11 you’re installing and click Next.
Select Location To Install Windows 11
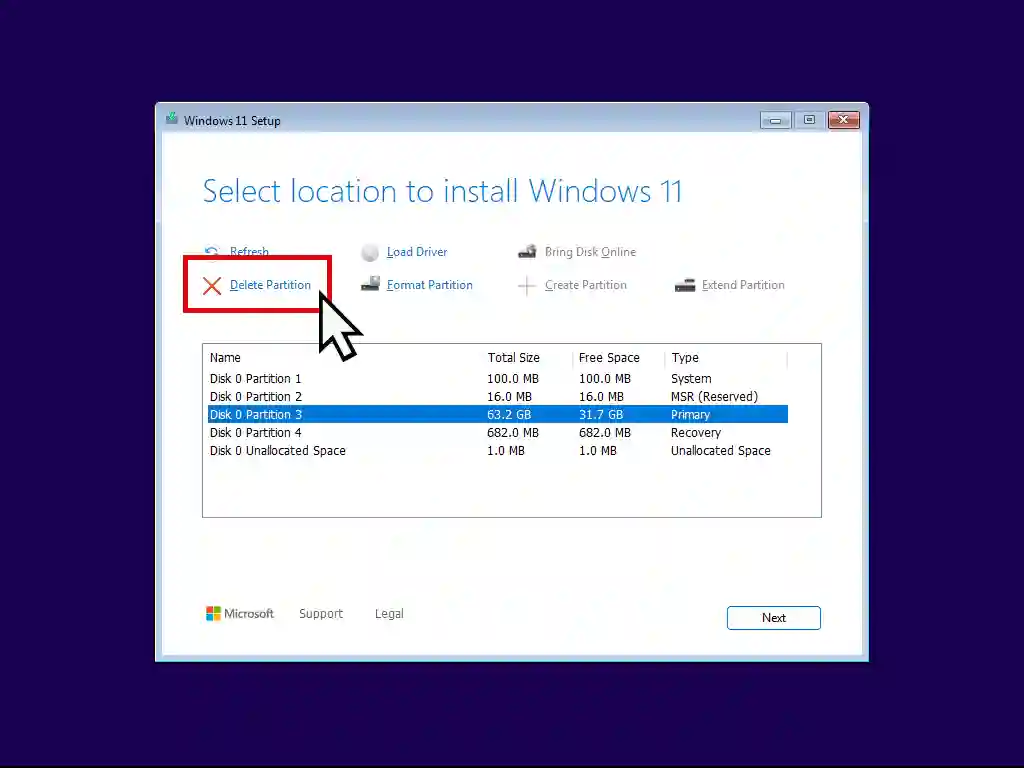
The Select Location To Install Windows 11 screen will display all the hard drives and hard drive partitions on your computer. What Are Drive Partitions
For most people you’ll only have one hard drive and only the standard Windows partitions. But you could have extra hard drives or partitions used for data storage.
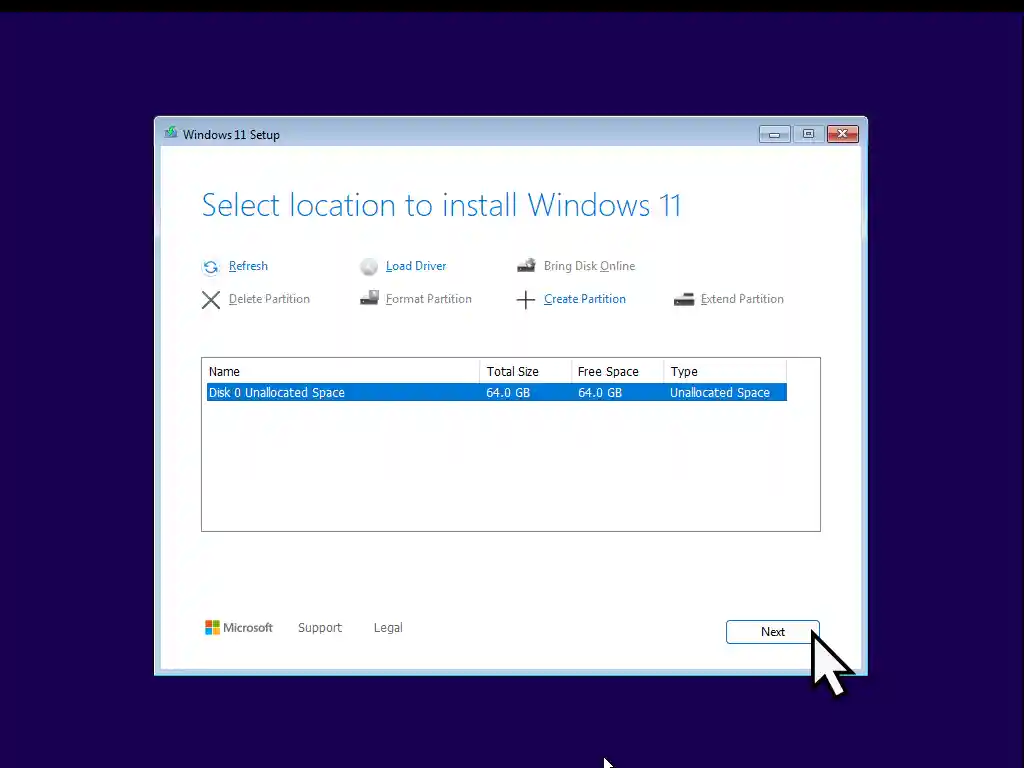
Assuming that you only have a standard hard drive and no data partitions, delete all the partitions. Select them one by one and click the Delete Partition option.
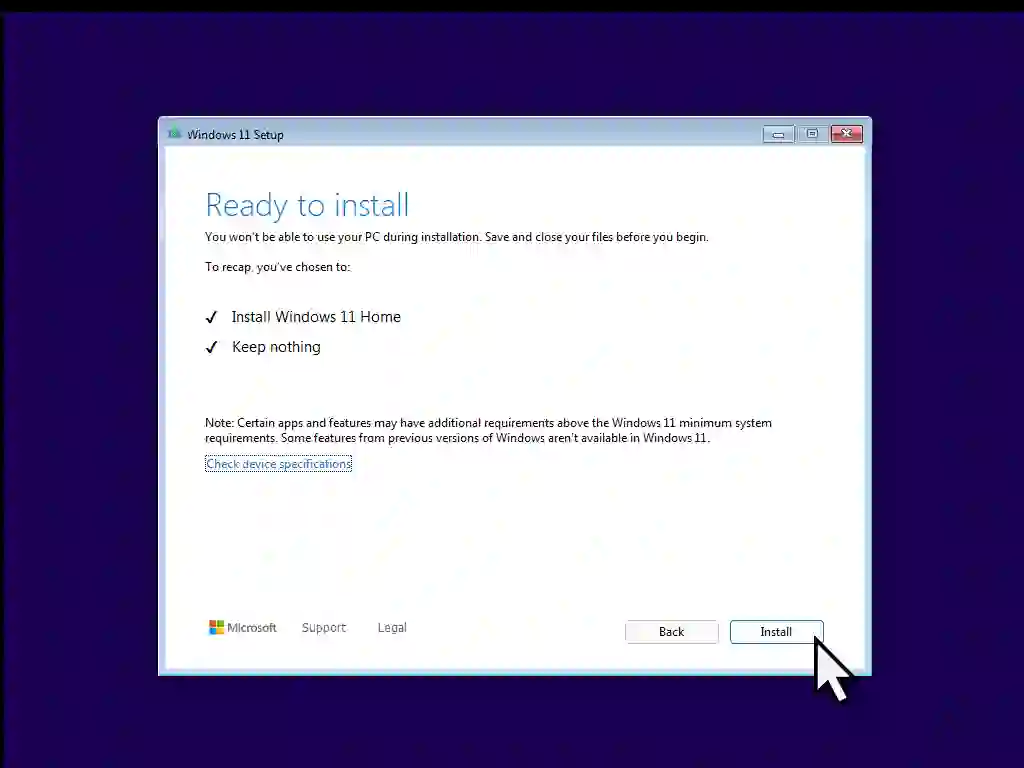
Once they’re all deleted, click the Next button. After a few moments you’ll see a confirmation screen that you’re ready to install Windows 11. Click Next and then the installation will begin.
Windows 11 Setup
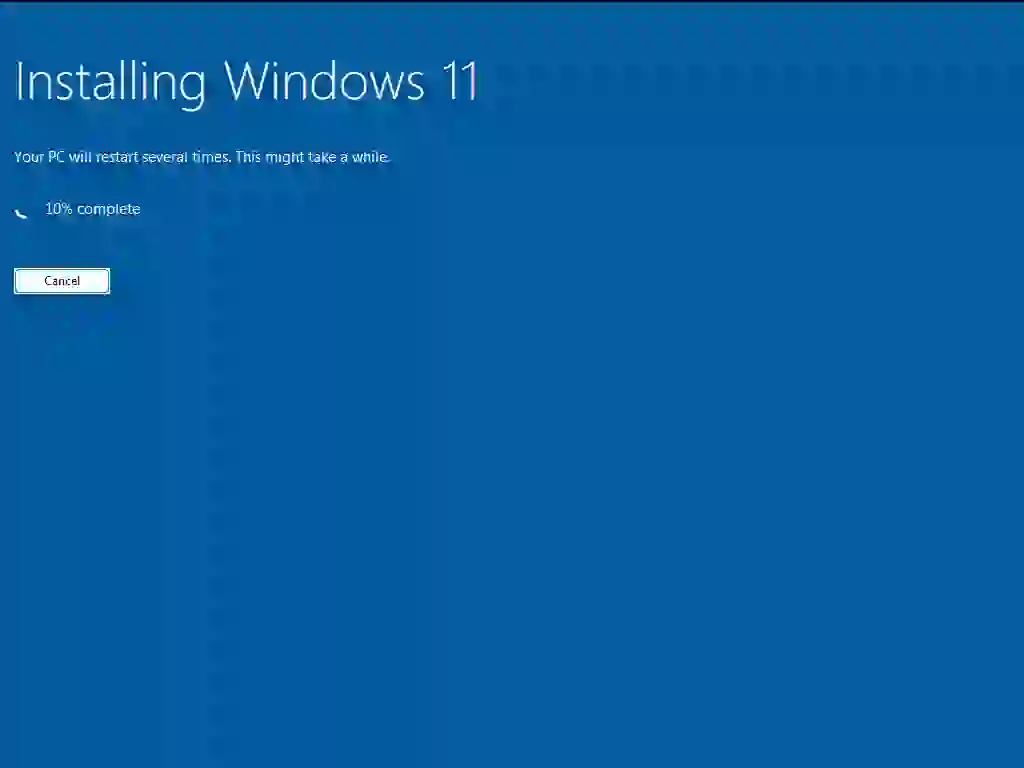
Setup will start installing the necessary Windows 11 files. Your computer might restart a couple of times. The main thing is to “Keep your computer on”.
You don’t need to do anything until you reach the “Is this the right country or region?” screen. Setup will pause here until you confirm by clicking the Yes button.
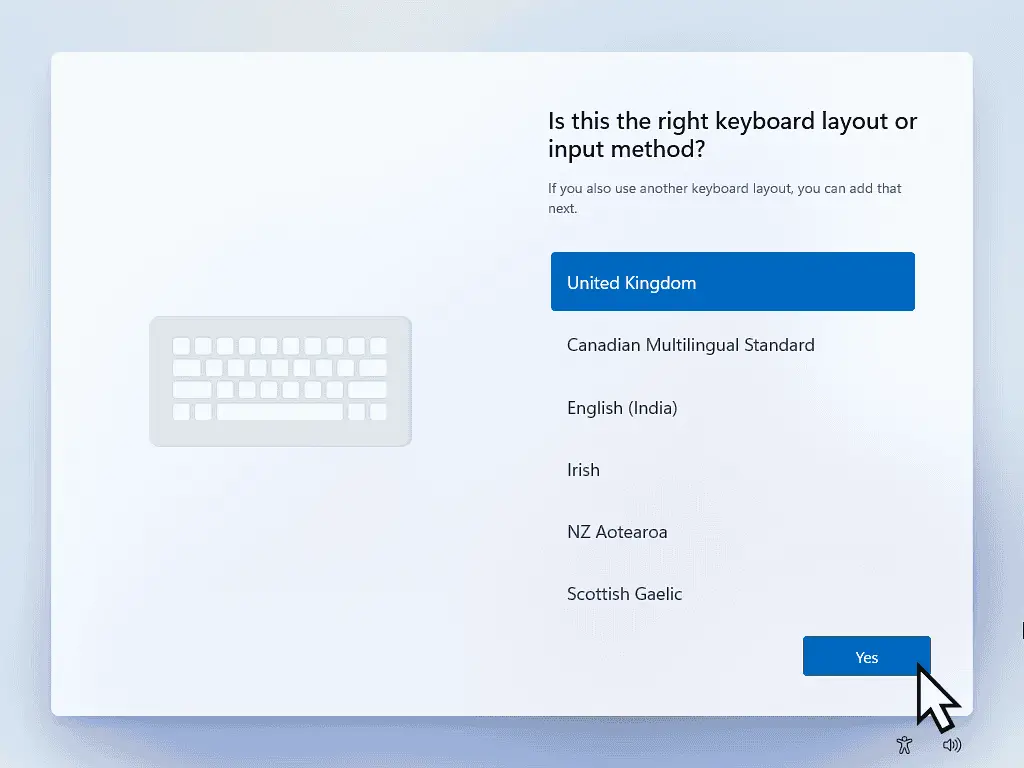
After setting the country or region, you’ll need to confirm the keyboard settings again. Click Yes for the keyboard layout and Skip for adding a second keyboard layout.
After that’s been done, Windows setup will check for updates and the computer might be restarted again.



Name Your Device.
Windows 11 allows you to give your computer a name during setup. Having a descriptive name helps you to identify the computer if you attach it to a home network.
Type in a short but descriptive name and Next, or if you’re not interested in naming the PC, click Skip For Now.
You can always change the name later if you need to.

Installing Windows 11 Pro – How Would You Like To Setup This Device?
“How would you like to set up this device”? This is a Windows 11 Pro option. You won’t see this screen when installing Windows 11 Home.
Assuming you’re installing Windows on your home computer, select “Setup for personal use”.

And Yet More Updates
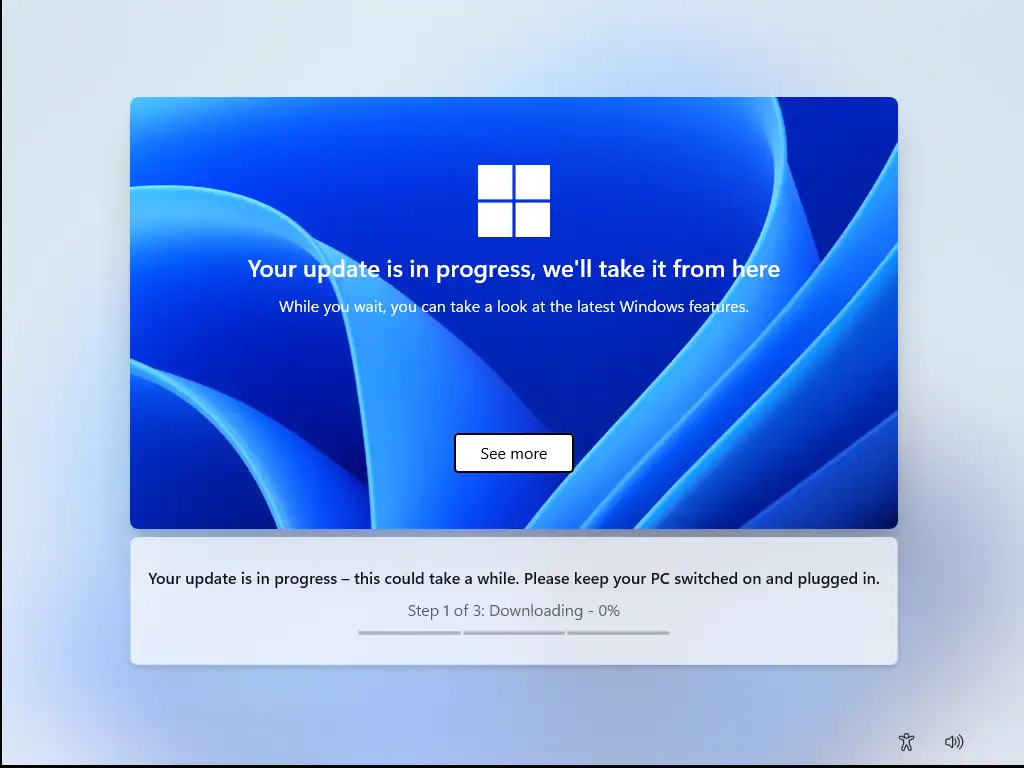
Windows 11 will check for and download even more updates.
This time around it’ll probably take a while to complete. But at least you get a progress bar to watch.
Signing In To Your Computer
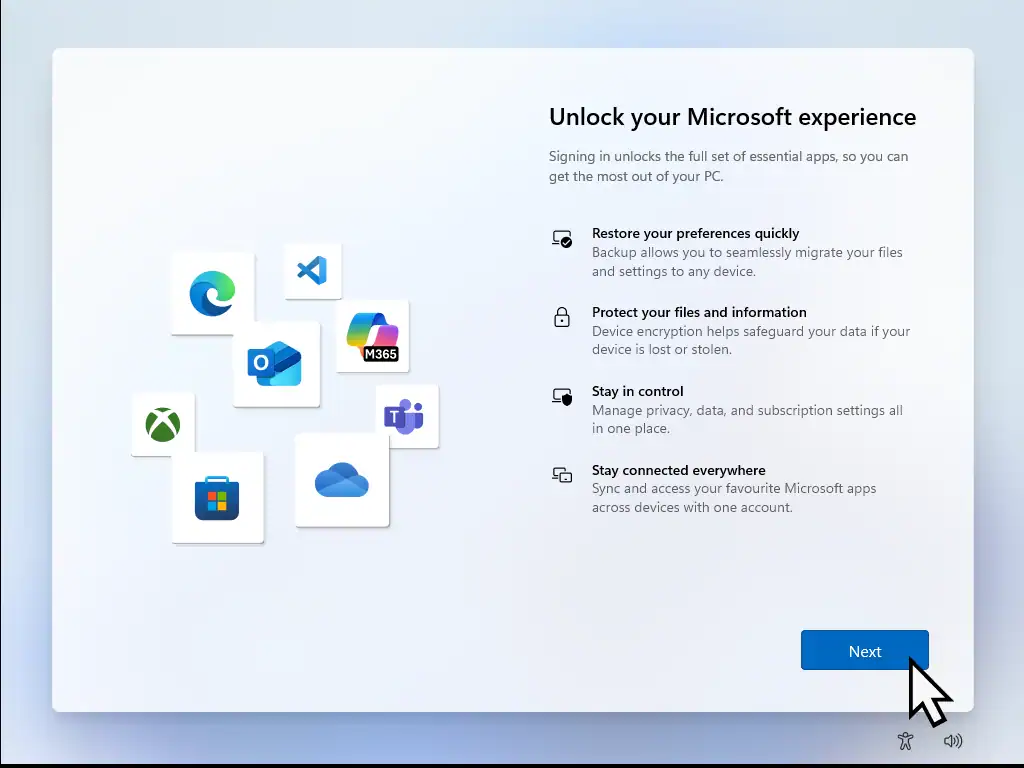
After all the updates have finished your computer will restart and open at the “Unlock your Microsoft experience” screen. Click the Next button.
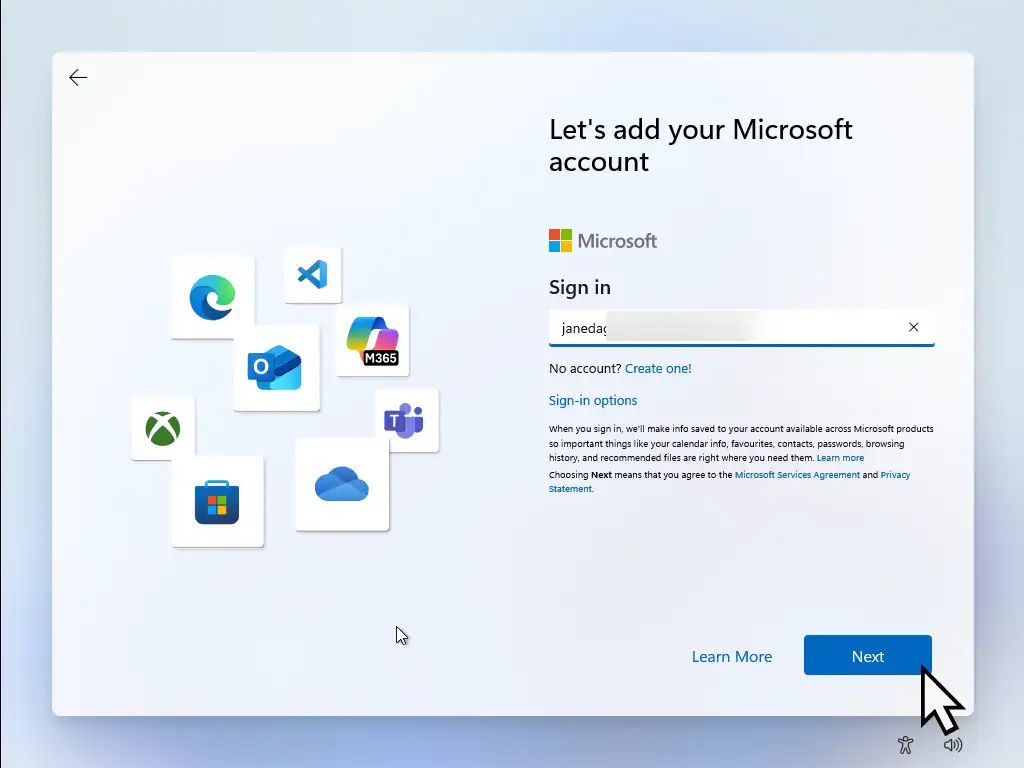
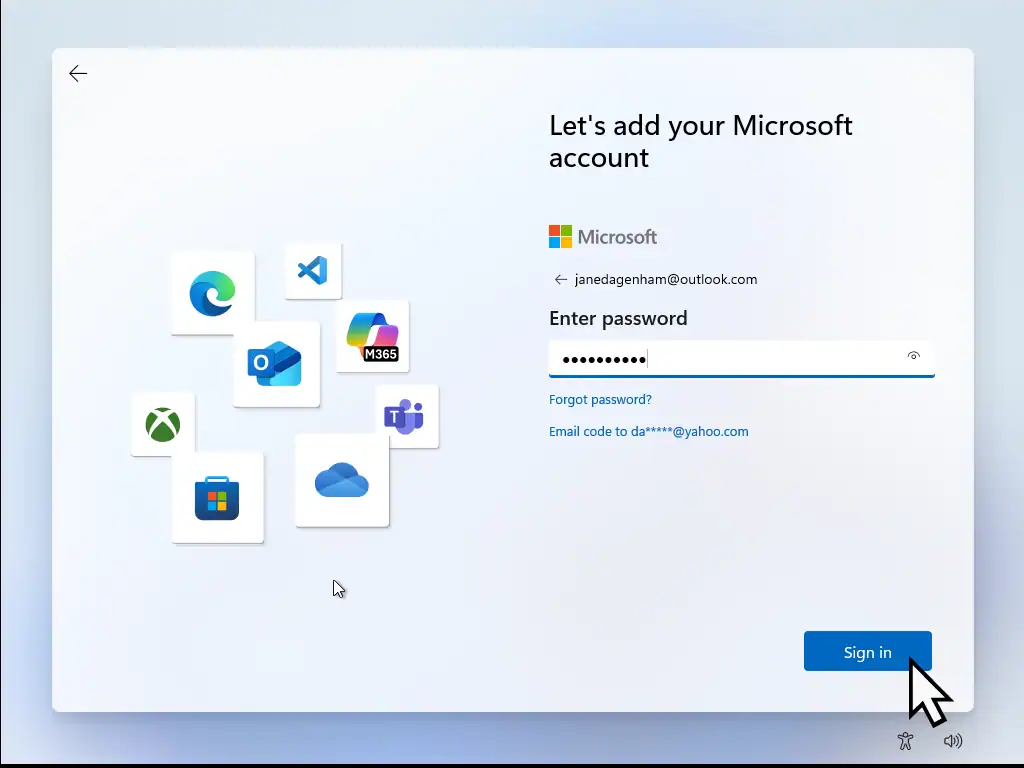
In the Sign In box, enter the email address or phone number that you used to setup your Microsoft account. Click Next and then add your password.
If you don’t yet have an MS account you can click the Create One link and follow the on screen prompts.
Microsoft Account Or Local Account
Microsoft want everyone to sign in to their computers using a Microsoft (online) account. Which means signing in over the internet.
They don’t offer the option of using an offline (local) account. But there are ways around this. If you’d rather use a local account click this link How To Install Windows Without A Microsoft Account
Create A PIN
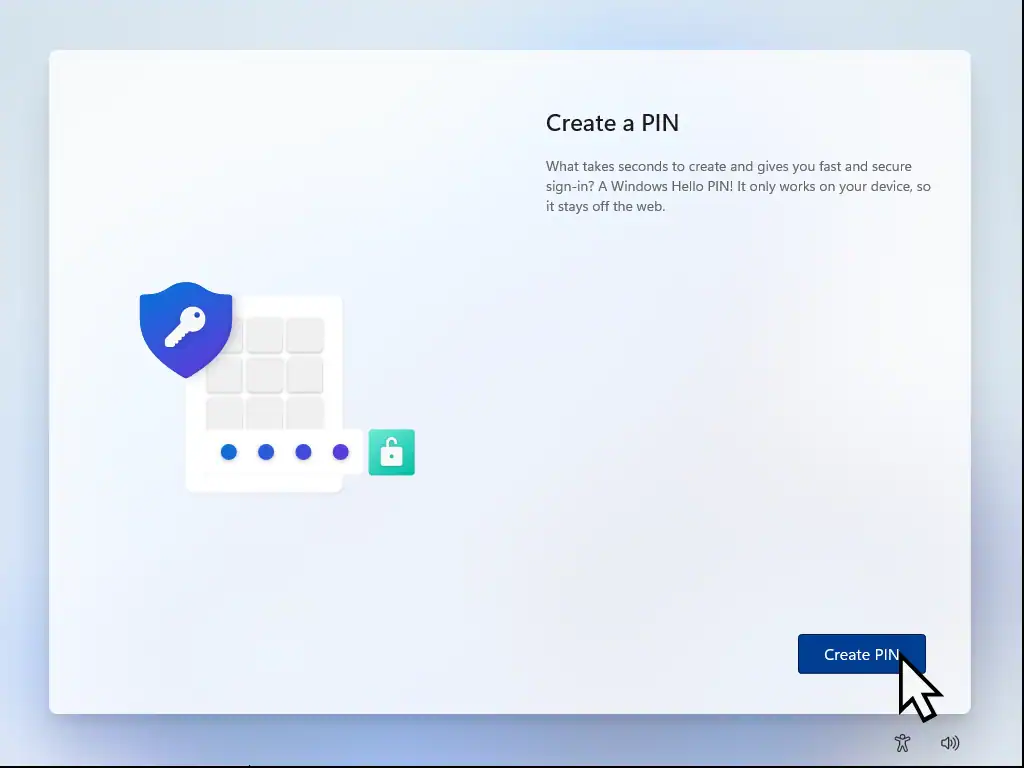
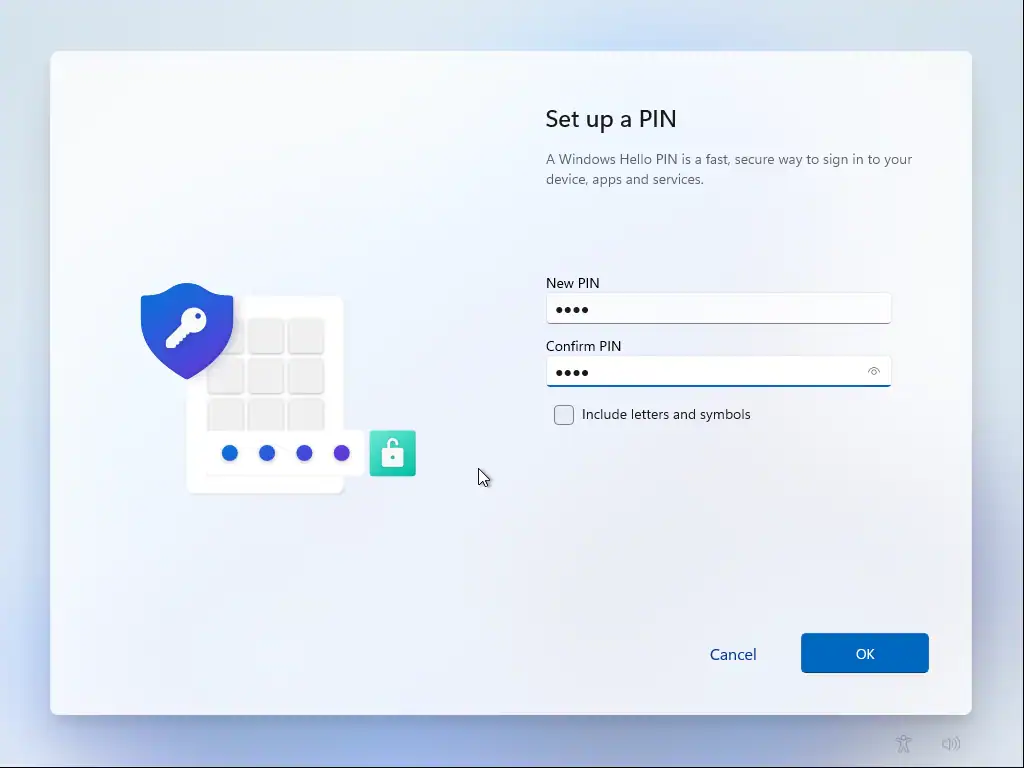
After signing in to your Microsoft account you’ll be required to create PIN (Personal Identity Number). The PIN will be used to sign in to your computer rather than having to enter your full password. Remember what you use for the PIN, you’ll need it later.
You have to set a PIN when your installing Windows 11 whether you want one or not. However you can remove it later if you’d like to.
Windows 11 Telemetry Options
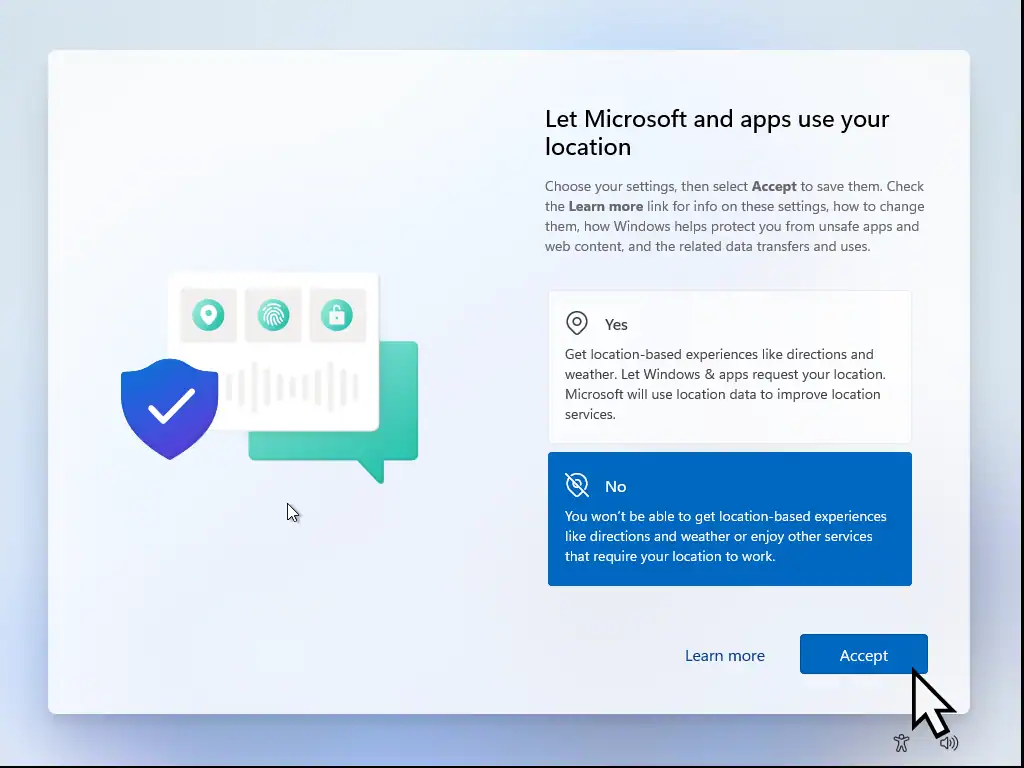
You’ll see several screens with what Microsoft call Telemetry settings. Telemetry in Windows refers to the collection and transmission of diagnostic and usage data from your device to Microsoft’s servers.
In plain English, what information Microsoft can gather about you and what you’re doing with your PC.
It’s personal choice but I’d always opt for the negative option.
Note that you won’t lose any functionality of your computer be answering No. It’ll work exactly the sane as if you’d answered Yes.
Restoring Your Settings
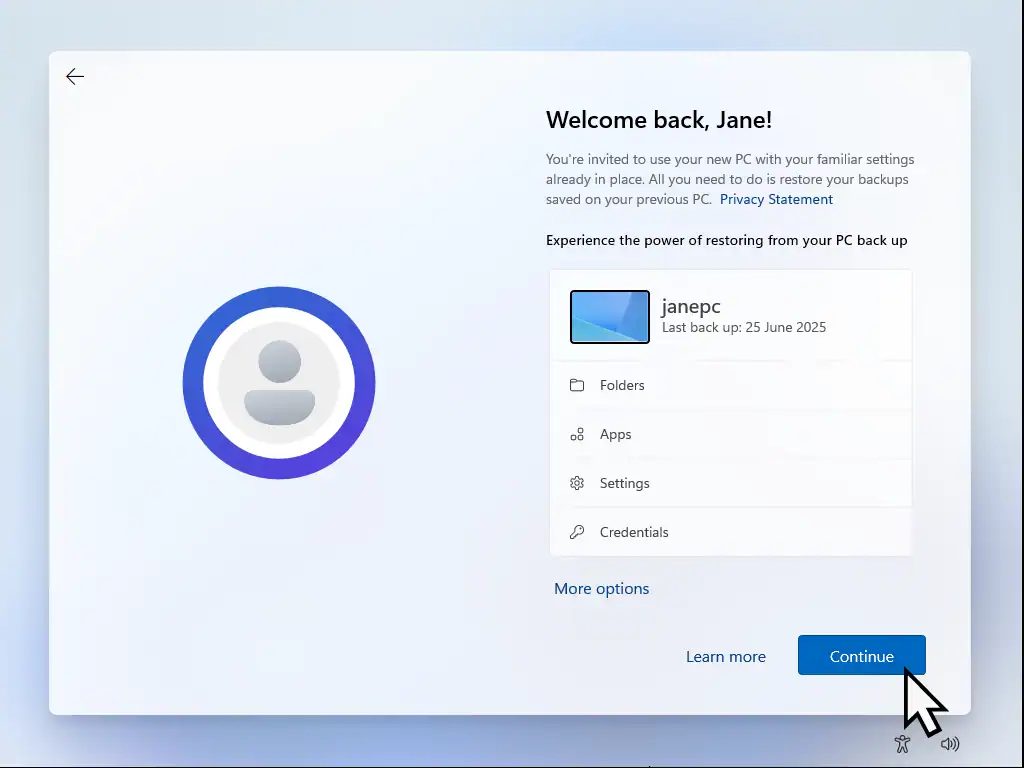
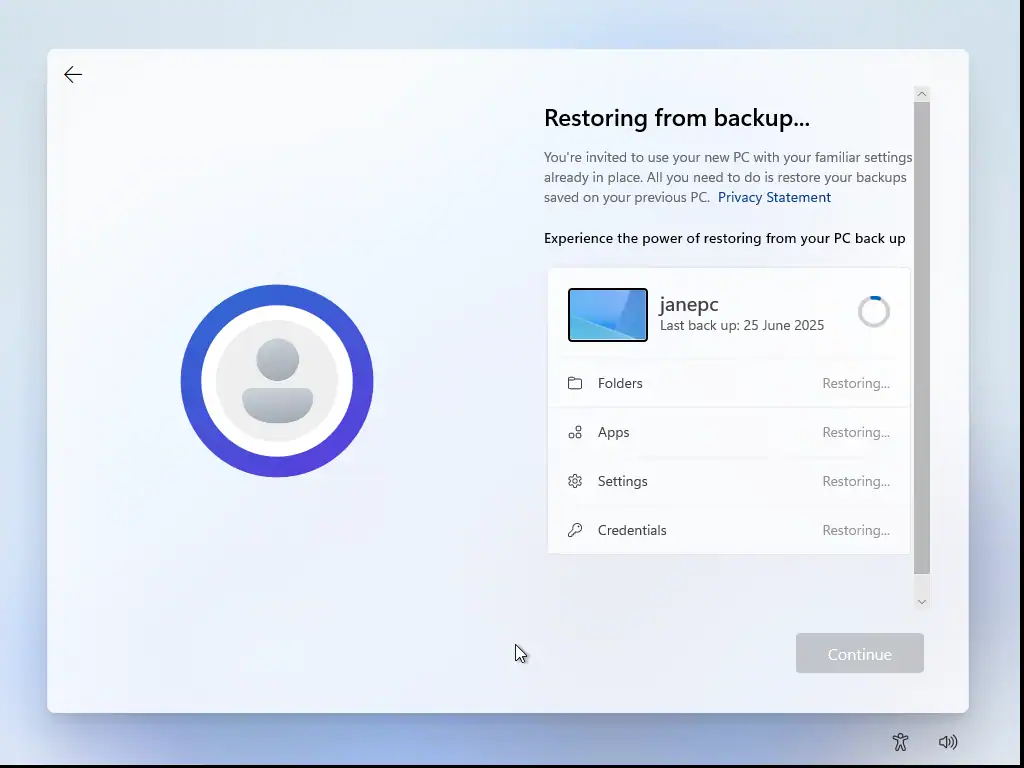
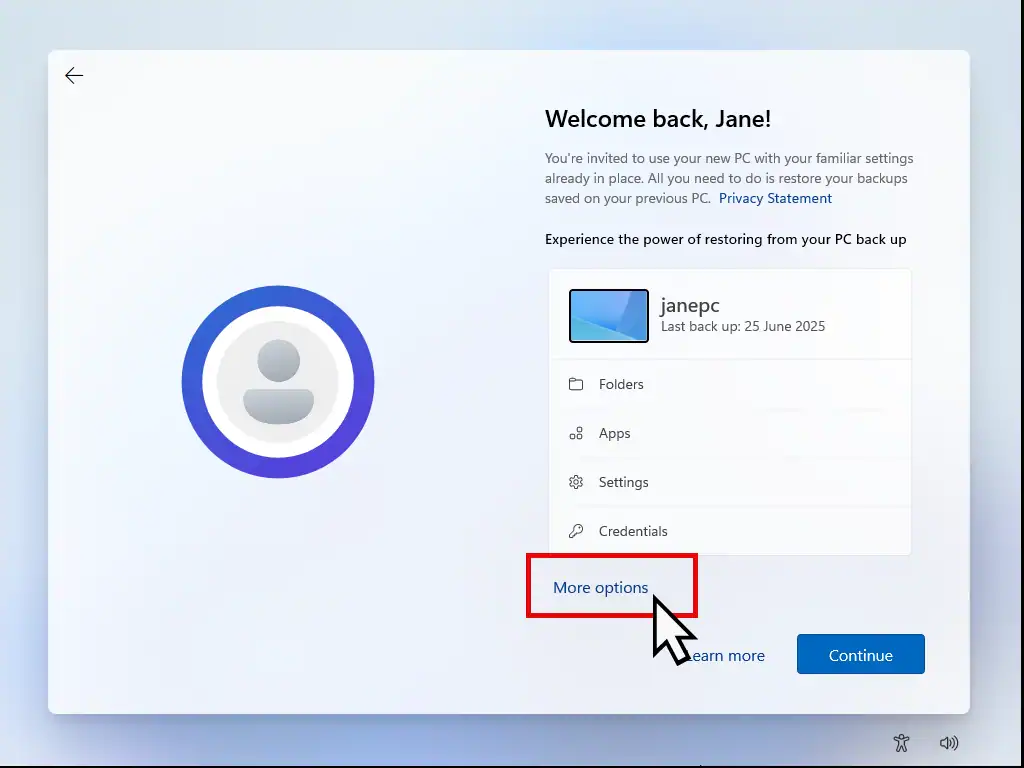
If you used a your Microsoft account to sign in earlier, then you’ll be offered the chance to restore any previously backed up files, folders, apps and settings. The files and folders will be restored from OneDrive.
Note that the apps that can be restored are only Microsoft apps. Third party programs and applications that you might have installed won’t be restored.
This is probably what you’ll want if you’re re-installing Windows 11 on to a computer. It’ll help to set it up as it was before your started. Click the Continue button and the backups from your MS account will be downloaded.
Clean Install Windows 11
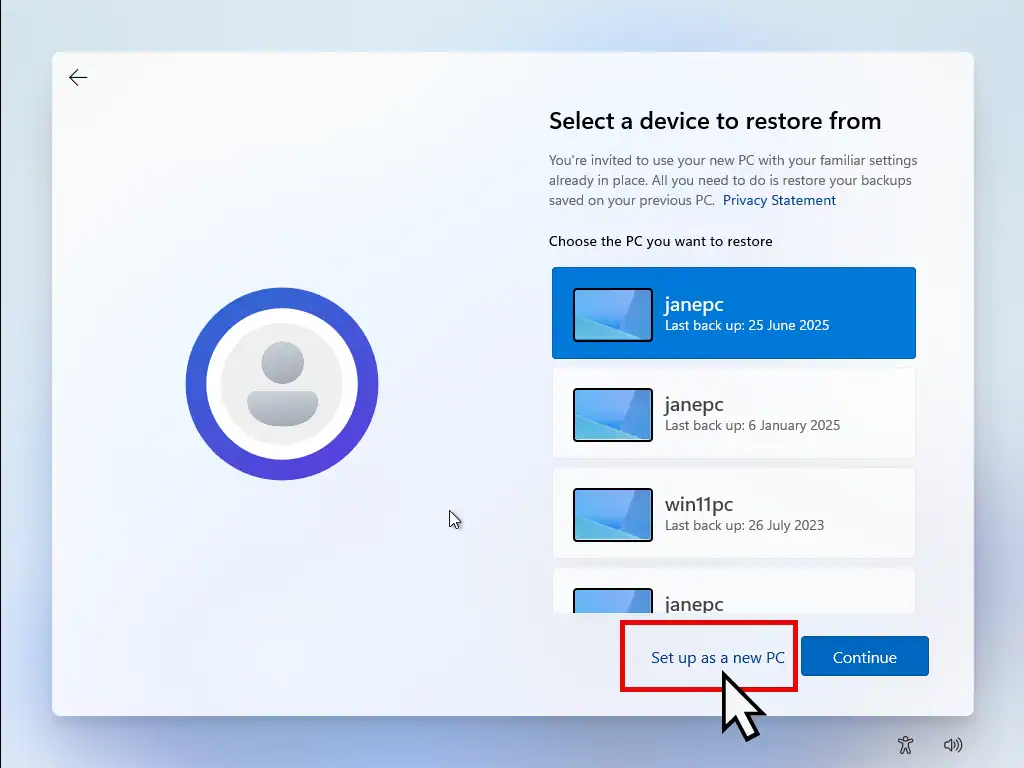
On the other hand you may well want to perform a clean install of Windows 11 without any of the data. Even if you are re installing Windows 11 you can still do this.
Any files or apps previously backed up can be downloaded separately once you’ve finished installing Windows.
To perform a clean install, click More Options and then click Set Up As A New PC.
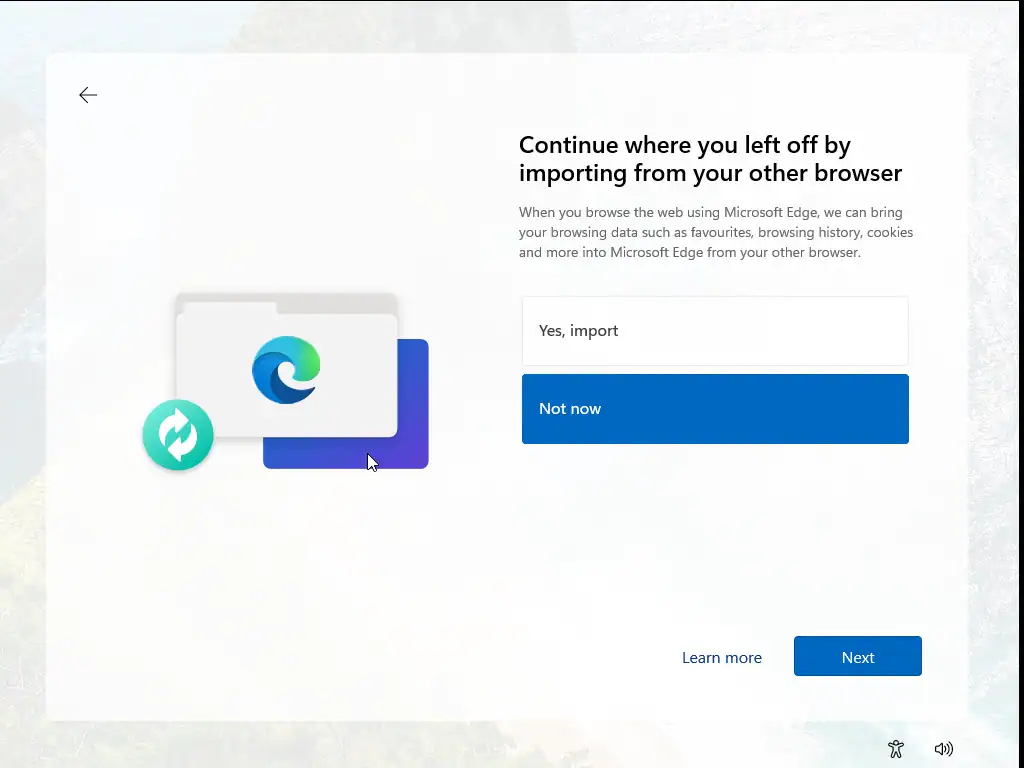
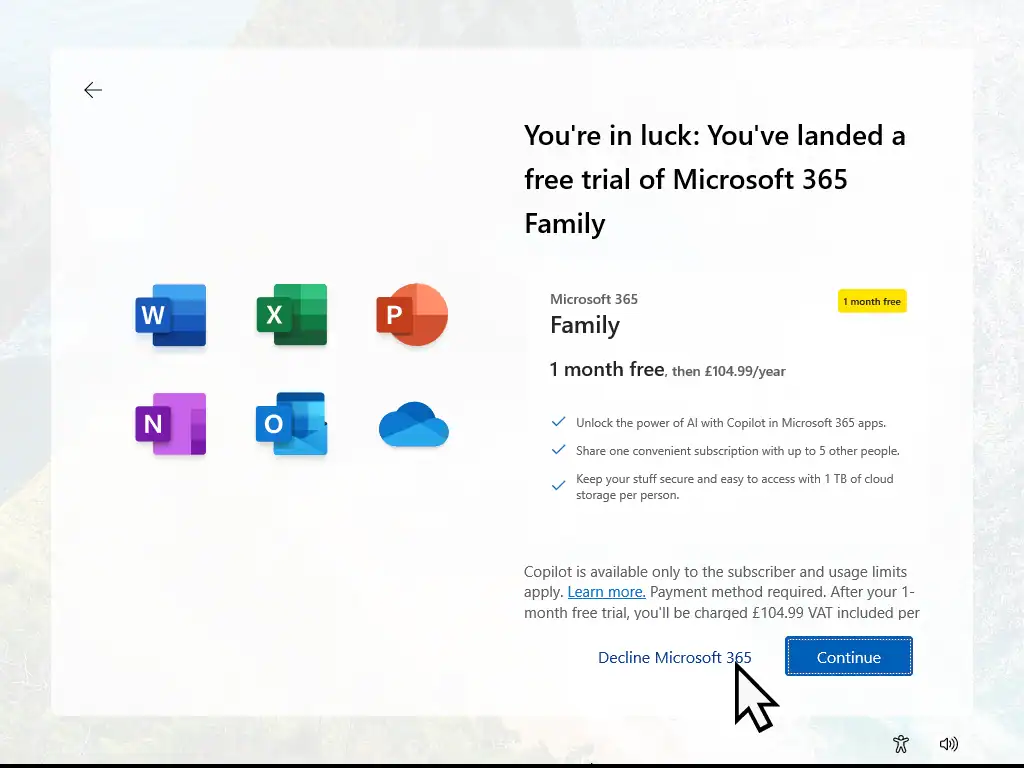
Microsoft Offers During Install
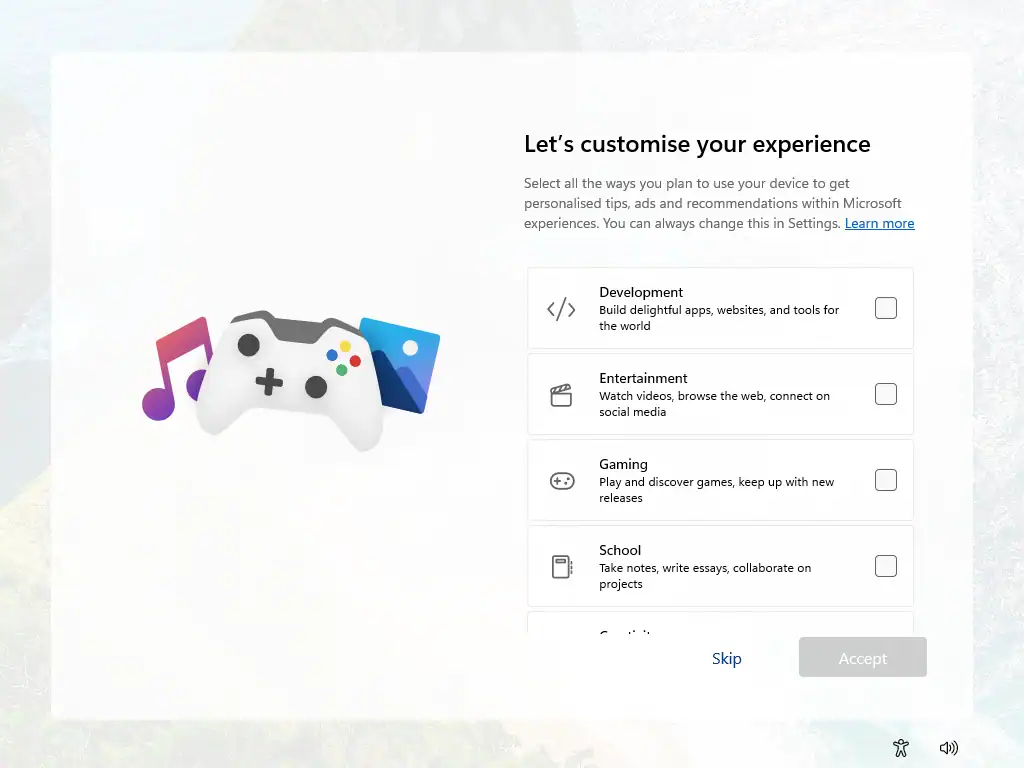
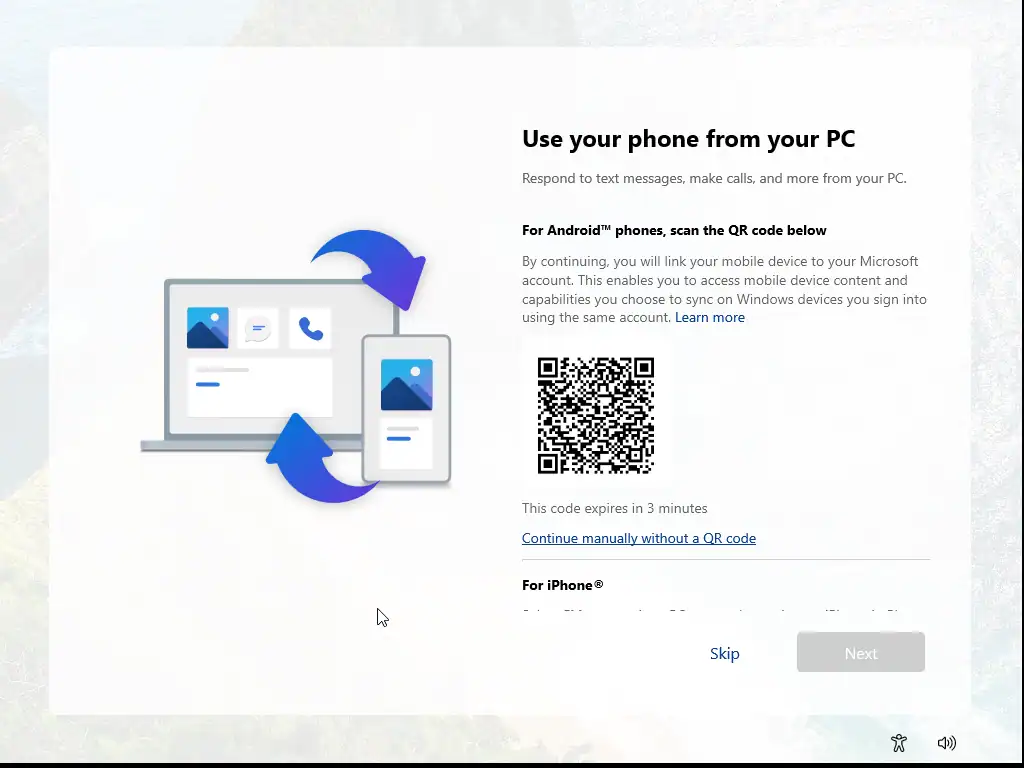
You’re almost done now. During the installation of Windows 11, Microsoft will offer you other services.
Generally just click the Skip or Decline option. Anything that you might be interested in can always be added later.
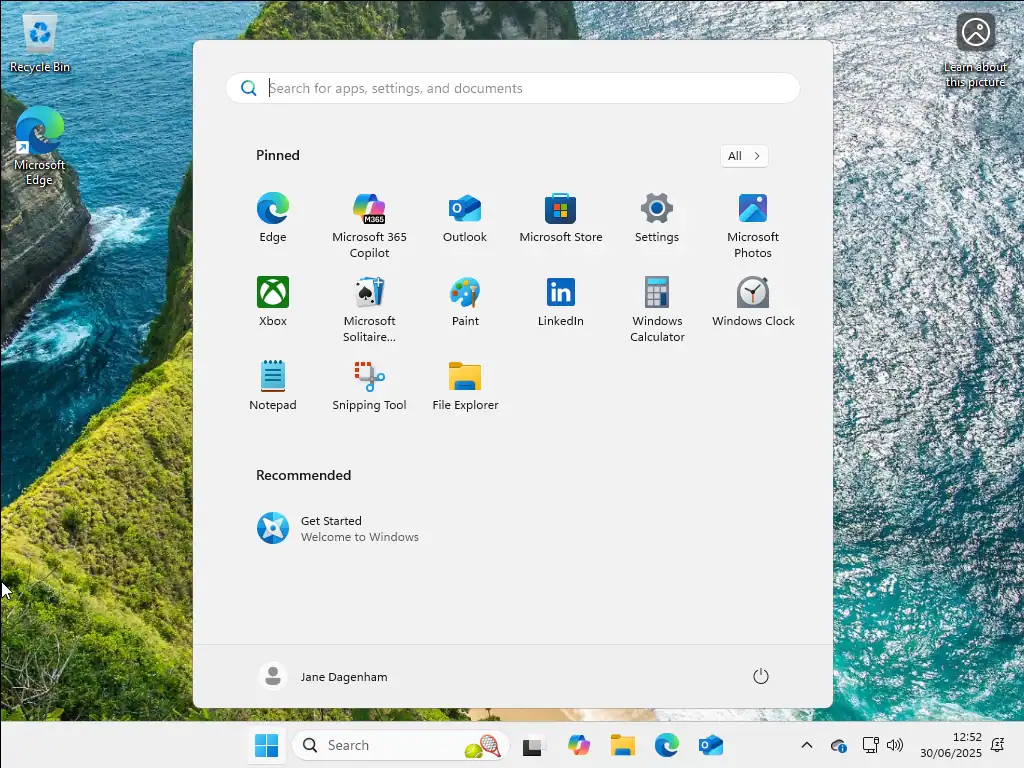
Windows 11 Installed
There you go, you’ve successfully installed Windows 11 on to your computer.
Summary.
If you’re reinstalling Windows 11 then it’d be a good idea to create a system image backup before you begin. That way if anything goes wrong, you can at least get your system up and running.
Related Posts
How To Install Windows 10.
Clean install Windows 10 from a USB drive.
How To Create A Windows USB Recovery Drive.
Have a recovery drive ready for when your computer just refuses to boot.
Windows 7 Virtual Machine On VMware Workstation Pro.
Run old software on a modern machine by setting up a Windows 7 VM.
Step By Step Computer Guides
Easy to follow step by step computer guides.


