
If you’ve got audio files in the WAV file format, you can convert them into MP3 format easily using the free VLC Media Player.
WAV files are the highest sound quality files that you can have. They’re generally perfect digital copies of your music CDs. There’s one issue though, they’re very large files.
Although most devices can play WAV files, they really do take up a lot of storage space. Sometimes it’s better to have them available in the much more space efficient MP3 format.
In this guide I’ll show you how to create MP3 copies of your WAV files. The idea is that you’ll have both versions available to you.
Download and Install VLC Media Player
Windows doesn’t have a way of converting WAV files to MP3 built into it. So you’ll need to use a third-party tool to carry out the conversion.
While there are plenty of file conversion tools around the Internet, it’s difficult to know which ones you can trust.
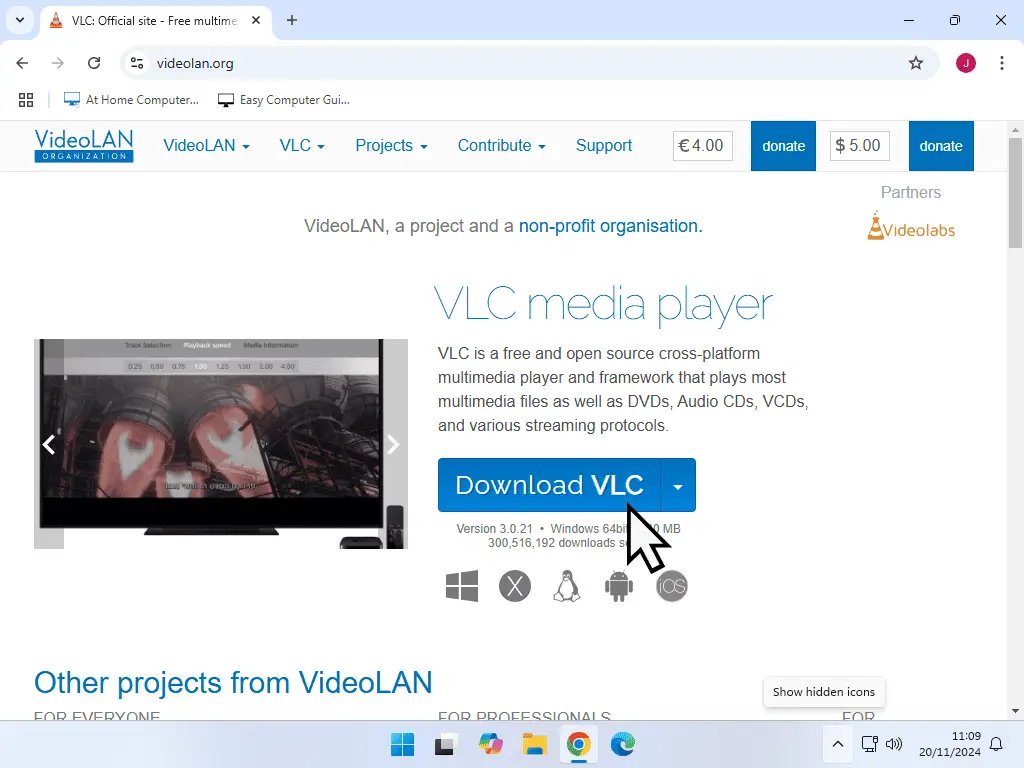
VLC media player has been around for many years, is open-source and free to use. If you haven’t already got it installed on your PC, you can download it from here.
- Click the Download button.
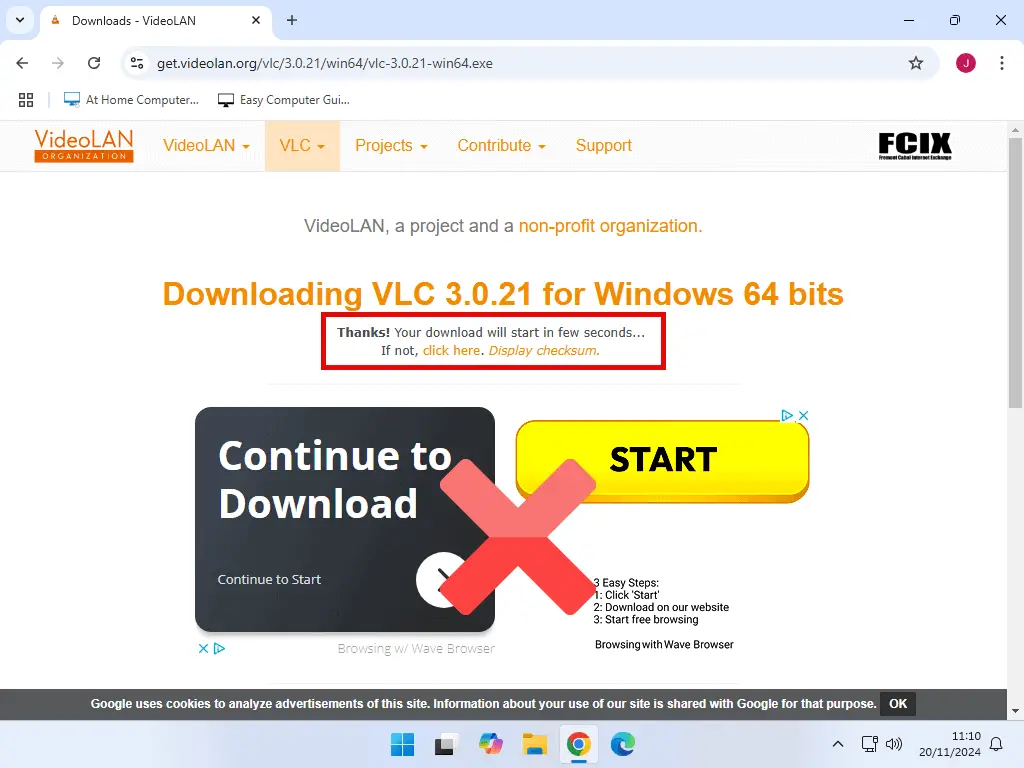
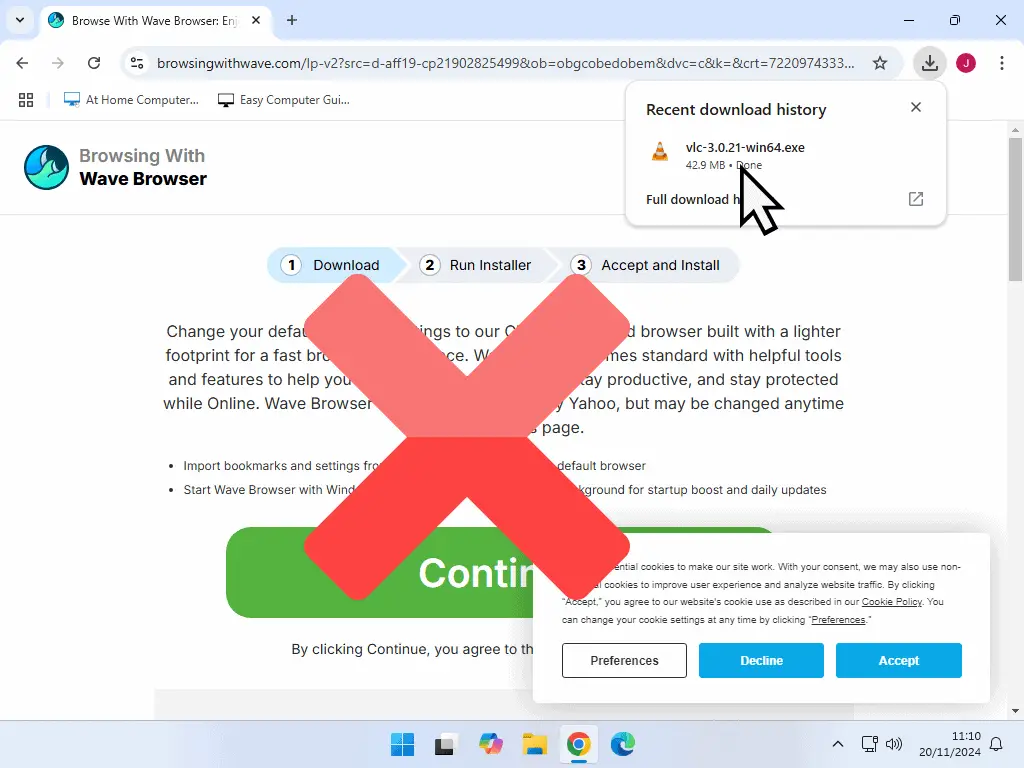
- Wait for the download to start. Don’t be tempted to click any of the other options.
- The download shouldn’t take long. When it’s completed, launch the installer and install VLC.
VLC
When downloading VLC, there’s a built in delay before the download actually starts. The general idea is that you’ll click one of the advertising links and download whatever they refer to.
Just be a little patient, the delay is only around 5 seconds, then the download will start.
How to Convert WAV to MP3
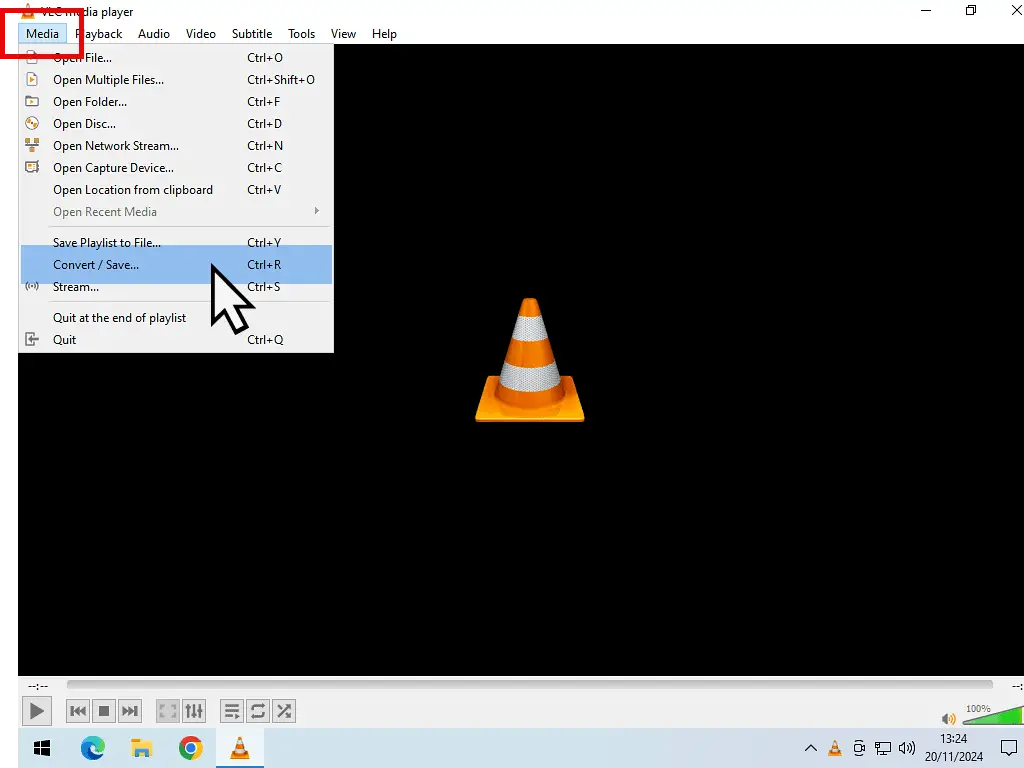
To convert your WAV audio files to MP3, open VLC Media Player.
Click on the Media button and then click the Convert/Save option.
Select WAV Files to Convert
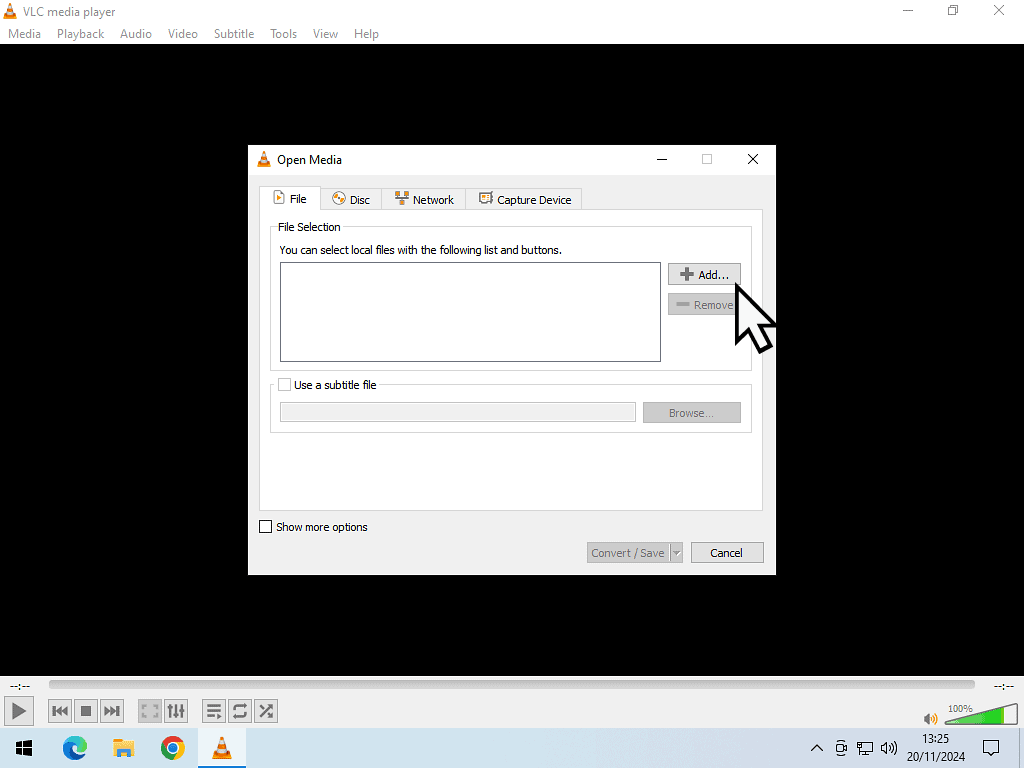
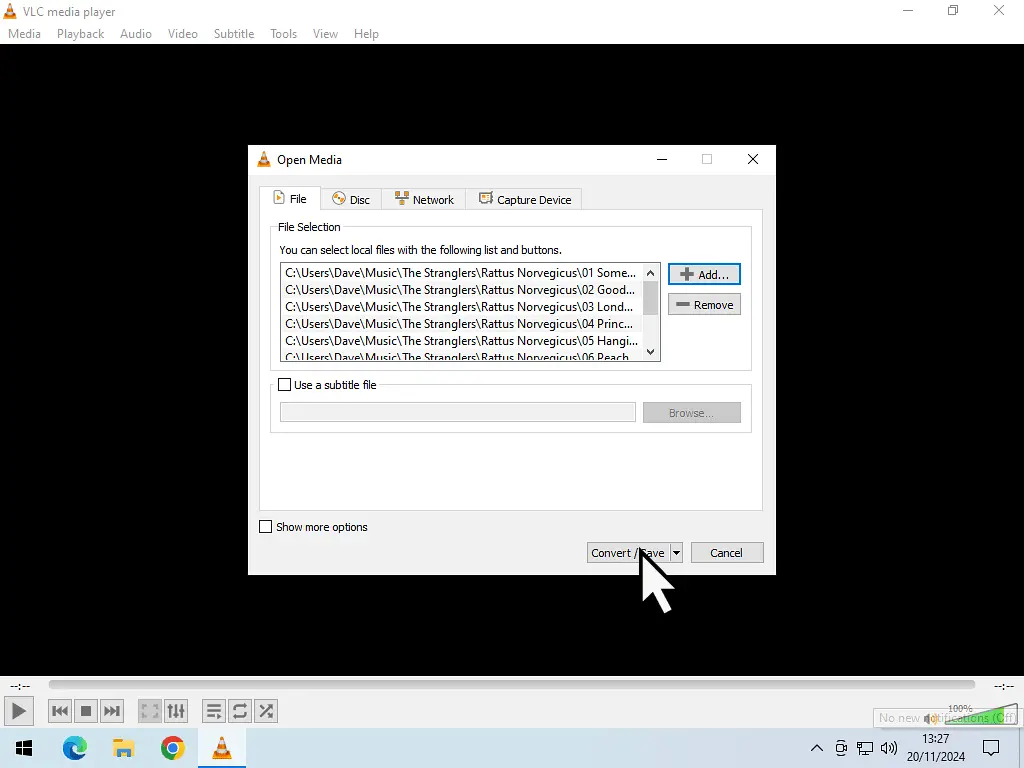
The Open Media window will appear in VLC. Click on the +Add button. That’ll open a File Explorer window allowing you to navigate to the WAV files that you want to convert.
You can add just a single file or select multiple WAV files for a batch conversion.
Once you’ve selected the files, click the Convert/Save button.
Conversion Profile
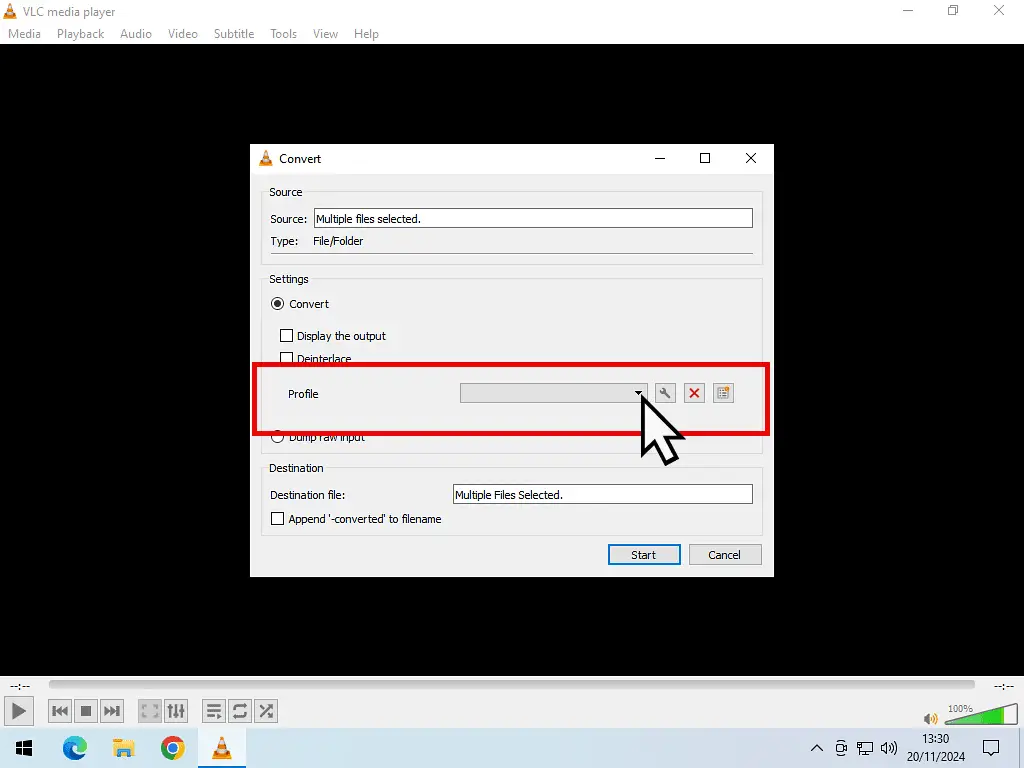
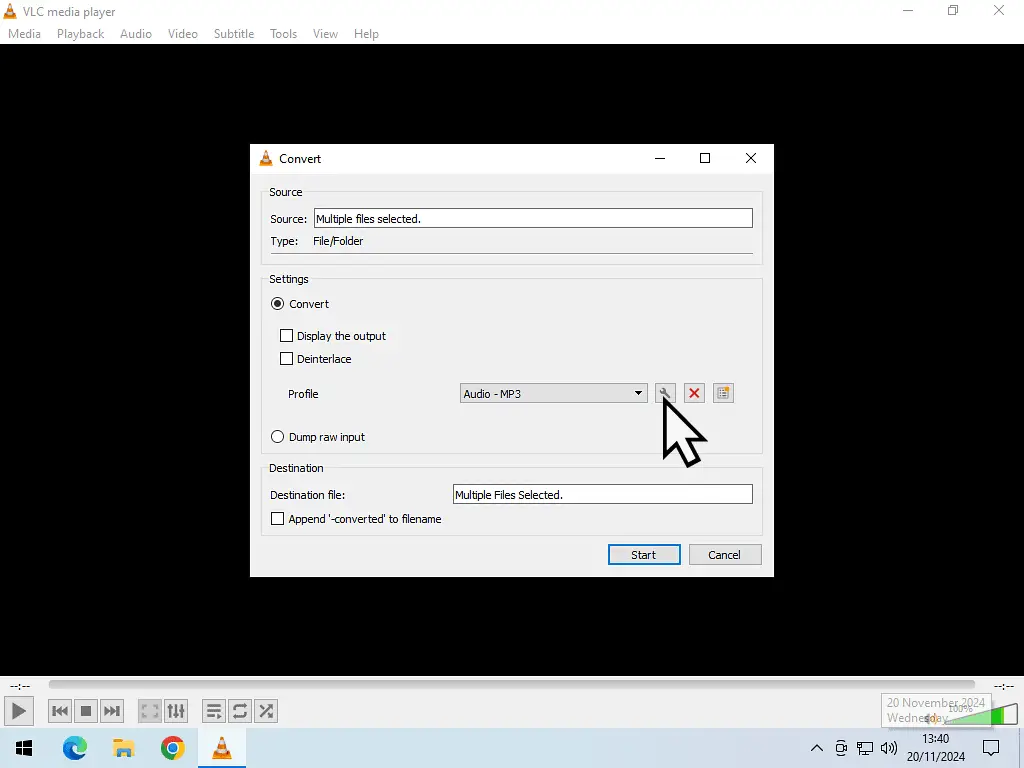
On the Convert screen, this is where you can tell VLC which format you’d like your WAV files to be converted to.
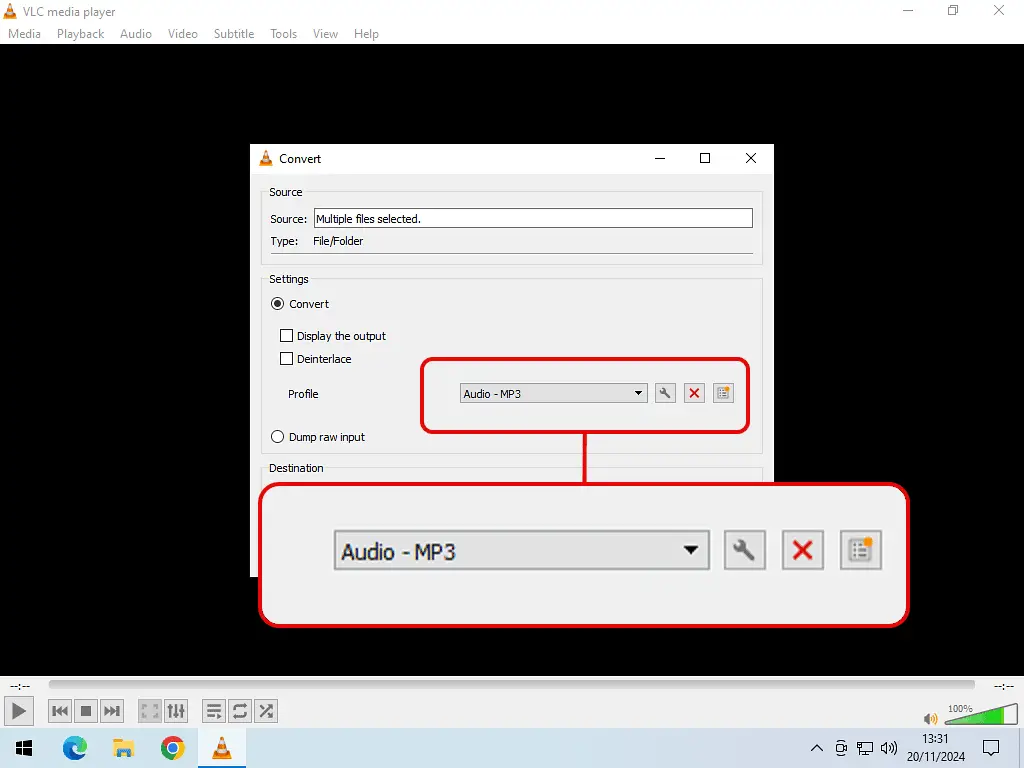
Click the drop down arrow in the Profile box. Scroll through the list of formats and select Audio – MP3.
Conversion Bitrate Settings
MP3 supports several Bitrates. A Bitrate determines the quality of the sound and also the size of the resulting file. The higher the Bitrate, the better the sound, but the larger the file.
By default, VLC will convert your WAV files to MP3 at a Bitrate of 128 kbits/s. That’s a good balance between sound quality and file size.
However, WAV files are the highest quality sound files, so you could use a higher Bitrate in the conversion if you wanted to.
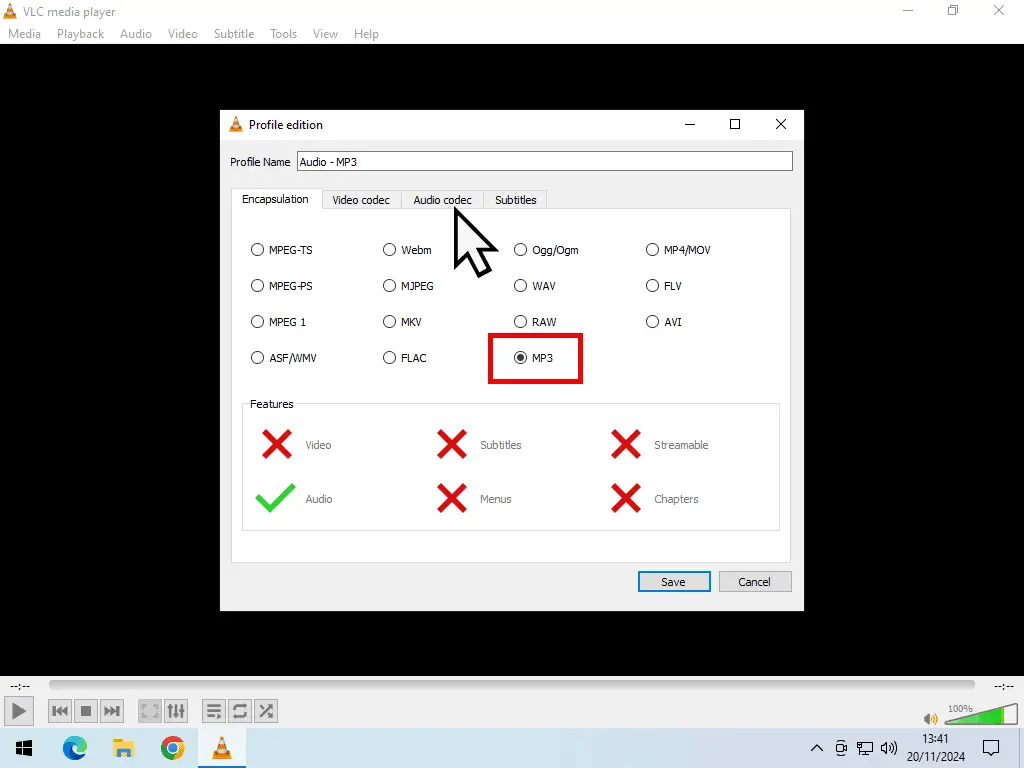
- Click the Edit Selected Profile button (it’s the spanner icon).
- Make sure that MP3 is selected, then click the Audio Codec tab.
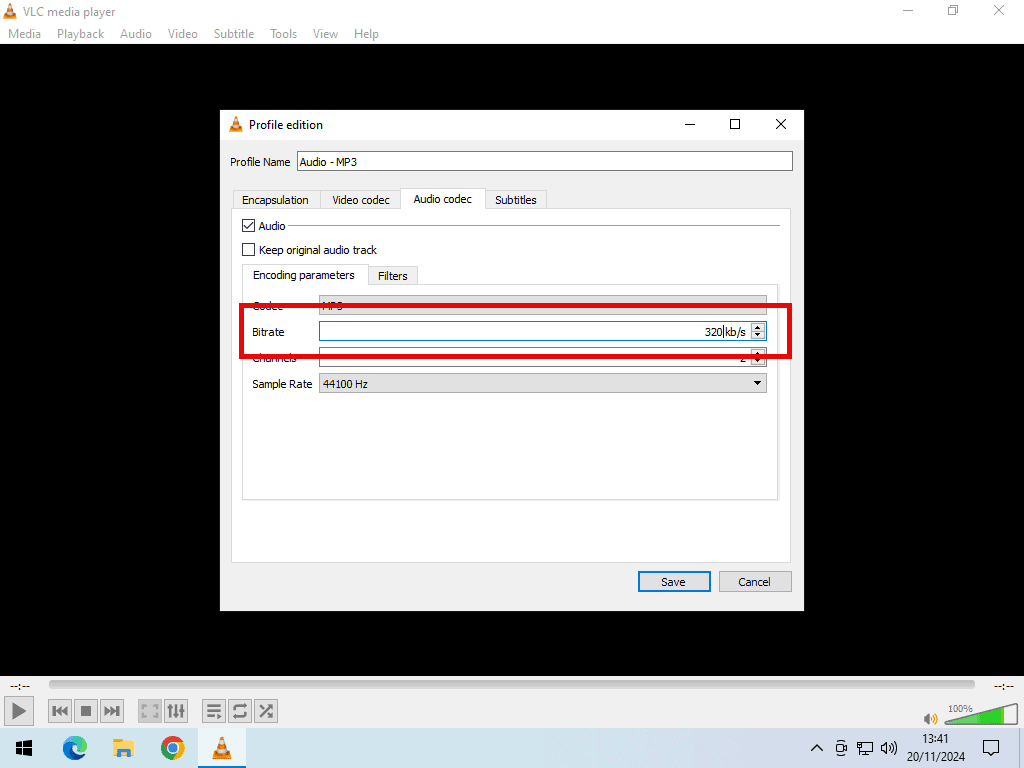
- Enter the Bitrate that you require. Click the Save button when finished.
MP3 Bitrates
The MP3 format supports a wide range of Bitrates. The bitrate directly affects both the sound quality and the file size.
32 kbit/s: Only acceptable for speech and even then it’s poor. But a very small file size.
96 kbit/s: Commonly used for speech or low-quality streaming.
128 or 160 kbit/s: Mid-range bitrate quality. OK for music especially if you’re using low quality speakers.
192 kbit/s: Medium quality bitrate.
256 kbit/s: A commonly used high-quality bitrate.
320 kbit/s: The highest level supported by the MP3 standard. Depending on your own hearing and sound equipment, this level is very close to CD quality.
If your WAV file is a music file, then don’t go lower than 128 kbits/s.
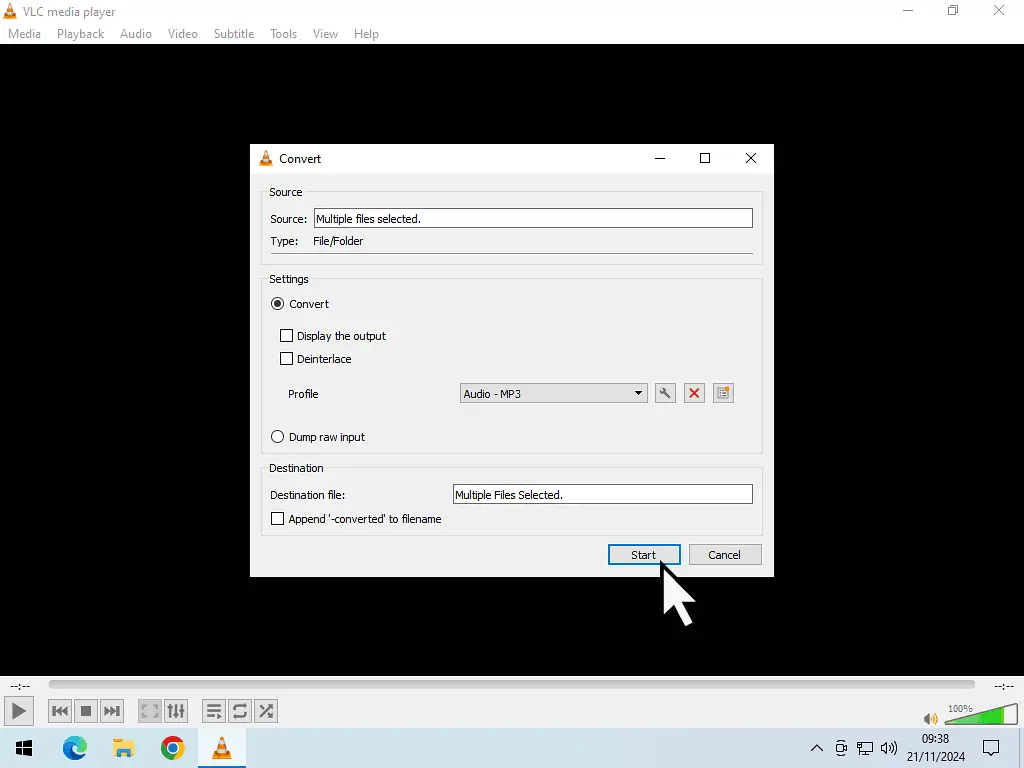
Once you’ve finished with the conversion settings, click the Start button to, err, start.
Converting WAV files to MP3 files doesn’t take long. At least not for your average 3-minute song. Obviously if you’re using larger WAV files, then the time taken will reflect this.
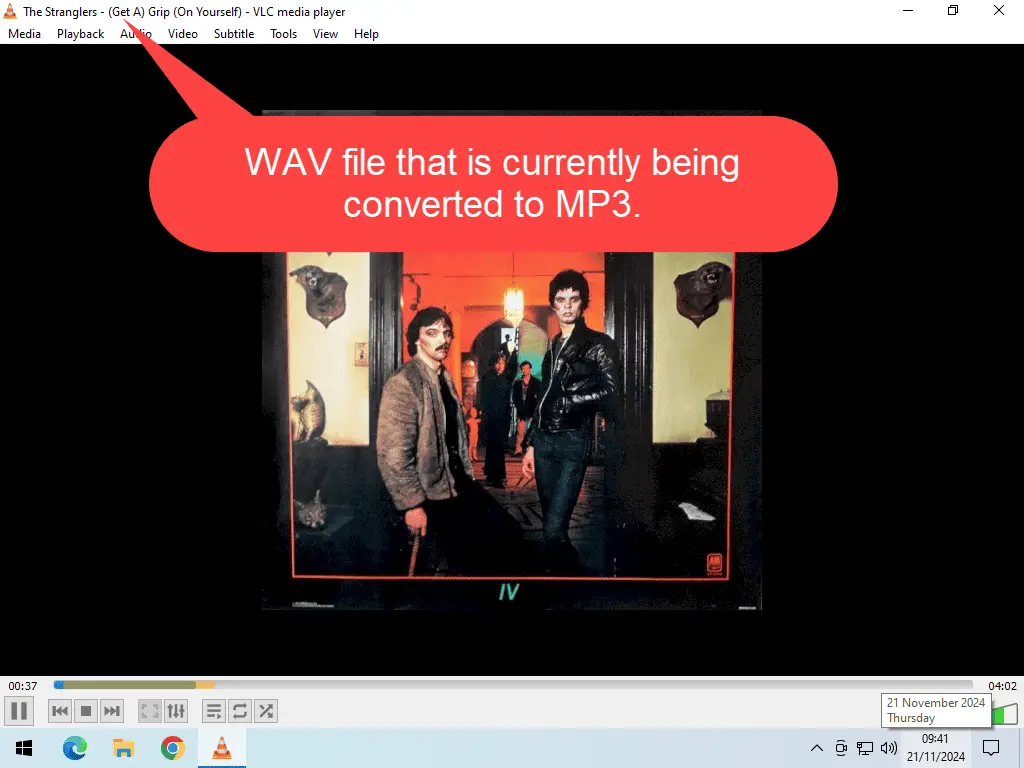
If your WAV files are actually music tracks, then you should see the cover art appear, if it’s available.
You can see which WAV file is being converted right at the very top of the VLC window.
After Conversion Has Finished
After the conversion has finished, VLC stores the MP3 files in the same folder as the original WAV files.
So if you now open that folder, you’ll see that you’ve got 2 versions of each song. One will be the original WAV file and the other is the MP3 converted file. That’s just a little messy for me. I prefer to have the two different file formats separated.
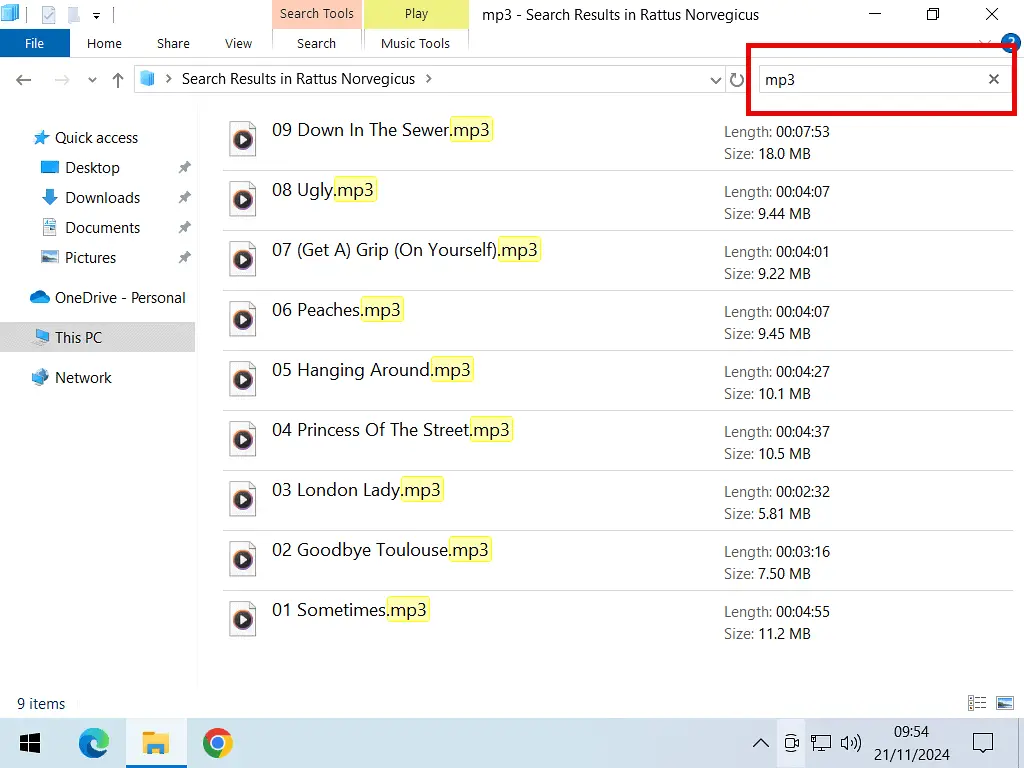
To separate the WAV from the MP3s, simply type MP3 into the folder search box and click the search icon.
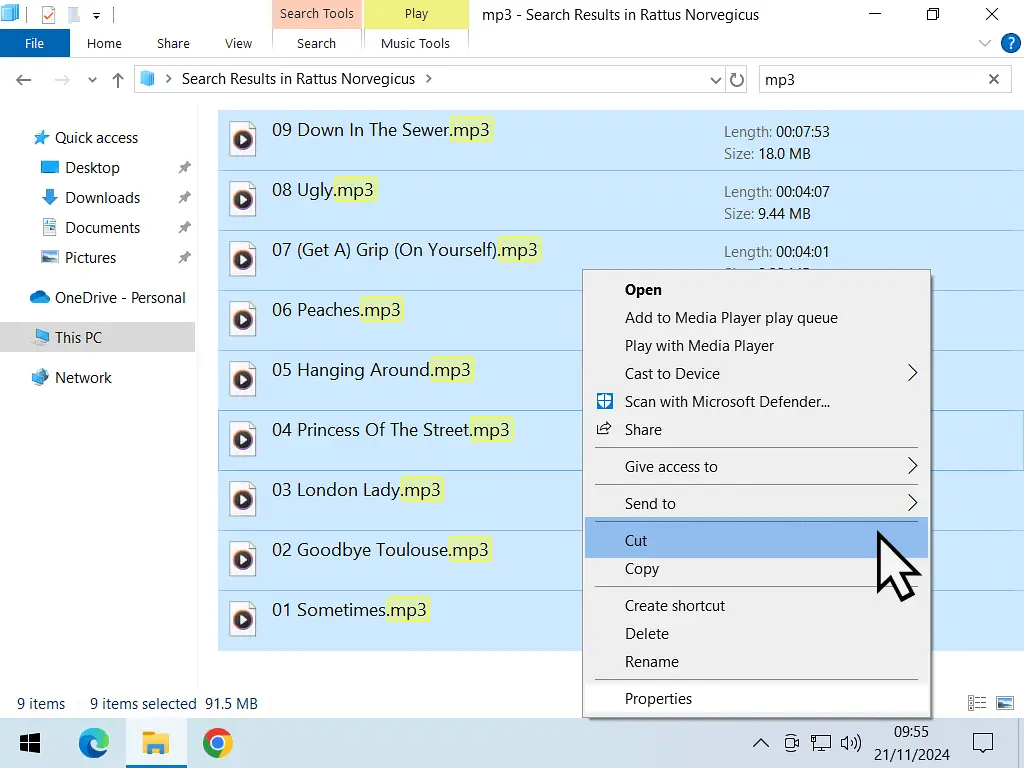
Then select all the MP3 files and Cut & Paste them into a different folder. Easy.
Summary
VLC makes converting WAV files to MP3 quick and painless, and because it’s free and already trustworthy software, there’s no need to hunt around for a dodgy online converter.
Keeping both versions gives you the best of both worlds: the original WAV files for archiving or editing at full quality, and space-saving MP3 copies for everyday listening, syncing to phones, or sharing with devices that don’t have room for large files.
Related At Home Computer Guides You Might Like
How to Convert WMA to MP3
Old WMA (Windows Media Audio) files are only really supported on computers. Change them to MP3.
Copy a CD to Computer Without Any Loss of Sound Quality
WAV files are huge. Rip your CDs using FLAC instead.
How To Fix Missing MP3 Tags
MP3 tags are the metadata such as album title, artist name and track listings etc.
How to Remove DRM from WMA Files
CDs ripped with Windows Media Player Legacy may have DRM (Digital Rights Management) attached to them, making them pretty much useless.
Microsoft has released an app that will remove the DRM from your old music files ripped in the Windows Media Audio (WMA) format.
You can find this and other related step by step guides in – At Home Computer Audio and Video Guides